bank of baroda kiosk manual - financial...
TRANSCRIPT

Bank Of Baroda
KIOSK MANUAL User manual for agents operating KIOSK
TCS Confidential [Pick the date]

1
Contacts
For questions or comments about this document’s technical content or to request changes to the document, contact:
Name Contact Details Organization
Poojan Shah [email protected] TCS
Manish Chandnani [email protected] TCS
Ramaiah CK [email protected] TCS
Purpose This document gives the flow of the FI banking using KIOSK terminal on field Target Audience The primary audiences for this document are:
CSC
Branch Mangers
VLE’s

2
TABLE OF CONTENTS
GENERAL PROCESS FLOW: ............................................................................................................................................ 3
AGENT CREATION:......................................................................................................................................................... 4
AGENT ACTIVATION: ..................................................................................................................................................... 4
AGENT FINGERPRINT CAPTURING: ............................................................................................................................... 4
KIOSK TERMINAL CONFIGURATION AND MAPPING: ................................................................................................... 4
AGENT LOGIN: ............................................................................................................................................................... 5
CUSTOMER CREATION: ................................................................................................................................................. 6
ACCOUNT OPENING FORM: ........................................................................................................................................ 14
TRANSACTIONS: .......................................................................................................................................................... 16
MONEY DEPOSIT: .................................................................................................................................................... 16 MONEY WITHDRAWAL: ........................................................................................................................................... 20 FUND TRANSFER: .................................................................................................................................................... 25 MINI STATEMENT: ................................................................................................................................................... 31
SUB-KO: ....................................................................................................................................................................... 34
SUB-KO CONFIGURATION: ...................................................................................................................................... 34 CAPTURE FINGERPRINTS OF SUB-KO ....................................................................................................................... 41 AUTHORIZE SUB-KO ............................................................................................................................................... 45 SUB-KO FIRST TIME LOGIN .................................................................................................................................... 47 SUB-KO TO MAIN-KO SWITCH ............................................................................................................................... 49
DO’S AND DON’TS FOR BC AGENTS ............................................................................................................................ 50
3
GENERAL PROCESS FLOW:
1) Agent Creation
a. Agent will be created by the authorized person by Bank or CSC having BC login
b. The agent ID will be created by the TCS or BC Admin
c. The agent will be activated by the authorized person by Bank or CSC having BC login
d. Finger prints of agent will be captured using the biometric device by authorized person by Bank or CSC having BC login
2) Terminal Configuration and mapping
a. KIOSK terminal of the agent will be configured by the bank/CSC authorized person having BC login
b. The KIOSK terminal will be mapped to the agent ID created
3) Customer Enrolment:
a. Once the agent is mapped to the KIOSK, the VLE can enrol the customers
b. Customer details will be filled and fingerprints will be captured
c. A print of account opening form along with KYC documents of the customer created to be submitted to the branch manager
d. The branch manager will authorize the account on the basis of KYC documents
e. The CIF and account number will be generated after the account is authorized
4) Customer transaction:
a. Customer can login using the CIF/UID for any transaction
b. Customers fingerprints will be verified at the time of login
c. Customer can select the account and then perform any of the below transactions:
i. Money deposit
ii. Money withdrawal
iii. Fund transfer
iv. Mini Statement

4
AGENT CREATION:
The agent will be created by an authorized person having BC login. All the required details of the agent are supposed to be filled
Please make sure that all the tabs viz. UserInfo, Internet, Address and Parameters are filled.
AGENT ACTIVATION:
Agent is activated by any branch manager having another BC login. Once an agent is successfully created, his fingerprints are to be captured using the BC login
AGENT FINGERPRINT CAPTURING:
Once the agent is activated all his fingerprints will be captured by the branch manager using BC login and preferred fingers will be set
KIOSK Terminal Configuration and Mapping:
The VLE’s KIOSK terminal will be configured in the system and mapped to his agent Id by the CSC agency.
Once the KIOSK terminal is mapped to a particular agent, only that agent is authorized to do enrollments and transactions through the mapped KIOSK.

5
AGENT LOGIN:
When the agent logs in for the first time, using the Agent ID and password provided to him, he will be prompt to change the default password.
If the agent wants to change the password once again, he can go to the following path on the Home screen Other Services>Change Password

6
CUSTOMER CREATION:
For new customer enrolment, click on Customer Creation -> Customer Creation.
Alternatively, if a process is left midway i.e. the previous process of Customer Creation was not successful, you can re-login and click on Customer Creation >Continue Customer Creation. You can enter the Reference Id and continue customer creation from the page it is pending.

7
The Reference Number will be generated after this step. It is visible on the top of the screen.
The customer fingerprints will be captured one by one. The fingerprints capture process is visible on the screen. It is similar to the Agent fingerprint capture procedure.

8

9
If, for some reason, a particular finger print is not available, you can skip that finger by directly clicking on the next one on the image.

10
The status of such fingers, which were skipped, will change to NA. Once all the fingerprints are captured, the customer can select three ‘Preferred fingers’ of his choice.

11
After fingerprint capture process, the customer details are to be filled as required.
Please make sure all the mandatory KYC fields are filled. Also, fill the details on ‘Other Details’ page and Click on Continue.

12
Once all the details are successfully uploaded, customer is required to upload his photo.

13
Please make sure that the clear photo of the customer is available on the laptop. This photo can be a scanned copy or clicked using available webcam/laptop camera.
A reference card will be generated as shown, copy of which can be printed and handed over to the customer.

14
ACCOUNT OPENING FORM:
Account opening form of the customer is available for print from the following path: Customer Creation>Account opening form

15
The agent is required to take a printout of this form, take the signature of the customer and submit it to the bank branch along with the KYC documents of the customer. Once the KYC documents are verified and authorized by the branch manager, the account number and CIF for the customer will be generated and the customer can access his account.

16
TRANSACTIONS:
MONEY DEPOSIT:
Click on Customer Login on the home page. Enter the CIF and click on Authenticate

17
The fingerprints of the customer will be verified during login. In case of mismatch, customer is required to use another finger for verification as displayed in the image on the screen.
If verification is successful, the customer is authenticated.
Click on Submit to get the account summary of the customer.

18
Select the account into which money is to be deposited. Also, select “Deposit” from the drop down menu.
Enter the amount to be deposited and the denomination of notes accordingly and click on Verify.
For e.g, Here, customer is depositing Rs. 2000 into his account in denomination of notes of 1000 and 500.

19
The agent is required to authorize himself before every customer transaction by giving his fingerprints as required.
Once the agent is verified, Customer fingerprints are verified for that transaction

20
The transaction is successful only after agent and customer, both are verified. A deposit receipt will be displayed on the screen which can be printed and handed over to the customer for his records.
MONEY WITHDRAWAL:
Click on Customer Login on the home page.
Enter the CIF and click on Authenticate

21
The fingerprints of the customer will be verified during login. In case of mismatch, customer is required to use another finger for verification as displayed in the image on the screen.
If verification is successful, the customer is authenticated.
Click on Submit to get the account summary of the customer.

22
Select the account from which money is to be withdrawn. Also, select “Withdrawal” from the drop down menu.
Enter the amount to be withdrawn and the denomination of notes accordingly and click on Verify.

23
For e.g, Here, customer is withdrawing Rs. 3000 into his account in denomination of notes of 1000, 500 and 100.
The agent is required to authorize himself before every customer transaction by giving his fingerprints as required.
Once the agent is verified, Customer fingerprints are verified for that transaction

24
The transaction is successful only after agent and customer, both are verified. A WITHDRAW RECIEPT will be displayed on the screen which can be printed and handed over to the customer for his records.
25
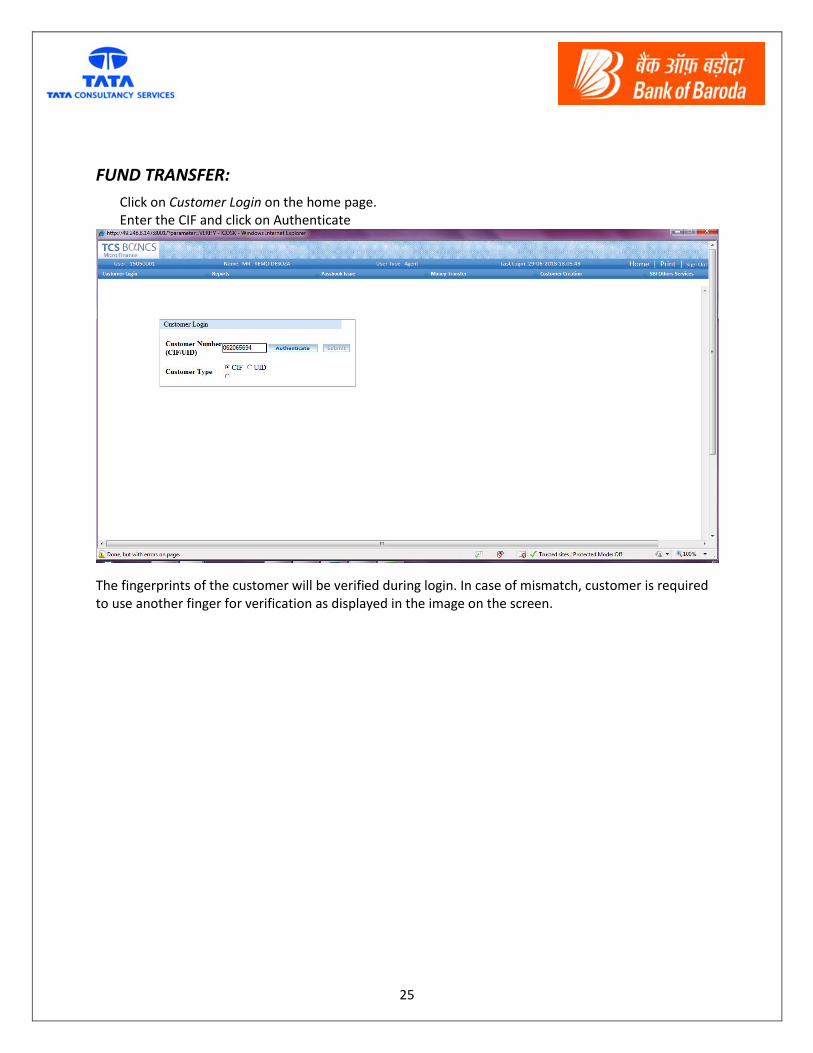
FUND TRANSFER:
Click on Customer Login on the home page. Enter the CIF and click on Authenticate
The fingerprints of the customer will be verified during login. In case of mismatch, customer is required to use another finger for verification as displayed in the image on the screen.

26
If verification is successful, the customer is authenticated.
Click on Submit to get the account summary of the customer.
Select the account from which money is to be transferred. Also, select “Funds Transfer” from the drop down menu.

27
Enter the transfer amount as well the account number to which transfer is to be done and click on Verify.
For e.g, Here, customer is transferring Rs. 500 to another account.

28
The agent is required to authorize himself before every customer transaction by giving his fingerprints as required.
Once the agent is verified, Customer fingerprints are verified for that transaction

29
Click on Submit, once the verification process is over
The transaction is successful only after agent and customer, both are verified. A FUND TRANSFER RECEIPT will be displayed on the screen which can be printed and handed over to the customer for his records.

30

31
MINI STATEMENT:
Click on Customer Login on the home page.
Enter the CIF and click on Authenticate
The fingerprints of the customer will be verified during login. In case of mismatch, customer is required to use another finger for verification as displayed in the image on the screen.

32
If verification is successful, the customer is authenticated.
Click on Submit to get the account summary of the customer.
Select the account number for which mini statement is required. Also, select “Ministatement” from the drop down menu.

33
A summary of transactions will be displayed and can be printed.
Following is the statement of the account where we can see our deposit, withdrawal and fund transfer transactions.
34
SUB-KO:
Sub-KO Configuration:
Click on OTHER SERVICES tab, and then choose Sub KO Configuration out of three options which
are displayed.
It will provide the screen with three tabs “subko details”, “subko valid details” and “address
details”.
In subko details, you have to enter title, first name, last name, gender, date of birth,
identification type, identification number, user level.
For Title we are provided with dropdown options where we can select the appropriate one.
First name and Last name should be greater than 3 letters and should not be null.
For Gender we are provided with dropdown options where we can select the appropriate one.
Provide the proper date birth of subko (i.e. date of birth of the person who is going to replace
main vle).
For Identification type we are provided with dropdown options where we can select the
appropriate one.
Identification number is nothing the number which is available on the identification type.
For example if you are selecting Driving license as Identification type then Identification number
will be the Driving license number.
User Role should be selected as Internal

35

36
Please note sub-ko id
37
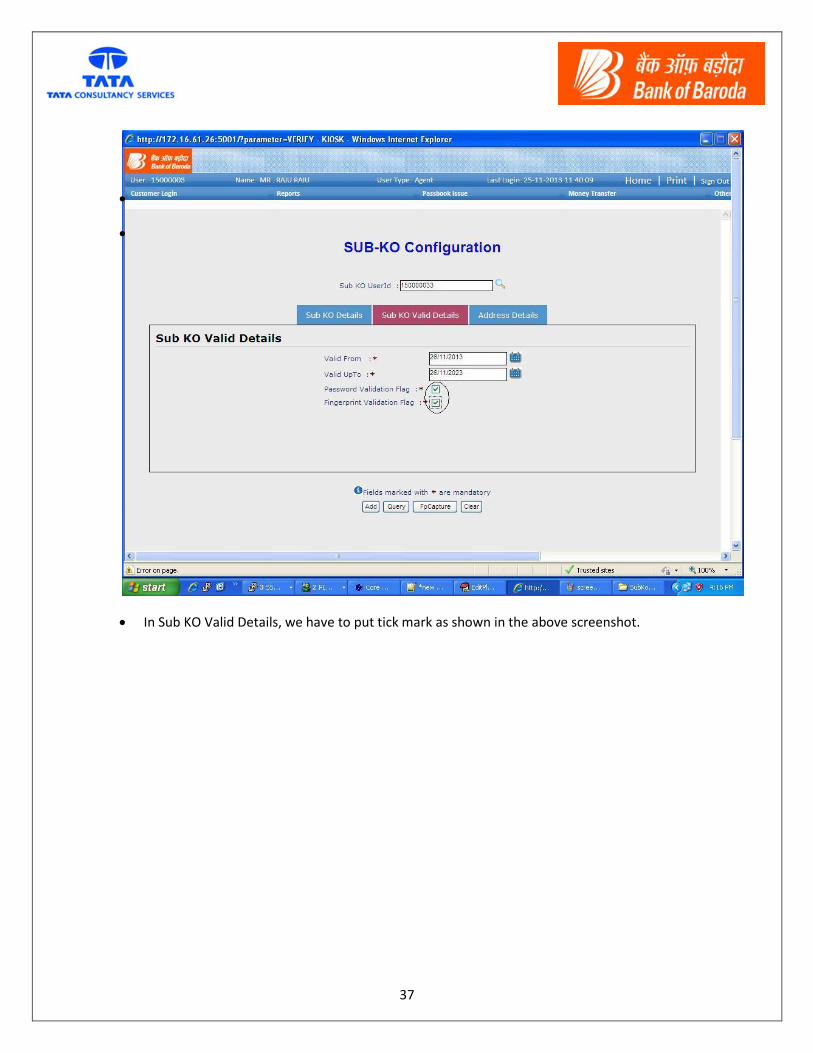
In Sub KO Valid Details, we have to put tick mark as shown in the above screenshot.

38
In Address Details, we have Address, Mobile No, state, city, village/taluka and postal code.
In the field address we have to enter the address of vle (subko).
In Mobile number field we have to enter mobile number (valid one).
State, city will be auto populated basing on Main KO.
We have to select village/taluka by using search option provided.
Pin code of that particular village should be provided in postal code field.

39
After enter all details in respective three tabs, click on Add button provided at the bottom of
screen.

40
After Clicking on ADD button, we will get message as user created successfully.

41
Capture fingerprints of Sub-KO
Now we have to capture fingerprints of the subko, for that click on FpCapture button.

42
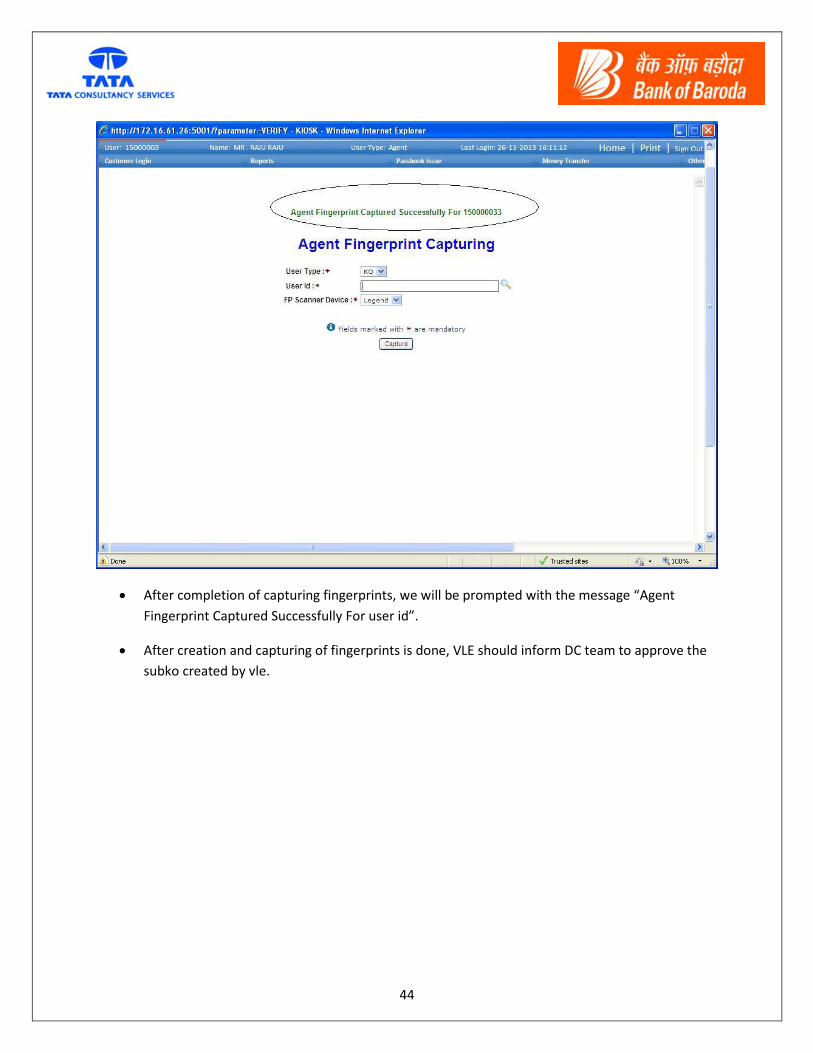
After Clicking on FpCapture button, we will get the above shown screen in which we have to
select User type as KO, User id (i.e. the id which we have to capture fingerprints) and FP Scanner
Device(i.e. Legend, Cogent).
Now click on capture, we get a screen saying please wait during initialization and after we will
get a screen with images of fingers where we have to capture the fingerprints.

43
44
After completion of capturing fingerprints, we will be prompted with the message “Agent
Fingerprint Captured Successfully For user id”.
After creation and capturing of fingerprints is done, VLE should inform DC team to approve the
subko created by vle.

45
Authorize Sub-KO
Once Approval is done from DC Team, then VLE should authorize Subko from his login by
choosing sub_ko_authorize option.

46
Select the subko id using search button and enter “remarks”. Click on submit buttion to authorize sub-
ko.
Once sub-ko is authorized main ko cannot login into the Kiosk application.

47
Sub-KO First Time Login
Now Sub-KO can login to Kiosk application using his sub-ko id and default password.
Application URL is same which is https://49.248.8.147/
Default password needs to be changed at first time login

48

49
Sub-KO to Main-KO Switch
Once the work of sub-ko is done, then sub-ko should authorize main ko using same option Other
Services -> Sub_KO_Authorize.
Main KO id will be automatically populated. Click on Submit button after entering “Remarks”. Click on
submit buttion to authorize main KO.
Once main ko is authorized Sub-KO cannot log in to the Kiosk application.

50
DO’s and DON’Ts for BC Agents
OD Banks Accounts and Saving Bank Accounts are required before BC Creation
Finger Prints are being used as authentication for BC Agent Verification and Transactions
Operator Rights of KIOSK terminal will be with BC Agent and cannot be transferred
Please make sure to collect Finger prints and Photographs of correct person while doing
enrollment
Customer need to stand in upright position while giving photograph
Finger Prints of Customers should be clean and tidy while doing transactions
In case server is not responding while doing transaction, please wait
Offline Transactions are not allowed. Please do not attempt offline transactions
Accounts need to be authorized by bank also. Hence collect all the required documents from the
customer and submit along with the Account Opening Forms at the branch