resizing a 3d stl object in repetrel...
TRANSCRIPT
Resizing a 3D STL Object in Repetrel Hyrel LLC
Resizing a 3D STL Object in Repetrel V01.docx Page 1 of 8 8/9/2016 6:40:00 PM
Resizing a 3D STL Object Model in Repetrel
Any modifications to 3D Object in Repetrel require modifying the STL file before Slicing.
To resize a 3D object in Repetrel:
• Use the same steps to open and center the STL Object file.
Printing Steps for Hyrel System 30 using Repetrel Software
• Repetrel uses a configured GCode File to print 3D Models.
Take the following steps to convert an STL File in to a Printable GCODE File.
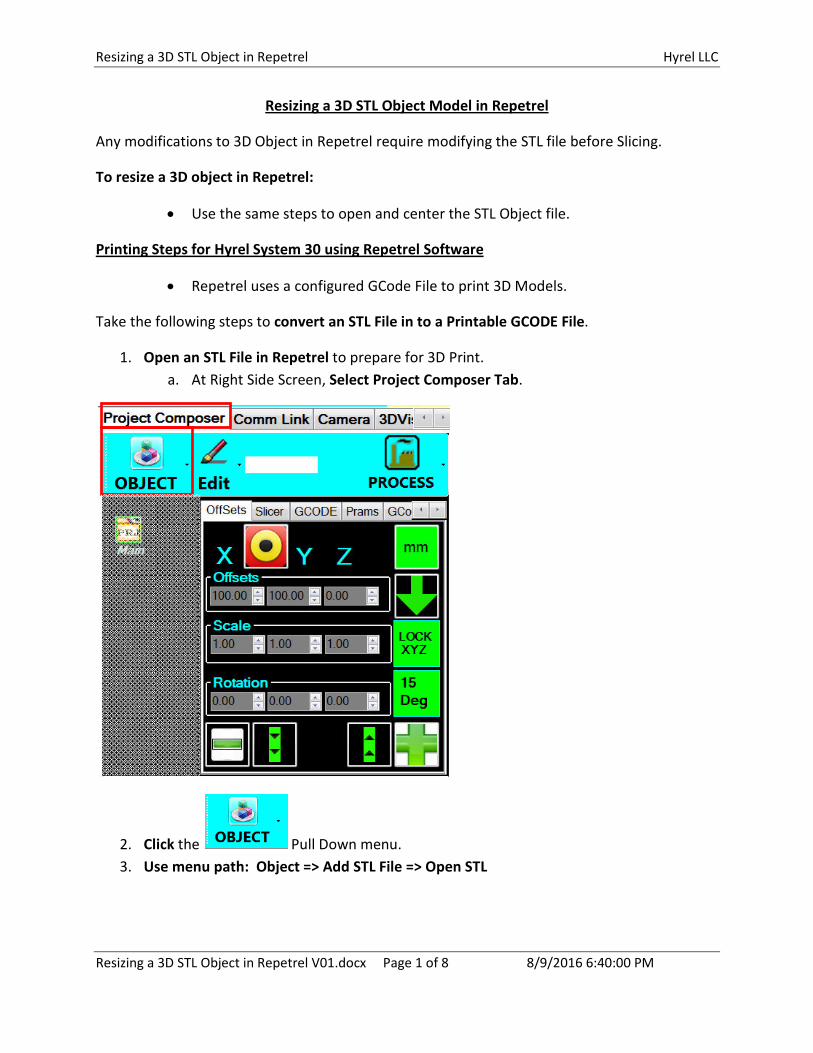
1. Open an STL File in Repetrel to prepare for 3D Print.
a. At Right Side Screen, Select Project Composer Tab.
2. Click the Pull Down menu.
3. Use menu path: Object => Add STL File => Open STL

Resizing a 3D STL Object in Repetrel Hyrel LLC
Resizing a 3D STL Object in Repetrel V01.docx Page 2 of 8 8/9/2016 6:40:00 PM
4. The default directory for Repetrel First Prints using STL Files should appear.
5. If not, navigate to C:\Repetrel\First Prints\stls\
• We will use the 2nd
Print Twisted Gear Vase for our example.
6. Click to select the STL File you will use, then Click the button.
Resizing a 3D STL Object in Repetrel Hyrel LLC
Resizing a 3D STL Object in Repetrel V01.docx Page 3 of 8 8/9/2016 6:40:00 PM
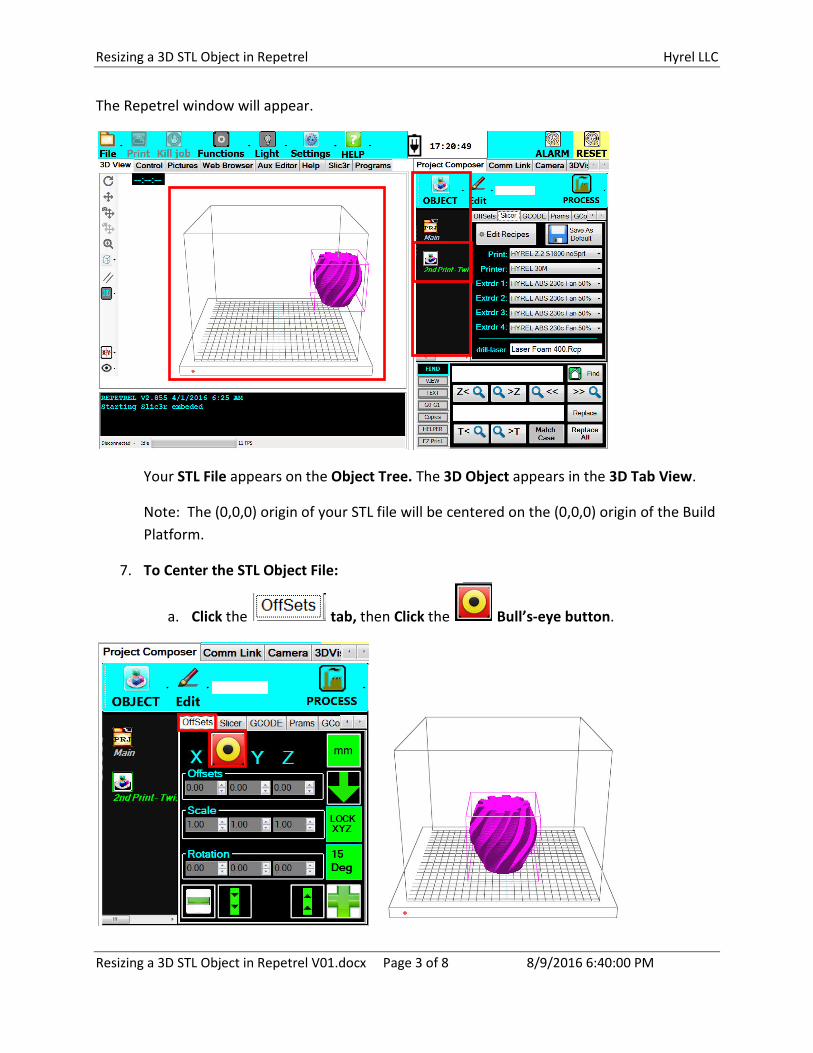
The Repetrel window will appear.
Your STL File appears on the Object Tree. The 3D Object appears in the 3D Tab View.
Note: The (0,0,0) origin of your STL file will be centered on the (0,0,0) origin of the Build
Platform.
7. To Center the STL Object File:
a. Click the tab, then Click the Bull’s-eye button.
Resizing a 3D STL Object in Repetrel Hyrel LLC
Resizing a 3D STL Object in Repetrel V01.docx Page 4 of 8 8/9/2016 6:40:00 PM
Note: The3D Object now should be centered, if your model was centered about the
(0,0,0) point. If not, Right Click on the physical object and hold and drag the Object to
the center or change your OffSets values manually.
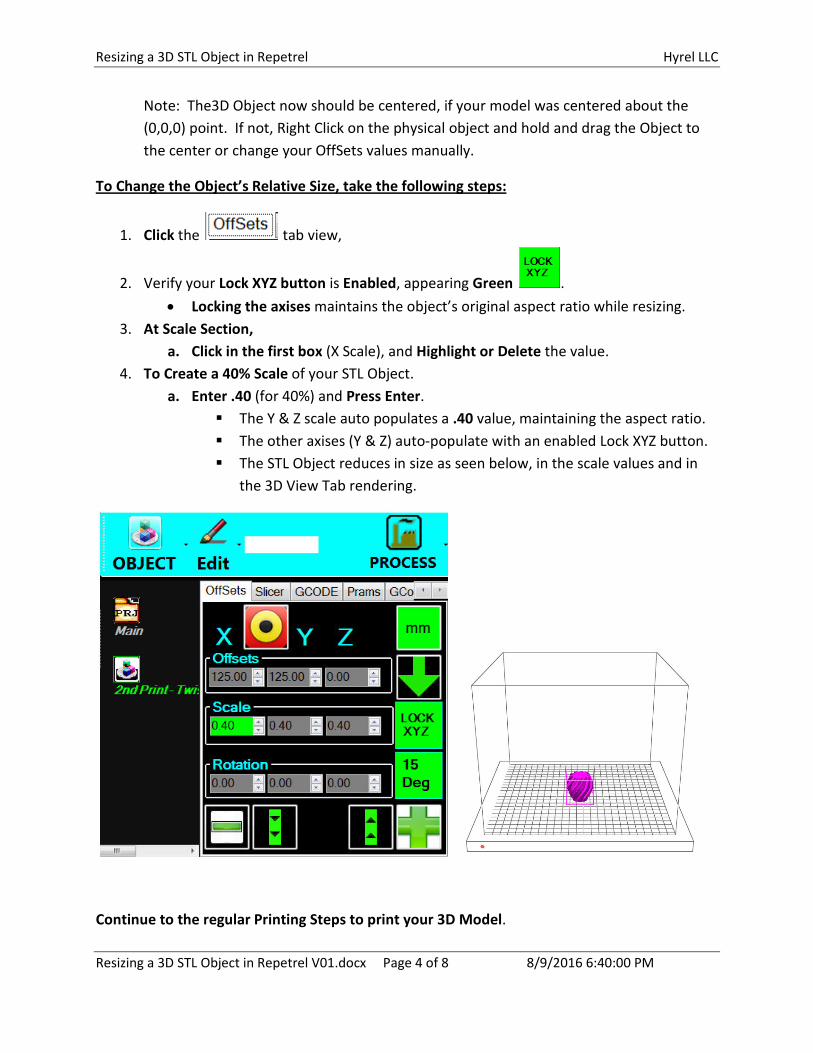
To Change the Object’s Relative Size, take the following steps:
1. Click the tab view,
2. Verify your Lock XYZ button is Enabled, appearing Green .
• Locking the axises maintains the object’s original aspect ratio while resizing.
3. At Scale Section,
a. Click in the first box (X Scale), and Highlight or Delete the value.
4. To Create a 40% Scale of your STL Object.
a. Enter .40 (for 40%) and Press Enter.
� The Y & Z scale auto populates a .40 value, maintaining the aspect ratio.
� The other axises (Y & Z) auto-populate with an enabled Lock XYZ button.
� The STL Object reduces in size as seen below, in the scale values and in
the 3D View Tab rendering.
Continue to the regular Printing Steps to print your 3D Model.

Resizing a 3D STL Object in Repetrel Hyrel LLC
Resizing a 3D STL Object in Repetrel V01.docx Page 5 of 8 8/9/2016 6:40:00 PM
In order to Print, we generate a GCODE File from the STL. The first step is to Verify and Select
the SLICER Recipes specific for your print. Repetrel comes with default recipes for different
materials including ABS. If your recipes are not already saved by default or you have changed
them, correct them and save the Recipes by clicking Save As Default.
SLICING the STL File
Slicing the STL File takes the STL File with your selected recipes to create a GCODE file.
To Slice your STL file take the following steps.
1. Click the SLICER Tab .
2. The Repetrel / Slicer (Slic3R) Recipes selection boxes will appear.
3. Select your Recipes before SLICING.
• Select the Pulldown menu Buttons for each of the fields above.
• Scroll and select the correct recipes for the material you are printing with.
• For an ABS Print, the defaults recipes should read as follows.
Print: HYREL Z.2 S1800 noSprt
Printer: HYREL 30M
Extruder 1: HYREL ABS 230c Fan 50%
Extruder 2: HYREL ABS 230c Fan 50%
Extruder 3: HYREL ABS 230c Fan 50%
Extruder 4: HYREL ABS 230c Fan 50%
Note: If you are printing with just one print head, it is only necessary to enter the
recipe for Extruder 1. Ignore Extruders 2, 3, & 4 for Single Head Prints.

Resizing a 3D STL Object in Repetrel Hyrel LLC
Resizing a 3D STL Object in Repetrel V01.docx Page 6 of 8 8/9/2016 6:40:00 PM
• Click the button, to save your settings for later prints.
4. Click the pull down menu.
5. Select menu path: Process => Slice with Slic3r
The following progress window appears.
6. Once the Slicing Process is complete, you will notice two things:
• Text displaying “Exporting GCODE to
C:Users\Hyrel\Documents\Slic3rOutputFile.GCODE”.
You would rarely have to Kill Slicing Process, other
than to redo a step you missed.
Resizing a 3D STL Object in Repetrel Hyrel LLC
Resizing a 3D STL Object in Repetrel V01.docx Page 7 of 8 8/9/2016 6:40:00 PM
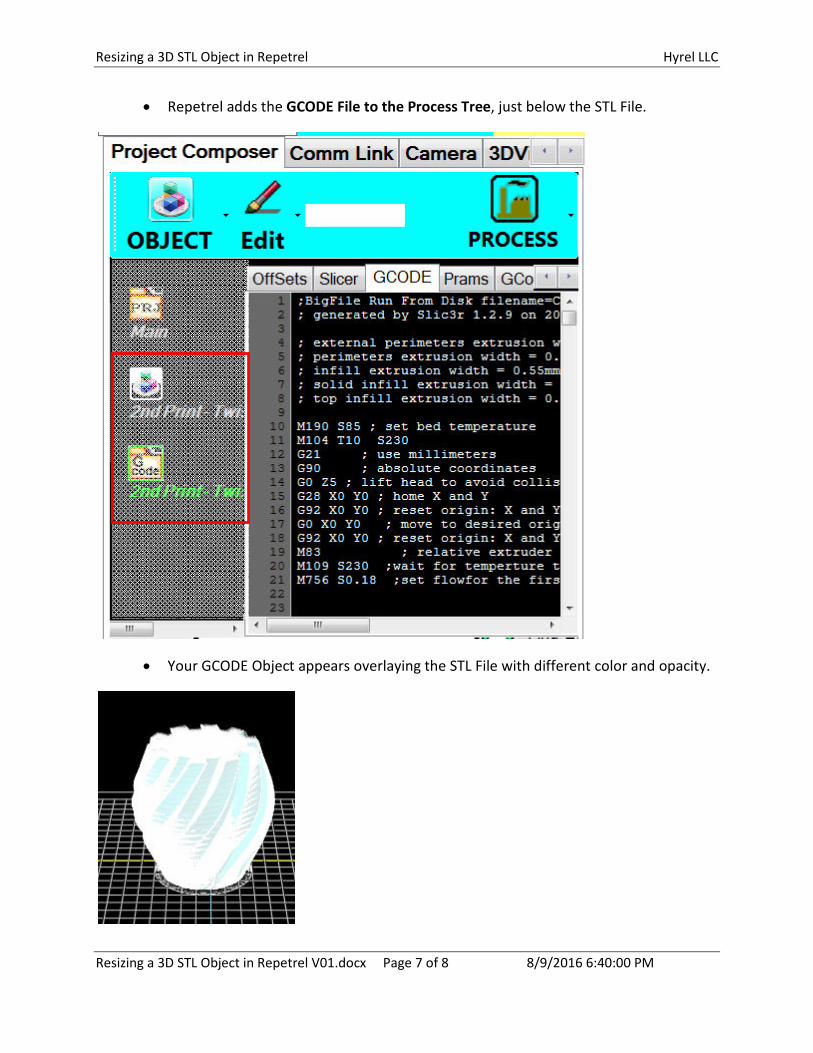
• Repetrel adds the GCODE File to the Process Tree, just below the STL File.
• Your GCODE Object appears overlaying the STL File with different color and opacity.
Resizing a 3D STL Object in Repetrel Hyrel LLC
Resizing a 3D STL Object in Repetrel V01.docx Page 8 of 8 8/9/2016 6:40:00 PM
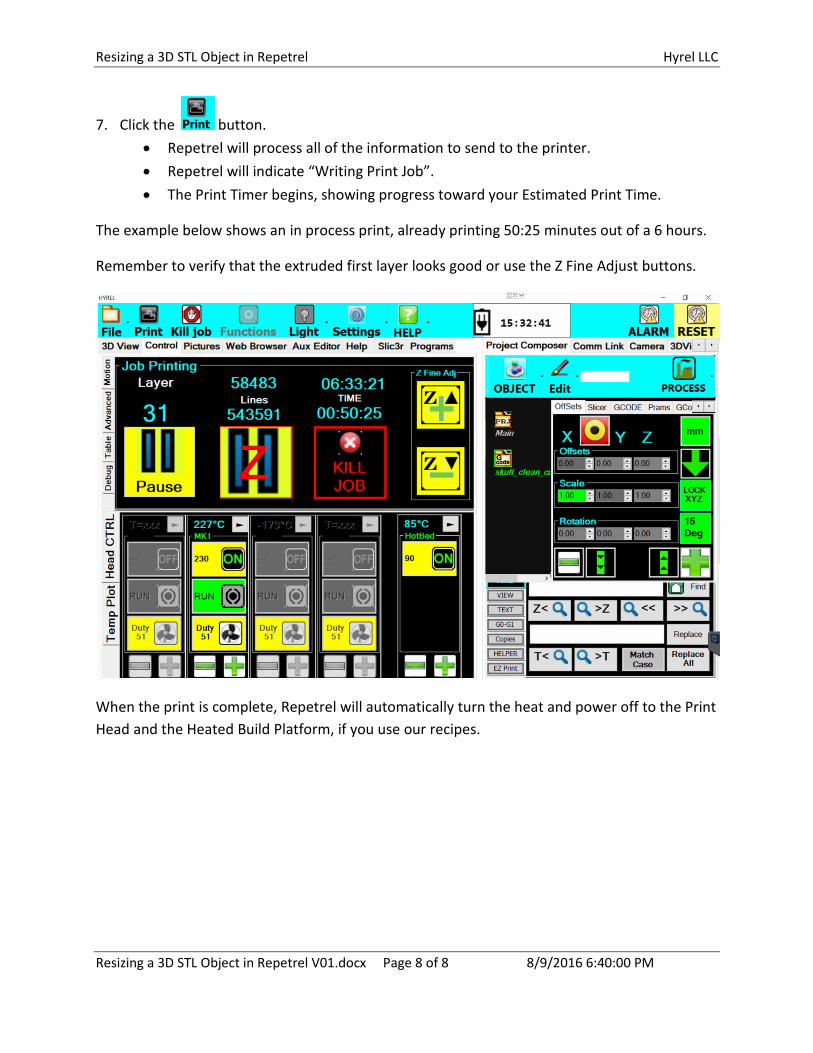
7. Click the button.
• Repetrel will process all of the information to send to the printer.
• Repetrel will indicate “Writing Print Job”.
• The Print Timer begins, showing progress toward your Estimated Print Time.
The example below shows an in process print, already printing 50:25 minutes out of a 6 hours.
Remember to verify that the extruded first layer looks good or use the Z Fine Adjust buttons.
When the print is complete, Repetrel will automatically turn the heat and power off to the Print
Head and the Heated Build Platform, if you use our recipes.