owner’s manual - metal detector manuals - …€¦ · owner’s manual the sharp shooter ii is a...
TRANSCRIPT
OWNER’S MANUALThe Sharp Shooter II is a professional metal detector. The conceptsand terminology can be quite unfamiliar if you are new to thehobby. To understand it quickly and to get the most enjoymentpossible from your detector, we strongly recommend that you:
1) Turn the Sensitivity knob to a low setting if you get falsesignals. A little practice is required to understand when and howyou can use the sensitivity at or near 100%.
2) Do not use indoors. This detector is for outdoor use only. Manyhousehold appliances emit electromagnetic energy, which caninterfere with the detector. If conducting an indoordemonstration, turn the sensitivity down and keep the searchcoil away from all floors, walls and metal objects.
3) Do not test by placing coins on the floor. Most floors containmetal.
4) Read this manual.Most importantly, review the Summary of Operating Modes .
5) Sweep the search coil from side-to-side. Coil motion is requiredin the motion modes to detect metal.
6) Use 9volt ALKALINE batteries only.Do not use Heavy Duty batteries.Do not use normal Zinc-Carbon batteries.
2
TABLE OF CONTENTSTERMINOLOGY . . . . . . . . . . . . . . . . . . . . . . . . . . . . . . .3
ASSEMBLY . . . . . . . . . . . . . . . . . . . . . . . . . . . . . . . . . . .4
BATTERIES . . . . . . . . . . . . . . . . . . . . . . . . . . . . . . . . . . .5
QUICK-START DEMO . . . . . . . . . . . . . . . . . . . . . . . . . . .6
BASIC OPERATION . . . . . . . . . . . . . . . . . . . . . . . . .7 & 8
SUMMARY OF OPERATING MODES . . . . . . . . . . . . . . .9
LCD TARGET DISPLAY . . . . . . . . . . . . . . . . . . . . .10 & 11
MODE & BATTERY INDICATORS . . . . . . . . . . . . . . . . .12
SENSITIVITY ADJUSTMENT . . . . . . . . . . . . . . . . . . . .12
AUDIO TARGET IDENTIFICATION . . . . . . . . . . . . . . .13
IN THE FIELD TECHNIQUESMotion Modes . . . . . . . . . . . . . . . . . . . . . . . . .14 & 15No-Motion Mode . . . . . . . . . . . . . . . . . . . . . . . . . . .16
METAL DETECTING APPLICATIONS . . . . . . . . . . . . . .17
TROUBLE SHOOTING GUIDE . . . . . . . . . . . . . . . . . . .18
CARE & MAINTENANCE . . . . . . . . . . . . . . . . . . . . . . .19
WARRANTY . . . . . . . . . . . . . . . . . . . . . . . . . . .Back Cover

TERMINOLOGYELIMINATION
Reference to a metal being "eliminated" means that the detector will not emit a tone,nor light up an LCD indicator, when a specified object passes through the coil’sdetection field.
DISCRIMINATIONWhen the detector emits different tones for different types of metals, and when thedetector "eliminates" certain metals, we refer to this as the detector "discriminating"among different types of metals. Discrimination is a fixed-start-point elimination system.
NOTCHNotching is the elimination of an item, or range of items, within the metallic spectrum.We "notch-out" an object selectively. Objects to the left and right on the metallicspectrum are retained. Notching creates a variable rejection window.
RELICA relic is an object of interest by reason of its age or its association with the past.Many relics are made of iron, but can also be made of bronze or precious metals.
IRONIron is a common, low-grade metal that is often an undesirable target in certain metaldetecting applications. Examples of undesirable iron objects are old cans, pipes,bolts, and nails.
Sometimes, the desired target is made of iron. Property markers, forinstance, can contain iron. Valuable relics can also be composed of iron; cannonballs, old armaments, and parts of old structures and vehicles can also becomposed of iron.
FERROUSMetals which are made of, or contain, iron.
PINPOINTINGPinpointing is the process of finding the exact location of a buried object. Long-buriedmetals can appear exactly like the surrounding earth, and can therefore be very hardto isolate.
PULL-TABSDiscarded pull-tabs from beverage containers are the most bothersome trash itemsfor treasure hunters. They come in many different shapes and sizes. We haveincorporated special features into the detector to let you automatically eliminate themost common types, using the AutoNotch Mode. Since there are many differenttypes, some must be "Notched-Out" manually.
GROUND BALANCEGround Balancing is the ability of the detector to ignore, or "see through," the earth’snaturally occurring minerals, and only sound a tone when a metal object is detected.
WATERPROOFThe search coil can be submerged in water. The control housing and cable-to-housingconnection must, however, stay dry.
COINSHOOTINGFinding buried coins is the most popular metal detecting application. The most valuableare very old; take care in unearthing them to avoid damage.
CACHE HUNTINGPronounced “cash”. A cache is a buried or hidden valuable stored inside a case, strongbox, or bag.
3

4
ASSEMBLY
Search Coil
SearchCoilCable
UpperStem
ControlHousing
Plug
LowerStem
Assembling your Sharp Shooter IIMetal Detector is easy and requires notools. Just follow these steps:
●1 Using the supplied bolt and knurledknob, attach the search coil to thelower stem.
●2 Press the button on the upper endof the lower stem and slide thelower stem into the upper stem.
Adjust the stem to a length thatlets you maintain a comfortableupright posture, with your armrelaxed at your side.
●3 Wind the search coil cable aroundthe stem. Leave enough slack in thecable to let you adjust the coil whenyou are hunting on uneven ground.Then tighten the knob at the end ofthe search coil.
Note: To adjust the coil, simply loosen the knob.
●4 Insert the coil’s plug into thematching connector on the controlhousing. Be sure the holes andpins line up correctly.
Caution:• Do not force the plug in.
Excess force will cause damage.• To disconnect the cable, pull on the
plug. Do not pull on the cable.
LowerStem
UpperStem
Connectoron back ofcontrol housing
Bolt KnurledKnob
Bottom view
5
BATTERIESIMPORTANT: Always use ALKALINE batteries for optimal performance.
Always remove the batteries for prolonged storage.
CHECK THE BATTERIES if your detector exhibits any of the followingsymptoms:
●1 The unit does not turn on.
●2 Low speaker volume.
●3 Unable to tune detector with the discriminate knob.
The Low Battery indicator will come on and stay on whenever thebatteries need replacing. It should flash momentarily when the PowerSwitch is turned on.
IMPORTANT: Your Sharp Shooter II metal detector requires two 9-Volt ALKALINE batteries.
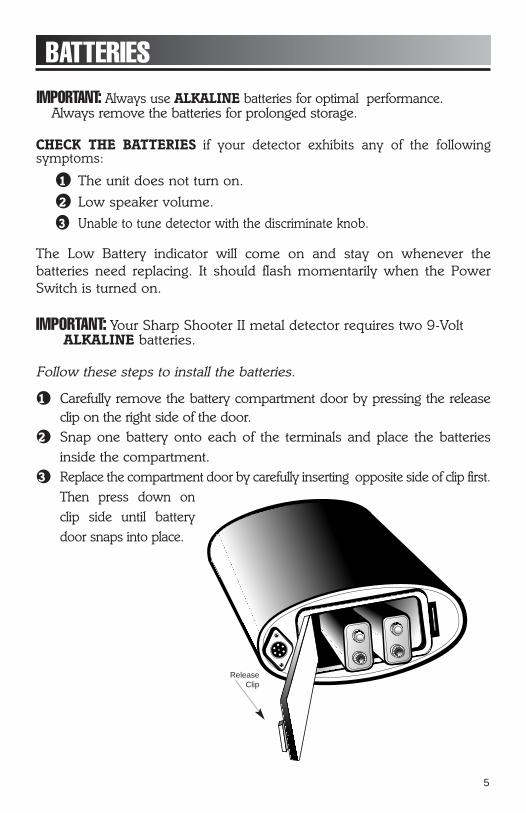
Follow these steps to install the batteries.
●1 Carefully remove the battery compartment door by pressing the releaseclip on the right side of the door.
●2 Snap one battery onto each of the terminals and place the batteriesinside the compartment.
●3 Replace the compartment door by carefully inserting opposite side of clip first.Then press down onclip side until batterydoor snaps into place.
ReleaseClip
I. SUPPLIES NEEDED• A Nail • Nickel• A small piece of aluminum foil • Dime• A large screwdriver or other large iron object • Quarter• A zinc penny (dated after 1982)
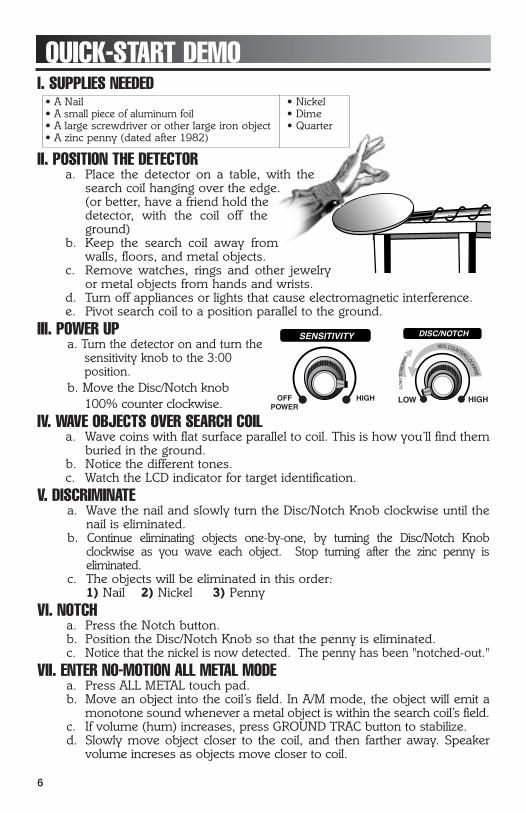
II. POSITION THE DETECTORa. Place the detector on a table, with the
search coil hanging over the edge.(or better, have a friend hold thedetector, with the coil off theground)
b. Keep the search coil away fromwalls, floors, and metal objects.
c. Remove watches, rings and other jewelryor metal objects from hands and wrists.
d. Turn off appliances or lights that cause electromagnetic interference.e. Pivot search coil to a position parallel to the ground.
III. POWER UPa. Turn the detector on and turn the
sensitivity knob to the 3:00position.
b. Move the Disc/Notch knob100% counter clockwise.
IV. WAVE OBJECTS OVER SEARCH COILa. Wave coins with flat surface parallel to coil. This is how you’ll find them
buried in the ground.b. Notice the different tones.c. Watch the LCD indicator for target identification.
V. DISCRIMINATEa. Wave the nail and slowly turn the Disc/Notch Knob clockwise until the
nail is eliminated.b. Continue eliminating objects one-by-one, by turning the Disc/Notch Knob
clockwise as you wave each object. Stop turning after the zinc penny iseliminated.
c. The objects will be eliminated in this order:1) Nail 2) Nickel 3) Penny
VI. NOTCHa. Press the Notch button.b. Position the Disc/Notch Knob so that the penny is eliminated.c. Notice that the nickel is now detected. The penny has been "notched-out."
VII. ENTER NO-MOTION ALL METAL MODEa. Press ALL METAL touch pad.b. Move an object into the coil’s field. In A/M mode, the object will emit a
monotone sound whenever a metal object is within the search coil’s field.c. If volume (hum) increases, press GROUND TRAC button to stabilize.d. Slowly move object closer to the coil, and then farther away. Speaker
volume increses as objects move closer to coil.
6
QUICK-START DEMO
6

7
TURN THE DETECTOR ONClick the left knob to the on position.The detector automatically enters the DISCRIMINATION Mode.
MOTION ALL-METAL ModeTo operate in this mode:
• Turn the right knob, Disc/Notch, 100% counterclockwise, to the offposition.
• Press the DISC button.• Reduce the Sensitivity Control to the 2:00 or 3:00 position.• Sweep the coil over the surface of the ground.
The detector will emit one of three tones, depending on the type of metaldetected.
The top display will indicate the type of metal targeted. A worthwhile target is evidenced by a consistent tone, and a repeatable
target indication as you sweep back and forth over the same spot on theground. Non-repeatable tones usually indicate the presence of trash objectsor highly oxidized metals.
You can increase the level of sensitivity, depending on the groundconditions. If the detector emits false signals, simply reduce the Sensitivityuntil the false signals cease. The detector will work well with the Sensitivityin the 2:00 or 3:00 position, but higher Sensitivity settings will increase depthdetection.
DISCRIMINATION ModeTo operate in this mode:
• Press the DISC button.• Reduce the Sensitivity Control
to the 2:00 or 3:00 position.• Sweep the coil over the
surface of the ground.• Turn the right knob,
Disc/Notch, to eliminateunwanted items fromdetection as illustrated to theright:
BASIC OPERATION
8
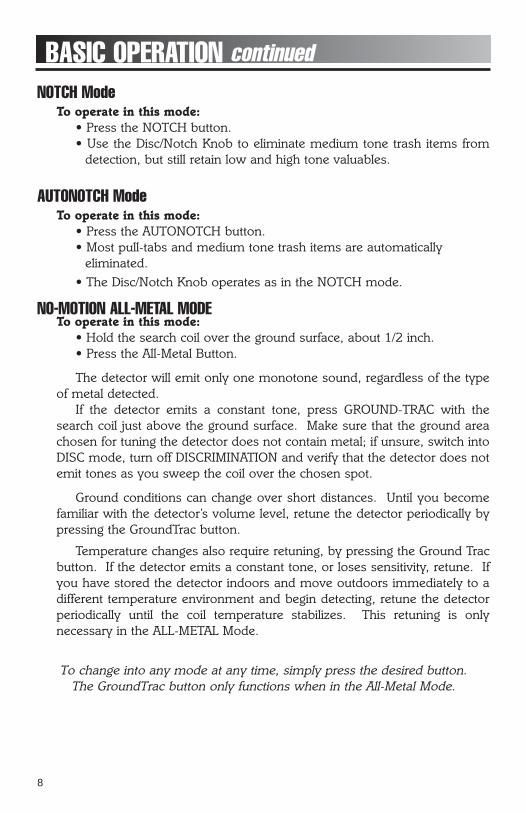
BASIC OPERATION continuedNOTCH Mode
To operate in this mode:• Press the NOTCH button.• Use the Disc/Notch Knob to eliminate medium tone trash items from
detection, but still retain low and high tone valuables.
AUTONOTCH ModeTo operate in this mode:
• Press the AUTONOTCH button.• Most pull-tabs and medium tone trash items are automatically
eliminated.• The Disc/Notch Knob operates as in the NOTCH mode.
NO-MOTION ALL-METAL MODETo operate in this mode:
• Hold the search coil over the ground surface, about 1/2 inch.• Press the All-Metal Button.
The detector will emit only one monotone sound, regardless of the typeof metal detected.
If the detector emits a constant tone, press GROUND-TRAC with thesearch coil just above the ground surface. Make sure that the ground areachosen for tuning the detector does not contain metal; if unsure, switch intoDISC mode, turn off DISCRIMINATION and verify that the detector does notemit tones as you sweep the coil over the chosen spot.
Ground conditions can change over short distances. Until you becomefamiliar with the detector’s volume level, retune the detector periodically bypressing the GroundTrac button.
Temperature changes also require retuning, by pressing the Ground Tracbutton. If the detector emits a constant tone, or loses sensitivity, retune. Ifyou have stored the detector indoors and move outdoors immediately to adifferent temperature environment and begin detecting, retune the detectorperiodically until the coil temperature stabilizes. This retuning is onlynecessary in the ALL-METAL Mode.
To change into any mode at any time, simply press the desired button.The GroundTrac button only functions when in the All-Metal Mode.
9
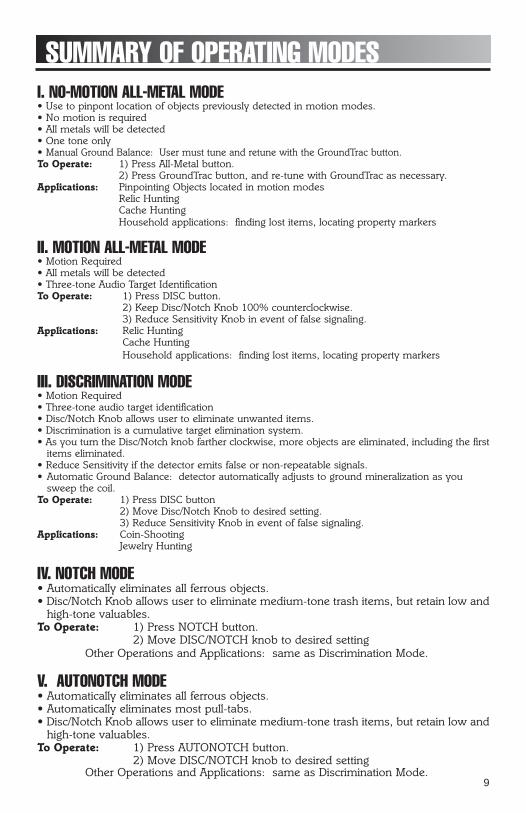
SUMMARY OF OPERATING MODESI. NO-MOTION ALL-METAL MODE• Use to pinpont location of objects previously detected in motion modes.• No motion is required• All metals will be detected• One tone only• Manual Ground Balance: User must tune and retune with the GroundTrac button.To Operate: 1) Press All-Metal button.
2) Press GroundTrac button, and re-tune with GroundTrac as necessary.Applications: Pinpointing Objects located in motion modes
Relic HuntingCache HuntingHousehold applications: finding lost items, locating property markers
II. MOTION ALL-METAL MODE• Motion Required• All metals will be detected• Three-tone Audio Target IdentificationTo Operate: 1) Press DISC button.
2) Keep Disc/Notch Knob 100% counterclockwise.3) Reduce Sensitivity Knob in event of false signaling.
Applications: Relic HuntingCache HuntingHousehold applications: finding lost items, locating property markers
III. DISCRIMINATION MODE• Motion Required• Three-tone audio target identification• Disc/Notch Knob allows user to eliminate unwanted items.• Discrimination is a cumulative target elimination system.• As you turn the Disc/Notch knob farther clockwise, more objects are eliminated, including the first
items eliminated.• Reduce Sensitivity if the detector emits false or non-repeatable signals.• Automatic Ground Balance: detector automatically adjusts to ground mineralization as you
sweep the coil.To Operate: 1) Press DISC button
2) Move Disc/Notch Knob to desired setting.3) Reduce Sensitivity Knob in event of false signaling.
Applications: Coin-ShootingJewelry Hunting
IV. NOTCH MODE• Automatically eliminates all ferrous objects.• Disc/Notch Knob allows user to eliminate medium-tone trash items, but retain low and
high-tone valuables.To Operate: 1) Press NOTCH button.
2) Move DISC/NOTCH knob to desired settingOther Operations and Applications: same as Discrimination Mode.
V. AUTONOTCH MODE• Automatically eliminates all ferrous objects.• Automatically eliminates most pull-tabs.• Disc/Notch Knob allows user to eliminate medium-tone trash items, but retain low and
high-tone valuables.To Operate: 1) Press AUTONOTCH button.
2) Move DISC/NOTCH knob to desired settingOther Operations and Applications: same as Discrimination Mode.
10
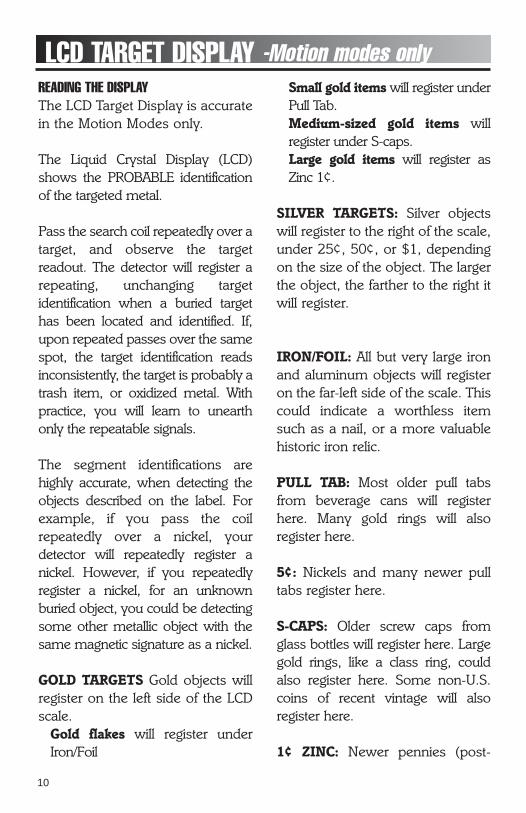
LCD TARGET DISPLAY -Motion modes onlyREADING THE DISPLAYThe LCD Target Display is accuratein the Motion Modes only.
The Liquid Crystal Display (LCD)shows the PROBABLE identificationof the targeted metal.
Pass the search coil repeatedly over atarget, and observe the targetreadout. The detector will register arepeating, unchanging targetidentification when a buried targethas been located and identified. If,upon repeated passes over the samespot, the target identification readsinconsistently, the target is probably atrash item, or oxidized metal. Withpractice, you will learn to unearthonly the repeatable signals.
The segment identifications arehighly accurate, when detecting theobjects described on the label. Forexample, if you pass the coilrepeatedly over a nickel, yourdetector will repeatedly register anickel. However, if you repeatedlyregister a nickel, for an unknownburied object, you could be detectingsome other metallic object with thesame magnetic signature as a nickel.
GOLD TARGETS Gold objects willregister on the left side of the LCDscale.
Gold flakes will register underIron/Foil
Small gold items will register underPull Tab.Medium-sized gold items willregister under S-caps.Large gold items will register asZinc 1¢.
SILVER TARGETS: Silver objectswill register to the right of the scale,under 25¢, 50¢, or $1, dependingon the size of the object. The largerthe object, the farther to the right itwill register.
IRON/FOIL: All but very large ironand aluminum objects will registeron the far-left side of the scale. Thiscould indicate a worthless itemsuch as a nail, or a more valuablehistoric iron relic.
PULL TAB: Most older pull tabsfrom beverage cans will registerhere. Many gold rings will alsoregister here.
5¢: Nickels and many newer pulltabs register here.
S-CAPS: Older screw caps fromglass bottles will register here. Largegold rings, like a class ring, couldalso register here. Some non-U.S.coins of recent vintage will alsoregister here.
1¢ ZINC: Newer pennies (post-
LCD TARGET DISPLAY -Motion modes only
11
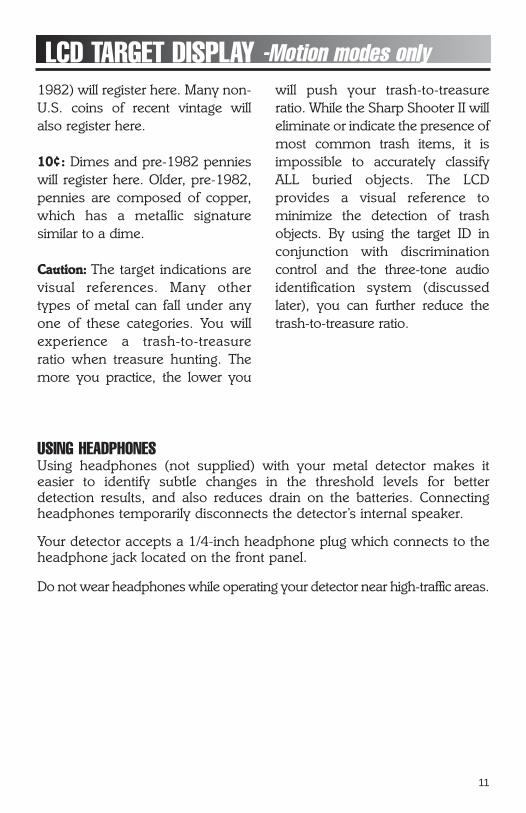
1982) will register here. Many non-U.S. coins of recent vintage willalso register here.
10¢: Dimes and pre-1982 pennieswill register here. Older, pre-1982,pennies are composed of copper,which has a metallic signaturesimilar to a dime.
Caution: The target indications arevisual references. Many othertypes of metal can fall under anyone of these categories. You willexperience a trash-to-treasureratio when treasure hunting. Themore you practice, the lower you
will push your trash-to-treasureratio. While the Sharp Shooter II willeliminate or indicate the presence ofmost common trash items, it isimpossible to accurately classifyALL buried objects. The LCDprovides a visual reference tominimize the detection of trashobjects. By using the target ID inconjunction with discriminationcontrol and the three-tone audioidentification system (discussedlater), you can further reduce thetrash-to-treasure ratio.
USING HEADPHONESUsing headphones (not supplied) with your metal detector makes iteasier to identify subtle changes in the threshold levels for betterdetection results, and also reduces drain on the batteries. Connectingheadphones temporarily disconnects the detector’s internal speaker.
Your detector accepts a 1/4-inch headphone plug which connects to theheadphone jack located on the front panel.
Do not wear headphones while operating your detector near high-traffic areas.
12
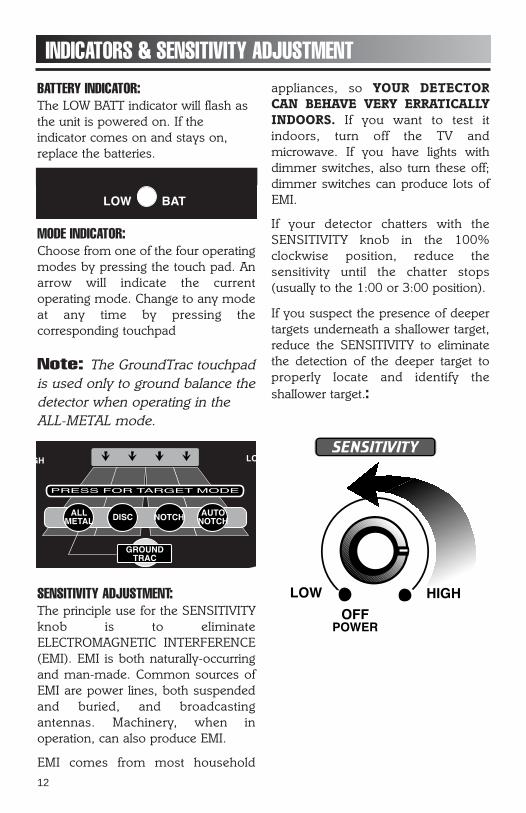
BATTERY INDICATOR:The LOW BATT indicator will flash asthe unit is powered on. If theindicator comes on and stays on,replace the batteries.
MODE INDICATOR:Choose from one of the four operatingmodes by pressing the touch pad. Anarrow will indicate the currentoperating mode. Change to any modeat any time by pressing thecorresponding touchpad
Note: The GroundTrac touchpadis used only to ground balance thedetector when operating in theALL-METAL mode.
SENSITIVITY ADJUSTMENT:The principle use for the SENSITIVITYknob is to eliminateELECTROMAGNETIC INTERFERENCE(EMI). EMI is both naturally-occurringand man-made. Common sources ofEMI are power lines, both suspendedand buried, and broadcastingantennas. Machinery, when inoperation, can also produce EMI.
EMI comes from most household
appliances, so YOUR DETECTORCAN BEHAVE VERY ERRATICALLYINDOORS. If you want to test itindoors, turn off the TV andmicrowave. If you have lights withdimmer switches, also turn these off;dimmer switches can produce lots ofEMI.
If your detector chatters with theSENSITIVITY knob in the 100%clockwise position, reduce thesensitivity until the chatter stops(usually to the 1:00 or 3:00 position).
If you suspect the presence of deepertargets underneath a shallower target,reduce the SENSITIVITY to eliminatethe detection of the deeper target toproperly locate and identify theshallower target.:
INDICATORS & SENSITIVITY ADJUSTMENT

13
AUDIO TARGET ID -Motion modes onlyIn the DISC, NOTCH or AUTONOTCHmodes, the detector emits threedistinct tones, which classify metalobjects into categories
IRON & STEEL:In the DISCRIMINATION mode mostiron and steel objects will induce a lowtone. Highly oxidized iron can induce ahigh tone. Very large iron objects (likemanhole covers) induce high tones.
GOLD:Gold objects will induce a low ormedium tone, depending on theirsizes. Very small gold objects willindicate on the left-most segment.Large gold objects will read under theZinc segment. If you are goldprospecting, you will usually belooking for natural gold in an areawhich it does not contain much trash,and can therefore ignore the specificsegment descriptions.
PULL TABS:Pull tabs are the most bothersome
trash items for detectorist. Most willinduce a medium tone. Older pull tabswill be eliminated automatically in theAUTO NOTCH mode, or alternativelybe manually “notched out” in NOTCHmode with the Disc/Notch control. Theolder pull tabs (those not attached tothe can after opening) are sometimesbroken in half; these broken tabs caninduce low tones.
It can be very difficult to differentiatepull tabs from gold rings. When theyboth induce medium tones, you mightnotice a “double beep” from a goldring but a “single beep” from pull tabs.To achieve this distinction, sweep thesearch coil very slowly, and at differentangles. Two tones might signal as thedetector passes over each side of theround ring.
COPPER, SILVER & BRASS:Most valuable coins are composed ofthese metals and will usually induce ahigh tone. Valuable objects other thancoinage can also be composed ofcopper, silver and brass.
Audio Target Identification (ATI) classifies metals into three categories.
LOW TONE
Nails & Bottle Caps,Gold & Nickel
MEDIUM TONE
Old & New Pull Tabs, Zinc,Pennies (Post 1982), Larger
Gold Objects
HIGH TONE
Copper, Silver & BrassCopper Pennies (Pre 1982)
14
IN THE FIELD TECHNIQUES - Motion modes
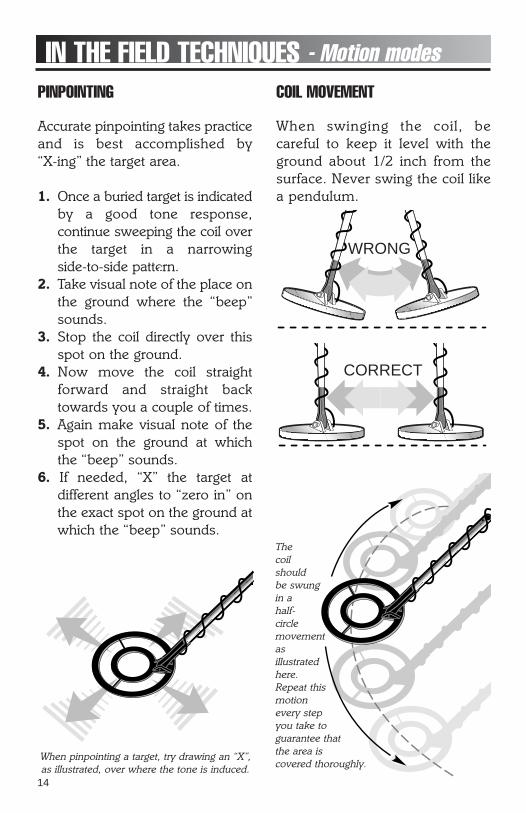
When pinpointing a target, try drawing an “X”,as illustrated, over where the tone is induced.
PINPOINTING
Accurate pinpointing takes practiceand is best accomplished by“X-ing” the target area.
1. Once a buried target is indicatedby a good tone response,continue sweeping the coil overthe target in a narrowingside-to-side pattern.
2. Take visual note of the place onthe ground where the “beep”sounds.
3. Stop the coil directly over thisspot on the ground.
4. Now move the coil straightforward and straight backtowards you a couple of times.
5. Again make visual note of thespot on the ground at whichthe “beep” sounds.
6. If needed, “X” the target atdifferent angles to “zero in” onthe exact spot on the ground atwhich the “beep” sounds.
COIL MOVEMENT
When swinging the coil, becareful to keep it level with theground about 1/2 inch from thesurface. Never swing the coil likea pendulum.
CORRECT
WRONG
Thecoilshouldbe swungin ahalf-circlemovementasillustratedhere.Repeat thismotionevery stepyou take toguarantee thatthe area iscovered thoroughly.
15
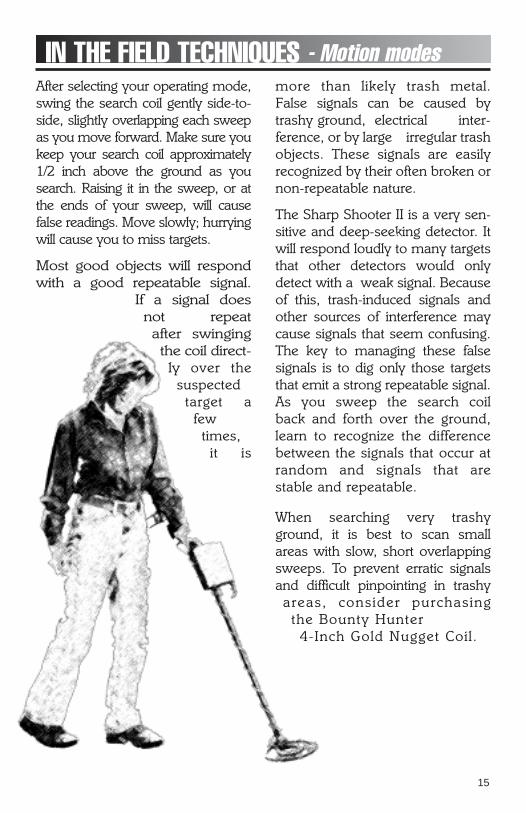
IN THE FIELD TECHNIQUES - Motion modesAfter selecting your operating mode,swing the search coil gently side-to-side, slightly overlapping each sweepas you move forward. Make sure youkeep your search coil approximately1/2 inch above the ground as yousearch. Raising it in the sweep, or atthe ends of your sweep, will causefalse readings. Move slowly; hurryingwill cause you to miss targets.
Most good objects will respondwith a good repeatable signal.
If a signal doesnot repeatafter swingingthe coil direct-ly over the
suspectedtarget a
fewtimes,
it is
more than likely trash metal.False signals can be caused bytrashy ground, electrical inter-ference, or by large irregular trashobjects. These signals are easilyrecognized by their often broken ornon-repeatable nature.
The Sharp Shooter II is a very sen-sitive and deep-seeking detector. Itwill respond loudly to many targetsthat other detectors would onlydetect with a weak signal. Becauseof this, trash-induced signals andother sources of interference maycause signals that seem confusing.The key to managing these falsesignals is to dig only those targetsthat emit a strong repeatable signal.As you sweep the search coilback and forth over the ground,learn to recognize the differencebetween the signals that occur atrandom and signals that arestable and repeatable.
When searching very trashyground, it is best to scan smallareas with slow, short overlappingsweeps. To prevent erratic signalsand difficult pinpointing in trashyareas, consider purchasing
the Bounty Hunter4-Inch Gold Nugget Coil.
16
IN THE FIELD TECHNIQUES - No-motion modeIn the No-Motion All-Metal Mode, coil sweep technique is not important. Rather,user retuning is critical.The detector does not automatically adjust to changing ground and environmentalconditions; the operator is required to make the adjustment. If the detectorsounds a constant tone over all areas of the ground, retune the detector bypressing the GroundTrac button. This action will “Ground Balance” the detector.
RETUNINGKeep the coil still, just above the ground surface, and press the GroundTrac button.Make sure that the spot on the ground you chose for tuning did not containmetal; pass over the area with the coil again to insure that the detector doesnot emit a tone.
TEMPERATURE CHANGEIf the detector moves from one temperature environment to another, or if thetemperature changes, you must retune the detector until the temperaturestabilizes. If you move from a cooler to a warmer environment, the detector mayemit a constant tone; if so, retune. If you move from a warmer to coolerenvironment, the detector may lose sensitivity; if so, retune.
PINPOINTINGHow To Pinpoint Targets Using The ALL-METAL Mode
When you’ve discovered a target you wish to dig, do the following:1. Hold the searchcoil about half an inch above the ground, off to the side of
where you think the target probably is. 2. Tap the ALL METAL touchpad button. This will put you into the All Metal
Pinpoint mode. NOTE: unlike the other modes, this mode does not requirethe searchcoil to be in motion to detect a target.
3. Lift the searchcoil slightly, and pass it over the target. The sound will beloudest over the center of the target.
To Narrow It Down Further:4. Now that you know about where the target is, again lower the searchcoil to
about half an inch above the ground, near the center of the target but notright over the top. Tap the button again. The sound will instantly go away.
5. Lift the searchcoil slightly and move it horizontally over the target. The audi-ble response zone will be much narrower. Repeat step #4 to narrow the tar-get zone even further.NOTE: if at any time it seems like the signal may be drifting, just tap theGround-Trac button. This restores the signal to its zero level.
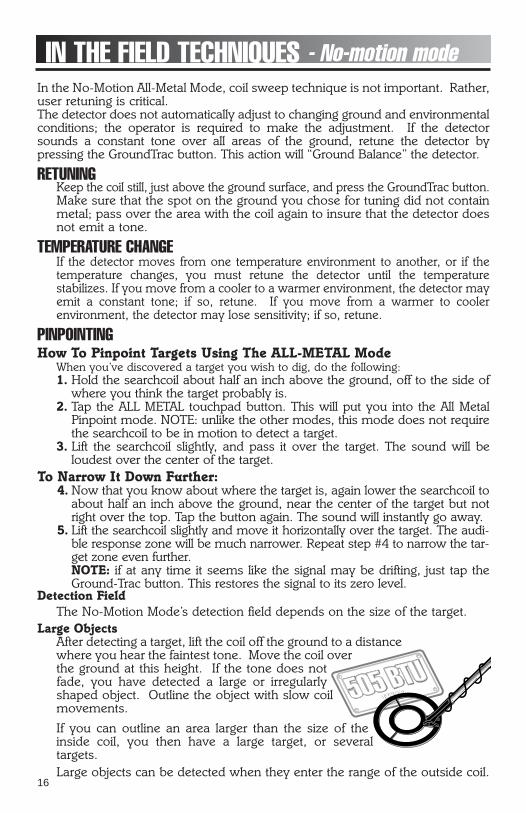
Detection FieldThe No-Motion Mode’s detection field depends on the size of the target.
Large ObjectsAfter detecting a target, lift the coil off the ground to a distancewhere you hear the faintest tone. Move the coil overthe ground at this height. If the tone does notfade, you have detected a large or irregularlyshaped object. Outline the object with slow coilmovements.
If you can outline an area larger than the size of theinside coil, you then have a large target, or severaltargets.Large objects can be detected when they enter the range of the outside coil.
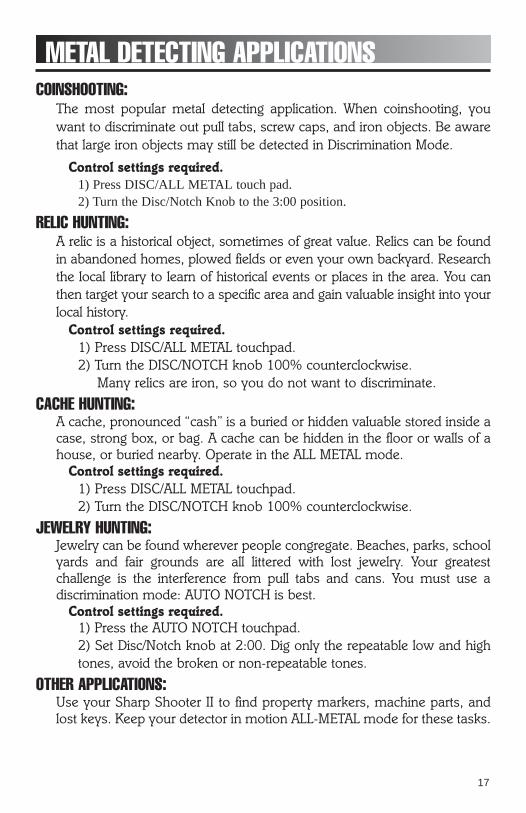
METAL DETECTING APPLICATIONSCOINSHOOTING:
The most popular metal detecting application. When coinshooting, youwant to discriminate out pull tabs, screw caps, and iron objects. Be awarethat large iron objects may still be detected in Discrimination Mode.
Control settings required.1) Press DISC/ALL METAL touch pad.2) Turn the Disc/Notch Knob to the 3:00 position.
RELIC HUNTING:A relic is a historical object, sometimes of great value. Relics can be foundin abandoned homes, plowed fields or even your own backyard. Researchthe local library to learn of historical events or places in the area. You canthen target your search to a specific area and gain valuable insight into yourlocal history.
Control settings required.1) Press DISC/ALL METAL touchpad.2) Turn the DISC/NOTCH knob 100% counterclockwise.
Many relics are iron, so you do not want to discriminate.
CACHE HUNTING:A cache, pronounced “cash” is a buried or hidden valuable stored inside acase, strong box, or bag. A cache can be hidden in the floor or walls of ahouse, or buried nearby. Operate in the ALL METAL mode.
Control settings required.1) Press DISC/ALL METAL touchpad.2) Turn the DISC/NOTCH knob 100% counterclockwise.
JEWELRY HUNTING:Jewelry can be found wherever people congregate. Beaches, parks, schoolyards and fair grounds are all littered with lost jewelry. Your greatestchallenge is the interference from pull tabs and cans. You must use adiscrimination mode: AUTO NOTCH is best.
Control settings required.1) Press the AUTO NOTCH touchpad.2) Set Disc/Notch knob at 2:00. Dig only the repeatable low and hightones, avoid the broken or non-repeatable tones.
OTHER APPLICATIONS:Use your Sharp Shooter II to find property markers, machine parts, andlost keys. Keep your detector in motion ALL-METAL mode for these tasks.
17
18
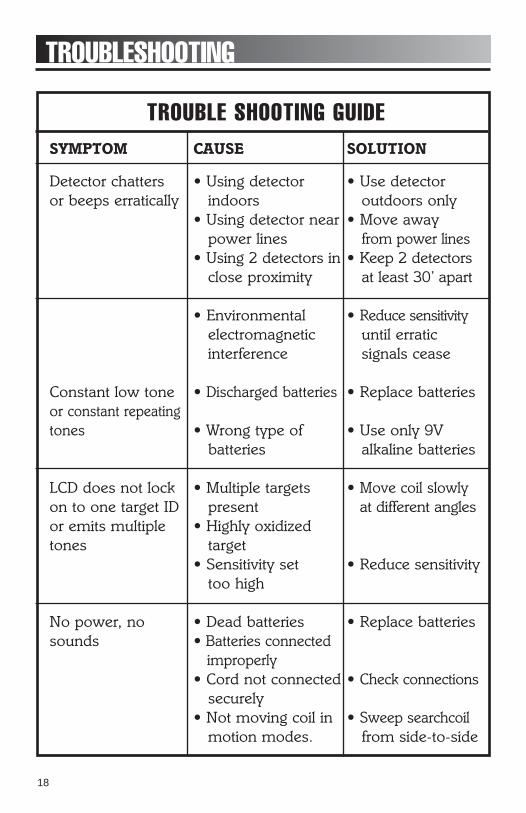
TROUBLE SHOOTING GUIDESYMPTOM CAUSE SOLUTION
Detector chatters • Using detector • Use detectoror beeps erratically indoors outdoors only
• Using detector near • Move away power lines from power lines
• Using 2 detectors in • Keep 2 detectorsclose proximity at least 30’ apart
• Environmental • Reduce sensitivityelectromagnetic until erratic interference signals cease
Constant low tone • Discharged batteries • Replace batteriesor constant repeatingtones • Wrong type of • Use only 9V
batteries alkaline batteries
LCD does not lock • Multiple targets • Move coil slowlyon to one target ID present at different anglesor emits multiple • Highly oxidizedtones target
• Sensitivity set • Reduce sensitivitytoo high
No power, no • Dead batteries • Replace batteriessounds • Batteries connected
improperly• Cord not connected • Check connections
securely• Not moving coil in • Sweep searchcoil
motion modes. from side-to-side
TROUBLESHOOTING
19
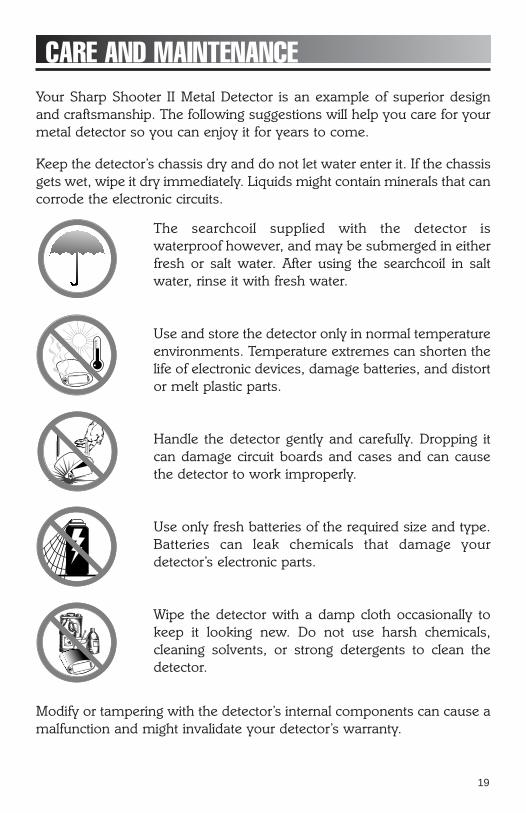
Your Sharp Shooter II Metal Detector is an example of superior designand craftsmanship. The following suggestions will help you care for yourmetal detector so you can enjoy it for years to come.
Keep the detector’s chassis dry and do not let water enter it. If the chassisgets wet, wipe it dry immediately. Liquids might contain minerals that cancorrode the electronic circuits.
The searchcoil supplied with the detector iswaterproof however, and may be submerged in eitherfresh or salt water. After using the searchcoil in saltwater, rinse it with fresh water.
Use and store the detector only in normal temperatureenvironments. Temperature extremes can shorten thelife of electronic devices, damage batteries, and distortor melt plastic parts.
Handle the detector gently and carefully. Dropping itcan damage circuit boards and cases and can causethe detector to work improperly.
Use only fresh batteries of the required size and type.Batteries can leak chemicals that damage yourdetector’s electronic parts.
Wipe the detector with a damp cloth occasionally tokeep it looking new. Do not use harsh chemicals,cleaning solvents, or strong detergents to clean thedetector.
Modify or tampering with the detector’s internal components can cause amalfunction and might invalidate your detector’s warranty.
CARE AND MAINTENANCE

20
TREASURE HUNTER’S CODE OF ETHICS:1. Respect the rights and property of others.2. Observe all laws, whether national, state or local.3. Never destroy historical or archaeological treasures.4. Leave the land and vegetation as it was. Fill in your holes.5. All treasure hunters may be judged by the example you set.
Always obtain permission before searching any site. Beextremely careful while probing, picking up, or discarding trashitems. And ALWAYS COVER YOUR HOLES!
First Texas Products, LP1100 Pendale RoadEl Paso, TX 79907
(915) 633-8354
REVISED 2/04
This product is warranted against defects in work-manship or materials under normal use for five yearsfrom date of purchase to the original user. Liability in
all events is limited to the purchase price paid.Liability under this Warranty is limited to replacing orrepairing, at our option, any Bounty Hunter Detector
returned, shipping cost prepaid, to First TexasProducts, LP. Damage due to neglect, accidental
damage or misuse of this product is not covered bythis warranty.
FIRST TEXAS PRODUCTS, LP5-YEAR LIMITED WARRANTY
Copyright ©MCMXCIX by First Texas Products, L.P.
All rights reserved, including the right to reproduce this book, or parts thereof, in any form, except for theinclusion of brief quotations in a review.
Published by First Texas Products, L.P.Bounty Hunter® and Sharpshooter® are registered trademarks of First Texas Products, L.P.
www.detecting.com