hydraulic arm - grearengineer.wikispaces.comarm.pdf1. fold the lid (a1) and apply tape to form the...
TRANSCRIPT
Caution!Make sure you do not pull on the plungers too hard.Once you feel it resist STOP!
Watch that you do not pull the plungers too close to the end of the syringe.
You do not want your plunger to come out of the syringe and the hydraulic fluid to leak.

Part AScooper & Arm
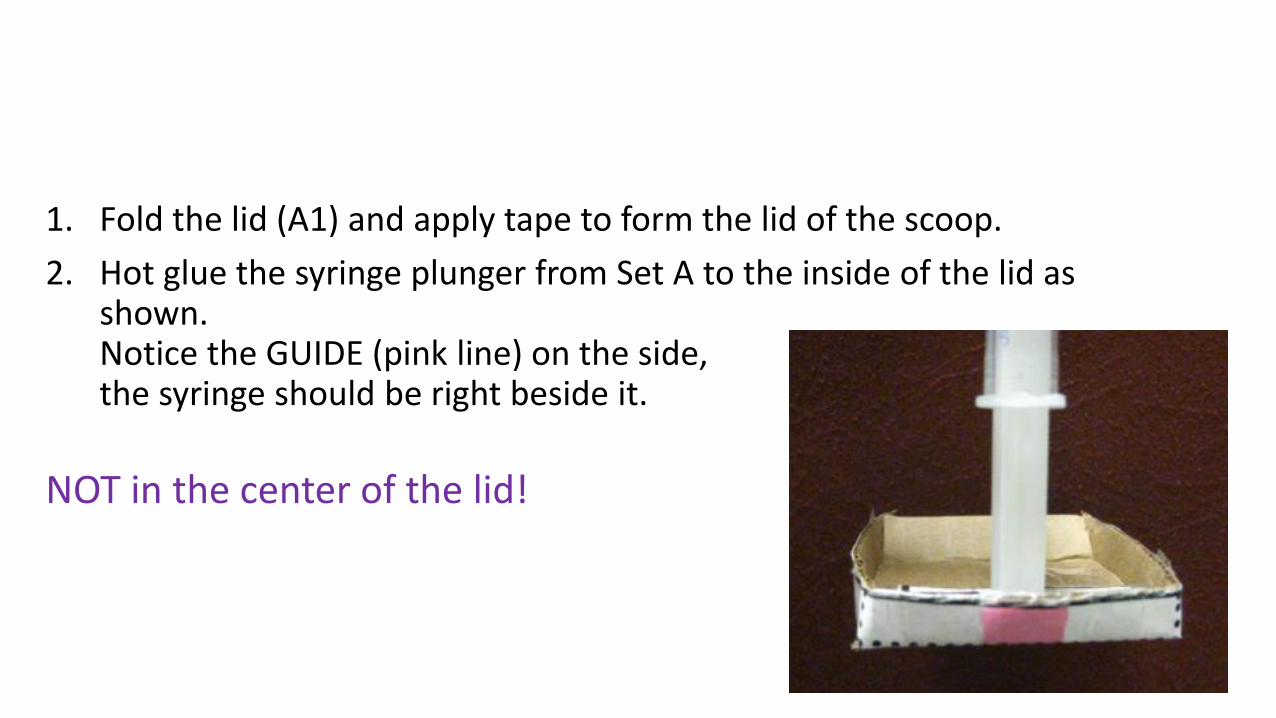
1. Fold the lid (A1) and apply tape to form the lid of the scoop.
2. Hot glue the syringe plunger from Set A to the inside of the lid as shown. Notice the GUIDE (pink line) on the side, the syringe should be right beside it.
NOT in the center of the lid!

4. Fold and tape together the body of the scoop (A2) to form a box.
5. Place the syringe handle in the notch of the box (A2) and secure with tape.
6. Place the shaded area of the arm (A3) between the syringe and the box (A2) to form the “arm”.
7. Fold the arm (A3) longitudinally with the tubing inside, and secure with tape.

8. At the narrow end of the arm (A3), bend the cardboard to form a loop. Tape or glue to secure such that there is a hole inside the loop.
Now you should have an “arm” with a scoop on one end
that you can open and close by
manipulating the large syringe to move the scoop lid
horizontally.

Part BRotating Base
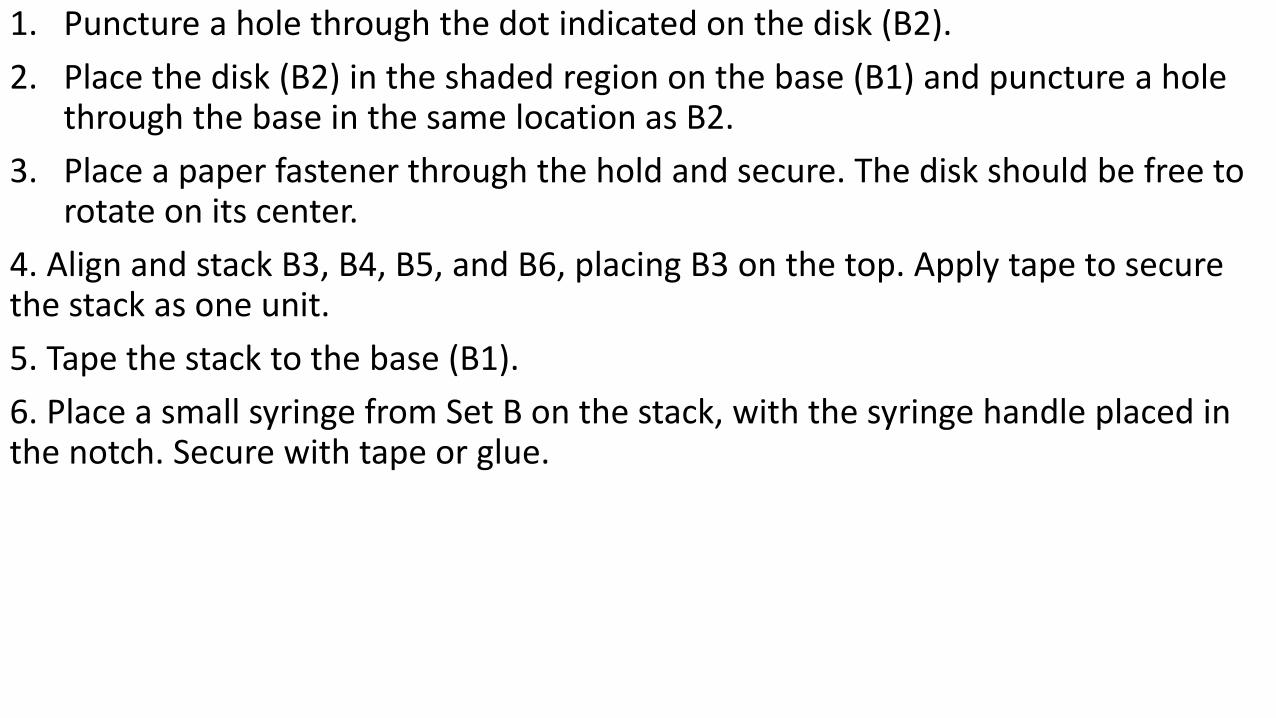
1. Puncture a hole through the dot indicated on the disk (B2).
2. Place the disk (B2) in the shaded region on the base (B1) and puncture a hole through the base in the same location as B2.
3. Place a paper fastener through the hold and secure. The disk should be free to rotate on its center.
4. Align and stack B3, B4, B5, and B6, placing B3 on the top. Apply tape to secure the stack as one unit.
5. Tape the stack to the base (B1).
6. Place a small syringe from Set B on the stack, with the syringe handle placed in the notch. Secure with tape or glue.
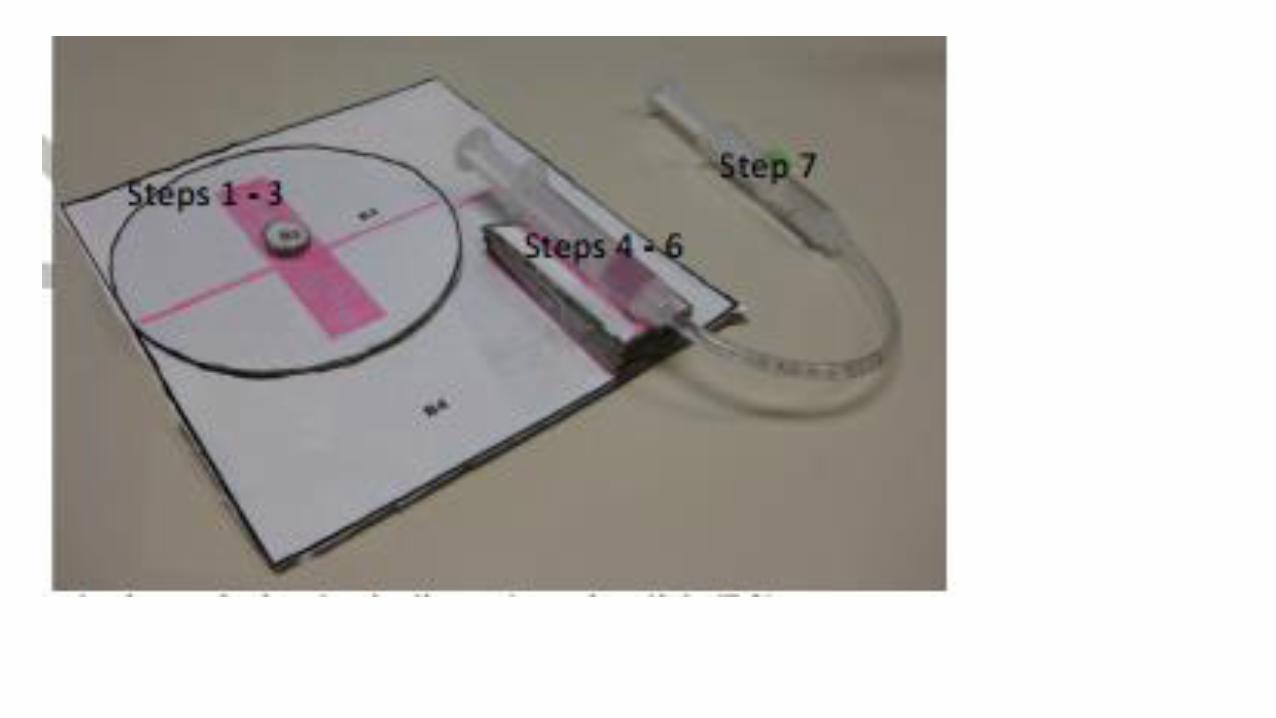

Part CLift

1. Fold the body (C1) to form a frame. 2. Puncture the two hole and slice the two small lines in the center of the template. 3. From inside the frame (C1), tuck the handle of syringe into one of the slit lines. Tape to secure.
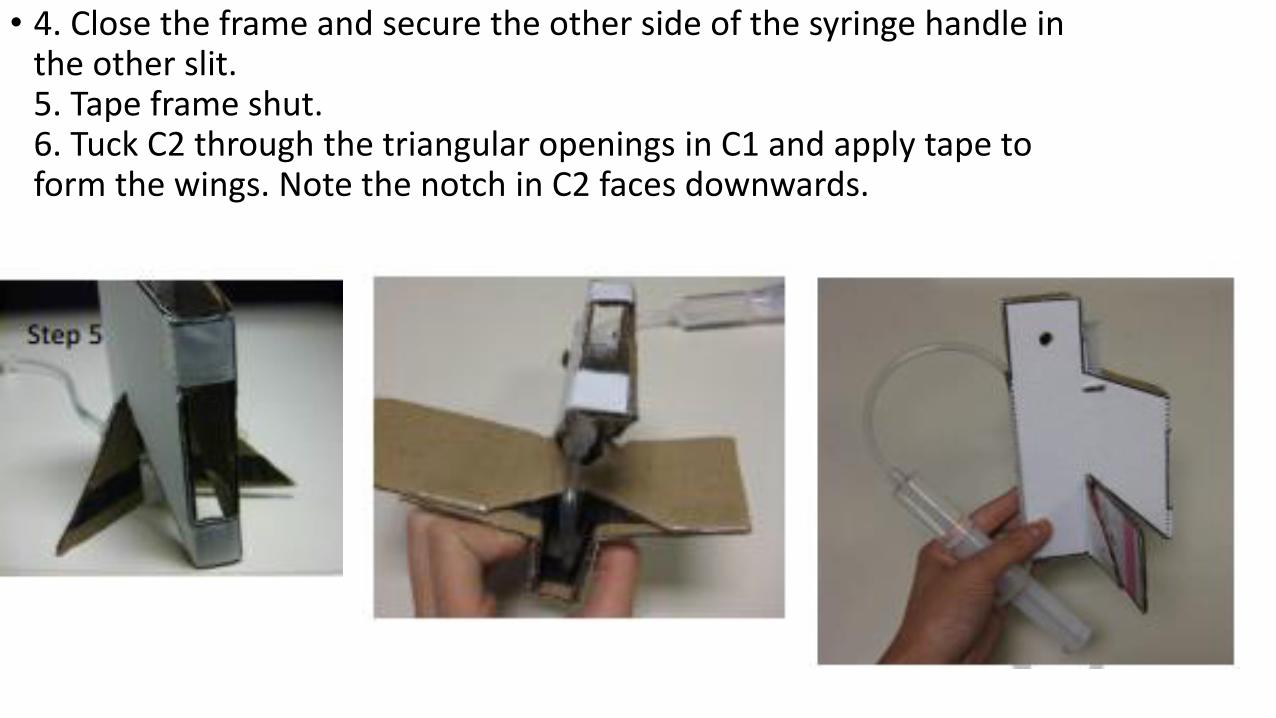
• 4. Close the frame and secure the other side of the syringe handle in the other slit. 5. Tape frame shut. 6. Tuck C2 through the triangular openings in C1 and apply tape to form the wings. Note the notch in C2 faces downwards.

Putting it all togetherSystem Integration
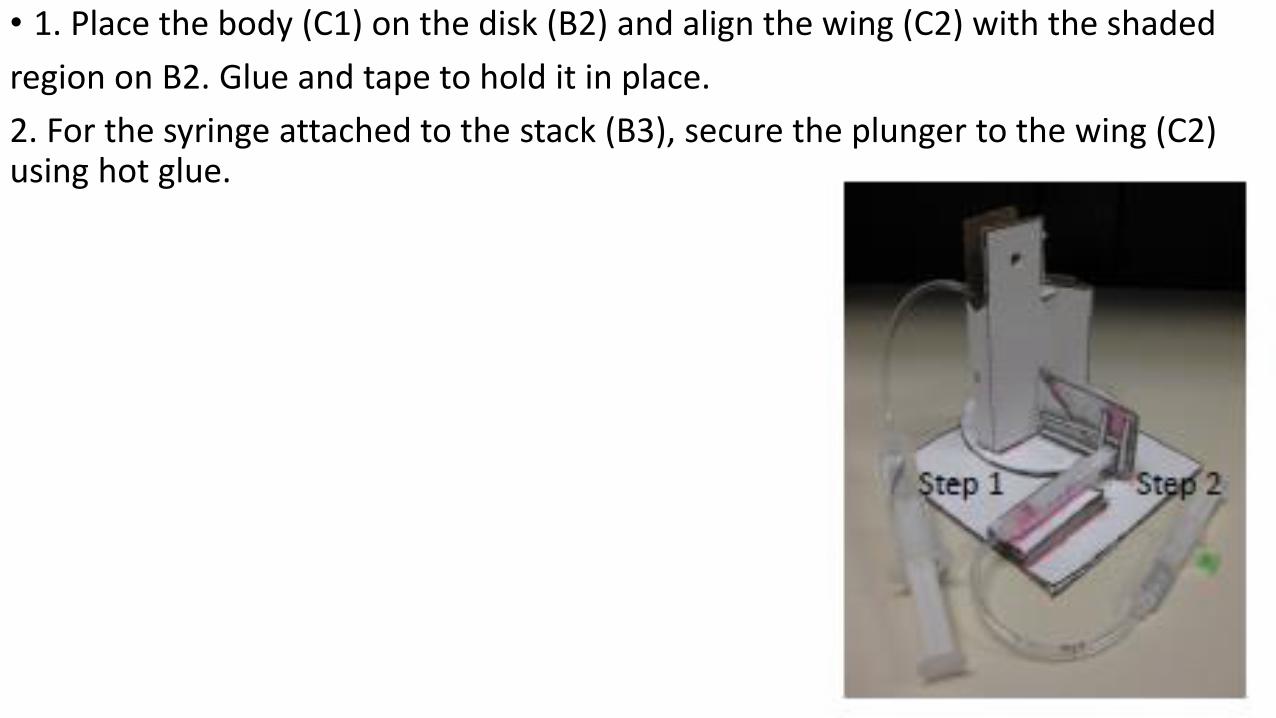
• 1. Place the body (C1) on the disk (B2) and align the wing (C2) with the shaded
region on B2. Glue and tape to hold it in place.
2. For the syringe attached to the stack (B3), secure the plunger to the wing (C2) using hot glue.
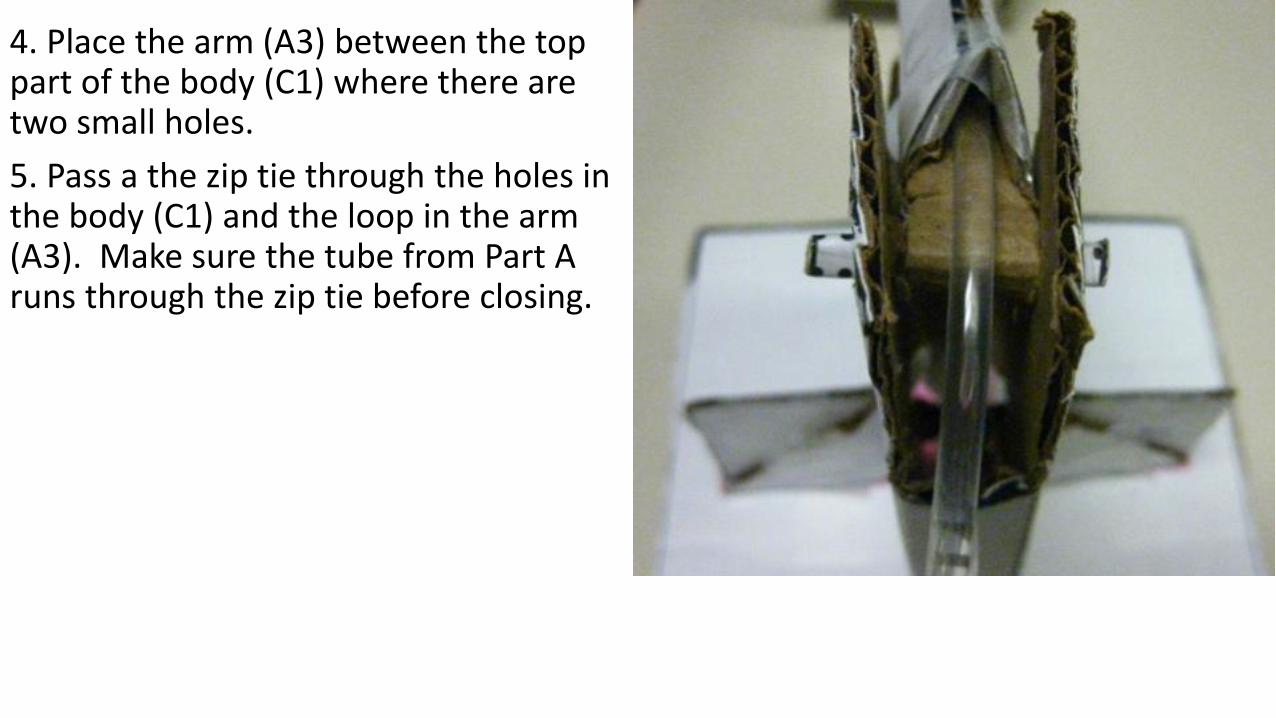
4. Place the arm (A3) between the top part of the body (C1) where there are two small holes.
5. Pass a the zip tie through the holes in the body (C1) and the loop in the arm (A3). Make sure the tube from Part A runs through the zip tie before closing.

Now you should have a working mechanical arm controlled by fluid power.
Add extra tape to secure any weak spots in your design and prepare your mechanical arm for a design challenge that will test its abilities!