frontier smartvoice
TRANSCRIPT
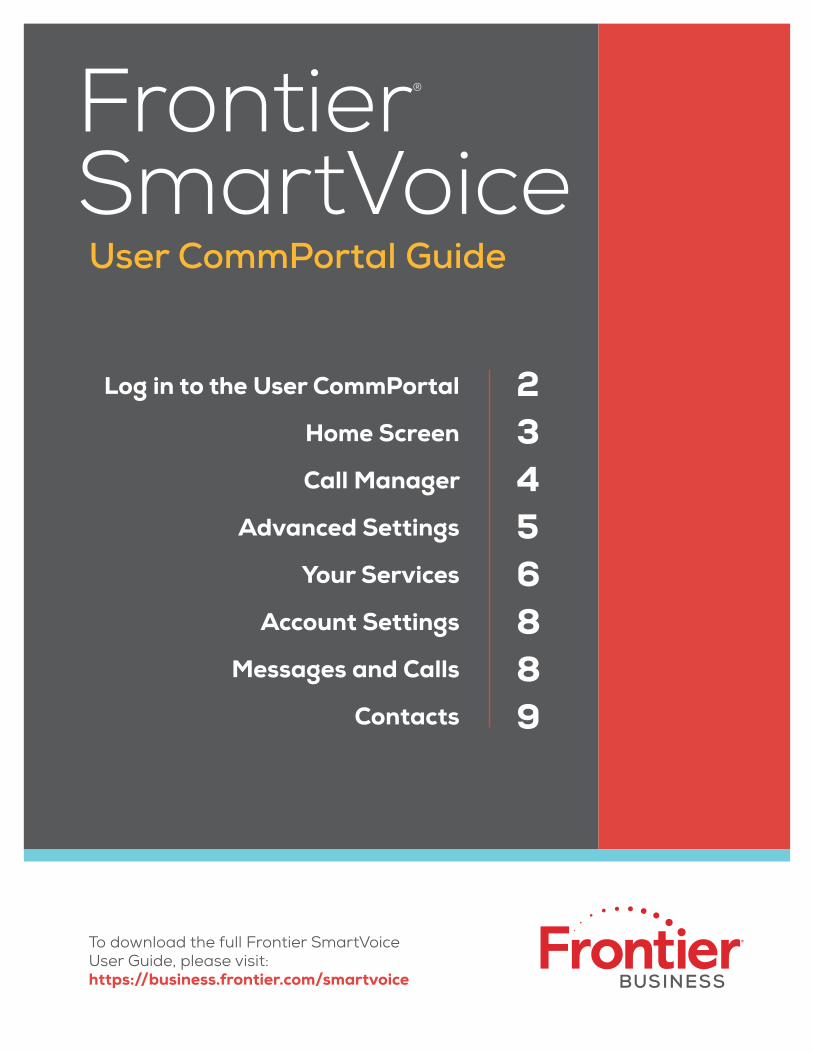
Frontier® SmartVoiceUser CommPortal Guide
To download the full Frontier SmartVoice User Guide, please visit:https://business.frontier.com/smartvoice
Log in to the User CommPortal
Home Screen
Call Manager
Advanced Settings
Your Services
Account Settings
Messages and Calls
Contacts
23456889
2
Log in
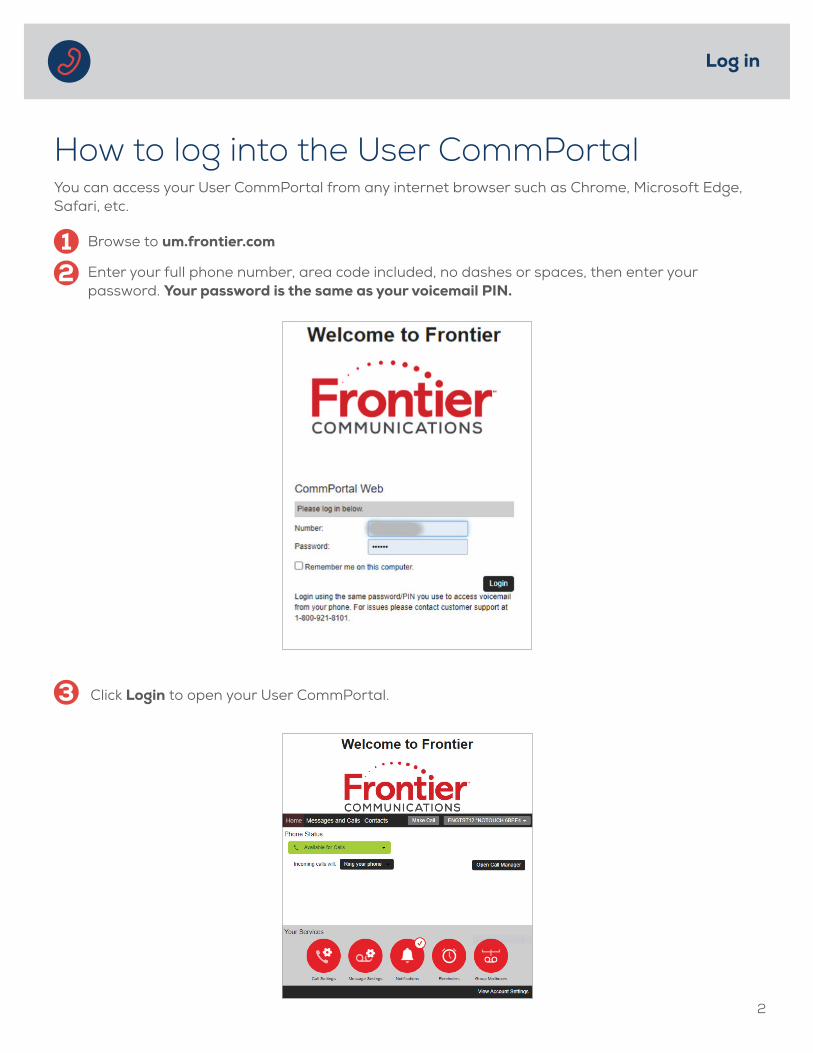
Browse to um.frontier.com
Enter your full phone number, area code included, no dashes or spaces, then enter your password. Your password is the same as your voicemail PIN.
You can access your User CommPortal from any internet browser such as Chrome, Microsoft Edge, Safari, etc.
How to log into the User CommPortal
12
3 Click Login to open your User CommPortal.
3
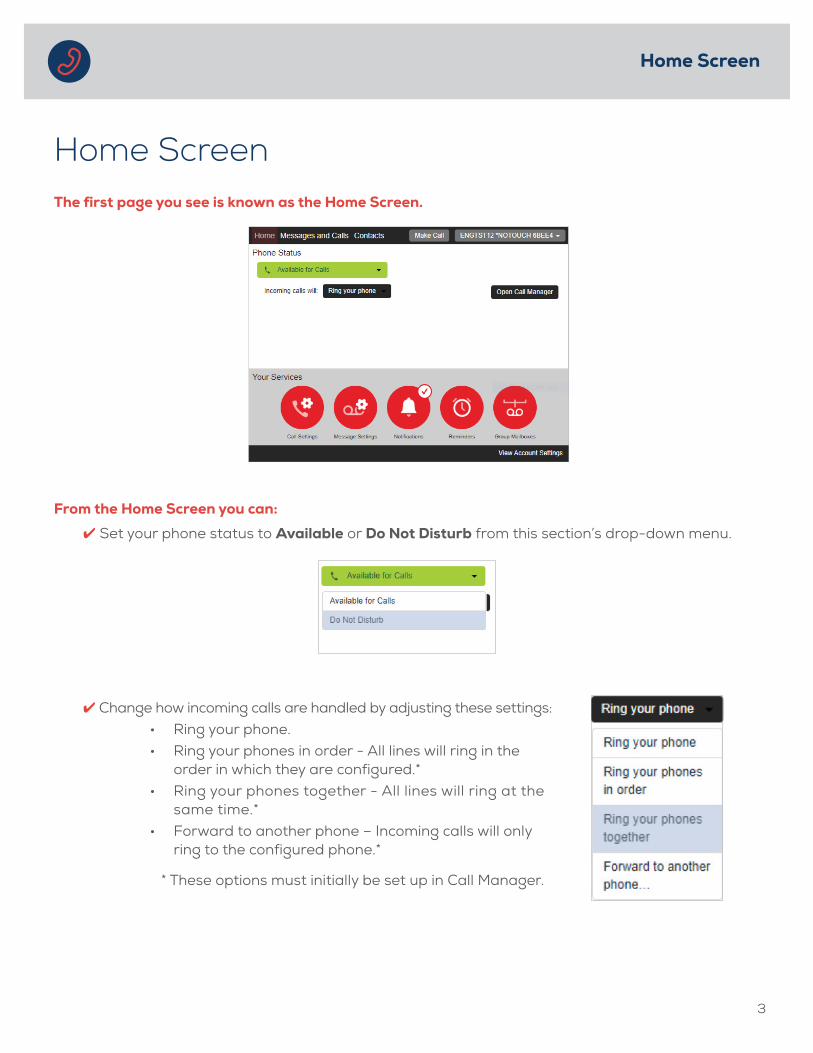
The first page you see is known as the Home Screen.
From the Home Screen you can:
4 Set your phone status to Available or Do Not Disturb from this section’s drop-down menu.
4 Change how incoming calls are handled by adjusting these settings: • Ring your phone.• Ring your phones in order - All lines will ring in the
order in which they are configured.*• Ring your phones together - All lines will ring at the
same time.*• Forward to another phone – Incoming calls will only
ring to the configured phone.*
* These options must initially be set up in Call Manager.
Home Screen
Home Screen
4
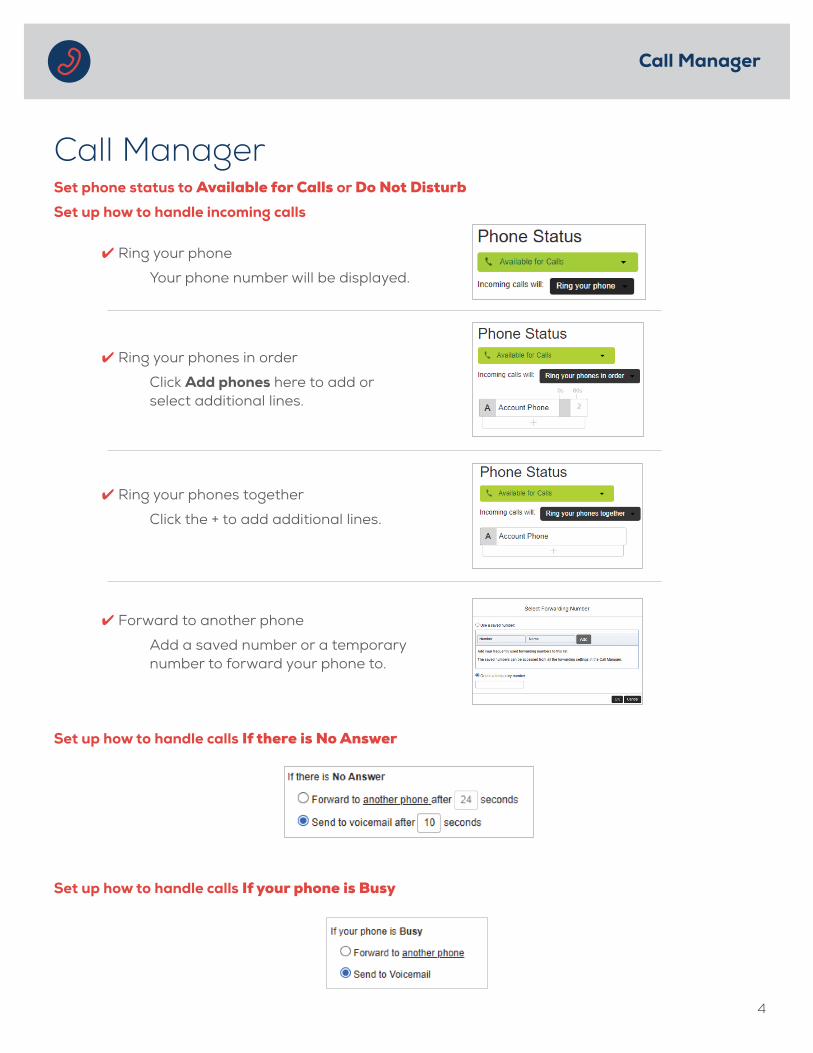
Set phone status to Available for Calls or Do Not Disturb
Set up how to handle incoming calls
4 Ring your phones in order
Click Add phones here to add or select additional lines.
4 Ring your phones together
Click the + to add additional lines.
4 Forward to another phone
Add a saved number or a temporary number to forward your phone to.
Set up how to handle calls If there is No Answer
Set up how to handle calls If your phone is Busy
Call Manager
4 Ring your phone
Your phone number will be displayed.
Call Manager
5
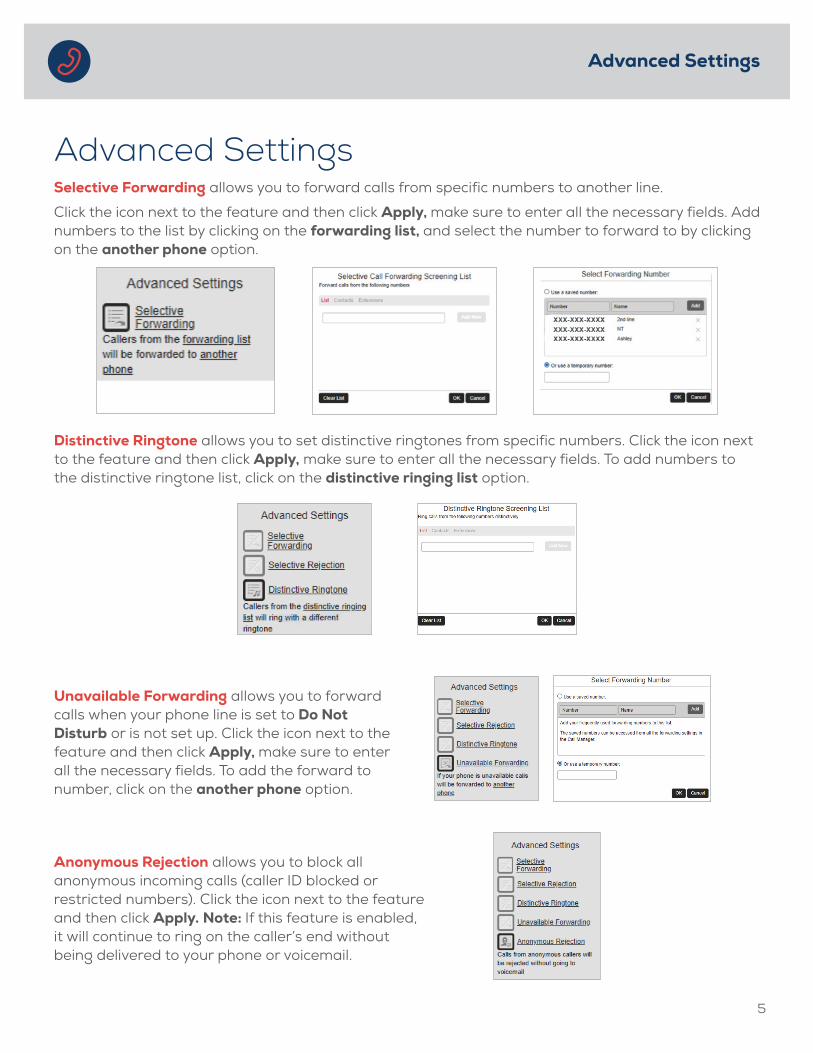
Selective Forwarding allows you to forward calls from specific numbers to another line.
Click the icon next to the feature and then click Apply, make sure to enter all the necessary fields. Add numbers to the list by clicking on the forwarding list, and select the number to forward to by clicking on the another phone option.
Distinctive Ringtone allows you to set distinctive ringtones from specific numbers. Click the icon next to the feature and then click Apply, make sure to enter all the necessary fields. To add numbers to the distinctive ringtone list, click on the distinctive ringing list option.
Unavailable Forwarding allows you to forward calls when your phone line is set to Do Not Disturb or is not set up. Click the icon next to the feature and then click Apply, make sure to enter all the necessary fields. To add the forward to number, click on the another phone option.
Anonymous Rejection allows you to block all anonymous incoming calls (caller ID blocked or restricted numbers). Click the icon next to the feature and then click Apply. Note: If this feature is enabled, it will continue to ring on the caller’s end without being delivered to your phone or voicemail.
Advanced Settings
Advanced Settings

6
Call Settings
Set caller ID and call forwarding options. Select your desired options, and click Apply.
Message Settings
4 Forward voicemails to an email address.4 Access voicemail and playback options and voicemail greeting options. 4 Select your desired options, fill in any required fields, and click Apply.
Your Services
Your Services
7
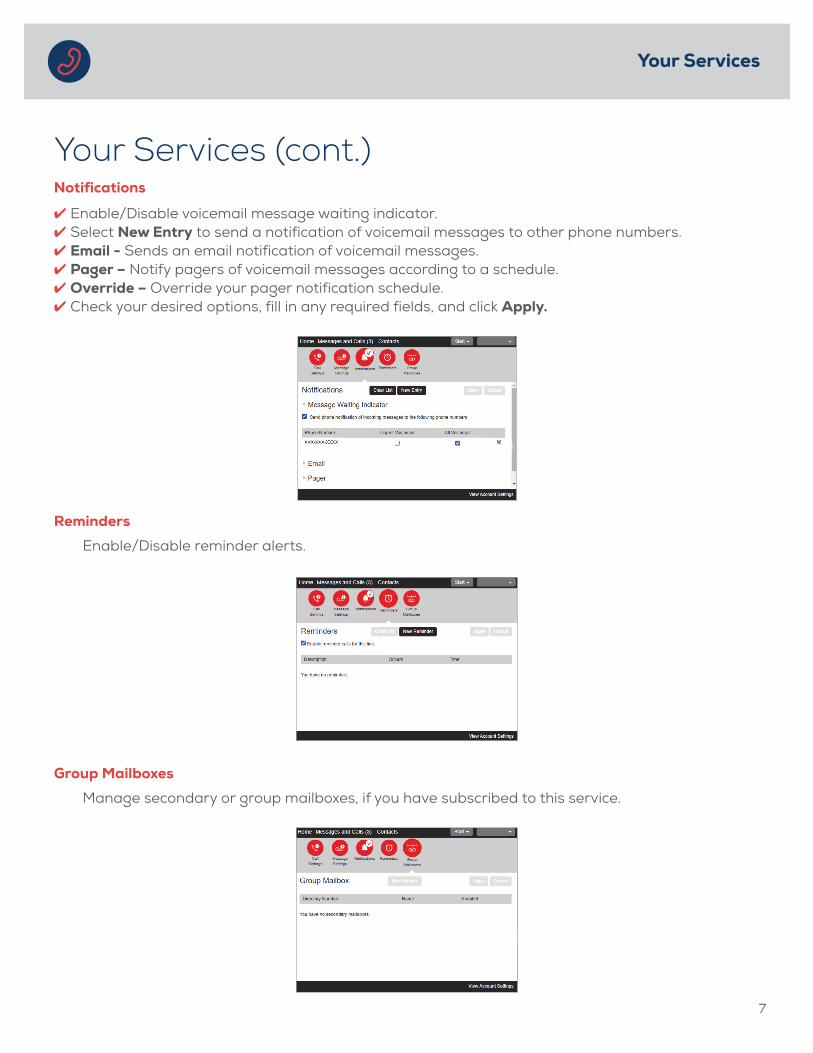
Notifications
4 Enable/Disable voicemail message waiting indicator.4 Select New Entry to send a notification of voicemail messages to other phone numbers.4 Email - Sends an email notification of voicemail messages.4 Pager – Notify pagers of voicemail messages according to a schedule.4 Override – Override your pager notification schedule.4 Check your desired options, fill in any required fields, and click Apply.
Your Services (cont.)
Group Mailboxes
Manage secondary or group mailboxes, if you have subscribed to this service.
Reminders
Enable/Disable reminder alerts.
Your Services
8
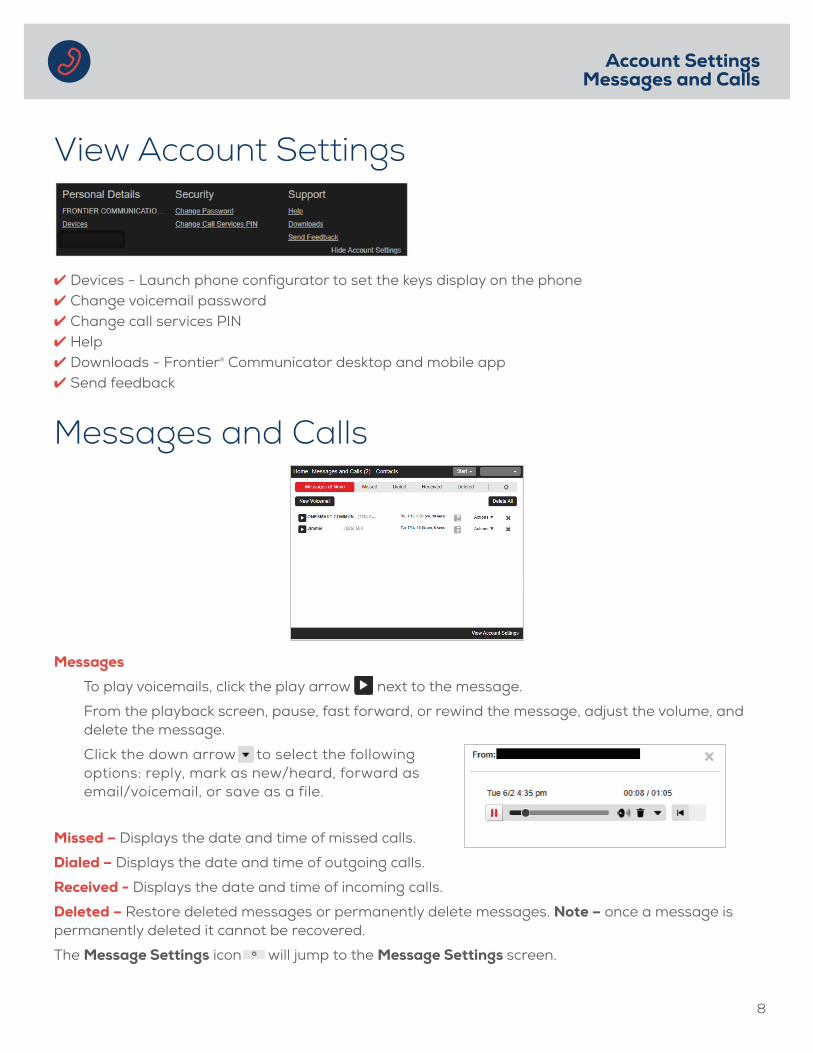
4 Devices - Launch phone configurator to set the keys display on the phone4 Change voicemail password4 Change call services PIN4 Help4 Downloads - Frontier® Communicator desktop and mobile app4 Send feedback
View Account Settings
Messages and Calls
Missed – Displays the date and time of missed calls.
Dialed – Displays the date and time of outgoing calls.
Received - Displays the date and time of incoming calls.
Deleted – Restore deleted messages or permanently delete messages. Note – once a message is permanently deleted it cannot be recovered.
The Message Settings icon will jump to the Message Settings screen.
Messages
To play voicemails, click the play arrow next to the message.
From the playback screen, pause, fast forward, or rewind the message, adjust the volume, and delete the message.
Click the down arrow to select the following options: reply, mark as new/heard, forward as email/voicemail, or save as a file.
Account SettingsMessages and Calls
9
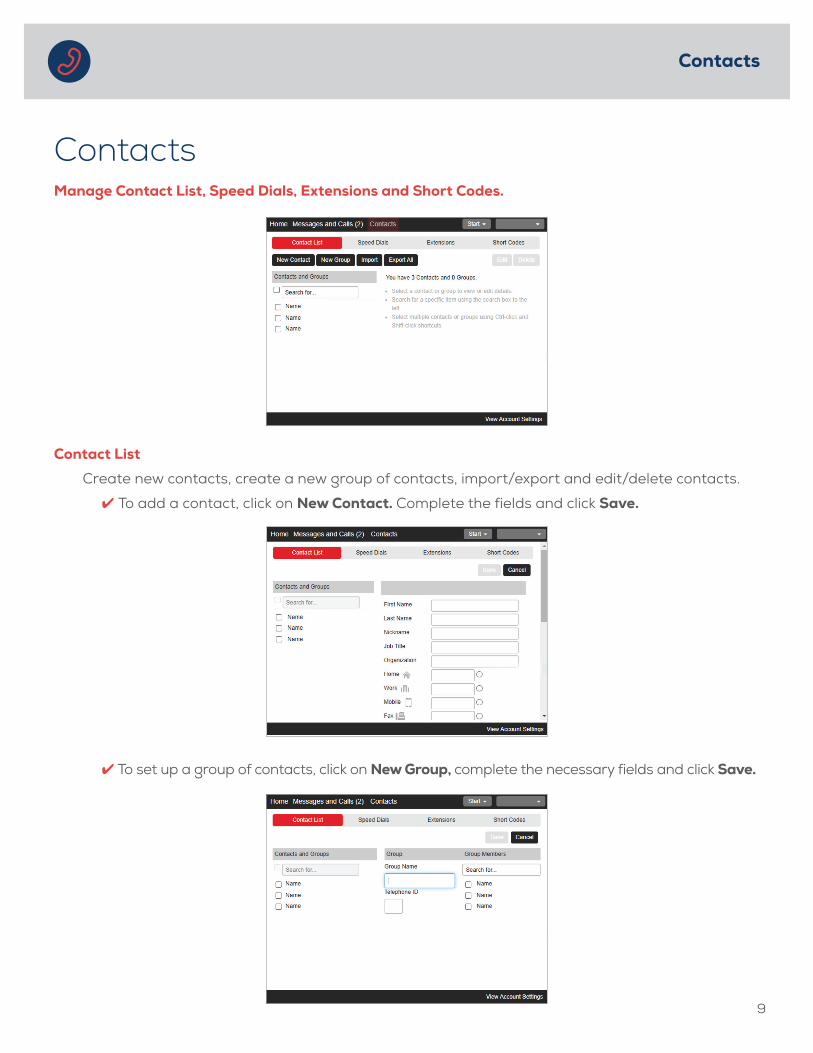
Manage Contact List, Speed Dials, Extensions and Short Codes.
Contacts
4 To set up a group of contacts, click on New Group, complete the necessary fields and click Save.
Contact List
Create new contacts, create a new group of contacts, import/export and edit/delete contacts.
4 To add a contact, click on New Contact. Complete the fields and click Save.
Contacts
10
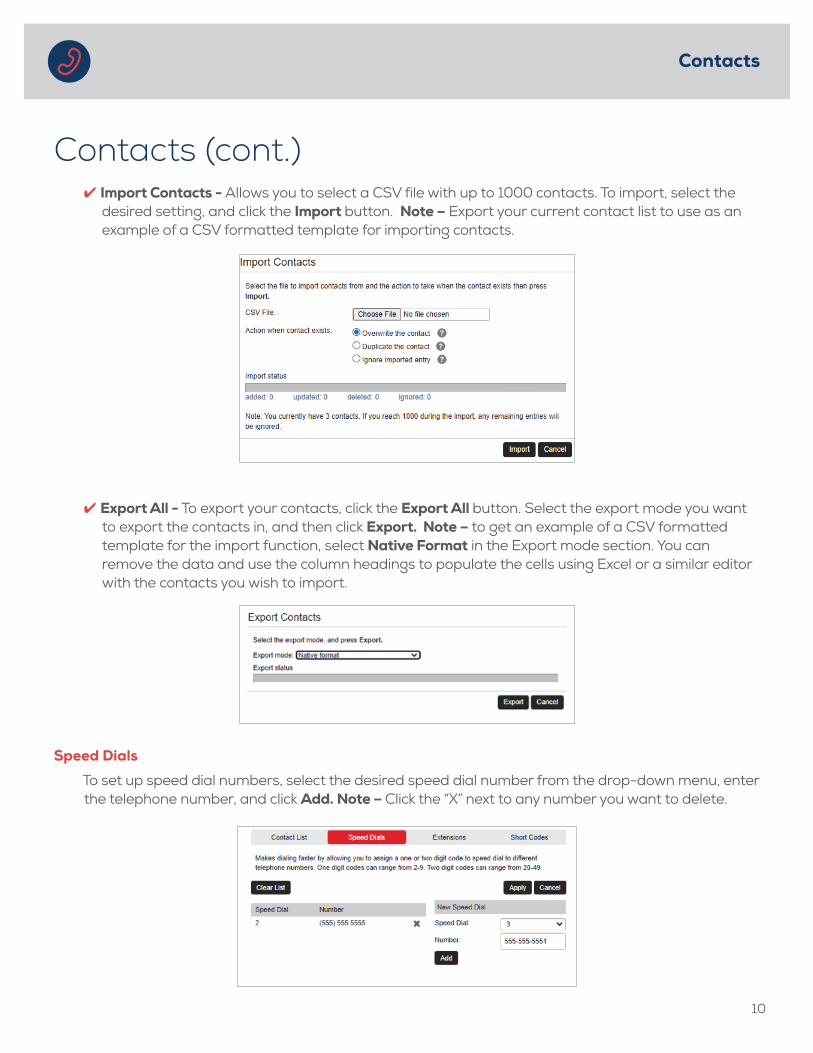
Contacts (cont.)4 Import Contacts - Allows you to select a CSV file with up to 1000 contacts. To import, select the
desired setting, and click the Import button. Note – Export your current contact list to use as an example of a CSV formatted template for importing contacts.
4 Export All - To export your contacts, click the Export All button. Select the export mode you want to export the contacts in, and then click Export. Note – to get an example of a CSV formatted template for the import function, select Native Format in the Export mode section. You can remove the data and use the column headings to populate the cells using Excel or a similar editor with the contacts you wish to import.
Speed Dials
To set up speed dial numbers, select the desired speed dial number from the drop-down menu, enter the telephone number, and click Add. Note – Click the “X” next to any number you want to delete.
Contacts
11
Contacts (cont.)
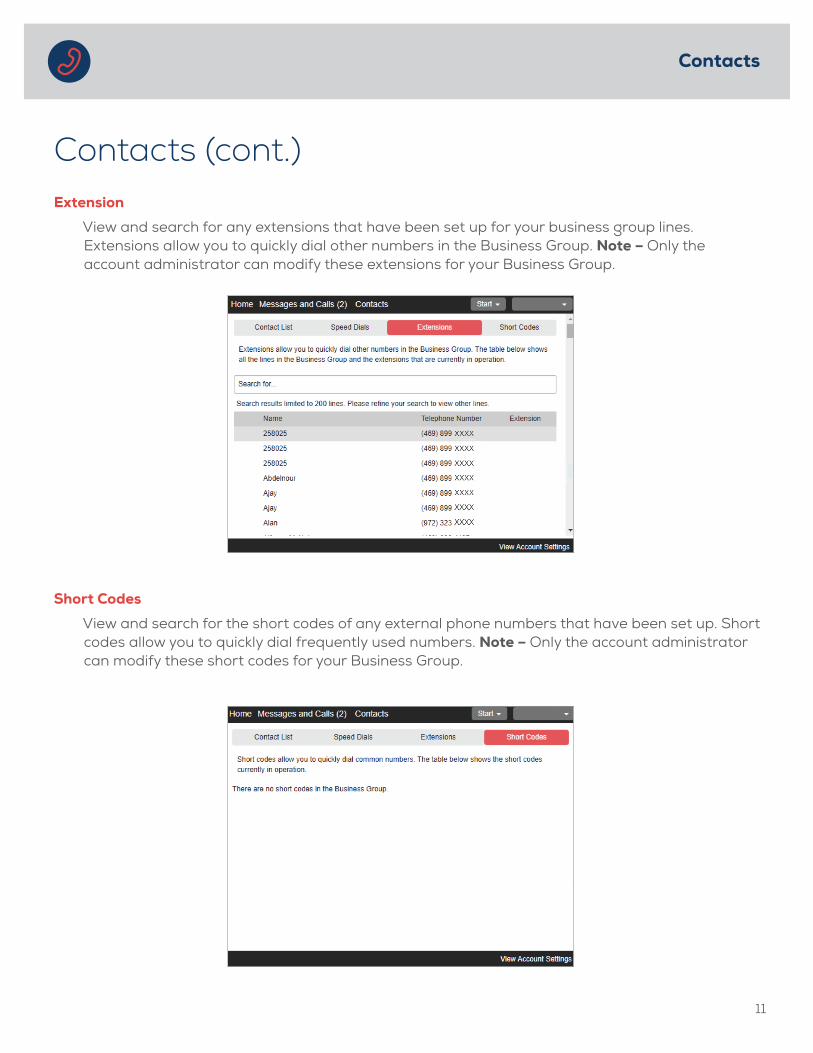
Short Codes
View and search for the short codes of any external phone numbers that have been set up. Short codes allow you to quickly dial frequently used numbers. Note – Only the account administrator can modify these short codes for your Business Group.
Extension
View and search for any extensions that have been set up for your business group lines. Extensions allow you to quickly dial other numbers in the Business Group. Note – Only the account administrator can modify these extensions for your Business Group.
Contacts