your all season grill cookbook - napoleon … the optional charcoal tray, it is important for you to...
TRANSCRIPT

®
GO
UR
ME
T C
OO
KB
OO
K
YOU
R A
LL S
EA
SO
N G
RIL
L C
OO
KB
OO
K
napoleongrills.com
Stay tuned to our website to download our new cookbook that will be written
by our fans of food and grilling!
Coming for 2015!

Grilling Principles...................................................................... 4
Operating Your Gas Grill ............................................................ 4
Trouble-Free Grilling .................................................................. 5
All Season Grilling ..................................................................... 5
Various Cooking Styles .............................................................. 6
Guide to Preparing Meat.......................................................... 12
Guide to Preparing a Whole Bird.............................................. 12
Guide to Preparing Fish ........................................................... 13
Marinades, Bastes, Rubs & Sauces....................................14-15
Grilling Accessories ................................................................. 58
Cooking Charts....................................................... 10-12, 60-61
Index ....................................................................................... 62
RecipesAppetizers ..................................................................... 25,51,57
Beef....................................................................................16-23
Lamb..................................................................................24-25
Pork ....................................................................................26-37
Chicken and Quail ..............................................................38-45
Fish ....................................................................................46-49
Vegetables .........................................................................50-53
Dessert/Fruit.......................................................................54-57
TABLe OF cONTeNTs
2

Dear grilling enthusiasts,
Cooking on a grill has come a long way and has become one of the most popular ways of preparing food and entertaining. With that in mind, Napoleon® Gourmet Grills is committed to creating superior gas grills with an advanced and versatile cooking system to ensure optimum performance, dependability and safety.
To assist you with the many authentic TED READER recipes in this book, we included a section on the many techniques that can be used to deliver outstanding results when preparing a meal for your family or friends. If you are not familiar with the various cooking methods, whether tube burner, rotisserie, infrared or the optional charcoal tray, it is important for you to learn how to apply them.
Using your Napoleon® grill is no longer restricted to fair weather. No matter what the season, our cooking system gives you the best grilling options for all your favourites, from juicy, thick steaks to tender vegetables or delicate fish.
Dining outdoors is one of the most enjoyable, relaxing lifestyles and your Napoleon® grill makes it easy for you to achieve culinary masterpieces and rave reviews in the art of outdoor entertaining.
Try some of these mouth watering recipes, guaranteed to become your favourites.
Thank you for choosing a Napoleon® grill.
Bon Appetite!
Napoleon Appliance Corporation 214 Bayview Drive Barrie, Ontario, Canada L4N 4Y8 Customer Care: 1-866-820-8686 [email protected]
Copyright© 2007 Wolfgang Schroeter 6th Edition. All rights reserved. No part of this book may be reproduced or transmitted in any form or by any means - graphic, electronic or mechanical - without prior written permission from Napoleon® Appliance Corporation, Barrie, Ontario, Canada. Notice of liability. The contents of this book are for the sole purpose of information. Napoleon® Appliance Corporation and/or any affiliation to Napoleon® Appliance Corporation is not liable for instructions contained in this book. Reprinted January 2014Napoleon® is a registered trademark of Wolf Steel Ltd., Barrie, Ontario, Canada
CREDITS: Food photography by Mike McColl • Recipes by Ted Reader
we weLcOme yOu
3

simpLe As cAN Be...
1. Raise the lid.
2. Open the valve at fuel source.
3. Turn on one of the gas burners, igniting the JETFIRE™ ignition or press the electronic ignition button. (Turn on other gas burners if required)
Do not bend over the grill when lighting. Lighting instructions are conveniently located on each Napoleon® grill. Before beginning to cook, preheat the grill with the lid closed for about 10 minutes (depending on outside temperature). This ensures that all your burners are firing correctly and your grill retains even heat for complete cooking needs.
Quick ANd cLeAN
Always cook with the lid closed to retain optimal heat and temperature and save on fuel. Once the grill is preheated, shut off one burner if necessary. After you finish cooking, turn the burners on high for 5 minutes and the grids will virtually self-clean. While the grids are still hot, brush off any remaining debris using a long handle grill brush. Your grill is now ready for your next cuisine adventure.
For complete operating instructions, please refer to your owner’s manual.
cOOkiNg seTTiNgs
High: High-setting will give approximate oven temperatures of 600˚F (315˚C) plus, depending on the weather, wind, etc. Perfect temperatures for direct grilling.
medium: Medium-setting will give approximate oven temperatures of 350-400˚F (204˚C), again depending on the weather, wind, etc. It is recommended for direct and indirect cooking (See page 6, Various Cooking Styles).
Low: Low-setting will give approximate oven temperatures of 250˚F (120˚C), once again depending on the weather, wind, etc. The lower temperatures are great for slow roasting larger cuts of meat and smoking foods (See page 6, Various Cooking Styles). Refer to your owner’s manual or visit our website for detailed information.
OpeRATiNg yOuR gAs gRiLL
1. Do not salt meat before cooking; the salt may dry out the meat.
2. Turn meat each time bubbles appear on the surface, so that the moisture goes back into the meat (Steak should only require turning once or twice).
3. Barbecue sauce is best applied towards the end of cooking to prevent the sugars in the sauce from burning.
4. To prevent food from sticking, you should brush or rub cooking oil on the cooking grids or food.
Caution: Never spray oil onto the grids while burners are on; apply vegetable oil cooking spray before lighting the burners.
5. Do not use a fork, as piercing the flesh allows the flavourful juices to escape.
Moisture must be retained for tender, juicy and flavourful meat. The following tips will help accomplish this:
cAuTiON: NeveR LeAve gRiLL
uNATTeNded!Cooking with gas is easy and fun but
certain safety precautions are necessary. Before turning on your grill, raise the lid. If the grill fails to light, turn off all burners
and wait a few minutes for the fuel to disperse before trying to light it again.
gRiLLiNg pRiNcipLes
4
If you take the time to give your grill a thorough check-up in the spring and once more in the fall, you will enjoy years of trouble-free grilling. If you can’t fit both check-ups in, choose the springtime, just before the busy summer grilling season starts to get at least one good check-up.
1. Always store your liquid propane (LP) cylinder outdoors. Do not bring it in the house for any reason, even to clean your grill. Inspect the fuel supply hose before each use. Look for excessive wear or any damage such as nicks or cuts to the hose. If you spot any damage, replace immediately! Check levels of propane before you begin cooking to avoid running out of fuel halfway through preparing your meal.
2. To clean your grill, open the grill lid, remove the warming racks, grids, sear plates, burners and drip pan. Carefully and slowly remove the drip pan in case there are excessive drippings, then wash using a mild soap and warm water and rinse with clean fresh water. Using a mild scrub brush, loosen any food residue from the grill base and lid. You can use a garden hose to assist you in gently spraying down the outer lid and base.
3. In everything we cook, fats and juices are unavoidable. Some of the fats and juices give us that great grilling flavour when they drip down and vaporize on the sear plates. However, excessive drippings venture onto the sear plates then onto the drip pan and into the grease tray. It is important to keep a stock of replaceable grease trays. Grease trays need to be replaced when ¾ full.
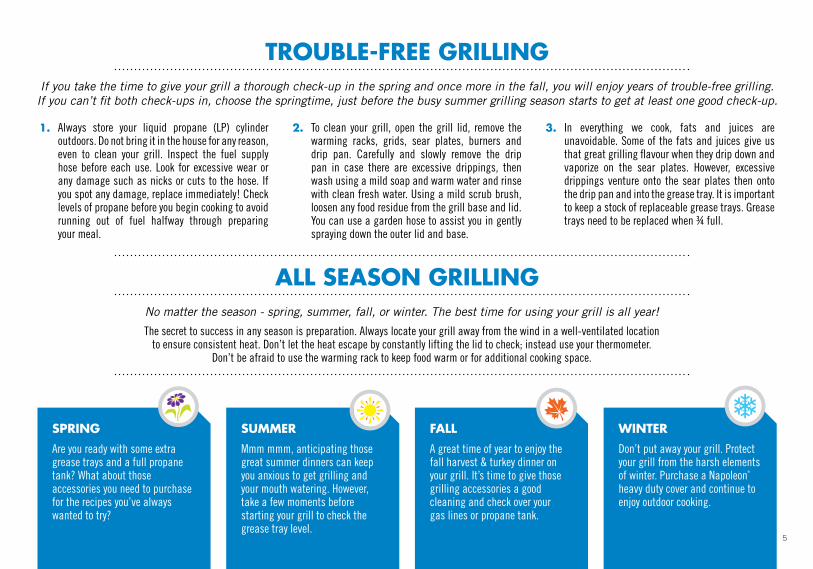
No matter the season - spring, summer, fall, or winter. The best time for using your grill is all year!
The secret to success in any season is preparation. Always locate your grill away from the wind in a well-ventilated location to ensure consistent heat. Don’t let the heat escape by constantly lifting the lid to check; instead use your thermometer.
Don’t be afraid to use the warming rack to keep food warm or for additional cooking space.
TROuBLe-FRee gRiLLiNg
ALL seAsON gRiLLiNg
summeR
Mmm mmm, anticipating those great summer dinners can keep you anxious to get grilling and your mouth watering. However, take a few moments before starting your grill to check the grease tray level.
FALL
A great time of year to enjoy the fall harvest & turkey dinner on your grill. It’s time to give those grilling accessories a good cleaning and check over your gas lines or propane tank.
wiNTeR
Don’t put away your grill. Protect your grill from the harsh elements of winter. Purchase a Napoleon® heavy duty cover and continue to enjoy outdoor cooking.
spRiNg
Are you ready with some extra grease trays and a full propane tank? What about those accessories you need to purchase for the recipes you’ve always wanted to try?
5

iNdiRecT cOOkiNg (cONT’)
so that only the left burner is providing heat. Use a similar method for models with four burners. You can place the food directly on the grids or in a roasting pan on the grids. Add water, beer, wine, juices or consommé to the roasting pan. The drippings are caught in the pan and mix with the liquids. This mixture steams, automatically basting the food. Add liquid if necessary to prevent the pan from drying out. Cook with the lid down to allow the heat to circulate evenly.
The indirect cooking method is healthy and easy. There are absolutely no flare-ups, which could char your food.
vARiOus cOOkiNg sTyLes
Operate on high with the lid closed until the ceramic burner(s) turn red. Place food on grids and cook according to times listed in the infrared grilling chart; see owner’s manual. Due to the intense heat the infrared burners provide, unattended food will burn easily. Keep the lid open when cooking with the infrared. The intense heat ensures excellent searing temperatures even with the lid open. Once you have seared the food, locking in the juices, you may move it away from the infrared burner, close the lid and allow oven temperatures to slowly finish the cooking.
diRecT cOOkiNg
This method of cooking uses all burners, cooking the food directly above the flame. Turn the food occasionally to avoid charring or flare-ups.
iNdiRecT cOOkiNg
For chicken, game, turkey, roasts, ham, vegetables, breads or combinations, the indirect cooking method gives great results every time.
With this method of cooking, the food is above the unlit burner, therefore not directly over the flame, but instead off to one side. Indirect heat cooks the food oven style and there is little need to turn. You can place food directly on the grids or in a roasting pan.
For models with three burners, place the food on the centre cooking grid and turn off the centre burner, so that only the left or right burners are providing heat. For models with two burners, place the food on the right cooking grid and turn off the right burner,
iNFRARed BOTTOm BuRNeR cOOkiNg (select models only)
OveN-Like peRFORmANce: Your gas grill can also be used as a conventional or convection oven. Bread, buns, cakes and pizzas can be cooked to perfection under the grill lid. For convection cooking, follow the same instructions as for the indirect cooking method. Your grill comes with a tightly sealed lid for heat retention, giving oven-like performance.6

1. Always remove the warming rack. You may also have to occasionally remove the grids depending on what size cut of meat you are cooking.
2. Turn on the rear infrared burner according to the instruction manual. Do not turn on the main burners.
3. Give the meat a uniform shape by tying it with string or wire. Insert the rotisserie rod lengthwise through the meat and insert the forks into the centre of the meat. Centre the meat on the rod. Tighten the fork thumb screws well. Insert the rod into the grill's rotisserie bracket. Let the heaviest side of the meat fall to the bottom. Using the counterweight, adjust the balancer opposite the heaviest side of the meat. Periodically check to see if the meat is turning smoothly while cooking and adjust the balancer, if necessary. If the meat is too heavy or has an irregular shape, it will not rotate well. Use a roasting pan under the meat to catch the drippings.
ROTisseRie & dRip pAN cOOkiNg
HOw TO use yOuR ReAR iNFRARed BuRNeR
For those grills with a rear rotisserie burner you can use the rotisserie method, which requires much less attention than other cooking methods. The infrared heat from the rear burner seals and locks in the juices quickly for superior tenderness.
The food is constantly rotating so the meat is continuously bathed in its own juices. All sides are cooked evenly, and flare-ups are avoided.
To make great gravy, add water, beer, juice, wine or consommé to the roasting pan. The drippings will add flavour to the liquid and create a basting sauce or gravy. Basting with this sauce adds flavour and moisture to the meat. Add liquids to the pan as needed so the pan does not dry out.
FOOd sAFeTy: It is fun to try different recipes and experiment with cooking styles and flavours. However, keep in mind that there are a few basic food preparation tips that can keep you and your family healthy while enjoying the spirit of grilling. Using marinades, rubs or injections is a quick way to excite your guests’ taste buds. Pour a small amount into a separate bowl for immediate use to inject or baste, this way no bacteria is transferred. To safely avoid the presence of bacteria, cook hamburgers until well done. Use different platters and utensils for transferring raw and cooked food. This will prevent cross contamination of bacteria.
gReAT gRAvy
7

Enjoy that delicious smoked meat flavour at home with your own grill and a few pointers from Napoleon®. When using gas grills, it’s best to put presoaked wood chips in the Napoleon® Smoker Pipe, available at Napoleon® grill retailers. This keeps your grill from filling up with ashes and clogging the jets. If you are using a charcoal tray, then you can either put the wood directly on the preheated coals or place them in the smoker pipe. Experiment a little to find what works best for you.
Fill the stainless steel smoker tube with wood chips. Submerge in water for at least half an hour. Place the smoker tube over the left burner and turn it on. Place your meat over the right burner, but do not turn on the burner. You are using the indirect/smoking cooking method.
Smoke the meat for several hours under a closed lid. To achieve maximum flavour, add fresh presoaked wood chips several times during the cooking process.
Alder: has a light flavour that works well with fish and poultry. Indigenous to the northwestern United States, it is the traditional wood for smoking salmon.
Almond: gives a nutty, sweet flavour that is good with all meats.
citrus woods: like lemon or orange has a moderate smoke that gives a light fruity flavour that is milder than apple or cherry.
Fruitwood: either apple or cherry, gives off a sweet, mild flavour that is good with poultry or ham.
grape vines: make a lot of tart smoke and give a fruity but sometimes heavy flavour. Use it sparingly with poultry or lamb.
Hickory: adds a strong flavour, so be careful not to use it excessively. It’s good with beef and lamb.
maple: like fruitwood, gives a sweet flavour that is excellent with poultry and ham.
mesquite: is probably the strongest flavoured wood and is ideal for larger cuts of meat, particularly beef.
Oak: is strong but not overpowering and is a very good wood for beef or lamb. Oak is probably the most versatile of the hardwoods.
pecan: burns cool and provides a delicate flavour. It’s a much subtler version of hickory.
peach & pear: is mild with a light sweetness and woodsy flavour. Pairs well (pun intended) with poultry, pork and game birds.
whiskey: add a smooth smokey whiskey flavour to your beef or lamb, the combination of oak and whiskey is very versatile for a variety of meats.
wANT THAT smOky gOOdNess?
diFFeReNT Types OF wOOd cHipsYou really can cook almost anything on a wooden plank.
Start with a clean, untreated piece of wood about one inch (2½ cm) thick and long and wide enough to completely hold the item you are going to grill. Try cedar, alder, oak, maple, cherry, or apple. Make sure that there are no chemical treatments on the board. See your Napoleon® dealer for good quality wood planks.
To reduce the burning of the wood, soak it in water for at least an hour. If you notice that the board has caught fire while you are grilling, spray it down with water in a spray bottle to put out the fire. Let the board burn a little for that smoke flavour. To prevent your fish from sticking to the board, very lightly brush it with cooking oil on the side that the fish will sit. Do not flip the fish (or whatever you are cooking) when plank cooking. During the cooking time you can baste the fish with lemon juice, butter, or almost any sauce.
Once the fish is done, remove the whole plank and fish with a pair of heat resistant gloves or slide the fish off onto a platter. The rich flavours and the ease of preparation will make this a popular method for you.
pLANk gRiLLiNg
See page 58 for Napoleon's Wood Chip selection
8

sTiLL wANT THe cONveNieNce OF gAs, BuT LONg FOR THAT cHARcOAL FLAvOuR?
cOOkiNg wiTH cHARcOAL ON yOuR gAs gRiLL
Charcoal is the traditional way of infrared cooking that we are all familiar with. It provides a feeling of nostalgia you can’t escape with the smoky flavour you’ve loved for so long. The glowing briquettes emit infrared energy to the food being cooked, with very little drying effect.
At Napoleon®, we are proud experts in infrared grilling, but as fans of all ways to grill, we know you
can’t replace the experience and smoky flavour of grilling with charcoal.
As masters of your grill we know you want the best of both worlds. With Napoleon's Charcoal / Smoker Trays you can! Experience the smoky flavour and power of charcoal, but with easier start up, less mess and more even heating – conventionally on your gas grill.
No problem! Napoleon’s Charcoal Tray lights easily with your gas burner. Before you begin to use your charcoal tray, you will need to determine how much charcoal you are going to need to complete the meal. Approximately one layer for burgers or steaks and two layers for roasts or chicken. Pour enough charcoal into the tray to make the layers needed. Remove cooking grids and necessary sear plates and place the charcoal
tray directly on the burner(s), light the gas burner(s)directly under the charcoal tray and burn on high until the charcoal is glowing red, then turn off the burner(s). Let coals burn until all coals are white on the surface. With a long handled instrument, spread the coals evenly across the coal grate. Put the cooking grids back in place, close the lid, wait 5 minutes and start cooking!
NeveR Add LigHTeR FLuid TO BuRNiNg cOALsEven if there is no flame, the heat will vaporize the lighter fluid and can
cause a serious flare-up the second the vapor encounters a flame.
9

HOw TO cOOk THe peRFecT iNFRARed sTeAk
Infrared grilling is simply the relationship between the type of food, heat, and time. Infrared cooking uses high efficiency radiant energy, much like the sun. High frequency electromagnetic waves from the invisible end of the light spectrum travel from the infrared source to the food.
Napoleon® infrared grills use ceramic burners with thousands of evenly spaced flame ports to generate infrared radiant energy. The flame energy is absorbed by the ceramic, which then glows and heats up to an incredible 1800˚F (980˚). This remarkable SIZZLE ZONE™ heat intensity quickly sears your food to lock in moisture and flavour. The results are unmistakable - succulent, flavourful food in a much-reduced grilling time! Napoleon’s infrared grilling technology makes serving the perfect meal quick and easy, each and every time.
You don’t have to be a pro to create a great meal with this cooking method, but you’ll certainly look like one.
iNFRARed gRiLLiNgSince the discovery of fire, mankind has been striving to improve taste and perfect the grilling experience.
ReTeNTiON OF FLAvOuR ANd mOisTuRe
Infrared provides the heat necessary to lock in the juices with little or no preheating time. Radiant energy is delivered more directly to the food and warms less air. Therefore, the food cooks very quickly, resulting in a greater retention of food weight. Food cooked in its own juices is more succulent, tender and tasty.
Pick a steak that is well marbled, the more marble there is inside, the more flavourful and tender your steak will be. A perfect steak size is about 1½" to 2" thick and about 12 to 16 ounces each, depending on the cut.
1. Lift lid.
2. Turn on infrared burner knob.
3. Press the ignition button.
4. Warm up for one minute.
5. Place thick, juicy steak on grids
6. Wait 2 to 3 minutes, flip steak with tongs (You do not want to use a fork and pierce the steak as this will let out the juices the infrared searing has locked in).
7. Wait another two-three minutes then turn off the infrared burner knob.
8. You now have a medium-rare steak. Bon Appetite.
Never cut a steak to see if it is done – use a meat thermometer. Cutting allows all the natural juices to escape.
Rare130°F to 140°F (54˚C to 60˚C)
Medium-Rare140°F to 145°F (60˚C to 63˚C)
Medium145°F to 150°F (63˚C to 66˚C)
Medium-Well150°F to 160°F (66˚C to 71˚C)
Well Done160°F to 170°F (71˚C to 77˚C)
TempeRATuRe TesT FOR A peRFecT sTeAk
10

mORe eFFicieNT
Infrared heats the object not the air so it cooks twice as fast as traditional burners while using less fuel. Because infrared heats food directly, not the air around it, grilling year round is much easier.
FRee yOuR Time
Don’t have much time after work? Then infrared cooking is the perfect solution for you. It takes less than 6 minutes to cook a steak.
NO FLARe-ups
With the intense heat of the ceramic burner, flare-ups are virtually eliminated. Drippings instantly vaporize, adding a great natural flavour to your food.
veRsATiLe
Grill anything like a professional, from steaks to seafood and fish to vegetables.
gRiLLiNg meAT wiTH iNFRARed (Times may vary slightly. Ensure meats are fully thawed before grilling.)
FOOd OveRALL cOOkiNg Time cONTROL seTTiNg HeLpFuL suggesTiONs
Hamburger - Rare (½" thick) 4 minutes High - 2 minutes per side Preparing hamburgers to order is made easier by varying the thickness of your patties.
Hamburger - Medium (½" thick) 6 minutesHigh - 2 minutes per side, reduce to Medium heat for 1 minute per side
Add an exotic flavour to your burgers using Napoleon® Hickory Wood Chips in your Napoleon® Smoker Pipe.
Hamburger - Well Done (½" thick) 8 minutesHigh - 2 minutes per side, reduce to Medium heat for 2 minutes per side
Steak - Rare (1" thick) 4 minutes High - 2 minutes per side When selecting meat for grilling, ask for marbled fat distribution. The fat acts as a natural tenderizer while cooking and keeps it moist and juicy.
Steak - Medium (1" thick) 5 minutesHigh - 2 minutes per side, reduce to Medium heat for ½ minute per side
Steak - Well Done (1" thick) 6 minutesHigh - 2 minutes per side, reduce to Medium heat for 1 minute per side
Chicken pieces 10 - 12 minutesMedium - 2 minutes per side, reduce to
Low heat for 4 - 5 minutes per sideThe joint connecting the thigh and the leg from the skinless side should be sliced ¾ of the way through the meat to lay flatter on the grill. This helps it to cook faster and more evenly.
Pork Chops 12 minutes Medium heat for 6 minutes per side Trim off excess fat before grilling. Choose thicker chops for more tender results.
Spare Ribs 40 minutes High - 2½ minutes per side, reduce to Low heat for 18 minutes per side, turning often
Choose ribs that are lean and meaty. Grill until meat easily pulls away from the bone.
Lamb Chops 30 minutesHigh - 2 minutes per side, reduce to
Low heat for 8 minutes per side, turning oftenTrim off the excess fat before grilling. Choose extra thick chops for more tender results.
11

wHOLe cHickeN ON THe ROTisseRie spiT:
NOTe: This is only an approximate guide. Actual cooking time depends on many factors, such as preheating, outside temperature, wind, altitude, humidity, how many times the lid is opened and closed, and thickness and size of the meat.
step 1: Have the chicken thawed, cleaned and ready to cook. Have the rod and forks cleaned and the rotisserie ready to go.
step 2: Run the rotisserie rod through centre cavity of chicken parallel with backbone. Try to imagine a line running through the very centre of the bird. The rod will run through the centre of the bird and through the body opening. Make sure it is centred.
step 3: Attach the rotisserie forks into the chicken breast and tail areas. Make sure the forks are pressed tightly together so that the chicken is very secure.
step 4: Tie the chicken wings together with twine at the first joint from the tip around the back of the chicken
step 5: Loop a piece of twine around the tail and rod and tie tightly around the crossed legs.
step 6: Test for balance by rolling the rotisserie rod in the palms of your hands. It should turn easily and not have a heavy side that “flops” to the bottom. Adjust the forks and counter balance. For added flavour, inject the bird with your favourite injection sauce or butter, it will add succulent flavour and keep your bird extra moist.
There is an art to putting a whole chicken on a rotisserie. If you put a bird on a rotisserie rod that isn’t balanced, it will put undue wear and tear on your rotisserie motor.
After preheating your grill to 350˚F (177˚C) using the rear burner, place the whole bird over a drip pan containing water or other juices. The drip pan will give you excellent gravy and catch drippings. Cooking time will vary depending on your bird size. A 12 lb (5 kg) turkey requires approximately 4 hours depending on many factors such as weather, wind etc. Let the bird stand approximately 20 minutes before carving.
1. Salt meats only after grilling to prevent the loss of moisture. All other spices and marinades can be used any time.
2. Sear meat over high heat for a short period of time to close the pores and lock in juices.
3. After searing, grill over medium heat, turn the meat until done. The inside should be juicy (whether rare, medium or well done) and the outside browned.
To sear cross-markings onto the meat, rotate it a quarter turn halfway through the cooking process on each side. Do not return cooked meat to a plate that was in contact with raw meat without cleaning it thoroughly with warm, soapy water.
4. It is important to cook meat sufficiently when grilling. Check the temperature by inserting a meat thermometer into the centre of the thickest part of the meat, or into the inner thigh or breast of poultry. The tip of the thermometer should not touch the bone, fat layers or the metal of the rotisserie rod.
guide TO pRepARiNg meAT
QuALiTy iNgRedieNTs
The quality and thickness of meat is important. Steaks and pork chops should be at least 1" thick. Tougher cuts of meat should be tenderized by marinating or pounding with a meat mallet and sliced thinly across the grain after grilling. Trimming excess fat from meat before grilling helps to prevent uncontrolled flare-ups plus making the grids much easier to clean.
meAT dONeNess TempeRATuRe AppROX. cOOkiNg Time
Beef Rare 130°F 54°C 15 to 20 min (per lb)
Beef Medium 150°F 66°C 20 to 25 min (per lb)
Beef Well Done 170°F 77°C 25 to 30 min (per lb)
Lamb Well Done 170°F 77°C 25 to 30 min (per lb)
Pork Well Done 170°F 77°C 20 to 25 min (per lb)
Poultry Well Done 150°F 66°C 15 to 20 min (per lb)
iNTeRNAL meAT TempeRATuRe guide
12

RIBS
Ask your butcher for lean and meaty ribs. Rinse meat, then dry with paper towels. Remove tough layer of skin on back side. Ribs can be grilled or cooked on the rotisserie. Pleat them on the rotisserie spit rod accordion style. Start with the second rib, skip three ribs, and continue in the same way until the whole rack of ribs is on the rod. Turn the rear burner to medium and grill for about 1 to 1¼ hours.
STEAK
Preparing a steak begins with first selecting the cut, this depends on the occasion, pricing and whatever you're in the mood for. Certain cuts of steak must be prepared differently, and regardless of your doneness preference, there is no argument that certain cuts are better cooked a certain way. For example; you may generally cook your steaks to medium-well, but a popular cut like a Strip Loin is best cooked to medium or rarer to keep it at its juiciest and flavourful. Infrared searing is the best way to lock in juices and get the most flavour from any cut of steak. It's all in the juice!
FISh
No time, but still want to barbecue? Try fish. It’s fast, easy, delicious and healthy, making it a great after-work meal.
Soak fish in marinade or apply your favourite seasoning. Light the grill a few minutes before everyone wants to eat. The hardest part of grilling fish is knowing when it’s done. When the fish is cooked, the meat will flake easily with a fork and will appear opaque all the way through. If any part of the meat is glossy and partially translucent, then it is not done. Choose a fish steak or fillet that is evenly cut. If one part is much thicker than another it will be hard to get the thick part cooked before the thin part dries out. If you are grilling whole fish, try stuffing it with cooked rice and lemon slices. This not only adds to the flavour, but also helps keep it moist.
LAmB
The best cuts to go for are the loin, leg, rump and ribs. Grill these cuts just as you would pork or beef. The secret of cooking lamb and mutton is in the tenderizing and marinating.
Depending on what cut you’re using, take the meat and pound it well with a meat tenderizer. This will help break down the meat density, allowing it to cook evenly and allowing the fats and tendons to break down more. Apply a marinade and allow it to sit for a few hours in the refrigerator.
Traditional marinades for lamb start with olive oil and mint or garlic.
Lamb will stick more than other meats, so make sure it has a good coating of oil on the surface. Lamb has a strong flavour - don’t hide-it, complement it.
Take your left forefinger and touch it to the tip of your left thumb. Don’t apply pressure, just use the lightest touch with your right hand index finger, touching the base of the meaty part of your left hand thumb. This feeling is similar to the consistency of rare steak. Now compare it by touching the steak. For medium done, use the second finger of your left hand to touch the tip of your left thumb. Well done, use the third finger of the left hand.
dONeNess TesT
13

Marinades tenderize and add flavour to any meat you barbecue. Cuts of meat that require marinating for tenderizing purposes include the round, rump, sirloin tip, cross rib, blade, short ribs and flank cuts. Marinating will also enhance the flavour of cuts of meat like rib-eye, for example, which does not require tenderizing.
Marinades work their magic through the acid they contain. Commonly used acidic ingredients are fruit juices, vinegar, wine and beer. This acid component helps to soften the connective tissue and tenderize the tissues reached by the marinade. To allow the marinade to penetrate into the centre of the meat, pierce holes in steaks and roasts with a long fork, or cut diagonal slashes into steaks.
To take full advantage of a marinade, allow it time to work. Tender cuts of meat or chicken need less time to marinate, but the larger or tougher a piece of meat, the longer you must marinate it. Cubes and strips of beef require only an hour or two of marinating, while thick steaks and roasts should be marinated for 5 or 6 hours. Make sure to refrigerate the marinating meat.
Generally speaking, marinades will keep for about two weeks in the refrigerator. Once a marinade has been used, however, its storage time is greatly reduced. A marinade that is used for a short time only can be re-used for the same type of meat within one or two days. Marinades should be frozen if not re-used right away. A marinade that has been used for 2 or 3 days should be discarded.
mARiNAdes, BAsTes, RuBs & sAuces
HeLpFuL HiNTs FOR mARiNATiNg
→ Use a plastic zip-lock bag or a small, shallow bowl that allows the marinade to completely cover the meat.
→ Turn the meat occasionally to expose all areas to the marinade.
→ Always cover and refrigerate while marinating.
→ Drain meat on paper towels before cooking to remove excess oil.
→ It is possible to thaw meat in a marinade. The marinating time becomes longer, but meat juices are conserved.
→ Remember, marinating for an adequate time is the key to success.
→ Oil allows the marinade to adhere to the meat, but if you are counting calories, you can easily omit it.
pROveNçAL mARiNAde
Dijon Mustard ½ cup | 125 mL Balsamic Vinegar ¼ cup | 60 mLLemon Juice ¼ cup | 60 mLGarlic 6 cloves | 6 clovesMixed Herbs 2 tbsp | 30 mL (basil, rosemary, thyme and marjoram)Olive Oil 1 cup | 250 mL
1. Place all ingredients in a food processor and process until well combined. Great for basting seafood and chicken.
Makes 2 cups of marinade.
pesTO
Fresh Basil Leaves 2 cups | 500 mL packedGarlic 3 cloves | 3 clovesParmesan Cheese ½ cup | 125 mL freshly gratedPine Nuts ¼ cup | 60 mL Lemon Zest ½ tsp | 2.5 mL Extra-Virgin Olive Oil ¾ cup | 175 mL
1. In a food processor, finely chop basil, garlic, Parmesan cheese, pine nuts and lemon zest.
2. With motor running, gradually add oil in a thin steady stream.
Makes approximately 1 cup.
14

spicy TOmATO gRiLLiNg sAuce
Vegetable Oil 2 tbsp | 30 mLLarge Onion 1 | 1 finely choppedGarlic 3 cloves | 3 cloves finely choppedCanned Crushed Tomatoes 28 oz | 796 mLKetchup 1 cup | 250 mLCider Vinegar ½ cup | 125 mLLemon Juice ½ cup | 125 mLHoney or Brown Sugar 3 tbsp | 45 mLWorcestershire Sauce 1 tbsp | 15 mLWhole Cloves 3 | 3Cinnamon Stick 1 | 1 3" or 7.5 cm longBay Leaf 1 | 1Crushed Chili Peppers ¼ tsp | 1.25 mLSalt and Pepper to taste | to taste
1. Heat oil in a medium-sized saucepan over medium heat. Add onion and sauté until soft, about 4 to 5 minutes. Add garlic and sauté for 30 seconds. Add all remaining ingredients and bring to a boil, then reduce heat and simmer for up to 2 hours, stirring frequently, until sauce is very thick. Use approximately three-quarters of a cup of sauce per whole chicken. For a sweeter sauce, add more brown sugar or honey. For a hotter sauce, add more crushed chili peppers. Great as a marinade for poultry.
Makes approximately 4 cups (can be frozen for future use).
JAmAicAN JeRk mARiNAde
Use this very spicy marinade for pork, chicken or fish filets.
Jalapeño Peppers 4 | 4 seeded Green Onions 4 | 4Shallot 1 | 1 peeled and cut in halfSmall Onion ½ | ½ peeledGarlic Clove 1 | 1 peeledGrated Ginger 2 tsp | 10 mLDried Thyme ½ tsp | 2.5 mLGround Allspice 1 tsp | 5 mLVegetable Oil 1½ tbsp | 22.5 mLSoy Sauce 1½ tbsp | 22.5 mLLime Juice 1½ tbsp | 22.5 mLPacked Brown Sugar 1½ tbsp | 22.5 mLSalt 1 tbsp | 15 mLBlack Pepper 1 tsp | 5 mLWater ½ cup | 125 mL
1. Combine all ingredients in a food processor and grind until almost smooth.
2. Marinate pork up to 6 hours; chicken 2 to 3 hours; 1 hour for fish or shrimp.
Makes 1 cup. Enough marinade for 2 lbs (.9 kg) of meat.
yOguRT mARiNAde
Whole-Milk Yogurt 1 to 1½ cups | 250 to 375 mLGarlic 5 cloves | 5 cloves peeled and choppedFresh Mint 2 tbsp | 30 mL choppedSalt 1 tsp | 5 mLGround Black Pepper ½ tsp | 2.5 mLGaram Masala 1 tsp | 5 mL or Curry Powder
1. Place all ingredients in a food processor and process until well combined. Great as a marinade for lamb and chicken.
15

pROFessiONAL cuTTiNg
BOARd seT70012
Prepare endless
meals and enjoy
a fast and easy
clean up with a
convenient Napoleon®
Professional Cutting
Board and mixing
bowl set.
16

1. In a small bowl, mix together olive oil, steak spice, Shiraz, garlic and thyme. Rub the steaks with the seasoning paste, pressing the seasoning into the meat to adhere. Cover and set aside until needed.
2. Drain portobello mushrooms from water and pat dry with paper toweling. Slice onions into 4 wedges through the root end. Season mushrooms and onion wedges with olive oil, and steak spice to taste.
3. Preheat grill to high heat.
4. Grill mushrooms and onions for 10 to 18 minutes, turning occasionally until lightly charred and tender. Set aside on the warming rack of the grill to keep warm.
5. Place steaks onto preheated grill and sear for 3 to 4 minutes per side. Reduce heat to medium and place steaks on the warming rack of the grill. Close lid and allow steaks to roast for an additional 10 to 15 minutes for medium-rare doneness, basting every few minutes with steak sauce.
6. Remove steaks from grill and allow to rest for 1 to 2 minutes.
7. Remove mushrooms and onions from grill and slice into 1" to 2" thick pieces.
8. Slice steaks into 1" thick slices across the grain and arrange on a platter. Top with the grilled onions and mushrooms and crumbled blue cheese. Serve immediately.
9. Try serving these succulent steaks with a glass of Shiraz.
Seasoning Paste
Olive Oil ¼ cup | 60 mL
Steak Spice 2 tbsp | 30 mL
Shiraz 4 tbsp | 60 mL
Minced Garlic 4 cloves | 4 cloves
Chopped Fresh Thyme 1 tbsp | 15 mL
Bone-in Cowboy / Rib Steaks 2 | 2 (2" to 3" thick - 24 oz / 680 g)
Large Portobello Mushrooms 4 | 4 stems removed, soaked in warm water for 1 hour
Medium White Onions 2 | 2 peeled and trimmed with root end attached
Olive Oil 1 tbsp | 15 mL
Steak Spice to taste | to taste
Steak Sauce ½ cup | 125 mL
Crumbled Blue Cheese 1 cup | 250 mL
cLAssic cOwBOy sTeAk wiTH gRiLLed musHROOms, ONiONs, ANd BLue cHeese
serves: | prep Time: 20 minutes | grilling Time: 45 minutes 17
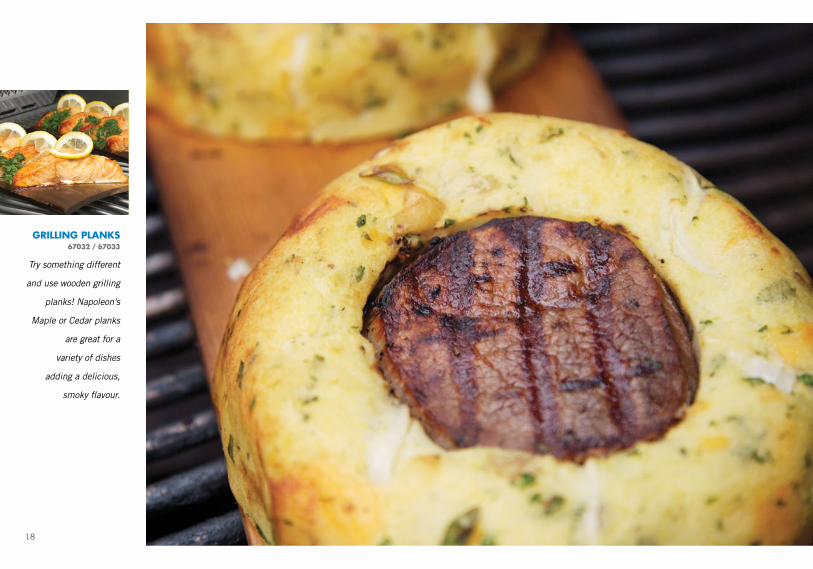
gRiLLiNg pLANks 67032 / 67033
Try something different
and use wooden grilling
planks! Napoleon's
Maple or Cedar planks
are great for a
variety of dishes
adding a delicious,
smoky flavour.
18

1. Mashed potatoes must be cold, so ideally prepare them the day before serving. Place potatoes into a large pot and cover potatoes with cold water. Bring water to a boil, add salt and boil until tender (about 5 to 10 minutes). Drain well and set aside for 10 to 15 minutes to dry out. Mash potatoes together with the butter, chopped herbs and season with salt and pepper to taste. Take care not to over mash, potatoes should be slightly lumpy. Set potatoes aside to cool at room temperature. When cooled, cover and refrigerate overnight.
2. Preheat grill to high heat.
3. Spray mushrooms and sliced onions with non-stick cooking spray and season with steak spice to taste. Grill vegetables for 5 to 6 minutes or until lightly charred and tender. Remove from grill and allow to cool slightly. Thinly slice mushrooms and onions and place into a large mixing bowl. Add cheese curds and Parmesan cheese, mix well and season with salt and coarsely ground black pepper to taste. Cover and set aside until needed.
4. Season steaks with steak spice, pressing seasoning into the meat. Place steaks onto grill and sear for 2 to 3 minutes on one side only. Remove from grill and evenly space steaks, seared side facing up, onto a Napoleon® Cedar Plank. Reduce grill temperature to medium heat.
5. Form the chilled potatoes around the steaks into uniform-level mounds surrounding each steak, leaving the tops of the steaks exposed. Place plank onto grill and close the lid. Plank grill steak and potatoes for 15 to 20 minutes, until potatoes are golden brown, crisp and heated through.
6. Remove the plank from the grill. Top each steak with one-quarter of the mushroom and onion mixture, so that steak is completely covered. Return plank to grill and cook for an additional 8 to 10 minutes, or until cheese is completely melted and bubbling.
7. Carefully remove the smoking plank from the grill and place onto a heat resistant surface, or another soaked plank. Serve immediately.
Napoleon® Cedar Planks 2 | 2
Large Yukon Gold Potatoes 8 | 8 peeled and quartered
Salt 2 tbsp | 30 mL
Softened Butter ¼ cup | 60 mL
Chopped Fresh Parsley ¼ cup | 60 mL
Salt and Coarsely Ground Black Pepper to taste | to taste
Mushroom & Onion Topping
Cremini Mushrooms 1 lb | 440 g
Medium Spanish Onions 2 | 2 peeled and sliced into ½" rings
Cheese Curds 2 cups | 500 mL white or orange
Parmesan Cheese ½ cup | 125 mL
Steak Spice to taste | to taste
Beef Tenderloin Steaks 4 | 4 (8 oz / 227 g)
Steak Spice ¼ cup | 60 mL
pLANked BeeF TeNdeRLOiN wiTH smOky mAsHed pOTATOes
serves: | prep Time: 30 minutes | grilling Time: 25 to 35 minutes 19

cAsT iRON cHARcOAL /
smOkeR TRAy67731
Two Grills in One!
Enjoy the smoky
taste of charcoal and
wood in your gas grill.
Exclusive to Napoleon®.
Try one today!
20

1. In a large bowl mix together red wine, balsamic vinegar, olive oil, one-quarter cup sesame seeds, one-quarter cup steak spice, brown sugar, and chopped parsley. Place steaks into a resealable container or bag and pour in marinade. Seal and refrigerate for one hour, turning occasionally to marinate evenly.
2. Remove one grid from grill and insert Napoleon® Cast Iron Charcoal/Smoker Tray according to manufacturer’s instructions. Arrange charcoal briquettes evenly into tray. Light charcoal according to manufacturer's instructions. Carefully place grids back into grill over lit charcoal, and allow charcoal to burn with grill lid open, until briquettes are white hot in colour, covered in ash and grill reaches medium-high heat.
3. Remove steaks from marinade, spray lightly with non-stick cooking spray and season with 1 tbsp of sesame seeds and 1 tbsp of steak spice.
4. Place steaks onto grill directly over the hot coals. Grill steaks for 5 to 6 minutes per side, turning once, for medium-rare. Remove steaks from grill and allow to rest for 1 to 2 minutes. Cut the string off each steak and serve immediately with steak sauce on the side and a green salad.
Napoleon® Cast Iron Charcoal/Smoker Tray 1 | 1
Charcoal Briquettes 2-3 lbs | 1 kg 1 bag
Rib Steaks 4 | 4 12 oz - 1 ½" thick, tied to form a tight circle
Black and White Sesame Seeds 1 tbsp | 15 mL
Steak Sauce to taste | to taste
Steak Spice 1 tbsp | 15 mL
Marinade
Cabernet Sauvignon ½ cup | 125 mL
Balsamic Vinegar ½ cup | 125 mL
Olive Oil ¼ cup | 60 mL
Black and White Sesame Seeds ¼ cup | 60 mL
Steak Spice ¼ cup | 60 mL
Brown Sugar 2 tbsp | 30 mL
Chopped Fresh Flat-Leaf Parsley 2 tbsp | 30 mL
Red wiNe mARiNATed RiB sTeAks
serves: | marinade Time: 1 hour | prep Time: 10 minutes | grilling Time: 10 to 15 minutes 21

sTAiNLess sTeeL spATuLA
55014
18" in length, this
large-head spatula
is ideal for flipping
burgers. The drain
holes allow excess
grease to escape for a
healthier meal
22

1. In a large bowl, combine the ground sirloin steak, steak sauce, 2 tbsp of steak spice, onion, garlic, parsley and Dijon mustard. Using your hands, mix well to combine, taking care not to over mix the meat.
2. Form into twelve uniform-sized patties, about 4 oz (100g) each, ½" thick. Place patties onto a parchment paper lined tray, cover and refrigerate for at least one hour to allow the meat to set.
3. Preheat grill to medium-high heat.
4. Lightly spray each patty with non-stick cooking spray and season with steak spice to taste. Grill burgers for 4 to 5 minutes per side for medium-well. Move burgers to the top rack of grill and top each burger with 2 slices of bacon and a slice of cheddar cheese. Close lid and allow cheese to melt and bacon to heat up for about one minute.
5. Brush-cut side of burger buns with melted butter and grill, buttered side down, until crisp and golden brown. Remove buns from grill, place one burger on each bun and garnish with tomato, lettuce and sliced onion, top with other bun.
6. Serve immediately with French fries or coleslaw and your favourite BBQ Sauce!
Ground Sirloin Steak 3 lbs | 1.36 kg
Steak Sauce ¼ cup | 60 mL
Steak Spice 2 tbsp | 30 mL
White Onion 1 | 1 finely chopped
Minced Garlic 3 cloves | 3 cloves
Chopped Fresh Parsley 1 tbsp | 15 mL
Dijon Mustard 1 tbsp | 15 mL
Steak Spice to taste | to taste
Bacon 24 slices | 24 slices precooked
Aged Cheddar Cheese 12 slices | 12 slices
Burger Buns 12 | 12
Melted Butter ½ cup | 125 mL
THe siRLOiN sTeAk BuRgeR
serves: | prep Time: 11/2 hours | grilling Time: 10 minutes 23

cHeF's kNiFe55207
Food preparation can
be easy and less time-
consuming when using
the proper tools. Try
Napoleon's Stainless
Steel Chef's Knife for
efficient cutting.
24

1. Using a sharp heavy knife, cut between every bone to form chops about ¾" thick.
2. Place Tandoori injector sauce, chopped fresh mint, olive oil and lime juice into a medium bowl and whisk to combine. Place chops into a resealable plastic bag, pour in marinade, seal bag and place into refrigerator to marinate for 2 to 3 hours, turning occasionally.
3. In a medium-sized mixing bowl, mix red onion, diced cucumber, minced garlic, yogurt, lime juice and mint. Season to taste with salt and coarsely ground black pepper. Cover and refrigerate until needed.
4. Preheat grill to medium-high heat.
5. Remove chops from the marinade. Carefully shake off excess marinade and place lamb chops onto grill. Grill lamb chops for 2 to 3 minutes per side, for medium rare doneness, basting continuously with extra marinade.
6. Remove from the grill and allow to cool for 1 minute. Serve immediately with Raita Dunk.
Lamb Racks 2 | 2 frenched - 5-7 ribs each
Marinade
Tandoori Injector Sauce 1 jar | 1 jar
Fresh Mint ½ cup | 125 mL chopped
Olive Oil ¼ cup | 60 mL
Lime Juice 2 tbsp | 30 mL
Raita Dunk
Small Red Onion 1 | 1 finely diced
Seedless Cucumber ½ | ½ peeled and finely diced
Minced Fresh Garlic 1 clove | 1 clove
Plain Yogurt 1 cup | 250 mL
Lime Juice 2 tbsp | 30 mL
Fresh Mint 1 tbsp | 15 mL chopped
TANdOORi LAmB cHOps wiTH RAiTA duNk
serves: (main dish) (appetizer) | prep Time: 3 hours | grilling Time: 10 minutes 25
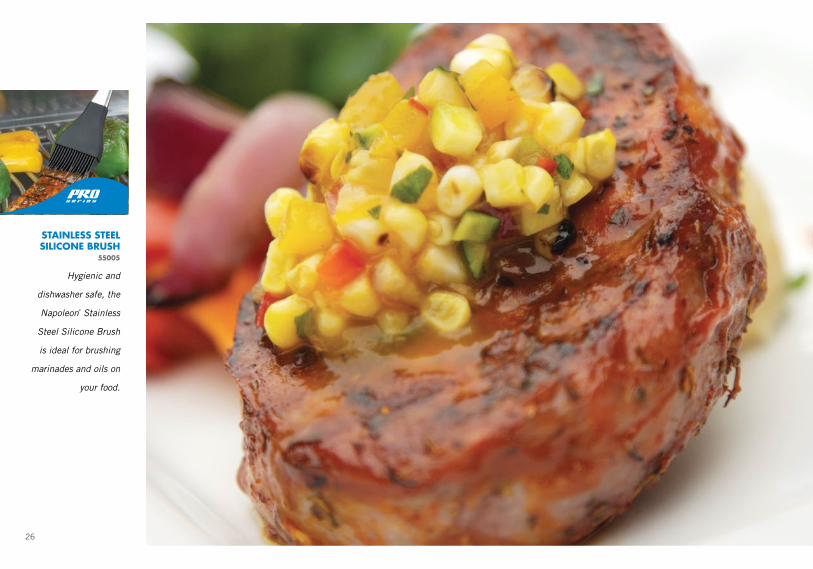
sTAiNLess sTeeL siLicONe BRusH
55005
Hygienic and
dishwasher safe, the
Napoleon® Stainless
Steel Silicone Brush
is ideal for brushing
marinades and oils on
your food.
26

1. Using the Napoleon® Marinade Injector, inject the centre of each chop with one-quarter cup of the Buffalo injector sauce. Rub the chops with Cajun Creole spice, massaging seasoning into the meat. Cover and refrigerate until needed.
2. In a small bowl, whisk together remaining Buffalo injector sauce and thick Balkan-style honey until combined and smooth. Set aside.
3. Preheat grill to medium-high heat.
4. Lightly brush corn, red onion, red pepper, and jalapeño pepper with olive oil, and season to taste with Cajun Creole spice. Place vegetables onto grill and cook until lightly charred and tender, about 4 to 5 minutes. Remove vegetables from grill and allow to cool. Remove kernels from corn, and finely dice onion, red pepper and jalapeño pepper. Place into a medium-sized bowl with one-quarter cup olive oil, lime juice and chopped cilantro. Mix well and season with salt and coarsely ground black pepper to taste. Cover and refrigerate until needed.
5. Place seasoned chops onto grill and sear for 2 to 3 minutes on each side. Reduce heat to medium-low and close the lid. Slow roast for an additional 10 to 12 minutes, turning and basting occasionally with the Buffalo and honey mixture, until chops are just cooked through and juices run clear. Give chops a final baste and remove from grill.
6. Serve immediately, topped with fire roasted corn salsa and extra basting sauce on the side.
Napoleon® Marinade Injector 1 | 1
Boneless Pork Loin Chops 4 | 4 about 2" to 3" thick (8 oz / 227 g)
Cajun Creole Spice ¼ cup | 60 mL
Buffalo Injector Sauce ²⁄³ cup | 150 mL
Buffalo Injector Sauce ½ cup | 60 mL
Balkan-Style Honey ¹⁄³ cup | 75 mL
Fire-Roasted Corn Salsa
Cajun Creole Spice to taste | to taste
Fresh Corn 2 | 2 husks and silk removed
Olive Oil 1 tbsp | 15 mL
Medium Red Onion 1 | 1 peeled and sliced into ¼" wide rings
Red Pepper 1 | 1 stem and seeds removed
Jalapeño Pepper 1 | 1
Fresh Cilantro 1 tbsp | 15 mL chopped
Olive Oil ¼ cup | 60 mL
Lime 1 | 1 juiced
Salt and Coarsely Ground Black Pepper to taste | to taste
dOuBLe THick pORk cHOps wiTH FiRe-ROAsTed cORN sALsA
serves: | prep Time: 20 minutes | grilling Time: 20 to 30 minutes 27
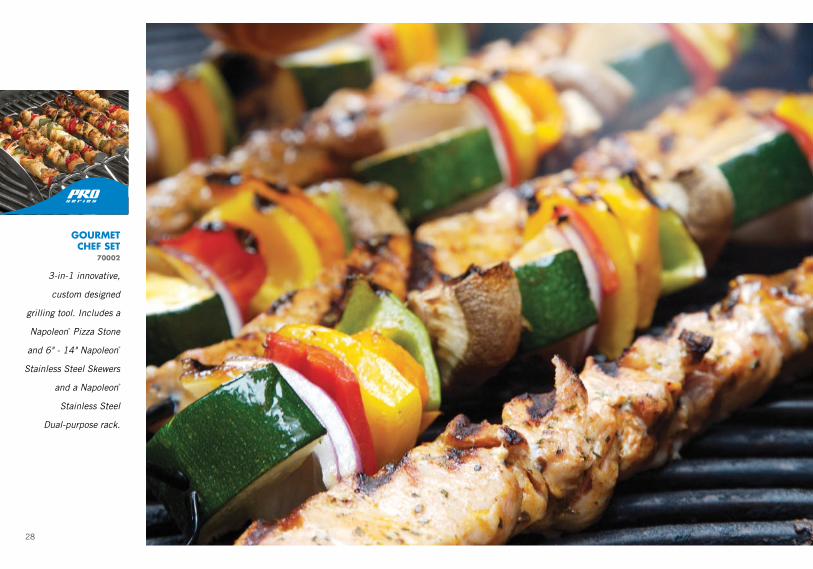
gOuRmeT cHeF seT
70002
3-in-1 innovative,
custom designed
grilling tool. Includes a
Napoleon® Pizza Stone
and 6" - 14" Napoleon®
Stainless Steel Skewers
and a Napoleon®
Stainless Steel
Dual-purpose rack.
28

1. In a medium bowl, whisk together one-quarter cup fire roasted garlic sauce, olive oil, balsamic vinegar, and chicken and rib spice. Set aside.
2. Cut zucchini, red onions and sweet peppers into approximately 1½" to 2" chunks and place into a large resealable container or bag. Add mushrooms, pour in marinade mixture, seal, and refrigerate, turning occasionally for 2 hours.
3. Meanwhile, cut pork tenderloin into large, 1½" to 2" chunks and place into a large bowl. Add one-quarter cup savory chicken and rib spice, and 2 tbsp olive oil to the bowl and mix well to coat pork completely. Skewer the seasoned pork, packing pieces together tightly, onto three of the skewers and place on rack from Napoleon's Gourmet Chef Set until ready. Preheat the grill to medium-high heat.
4. Remove vegetables from marinade, reserving marinade, and thread onto three skewers, pressing the vegetables together firmly. Cover and set aside.
5. To make the basting sauce, in a medium-sized pan over medium-high, heat fire roasted garlic sauce, maple syrup, and savory chicken and rib spice until boiling. Remove from heat, add cold butter, and whisk until incorporated. Set aside and keep warm.
6. Place pork kebabs onto grill. Grill pork kebabs for 6 to 8 minutes, turning and brushing with basting sauce during final 2 to 3 minutes of cooking, until lightly charred and cooked throughout (internal temperature should be 165°F/74˚C).
7. After the first 5 minutes of cooking the pork kebabs, then place vegetable kebabs onto grill. Grill vegetables for 4 to 6 minutes, turning and basting with reserved marinade every 1 to 2 minutes, or until lightly charred and tender. Move vegetable kebabs to top rack of grill to keep warm, turning occasionally while pork is cooking.
8. Remove skewers from grill, allow to cool slightly, and serve immediately with warmed pita bread and extra basting sauce on the side.
Napoleon® Gourmet Chef Set 1 | 1
Fire Roasted Garlic Sauce ½ cup | 125 mL
Olive Oil ¼ cup | 60 mL
Balsamic Vinegar ¼ cup | 60 mL
Savory Chicken and Rib Spice 2 tbsp | 30 mL
Vegetable Kebabs
Medium Zucchini 2 | 2
Medium Red Onion 2 | 2 peeled
Sweet Peppers 3 | 3 (red, yellow, orange) stems and seeds removed
Medium White Mushrooms 12 | 12
Pork Kebabs
Pork Tenderloin 3 lbs | 1.4 kg silver skin removed
Savory Chicken and Rib Spice ¼ cup | 60 mL
Olive Oil 2 tbsp | 30 mL
Basting Sauce
Fire Roasted Garlic Sauce 1 bottle | 1 bottle
Maple Syrup ½ cup | 125 mL
Chicken and Rib Spice 3 tbsp | 45 mL
Cold Butter ¼ lb | 113 g
FiRe ROAsTed pORk ANd vegeTABLe keBABs
serves: | prep Time: 30 minutes | grilling Time: 20 minutes 29

sTAiNLess sTeeL RiB & ROAsT RAck
70009
Perfect for delicious
and juicy racks of ribs
and roasts. Custom
designed and made of
quality stainless steel
for long lasting use.
Photo submitted by Jared Sechtman, winner of 2012 Recipe Blog Contest.Photo also shown on cover.
30

1. Preheat oven to 225˚F (107˚C)
2. Rub: Combine salt, black pepper, garlic powder, onion powder, paprika, cayenne pepper.
3. Coat both sides of ribs with dry rub. Place ribs on foil covered cookie sheet.
4. Roast the ribs in oven for 2½ hours, flipping every 30 minutes.
5. Cut cooked ribs off rack individually and let cool a bit.
6. Marinade: Mix hot sauce, white vinegar, sugar, steak sauce, dash of Worcestershire sauce. Place ribs into 1 gallon zip locking bags (approximately 1 rack per bag) and add half of the marinade to each bag. Let them sit in the fridge overnight.
7. Place ribs on hot grill (charcoal works best) for approximately 15 minutes, turning once.
Pork Spare Ribs 2 racks | 2 racks
RUB
Salt 3 tbsp | 45 mL
Black Pepper 3 tbsp | 45 mL
Cayenne Pepper 1 tbsp | 15 mL
Garlic Powder 3 tbsp | 45 mL
Onion Powder 2 tbsp | 30 mL
Paprika 2 tbsp | 30 mL
MARINADE
Hot Sauce ½ cup | 125 mLWing style works best
White Vinegar 2 cups | 500 mL
Sugar ½ cup | 125 mL
Steak Sauce 2 tbsp | 30 mL
Worcestershire Sauce Dash | Dash
HOT wiNg RiBs Recipe Submitted by: Jared Sechtman
serves: | marinade Time: 8+ hours | prep Time: 10 minutes | cooking Time: 21/2 to 3 hours | grilling Time: 15 minutes
2012 cONTesT wiNNeR
31
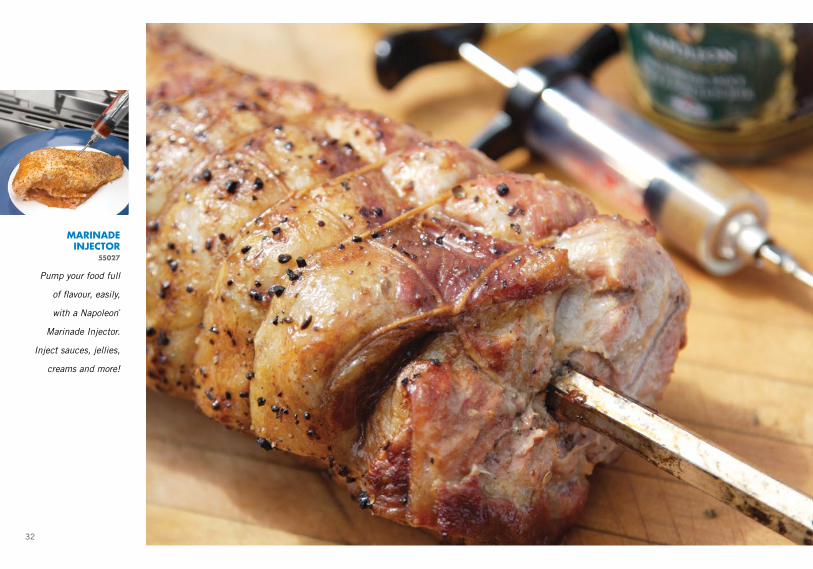
mARiNAde iNJecTOR
55027
Pump your food full
of flavour, easily,
with a Napoleon®
Marinade Injector.
Inject sauces, jellies,
creams and more!
32
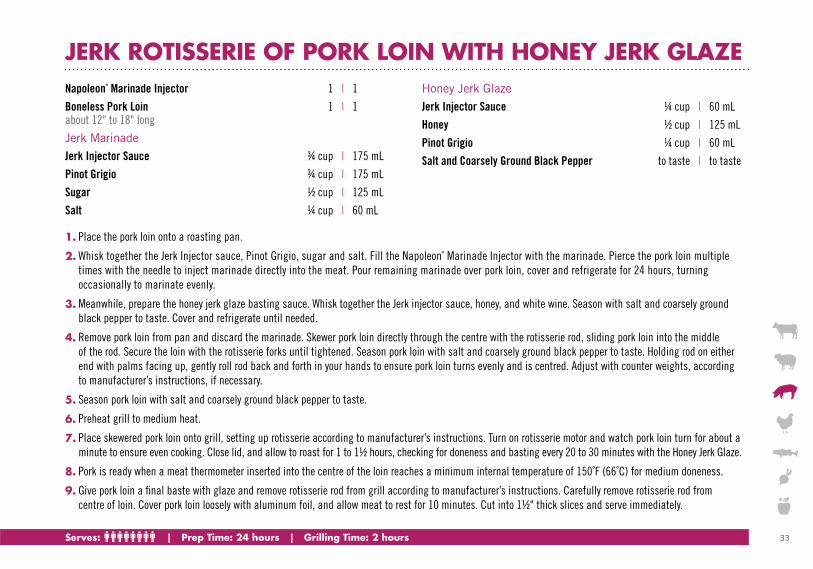
1. Place the pork loin onto a roasting pan.
2. Whisk together the Jerk Injector sauce, Pinot Grigio, sugar and salt. Fill the Napoleon® Marinade Injector with the marinade. Pierce the pork loin multiple times with the needle to inject marinade directly into the meat. Pour remaining marinade over pork loin, cover and refrigerate for 24 hours, turning occasionally to marinate evenly.
3. Meanwhile, prepare the honey jerk glaze basting sauce. Whisk together the Jerk injector sauce, honey, and white wine. Season with salt and coarsely ground black pepper to taste. Cover and refrigerate until needed.
4. Remove pork loin from pan and discard the marinade. Skewer pork loin directly through the centre with the rotisserie rod, sliding pork loin into the middle of the rod. Secure the loin with the rotisserie forks until tightened. Season pork loin with salt and coarsely ground black pepper to taste. Holding rod on either end with palms facing up, gently roll rod back and forth in your hands to ensure pork loin turns evenly and is centred. Adjust with counter weights, according to manufacturer’s instructions, if necessary.
5. Season pork loin with salt and coarsely ground black pepper to taste.
6. Preheat grill to medium heat.
7. Place skewered pork loin onto grill, setting up rotisserie according to manufacturer’s instructions. Turn on rotisserie motor and watch pork loin turn for about a minute to ensure even cooking. Close lid, and allow to roast for 1 to 1½ hours, checking for doneness and basting every 20 to 30 minutes with the Honey Jerk Glaze.
8. Pork is ready when a meat thermometer inserted into the centre of the loin reaches a minimum internal temperature of 150˚F (66˚C) for medium doneness.
9. Give pork loin a final baste with glaze and remove rotisserie rod from grill according to manufacturer’s instructions. Carefully remove rotisserie rod from centre of loin. Cover pork loin loosely with aluminum foil, and allow meat to rest for 10 minutes. Cut into 1½" thick slices and serve immediately.
Napoleon® Marinade Injector 1 | 1
Boneless Pork Loin 1 | 1 about 12" to 18" long
Jerk Marinade
Jerk Injector Sauce ¾ cup | 175 mL
Pinot Grigio ¾ cup | 175 mL
Sugar ½ cup | 125 mL
Salt ¼ cup | 60 mL
Honey Jerk Glaze
Jerk Injector Sauce ¼ cup | 60 mL
Honey ½ cup | 125 mL
Pinot Grigio ¼ cup | 60 mL
Salt and Coarsely Ground Black Pepper to taste | to taste
JeRk ROTisseRie OF pORk LOiN wiTH HONey JeRk gLAze
serves: | prep Time: 24 hours | grilling Time: 2 hours 33

smOkeR pipe67011
For that genuine
smoky flavour try using
Napoleon's Stainless
Steel Smoker Pipe for
use with Napoleon®
Wood Chips .
34

1. Using a sharp knife, score the membrane on the backside of the ribs in a diamond or criss-cross pattern.
2. Combine the Shiraz, water, sugar and salt. Stir to dissolve sugar and salt, and then pour over the ribs. Cover and marinate for a minimum of 4 hours.
3. Preheat one side of the grill to low (225°F/107˚C).
4. Remove the ribs from the marinade, reserving the marinade for basting. Rub ribs with Creole Cajun spice, and place the ribs into a roasting pan.
5. Place the soaked Napoleon® Wood Chips in the Napoleon® Smoker Pipe over the preheated side of the grill.
6. Place the ribs over the unlit side of the grill (indirect heat) and close the lid. Baste with the reserved marinade every hour and carefully refill the Napoleon® Smoker Pipe with fresh, soaked Napoleon® Wood Chips several times for maximum smoke flavour. Smoke ribs for 3 to 4 hours, until ribs are a deep pink smoked colour. Remove ribs from grill and wrap each individually in 2 sheets of aluminum foil. Return ribs to grill and cook in foil for an additional 1½ to 2 hours, or until ribs are tender and bones will wiggle a little when pulled. Remove ribs from grill and allow to cool slightly in the foil.
7. Meanwhile, while ribs are smoking, prepare the Shiraz glazing sauce. In a medium saucepan over medium heat, melt butter and sauté onion and garlic for 2 to 3 minutes. Add fire roasted garlic sauce, Shiraz, honey and grape jelly and bring to a boil. Reduce heat to low and simmer for 10 to 15 minutes, stirring occasionally. Season to taste with cayenne pepper, salt, and coarsely ground black pepper. Remove from heat, set aside and allow to cool.
8. Turn both sides of grill up to medium-high heat.
9. Spray ribs lightly with non-stick cooking spray and place onto preheated grill. Grill smoked ribs for 10 to 12 minutes per side, basting liberally with glazing sauce throughout cooking. Remove from grill and allow to cool slightly. Cut ribs between every third rib bone and serve immediately.
Napoleon® Wood Chips 1 | 1 (cherry or apple) soaked in water for 2 hours
Napoleon® Smoker Pipe 1 | 1
Aluminum Foil
Pork Baby Back Ribs 4 racks | 4 racks (1½ to 2 lbs / 2 kg each)
Shiraz 2 cups | 500 mL
Water 1 cup | 250 mL
Sugar ½ cup | 125 mL
Salt ¼ cup | 60 mL
Creole Cajun Spice ¼ cup | 60 mL
Shiraz Glazing Sauce
Butter 2 tbsp | 30 mL
Medium Onion 1 | 1 Fine diced
Minced Garlic 4 cloves | 4 cloves
Fire Roasted Garlic Sauce 1 cup | 250 mL
Shiraz ½ cup | 125 mL
Honey ½ cup | 125 mL
Grape Jelly ¼ cup | 60 mL
Cayenne Pepper to taste | to taste
Salt and Coarsely Ground Black Pepper to taste | to taste
sHiRAz smOked BABy BAck RiBs
serves: | marinade Time: 4+ hours | prep Time: 1 hour | grilling Time: 5 to 6 hours 35
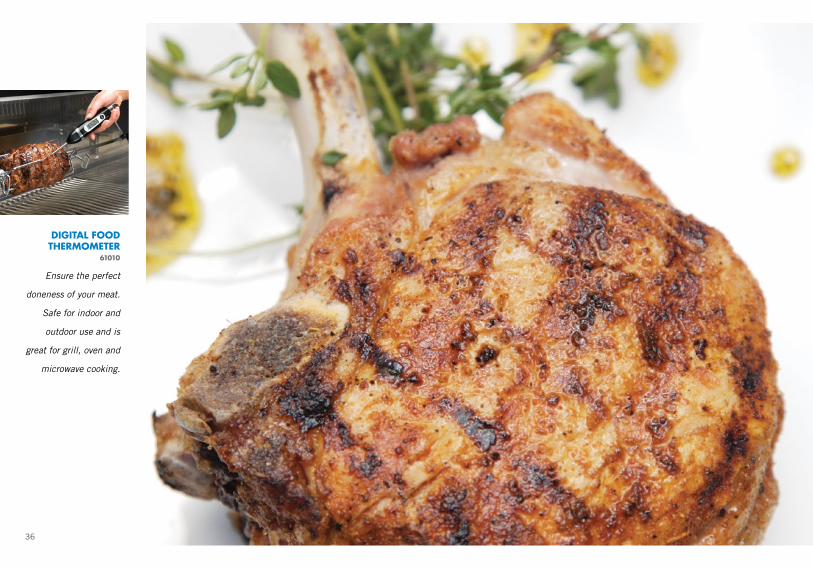
digiTAL FOOd THeRmOmeTeR
61010
Ensure the perfect
doneness of your meat.
Safe for indoor and
outdoor use and is
great for grill, oven and
microwave cooking.
36

1. In a large bowl, combine cubed bread, ground sausage, diced onion, diced celery, Sauvignon Blanc, fire roasted garlic sauce, shredded mozzarella cheese, chopped fresh thyme, chopped fresh sage, and Creole Cajun spice. Mix well.
2. Using a sharp knife, make a 2" to 3" deep incision on the side of each pork chop to form a pocket in the centre, taking care not to cut through the other side.
3. Stuff each pork chop with about half to three-quarters of a cup of the stuffing mixture, packing stuffing tightly into each pocket. Season pork chops with Creole Cajun spice, pressing the seasoning into the meat to adhere. Place stuffed pork chops onto a tray, cover and refrigerate for a minimum of one hour to allow the stuffing to set.
4. Preheat grill to medium heat.
5. Grill pork chops for 10 to 12 minutes, turning once, until lightly charred. Move chops to top rack of grill, close lid and allow to roast for an additional 8 to 10 minutes, turning every 2 minutes and basting with fire roasted garlic sauce, or until pork is fully cooked and stuffing is hot throughout. Remove from grill and allow to cool for 1 to 2 minutes. Serve immediately with extra fire roasted garlic sauce on the side.
Bone-in Pork Loin Chops 4 | 4 about 2" thick (10 to 12 oz / 285-340 g)
Cajun Creole Spice 2 tbsp | 30 mL
Stuffing
Multi-Grain Bread 3 cups | 750 mL toasted, cooled, and cut into ½" cubes
Ground Breakfast Style Sausage 1 cup | 250 mL
White Onion ½ cup | 125 mL finely diced
Celery ¼ cup | 60 mL finely diced
Sauvignon Blanc ¼ cup | 60 mL
Fire Roasted Garlic Sauce ¼ cup | 60 mL
Mozzarella Cheese ½ cup | 125 mL shredded
Fresh Thyme 1 tbsp | 15 mL chopped
Fresh Sage 1 tbsp | 15 mL chopped
Cajun Creole Spice 2 tbsp | 30 mL
sTuFFed pORk cHOp
serves: | prep Time: 20 to 30 minutes | grilling Time: 25 minutes 37

wiReLess THeRmOmeTeR
70006
Ensure the perfect
temperature of your
food from 2oo feet
away. Now you can
keep a close eye
without being confined
to your grill.
38
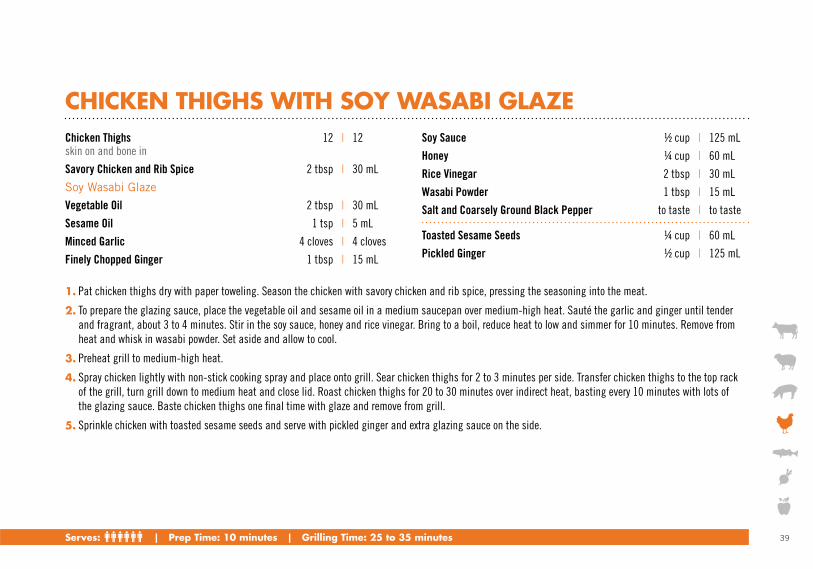
1. Pat chicken thighs dry with paper toweling. Season the chicken with savory chicken and rib spice, pressing the seasoning into the meat.
2. To prepare the glazing sauce, place the vegetable oil and sesame oil in a medium saucepan over medium-high heat. Sauté the garlic and ginger until tender and fragrant, about 3 to 4 minutes. Stir in the soy sauce, honey and rice vinegar. Bring to a boil, reduce heat to low and simmer for 10 minutes. Remove from heat and whisk in wasabi powder. Set aside and allow to cool.
3. Preheat grill to medium-high heat.
4. Spray chicken lightly with non-stick cooking spray and place onto grill. Sear chicken thighs for 2 to 3 minutes per side. Transfer chicken thighs to the top rack of the grill, turn grill down to medium heat and close lid. Roast chicken thighs for 20 to 30 minutes over indirect heat, basting every 10 minutes with lots of the glazing sauce. Baste chicken thighs one final time with glaze and remove from grill.
5. Sprinkle chicken with toasted sesame seeds and serve with pickled ginger and extra glazing sauce on the side.
Chicken Thighs 12 | 12 skin on and bone in
Savory Chicken and Rib Spice 2 tbsp | 30 mL
Soy Wasabi Glaze
Vegetable Oil 2 tbsp | 30 mL
Sesame Oil 1 tsp | 5 mL
Minced Garlic 4 cloves | 4 cloves
Finely Chopped Ginger 1 tbsp | 15 mL
Soy Sauce ½ cup | 125 mL
Honey ¼ cup | 60 mL
Rice Vinegar 2 tbsp | 30 mL
Wasabi Powder 1 tbsp | 15 mL
Salt and Coarsely Ground Black Pepper to taste | to taste
Toasted Sesame Seeds ¼ cup | 60 mL
Pickled Ginger ½ cup | 125 mL
cHickeN THigHs wiTH sOy wAsABi gLAze
serves: | prep Time: 10 minutes | grilling Time: 25 to 35 minutes 39

sTAiNLess sTeeL cHickeN ROAsTeR
56021
A true favourite for
grilling enthusiasts is
Beer Can Chicken and
it's easy to make with
the Napoleon® Stainless
Steel Chicken Roaster.
40

1. Preheat the grill to medium-high heat.
2. Wash the chicken inside and out with cold water and pat dry with paper toweling. Rub the chicken inside and out with the Creole Cajun spice, rubbing the seasoning into the meat so it adheres.
3. Open the beer can and pour about one-quarter of the liquid into a small saucepan and set saucepan aside.
4. Place the opened can onto the center of the Napoleon® Stainless Steel Chicken Roaster base. Assemble Napoleon® Stainless Steel Chicken Roaster according to manufacturer’s instructions. Place the seasoned chicken over the can so that the can is in the cavity of the bird and the bird is standing upright. Tuck the wing tips in behind the chicken, ensuring they are secure.
5. Meanwhile, prepare the basting sauce. Bring reserved beer in saucepan to a boil over high heat. Reduce heat to medium-low and simmer for 1 to 2 minutes. Add butter and stir until melted. Stir in fire roasted garlic sauce and heat, stirring well, until incorporated. Remove from heat and set aside until needed.
6. Place the chicken on the Napoleon® Stainless Steel Chicken Roaster onto the grill. Close the lid and roast for 1 to 1½ hours, about 20 minutes per pound. Baste liberally with BBQ basting sauce throughout the last half of cooking time. To check for doneness, insert a meat thermometer into the thigh. It should read 180˚F (82˚C).
7. Carefully remove the chicken from the grill. Allow to cool slightly and remove chicken from roaster very carefully with tongs and a large fork, keeping the Napoleon® Stainless Steel Chicken Roaster upright on a flat surface. Chicken will be very hot and there will be steam. Cut chicken into quarters and serve immediately with extra basting sauce on the side.
Napoleon® Stainless Steel Chicken Roaster 1 | 1
Whole Chicken 1 | 1 3-4 lbs / 1.5 - 2 kg
Creole Cajun Spice ¼ cup | 60 mL
Can of Beer 1 | 1 12 oz / 355 mL
Fire Roasted Garlic Sauce ½ cup | 125 mL
Butter 2 tbsp | 30 mL
FiRe ROAsTed gARLic BeeR cAN cHickeN
serves: | prep Time: 30 minutes | grilling Time: 11/2 hours 41

sTAiNLess sTeeL skeweRs
70016
Enjoy creative and
delicious shish kebabs
with Napoleon's
Stainless Steel Skewers.
They won't rust and have
built-in sliders for easy
removal of food.
42

1. Rub the quail with the savory chicken and rib spice, gently pressing the seasoning into the meat.
2. Skewer each butterflied quail with 2 skewers in an ‘X’. To skewer, lay one quail on a flat surface, breast side up. Bring the legs up snug to the body of the quail. To skewer the quail in an ‘X’ pattern, begin with the first skewer and pierce through the leg, then under the leg bone and through the breast, exiting near the wing. Repeat with second skewer on opposite side to form an ‘X’ and do the same with remaining 11 quails.
3. Lightly brush each quail with olive oil, cover and refrigerate until needed.
4. Peel both mangoes and carefully cut fruit off the pit. Cut mango flesh into large chunks and place into a small food processor, add Chardonnay. Pulse on high until puréed and smooth. Pour purée into a small saucepan.
5. Add mango BBQ sauce, black pepper and thyme to saucepan of mango purée mixture. Bring to a boil over medium-high heat while stirring frequently. Remove pan from heat and whisk in 2 tbsp of cold butter, a few chunks at a time until all the butter is incorporated. Set aside and keep warm.
6. Preheat grill to medium-high heat.
7. Grill quails skin side down for 2 to 3 minutes. Turn each quail over and continue to cook for another 2 to 3 minutes, basting liberally with mango BBQ sauce.
8. Remove quails from grill and serve immediately with extra mango BBQ sauce.
6"-8" Bamboo or Napoleon® Stainless Steel Skewers 24 | 24 (soak bamboo skewers in water for 1 hour minimum)
Quails 12 | 12 butterflied - Ask your butcher to butterfly and remove the backbone and rib cage of the quail.
Savory Chicken and Rib Spice ¼ cup | 60 mL
Olive Oil ¼ cup | 60 mL
Mango Sauce
Ripe Mangoes 2 | 2
Chardonnay ¼ cup | 60 mL
Mango BBQ Sauce ¾ cup | 175 mL
Chopped Fresh Thyme 1 tbsp | 15 mL
Coarsely Ground Black Pepper 1 tbsp | 15 mL
Unsalted Cold Butter 2 tbsp | 30 mL in small chunks - to taste
mANgO BBQ QuAiL
serves: | prep Time: 1 hour | grilling Time: 4 to 6 minutes 43

TumBLe BAskeT64003
Ideal for chicken
wings, shrimp and
other delicate foods.
Non-stick for easy
cleaning and can be
used with your existing
rotisserie kit.
44
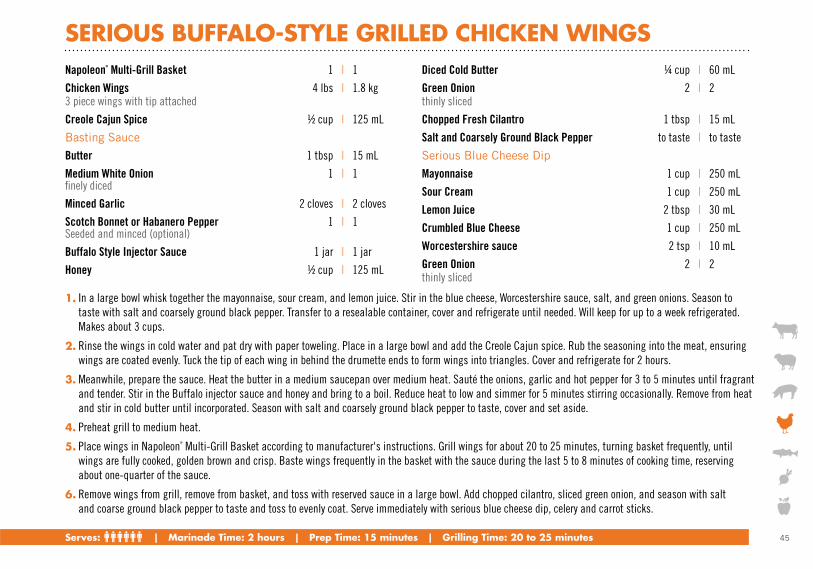
1. In a large bowl whisk together the mayonnaise, sour cream, and lemon juice. Stir in the blue cheese, Worcestershire sauce, salt, and green onions. Season to taste with salt and coarsely ground black pepper. Transfer to a resealable container, cover and refrigerate until needed. Will keep for up to a week refrigerated. Makes about 3 cups.
2. Rinse the wings in cold water and pat dry with paper toweling. Place in a large bowl and add the Creole Cajun spice. Rub the seasoning into the meat, ensuring wings are coated evenly. Tuck the tip of each wing in behind the drumette ends to form wings into triangles. Cover and refrigerate for 2 hours.
3. Meanwhile, prepare the sauce. Heat the butter in a medium saucepan over medium heat. Sauté the onions, garlic and hot pepper for 3 to 5 minutes until fragrant and tender. Stir in the Buffalo injector sauce and honey and bring to a boil. Reduce heat to low and simmer for 5 minutes stirring occasionally. Remove from heat and stir in cold butter until incorporated. Season with salt and coarsely ground black pepper to taste, cover and set aside.
4. Preheat grill to medium heat.
5. Place wings in Napoleon® Multi-Grill Basket according to manufacturer's instructions. Grill wings for about 20 to 25 minutes, turning basket frequently, until wings are fully cooked, golden brown and crisp. Baste wings frequently in the basket with the sauce during the last 5 to 8 minutes of cooking time, reserving about one-quarter of the sauce.
6. Remove wings from grill, remove from basket, and toss with reserved sauce in a large bowl. Add chopped cilantro, sliced green onion, and season with salt and coarse ground black pepper to taste and toss to evenly coat. Serve immediately with serious blue cheese dip, celery and carrot sticks.
Napoleon® Multi-Grill Basket 1 | 1
Chicken Wings 4 lbs | 1.8 kg 3 piece wings with tip attached
Creole Cajun Spice ½ cup | 125 mL
Basting Sauce
Butter 1 tbsp | 15 mL
Medium White Onion 1 | 1 finely diced
Minced Garlic 2 cloves | 2 cloves
Scotch Bonnet or Habanero Pepper 1 | 1 Seeded and minced (optional)
Buffalo Style Injector Sauce 1 jar | 1 jar
Honey ½ cup | 125 mL
Diced Cold Butter ¼ cup | 60 mL
Green Onion 2 | 2 thinly sliced
Chopped Fresh Cilantro 1 tbsp | 15 mL
Salt and Coarsely Ground Black Pepper to taste | to taste
Serious Blue Cheese Dip
Mayonnaise 1 cup | 250 mL
Sour Cream 1 cup | 250 mL
Lemon Juice 2 tbsp | 30 mL
Crumbled Blue Cheese 1 cup | 250 mL
Worcestershire sauce 2 tsp | 10 mL
Green Onion 2 | 2 thinly sliced
seRiOus BuFFALO-sTyLe gRiLLed cHickeN wiNgs
serves: | marinade Time: 2 hours | prep Time: 15 minutes | grilling Time: 20 to 25 minutes 45

pROFessiONAL kNiFe seT
55206
Perfectly balanced
easy grip handles for
professional quality
use. Set includes a
chef's knife, carving
fork and four serrated
steak knives.
46

1. Preheat grill to medium-high heat.
2. Rub salmon all over with country herb spice, gently pressing the spices into the meat. Place the salmon, evenly spaced, on the plank.
3. In a large bowl combine red onion, green onion, dill, garlic, fire roasted garlic sauce and country herb spice. Mix well and divide topping evenly onto the salmon fillets, gently pressing topping into the fillets to adhere.
4. Using a sharp knife, slice the scallops into 4 round slices. Season scallops with coarsely ground black pepper to taste. Arrange 6 to 8 scallop slices evenly onto each salmon on top of the red onion crust.
5. Carefully place the plank on the grill and close the lid.
6. Plank grill for 12 to 15 minutes, or until salmon is just cooked through and the scallops are golden.
7. Remove plank from grill and serve immediately with wedges of lemon and extra fire roasted garlic sauce on the side.
Napoleon® Multi-Grill Basket 4 | 4
Napoleon® Cedar Plank 2 | 2 soaked in water for one hour minimum
Atlantic Salmon fillets 4 | 4 10 to 12 oz, pin-bones and skin removed
Country Herb Spice ¼ cup | 60 mL
Coarsely Ground Black Pepper to taste | to taste
Lemon 1 | 1 cut into wedges
Crust
Large Red Onion 1 | 1 finely diced
Green Onion ½ cup | 125 mL thinly sliced
Chopped Fresh Dill ¼ cup | 60 mL
Minced Garlic 3 cloves | 3 cloves
Fire Roasted Garlic Sauce ¼ cup | 60 mL
Country Herb Spice 1 tbsp | 15 mL
Fresh Scallops 1 lb | 454 g 8 to 10 pieces
cedAR pLANked sALmON wiTH scALLOp cRusT
serves: | prep Time: 30 minutes | grilling Time: 12 to 15 minutes 47

HeAT ResisTANT gLOves
62140
Made of high quality
leather for long life.
Use to safely remove
hot items from your gas
or charcoal grill.
48

1. Enjoy this simple, flaky fish with a glass of Sauvignon Blanc.
2. Preheat grill to medium heat.
3. In a small saucepan, heat butter and Sauvignon Blanc until butter is melted and bubbling. Add juice of 2 lemons, chopped fresh thyme, 4 cloves of minced garlic and mix well. Season with steak spice to taste. Set aside and keep warm.
4. Rinse trout under cold water and pat dry with paper toweling. Season fish inside and out with olive oil and steak spice to taste. Fill the cavity of the fish with lemon slices, half of the fresh thyme, sliced white onion and 2 cloves of garlic.
5. Place fish into basket, and place basket onto grill. Grill fish for 10 to 12 minutes per side, carefully turning the basket every 5 to 6 minutes. Basting continuously with white wine butter sauce, until fish is fully cooked and hot throughout and skin is crispy.
6. Remove basket from grill and remove fish from basket. Carefully transfer fish to a platter and serve immediately with wedges of lemon and a glass of Sauvignon Blanc.
Napoleon® Multi-Grill Basket 1 | 1
Whole Trout 2-3 lbs | 1 kg scaled and gutted, head attached
Olive Oil 2 tbsp | 30 mL
Lemons 2 | 2 ¼" thick wheels
Fresh Thyme ½ bunch | ½ bunch
White Onion 1 | 1 peeled and sliced into ¼" thick rings
White Wine Butter Sauce
Unsalted Butter ½ lb | 225 g
Sauvignon Blanc ½ cup | 125 mL
Lemons 2 | 2 juiced
Minced Garlic Cloves 4 + 2 | 4 + 2
Chopped Fresh Thyme 1 tbsp | 15 mL
Steak Spice to taste | to taste
gRiLL BAskeT wHOLe TROuT
serves: | prep Time: 30 minutes | grilling Time: 20 to 25 minutes 49

pROFessiONAL gRiLL TOppeR
70023
The custom made,
stainless steel design
offers long lasting
quality use and with
integrated handles it is
easy to use for trouble-
free grilling enjoyment.
50
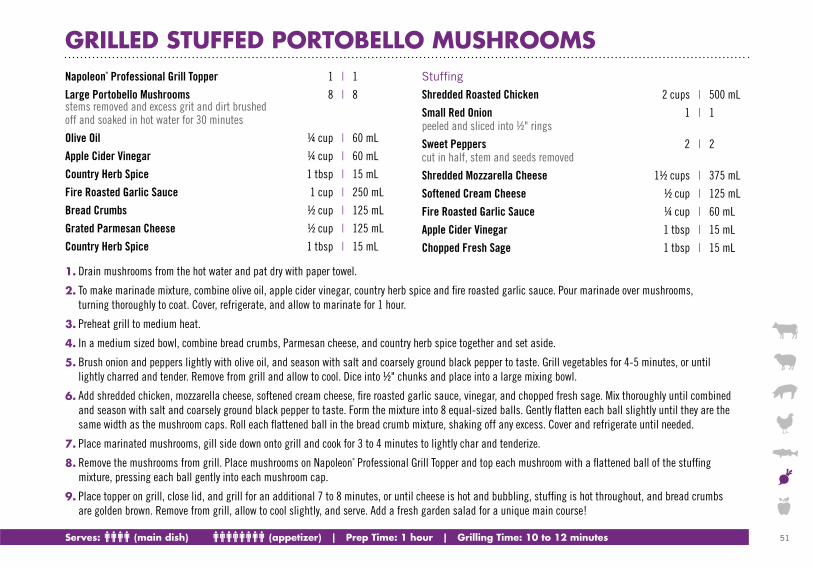
1. Drain mushrooms from the hot water and pat dry with paper towel.
2. To make marinade mixture, combine olive oil, apple cider vinegar, country herb spice and fire roasted garlic sauce. Pour marinade over mushrooms, turning thoroughly to coat. Cover, refrigerate, and allow to marinate for 1 hour.
3. Preheat grill to medium heat.
4. In a medium sized bowl, combine bread crumbs, Parmesan cheese, and country herb spice together and set aside.
5. Brush onion and peppers lightly with olive oil, and season with salt and coarsely ground black pepper to taste. Grill vegetables for 4-5 minutes, or until lightly charred and tender. Remove from grill and allow to cool. Dice into ½" chunks and place into a large mixing bowl.
6. Add shredded chicken, mozzarella cheese, softened cream cheese, fire roasted garlic sauce, vinegar, and chopped fresh sage. Mix thoroughly until combined and season with salt and coarsely ground black pepper to taste. Form the mixture into 8 equal-sized balls. Gently flatten each ball slightly until they are the same width as the mushroom caps. Roll each flattened ball in the bread crumb mixture, shaking off any excess. Cover and refrigerate until needed.
7. Place marinated mushrooms, gill side down onto grill and cook for 3 to 4 minutes to lightly char and tenderize.
8. Remove the mushrooms from grill. Place mushrooms on Napoleon® Professional Grill Topper and top each mushroom with a flattened ball of the stuffing mixture, pressing each ball gently into each mushroom cap.
9. Place topper on grill, close lid, and grill for an additional 7 to 8 minutes, or until cheese is hot and bubbling, stuffing is hot throughout, and bread crumbs are golden brown. Remove from grill, allow to cool slightly, and serve. Add a fresh garden salad for a unique main course!
Napoleon® Professional Grill Topper 1 | 1
Large Portobello Mushrooms 8 | 8 stems removed and excess grit and dirt brushed off and soaked in hot water for 30 minutes
Olive Oil ¼ cup | 60 mL
Apple Cider Vinegar ¼ cup | 60 mL
Country Herb Spice 1 tbsp | 15 mL
Fire Roasted Garlic Sauce 1 cup | 250 mL
Bread Crumbs ½ cup | 125 mL
Grated Parmesan Cheese ½ cup | 125 mL
Country Herb Spice 1 tbsp | 15 mL
Stuffing
Shredded Roasted Chicken 2 cups | 500 mL
Small Red Onion 1 | 1 peeled and sliced into ½" rings
Sweet Peppers 2 | 2 cut in half, stem and seeds removed
Shredded Mozzarella Cheese 1½ cups | 375 mL
Softened Cream Cheese ½ cup | 125 mL
Fire Roasted Garlic Sauce ¼ cup | 60 mL
Apple Cider Vinegar 1 tbsp | 15 mL
Chopped Fresh Sage 1 tbsp | 15 mL
gRiLLed sTuFFed pORTOBeLLO musHROOms
serves: (main dish) (appetizer) | prep Time: 1 hour | grilling Time: 10 to 12 minutes 51

muLTi-gRiLL BAskeT
57010
A convenient way to
grill meat, seafood and
vegetables. The basket
readily adjusts to
accommodate different
food thickness and has
a removable handle.
52
1. First, prepare the vinaigrette. In a bowl whisk together the olive oil, Shiraz, balsamic vinegar, Dijon mustard and rosemary. Season with salt and coarsely ground black pepper to taste.
2. In a large bowl or resealable container, combine all vegetables together. Add half of the vinaigrette to container, seal and refrigerate for one hour, turning occasionally to marinate evenly. Reserve remaining half of the vinaigrette to toss with vegetables after grilling.
3. Preheat grill to medium-high heat.
4. Remove vegetables from marinade and arrange in a Napoleon® Multi-Grill Basket. Place basket onto grill and cook vegetables, turning basket and basting occasionally with marinade, until lightly charred and tender, about 6 to 8 minutes per side.
5. Remove basket from grill and allow to cool slightly. Remove vegetables and cut into large chunks. Place vegetables into a large bowl, toss with reserved red wine balsamic vinaigrette, season with salt and coarsely ground black pepper to taste. Arrange onto serving platter and top with crumbled goat cheese and chopped fresh rosemary.
Napoleon® Multi-Grill Basket 1 | 1
Balsamic Vinaigrette
Olive Oil 1 cup | 250 mL
Shiraz ¼ cup | 60 mL
Balsamic Vinegar ¼ cup | 60 mL
Dijon Mustard 2 tbsp | 30 mL
Chopped Fresh Rosemary 1 tbsp | 15 mL
Salt and Coarsely Ground Black Pepper to taste | to taste
Large Vidalia or Sweet Yellow Onion 1 | 1 peeled and sliced into rings
Large White Mushrooms 8 | 8
Green Zucchini 2 | 2 sliced in half lengthwise
Sweet Peppers 3 | 3 (red, yellow, orange) cut in half, stems and seeds removed
Trimmed Asparagus 1 bunch | 1 bunch
Crumbled Goat Cheese 1 cup | 250 mL
Chopped Fresh Rosemary 1 tsp | 5 mL
gRiLLed vegeTABLe sALAd wiTH sHiRAz BALsAmic viNAigReTTe
serves: | prep Time: 5 to 10 minutes | grilling Time: 12 to 16 minutes 53

pizzA spATuLA70003
Cancel delivery and
throw a pizza pie on
the BBQ at home! It's
never been easier with
a sturdy stainless steel
spatula with a folding
wooden handle for
easy storage.
54
1. In a medium saucepan over high heat, bring Chardonnay to a boil. Reduce heat to medium and simmer until the wine is reduced by half. Add the brown sugar, stirring gently, until the sugar has completely dissolved. Stir in the cream, increase heat to high and bring to a boil again. Reduce heat to low and simmer for 1 to 2 minutes. Remove from heat, allow to cool completely and whisk in the condensed milk. Set aside and keep warm until needed. Chardonnay caramel sauce will keep, covered and refrigerated, for about 5 days.
2. Preheat grill to medium-high heat, leaving one side of the grill turned off.
3. Squeeze juice of the three blood oranges (or tangerines) into a small bowl, mix with a half cup Chardonnay and set aside. Meanwhile, cut top and bottom off the three remaining blood oranges, cut each orange in half (you should have 6 orange wheels) and set aside. Peel pears and slice a small section off the bottom of each pear so that they sit upright. Set aside.
4. Place 2 sheets of foil (one on top of the other) on a flat surface. Place one blood orange wheel in the center of foil, top with 1 tbsp of brown sugar, then stand a pear upright on top of the sugar. Drizzle the pear with about 1 tbsp of the wine and orange juice mixture, then sprinkle with coarsely ground black pepper. Draw the corners of the foil square up to the centre, insert a small cinnamon stick into the bundle with the pear, and crimp foil tightly to form a bundle. Repeat for all remaining pears.
5. Place the bundles on the unheated side of grill, close the lid and grill roast for 30 to 45 minutes or until the pears are tender.
6. Remove bundles from the grill, allow to rest for 1 to 2 minutes and open very carefully as there will be a lot of steam. Remove pear from foil and place the “poached” orange slice into the centre of serving plate. To slice the pear, starting just below the stem, make half-inch-deep slits vertically down the pear, about one-quarter inch apart. Place pear back onto orange slice, drizzle with the Chardonnay caramel sauce and garnish with a sprig of fresh mint. Repeat with remaining pears. Serve with vanilla ice cream and fresh berries.
Chardonnay Caramel Sauce
Chardonnay 1 cup | 250 mL
Brown Sugar 1 cup | 250 mL
35% Cream 1 cup | 250 mL
Sweetened Condensed Milk ½ cup | 125 mL
Fresh Pears 6 | 6
Aluminum Foil 12 | 12 (12"x 12" square sheets)
Dark Brown Sugar ½ cup | 125 mL
Blood Oranges or Tangerines 3 + 3 | 3 + 3
Chardonnay ½ cup | 125 mL
Coarsely Ground Black Pepper 1 tbsp | 15 mL
Cinnamon Sticks 6 | 6
Fresh Mint 1 bunch | 1 bunch
Vanilla Ice Cream to taste | to taste
Assorted Berries 2 cups | 500 mL (strawberries, blueberries, raspberries, blackberries)
BLOOd ORANge ANd cHARdONNAy pOAcHed peARs
serves: | prep Time: 1 hr | grilling Time: 30 to 45 minutes 55

pROFessiONAL spATuLA
70010
A must for every
grilling chef, this
spatula features an
extra large head for
easy use and a serrated
edge allows for quick
trimming of food
right on the grill.
56

1. Soak your cedar plank for a minimum of 1 hour in cold water.
2. Place the Brie wheels spaced evenly on the presoaked plank. Place all berries into a mixing bowl, pour in white wine and jam and toss gently to combine. Season with coarsely ground black pepper to taste.
3. Preheat grill to medium heat.
4. Spoon the berry mixture evenly over the top of the two wheels of cheese.
5. Place the plank onto the preheated grill and close the lid. Plank bake Brie for 10 to 12 minutes, or until sides are bulging and golden brown. Remove plank from grill and serve with slices of fresh baguette or crackers and plenty of napkins.
Napoleon® Cedar Plank 1 | 1 soaked in water for one hour minimum
Brie Cheese 2 x 4½ oz | 125 g
Strawberries 1 cup | 250 mL trimmed and sliced into quarters
Fresh Berries 1 cup | 250 mL (blueberries, raspberries, or blackberries)
Raspberry Jam ½ cup | 125 mL
Sauvignon Blanc ¼ cup | 60 mL
Black Pepper to taste | to taste coarsely ground
cedAR pLANked BRie cHeese wiTH FResH BeRRies
serves: | prep Time: 1 hr | grilling Time: 10 to 12 minutes 57
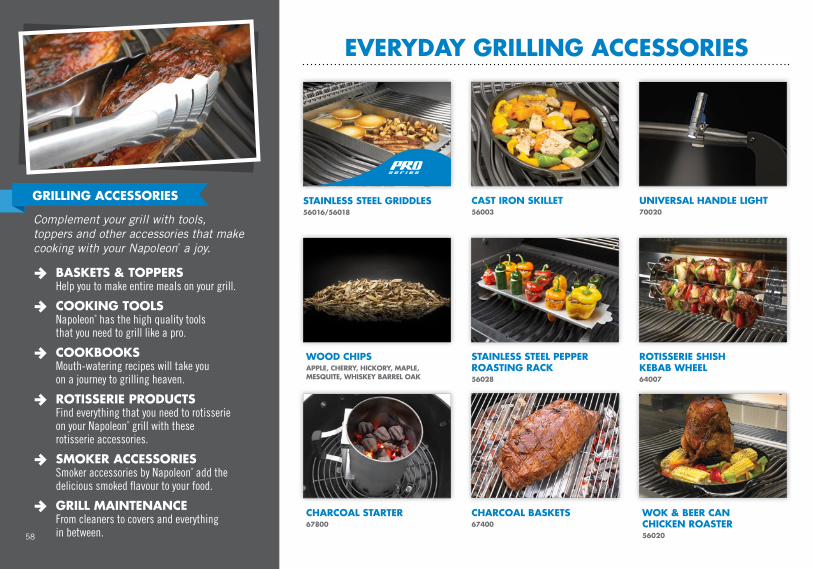
cHARcOAL sTARTeR67800
wOOd cHipsAppLe, cHeRRy, HickORy, mApLe, mesQuiTe, wHiskey BARReL OAk
wOk & BeeR cAN cHickeN ROAsTeR56020
cHARcOAL BAskeTs67400
sTAiNLess sTeeL peppeR ROAsTiNg RAck56028
cAsT iRON skiLLeT56003
ROTisseRie sHisH keBAB wHeeL64007
uNiveRsAL HANdLe LigHT70020
eveRydAy gRiLLiNg AccessORies
→ BAskeTs & TOppeRs Help you to make entire meals on your grill.
→ cOOkiNg TOOLs Napoleon® has the high quality tools that you need to grill like a pro.
→ cOOkBOOks Mouth-watering recipes will take you on a journey to grilling heaven.
→ ROTisseRie pROducTs Find everything that you need to rotisserie on your Napoleon® grill with these rotisserie accessories.
→ smOkeR AccessORies Smoker accessories by Napoleon® add the delicious smoked flavour to your food.
→ gRiLL mAiNTeNANce From cleaners to covers and everything in between.
Complement your grill with tools, toppers and other accessories that make cooking with your Napoleon® a joy.
gRiLLiNg AccessORies sTAiNLess sTeeL gRiddLes56016/56018
58
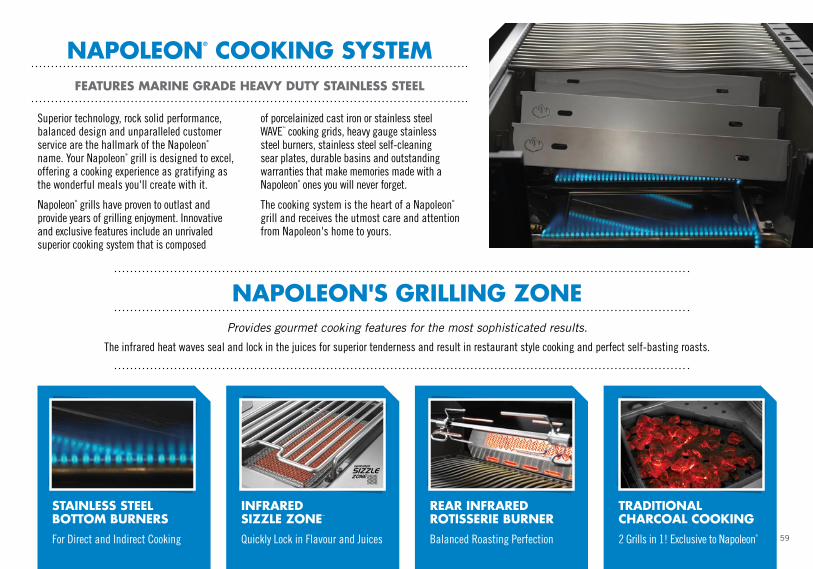
59
FeATuRes mARiNe gRAde HeAvy duTy sTAiNLess sTeeL
Superior technology, rock solid performance, balanced design and unparalleled customer service are the hallmark of the Napoleon® name. Your Napoleon® grill is designed to excel, offering a cooking experience as gratifying as the wonderful meals you'll create with it.
Napoleon® grills have proven to outlast and provide years of grilling enjoyment. Innovative and exclusive features include an unrivaled superior cooking system that is composed
of porcelainized cast iron or stainless steel WAVE™ cooking grids, heavy gauge stainless steel burners, stainless steel self-cleaning sear plates, durable basins and outstanding warranties that make memories made with a Napoleon® ones you will never forget.
The cooking system is the heart of a Napoleon® grill and receives the utmost care and attention from Napoleon's home to yours.
Provides gourmet cooking features for the most sophisticated results.
The infrared heat waves seal and lock in the juices for superior tenderness and result in restaurant style cooking and perfect self-basting roasts.
NApOLeON® cOOkiNg sysTem
NApOLeON's gRiLLiNg zONe
iNFRARed sizzLe zONe™
Quickly Lock in Flavour and Juices
ReAR iNFRARed ROTisseRie BuRNeR
Balanced Roasting Perfection
TRAdiTiONAL cHARcOAL cOOkiNg
2 Grills in 1! Exclusive to Napoleon®
sTAiNLess sTeeL BOTTOm BuRNeRs
For Direct and Indirect Cooking

ROTisseRie guide FOR meAT ANd pOuLTRyAppROXimATe ROAsTiNg Time - cLOsed Lid
meAT cuT weigHT TempeRATuRe RARe medium weLL dONe cOmmeNTs
BeeF Rolled Rib Roast 5 - 6 lbs Hot 1½ - 2 hours 2 - 2¼ hrs 2½- 3 hrs Use roasting pan underneath
Tenderloin Roast 2½ lbs Medium - High 40 - 45 minutes 50 - 60 min - Use roasting pan underneath
Eye of Round 3 - 4 lbs Medium - High 1¼ - 1½ hours 1½ - 2 hrs - Use roasting pan underneath
Boneless Rump Roast 3 - 4 lbs Medium - High - 1¼ - 1¾ hrs 1½ - 2 hrs Have meat rolled and tied, use roasting pan
LAmB Leg 5 - 7 lbs Medium 1 hour 1½ - 2 hrs 1¾ - 2¼ hrs Have shank cut off short
pORk Boneless Loin Roast 5 - 6 lbs Medium - - 2½ - 5 hrs Have meat rolled and tied, use roasting pan
Loin Back Ribs or Spareribs 3 - 4 lbs Medium - High - - 1 - 1¼ hrs Thread on spit accordion style, use roasting pan
HAm Boneless Piece 9 - 10 lbs Medium - - 2 - 2¼hrs Use roasting pan
cHickeN Whole 2½ - 3 lbs Medium - High - - 1½ - 2 hrs Use roasting pan
cORNisH HeNs 4 Birds 1 - 1½ lbs each Medium - - 1 - 1¼ hrs Use roasting pan
duckLiNg Whole 4 - 6 lbs Medium - High - - 1½ - 1¾ hrs Pan is essential
TuRkey Unstuffed 6 - 8 lbs High - - 2 - 2½ hrs Push holding forks deep into bird. Purchase frozen, thaw completely
Unstuffed 12 - 16 lbs High - - 2½ - 3 hrs Push holding forks deep into bird. Purchase frozen, thaw completely
2 Rolled Turkeys 28 oz Medium - High - - 1¾ - 2¼ hrs Use pan
Boneless Turkey Roast 5 - 6 lbs Medium - High - - 2 - 2½ hrs
ARe yOuR scRews LOOse?Tighten spit screws with pliers as they often loosen when exposed to heat.
Make sure meat is balanced in the centre of the spit or rotisserie will not turn. Use a counterweight if meat is not balanced.60

BAsic gRiLLiNg guidecOOkiNg ON gRids - Lid OpeN cOOkiNg ON gRids - Lid cLOsed
meAT cuT weigHT/THickNess TempeRATuRe medium weLL dONe medium weLL dONe cOmmeNTs
BeeF
Burgers*
½" Medium - High - 10 - 12 min - 8 - 10 min Min. temp 156˚ F½" Medium - 12 - 15 min - 10 - 12 min Min. temp 156˚ F¾" High - 12 - 15 min - 10 - 12 min Min. temp 156˚ F¾" Medium - 14 - 18 min - 12 - 15 min Min. temp 156˚ F
Porterhouse 1" Medium - High 12 - 18 min 15 - 20 min 8 - 10 min 10 - 15 min
T-bone or Sirloin Steaks1½" High 18 - 20 min 20 - 25 min 15 - 18 min 18 - 22 min1½" Medium 20 - 25 min 25 - 30 min 10 - 15 min 15 - 18 min
Chuck Blade1" Medium 50 - 60 min 55 - 60 min 45 - 55 min 50 - 60 min
2½" Medium 50 - 60 min 55 - 60 min 45 - 55 min 50 - 60 minLAmB
Rib Chop1" Medium - 20 - 25 min - 20 - 25 min
1½" Medium 25 - 30 min 28 - 32 min 28 - 32 min 20 - 25 min
Shoulder Chop1" Medium - 22 - 28 min - 18 - 22 min
1½" Medium 28 - 32 min 30 - 35 min 20 - 25 min 25 - 30 minpORk
Loin Chops1" Medium - 22 - 25 min - 18 - 22 min
A wire grill basket aids in turning1½" Medium - 30 - 35 min - 25 - 30 min
Blade Steak ¾" Medium - 15 - 20 min - 15 - 20 min
Loin Back or Side Ribs 5 - 6 lbs Medium - - -1¼ - 1¾ hrs Uncooked20 - 30 min Pre-cooked
HAmFully Cooked Boneless Slice
½" Medium - High - 15 - 18 min - 25 - 30 min Slash fatty edge of ham slice, minimum internal temperature 140˚F1" Medium - 6 - 8 min - 6 - 8 min
cHickeN Broiler-Fryer Halves 2½ - 3 lbs Medium - High - 60 - 70 min - 60 - 70 min Meat thermometer inserted in thigh should register 185˚FRoasting Chicken (Unstuffed) 3 - 4 lbs Medium - - - 1½ - 1¾ hrs
TuRkeyUnstuffed
6 - 8 lbs Medium - High - - - 2 - 2½ hrs Meat thermometer inserted in thigh should register 185˚F12 - 16 lbs Medium - High - - - 2½ - 3 hrs
FisHSalmon or Halibut Steaks
¾" Medium - 17 - 22 min - 15 - 20 min Use a wire grill basket or aluminum foil1 - 1½" Medium - High - 10 - 17 min - 10 - 15 min
Trout, Snapper or Whitefish Fillets 6 - 8 oz each
Medium - High - 10 - 17 min - 10 - 15 min Use a wire grill basket or aluminum foilMedium - 17 - 20 min - 15 - 17 min
seAFOOd Shrimp (large) 2 lbs Low - Medium - 10 - 15 min - 10 - 15 min
*Hamburger and any ground meat must reach a temperature of 160˚F - make sure juices run clear. 61

62
cOOkiNg ON yOuR NApOLeON® gRiLL
Operating your gas grill............................................. ...4
All season grilling ........................................................ 5
Various cooking styles .............................................6-10
Direct cooking style.......................................................6
Indirect cooking style....................................................6
Infrared bottom burner cooking style............................6
Rotisserie and drip pan cooking...................................7
How to use your rear infrared burner............................7
Smoking.......................................................................8
Wood chips...................................................................8
Plank grilling................................................................8
Cooking with charcoal on your gas grill........................9
Infrared grilling .......................................................... 10
Guide to preparing meat ............................................ 11
Preparing whole birds ................................................ 12
Fish, lamb, ribs and steak.......................................... 13
cOOkiNg cHARTs
Infrared cooking guide ..........................................10-11
Internal meat temperature guide ............................... 12
Rotisserie guide ......................................................... 60
Basic grilling guide.....................................................61
mARiNAdes, BAsTes, RuBs & sAuces
How to marinate ......................................................... 14
Pesto .......................................................................... 14
Provençal marinade ................................................... 14
Spicy tomato grilling sauce ........................................ 15
Jamaican jerk marinade ............................................. 15
Yogurt marinade......................................................... 15
AppeTizeRs & sALAd
Grilled stuffed Portobello mushrooms ...................50-51
Grilled vegetable salad with Shiraz balsamic vinaigrette...........................52-53
Cedar planked Brie cheese with fresh berries .......56-57
meATs
2012 Recipe Blog Contest Winner: Hot Wing Ribs........................................................30-31
Classic cowboy steak with grilled mushrooms, onions and blue cheese.....................16-17
Planked beef tenderloin with smoky mashed potatoes ................................18-19
Red wine marinated rib steaks..............................20-21
The sirloin steak burger.........................................22-23
Tandoori lamb chops with Raita Dunk ...................24-25
Double thick pork chops with fire-roasted corn salsa ..................................26-27
Fire roasted pork and vegetable kababs................28-29
Jerk rotisserie of pork loin with honey jerk glaze ......................................32-33
Shiraz smoked baby back ribs ...............................34-35
Stuffed pork chops ................................................36-37
pOuLTRy
Chicken thighs with soy wasabi glaze ...................38-39
Fire roasted garlic beer can chicken......................40-41
Mango BBQ quail ..................................................42-43
Serious Buffalo-style grilled chicken wings...........44-45
FisH & seAFOOd
Cedar planked salmon with scallop crust .............46-47
Grill basket whole trout .........................................48-49
sweeT TReAT
Blood orange and Chardonnay poached pears ......54-55
iNdeX

GOURMET GRILLSHYBRID WOOD FURNACESFURNACESSTOVES AIR CONDITIONINGFIREPLACES
STYLE | PERFORMANCE | QUALITY
Providing home comfort for over 35 years.
Memories made with a Napoleon®

214 Bayview Drive, Barrie, Ontario, Canada L4N 4Y8103 Miller Drive, Crittenden, Kentucky, USA 410307200 Trans Canada Highway, Montreal, Quebec H4T 1A3
PHONE: 705-726-4278 • FAX: [email protected]
Fireplace Inserts • Charcoal Grills • Gas Fireplaces • Mantels • Wood Stoves Hybrid Furnaces • Electric Fireplaces • Heating & Cooling • BBQ Accessories
Oth
er N
apol
eon®
Pro
duct
sPrinted in Canada
N415-0041 01/2014