welcome to the fms system employee tutorial. to begin you
TRANSCRIPT

Welcome to the
FMS System Employee Tutorial. To begin you will need to
enter your user name and password and click on the I agree
button.

The Main Menu button at the top of the page is a Navigation Bar
“Enter Timesheets” allows you to add a late timesheet
*Per Federal regulations time must be entered via the EVV application
“Review Timesheets” allows you to review all paid and unpaid timesheets by client and date
“Print Timesheets” allows you to view/print timesheet information
“Review Paystubs” allows you to access your past paystubs
“Documents” allows you quick access to user guides and commonly used forms
“Send Alerts” allows you to send a message to another user in the system
“Demographics “ allows you to see your demographic information as well as participants you are assigned to support
Main Menu Page
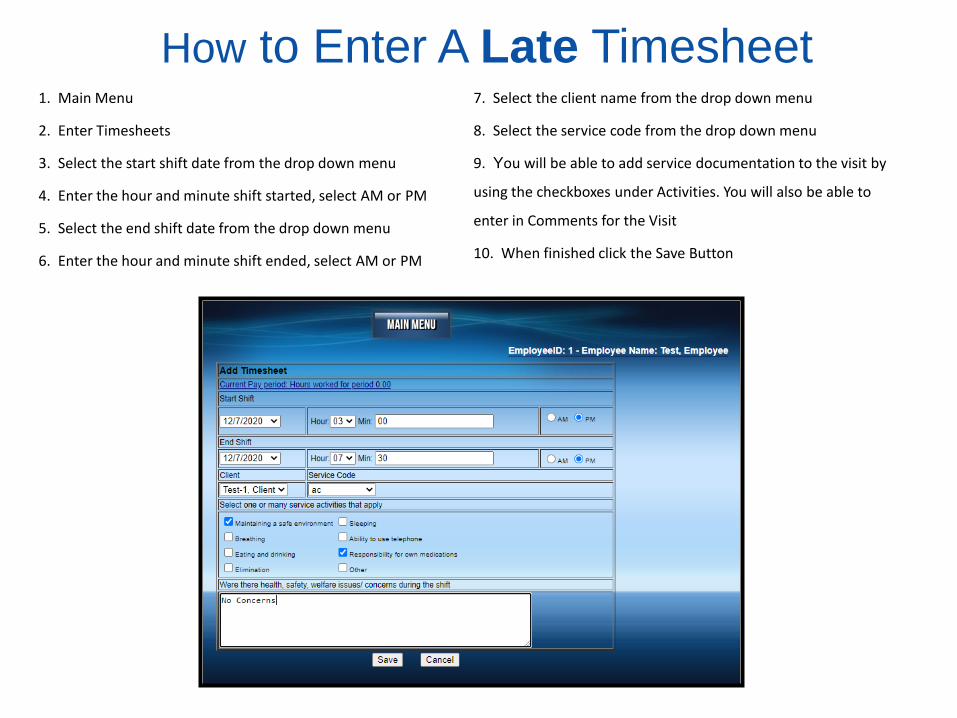
How to Enter A Late Timesheet 1. Main Menu
2. Enter Timesheets
3. Select the start shift date from the drop down menu
4. Enter the hour and minute shift started, select AM or PM
5. Select the end shift date from the drop down menu
6. Enter the hour and minute shift ended, select AM or PM
7. Select the client name from the drop down menu
8. Select the service code from the drop down menu
9. You will be able to add service documentation to the visit by
using the checkboxes under Activities. You will also be able to
enter in Comments for the Visit
10. When finished click the Save Button

Time Entry Rules
The Time entries must comply with the following rules:
1. All services combined (with the exception of respite) cannot exceed 40 hours a week between all employees/services, Sunday – Saturday.
2. Employees are not allowed to have overlapping hours across all clients that employee provides for
3. If employee contract is outdated, employee can’t enter time
4. Service Activities Documentation
• A list of activities will be provided based on service code selected
• All applicable activities during timesheet visit should be selected
• Additional section for comments
5. AM and PM are required for all shifts entered
6. Representative must review all time and service documentation prior to approving time
7. Support Broker must review all time and service documentation prior to approving time

The Time entries must comply with the following rules:
1. All services combined (with the exception of respite) cannot exceed 45 hours a week between all employees/services, Sunday – Saturday.
2. Employees are not allowed to have overlapping hours across all clients that employee provides for
3. If employee contract is outdated, employee can’t enter time
4. Service Activities Documentation
• A list of activities will be provided based on service code selected
• All applicable activities during timesheet visit should be selected
• Additional section for comments
5. AM and PM are required for all shifts entered
6. Representative must review all time and service documentation prior to approving time
7. Support Broker must review all time and service documentation prior to approving time
HCB2 – Time Entry Rules

1. Main Menu
2. Review Timesheets
3. Select the client from the drop down menu
4. Select the date range from the drop down menu
5. Search
How to Review Timesheets
Time entered in error can be deleted
If changes are needed to the time entries click the Edit Button. Please note approved entries cannot be edited
Approved time entries status will say Yes, Not Approved time entries will say No
If a visit is completed in the EVV app the verified column will say True. If a visit is entered in the website or edited the column will say False.

View of Timesheet Visit in FMS
Website Once user clicks edit they will now see a full view of the timesheet visit information which includes the GPS Location Map, Activities selected and Comments entered
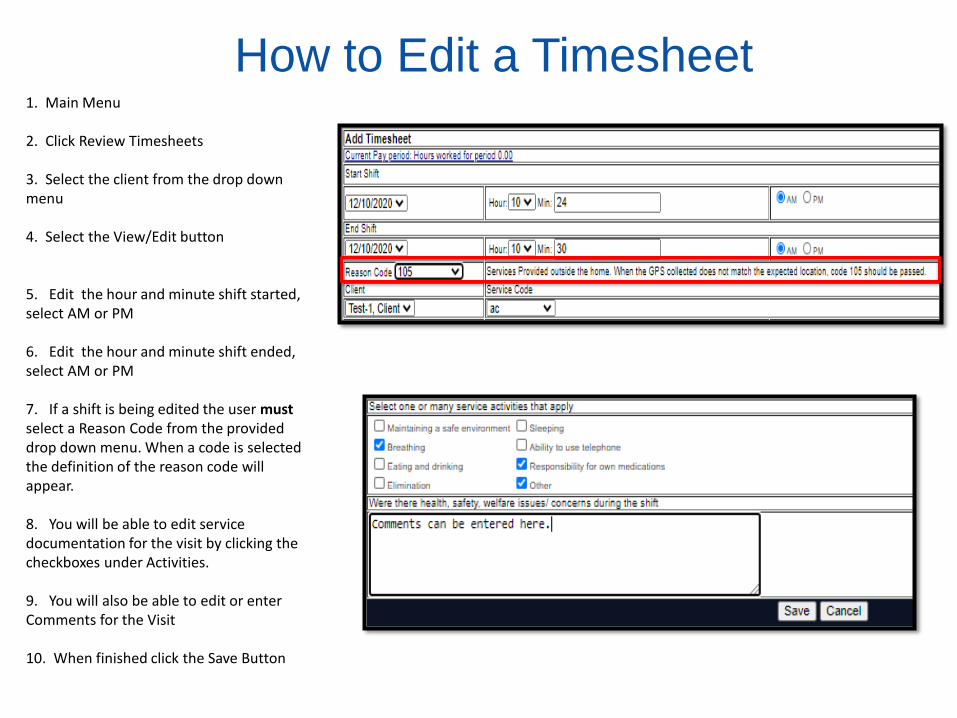
How to Edit a Timesheet 1. Main Menu 2. Click Review Timesheets 3. Select the client from the drop down menu 4. Select the View/Edit button
5. Edit the hour and minute shift started, select AM or PM 6. Edit the hour and minute shift ended, select AM or PM 7. If a shift is being edited the user must select a Reason Code from the provided drop down menu. When a code is selected the definition of the reason code will appear. 8. You will be able to edit service documentation for the visit by clicking the checkboxes under Activities.
9. You will also be able to edit or enter Comments for the Visit
10. When finished click the Save Button

List of Reason Codes

1. Main Menu
2. Print Timesheets
3. Select the client from the drop down menu
4. Select the date range from the drop down menu
5. Print Timesheets
*** Please note, you are not required to print and submit your timesheet, this is simply a function available to you if you want a paper copy for your records ***
How to Print an Employee Timesheet

Example of a Printed Timesheet
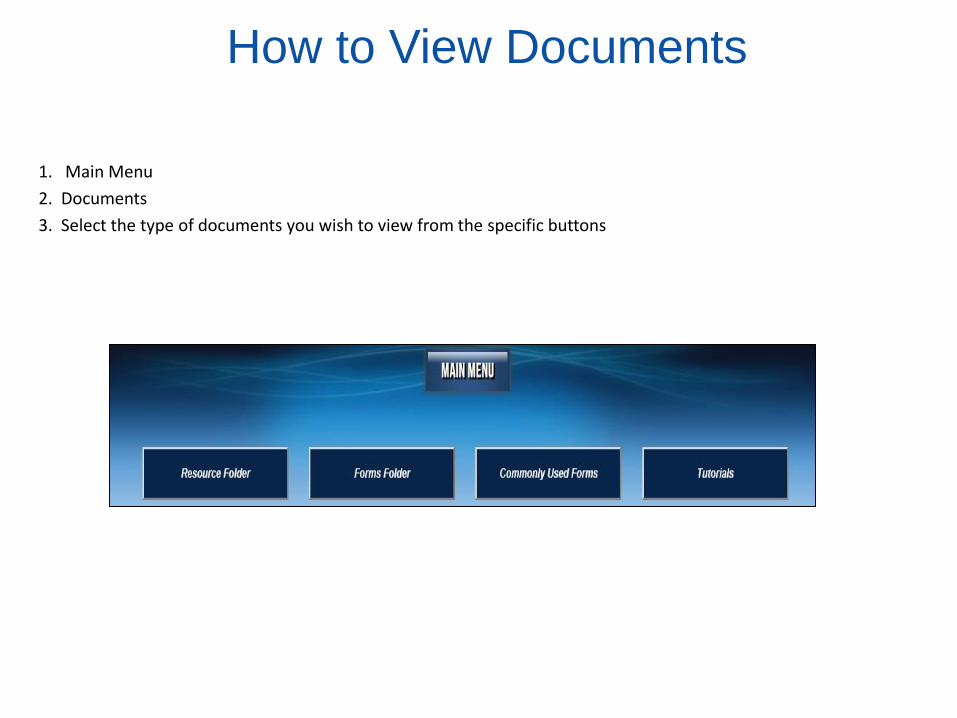
1. Main Menu
2. Documents
3. Select the type of documents you wish to view from the specific buttons
How to View Documents
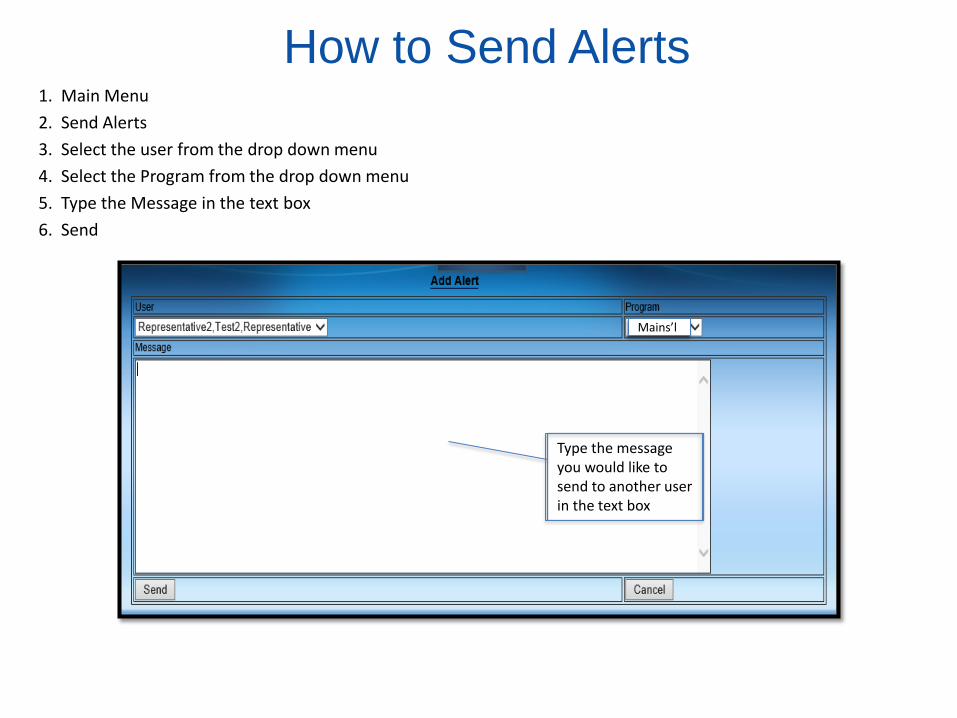
1. Main Menu
2. Send Alerts
3. Select the user from the drop down menu
4. Select the Program from the drop down menu
5. Type the Message in the text box
6. Send
How to Send Alerts
Type the message you would like to send to another user in the text box
Mains’l
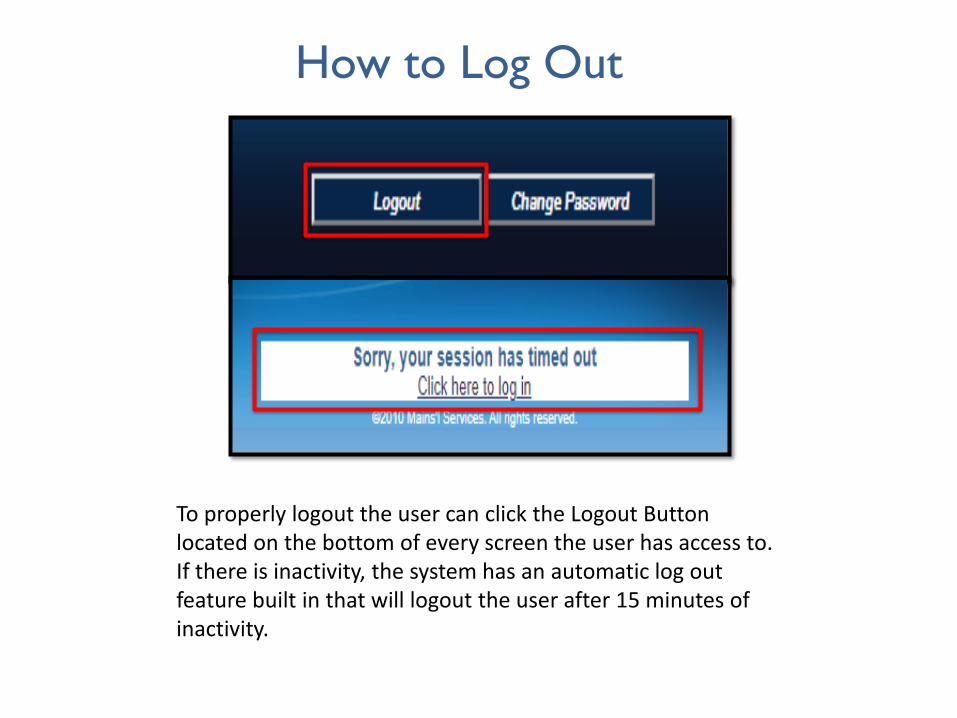
How to Log Out
To properly logout the user can click the Logout Button located on the bottom of every screen the user has access to. If there is inactivity, the system has an automatic log out feature built in that will logout the user after 15 minutes of inactivity.

How to Change Password
1. The user can click the Change Password Button 2. The user will enter the Old Password 3. The user will enter the New Password (Password parameters will be located at the bottom of the screen) 4. The user will confirm the New Password 5. When finished the user can click the Save Button
This will conclude the Employee Tutorial
Thank you!