chettinadtech.ac.inchettinadtech.ac.in/storage/13-12-20/13-12-20-09-43-46... · web viewi will...
TRANSCRIPT

1
PART A
1. Define window manager
A window manager is a "metaclient", whose most basic mission is to manage other clients.
XServer is not responsible for “client window controls”(eg.,maximize,resize,move)
Another program called “window manager” is responsible for on screen space. Window manager in X
is another client(not part of xwindow system).
eg.,twm,enlightenment,fvwm, amiwm, icewm, windowmaker, afterstep, sawfish, kwm, and
countless others.
2. Define widgets
Creating GUI for client programs using Xlib is complicated and time consuming( eg creating buttons,
scroll bar..). Someone else has taken the trouble of creating a user friendly library over Xlib. These
controls are called as “widgets” and library is called as “widget library”.
3. What is Gimp Display Kit
It is a Library to perform the actual rendering to the display .Abstracts out the display so that it can be
X11 or Win32 or Cocoa or whatever .Also provides some pixmap functions if you need those (not
covered today).
4. What is X Window System?
X was designed with a client server architecture.
The server controls the display directly, and is responsible for all input/output via the keyboard,
mouse or display.
5. What are the steps of GTK programming
When writing a GTK program, there are seven steps that need to be done.
1. Initialize GTK.2. Create the widgets.3. Place the widgets.4. Implement event listening and callback functions for widgets.5. Show the widgets.6. Begin the event handling loop.7. Shut down the application.
6. What are features of QT programming?
Seamless object communication using Signals and Slots
Powerful events and event filters
Contextual string translation for internationalization
Sophisticated event driven timers for event driven GUI
7. What is QObject i?
QObject is the base class in Qt. QWidget, which inherits from QObject is
the base class for all visible classes in Qt
2
8. What are the advantages of slots and signals?
Signals and slots are used for communication between objects
We use signals and slots as alternative to callback technique.
A signal is emitted when a particular event occurs
A slot is a function that is called in response to a particular signal
The signals and slots mechanism is type safe
All classes that inherit from QObject emit signals when they change their state
9. Define Signal.
A signal is emitted when a particular event occurs. Signals are emitted by an object when its internal state has changed.
For eg. A list box emits both highlighted() and activated() signals
10. Define Slot.
A slot is called when a signal connected to it is emitted • Slots are normal member functions but have access rights.
11. What are the types of Slots?
Public slots - anyone can connect signals to
Protected slots - this class and its subclasses may connect signals to
Private slots - only the class itself may connect signals to
12. What is tuple?
Tuples are similar to lists. They cannot be modified once they are declared. They are similar to strings.
When items are defined in parenthesis separated by commas then they are called as Tuples. Tuples are
used in situations where the user cannot change the context or application; it puts a restriction on the
user.
13. Define Glade
Glade: A Visual Designer Tool for GTK, GNOME
Glade enables the developer to quickly and efficiently design an application visually and then move on to
concentrate on actual program implementation instead of being bogged down with user interface
issues.
14. What are the advantages of X windows
Separation of computing and Graphics
Different systems under X
Only Mechanism, No policy
Network Transparency
Room for future Extensions
Load Sharing
Resource Sharing

3
15. Define GTK Programming
GTK (GIMP Toolkit) is a library for creating graphical user interfaces and is called the GIMP toolkit because it was originally written for developing the GNU Image Manipulation Program (GIMP), but GTK has now been used in a large number of software projects, including the GNU Network Object Model Environment (GNOME) project.
16. Define AWK Scripting?
The Awk text-processing language is useful for such tasks as:
Tallying information from text files and creating reports from the results.
Adding additional functions to text editors like "vi".
Translating files from one format to another.
Creating small databases.
Performing mathematical operations on files of numeric data.
Awk has two faces: it is a utility for performing simple text-processing tasks, and it is a programming language for performing complex text-processing tasks.
17. Draw X window system Architecture

4
18. What are the features of QT
Seamless object communication using Signals and Slots Powerful events and event filters Contextual string translation for internationalization Sophisticated event driven timers for event driven GUI
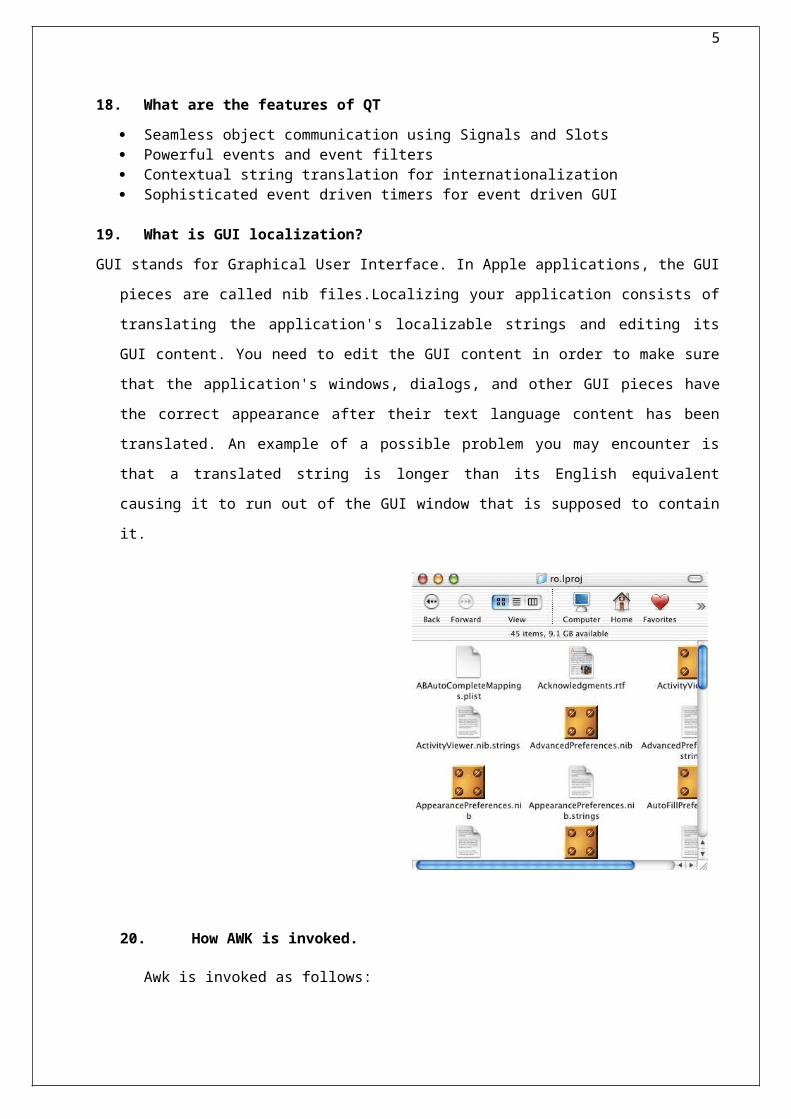
19. What is GUI localization?
GUI stands for Graphical User Interface. In Apple applications, the GUI pieces are called nib
files.Localizing your application consists of translating the application's localizable strings and editing
its GUI content. You need to edit the GUI content in order to make sure that the application's
windows, dialogs, and other GUI pieces have the correct appearance after their text language content
has been translated. An example of a possible problem you may encounter is that a translated string is
longer than its English equivalent causing it to run out of the GUI window that is supposed to contain
it.
20. How AWK is invoked.
Awk is invoked as follows:
awk [ -F<ch> ] {pgm} | { -f <pgm_file> } [ <vars> ] [ - | <data_file> ]
-- where:
ch: Field-separator character. pgm: Awk command-line program. pgm file: File containing an Awk program. vars: Awk variable initializations.data file: Input data file.
5
An Awk program has the general form:
BEGIN {<initializations>} <search pattern 1> {<program actions>} <search pattern 2> {<program actions>}END {<final actions>}
21. Write the sample GTK program.
#include<gtk/gtk.h>
int main(int argc,&argv[])
{
gtkwIDGET * WINDOW;
window=gtk_window_new(GTK_WINDOW_TOPLEVEL);
gtk_widget_show(window);
gtk_main();
return 0;
}
PART-B

6
1. X Windows server architecture
X was developed by the Athena project at MIT, and released in 1984. In 1988 an entity called
the "X Consortium" took over X, and to this day handles its development and distribution. The X
specification is freely available, this was a smart move as it has made X almost ubiquitous. Main
advantages of X windows
• Separation of computing and Graphics
• Different systems under X
• Only Mechanism, No policy
• Network Transparency
• Room for future Extensions
• Load Sharing
• Resource Sharing
The X Window System Architecture: overview
X was designed with a client-server architecture. The applications themselves are the clients; they
communicate with the server and issue requests, also receives information from the server .
The X server maintains exclusive control of the display and services requests from the clients. At
this point, the advantages of using this model are pretty clear. Applications (clients) only need to
know how to communicate with the server, and need not be concerned with the details of talking to
the actual graphics display device. At the most basic level, a client tells the server stuff like "draw a
line from here to here", or "render this string of text, using this font, at this position on-screen". This
would be no different from just using a graphics library to write our application. However the X
model goes a step further. It doesn't constrain the client being in the same computer as the server. The
protocol used to communicate between clients and server can work over a network, or actually, any
"inter-process communication mechanism that provides a reliable octet stream". Of course, the
preferred way to do this is by using the TCP/IP protocols. As we can see, the X model ( X protocol )
is really powerful; the classical example of this is running a processor-intensive application on a Cray

7
computer, a database monitor on a Solaris server, an e-mail application on a small BSD mail server,
and a visualization program on an SGI server, and then displaying all those on my Linux
workstation's screen.
Some facts about the X protocol are:
• Introduced around mid 1980
• Network transparent GUI
• Distribute (Client & Server)
• Machine Code of X
• Asynchrnous/Synchrnous
• Same Look and Feel
• Highly Portable (OS/Language/Hardware)
• Better Performance
We have seen that the X server is the one handling the actual graphics display. Also, since it's the X
server which runs on the physical, actual computer the user is working on, it's the X server's
responsibility to perform all actual interactions with the user. This includes reading the mouse and
keyboard. All this information is relayed to the client, which of course will have to react to it.
X provides a library, aptly called Xlib, which handles all low-level client-server communication tasks.
It sounds obvious that, then, the client has to invoke functions contained within Xlib to get work done.
In a nutshell, we have a server in charge of visual output and data input, client applications, and a way
for them to communicate between each other. In picturing a hypothetical interaction between a client
and a server, the client could ask the server to assign a rectangular area on the screen. Client is not
concerned with where ii is being displayed on the screen. Client just tell the server "give me an area X
by Y pixels in size", and then call functions to perform actions like "draw a line from here to there",
"tell me whether the user is moving the mouse in my screen area" and so on.
2. Explain in detail about Window Managers
However, we never mentioned how the X server handles manipulation of the clients' on-screen
display areas (called windows). It's obvious, to anyone who's ever used a GUI, that you need to have
control over the "client windows". Typically you can move and arrange them; change size, maximize
or minimize windows. How, then, does the X server handle these tasks? The answer is: it doesn't.
One of X's fundamental tenets is "we provide mechanism, but not policy". So, while the X server
provides a way (mechanism) for window manipulation, it doesn't actually say how this manipulation
behaves (policy). All that mechanism/policy weird stuff basically boils down to this: it's another
program's responsibility to manage the on-screen space. This program decides where to place
windows, gives mechanisms for users to control the windows' appearance, position and size, and

8
usually provides "decorations" like window titles, frames and buttons, that give us control over the
windows themselves. This program, which manages windows, is called (guess!) a "window
manager".
"The window manager in X is just another client -- it is not part of the X window system, although it
enjoys special privileges -- and so there is no single window manager; instead, there are many, which
support different ways for the user to interact with windows and different styles of window layout,
decoration, and keyboard and color map focus."
The X architecture provides ways for a window manager to perform all those actions on the windows;
but it doesn't actually provide a window manager. There are, of course, a lot of window managers,
because since the window manager is an external component, it's (relatively) easy to write one
according to your preferences, how you want windows to look, how you want them to behave, where
do you want them to be, and so on. Some window managers are simplistic and ugly (twm); some are
flashy and include everything but the kitchen sink (enlightenment); and everything in between; fvwm,
amiwm, icewm, windowmaker, afterstep, sawfish, kwm, and countless others. There's a window
manager for every taste.
A window manager is a "meta-client", whose most basic mission is to manage other clients. Most
window managers provide a few additional facilities (and some provide a lot of them). However one
piece of functionality that seems to be present in most window managers is a way to launch
applications. Some of them provide a command box where you can type standard commands (which
can then be used to launch client applications). Others have a nice application launching menu of
some sort. This is not standardized, however; again, as X dictates no policy on how a client
application should be launched, this functionality is to be implemented in client programs. While,
typically, a window manager takes on this task (and each one does it differently), it's conceivable to
have client applications whose sole mission is to launch other client applications; think a program
launching pad. And of course, people have written large amounts of "program launching"
applications.
Client Applications
Let's focus on the client programs for a moment. Imagine we want to write a client program from
scratch, using only the facilities provided by X. We would quickly find that Xlib is pretty spartan, and
that doing things like putting buttons on screen, text, or nice controls (scrollbars, radio boxes) for the
users, is terribly complicated.
Luckily, someone else went to the trouble of programming these controls and giving them to us in a
usable form; a library. These controls are usually known as "widgets" and of course, the library is a
"widget library". Then we just have to call a function from this library with some parameters and have

9
a button on-screen. Examples of widgets include menus, buttons, radio buttons, scrollbars, and
canvases.
A "canvas" is an interesting kind of widget, because it's basically a sub-area within the client where i
can draw stuff. Understandably, since we shouldn't use Xlib directly, because that would interfere
with the widget library, the library itself gives a way to draw arbitrary graphics within the canvas
widget.interpreting user's actions into input, the library used is largely responsible for each client's
aspect and behavior. From a developer's point of view, a widget library also has a certain API (set of
functions), and that might define which widget library we want to use.
3. What isWidget Libraries explain in detail about Widget Libraries or toolkits
The original widget library, developed for the Athena Project, is of course the Athena widget
library, also known as Athena Widgets. It's very basic, very ugly, and the usage is not intuitive by
today's standards (for instance, to move a scrollbar or slider control, we don't drag it; instead, we click
the right button to scroll up and the left button to scroll down). As such, it's pretty much not used a lot
these days.
Just as it happens with window managers, there are a lot of toolkits, with different design goals in
mind. One of the earliest toolkits is the well-known Motif, which was part of the Open Software
Foundation's Motif graphical environment, consisting of a window manager and a matching toolkit is
identified to be superior to Athena. In the recent times, Gtk, Qt, LessTif are in predominant use.
The widely known and used Gtk, was specifically created to replace Motif in the GIMP project (one
possible meaning of Gtk is "GIMP ToolKit, although, with its widespread use, it could be interpreted
as the GNU ToolKit). Gtk is now very popular because it's relatively lightweight, feature-rich,
extensible and totally free.
Another very popular toolkit these days is Qt. It was not too well-known until the advent of the KDE
project, which utilizes Qt for all its GUI elements. Finally, another alternative worth mentioning is
LessTif. The name is a pun on Motif, and LessTif aims to be a free, API-compatible replacement for
Motif. We may have several possible window managers, which manage our screen real estate; we also
have our client applications, which are where we actually get our work done, and clients can be
programmed using several possible different toolkits.
Desktop environments
The concept of a desktop environment is something new to people coming for the first time to Linux
because it's something that other operating systems (like Windows and the Mac OS) intrinsically
10
have. Main objective of desktop environment is to provide consistent look-and-feel during the
computing session. The operating system provides a default file manager (the finder), a system wide
control panel, and single toolkit that all applications have to use (so they all look the same), a window
manager to manage all application windows and a set of guidelines that tell developers how their
applications should behave, recommend control looks and placement, and suggest behaviors
according to those of other applications on the system.
For example, KDE includes a single window manager (kwm), which manages and controls the
behavior of our windows. It recommends using a certain graphic toolkit (Qt), so that all KDE
applications look the same, as far as their on-screen controls go. KDE further extends Qt by providing
a set of environment-specific libraries (kdelibs) for performing common tasks like creating menus,
"about" boxes, program toolbars, communicating between programs, printing, selecting files, and
other things. These make the programmer's work easier and standardize the way these special features
behave. KDE also provides a set of design and behavior guidelines to programmers, with the idea that,
if everybody follows them, programs running under KDE will both look and behave very similarly.
Finally, KDE provides, as part of the environment, a launcher panel (kpanel), a standard file manager
(which is, at the time being, Konqueror), and a configuration utility (control panel) from which we
can control many aspects of our computing environment, from settings like the desktop's background
and the windows' title bar color to hardware configurations.
The KDE panel is an equivalent to the MS Windows taskbar. It provides a central point from which to
launch applications, and it also provides for small applications, called "applets", to be displayed
within it. This gives functionality like the small, live clock most users can't live without.
GNOME is another popular desktop environment. The most obvious difference is that GNOME
doesn't mandate a particular window manager (the way KDE has kwm). Originally GNOME favored
the Enlightenment window manager, and currently their preferred window manager is Sawfish, but
the GNOME control panel has always had a window manager selector box.
Other than this, GNOME uses the Gtk toolkit, and provides a set of higher-level functions and
facilities through the gnome-libs set of libraries. GNOME has its own set of programming guidelines
in order to guarantee a consistent behavior between compliant applications; it provides a panel (called
just "panel"), a file manager (gmc, altough it's probably going to be superseded by Nautilus), and a
control panel (the gnome control center).
A quick internet search will reveal about half a dozen desktop environments: GNUStep, ROX,
GTK+XFce, UDE, to name a few. They all provide the basic facilities we mentioned earlier. GNOME
and KDE have had the most support, both from the community and the industry, so they're the most
advanced ones, providing a large amount of services to users and applications.

11
After that, I go back to my spreadsheet, now that I'm finished I want to print my document. Gnumeric
is a GNOME application, so it can use the facilities provided by the GNOME environment. When I
print, Gnumeric calls the gnome-print library, which actually communicates with the printer and
produces the hard copy I need.
4. What is GTK Programming? Explain in detail with an example.
GTK (GIMP Toolkit) is a library for creating graphical user interfaces and is called the GIMP
toolkit because it was originally written for developing the GNU Image Manipulation Program
(GIMP), but GTK has now been used in a large number of software projects, including the GNU
Network Object Model Environment (GNOME) project. GTK is built on top of GDK (GIMP Drawing
Kit) which is basically a wrapper around the low-level functions for accessing the underlying
windowing functions (Xlib in the case of the X windows system), and gdk-pixbuf, a library for client-
side image manipulation.
GTK is essentially an object oriented application programmers interface (API) although written
completely in C and implemented using the idea of classes and callback functions (pointers to
functions). In addition, GLib is used with GTK which contains a few replacements for some standard
calls to increase portability; additional functions for handling linked lists, etc.All GTK programs has
to include gtk/gtk.h which declares the variables, functions, structures, etc. that will be used in your
GTK application. While writing GTK programs, we use gint, gchar, etc., types of variable which are
typedefs to int and char, respectively, that are part of the GLib system. This is done to get around that
nasty dependency on the size of simple data types when doing calculations. A good example is
"gint32" which will be typedef'd to a 32 bit integer for any given platform, whether it be the 64 bit
alpha, or the 32 bit i386. The typedefs are very straightforward and intuitive. They are all defined in
glib/glib.h (which gets included from gtk.h). All GTK programs has to first call the following
function.
gtk_init (&argc, &argv);
This further calls function gtk_init(gint *argc, gchar ***argv) which will be called in all GTK
applications; This function initializes such as the default visual and color map and then calls
gdk_init(gint *argc, gchar ***argv)which initializes the library for use, sets up default signal
handlers, and checks the arguments passed to your application on the command line. This creates a set
of standard arguments accepted by all GTK applications. Then, we have to write code to create and
display a window. For this, the following function calls are used.
window = gtk_window_new (GTK_WINDOW_TOPLEVEL);
gtk_widget_show (window);
12
The GTK_WINDOW_TOPLEVEL argument specifies that we want the window to undergo window
manager decoration and placement.
The gtk_widget_show() function lets GTK know that we are done setting the attributes of this widget,
and that it can display it.
After this, we have to call GTK main processing loop,
gtk_main ();
This, gtk_main() call seen in every GTK application. When control reaches this point, GTK will sleep
waiting for X events (such as button or key presses), timeouts, or file IO notifications to occur.
GTK is an event driven toolkit and an event occurs then the control is passed to the appropriate
function. This passing of control is done using the idea of "signals". (Note that these signals are not
the same as the Unix system signals, and are not implemented using them, although the terminology is
almost identical.) When an event occurs, such as the press of a mouse button, the appropriate signal
will be "emitted" by the widget that was pressed. This is how GTK does most of its useful work.
There are signals that all widgets inherit, such as "destroy", and there are signals that are widget
specific, such as "toggled" on a toggle button.
d call the appropriate function. This is done by using a function such as:
gulong g_signal_connect( gpointer *object,
const gchar *name,
GCallback func,
gpointer func_data );
where the first argument is the widget which will be emitting the signal, and the second the name of
the signal you wish to catch. The third is the function you wish to be called when it is caught, and the
fourth, the data you wish to have passed to this function.
The function specified in the third argument is called a "callback function", and should generally be of
the form
void callback_func( GtkWidget *widget,
gpointer callback_data );

13
where the first argument will be a pointer to the widget that emitted the signal, and the second a
pointer to the data given as the last argument to the g_signal_connect() function as shown above.
Note that the above form for a signal callback function declaration is only a general guide, as some
widget specific signals generate different calling parameters.
Another call which can be used to connect function to signal is:
gulong g_signal_connect_swapped( gpointer *object,
const gchar *name,
GCallback func,
gpointer *slot_object );
g_signal_connect_swapped() is the same as g_signal_connect() except that the callback function only
uses one argument, a pointer to a GTK object. So when using this function to connect signals, the
callback should be of the form
void callback_func( GtkObject *object );
where the object is usually a widget. We usually don't setup callbacks for
g_signal_connect_swapped() however. They are usually used to call a GTK function that accepts a
single widget or object as an argument.
The purpose of having two functions to connect signals is simply to allow the callbacks to have a
different number of arguments. Many functions in the GTK library accept only a single GtkWidget
pointer as an argument, so you want to use the g_signal_connect_swapped() for these, whereas for
your functions, you may need to have additional data supplied to the callbacks.To begin our
introduction to GTK, we'll start with the simplest program possible. This program will create a
200x200 pixel window and has no way of exiting except to be killed by using the shell.
5. Write in detail about Glade: and explain it with an Visual Designer Tool for GTK, GNOME.Glade enables the developer to quickly and efficiently design an application visually and then move on to concentrate on actual program implementation instead of being bogged down with user interface issues.
1. Start up glade. Usually, we may find in programs option in our start toolbar. We will see the following three windows

14
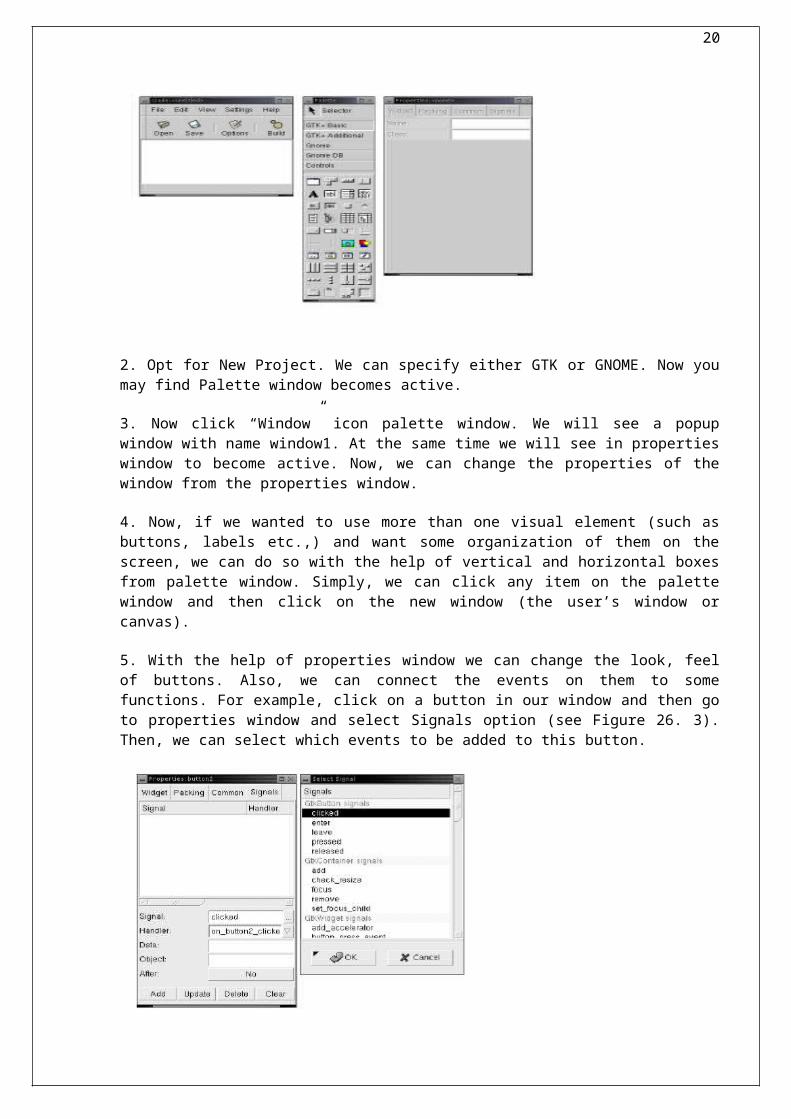
2. Opt for New Project. We can specify either GTK or GNOME. Now you may find Palette window becomes active.
3. Now click “Window” icon palette window. We will see a popup window with name window1. At the same time we will see in properties window to become active. Now, we can change the properties of the window from the properties window.
4. Now, if we wanted to use more than one visual element (such as buttons, labels etc.,) and want some organization of them on the screen, we can do so with the help of vertical and horizontal boxes from palette window. Simply, we can click any item on the palette window and then click on the new window (the user’s window or canvas).
5. With the help of properties window we can change the look, feel of buttons. Also, we can connect the events on them to some functions. For example, click on a button in our window and then go to properties window and select Signals option (see Figure 26. 3). Then, we can select which events to be added to this button.
6. Once we are satisfied with our main widget’s layout we can select Build option to generate the
code. If we now look in our Project directory (remember we saved it in /home/[your
username]/Projects/hello) we will see all the files Glade has created. The actual source code resides in
the "src" subdirectory. Some files such as README, ChangeLog and such you'll probably modify
yourself when you actually develop an application. For now though we can let them be.

15
7. Build the Makefiles by executing ./autogen.sh from this directory in your favorite terminal. A
bunch of messages will scroll by as it checks your particular environment and creates appropriate
Makefiles.
8. Now go to src directory and edit callbacks.c according to our requirement. That is, we can write the
code in the callback functions whose skeletons are generated by Glade.
For example if we want some message to be displayed when button2 is clicked, we can add a line
g_printf(“Hello\n”)to on_button2_clicked() function.
void on_button2_clicked (GtkButton *button, gpointer user_data)
{
g_printf(“Hello\n”);
}
9. We can actually build our application by simply executing make.
10. The final binary will be available in src directory.
AWK SCRIPT
The Awk text-processing language is useful for such tasks as:
Tallying information from text files and creating reports from the results.
Adding additional functions to text editors like "vi".
Translating files from one format to another.
Creating small databases.
Performing mathematical operations on files of numeric data.
Awk has two faces: it is a utility for performing simple text-processing tasks, and it is a programming
language for performing complex text-processing tasks. The two faces are really the same, however.
Awk uses the same mechanisms for handling any text-processing task, but these mechanisms are
flexible enough to allow useful Awk programs to be entered on the command line, or to implement
complicated programs containing dozens of lines of Awk statements.
Awk statements comprise a programming language. In fact, Awk is useful for simple, quick-and-dirty
computational programming. Anybody who can write a BASIC program can use Awk, although
Awk's syntax is different from that of BASIC. Anybody who can write a C program can use Awk
with little difficulty, and those who would like to learn C may find Awk a useful stepping stone, with
the caution that Awk and C have significant differences beyond their many similarities. There are,
however, things that Awk is not. It is not really well suited for extremely large, complicated tasks. It
is also an "interpreted" language -- that is, an Awk program cannot run on its own, it must be executed
by the Awk utility itself. That means that it is relatively slow, though it is efficient as interpretive
16
languages go, and that the program can only be used on systems that have Awk. There are translators
available that can convert Awk programs into C code for compilation as stand-alone programs, but
such translators have to be purchased separately.
One last item before proceeding: What does the name "Awk" mean? Awk actually stands for the
names of its authors: "Aho, Weinberger, & Kernighan". Kernighan later noted: "Naming a language
after its authors ... shows a certain poverty of imagination." The name is reminiscent of that of an
oceanic bird known as an "auk", and so the picture of an auk often shows up on the cover of books on
Awk.
6. What is awk invocation and explain awk invocation with its operation
* Awk is invoked as follows:
awk [ -F<ch> ] {pgm} | { -f <pgm_file> } [ <vars> ] [ - | <data_file> ]
-- where:
ch: Field-separator character.
pgm: Awk command-line program.
pgm file: File containing an Awk program.
vars: Awk variable initializations.
data file: Input data file.
An Awk program has the general form:
BEGIN {<initializations>}
<search pattern 1> {<program actions>}
<search pattern 2> {<program actions>}
...
END {<final actions>}
If the Awk program is written on the command line, it should be enclosed in single quotes ('{pgm}')
instead of double quotes ("{pgm}") to prevent the shell from interpreting characters within the
program as special shell characters. Please remember that the PC COMMAND.COM shell does not
allow use of single quotes in this way. Naturally, if such interpretation is desired, double quotes can
be used. Those special shell characters in the Awk program that the shell should not interpret should
be preceded with a "\".
* This syntax diagram should be easily understood by anyone who has read the first chapter, with a
few comments.First, the data file is optional. If it isn't specified, Awk takes data from standard input,
with input terminated by a

17
CTRL-D. However, if you are initializing variables on the command line, a matter to be explained
shortly, you must specify standard input by using "-" as a parameter. Multiple data files can also be
specified. Awk will scan each in turn and generate a continuous output from the contents of the
multiple files
Awk regards each line of input data as composed of multiple "fields", which are essentially
words separated by blank spaces. A blank space (or a tab character) is the default "field separator". In
some cases, the input data may be divided by another character, for example, a ":", and it would be
nice to be able to tell Awk to use a different field separator. This is what the "-F" option does. To
invoke Awk and specify a ":" as the field separator, you write:
awk -F: ...
This can also be done by changing one of Awk's built-In variables; again, more on this later.
Third, it is also possible to initialize Awk variables on the command line. This is obviously only
useful if the Awk program is stored in a file or is an element in a shell script, as any initial values
needed in a script written on the command-line can be written as part of the program text.
Consider the program example in the previous chapter to compute the value of a coin collection.
The current prices for silver and gold were embedded in the program, which means that the program
would have to be modified every time the price of either metal changed. It would be much simpler to
specify the prices when the program is invoked.
The main part of the original program was written as:
/gold/ { num_gold++; wt_gold += $2 }
/silver/ { num_silver++; wt_silver += $2 }
END { val_gold = 485 * wt_gold
val_silver = 16 * wt_silver
...
The prices of gold and silver could be specified by variables, say, "pg" and "ps":
END { val_gold = pg * wt_gold
val_silver = ps * wt_silver
...
-- and then the program would be invoked with variable initializations in the command line as
follows:
awk-f summary.awk pg=485 ps=16 coins.txt
-- with the same results as before. Notice that the variable initializations are listed as "pg=485" and
"ps=16", and not "pg = 485" and "ps = 16"; including spaces is not recommended as it might confuse
command-line parsing.
18
7. What is Serach patterns? Write an example for search patterns.
The simplest kind search pattern that can be specified is a simple string, enclosed in forward-
slashes ("/"). For example:
/The/
-- searches for any line that contains the string "The". This will not match "the" as Awk is "case-
sensitive", but it will match words like "There" or "Them". This is the crudest sort of search pattern.
Awk defines special characters or "metacharacters" that can be used to
make the search more specific. For example, preceding the string with a "^" tells Awk to search for
the string at the beginning of the input line. For example:
/^The/
-- matches any line that begins with the string "The". Similarly, following the string with a "$"
matches any line that ends with "The", for example:
/The$/
But what if you actually want to search the text for a character like "^" or "$"? Simple, just precede
the character with a backslash ("\"). For example:
/\$/
-- matches any line with a "$" in it.
* Such a pattern-matching string is known as a "regular expression". There are many different
characters that can be used to specify regular expressions. For example, it is possible to specify a set
of alternative characters using square brackets ("[]"):
/[Tt]he/
This example matches the strings "The" and "the". A range of characters can also be specified. For
example:
/[a-z]/
-- matches any character from "a" to "z", and:
/[a-zA-Z0-9]/
-- matches any letter or number. A range of characters can also be excluded, by preceding the range
with a "^". For example:
/^[^a-zA-Z0-9]/
-- matches any line that doesn’t start with a letter or digit. A "|" allows regular expressions to be
logically ORed. For example:

19
/(^Germany)|(^Netherlands)/
-- matches lines that start with the word "Germany" or the word "Netherlands". Notice how
parentheses are used to group the two expressions. * The "." special characters allows "wildcard"
matching, meaning it can be used to specify any arbitrary character. For example:
/wh./
-- matches "who", "why", and any other string that has the characters "wh" and any following
character. This use of the "." wildcard should be familiar to UN*X shell users, but awk interprets the
"*" wildcard in a subtly different way. In the UN*X shell, the "*" substitutes for a string of arbitrary
characters of any length, including zero, while in awk the "*" simply matches zero or more repetitions
of the previous character or expression. For example, "a*" would match "a", "aa", "aaa", and so on.
That means that ".*" will match any string of characters.
There are other characters that allow matches against repeated characters expressions. A "?" matches
zero or one occurrences of the previous regular expression, while a "+" matches one or more
occurrences of the previous regular expression. For example:
/^[+-]?[0-9]+$/
-- matches any line that consists only of a (possibly signed) integer number. This is a somewhat
confusing example and it is helpful to break it down by parts:
/^ Find string at beginning of line.
/^[-+]? Specify possible "-" or "+" sign for number.
/^[-+]?[0-9]+ Specify one or more digits "0" through "9".
/^[-+]?[0-9]+$/ Specify that the line ends with the number.
NUMBERS & STRINGS
* Numbers can be expressed in Awk as either decimal integers or floating-point quantities. For
example:
789 3.141592654 +67 +4.6E3 -34 -2.1e-2
There is no provision for specifying values in other bases, such as hex or octal, though, as will be
shown later, it is possible to output them from Awk in hex or octal format. Strings are expressed in
double-quotes. For example:
"All work and no play makes Jack a homicidal maniac!"
"1987A1"
"do re mi fa so la ti do"
Awk also supports null strings, which are represented by empty quotes: "". There are various "special"
characters that can be embedding into strings:
\n Newline (line feed).
\t Horizontal tab.
\b Backspace.
20
\r Carriage return.
\f Form feed.
A double-quote (") can be embedded in a string by preceding it with a "\", and a "\" can be embedded
in a string by typing it in twice: "\\". If a backslash is used with other characters (say, "\m"), it is
simply treated as a normal character.
It is possible in the C programming language to specify a character by its three-digit octal code,
preceded by a "\", but this is not possible in Awk.
VARIABLES
* As already mentioned, Awk supports both user-defined variables and its own predefined variables.
Any string beginning with a letter, defined as consisting of alphanumeric characters or underscores
("_"), and which does not conflict with Awk's reserved words can be used as a variable name. Beware
that using a reserved word is a common bug when building Awk programs, so if your program blows
up on a seemingly inoffensive word, try
changing it to something more unusual and see if the problem goes away. There is no need to declare
variables, and in fact you can't, though it is a good idea in an elaborate Awk program to initialize
variables in the BEGIN clause to make them obvious and to make sure they have proper initial values.
Relying on default values is a bad habit in any programming language. The fact that variables aren't
declared in awk can also lead to some odd bugs, for example by misspelling the name of a variable
and not realizing that this has created a second, different variable that is out of the loop in the rest of
the program.
Also as mentioned, awk is weakly typed. Variables have no data type, and can be used to store either
string or numeric values; string operations on variables will give a string result and numeric
operations will give a numeric result, with a text string that doesn't look like a number simply being
regarded as 0 in a numeric operation. Awk will follow its own rules in this issue and so it is important
for the programmer to remember it and avoid possible traps. For example:
var = 1776
-- is the same as:
var = "1776"
-- both loading the value 1776 into the variable "var". This can be treated as a numeric value in
calculations in either case, and string operations can be performed on it as well. If "var" is loaded up
with a text string of the form:
var = "somestring"
-- string operations can be performed on it, but it will evaluate to a 0 in numeric operations. If this
example is changed as follows:
var = somestring

21
-- this will always return 0 for both string and numeric operations -- because awk thinks "somestring"
without quotes is the name of an uninitialized variable. Incidentally, an uninitialized variable can be
tested for a value of 0:
var == 0
This tests "true" if "var" hasn't been initialized; but, oddly, if you try to "print" an uninitialized
variable, you get nothing. For example:
print var
-- simply prints a blank line, while:
var = 0; print var
-- prints a "0". * Unlike many other languages, an Awk string variable is not represented as one-
dimensional array of characters. However, it is possible to use the "substr()" function, more on this
later, to access characters or substrings of a string.
* Awk's built-in variables include the field variables -- $1, $2, $3, and so on ($0 is the entire line) --
that give the text or values in the individual text fields in a line, and a number of variables with
specific functions:
NR: Keeps a current count of the number of input lines.
NF: Keeps a count of the number of words in an input line. The last field in the input line can be
designated by $NF.
FILENAME: Contains the name of the current input file.
FS: Contains the "field separator" character used to divide fields on the input line. The default is
"white space", meaning space and tab characters. FS can be reassigned to another character to change
the field separator.
RS: Stores the current "record separator" character. Since, by default, an input line is the input record,
the default record separator character is a "newline".
OFS: Stores the "output field separator", which separates the fields when Awk prints them. The
default is a "space" character.
ORS: Stores the "output record separator", which separates the output lines when Awk prints them.
The default is a "newline" character.
OFMT: Stores the format for numeric output. The default format is "%.6g", which will be explained
when "printf" is discussed.
OPERATIONS
* Awk's relational operations ("<" "<=" "==" "!=" ">=" ">") have already been discussed. Note that,
unlike some languages, relational expressions in Awk do not return a value. They only evaluate to a
true condition or a false condition. That means that a Awk program like:
BEGIN {a=1; print (a==1)}

22
-- doesn't print anything at all, and trying to use relational expressions as part of an arithmetic
expression causes an error.
Awk uses the standard four arithmetic functions:
+ addition
- subtraction
* multiplication
/ division
All computations are performed in floating-point. There is also a modulo-division ("remainder")
operator:
% mod
For example, "13 % 8" yields 5, "20 % 6" yields 2, "3 % 5" yields 3, and so on.
There are increment and decrement operators:
++ Increment.
-- Decrement.
8.What is Qt programming? With an example explain Qt programming.
Qt is a toolkit used to create X Window programs.
With Qt you can recompile your code for different desktops (X Window, MS Windows).
Qt = (C++) + Meta Object System
Meta Object System = Signals and Slots + Dynamic Property System
The Qt Story
The Qt toolkit is a multi-platform C++ GUI toolkit (class library) that has been developed over a 6
year period. The company Troll Tech AS was founded in 1994 to secure future development of Qt.
On May 20, 1995, Qt was made available under commercial and non-commercial GNU licenses. The
non-commercial license grants any developer the right to use Qt to develop software for the free
software community. It was ten months before the first commercial license was purchased. The
European Space Agency purchased the second. Around 1997, Qt was chosen as the code basis for the
KDE linux desktop environment. Qt 3.0 was released in 2001 with Windows, Unix, Linux, Embedded
Linux, and Mac OS X libraries.
Features of Qt
Seamless object communication using Signals and Slots
Powerful events and event filters
Contextual string translation for internationalization
Sophisticated event driven timers for event driven GUI
QObject is the base class in Qt. QWidget, which inherits from QObject is
the base class for all visible classes in Qt. QPushButton is an example of a class

23
that inherits from QWidget. The QWidget simply represents an empty window area.
.Features of Signals and Slots Signals and slots are used for communication between objects
• We use signals and slots as alternative to callback technique.
• A signal is emitted when a particular event occurs
• A slot is a function that is called in response to a particular signal
• The signals and slots mechanism is type safe
• All classes that inherit from QObject emit signals when they change their state
Signals
Signals are emitted by an object when its internal state has changed • For eg. A list box emits
both ighlighted() and activated() signals . When a signal is emitted, the slots connected to it are
executed immediately, just like a normal function call. If several slots are connected to one signal, the
slots will be executed one after the other, in an arbitrary order, when the signal is emitted.
class MyWindow : public QWidget{
Q_OBJECT // Enable signals and slots
public:
MyWindow();
signals:
void created(); // Signal definition
};
// Constructor for MyWindow
MyWindow::MyWindow() : QWidget() {
emit created(); //Emit the signal created()
}
Slots
A slot is called when a signal connected to it is emitted. Slots are normal member functions but have
access rights. A slot's access right determines who can connect to it
• public slots - anyone can connect signals to
• protected slots - this class and its subclasses may connect signals to
• private slots - only the class itself may connect signals to
class MyWindow : public QWidget {
Q_OBJECT // Enable signals and slots
public:
MyWindow();
public slots: // This slots section is public
24
void mySlot(); // A public slot
};
void MyWindow::mySlot() { // Implementation for the slot
cout << "slotPublic" << endl;
}
Connecting a Slot to a Signal
The command connect connects a slot to a signal. You can connect several slots to one signal.
connect(startobject, SIGNAL(signal()),
targetobject, SLOT(slot()) )
Start object contains a pointer to the object that the signal comes from. Signal specifies what signal
emitted by the start object to handle target object is the object which responds to a signal
slot is the slot which responds to the signal.
class MyWindow : public QWidget {
Q_OBJECT // Enable slots and signals
public:
MyWindow();
private slots:
void slotButton();
25
private:
QPushButton *button1;
};
MyWindow::MyWindow() : QWidget() {
// Create button1 and connect
// button1->clicked() to this->slotButton1()
button1 = new QPushButton("Button1", this);
button1->setGeometry(10,10,100,40);
button1->show();
connect(button1, SIGNAL(clicked()), this,
SLOT(slotButton()));
// This slot is called when button1 is clicked.
void MyWindow::slotButton() {
cout << "Button1 was clicked" << endl;
}
}
10.Write a Simpe c++ program using Qt to display/* HelloWorld.cpp */
#include <qapplication.h>
#include <qlabel.h>
int main(int argc, char **argv) {
QApplication myapp(argc, argv);
Qlabel *mylabel = new Qlabel(“Hello World”, 0);
mylabel->resize(100, 200);
myapp.setMainWidget(mylabel);
mylabel->show();
return myapp.exec();
}
#include <qapplication.h>
#include <qlabel.h>
Always #include any Q types referenced in code.
QApplication myapp(argc, argv);
Creates an object to manage application-wide resources. Passes argc and argv because Qt supports a
few command line arguments of its own.
26
Qlabel *mylabel = new Qlabel(“Hello World”, 0);
Creates a QLabel widget on the heap. A widgets is any visual element in a user interface. Widgets
can contain other widgets. For example a window may contain a QMenuBar,0 QToolBar,
QStatusBar, and other widgets. The 0 parameters says that that the label is a stand-alone window, is
not inside another window.
mylabel->resize(100, 200);
Invokes the resize() member function.
myapp.setMainWidget(mylabel);
Make the label the main application widget. This means that closing the label windows closes the
application.
mylabel->show();
Invoke the show() member function to make the label visible. All widgets are created invisible so that
their properties can be manipulated without flickering. For example, you would show a widget and
then change its size and color. You would change the size and color first, and then show the widget.
return myapp.exec();
Passes control of the application to Qt. At this point the application goes into “event-driven” mode.
It will just sit there until the user does something to create an even. This is the same concept as Word.
Word starts and waits for the user to do something.
Events
Signals: emit events declare as signals, otherwise normal member functions You don't implement
them. Rather, you send them with the (new) keyword emit E.g. emit(sliderChanged(5))
Slots: receive and handle events Normal member functions declared as slots Connect: must connect
signals to slots
Object::connect( mymenu, SIGNAL(activated(int)), myobject, SLOT(slotDoMenuFunction(int)) );
moc: meta object compiler (preprocessor) converts these new keywords to real C++
Widgets
1. Properties
width, height, backgroundColor, font, mouseTracking, backgroundPixmap, etc.
2. Slots
repaint, show, hide, move, setGeometry, setMainWidget, etc.
3. Signals:
mouseMoveEvent, keyPressEvent, resizeEvent, paintEvent, enterEvent, leaveEvent, etc.

27
shorter sequence is the smaller (lesser) one. Lexicographical ordering for strings uses the ASCII
ordering for individual characters. Some examples of comparisons between sequences with the same
types:
For example the following gives true.
(1, 2, 3) < (1, 2, 4)
11. Write in detail about Programming GUI applications
The first thing I want to say is that you won't learn anything new about programming here.
Programming a GUI is exactly like any other kind of programming, you can use sequences, loops,
branches and modules just as before. What is different is that in programming a GUI you usually use a
Toolkit and must follow the pattern of program design laid down by the toolkit vendor. Each new
toolkit will have its own API and set of design rules and you as a programmer need to learn these.
This is why most programmers try to standardize on only a few toolkits which are available across
multiple languages - learning a new toolkit tends to be much harder than learning a new programming
language!
Most windows programming languages come with a toolkit included (usually a thin veneer over the
very primitive toolkit built into the windowing system itself). Visual Basic, Delphi(Kylix) and Visual
C++/.NET are examples of this.
Java is different in that the language includes its own graphics toolkit (called Swing) which runs on
any platform that Java runs on - which is almost any platform!
There are other toolkits that you can get separately which can be used on any OS (Unix, Mac,
Windows...). These generally have adapters to allow them to be used from many different languages.
Some of these are commercial but many are freeware. Examples are: GT/K, Qt, Tk
They all have web sites. For some examples try:
wxPython , a Python version of the wxWidgets toolkit which is actually written in C++
PyQt, the Qt toolkit which has "bindings" to most languages.
pyGTK, the Gimp Toolkit, or GTK+ which is a opensource project used heavily in the Linux
community.
Qt and GT/k are what most Linux applications are written in and are both free for non commercial use
(i.e. where you don't sell your programs for profit). Qt can provide a commercial license too if you
want to use it for commercial purposes and GTk is licensed under the Gnu GPL which has its own
special terms.

28
The standard Python graphics kit (comes with the language) is Tkinter which is based on Tk, a fairly
old multi-OS toolkit. This is the toolkit we will look at most closely, versions of it are available for
Tcl, Haskell and Perl as well as Python.
The principles in Tk are slightly different to other toolkits so I will conclude with a very brief look at
another popular GUI toolkit for Python (and C/C++) which is more conventional in its approach. But
first some general principles:
As we have already stated several times GUI applications are nearly always event driven by nature. If
you don't remember what that means go back and look at the event driven programming topic.
I will assume that you are already familiar with GUIs as a user and will focus on how GUI programs
work from a programmers perspective. I will not be going into details of how to write large complex
GUIs with multiple windows, MDI interfaces etc. I will stick to the basics of creating a single window
application with some labels, buttons, text boxes and message boxes.
First things first, we need to check our vocabulary. GUI programming has its own set of
programming terms. The most common terms are described in the table below:
Term Description
Window An area of the screen controlled by an application. Windows are usually rectangular but some
GUI environments permit other shapes. Windows can contain other windows and frequently
every single GUI control is treated as a window in its own right.
Control A control is a GUI object used for controlling the application. Controls have properties and
usually generate events. Normally controls correspond to application level objects and the
events are coupled to methods of the corresponding object such that when an event occurs the
object executes one of its methods. The GUI environment usually provides a mechanism for
binding events to methods.
Widget A control, sometimes restricted to visible controls. Some controls (such as timers) can be
associated with a given window but are not visible. Widgets are that subset of controls which
are visible and can be manipulated by the user or programmer. The widgets that we shall
cover are:
Frame
Label
Button
Text Entry

29
Message boxes
The ones we won't discuss in this topic but are used elsewhere in the tutor are:
Text box
Radio Button
Finally, the ones not discussed at all are:
Canvas - for drawing
Check button - for multiple selections
Image - for displaying BMP, GIF, JPEG and PNG images
Listbox - for lists!
Menu/MenuButton - for building menus
Scale/Scrollbar - indicating position
Frame A type of widget used to group other widgets together. Often a Frame is used to represent the
complete window and further frames are embedded within it.
Layout Controls are laid out within a Frame according to a particular form of Layout. The Layout
may be specified in a number of ways, either using on-screen coordinates specified in pixels,
using relative position to other components (left, top etc) or using a grid or table arrangement.
A coordinate system is easy to understand but difficult to manage when a window is resized
etc. Beginners are advised to use non-resizable windows if working with coordinate based
layouts.
Child GUI applications tend to consist of a hierarchy of widgets/controls. The top level Frame
comprising the application window will contain sub frames which in turn contain still more
frames or controls. These controls can be visualized as a tree structure with each control
having a single parent and a number of children. In fact it is normal for this structure to be
stored explicitly by the widgets so that the programmer, or more commonly the GUI
environment itself, can often perform some common action to a control and all its children.
The Containment tree
One very important principle to grasp in GUI programming is the idea of a containment hierarchy.
That is the widgets are contained in a tree like structure with a top level widget controlling the entire
interface. It has various child widgets which in turn may have children of their own. Events arrive at a
child widget and if it is unable to handle it it will pass the event to its parent and so on up to the top
level. Similarly if a command is given to draw a widget it will send the command on down to its

30
children, thus a draw command to the top level widget will redraw the entire application whereas one
sent to a button will likely only redraw the button itself.
This concept of events percolating up the tree and commands being pushed down is
fundamental to understanding how GUIs operate at the programmer level, and why you
always need to specify a widgets parent when creating it, so that it knows where it sits in the
containment tree. We can illustrate a containment tree for the simple application we will
create in this topic like this:
This illustrates the top level widget containing a single Frame which represents the outermost window
border. This in turn contains two more Frames, the first of which contains a Text Entry widget and the
second contains the two Buttons used to control the application. We will refer back to this diagram
later in the topic when we come to build the GUI.
A Tour of Some Common Widgets
In this section we will use the Python interactive prompt to create some simple windows and widgets.
Note that because IDLE is itself a Tkinter application you cannot reliably run Tkinter applications
within IDLE. You can of course create the files using IDLE as an editor but you must run them from a
OS command prompt. Pythonwin users can run Tkinter applications since Pythonwin is built using
windows own GUI toolkit, MFC. However even within Pythonwin there are certain unexpected
behaviors with Tkinter application. As a result I will use the raw Python prompt from the Operating
System.

31
>>> from Tkinter import *
This is the first requirement of any Tkinter program - import the names of the widgets. You could of
course just import the module but it quickly gets tiring typing Tkinter in front of every component
name.
>>> top = Tk()
This creates the top level widget in our widget hierarchy. All other widgets will be created as children
of this. Notice that a new blank window has appeared complete with an empty title bar save for a Tk
logo as icon and the usual set of control buttons (iconify, maximize etc). We will now add
components to this window as we build an application.
>>> dir(top)
['_tclCommands', 'children', 'master', 'tk']
The dir function shows us what names are known to the argument. You can use it on modules but in
this case we are looking at the internals of the top object, an instance of the Tk class. These are the
attributes of top, note, in particular, the children and master attributes which are the links to the
widget containment tree. Note also the attribute _tclCommands, this is because, as you might recall,
Tkinter is built on a Tcl toolkit called Tk.
>>> F = Frame(top)
Create a Frame widget which will in turn contain the child controls/widgets that we use. Frame
specifies top as its first (and in this case only) parameter thus signifying that F will be a child widget
of top.
>>> F.pack()
Notice that the Tk window has now shrunk to the size of the added Frame widget - which is currently
empty so the window is now very small! The pack() method invokes a Layout Manager known as the
packer which is very easy to use for simple layouts but becomes a little clumsy as the layouts get
more complex. We will stick with it for now because it is easy to use. Note that widgets will not be
visible in our application until we pack them (or use another Layout manager method).
>>> lHello = Label(F, text="Hello world")
Here we create a new object, lHello, an instance of the Label class, with a parent widget F and a text
attribute of "Hello world". Notice that because Tkinter object constructors tend to have many
parameters (each with default values) it is usual to use the named parameter technique of passing
arguments to Tkinter objects. Also notice that the object is not yet visible because we haven't packed
it yet.

32
One final point to note is the use of a naming convention: I put a lowercasel, for Label, in front of a
name, Hello, which reminds me of its purpose. Like most naming conventions this is a matter of
personal choice, but I find it helps.
>>> lHello.pack()
Now we can see it. Hopefully yours looks quite a lot like this:
We can specify other properties of the Label such as the font and color using parameters to the object
constructor too. We can also access the corresponding properties using the configure method of
Tkinter widgets, like so:
>>> lHello.configure(text="Goodbye")
The message changed. That was easy, wasn't it? configure is an especially good technique if you need
to change multiple properties at once because they can all be passed as arguments. However if you
only want to change a single property at a time, as we did above you can treat the object like a
dictionary, thus:
>>> lHello['text'] = "Hello again"
which is shorter and arguably easier to understand.
Labels are pretty boring widgets, they can only display read-only text, albeit in various colors, fonts
and sizes. (In fact they can be used to display simple graphics too but we won't bother with that here).
Before we look at another object type there is one more thing to do and that's to set the title of the
window. We do that by using a method of the top level widget top:
>>> F.master.title("Hello")
We could have used top directly but, as we'll see later, access through the Frame's master property is a
useful technique.
>>> bQuit = Button(F, text="Quit", command=F.quit)
Here we create a new widget a button. The button has a label "Quit" and is associated with the
command F.quit. Note that we pass the method name, we do not call the method by adding
parentheses after it. This means we must pass a function object in Python terms, it can be a built-in
method provided by Tkinter, as here, or any other function that we define. The function or method
33
must take no arguments. The quit method, like the pack method, is defined in a base class and is
inherited by all Tkinter widgets, but is usually called at the top window level of the application.
>>>bQuit.pack()
Once again the pack method makes the button visible.
>>>top.mainloop()
We start the Tkinter event loop. Notice that the Python >>> prompt has now disappeared. That tells us
that Tkinter now has control. If you press the Quit button the prompt will return, proving that our
command option worked. Don't expect the window to close, the python interpreter is still running and
we only quit the mainloop function, the various widgets will be destroyed when Python exits - which
in real programs is usually immediately after the mainloop terminates!
Note that if running this from Pythonwin or IDLE you may get a slightly different result, if so try
typing the commands so far into a Python script and running them from an OS command prompt.
In fact it's probably a good time to try that anyhow, after all it's how most Tkinter programs will be
run in practice. Use the principle commands from those we've discussed so far as shown:
from Tkinter import *
# set up the window itself
top = Tk()
F = Frame(top)
F.pack()
# add the widgets
lHello = Label(F, text="Hello")
lHello.pack()
bQuit = Button(F, text="Quit", command=F.quit)
bQuit.pack()
# set the loop running
top.mainloop()
The call to the top.mainloop method starts the Tkinter event loop generating events. In this case the
only event that we catch will be the button press event which is connected to the F.quit method. F.quit
in turn will terminate the application and this time the window will also close because Python has also
exited. Try it, it should look like this:

34
Exploring Layout
Note: from now on I'll provide examples as Python script files rather than as commands at the >>>
prompt.
In this section I want to look at how Tkinter positions widgets within a window. We already have seen
Frame, Label and Button widgets and those are all we need for this section. In the previous example
we used the pack method of the widget to locate it within its parent widget. Technically what we are
doing is invoking Tk's packer Layout Manager. The Layout Manager's job is to determine the best
layout for the widgets based on hints that the programmer provides, plus constraints such as the size
of the window as controlled by the user. Some Layout managers use exact locations within the
window, specified in pixels normally, and this is very common in Microsoft Windows environments
such as Visual Basic. Tkinter includes a Placer Layout Manager which can do this too via a place
method. I won't look at that in this tutor because usually one of the other, more intelligent, managers
is a better choice, since they take the need to worry about what happens when a window is resized
away from us as programmers.
The simplest Layout Manager in Tkinter is the packer which we've been using. The packer, by
default, just stacks widgets one on top of the other. That is very rarely what we want for normal
widgets, but if we build our applications from Frames then stacking Frames on top of each other is
quite a reasonable approach. We can then put our other widgets into the Frames using either the
packer or other Layout Manager within each Frame as appropriate. You can see an example of this in
action in the Case Study topic.
Even the simple packer provides a multitude of options, however. For example we can arrange our
widgets horizontally instead of vertically by providing a side argument, like so:
lHello.pack(side="left")
bQuit.pack(side="left")
That will force the widgets to go to the left thus the first widget (the label) will appear at the extreme
left hand side, followed by the next widget (the Button). If you modify the lines in the example above
it will look like this:

35
And if you change the "left" to "right" then the Label appears on the extreme right and the Button to
the left of it, like so:
One thing you notice is that it doesn't look very nice because the widgets are squashed together. The
packer also provides us with some parameters to deal with that. The easiest to use is Padding and is
specified in terms of horizontal padding (padx), and vertical padding(pady). These values are
specified in pixels. Let's try adding some horizontal padding to our example:
lHello.pack(side="left", padx=10)
bQuit.pack(side='left', padx=10)
It should look like this:
If you try resizing the window you'll see that the widgets retain their positions relative to one another
but stay centered in the window. Why is that, if we packed them to the left? The answer is that we
packed them into a Frame but the Frame was packed without a side, so it is positioned top, center - the
packers default. If you want the widgets to stay at the correct side of the window you will need to
pack the Frame to the appropriate side too:
F.pack(side='left')
Also note that the widgets stay centered if you resize the window vertically - again that's the packers
default behavior.
I'll leave you to play with padx and pady for yourself to see the effect of different values and
combinations etc. Between them, side and padx/pady allow quite a lot of flexibility in the positioning
of widgets using the packer. There are several other options, each adding another subtle form of
control, please check the Tkinter reference pages for details.
There are a couple of other layout managers in Tkinter, known as the grid and the placer. To use the
grid manager you use grid() instead of pack() and for the placer you call place() instead of pack().
Each has its own set of options and since I'll only cover the packer in this intro you'll need to look up
the Tkinter tutorial and reference for the details. The main points to note are that the grid arranges
components in a grid (surprise!) within the window - this can often be useful for dialog boxes with

36
lined up text entry boxes, for example. The placer user either fixed coordinates in pixels or relative
coordinates within a window. The latter allow the component to resize along with the window -
always occupying 75% of the vertical space say. This can be useful for intricate window designs but
does require a lot of pre-planning - I strongly recommend a pad of squared paper, a pencil and eraser!
Controlling Appearance using Frames and the Packer
The Frame widget actually has a few useful properties that we can use. After all, it's very well having
a logical frame around components but sometimes we want something we can see too. This is
especially useful for grouped controls like radio buttons or check boxes. The Frame solves this
problem by providing, in common with many other Tk widgets, a relief property. Relief can have any
one of several values: sunken, raised, groove, ridge or flat. Let's use the sunken value on our simple
dialog box. Simply change the Frame creation line to:
F = Frame(top, relief="sunken", border=1)
Note 1:You need to provide a border too. If you don't the Frame will be sunken but with an invisible
border - you don't see any difference!
Note 2: that you don't put the border size in quotes. This is one of the confusing aspects of Tk
programming is knowing when to use quotes around an option and when to leave them out. In general
if it's a numeric or single character value you can leave the quotes off. If it's a mixture of digits and
letters or a string then you need the quotes. Likewise with which letter case to use. Unfortunately
there is no easy solution, you just learn from experience - Python often gives a list of the valid options
in it's error messages!
One other thing to notice is that the Frame doesn't fill the window. We can fix that with another
packer option called, unsurprisingly, fill. When you pack the frame do it thusly:
F.pack(fill="x")
This fills horizontally, if you want the frame to fill the entire window just use fill='y' too. Because this
is quite a common requirement there is a special fill option called BOTH so you could type:
F.pack(fill="both")
The end result of running the script now looks like:

37
Adding more widgets
Let's now look at a text Entry widget. This is the familiar single line of text input box. It shares a lot
of the methods of the more sophisticated Text widget which we won't look at here. Essentially we will
simply use it to capture what the user types and to clear that text on demand.
Going back to our "Hello World" program we'll add a text entry widget inside a Frame of its own and
a button that can clear the text that we type into it. This will demonstrate not only how to create and
use the Entry widget but also how to define our own event handling functions and connect them to
widgets.
from Tkinter import *
# create the event handler first
def evClear():
eHello.delete(0,END)
# create the top level window/frame
top = Tk()
F = Frame(top)
F.pack(expand="true")
# Now the frame with text entry
fEntry = Frame(F, border=1)
eHello = Entry(fEntry)
fEntry.pack(side="top", expand="true")
eHello.pack(side="left", expand="true")
# Finally the frame with the buttons.
# We'll sink this one for emphasis
fButtons = Frame(F, relief="sunken", border=1)
bClear = Button(fButtons, text="Clear Text", command=evClear)
bClear.pack(side="left", padx=5, pady=2)
bQuit = Button(fButtons, text="Quit", command=F.quit)
bQuit.pack(side="left", padx=5, pady=2)
fButtons.pack(side="top", expand="true")
# Now run the eventloop
F.mainloop()

38
Note that once more we pass the name of the event handler (evClear)., without parentheses, as the
command argument to the bClear button. Note also the use of a naming convention, evXXX to link
the event handler with the corresponding widget.
Running the program yields this:
And if you type something in the text entry box then hit the "Clear Text" button it removes it again.
Binding events - from widgets to code
Up till now we have used the command property of buttons to associate Python functions with GUI
events. Sometimes we want more explicit control, for example to catch a particular key combination.
The way to do that is use the bind function to explicitly tie together (or bind) an event and a Python
function.
We'll now define a hot key - let's say CTRL-c - to delete the text in the above example. To do that we
need to bind the CTRL-C key combination to the same event handler as the Clear button.
Unfortunately there's an unexpected snag. When we use the command option the function specified
must take no arguments. When we use the bind function to do the same job the bound function must
take one argument. This we need to create a new function with a single parameter which calls
evClear. Add the following after the evClear definition:
def evHotKey(event):
evClear()
And add the following line following the definition of the Entry widget:
eHello.bind("<Control-c>",evHotKey) # the key definition is case sensitive
Run the program again and you can now clear the text by either hitting the button or typing Ctrl-c. We
could also use bind to capture things like mouse clicks or capturing or losing Focus or even the
windows becoming visible. See the Tkinter documentation for more information on this. The hardest
part is usually figuring out the format of the event description!
A Short Message
You can report short messages to your users using a MessageBox. This is very easy in Tk and is
accomplished using the tkMessageBox module functions as shown:

39
import tkMessageBox
tkMessageBox.showinfo("Window Text", "A short message")
There are also error, warning, Yes/No and OK/Cancel boxes available via different showXXX
functions. They are distinguished by different icons and buttons. The latter two use askXXX instead
of showXXX and return a value to indicate which button the user pressed, like so:
res = tkMessageBox.askokcancel("Which?", "Ready to stop?")
print res
Here are some of the Tkinter message boxes:
Things to remember
GUIs controls are known as widgets
Widgets are assembled in a containment hierarchy
Different GUI toolkits provide different sets of widgets, although there will be a basic set you can
assume will be present
Frames allow you to group related widgets and form the basis of reusable GUI components
Event handling functions or methods are associated with widgets by linking their name with the
widgets command property.
OOP can simplify GUI programming significantly by creating objects that correspond to widget
groups and methods that correspond to events.
12. Write in detail about GUI localization
This page explains how you can translate the GUI pieces of your application and how to test your
localization. GUI stands for Graphical User Interface. In Apple applications, the GUI pieces are called
nib files.Localizing your application consists of translating the application's localizable strings and
editing its GUI content. You need to edit the GUI content in order to make sure that the application's
windows, dialogs, and other GUI pieces have the correct appearance after their text language content
has been translated. An example of a possible problem you may encounter is that a translated string is
longer than its English equivalent causing it to run out of the GUI window that is supposed to contain
it. You can fix such problems by editing the application's GUI with Interface Builder.

40
The GUI pieces of the application reside in files with the extension "nib". AppleGlot extracts all the
nib files of the application when it does its initial pass. These files will reside in the your
_language.lproj bundle, which is in the _NewLoc directory of your AppleGlot environment.You will
edit the nib files with Interface Builder. Interface Builder is installed on your computer using the Mac
OS X Developer CD included with every Mac OS X system package. Documentation for Interface
Builder is packaged with the application and more information is available at the Interface Builder
webpage. The following discussion assumes that you have installed and can run Interface Builder.To
start editing the nib files, go to the your _language.lproj and open each nib file in Interface Builder.
Figure 1 is a shot of a Romanian Safari bundle containing nib files.