using the file manager webct 6. understanding file manager the file manager is the area where all...
Post on 22-Dec-2015
226 views
TRANSCRIPT
Using the File Using the File ManagerManager
Using the File Using the File ManagerManager
WebCT 6WebCT 6

Understanding File Manager
The File Manager is the area where all course files are stored.
Whenever you link a file in your course, it must first be uploaded to the File Manager.

To access the File Manager:
1. On the homepage, select the Build Tab.
2. Scroll down; select Designer Tools/File Manager.
New location!
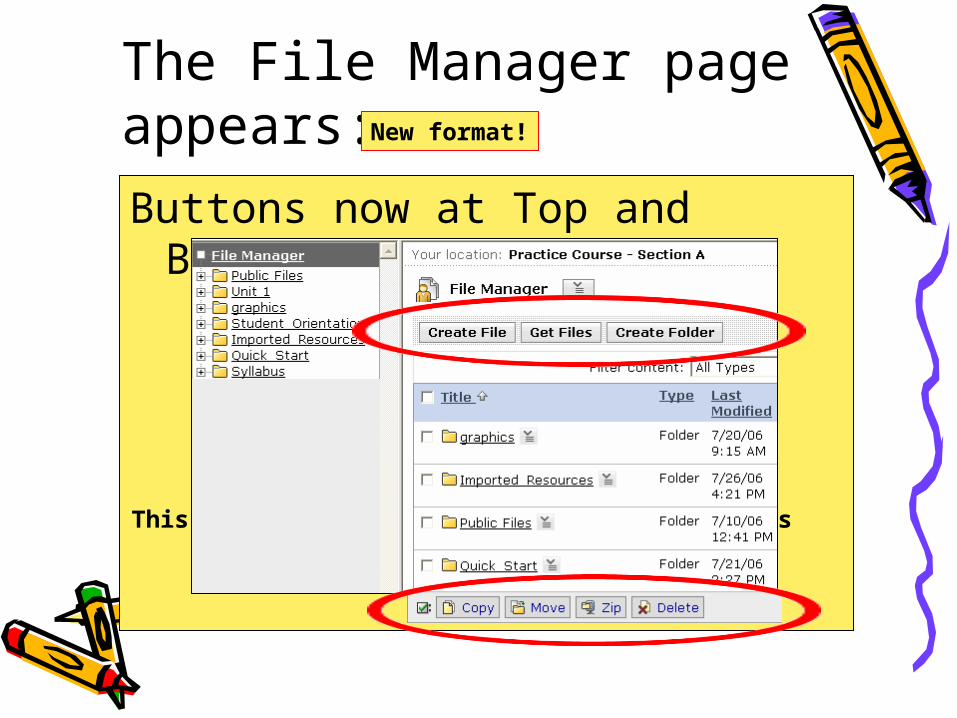
The File Manager page appears:
Buttons now at Top and Bottom
This gives you access to all your course files
New format!

Displaying Folders Displaying Folders and Filesand FilesDisplaying Folders Displaying Folders and Filesand Files

If you want to see a list of all folders and files not assigned to folders:
Click the Dark Gray File Manager link:
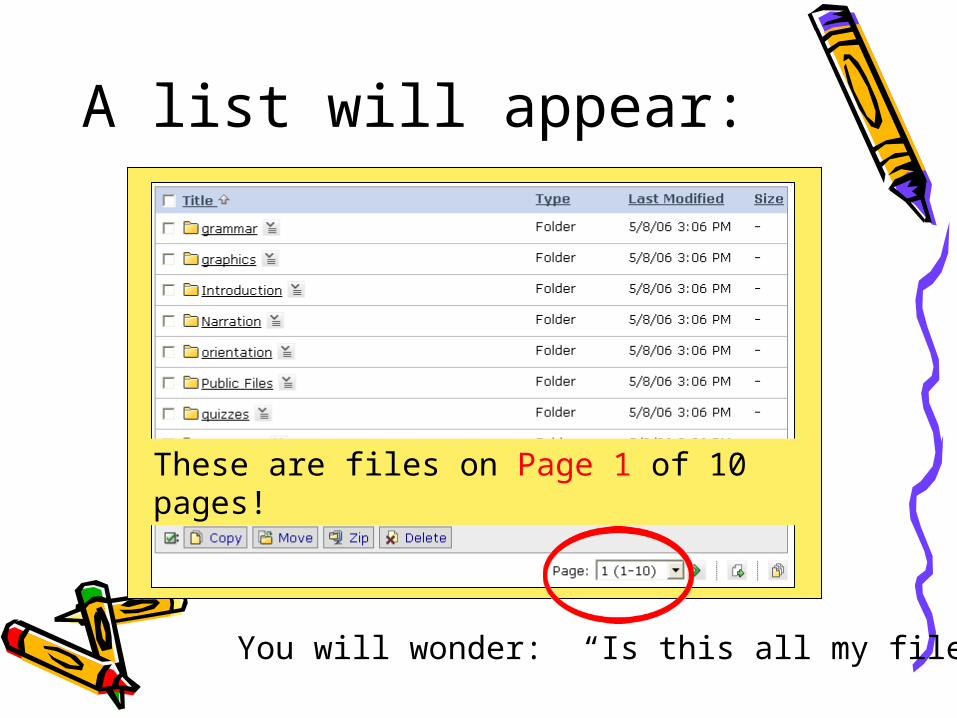
A list will appear:
You will wonder: “Is this all my files?”
These are files on Page 1 of 10 pages!

By default, only 10 items are displayed per page.

To see more files:
Or Click the green “next page” icon.
Select pages from the dropdown menu, and click the green arrow.

To change the display:
Click the Yellow “pages” icon.

You will get a display option dialog box:
Type in desired number, and click OK.

Now you can see more files displayed:

The File Manager has two sections:
A list of folders appears on the left.
Folders + loose files appear on right
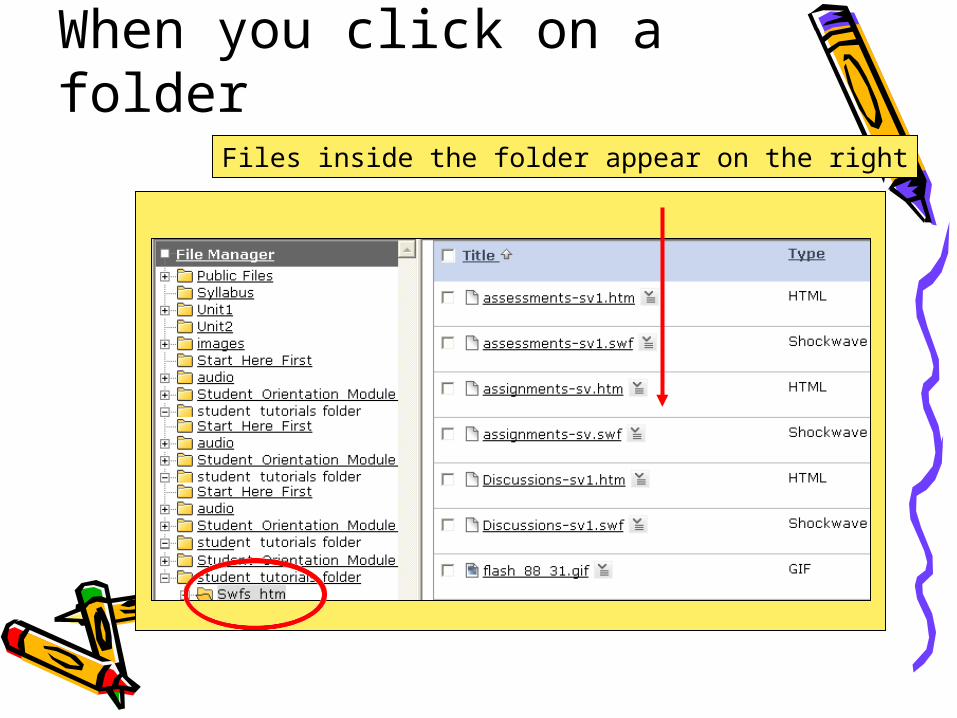
When you click on a folderFiles inside the folder appear on the right

Notice the File Manager has various buttons:
Create File lets you write from scratch. Get File allows you to upload files.Create folder lets you add a new folder

To add a folder:• Click the Create Folder button.• The Create Folder dialog box
appears:
Fill in the Title
Click OK

The new folder appears:
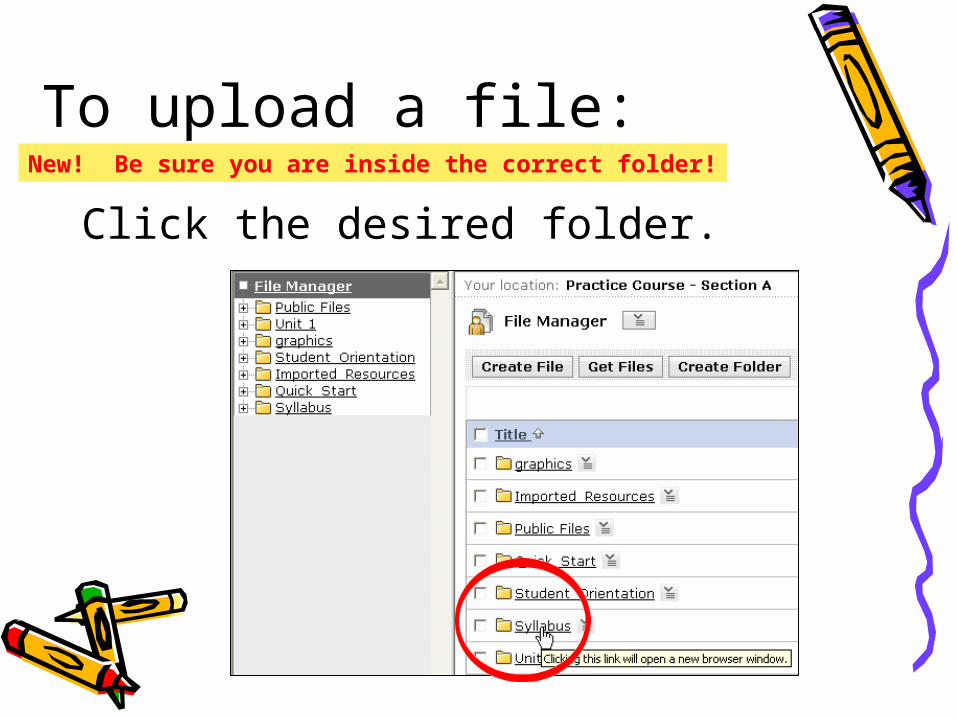
To upload a file:
Click the desired folder.
New! Be sure you are inside the correct folder!

The folder opens:
Click the “Get Files” button

The Content Browser appears:
Click the “My Computer” icon.
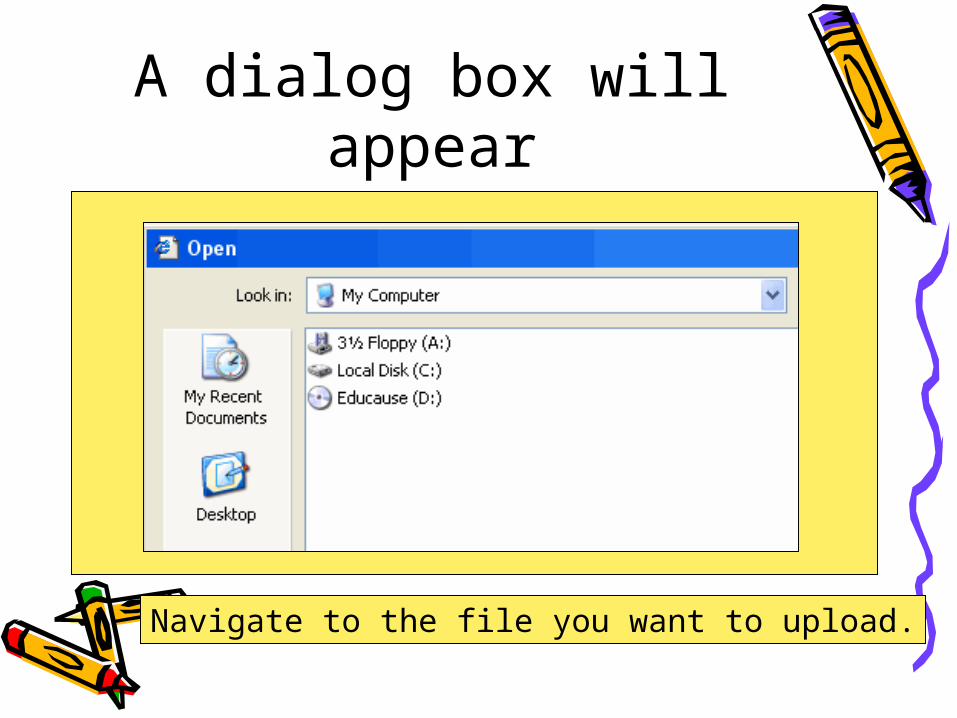
A dialog box will appear
Navigate to the file you want to upload.

In this case, I’ll upload the syllabus file.
Click “Open”

WebCT uploads the file:
A “success” message appears.
The file appears in the file list.
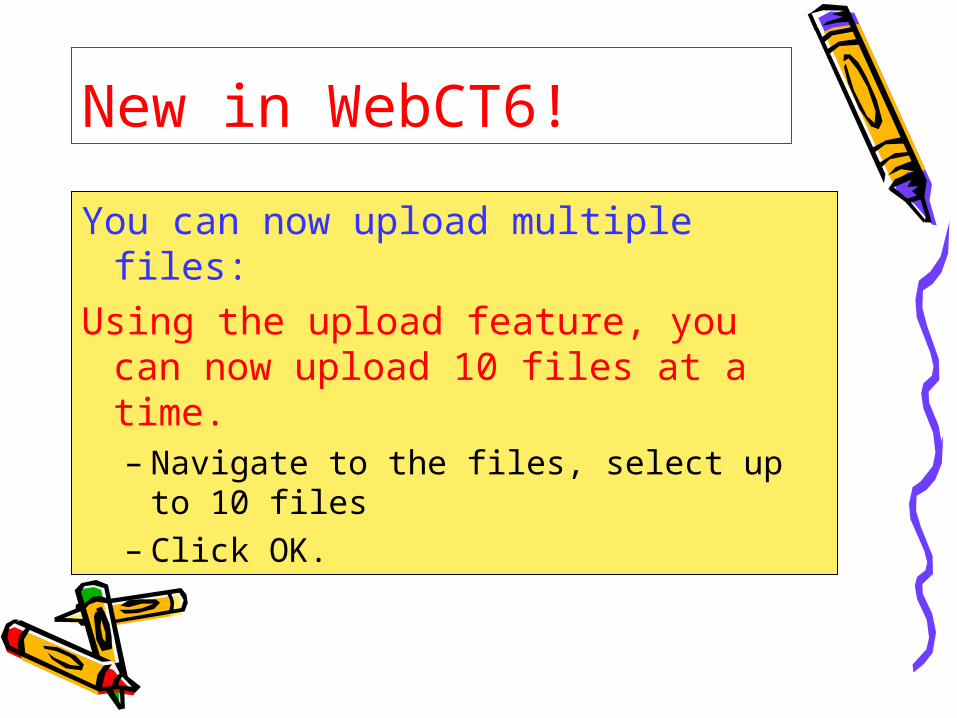
New in WebCT6!
You can now upload multiple files:Using the upload feature, you can
now upload 10 files at a time.– Navigate to the files, select up to
10 files – Click OK.

There’s more!There’s more!There’s more!There’s more!Upload files from Upload files from another courseanother course

If you are teaching multiple courses:
You can import files from another course!

Let’s return to the File Manager
Click the “Get Files” button

Notice the options:
You get a list of all the courses you teach.
When you click the Class Files tab:

Click on a course name:

Folders and files inside that courseappear on the right.
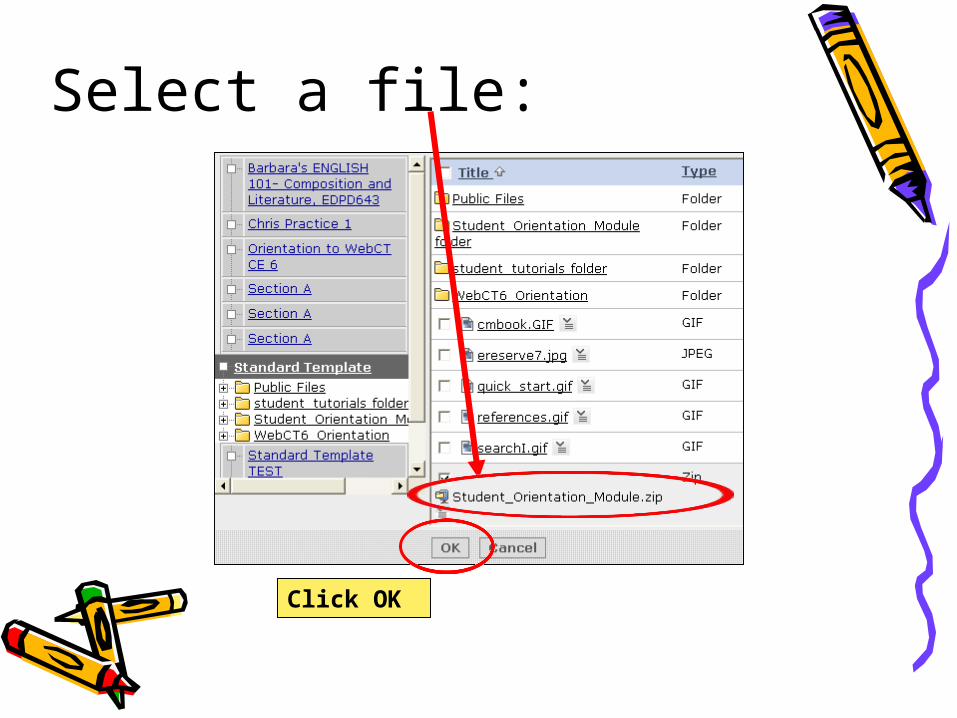
Select a file:
Click OK

The file has been imported:
Success message
The file is added to File Manager.

End of PresentationEnd of PresentationEnd of PresentationEnd of PresentationBe sure to see otherBe sure to see other
File Manager PowerPoints!File Manager PowerPoints!