user guide - sharescope guide.pdfmarket terms and other information not available in the user guide....
TRANSCRIPT
User Guide
Important Update:We are in the process of compiling a comprehensive user guide and expect this to take several months. In the interim we will upload all completed chapters to the following page:http://www.sharescope.co.uk/userguide.php

© Ionic Information Ltd. 1997-2006 All rights reserved. This guide and the program are copyright works of Ionic Information Limited, London, England and are licensed in terms of our standard contract. The data referred to herein is the copyright of the London Stock Exchange, Hemscott PLC, FTSE, AFX News and others. Reproduction in whole or in part without the express written permission of Ionic Information Limited is prohibited. Reverse engineering is also prohibited.ShareScope is the trademark of Ionic Information Limited.
Ionic Information LtdIonic House3 Bath PlaceRivington StreetLondonEC2A 3DRTel: 020 7749 8500Fax: 020 7749 8501
DisclaimerWhilst every effort is made to keep this guide up to date, the number and rapidity of enhancements to ShareScope means that there may sometimes be omissions and inaccuracies. We apologise for any confusion this may cause, and refer you to the ‘What’s New?’ section of the on-screen Help within the program itself, which is updated with every new version.
The calculations and rankings given in this guide, and in ShareScope, should be used for guidance only. Ionic Information does not make any recommendations or endorsements on whether an investment is a suitable or wise investment or investment strategy. Please check all figures independently before taking action.
SupportEvery effort has been made to make ShareScope easy and intuitive to use, but computers and the stock market can be complicated. Use the on screen help for any technical questions. Our free lifetime support is there to help you:
Telephone: 0845 045 0111
Email: [email protected]
Eighth Edition April 2006

C o n t e n t sSection 1 How to use the guide 2Section 2 Installing the program 4Section 3 Tutorial 8Section 4 Graph screen 16Section 5 Details screen 28Section 6 List screen 34Section 7 Portfolios 44Section 8 Portfolio Transactions screen 48Section 9 Alarms 52Section 10 Data Mining 54Section 11 News 64Section 12 Directors’ dealings screen 68Section 13 Email and forums 72Section 14 Importing and exporting data 76Section 15 Dynamic data exchange (DDE) 80Section 16 Options 84Section 17 Toolbars 90Section 18 Updates 94Section 19 Find a Share 98Section 20 Menus and the mouse 100Section 21 InfoCentre 104
Appendix A Help and troubleshooting 108Appendix B Backing up your data 112Appendix C ShareScope files 114Appendix D Hardware specification 116Appendix E Listed shares 118
Index 120Quick reference 123


Section 1How to use the guide 1

Page 2 Section 1 How to use the guide
Section 1
How to use the guideIf you are a less experienced computer user, you may find it helpful to read through Sections 2 and 3 for a step-by-step guide before dipping into the other sections which give more detailed explanations of each screen. The terminology below, and information about other mouse functions given in Section 20, may also be of help.
Ionic Information has a policy of continuous improvement, so not all features can be included in this guide. Please refer to the What’s New? section of the on-screen Help.
The on-screen Help gives further details of features covered in this guide including definitions of charting tools, accounting ratios and explains some stock market terms.
Some terminologyIn this guide, buttons (on-screen and the keys on your keyboard) and menu items to select are written in bold. View : Unit Trusts means you should click on View on the menu bar (at the top of the screen) and then click on Unit Trusts to bring up the list of these.
Click always means a single click on the left mouse button.
Right click always means a single click on the right mouse button. This brings up a context menu or a dialog box relevant to the ShareScope screen you are using and the position of the mouse pointer (Section 20 gives more details on this useful feature).
Double click always means a quick double click with the left mouse button. If you have problems double clicking, you can alter the mouse response speed through your computer’s Start menu : Settings : Control Panel : Mouse.
Click and drag always means click and then hold the left button down while moving the mouse pointer.
Please see Section 20 for further details on mouse functions.
Please note: You cannot destroy any of ShareScope’s data from within the program. At worst, you may lose your own settings, portfolio details and imported data. We recommend you backup your files regularly to help protect against the accidental loss of your portfolios, settings and imported data (see Appendix B).

Page 3Section 1 How to use the guide
Section 2Installing the program 2

Page 4 Section 2 Installing the program
Section 2
Installing the programDuring the installation process you will be prompted to enter your ShareScope account number and password. You will find these on the inside front cover of this guide. This password is for you alone. If you lose your password or someone else starts using it, you will be issued with a new one.
If you have previously installed the ShareScope demonstration version, during the installation process you will be given the option to uninstall the demonstration version and copy the settings from it.
Installing from CD ROMPlace the ShareScope CD into your CD ROM drive. The ShareScope installer should automatically run on your computer. (If the autorun feature is not enabled on your computer, select Run… from the Start menu and type D:\start.exe in the box.) From the menu that appears, select ShareScope Gold, ShareScope Plus or ShareScope Pro (whichever is applicable) and follow the on-screen instructions.
If you are using Windows XP, you must be logged in to your computer using an account with administrator rights.
For XP Home users you can find out which users are ‘Computer administrators’ and which are ‘Limited users’ by clicking on the Start menu : Settings : Control Panel : User Accounts. For XP Pro the User Accounts section of the control panel shows whether each computer user is a member of the group ‘Administrators’.
By default, ShareScope installs to the C:\Program Files\ShareScope folder. ShareScope also keeps users settings (cfg files) and its share database in this folder. However, on Windows XP, only administrators are allowed to create or modify files in this folder. Therefore you should either be a user with Administrator rights (as discussed above) or install ShareScope outside of the C:\Program Files\directory (e.g. C:\ShareScope) if you wish to run ShareScope as a “limited” user.
Running ShareScope Once the installation is complete, you can open ShareScope by double-clicking on the ShareScope double S icon on your desktop. Alternatively, you can access ShareScope by clicking on the Start menu, placing the mouse pointer on Programs, then on ShareScope and then clicking on the ShareScope double S icon. Once you have installed ShareScope, you will normally find it on the C: drive in the Program Files folder.
Uninstalling the programIf you wish to remove ShareScope from your computer, click on the Start menu, select Settings and then click on Control Panel. Choose Add/Remove Programs, select ShareScope or ShareScope Demonstration from the list and click on Add/Remove.

Page 5Section 2 Installing the program
Reinstalling the programIf you need to reinstall ShareScope, or transfer it to an alternative computer, you may wish to copy your share portfolios, any imported data and other customised settings to the freshly installed version. To do this, use the Backup facility (File : Backup – see Appendix B) to copy all settings from your existing version to a floppy disk. Then install ShareScope onto the new computer (follow the installation instructions above) and update the data. Once this is done, you can restore your portfolios and settings by inserting the floppy disk, selecting File : Restore and following the on-screen instructions.
Rather than reinstalling from an old CD (i.e. one that is several months old), it is recommended that you download an up-to-date full version of the program from http://www.sharescope.co.uk/downloads.php. Documentation, such as the latest version of this User Guide may also be downloaded from here. Alternatively, you can contact ShareScope Support for a new disk to avoid the download.

Page 6 Section 2 Installing the program

Page 7Section 2 Installing the program
Section 3Tutorial 3

Page 8 Section 3 Tutorial
Section 3
TutorialThis section gives a simple guide to ShareScope’s major features. Nearly all aspects of the many screens available can be customised to suit your preferences; for more detailed coverage please refer to the relevant sections in this guide or the on-screen Help.
Start by double clicking on the ShareScope icon on your desktop. After ShareScope has opened, you may see the Help window showing ShareScope’s latest enhancements (this can be closed by clicking the x button at the top right corner) and the Tip of the Day box.
Electronic HelpShareScope Help provides further information on all the features available in the program. For example, the Help menu gives a brief definition of all the charting tools available (including Indicators and Market Graphs) as well as definitions of stock market terms and other information not available in the User Guide. We recommend using this before calling ShareScope Support as it contains many of the answers you may be looking for.
To access the Help menu select Help : Help - Contents and Search. You can use the Index tab to type in the name of any feature you want help on (for example, update, moving averages or Gann angles) and the relevant section of the Help will appear.
Tip of the DayThese tips will tell you about some of ShareScope’s features. Click on Next Tip if you want to see another tip. With Show Tips on Start Up selected, the Tip of the Day will appear every time you open ShareScope. Click on this to remove the tick and turn this option off. Now click on Close to remove the Tip of the Day box from the screen and you will be able to see the graph underneath in full.
GraphThis screen shows the price history of the first share in the alphabetical list. You will see that the graph has trend lines (in blue) and a moving average (in green) – these can be seen on the graph on the facing page. If you press the Space bar you will see the next share. Hold down Shift and press Space to move back one share. These keys can be used to move between shares anywhere in ShareScope.

Page 9Section 3 Tutorial
Menu Toolbar Minimize button
Column Headings Sorted Column (Bold)
Selected Share
Status bar

Page 10 Section 3 Tutorial
Find a ShareTo find a share quickly from the List, Graph or Details screens in ShareScope, type the first few letters of the share you are looking for and a selection will appear in a dialog box. Find a Share will only look for shares in the list you are currently using. The name of that list will appear at the top of the dialog box – it is currently ALL. Click on the share you want and it will appear. Alternatively, to accept the highlighted share, press Enter on the keyboard or click on the OK button in the dialog box. Try this several times until you feel comfortable with the process. If there is more than one share type for the chosen company, you will be offered a choice. Select the one you want by clicking on it and then click OK.
If you select the Use EPIC codes tick box at the bottom of the Find a Share window, you can search for shares using the EPIC code rather than the full company name. If selected, you will be offered the choice to use the Fast EPIC search, which allows shares to be selected on entering the code without needing to click the OK button.
To search on any part of a share name, untick both Start from first letter and Use EPIC codes. This is useful if you have problems finding a share in the list. If you begin typing when there is a menu open or a dialog box visible on screen, Find a Share will not function.
Details screenPress Enter to go to the Details screen. This screen provides a graphical representation of key details, including company performance, forecasts, financial stability and market/sector ranking.
This screen is entirely customisable or you can use the 12 Details Settings to create your own templates. For more details, please refer to Section 5 of the User Guide.
Use the Space bar to move to the next share in the list (or Shift and Space to move back to the previous item). You can also simply type the first few letters a share name to access the Find a Share dialog.
List screenPress Enter again and you will see a list of shares from the ALL list – as shown on the preceding page. This is a complete list of ordinary shares, convertibles, preference shares, warrants, investment trusts, unit trusts, indices, gilts, commodities and exchange rates that are available in ShareScope. Some companies have a single capital letter in front of their name. This tells you that the share displayed is not the primary ordinary share for that company (see Appendix E for more information).
Press Page Up or Page Down to move around this list or use the scroll bar at the right of the screen. You may also use the Space bar to move down the list (or Shift and Space to move up). You can also simply type the first few letters of the share you want and a selection will appear. See Find a Share above.
Tables in the List screenYou control what information is displayed here and how it is displayed. For now, press F3. A new information Table for the same shares appears. To return to the first Table, press F2. All list choices such as these can be modified – this is covered in Section 6.

Page 11Section 3 Tutorial
Sorting in the List screenEach column has a heading. Double click on the heading Broker consensus and the shares will be sorted by brokers’ buy/hold/sell recommendations. Double click on the column heading again to reverse the order. Note that there is no forecast for many of the shares. This is either because the company is not researched or because it has made a recent announcement that has yet to be incorporated into ShareScope's data from Hemscott. Double click on the column heading Name to return to the initial alphabetical order. You can sort any column by this method.
News screenPress the ‘\’ key on your keyboard or right click and select Share’s News from the context menu and you will see the news headlines for the company you are currently viewing (if there are no news items for that company, the screen will show No stories). Press the ‘\’ key again and you will return to the previous screen. You can access news items for a single company in this way from any screen.
Now click on the News button on the toolbar (denoted by a newspaper) or press Shift and ‘\’ and you will see the full list of news stories for all companies. As on the ALL list, you can use the Space bar to move down the list (or Shift and Space to move up). You can also sort the list by double clicking on the column headings.
To search for stories containing a particular word (or words), just start typing and the Search box will appear. Click Search and the list will be restricted to those stories matching the search.
To view a story, press Enter, or double click on any news item in this list and a box will appear showing the full news story. Click Close on this box to return to the list (or press Esc).
Directors’ dealingsPress F5 to return to the ALL list. Press the ‘.’ (full stop) key on your keyboard and you will see the Directors’ dealings for the share that is currently selected. For now, press the ‘.’ (full stop) key again and you will return to the previous screen. (This option – Share’s Directors’ Dealings – is also available on each screen’s context menu.) Now click on the Directors' Dealings button on the toolbar (denoted by a shirt and tie) or press Ctrl and F11 and you will see the entire list for all shares. This list is sorted alphabetically by investor name but you can sort it by any column (see above).
In this screen, type the first few letters of the investor's name, and all names containing the letters you type will be brought up in the Find an investor box. As in the other List screens, there are different Table Settings. Because there are over 100,000 entries, sorting and finding may be a little slower than in the share lists.
Right click in the central part of the screen to show the context menu and click on Select display…. Currently, only the Directors’ dealings are showing. Click in the tick boxes to select which dealings and holdings you wish to see. Once you have made your choice, click OK. The number of items the list contains is displayed just above the column headings.

Page 12 Section 3 Tutorial
Data MiningData Mining allows you to search for shares using your own criteria. By creating a filter, you can isolate shares which match your specifications. Click on the Data Mining button on the toolbar (shown as a pick-axe and shovel). On the vertical filter bar on the right of the screen, click on Select Filter, select one of the pre-set example filters and click OK. The criteria for this filter will appear on the right hand side. Both the table and the scatter graph will show all the shares matching the criteria. Click on one of the triangles on the graph and the share this represents will be highlighted in the list above. You can adjust the criteria, add more or create your own filter. Please see Section 10 for full details.
Status bar in the List screenNear the bottom of your screen you can see the status bar. On the right this gives you information about the screen you are viewing. Click on the ALL button and you will see this information change to show which sector you are viewing (currently All sectors), the portfolio you are currently viewing and the list in use (All).
ToolbarNear the top of your screen is the toolbar which allows you to move quickly from screen to screen. These buttons allow you to select ShareScope’s main features. Click on the Graph button (which shows a picture of a graph) and you will go straight to the Graph screen. Please note that if buttons or menu items are shown in grey, it means that that option does not apply to your current screen and is therefore unavailable. You can display multiple toolbars, choose which buttons to include and select the size of your buttons (for full details of options available for the toolbar, please see Section 17).
As you move the mouse pointer over any of the buttons in the toolbar at the top of the screen or over any other menu items, a data tip will appear to explain its function.
Settings in the Graph screenAs in the List screen where there are different Table options, you have 12 Settings options in the Graph screen. Press F3 and the trend lines (coloured blue) and moving average lines (coloured green) disappear. Press F4 for another pre-set Setting. Press F2 to return to the initial Setting. Please see Section 4 for more information.
Creating a portfolioTo create a portfolio, click on the Select Portfolio button and when the dialog box appears, click on << new >>. Type a name, for example Current holdings and select the currency (e.g. Sterling). Click OK. This is now your current portfolio. It will have no entries in it. (The Graph and Details buttons in the toolbar are now grey – no share is selected so there is no available Graph or Details screen.)
You can add a share to your portfolio by right clicking and then selecting Add share to portfolio… from the context menu. View your chosen share by typing its name (see Find a Share above). You can add as many shares as you want in this way. You can also add individual or groups of shares to your current portfolio from the List, Graph or Details screens. Please see Section 7 for more details.

Page 13Section 3 Tutorial
Recording a transactionClick on the Transactions button (denoted by a folder and share certificate) and the Transactions screen will appear. Type the first few letters of the first share that you want and when you find it, click OK. A transaction dialog box will appear. Enter the number of shares, the price and the associated charges (broker fees, stamp duty and levy) in the spaces provided. To move between these spaces, use the Tab key or press Enter. You can leave any of these spaces blank if you like. Below, there is a box called Total cost. This automatically adds your figures as you enter them. Check that the date displayed at the bottom of the dialog box is correct and click OK.
Your transaction will now appear on the main Transactions screen.
Data appears here ordered by company name and by date with the most recent transaction at the bottom. Below the most recent transaction is the latest line in bold type which shows the current status of that holding. Clicking on the Transactions button again limits the screen to just these latest positions. A further click restores the screen to the whole list. Once a share has been entered, you may add, edit or delete a transaction by clicking on the relevant transaction line (not the bold lines), and then right clicking to bring up a context menu with those choices. The share will also be listed on your Current Portfolio screen. Please see Section 8 for more details.
Updating your dataClick on the Update Data button on the screen. Provided you are connected to the Internet, the program will connect to Ionic Information’s data service and update your database.
Alternatively you can update via a modem connection – please see the Communications paragraph in Section 16 for more details.
Updates should usually take less than one minute. If there is several days’ data, it could take longer (and this will be the case the first time you update). If you experience problems updating, please refer to Section 18, Appendix A or the on-screen Help.
MenusNearly all of ShareScope’s main features can be accessed by right clicking to bring up a context menu. Context menus, as the name suggests, are menus specific to the current screen situation. Depending on where the mouse pointer is on the screen, and which screen you are on, different options will be available.
The menus above the toolbar offer another way of accessing ShareScope’s features. To the right of many of the menu items is the name of the key command that you may use to carry out that operation. For example, click on View and you will see the first item in the menu list is All with F5 on the right. (The menu is View : Change List : All in ShareScope Plus and Pro).
You can click anywhere in the main part of the screen to get rid of the menu. Note that if you hold the mouse pointer over a menu, a short description of the function is shown at the bottom of the screen on the left side of the status bar. If a menu item is highlighted and you press F1 you get a fuller explanation from the on-screen Help.
Please see Section 20 for more details of menus and mouse functions.

Page 14 Section 3 Tutorial
Changing the screen displayYou can change fonts on any screen. Right click to display the context menu, select List design... and then click on the Text tab. Click on the Abc button and alter the character style, colour and size as you require. Use the tabs and other buttons to completely customise your list. You may use a different font and colour design for different screens (List, Details etc.). In the Graph screen you can choose the type of price chart, line style and colour by selecting Graph Design....
You can also change the selection, size, colour and order of the yellow toolbar buttons. To do this, place your mouse pointer over any of the toolbar buttons and right click. From the context menu that appears, select Customise Toolbar… to make these changes. Further details are given in Section 17.
PrintingAll screens can be printed. There are four items under the File menu: Page Set-up..., Print Settings..., Print Preview and Print.... These operate as with any other Windows program.
Backup and restoreTo backup ShareScope files including portfolios and cash accounts, configuration and graph files select File : Backup. The data will then be stored in a directory of your choice (this can be a floppy disk or direct on to your hard drive). Click on the Browse... button beside the Backup folder to choose the destination folder yourself.
If you need to restore the files you can do this by selecting File : Restore.
Closing the programWhen you close ShareScope any changes that you have made to the settings and portfolios will automatically be saved. Settings can also be saved manually by selecting File : Save. To close the program click on the x in the top right hand corner of the window. Alternatively, click on File : Exit. When you return to the program, it will open on the screen where you left it.
You have now finished the tutorial and have covered all the general features. To get the most out of ShareScope we recommend that you take the time to read the following pages on how to use ShareScope in more detail.

Section 4Graph screen 4

Page 16 Section 4 Graph screen
Section 4
Graph screenInitially, the main graph is displayed as a closing price line with the most recent dates giving daily open, high, low and close price bars.
The share name is displayed at the top of the graph. To the left are the units, generally Pounds but it could be other currencies. To the right, the type of share is given (see Appendix E for the possible types). At the bottom is the date scale. This changes dynamically according to how much data is displayed. The first date is always displayed at the bottom left and the last on the bottom right.
As in the List and Details screens, you can use the Space bar (or Shift and Space) to move to the next (or preceding) share in the current list. You may also move to the next (or preceding) graph on the current list by clicking at the top right (or left) corners of the Graph screen – the mouse pointer will change to a horizontal arrow when in the correct position.
Context menuThe context menu for the Graph screen, revealed by right clicking, has the following options, most of which are detailed in the paragraphs below:

Page 17Section 4 Graph screen
Price chart displayBy selecting Graph Design… from the context menu, the following dialog box appears:
The Price tab (shown above) gives you the option to select what type of graph you would like displayed; i.e. Close line, OHLC (Open, High, Low, Close) chart, the HLC (High, Low, Close) chart, Candlesticks, Point & Figure, Kagi, Renko or 3-Line break. Below these choices, you can select the colour and style of the main prices by clicking on the Price colour button.
A Single Colour can be used to draw all points on the graph.
Close relative to previous close, colours are based on whether the close is higher or lower than the previous day’s close. When a close line has been selected, the colour will be used to draw the line between a close price and the previous day's close.
Close relative to open, colours are based on the close relative to the same day’s open.
Volume relative to previous volume, the price line is coloured based on the volume relative to the previous day’s volume.
Volume relative to signal volume, the price line is coloured based on the relationship between a day’s volume and the volume signal line (an exponential moving average).
Graduated by volume, the colouring of the price line is graduated based on the day’s volume relative to the maximum and minimum volumes in the displayed range.
Swing Chart, the main price graph can be drawn as a Swing Chart with Up days, Down days, Neutral days, Inner days and Outer days.

Page 18 Section 4 Graph screen
Below this, you can also choose to have lines added to the graph connecting the days’ highest, lowest or closing prices by selecting the High, Low or Close tick boxes. More price-related lines can be added using the options to the right: Median, when selected, will draw a line on the graph connecting the average of the days’ high and low prices; Weighted will give the average of the high, low and twice the close; Typical will give an average of the high, low and close.
Show latest price in right margin will display the latest close price on the right axis. To edit the background colour used for the display of the latest price, click on the colour box to the right (this option is only available once you have chosen to display the latest price).
The Volume tab allows you to turn on/off the volume histogram which appears at the bottom of the main price graph to indicate the number of shares traded each day (in either thousands or millions). With the default colours, black bars indicate higher volume and the red bars show lower volume. You can adjust this to have the volume bars coloured the same as the main price colour, or in a single-colour or coloured by price movement. Click the Signal Line tick box to overlay a moving average line. To change the type of moving average that is used, select an option from the Method drop-down menu.
The Data source option allows you to specify the time period for the volume histogram. This can be set to a daily or weekly basis or according to the time period used in the main graph.
The Time tab allows you to select whether the bar charts are to be displayed as daily or weekly price bars or else to let ShareScope choose the scale according to the amount of data on the screen (by selecting Dynamic selection of scale).
The Time tab also lets you customise the timescale on the graph screen. To drop the timescale from the bottom of the graph to sit below your analytic indicators, click Draw timescale below analytic graphs. To increase the clarity of the timescale on price charts, you can display months/days on a separate line beneath the year scale. To select this option, select Draw double height timescale. To add a horizontal sliding bar to the bottom of your graph, select Add timescale scroll bar.
The Lines & Text tab can be used to edit the colours and style of lines on display. The graph price scale can be displayed on the left-hand side, the right hand side or on both sides.
You can add a watermark and shade your graph by using the options available in the Style tab. If the watermark option is ticked, you can select one or all of the following display options: Epic code, Volume title, Analytic title, Last closing price, Average daily volume and Last analytic value.
The Analytics tab allows you to edit the analytics display. To remove any vertical spacing between analytic graphs displayed below the main graph, select No gap between analytic graphs. To add the title of the analytic to the top of the analytic window, tick Show title on analytic graphs.

Page 19Section 4 Graph screen
Loading and saving graph settingsThe Library facility on the left of the Graph design... dialog box allows you to save and restore individual graph settings which can be easily exchanged with other ShareScope users. To save a graph setting, click on the Library button and select Add current settings to library. You can then name and save this setting in your Library folder or save to another location. To restore a graph setting at a later date, click on the Library tab and select from the list or choose Open library folder....
(The Library facility can also be used to save and restore List screen settings. To access the Library in a List screen, select List design... from the context menu).
The Legend boxThis is initially displayed towards the top left of the graph, and gives a key to each line on the graph. Legend settings can be changed by right clicking in the legend window to bring up the Historic graph legend design screen.
Values
This tab lets you choose which numerical values are displayed on the legend. Each value is available as the Latest Value (the most recent value) or the Cursor Value (the value of the item at the current mouse position). If a check box is greyed out, this means that your current graph setting does not include this item. You can still choose whether the legend should display the value of that item, were it to be included on the graph.
Items
This tab allows you to include selected Details about the share or graph such as the sector or current graph setting. You can also select which of the graph lines are displayed.
Style
This tab allows you to change the legend colours, font and white space setting.
You may move the legend by clicking and dragging it, and you may resize it or close it in the standard Windows way.
Zooming in on a selected part of the graphClick and drag over the section of the graph that you want to see in detail. The area will be highlighted as you drag and when you release the mouse button, that section will fill the screen. If necessary, repeat the process until you have the detail you require. (Note that as you highlight an area of the graph the status bar will display the start and end dates of that period.)
After zooming in like this, you can scroll the graph left or right by holding down the left or right arrow keys (or Shift and left / right). By clicking outside the vertical scale on either the left or the right of the graph the section will expand in that direction with each click. To return quickly to the full graph display, double click on the graph.

Page 20 Section 4 Graph screen
You can also set the Graph screen to display data for a defined period – for example, the last six months. To do this, right click and from the context menu choose Limit date range : Set date range…. A dialog box will appear allowing you to choose your date range. Once set, double click on the graph to switch to the full data range. A second double click will return to the date range you selected. You can save different, defined date ranges in each of the separate Graph Settings (see below).
You can also zoom in/out using the timescale scroll bar. To add a timescale scroll bar, right click to display the context menu and select Graph design…. Click on the Time tab and select Add timescale scroll bar.
The full width of the scroll bar represents the entire data range and by reducing the width of the scroll bar, you can zoom in for a closer look at a specific date range. There are two arrows at each end of the scroll bar. To zoom in, click and drag the inner arrows to narrow the date range. Once you are zoomed in, click on the outer arrows to scroll through the chart in either direction. Alternatively, click and drag the scroll bar in the direction of the date range that you wish to view.
Add a share or index...You may look at any other share or index relative to the main graph by selecting that option from the context menu. So you can add, for example, the Oil & Gas index to the graph of the share you are looking at. This added line shows the movement of the Oil & Gas index starting from the same point at the left hand side of the graph. The added line is in proportion (unit for unit) to the main graph. Often, the vertical scale will change to accommodate the added line.
You may add up to four shares or indices at a time, although only the first one added will be shown in the graph title. The most common comparison is to the FTSE 100 – for ease this is included in the context menu. Also included are the options to add the share’s sector index and a collective graph of shares in any of your portfolios.
Price relative to...This option on the context menu allows you to see how one share or index is performing relative to another (one share is deflated by another to show a line of comparative performance). Typically this is by the FTSE 100 to see how the share has performed compared to this important market measure and this option is included in the menu. Again, the lines will begin from the same point on the left. The right hand graph scale will change to indicate the percentage difference compared with the original share price. The original (undeflated) graph and a horizontal line marking the point of equal performance can be displayed with this graph – these can be selected in Tools : Options… : Graph.
This line indicates the difference in price between the two shares on the screen compared to the start level at the beginning of the graph. So for example, if a line showing the current share relative to the FTSE 100 is added, where this line is above the start point (or horizontal line, if shown) then the share is performing better than the FTSE 100. And where this price relative line is below the start point the share is not performing as well as the FTSE 100.

Page 21Section 4 Graph screen
Extending the graph into the future...The Show Future option lets you extend space to the right of the graph. To select this function, right click to display the context menu, hold the mouse pointer over Show Future and select Show Future Settings.... This brings up a dialog box in which you can select how far to extend the graph. You may wish to use this feature to extend trend lines and other indicators.
Drawing your own trend lines and text boxesYou can draw your own trend lines on a graph. To do this, hold down the Shift key and click and drag the mouse. You will see the line extend from the start point. Now release the mouse button. To adjust a line, select it by clicking on it or pressing the Tab key.
By holding down the Ctrl key and clicking and dragging the mouse, you can also draw partial trends over a selected part of the graph.
Horizontal lines can be drawn easily across a graph. To do this hold down Shift and click the left mouse button at the price required. A horizontal line will be drawn at the selected price.
To draw a horizontal line from the cursor to the right hand vertical axis, hold down the Shift key on the right hand side of the keyboard and click the left mouse button.
Lines can be drawn in indicator windows and the volume histogram in the same way they can be drawn on the main graph display.
You can adjust the lines by clicking and dragging the end markers. Similarly, use the middle marker to move the line to a parallel position. If you hold down the Shift key when moving a line, you can create a copy of the line. When a line is selected, right clicking will bring up a context menu from which you can change the line’s colour and style.
To add a text box, press the Alt and Enter keys together. Click on the graph where you want the text box displayed, then enter your text and click OK. To select the box, click on it or press the Tab key (please note that each time you press Tab, you will select the next line or text box in the order they were added to the screen). You can click and drag the box to anywhere on the graph. The size and shape can also be adjusted by clicking and dragging the markers. When a box is selected, right clicking will bring up a context menu offering several options relating to that box.
To delete a line or text box, select it and then press Delete.
These options can also be found under the Graph context menu in the Lines and Text sub-menu.
Drawing shapesShapes can be drawn on your graphs to mark or highlight items of interest. To add a shape, right click to open the context menu and select Lines and Text. Click on Draw a Shape and the cursor will then turn into a crosshair. Click and drag the mouse to create the shape. To edit the appearance, right-click inside the body of the shape and select Colour and Style from the context menu.

Page 22 Section 4 Graph screen
AnalyticsNumerous analytic charting tools can be added to the screen. You can add moving averages, trend lines and line studies to the main graph display. You can also add up to four extra windows under the main graph, choosing from a selection of more than forty indicators and market graphs. Each window can contain up to four analytics, although the vertical scale will refer only to the first. Each analytic window can be changed in size either by clicking on the magnifying glass icon at the bottom right or by moving the mouse over the top boundary and, when the pointer changes to an up and down arrow, clicking and dragging the window boundary to where you want it.
A brief description on how to access the various charting tools is given below but for greater detail on individual analytics, please refer to the on-screen Help. There are also many books on chart analysis – special offers on a selection of these are often available at the ShareScope Book Shop on our website.
From the Graph screen context menu, clicking on Moving Averages…, Trend Lines… or Zig-zag chart... brings up dialog boxes letting you turn these options on or off (by clicking in the tick boxes) and adjust their parameters.
The options in the sub-menu under Add Indicator, when selected, will bring up a dialog box allowing you to choose options relating to that indicator such as the number of days’ price movement used in the calculation and the colour and style of the line. You can also choose whether to create a new window below the main price graph for the indicator or to add this new line to an existing indicator window. The Data source option lets you set the length of each period; this can be daily, weekly or determined by the main graph time period.
The options under Add Market Graph bring up similar dialog boxes but here you can choose which shares to use in calculation of the market graph and whether to apply any smoothing (exponential moving average) to the line.
Under Lines and Text are choices for other line studies (details on how to draw simple straight lines and add text boxes are given on page 21). To use these, click to select the study you wish to draw on the price graph then move your mouse pointer to where you wish to start drawing and click and drag the mouse to see the lines extend. When you release the mouse the line will be set. If you wish to move or adjust it further, click on it and three markers will appear on the primary line. Click and drag these to adjust the placement of the line study. A context menu with options for a line is available by right clicking when the line is selected. You can also select any lines (or text boxes) on the screen in turn by pressing the Tab key. To delete a line drawn in this way, select it and press Delete on your keyboard or press Shift and Delete to remove all lines from the current graph.
Marking transactions and events on graphsTo display key transactions and events on the graph screen, select Events... from the context menu. From the Display Events dialog box that appears, select the events you are interested in and click OK.
You can customise the symbols used and their position by clicking on the symbols in the Display Events dialog box.

Page 23Section 4 Graph screen
Stop-loss and stop-gain To add either a stop-loss line or a stop-gain line to a graph, right click and from the context menu, place the mouse pointer over Stop-loss. From the sub-menu select either Stop-loss settings – This Share… to add the line just to the graph you are viewing or Stop-loss settings – Global… to add the line to all shares in the current Graph Setting. In the dialog box that appears, you have the option to select either a stop-loss line or a stop-gain line. You can adjust the settings and then click OK.
Stop-Gain is simply the opposite of stop-loss and is useful if you are shorting a share or index.
Training ModeTraining Mode gives you the opportunity to test out your investment strategies and analytical theories. In this mode, ShareScope will pick a share at random from the current list and conceal the share’s name and the price line. You can add analytic tools to the blank chart and set marks to gradually reveal the price movement. In this way, you can test your analysis theories and skills at predicting prices. The name of the share will only be revealed when the whole graph is visible.
To start, open the context menu and select Training Mode. Please note that most features outside the Graph screen will be unavailable whilst in Training Mode.
At the top right corner of the graph will be the red and yellow base mark. Move your mouse pointer over this and click and drag to the left. Release the mouse button to place the red mark anywhere along the top of the chart (you can click and drag the mark to a new position at any time). Add up to 10 red marks. Once you have these in place, press the Space bar to reveal the share price line up to the first mark (the one furthest to the left). Press the Space bar again to show more of the graph up to the second mark and so on (each mark will turn yellow as you move to it). You can also press Shift and Space to move back – hiding the price line again. You may wish to add indicators, draw trend lines etc. and then reveal portions of the graph to see whether the actual price movement is close to what you expect.
Once the whole price graph is visible, the share’s name will be displayed at the top. To begin again on a new share, press the Space bar.
To exit Training Mode, click on Graph : Training Mode to deselect this or press the Esc key.

Page 24 Section 4 Graph screen
Editing price dataShare prices can be edited manually from the graph screen. To edit price data, right click to open the context menu and select Edit Price Mode. Position the cursor over the value you wish to adjust and a special edit mode cursor will appear. Click and hold down the left mouse button and drag up or down to adjust the value. Once you are happy with the new value shown, release the mouse button.
Double click on the edit mode cursor or right click and select Edit values for this date... to access the Edit Price dialog box and enter exact values for the open, high, low, close, and volume data.
To save changes, right click to display the context menu and select Save all new values. To discard amendments, select Reset all values (for this share) or deselect Edit Price Mode to exit.
Slide showThe slide show function scans though a number of price charts in quick succession for you. To display a slide show, select Tools : Slide show.... The slide show dialog box lets you select the amount of time between charts and whether the show stops on reaching the end of the current list or loops back to the start.
Status barThe status bar at the bottom of the graph gives you key information about the share you are looking at. Place the pointer on the title of the share and the status bar will tell you the sector and, if there is one, the index that the share belongs to, along with the current portfolio name. Place the pointer anywhere on the actual graph and the bar will tell you the date and week, the share price, and if there has been any price change from the previous day. This is also shown in the Legend. If you press the left or right arrow keys on the keyboard you can move the pointer and price one day at a time.
Place the pointer on the vertical scale to the side of the graph and, if you are using trend lines, the annual rate of the trend will be displayed on the status bar. If you are using the log scale, this will be the annual percentage growth, otherwise it is pence (or other units) growth per year. It will also tell you how many trading days are displayed and remind you which Graph Setting (see below) you are currently using. If you hold down the Shift key, the share’s unadjusted prices will be shown. This is the day’s share price before splits, consolidations, rights issues, etc. are taken into account. This only has an effect if a share has been adjusted. For instance, COLT Telecom split 2 for 1 on 1/9/98 (in other words, for every share two more were added). You can reverse this function under Tools : Options… : Graph (see Section 16). You may also bring up a full list of a share’s prices (adjusted and unadjusted) by pressing the ‘/’ key; press ‘/’ again to close this dialog.
If you have a graph indicator displayed, such as the stochastic oscillator, and you move the mouse pointer over it, the status bar will display the date, week and a numeric value. If you have added several indicators to one window, the numeric value will be associated with the first one. See the on-screen Help for more details about these numbers.

Page 25Section 4 Graph screen
Customising your Graph SettingsShareScope has 12 Graph Settings. These let you move quickly and easily from one type of graph display to another. Graph Settings allow you to customise and record how much of any share price graph you want displayed, which indicators you wish to display – trend lines, moving averages, added graphs and ‘relative to’ lines – and how they look. Sometimes you might like to see share prices relative to FTSE 100, other times you might like to overlay FTSE indices or use other analytic tools. When you customise a Setting it is automatically saved when you exit ShareScope so that next time you won’t have to recreate it.
To give you an idea of how to use this powerful feature, ShareScope has four pre-set Settings – which you can of course modify. These Settings are shown below:
Setting name Key DescriptionSetting 1 F2 Displays all the available data
Setting 2 F3 No trend lines or moving averages
Setting 3 F4 Displays the last 30 days
Setting 4 Shift F2 Displays the graph with 4 indicators
The other eight Settings (‘Not set’) are identical to the Setting 2 (F3). As you use them, you can choose what to display and rename them to suit your requirements. To change a Setting, select it either by pressing the relevant keys (a combination of F2, F3, or F4 and the Shift and Ctrl keys) or through Graph Settings. Now set up the display you want. You can modify the moving averages, trend lines, indicators, stop-loss, log scale, ‘relative to’ and added graphs. You can adjust the size of any added windows and the default date range.
You can give your Graph Setting a name by selecting Graph Settings : Rename setting. The new name will be displayed on the status bar and in the menu to remind you which Graph Setting you are currently using.
Saving and restoring your Graph SettingsAs long as you exit the program properly ShareScope will save all your Settings automatically. You can also save your Settings as you go along by using Graph Settings : Save and Restore : Save all settings and tables or Save this setting. If you make a mistake modifying a Setting you can either undo your mistake or you can reload the previous Setting using Graph Settings : Save and Restore : Restore all settings and tables or Restore this setting.

Page 26 Section 4 Graph screen

Page 27Section 4 Graph screen
Section 5Details screen 5

Page 28 Section 5 Details screen
Section 5
Details screenThe Details screen provides a powerful, in-depth graphical analysis of each company’s performance, forecasts, financial stability and market/sector ranking.
The default Details design includes the following information:
• Company name, sector, index and web address• Historical & forecast headline results in tabular and graph format• Market and sector ranking • Advanced metrics such as liquidity, gearing, return, cash, operating margin and book value• Current share price, price change and percentage price change• Historical price graph• Sector price graph• Key events• Brokers consensus and Investors Chronicle Views
Press the Space bar whilst in the Details screen to display the next share in the source list, or press Shift and the Space bar together to display the previous share.
The Details screen is comprised of List boxes, Results tables and Graphs.
List Boxes can be used for titles, free text, or lists of information such as headline results and financial ratios.
Results Tables display historical/forecast results and ratios.
Results Graph displays historical and forecast performance in graph format. You can create a graph for each metric, such as Profit or EPS Growth, or you can add multiple metrics to the same graph.
Price Graphs can be used to add a historical price graph for the share or for its sector, sub-sector or index.

Page 29Section 5 Details screen
Context MenuRight-click anywhere in Details screen to view the context menu.
This changes relative to the type of box that the cursor is positioned over.
Customising the Details screenJust like ShareScope’s other main screens, the Details screen can be customised to display exactly the information your are interested in, and in the layout that you find easiest to read.
ShareScope provides a number of pre-configured Detail settings and a maximum of 12 settings for you to customise. ShareScope automatically saves any changes you make.
To change the overall appearance of the Details screen, right-click and select Details Design… from the context menu that appears.
The Details Design… dialog controls the following options:
• Text font & colour • Background colour• Box frame colour• White Space• Watermark colours• Grid• Printing
For more information about these functions, please refer to the on-screen Help.
In addition to the main Details Design… settings, each List Box, Table and Graph can be individually customised. Please see the Editing a box section on the next page for more information.

Page 30 Section 5 Details screen
Creating a boxYou can add any number of List boxes, Results Tables and Price/Results graphs to your Details screen. To add a new window, right-click and select New [window type] from the context menu.
For example, to add a List Box, right-click anywhere in the Details screen and select New List Box from the context menu. A new blank box will appear on the screen.
To add items to the box, right-click inside the box and select Add list box item from the menu. A further menu of options will be displayed. Select the item you want to add and repeat until you have added all the required items.
Editing a boxRight-click on the box you wish to edit and, depending on the type of box you have selected, choose List Box Design…, Result Table Design…, or Graph Design… from the context menu.
The options below may not be suitable for all types of box. For example, Results Graphs only allow you to select the colours used for the plotted values.
Heading lets you add a heading of your choice.
Background allows you to select the background colour of a box and Alternate background lets you display alternate items with a different colour background.
Show frame allows you show or hide the frame around the graph.
The colour of the line used between columns and beneath the heading can be set using the Separator/column divider option.
List item settings determine whether you display a long or short description of the item you are adding.
Justification allows you to specify how you wish to align the text in the box.

Page 31Section 5 Details screen
Alternative font size can be used if you wish to use a different font size to that specified in the default Details settings, for example, to create a heading or footnote.
Font size adjustment individual items (such as title) can be set to use an alternative font size. See Help for more information.
When you press the Space bar in the Details screen, data for the next share in the list will be displayed. You can check the Set Share option if you wish for the data in a box to remain unchanged.
A Watermark can displayed for the EPIC, Change from Previous Close and % Change. The colours used for the watermarks is set in the main Details design dialog.
Moving or resizing a boxClick on a box and its frame will become highlighted. You will notice that the frame includes “handles” in the corner and mid-way along each side. Click and drag these handles to stretch or shrink the box in that direction.
If you position the mouse cursor on the frame anywhere in-between the handles, you will notice that the cursor turns to the standard Windows “Move” cursor. Click and drag to move the component in any direction.
Note that the Snap to grid option in the main Details Design dialog may help you position components.
Deleting a boxTo delete a box, right-click and select Delete from the context menu. Alternatively, select the box you wish to delete and press the Delete key on your keyboard.
Undo last editIf you want to undo an action, right-click and select Undo last edit from the context menu.
Printing the Details screenDetails set 1 (Main) and Details set 2 (Portrait) are designed for printing, landscape and portrait respectively, on a standard A4 page. Make sure the print Settings in the File : Page Setup menu are correct.

Page 32 Section 5 Details screen

Page 33Section 5 Details screen
Section 6List screen 6

Page 34 Section 6 List screen
Section 6
List screenList screens in ShareScope let you display information for different lists of financial instruments (e.g. shares, gilts, unit trusts) in columns on your screen.
ALL (F5) lists all items in ShareScope (see Appendix E for details of what is included). Shares (F6) is the list of all ordinary shares. There are also lists of Investment Trusts (F7), Indices (F8), Unit Trusts, Gilts, Commodities and Exchange Rates.
Other List screens, such as the FTSE 100, FTSE 250, AIM etc. can be selected either from the toolbar, or from View : Other fixed selection, or by pressing F5, F6, F7 or F8 with a combination of the Shift and Ctrl (Control) keys. For example, to see the FTSE 250, press the Shift key and while holding it down, press F6. The complete list of shortcuts is shown below:
Non-index means ordinary shares that have a full listing but are not in any of the main indices. Others include ordinary shares that are not primary, e.g. Marks & Spencer B shares. You can easily construct a portfolio from any of these lists – see Section 7.
You can also add your own data to the List screens – please see Section 14 for details.
Historical shares (e.g. those that have delisted) are displayed in green. If you only want to see current shares i.e. ignore shares that have stopped trading, you can do this by selecting View : Show historic shares and un-ticking this option. The number of days that ShareScope checks back to remove historical shares can be adjusted in the Options box (Tools : Options… : Lists).
None Shift Ctrl Ctrl & ShiftF5 All FTSE 100 Non-index Convertibles
F6 Shares FTSE 250 AIM Income
F7 Invest. Trusts FTSE Small Cap Warrants Capital
F8 Indices FTSE Fledgling Preference Others

Page 35Section 6 List screen
Context menuThere are two context menus available in the List screen – one for making changes to the columns displayed and the other for more general options. If you right click in the main part of the display you see:
Add selected share to portfolio [portfolio name] will add the highlighted share to the Current Portfolio. For details, please see Section 7.
When selected, New Highs/Lows will restrict the list to show only those shares that are currently at a new high or low. You can adjust the period to which these highs/lows are relevant in Tools : Options... : Pre-set Portfolios or by selecting New Highs/Lows : Highs & Lows Settings (Global)… from the context menu. The following options are available:
• All history • A user-defined number of trading days• A user-defined number of days• Since the 1st of January (unless in the first 3 months of the year, in which case since the 1st of the previous January)• Since a specific date

Page 36 Section 6 List screen
Select sector leads to a sub-menu from which you can Choose the sector… you wish to view. To return to the complete list, simply click on the relevant toolbar button (e.g. ALL) or else click on Select sector in the sub-menu to deselect it.
Horizontal scrollingAs well as the horizontal scroll bar, you can use the left and right arrow keys to scroll columns left and right. Shift and left / right will move five columns at once. The two columns on the left are initially fixed and will not scroll. You can adjust the number of fixed columns in Tools : Options… : Lists (see Section 16).
Graphing a listYou may graph all the shares in a list. This works out the total value of the shares over time. To do this select Graph whole list (weighted by cap.) and the graph will be weighted according to each company’s capitalisation (so smaller companies have less effect on the movement of the graph line). Alternatively, select Graph whole list (not weighted) to draw a graph of the shares based solely on the price movement. The initial value of this graph is always 100.
List TablesThere are 12 Tables available. The contents of each Table are entirely controlled by you. Different Tables can have different columns. So one Table might concentrate on general information, another on historical results and a third on forecast results. A single key press will move between these Tables. If you place the mouse pointer on any column heading, the Table you are currently using will be shown in the status bar at the bottom of the screen along with the matching key command.
As you change screens, e.g. from List to Portfolio, the program will remember which Table you were using in each one and automatically restore it. Therefore, if in ALL you were using Table 1 and in Current Portfolio, Table 3, these are the Tables which would appear. To change them, press the key that corresponds to the Table you want to use. Initially ShareScope has three pre-set Tables which correspond to the keys F2, F3 and F4.
You can change Tables by pressing the relevant key or through List Tables which lists all the Tables by name with their corresponding key commands. If you modify one of the Table Settings, say by adding a column or changing a name, it will be saved automatically when you exit the program.
Tables can also be renamed by right clicking over the wide toolbar buttons and selecting Rename this Table or through List Tables : Rename table.
Saving and restoring your TablesIn exactly the same way as you can save and restore Graph Settings, you can also save your Tables as you create them using List Tables : Save and Restore : Save all tables and settings or Save this table. If you make a mistake modifying a Table you can either undo your mistake or you can reload the previous setting using List Tables : Save and Restore : Restore all tables and settings or Restore this table.

Page 37Section 6 List screen
Column heading context menuIf the pointer is within the box of any column heading and you right click, the context menu that appears is:
Adding a columnTo add a column, move the mouse pointer to the column heading to the right of where you want your new column, right click to bring up the context menu shown above. The first few options show categories of columns available. The sub-menus linked to these show which columns you can add. Column headings already selected will have a tick beside them. You may add a column more than once. You may find that it is better to start another Table rather than put all the data you are interested in into one Table. You can then move very quickly and easily between different data on the same shares. The columns under Add General Column include:

Page 38 Section 6 List screen
Adding note columnsTo add columns of your own text to the List screens, right click on any column heading. From the context menu that appears, select Add General Column, then Note, and then one of the ten available notes. Now highlight the share to which you wish to add a note and with the mouse pointer within the Note column, right click. Select Edit Note from the menu, type in your text then click OK.
If you need to widen the column, move the mouse pointer to the edge of the column heading – you will see the pointer change to a horizontal arrow. Click and drag the mouse to adjust the column width. All columns may be adjusted in this way.
You can also have these notes displayed on the Details screen by right clicking in the Details screen and selecting Show notes from the context menu.
Adding a price columnTo add a price column, move the pointer to a column heading, right click to bring up the context menu and select Add Price Column. This takes you to a sub-menu where you can select which column you wish to add by clicking on the relevant option.
When looking at historic prices, you are given the option to choose days (i.e. calendar days) or trading days (where a year is defined as 250 trading days and a month is 20 trading days).
Price +/- shows the price change since the most recent close. Please see the on-screen Help for further information about prices.
% Price change since… gives you the option of displaying the percentage change in price over a chosen period up until the latest date. You can also add a column showing the change between any two dates you choose by selecting % Price change between....
You can bring up a dialog box showing a numerical list of prices for a share from any screen in ShareScope by pressing the ‘/’ key on your keyboard or by selecting Tools : Price list. This list initially shows only the share’s closing prices, but further options can be found by right clicking on this box.
Adding a result columnTo add a result column, move the mouse pointer to the column heading, right click to view the context menu, and select Add Result Column.... This brings up a dialog box, which allows you to select one or more results columns.
The Headline Results tab allows you to display historical or forecast headline results, and to choose which result you want displayed: Profit, EPS, Dividend or Turnover.
If you would like to display other fundamental results data, such as ROCE, gearing and quick ratio, you will need to click on the Advanced results & ratios tab. You may choose whether to display the most recent data or the data from any of one to five years previously, and also whether to display the ‘raw’ fundamental data, or to compose it into one of two standard ratios (value per share or price divided by value per share). You can choose whether to display the actual result figure from a year or the year-on-year percentage change over one, two or more years.

Page 39Section 6 List screen
For a full list of the fundamental data available from the Advanced results & ratios tab please refer to the on-screen Help.
Adding a rank columnRank columns can be added to list screens and allow you to gauge a company's strength or 'desirability' at a glance. You can rank a company to see how it compares against the full market or its sector peers. To add a rank column to your list screen, right click on an existing column heading and select Add Rank Column....
Adding a date columnTo add a date column, move the mouse pointer over a column heading, right click to show the context menu and select Add Date Column… This takes you to a sub-menu where you can choose which column you wish to add by clicking on the relevant option.
Adding a transaction columnSome columns that can be added to the main Transactions screen (see Section 8) may also be shown on the share Tables. To add a transaction column here, move the pointer to a column heading, right click to bring up the context menu and select Add Tran. Column. This takes you to a sub-menu where you can select which transaction column you would like by clicking on the relevant option. These columns will only have information in them if you have recorded a transaction.
Please note, Average price is the average price paid for these shares. If a single purchase is made then it is simply the price paid. If two or more purchases are made then it is the sum of the cost of the purchases divided by the number of shares.
Adding a separator columnThis is a narrow, empty column used to separate groups of related columns. To add a separator column, move the pointer over a column heading, right click to bring up the context menu and select Add Separator column.
Changing a column headingTo rename a column, move the pointer to the relevant column heading, right click to bring up the context menu and select Change heading. Type in your new heading or abbreviation and click OK (or press Enter).
Borders & shadingTo amend column attributes right click on the column heading and select Borders & Shading... from the context menu. From the dialog that appears, you can customise the individual column background colours, text style and borders.

Page 40 Section 6 List screen
Removing a columnTo remove a column, move the pointer to the column heading of the column you wish to remove, right click to bring up the context menu and select Remove column. If you choose to delete a Note column you will be asked if you want to delete all the notes in the column. You will be further warned if this column is used in another Table.
Moving a columnThere are two ways to rearrange columns in any list screen:
You can drag a column to a new position using the mouse. Move the pointer to the heading of the column you wish to move, hold down the left mouse button, drag the pointer to the new position where you wish to drop the column and release the mouse button.
Alternatively move the pointer to the heading of the column you wish to move, right click to bring up the context menu and select Move column (column positions are numbered from left to right).
Changing the width of a columnFit width allows you to size a column to the width of its contents and can be selected by right clicking to show the column heading context menu. Alternatively you can easily adjust a column’s width by moving the mouse pointer to the headings. As you move the mouse over the boundary between two columns the pointer will change to a horizontal arrow. To adjust the column (to the left of the boundary) click and drag the column line to the desired position and release the mouse.
To adjust the width to the data in the column move the mouse pointer to the right boundary of the column heading and double click.
The context menu option to Set width… allows you to determine numerically exactly how wide a column is. Note that the minimum value is 20 and the maximum 1,000 pixels (the tiny dots that make up the screen image). If the heading no longer fits then you can abbreviate it – see the paragraph ‘Changing a column heading' on the previous page.
Formatting the column displayThere are several ways to change the appearance of a column’s contents. These options are found in the column heading context menu. Please note that these options are not available for all columns.
Justify sets left, right or centre justification. Text is often better left justified, numbers better right justified.
Numeric display: To adjust the display of fractions, decimal places and significant figures shown in a column, right click on the relevant column heading to bring up the column context menu. Hold your mouse pointer over Numeric display and then click on your preference on the sub-menu that appears. You will have a choice to display numbers either with decimals or fractions. If you would like ShareScope to choose the number of decimal places displayed for you, then select Dynamic decimal places.
You also have the option to display the price in pounds or pence, depending on your

Page 41Section 6 List screen
preference. Once again if you select Dynamic Pounds/Pence, ShareScope will decide whether it is best to display pence or pounds.
Some fonts will not display fractions – instead you will get some other symbol. There are two choices: either do not use fractions or switch to a font such as Arial or Times New Roman that does allow fractions.
Display zero gives you the choice to display zeros, show them as ‘-’ or leave the field blank.
Display as number allows some text columns, such as Broker consensus, to be displayed in their numeric form. In the case of Broker consensus, the lower the number, the more positive the consensus.
Show Up/Down arrow: Arrows indicating the change in the current value of a column can be added to selected items, such as the Last price column.
Enable Data Tip: allows you to display additional information about a share. For example, positioning the mouse cursor over a share's EPIC code will display the name of the share and vice-versa.
Data Tips can be switched on or off globally by selecting Tools : Options and clicking on the Lists tab. See Section 16 for more details.
Sorting a columnTo sort the shares by a column heading, you can either use the context menu or double click on the column heading. For example, if you have a Sector column heading, double click on it and your list will be sorted by sector. If you double click on the same column heading again, the order will be reversed.
Wrapping columnsColumns can be ‘wrapped’ to display details of more shares on the screen at one time. To wrap columns right click over the list screen and select List design from the context menu. Tick Wrap columns (if possible). Wrapped column blocks are separated by a thick vertical line.
CalendarThis feature lets you view important dates in the financial calendars of companies in your current list. To open the calendar, select View and then click on the Calendar option. You can then choose from a selection of events and specify the date range you are interested in.
Listing a sectorYou can view constituent shares of a specific sector by selecting List : Select Sector : Choose the Sector. A dialog box appears that lets you choose which sector you wish to view.
Once you have selected the sector, the sector name will be displayed on the title bar. To return to the Shares list, select Shares from the toolbar or press F6 on your keyboard.

Page 42 Section 6 List screen
The Sector Analysis toolThe Sector Analysis tool allows you to view a breakdown of the individual companies or sectors in your current list or portfolio, arranged in order of capitalisation, or the size of your holding in each entry. You can view the data as a list or as a pie chart, enabling a simple visual display of the emphasis and importance of each entry.
To access Sector Analysis, right click in any list and select Sector Analysis.
Pop-up graphsPop-up graphs can be displayed in list screens to give a snapshot of a stock's track record and projected future performance for certain fundamental data. Pop-up graphs are provided for EPS, EPS growth, PEG, P/E, Profits, Turnover, Dividend and Yield. To select this feature simply position the cursor over a relevant column cell and the graph will pop-up.
To customise Pop-up graphs, right click to display the context menu. Select List Design… and click on the Pop-up Graphs tab.
Switch Pop-up graphs on or off by going to Tools : Options and clicking on the Lists tab.
Section 7Portfolios 7

Page 43Section 6 List screen
Section 7Portfolios 7

Page 44 Section 7 Portfolios
Section 7
PortfoliosA portfolio is a collection of shares. You can use ShareScope's portfolios to create watchlists for further research or you can add transactions to a portfolio to reflect your own investments.
In ShareScope you can create up to 1,000 portfolios, with unlimited shares in each. ShareScope offers multi-currency support, which means that you can create portfolios designated in foreign currencies (e.g. Euros) and include foreign currency transactions within Sterling portfolios. You can graph each share in a portfolio or you can graph the whole portfolio
Each portfolio has two screens. The Current Portfolio (F11) screen shows the shares you have included in your most recently used portfolio. The appearance and layout of this screen corresponds to the Settings in other List screens (e.g. the ALL list). Transactions relating to these shares are recorded on the Transactions screen, which is covered in Section 8.
Creating a new portfolioYou can create a portfolio by clicking on the Select Portfolio toolbar button or by pressing F12. Click on << new >> and you will be asked to name your portfolio. By default, the new portfolio will be expressed in Sterling. Use the Currency drop-down menu to change the native currency of the portfolio.
Once you have done this, the screen will show your new portfolio and its name will appear on the status bar at the top of the screen. The screen will show No shares because you haven’t added any shares to it yet.
Adding shares to a portfolioSelect the list of shares you wish to use e.g. FTSE 100 (click on the relevant icon or use the function keys). Select the share that you want to add. Right click on the list and use the context menu to add the share to your portfolio. This can be repeated as many times as you like. Select Current Portfolio from the toolbar or press F11 to view the shares that you have added to your portfolio. Remember that Find a Share will only search through the list currently in use.
Alternatively, when you are viewing the Current Portfolio screen you can simply choose Add share to portfolio… from the context menu or use the shortcut keys Ctrl and A. Please refer to the Quick reference at the back of this guide for a complete list of shortcuts.
Viewing a portfolioTo view a portfolio you have already created, click on Select Portfolio and highlight your choice. Portfolios will be listed in alphabetical order. To view your Current Portfolio, click on Current Portfolio or press F11. You can also move to the next or previous portfolio in your list by using the toolbar. To do this you will need to add the buttons to your toolbar (see Section 17 for how to adjust the toolbar display). You can also assign certain portfolios to the numbered portfolio toolbar buttons – this is explained in more detail in Section 17.

Page 45Section 7 Portfolios
Sorting a portfolioThis is exactly the same as sorting a list (see Sorting a column in Section 6). You can also change your portfolio display in the same way as for a List Table (see Adding a column in Section 6). The twelve Table layouts available in List screens can also be used in the Portfolio and Data Mining screens.
Copying and moving shares to alternative portfoliosTo copy a share and all related transactions, click on the share you wish to copy and select Copy selected share from the context menu. A dialog box will then appear allowing you to select which portfolio to copy the share to. In the same way, you can remove a share and all related transactions and place them in a different portfolio by selecting Move selected share.
By selecting Copy a portfolio… from the context menu, you can copy an existing portfolio and save it with a different name. You can also rename existing portfolios using the option in the context menu.
Deleting shares from a portfolioSimply click on the item you wish to delete and select Delete (and the relevant option from the sub-menu) from the context menu or press Delete on your keyboard. This will remove all associated transactions and cash account entries for that share.
You can delete an entire portfolio by selecting Delete a portfolio… from the context menu and clicking on the name of the portfolio you wish to delete. To avoid accidental deletion, ShareScope will ask if you are sure. To delete the portfolio click Yes.
Selecting multiple sharesYou can select multiple shares by using the Shift or Ctrl keys in conjunction with the mouse (just as you would in other Windows applications), in order to add, move, copy or delete them.
To add muliple shares to a portfolio once you have selected them, right click and select Add n selected shares to portfolio '[portfolio name]' from the context menu (where n is the number of shares you have selected). The selected shares will then appear in your Current Portfolio screen.
Creating a group portfolioA group portfolio contains a selection of other portfolios. This allows you to see the collective performance of some or all of your portfolios. Click on the Select Portfolio button (or press F12) and select << new group >> in the dialog box that appears. After naming the group and specifying what currency to use, a further dialog allows you to select which portfolios to include. Highlight a portfolio name in the left-hand window and click on the > button to add that portfolio to the group or click the >> button to add all your portfolios. When viewing the group portfolio, you can adjust which portfolios are included in that group by selecting Edit portfolios included from the context menu.

Page 46 Section 7 Portfolios
Shares and transactions included in group portfolios are exactly the same entries as those in each of the portfolios that make up the group. Editing items here will produce corresponding changes to the relevant portfolio.
Portfolio statisticsSome statistics about the portfolio are shown at the top of the screen, just above the column headings. Initially it displays the portfolio name, the number of shares it contains, the average price of the shares, the change in that average price since the last update (shown in pence and as a percentage), the total capitalisation and the average capitalisation.
You can change this display by selecting Investment Portfolio from the context menu. This alternative display shows the portfolio name, the total value of the holdings, the change in this total since the last update (in pounds and as a percentage), the total pure (unrealised) profit to date, the total realised profit and the total charges paid.
You can customise the look and colour of the portfolio statistics line by selecting List design... from the context menu and clicking on the Summary tab.
Dynamic portfolios Unlike standard portfolios, dynamic portfolios do not contain a fixed list of shares.
After each data update, the shares in a dynamic portfolio may change as the shares included must meet the criteria you set up in your Data Mining filters. You can copy the list to create a standard (static) portfolio by right clicking and selecting this option from the context menu.
Filters that you create in Data Mining are automatically listed as dynamic portfolios (see Section 10 for full details). You can access dynamic portfolios by clicking on the Select Portfolio button and then clicking on the Advanced button in the dialog box.
Graphing a portfolioYou can graph your portfolio share by share or in its entirety. To graph all the shares in your portfolio collectively (weighted by capitalisation), choose Graph Shares (weighted by cap.) from the context menu, or select Portfolio : Graph Shares (weighted by cap.). To graph each share, highlight the share and then either click on the Graph button or press Enter. Once transactions have been added to your portfolios (see Section 8), you will be able to use the Graph Value and Graph Profits options from these menus.

Page 47Section 7 Portfolios
Section 8Portfolio Transactionsscreen 8

Page 48 Section 8 Portfolio Transactions screen
Section 8
Portfolio Transactions screen The Transactions screen records all of your acquisitions, disposals, costs and revenues associated with share ownership. The screen shows all transactions relating to your Current Portfolio and is accessed from the toolbar or by pressing the + key.
The list of transactions appears sorted by company name and date with the most recent always appearing at the bottom. Sorting is restricted to name and date.
Once you have entered a transaction, you will notice two lines: one for the relevant transaction and a Latest line in bold type. The Latest line shows the current status of your total holding for that share so it changes each time you add another transaction for that share. You can show only the Latest lines by clicking on the Transactions button, pressing the + key, or by right clicking and selecting Show latest only from the context menu.
Adding a transaction columnFrom the column heading context menu, the Add Column sub-menu gives the following options:

Page 49Section 8 Portfolio Transactions screen
Recording a transactionIn the Transactions screen, type the first few letters of the share you wish to enter and when found, click OK or press Enter. A transaction dialog box will appear. Click on the arrow next to the box called Transaction and select the type of transaction you wish to record.
You may wish to give the transaction your own reference and you can do this by clicking on and then typing in the Reference box. This text can be displayed on the Transactions screen by adding the Reference column. Similarly, you can enter text in the Note box and this can be shown on the main screen by adding the Note column. You can move between the boxes using the Tab key or the Enter key, or by clicking on them.
Enter the number of shares, the price and, optionally, the charges – Broker Charge, Stamp Duty and Contract Levy. You can leave any of these boxes blank if you like. You can also choose whether or not to display the expenses boxes in Tools : Options… : Portfolios & Transactions (Section 16 gives details). As you move from box to box, the figures will be added together automatically in the Total cost box below. Make sure the date displayed at the bottom of the box is correct. When you have completed the transaction information, click OK and the transaction will be placed in the main Transactions screen. The chosen share will also be listed in your Current Portfolio. You can also access the transaction dialog box from the Current Portfolio screen by selecting the relevant option from the context menu (e.g. Buy).
Types of transactionAs well as recording buys, sells and dividends you can also enter share splits and consolidations into ShareScope portfolios. These are entered in the same way as other transactions and allow you to type in the adjustment factor or the new number of shares owned without affecting the value of your holding.
Adding further transactionsTo enter additional transactions, simply select the relevant share, right click and select the relevant option (e.g. Buy) from the context menu. If you want to add a different share, just follow the instructions above.
Editing transactionsYou can edit or delete an entered transaction by selecting the transaction and then right clicking to bring up a context menu. Individual transactions may also be copied or moved to different portfolios by selecting these options.
Sorting transactionsTo sort transactions by date or name, double-click on the column heading. To sort in reverse order, double-click again in the header. When transactions are sorted by date, the Latest lines are hidden.

Page 50 Section 8 Portfolio Transactions screen
Show current holdings onlyIf you want to display only shares held currently in portfolios and transaction screens, right click in the Portfolio or Transactions screen and select Show current holdings only from the context menu.
Positions that have been closed will be hidden and portfolio statistics data shown in the summary line will be adjusted accordingly. This is a global setting, so will apply to all portfolios when selected.
Cash accountsCash accounts allow you to keep track of cash that is associated with your investments. To create a new account, add the Select Cash button to the toolbar or select View : Select Cash Account : << new >>. When you are in the cash account screen, right click for options to add a debit or a credit, account interest and charges, edit and delete entries, and create, rename and delete cash accounts.
You can attach an account to a particular portfolio by choosing this option when you create the account or by selecting Change attachment… from the Cash screen context menu. You can also attach individual transactions to a particular cash account by selecting the account name when recording (or editing) a transaction.
If a cash account is attached to a particular portfolio, the balance of that cash account may be included in the portfolio valuation figures as well as the portfolio value graph (as long as the portfolio does not also contain share transactions linked to other cash accounts). This can be set by selecting Tools : Options... : Portfolios & Transactions and then clicking the tick-box at the top.
Opting to include a cash balance in this way will alter the display of the portfolio statistics summary line at the top of the Current Portfolio and Transactions screens. An additional figure will appear at the start of this line giving the total portfolio valuation plus the cash balance. The rest of the figures on the statistics summary line (described in Section 7) remain unchanged. For further details on cash accounts, please see the on-screen Help.
Capital Gains Tax calculatorTo use the CGT calculator select Capital Gains from the Transactions screen context menu: the available features will appear in a sub-menu. In the Transactions screen add one or both of the CGT columns (before or after losses). You can double click on either of the CGT columns to see the CGT report for a particular share. To adjust the CGT details for a transaction, edit the transaction then click on the Show CGT button at the bottom right-hand corner of the transaction dialog box to show the CGT options. Full details are available in the on-screen Help.
Dividend reportThe Dividend report can be activated by right clicking over the Transaction screen and selecting Dividend report. The dialog box will display a list of all dividends that you have recorded for a specific tax year. For each dividend, you will see the date, company name, number of shares, net per share, total payment received, the tax rate and the tax credit. At the bottom of the list you will see a total amount of dividends received and the total tax credit.
Section 9Alarms 9

Section 9Alarms 9

Page 52 Section 9 Alarms
Section 9
Alarms
Setting and adjusting alarmsYou can set alarms for individual shares or globally.
To set or edit alarms for an individual share, select the share and then select Edit : Edit alarms for [share name]. In the dialog box that appears, click any of the tick boxes to activate and adjust your preferred limits. By selecting the On this date only tick box, an alarm can be set to trigger on the chosen date, perhaps to remind you of an AGM.
You can also set or edit alarms for percentage price changes in all shares by selecting Edit : Edit global alarms and then activating and adjusting the limits in the dialog box.
Viewing triggered alarmsShareScope can be set to show a list of triggered alarms automatically after each update. This option is found in Tools : Options... : Pre-set Portfolios. You can also set ShareScope to go straight to the Alarms portfolio after each update, to check intermediate rises, or to check back over a chosen period. To call up the list of triggered alarms, select View : View triggered alarms or press Shift and Ctrl and F12.
You can review which shares you have alarms set for at any time by choosing the Review alarms option from the Edit menu.
Alarms portfoliosShareScope contains two pre-set portfolios named Alarms and Global Alarms.
If an alarm set on an individual share is triggered, that share will be added to the Alarms portfolio automatically. Similarly, shares that have triggered any global alarms will appear in the Global Alarms portfolio.
To select these portfolios, click on the Select Portfolio button on the toolbar and then, on the box that appears, click the Advanced button to reveal the buttons for these portfolios below.
Section 10Data Mining
10

Section 10Data Mining
10

Page 54 Section 10 Data Mining
Section 10
Data MiningData Mining is an advanced filtering system allowing you to search for and select shares by setting and adjusting any number of criteria. These filters, saved as dynamic portfolios, display only those shares that match the set criteria, and the shares included will change automatically with each update.
An introductory tutorial, as well as descriptions and definitions of some of the more detailed features of Data Mining, can be found in the on-screen Help. There is also an open discussion about Data Mining at the ShareScope website. You can access this by selecting Help : Discussion forums : Data mining.
The ShareScope Data Mining CD is also available to help you get the most out of this powerful tool. This audio-visual training CD covers over two hours of step-by-step tuition which has been split into easy to use sections. Visit our website at http://www.sharescope.co.uk to learn more.
The Data Mining screen can be accessed by clicking on the Data Mining button on the toolbar (represented by a pick-axe and shovel) or from View : Data Mining or by pressing Shift and F12.
Creating a filterIn the Data Mining screen, click the Select Filter button towards the top right of the control section. A Select the filter dialog will open displaying all available filters. Clicking on <<new>> will allow you to create a new filter.
The filter Source option lies directly below the filter name and is used to specify the base list to filter. The radio buttons offer a quick selection of the Shares and FTSE 100 lists. For other lists choose Other and select from the drop-down menu. The share table will change according to which selection you have made. The table can be used and adjusted in the same way as on other List screens (see Section 6 on how to do this).
Initially, a new filter will have no criteria. To add a criterion, click the Add Criterion button to start the Data Mining Wizard.
The Data Mining Wizard takes you through a succession of steps which will help you build your Data Mining filter. To begin adding a criterion, select a category and click on the Next > button to progress to the following step. This will show any further available options.
The blue bar on the left gives an overview of the choices you have made so far. To make changes to your selection, click on the < Back button at any time or press Cancel to exit the Wizard completely.
On the last page, which finalises a selection, a green tick will appear in the coloured bar, and the Next > button will change to read Finish. Clicking the Finish button adds the selection to the chart.
To disable the Data Mining Wizard, select Tools : Options... : General and untick Use Wizard to add & edit criteria.

Page 55Section 10 Data Mining
Filter name
Criterion box
Slider
Upper limit
Lower limit

Page 56 Section 10 Data Mining
Adjusting criteria limitsA criterion box shows the details of the added criterion and allows you to adjust the range more precisely. Initially, a criterion will default to show the lowest (on the left) and highest (on the right) numeric limits applicable to the selected source. These can be adjusted either by clicking in the boxes, typing new values and pressing Enter on your keyboard, or by clicking and dragging the sliders at either end of the horizontal bar in the middle.
As well as adjusting the value of the lower and upper limits, there is also an option to invert the limits of the criterion, so that rather than find shares with values within the set range, you can exclude shares between those two values. Right click on any criterion box and the option to Invert selected range can be seen on the context menu. (For example, if you add a Last Price criteria and set values to find shares with a price between £5 and £10, clicking Invert selected range on the context menu will switch the shares selected to being all items except those with a price between £5 and £10.)
The coloured circle button in the criterion box is the traffic light status button and can be used to adjust or temporarily disable a criterion. As the name suggests, this button has three colours:
Green for Full filtering - shares must have a value that lies within the selected range;
Red for Disable this criteria - the criterion will not be active;
Yellow for Partial filtering - shares without a valid criterion value will still be shown (for instance if you had a Broker consensus criterion, you may wish to include shares which have no current consensus as well as those within your chosen limits). This can be particularly useful where data for the criterion you have chosen is not available for a share.
These settings can also be altered by right clicking on the criterion box and selecting the option from the context menu.
To edit a criterion, simply double click on the relevant criterion box to bring up the Edit Criterion dialog box, or right click on the criterion box and select this option from the context menu.
Clicking on the x at the corner of the box will delete the criteria.
The X, Y and Z buttons on the criteria boxes relate to where criteria are represented on the scatter graph (see next page).
Locking criteria values for a filterA feature called Automatic range adjust lets you lock a filter’s criteria ranges in place, or set them to change whenever the source list is changed.
If the criteria ranges are locked, the range values will stay the same when you switch between lists. If you prefer to let the ranges adjust automatically, the criterion values will shrink to match the largest possible value for that criterion.
Please note: ranges will not expand if the largest possible value in a list is more than the current value set. Therefore, switching to a source with smaller values will reduce range values, but switching back to a source with larger values will not automatically

Page 57Section 10 Data Mining
expand them.
To access this feature, right-click on the filter bar and select Automatic range adjust... from the context menu.
To keep the ranges locked in place, select Always keep filter values when changing lists.
To change the ranges when you switch between source lists, select Automatically adjust filter values if the range of the new list is smaller.
Tick Set this as default for new filter to ensure that all new filters behave in the same way as your current filter.
Tick Apply this to all existing filters to set all filters to match the options used for your current filter.
Adjusting the scatter graphIn the white area immediately above the scatter graph to the right, you will see the number of shares selected out of the total list and the number visible in the scatter graph at the time.
The scatter graph displays the spread of the shares in the filter across a range of up to three criteria. The horizontal (X) axis and vertical (Y) axis display the values and name of the criteria set to these. Clicking the X or Y buttons on the criteria boxes to the right will change which criteria are shown on these axes. Each ‘mark’, or box, making up the scatter graph, represents a share. The size (and colour) of these marks gives a third criterion, introduced by clicking the Z button on a criterion box; the larger the mark, the higher the value that share has for this third criterion. Clicking on any of these marks will highlight the share it represents in the table above (and vice versa). You can adjust the shape, size and colour of the marks by right clicking on the scatter graph and selecting Graph Design… from the context menu.
You can zoom in on any area of the scatter graph by clicking and dragging the mouse over it in much the same way as on the main Graph screen – except that here you can select the area to enlarge top to bottom as well as left to right. A double click restores the original scatter graph bringing all filtered shares back into view.
The blue histogram shows the frequency and distribution of shares on the X or Y axes (the longer the bar, the more shares at that value). A simple moving average of this distribution is shown in red. You can choose to have a histogram shown on either the X or Y axis, or on both and you can change the colour of the histogram and the display line by selecting Graph Design… from the context menu.
You can set the Data Mining screen to show only the scatter graph, or just the share table by selecting Graph or Table from the context menu. To resize the scatter graph, move the mouse pointer over the top boundary and when the pointer has changed to an up and down arrow, click and drag the mouse.
Page 58 Section 10 Data Mining
Graph and Table SettingsAs with the Graph and List screens, there are twelve Tables and twelve Graph Settings available in the Data Mining screen. These can be selected and saved from the Data Mining Tables/Graph Settings menu. To switch from Table to Graph Settings, select Data Mining Tables : Make graph active (this option will change accordingly when changing from Graph Settings to Tables). Alternatively, the Tab key on your keyboard also changes between the Tables and Graph Settings.
Dynamic portfoliosAny filters that you create in Data Mining will automatically be listed as dynamic portfolios. These can be accessed by clicking the Select Portfolio button on the toolbar and then clicking the Advanced button at the bottom right. This extends the box, revealing buttons for the pre-set lists and a list of dynamic portfolios - each corresponding to a filter.
Importing and exporting filtersData Mining filters can be imported and exported letting you share filters with other ShareScope users. To export a filter first select the filter you require. Then select File : Export : Export filter or right click in the control section and select Export this filter... from the context menu. Once you have done this a dialog box will appear asking you where you wish to store your filter.
Please note that the filter will be saved as a *.flt file which will only work when used in conjunction with ShareScope. You will not be able to view this file outside the program. The file will be called (Filter Name).flt. Once the file has been exported you can send it via email or save it to a floppy disk.
To import filters, first open the Data Mining screen. Select File : Import : Import a filter or right click in the control section and select Import a filter... from the context menu. Use the dialog box that appears to select your filter and then select Open. The filter will then be saved in ShareScope and can be selected using the Select Filter button.

Page 59Section 10 Data Mining
ExamplesThere are many criteria available in Data Mining and the following examples are included purely to help you learn about this powerful feature. They are not intended to endorse any investment strategy or opinion.
To create a filter from scratch, click Select Filter on the right hand side of the screen, select << new >> in the dialog box that appears, click OK and then give the filter a name of your choice (in the same way you would name a portfolio). Click OK to continue.
A. To find shares whose price is lower than it was 1 year ago but has risen in the last week.
1. On the right hand side of the screen, click Add Criterion to start the Data Mining Wizard. Select Price and then click Next.
2. This will show you a list of further options. Select Price change since date... and click Next to progress to the following step.
3. Click on the round radio button to select Years ago, then click in the box to the right of this and type 1. Click on Next.
4. Select Percentage and then click the Finish button on this box. After a moment, the criterion box labelled % Price since 1yr ago will appear on the right of the screen. Initially, the lower and upper limits will appear at their greatest available values.
5. To use this criterion to filter for shares whose price is less than it was one year ago, the change in price must be negative (between 0% and -99%). Therefore the upper limit (the right hand number on this box) needs to be set to zero. Click in this box, delete the figure there, type 0 and press Enter on your keyboard. You will notice that the right hand slider on the bar immediately above this number will shift to the corresponding position on the bar. Rather than typing in numbers, you can also click and drag these sliders to adjust the selected limits.
6. The second criterion will use the same criterion options as the first. Click Add Criterion, choose Price : Price Change Since... and click on Next. .
7. This time, click on the radio button next to Weeks ago, type 1 in the box next to this and then click Next. Select Percentage from the following screen.
8. To filter for shares whose price has risen in the past week, set the lower limit to zero by clicking in the left hand numerical box on this criterion, typing 0 and pressing Enter.
The list will now be showing only those shares that fit these criteria. You can choose on which axis of the scatter graph each of the criteria are shown by clicking the corresponding X, Y, Z buttons on the criteria boxes.

Page 60 Section 10 Data Mining
B. The Golden Cross: To find shares for which a rising 50 day moving average has recently crossed a 150 day moving average.
1. To set up this filter, criteria need to be added which look for the difference between the moving average lines and find shares where one day, the first moving average (50) is below the other (150), and the next day, the first moving average (50) is above the second (150) (i.e. they have crossed).
2. Create a new filter.
3. Click the Add Criterion... button to display the Wizard. Select Technical analysis and click on the Next button.
4. Select Moving Average and then from the following page select Difference between two moving averages on date....
5. This filter is to be for shares for which the moving averages have just crossed (i.e. yesterday) so click to select Trading days and type 1 in the box. Click Next.
6. At this stage you can select the type of moving averages (currently Simple) and choose the periods over which the lines are calculated. For this example enter 50 & 150 and then click Next.
7. Select Percentage and then click Finish. The criterion box will appear on the right of the screen.
7. Another similar criteria now needs to be added. Right click on the criteria box you’ve just added and select Copy this criterion... from the context menu. Now right click on the new criterion box, select Edit this criterion… and change the Trading days number to 0. Continue clicking Next until you reach the final page. At the final page, click Finish.
8. You now need to set the first criteria to find values less than zero. The second criteria needs to be set to find values greater than zero. As the difference between one line and the other has changed from negative to positive, the lines must have crossed.
9. To do this, in the first criteria box (M.A. - M.A. (%) 1td ago) adjust the upper limit by clicking in the right hand number box and typing negative - 0.01 and then press Enter on your keyboard. On the next criteria (M.A. - M.A. (%) 0td ago) adjust the lower limit (the left-hand number box) to + 0.01.
You can check the precise nature of the moving average crossing by selecting a share in the list, pressing Enter to get to the Graph screen and adding the corresponding moving average lines to the graph (right click in the middle of the graph, select Moving Averages… and create a 50 day and a 150 day moving average). Pressing the space bar will take you to the next share in the filtered list.

Page 61Section 10 Data Mining
C. To find shares which have:• A 15% growth rate in EPS over the last three years• Similar forecast growth in EPS• An increase of 15% in turnover in the last year• A quick ratio greater than 1• An operating margin of at least 10%
1. Create a new filter.
2. To add the EPS growth criteria over the last three years, click Add Criterion to bring up the Data Mining Wizard and select Headline ratios, results and forecasts.
Using the Data Mining Wizard, select:
EPS (Earnings Per Share) : Year end : Latest : Use latest analysed figure: 1 year percentage change.
Click Finish to display the criterion box in the right of the screen.
Another similar criterion now needs to be added. Right click on the criterion box you’ve just added and select Copy this criterion... from the context menu. Now right click on the new criterion box, select Edit this criterion… and then change Year End to Historical. Select 1 Year ago and click Next until you reach the final page. Click Finish.
A third criterion needs to be added. Right click on the criterion box you’ve just added and select Copy this criterion... from the context menu. Now right click on the new criterion box, select Edit this criterion… and change 1 Year ago to 2 Years ago. Click Next until you reach the final page. Click Finish to finalise the selection. Adjust the lower limit (the left hand value) in each criterion box to 15 and press Enter.
3. Now click on the Add Criterion... button again and select Headline Ratios, results and forecasts. Select:
EPS : Year End : Forecast : 1 year forecast : 1 year percentage change
This will look at the change between the latest and the 1 year forecast EPS figures.
Adjust the lower limit (the left hand value) in the criteria box to 15 and press Enter.

Page 62 Section 10 Data Mining
4. Our next criterion is turnover. Click Add Criterion... and then choose Headline ratios, results and forecasts from the wizard. Select:
Turnover : Percentage change from last year : Latest : 1 year percentage change
In the new criterion box that appears, adjust the lower limit (the left hand value) in the criteria box to 15 and press Enter.
5. The quick ratio is a measure of a company’s short-term liquidity and its ability to repay its immediate creditors. Values greater than one generally indicate that short-term debts are fully covered.
Click Add Criterion and select Advanced results and forecasts from the Wizard. Then select:
Financial ratios : Quick ratio : Latest year : Result
Click Finish to add the criterion.
Adjust the lower limit (the left hand value) in the criterion box to 1 and press Enter.
6. The last criterion we need to add is for operating margin.
Click Add Criterion and select Advanced results and forecasts from the Wizard. Then select:
Financial ratios : Operating margin : Latest year : Result
Click Finish to add the criterion.
Adjust the lower limit (the left hand value) in the criterion box to 10 and press Enter.
The list will now be showing only those shares that fit these criteria.
Section 11News screen
11

Section 11News screen
11

Page 64 Section 11 News screen
Section 11
News screenDaily news (from AFX) may be updated along with the prices. The News screen operates in much the same way as the other List screens (see Section 6 for details of how to customise the Lists).
You can access the news items for the company you are viewing, from anywhere in ShareScope, by pressing the ‘\’ key on your keyboard, or by selecting Share’s News from the screen’s context menu. To view the list of all news items for all companies, click on the News Flow button on the toolbar or press Shift and ‘\’ on your keyboard.
The News screen’s context menu has the following options:
Latest only will limit the display to show only those stories received in the last day which are still marked as Unread in the Status column.
Current list or portfolio only will limit the display to show only those stories relevant to the shares in your current list or portfolio (the portfolio name is displayed on the status bar). To return to the full list, either deselect this option from the context menu or press Esc (Escape) on your keyboard.
Viewing news stories To view the full story for any item in the list, just press the Enter key on your keyboard or double click on it. Alternatively, choose View story… from the context menu. On the story dialog box, the << Previous and Next >> buttons can be used to take you to the previous or next story on the list, or you can move to the next story by pressing the Space bar (Shift and Space to move back).

Page 65Section 11 News screen
This dialog box also gives you the options to Print the story or to Save it to disk (as either a text or a hypertext file) so that you can view it outside of ShareScope. You can also right click to Copy story to clipboard.
Once a story has been viewed, the Unread marking in the Status column will disappear.
You can choose to keep individual stories (they would otherwise be deleted when the news archive is purged). To do this, highlight the story on the News screen, right click and select Mark selected story : For keeping. In this way you could, for example, maintain a full news history relating to companies that interest you. Conversely, if you wish to remove unwanted stories that are outside the purge limit you have set, select Mark selected story : To delete on purge.
Searching the news To search for news stories, just start typing and the News search box will appear. Type in the word (or words) you wish to search for, for example Gold, Rand or Weather and click the Search button. ShareScope will search the text of all the stories and the list will be reduced to contain only those items that match your search criteria. You can press Esc (Escape) on your keyboard to return to the full news list.
You can search for a single word but you can also perform a more sophisticated search by using spaces, commas, minus signs and inverted commas as follows:
Space (A B) Search for stories containing both words A and B in any order
Comma (A,B) Search for stories containing either word A or word B (or both)
Minus (A-B) Search for stories containing word A but not word B (note there should be no spaces between the words and the minus sign)
Inverted commas
(‘A B’ or “A B”)
Search for stories containing text exactly as it appears between the inverted commas
If you have a large number of stories, you may wish to limit the period over which the search engine looks. This can avoid very old stories being found. To do this, right click on the News screen and, from the context menu, select News options.... This brings up a box where you can restrict the search to a specific number of weeks, under the Searching news section.
After searching, the text used in the search will be highlighted in the story window. To jump to the highlighted text, click on the Locate next found button. The number of times the search text appears in the story will be displayed at the top right of the story dialog box.
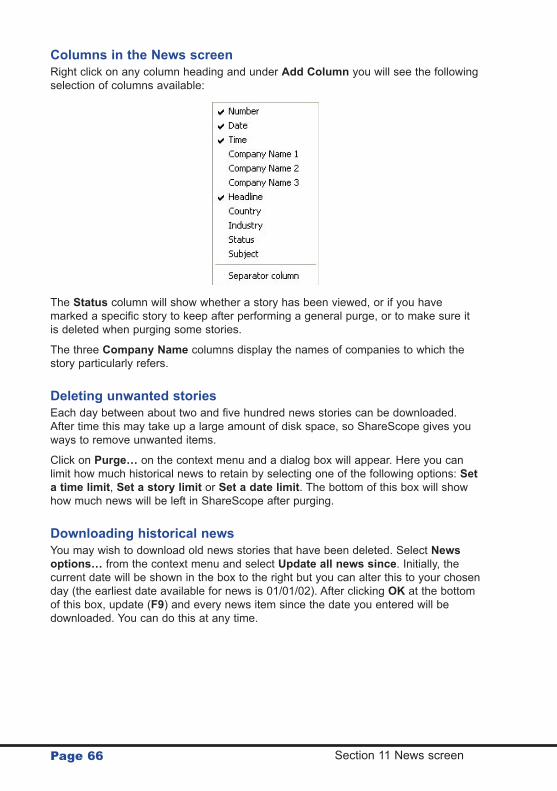
Page 66 Section 11 News screen
Columns in the News screenRight click on any column heading and under Add Column you will see the following selection of columns available:
The Status column will show whether a story has been viewed, or if you have marked a specific story to keep after performing a general purge, or to make sure it is deleted when purging some stories.
The three Company Name columns display the names of companies to which the story particularly refers.
Deleting unwanted storiesEach day between about two and five hundred news stories can be downloaded. After time this may take up a large amount of disk space, so ShareScope gives you ways to remove unwanted items.
Click on Purge… on the context menu and a dialog box will appear. Here you can limit how much historical news to retain by selecting one of the following options: Set a time limit, Set a story limit or Set a date limit. The bottom of this box will show how much news will be left in ShareScope after purging.
Downloading historical newsYou may wish to download old news stories that have been deleted. Select News options… from the context menu and select Update all news since. Initially, the current date will be shown in the box to the right but you can alter this to your chosen day (the earliest date available for news is 01/01/02). After clicking OK at the bottom of this box, update (F9) and every news item since the date you entered will be downloaded. You can do this at any time.

Section 12Directors’ dealings screen
12

Page 68 Section 12 Directors' dealings screen
Weekly statistics will show the weekly number of sales and purchases or their value in a list or graph format.
Section 12
Directors’ dealings screenTo view the Directors’ dealings for an individual share from any screen in ShareScope, press the ‘.’ (full stop) key on your keyboard (this option – Share’s Directors’ Dealings – is also available on each screen’s context menu). Clicking on the Directors’ Dealings button on the toolbar or pressing Ctrl and F11 will bring up the entire list for all shares.
In this screen, Find a Share will search for the investor name rather than the company. The Start from first letter box is not selected initially so that as you type in your chosen name, all names containing those letters will be found. Titles and initials vary in presentation, so this is generally more effective to find any match.
Context menuRight clicking gives the following options:
Select display… brings up a dialog box from which you can select which dealings and holdings you wish to view.

Page 69Section 12 Directors' dealings screen
Latest only will limit the display to just the most recent deal for each investor.
Current list or portfolio only - when this option is selected, only dealings or holdings relevant to the list in use when you switched to the Directors’ dealings screen will be shown (this list or portfolio name is displayed in the status bar). To return to the full list, either deselect this option from the context menu or simply click again on the Directors’ Dealings toolbar button (or press Ctrl and F11).
Expand abbreviations allows you to expand the abbreviations used in the Role column. For example "ch" becomes "Chairman".
N.B. The weekly statistics graph for Directors' dealings is also available from the main menu bar (View : Directors' dealings weekly stats.).

Page 70 Section 12 Directors' dealings screen

Section 13Email and forums
13

Page 72 Section 13 Email and forums
Section 13
Email and forumsTo facilitate communication between members, ShareScope has built-in email and runs web-based discussion forums for use by members.
EmailTo access this feature, click on the Email button in the toolbar, select View : Email or press Ctrl and F12. The email program operates in a similar fashion to most standard email software. The on-screen Help (within the email window) gives extensive details of all the available features. Please note that the ShareScope email system is designed to ease communications between users and Ionic Information and as such does not support the use of attachments, either sending or receiving.
Setting your email address Your email address is [your ShareScope account number]@mail.sharescope.com (e.g. [email protected]). You may prefer to adjust the first part of the address, known as the ‘alias’ (the text before the ‘@’). To do this, in the email window select Mail : Set Alias and type a new email alias in the dialog box.
Note that the OK button on this dialog will only be available once an acceptable address has been entered. If the alias you have entered is already in use by another ShareScope member, our computer will send a message advising this and you will need to choose an alternative. It may take about five minutes for this notification to be sent.
Sending and receiving emailTo send and receive ShareScope email, go to Mail : Send/Receive Mail or click on the Update Data button on the toolbar (F9). This requires ShareScope to be running (even though email is a stand-alone application). The email program will connect with the Ionic Information server and deliver and receive any outstanding messages, while also updating your ShareScope prices and fundamental data. All outstanding messages are sent together in one connection.
Email communications finish when ShareScope pops up the message Data up to date. Click on OK to close this message, and return to the email window if desired. To continue sending and receiving email, this message must first be closed.
You can also send messages directly to ShareScope Support, the ShareScope Wishlist or you can ask for a free ShareScope demonstration pack to be sent to a Friend by selecting these options from the Mail menu.
If you use email regularly, you may wish to create your own email address book. You can access this from the Edit menu in the email window.

Page 73Section 13 Email and forums
Deleting a messageTo delete a message permanently from the In Basket, click on the email you want to delete and press the Delete key or go to Mail : Delete Message.
You can also mark messages for deletion when the email program is closed. The advantage of this over Delete Message is that the email can be restored to its undeleted state. To mark a message for deletion, while it is highlighted go to Mail : Mark Message for Delete.
Discussion forumsThe ShareScope discussion groups on our website (http://forums.sharescope.co.uk) can be accessed directly from within the program.
Select Help : Discussion forums and then select the required forum from the sub menu that appears - General, Support or Data mining.
Here you can share your views and find out what others have to say about private investment. You can see how ShareScope is being used to refine investment strategies, and find out what other ShareScope members are thinking about their investments.
There is also an excellent discussion forum on The Motley Fool website (http://www.fool.co.uk) dedicated to ShareScope. To find it, click on the Discussion Boards tab of their website, then scroll to the bottom of the window and type in "ShareScope" in the Board field. Click on Find, then click on ShareScope Software User Group.
Other forums you may be interested in visiting are at Trade2Win (http://www.trade2win.com) and the Hemscott website (http://www.hemscott.com).

Page 74 Section 13 Email and forums
Section 14Importing and exporting data
14

Section 14Importing and exporting data
14

Page 76 Section 14 Importing and exporting data
Section 14
Importing and exporting dataIf there is a share not listed in ShareScope, you can add or import your own share data.
You can also export certain data from ShareScope for use in other programs (such as Excel).
Adding your own dataTo type in your own share data, select Edit : Add new data. In the box that appears, enter the name of the share or index and any other relevant information in the spaces provided. Use the Tab key to move between these spaces or click on them. Now click on the Share Price tab. To add prices, select a date, press the Enter key and type in that day’s price in pence (type M for missing or H for holiday). Move to the next date by pressing Enter or Tab or click next to the relevant date. Click OK when you have finished to save the prices and close the window.
Your new data will now appear in the All list, the Imported data list and other relevant lists depending on the Share type set. For example, if set to Ord then it will appear in the Share list. You can then find it and add the share to a portfolio in the same way as you can any other share. In List screens your added data will appear in a different colour to distinguish it from data supplied by ShareScope. N.B. ShareScope will not update the price data for you.
Importing data from a fileYou can import data from text files using File : Import : Import a share or Import all shares in a folder . Any non-blank line without a colon, date or field separator is assumed to be the share name. If no name is detected, the file name will be used as the share name, if this option is set. Otherwise you will be prompted for a file name. ShareScope can only import closing prices and not the open, high, low and volume data.
The following fundamental information can be entered: NMS, Type, Event, Currency, Sedol and Listing by naming them followed by a colon and the data.
For example:
Special Tram Co
NMS: 15
Type: Ord
Currency: pounds
Sedol: 1234567
Listing: full
12/4/98;213
13/4/98;214

Page 77Section 14 Importing and exporting data
Here the field separator is set to semi-colon, the date to ddmmyy, and the date separator is a ‘/’. The field and date format can be changed in Tools : Options... : Import. Typically a date appears as ‘15/6/98’.
Prices may be any number, e.g. 1070 or 23.252. Prices are held to five significant digits with two decimal places. Do not enter 4-digit numbers with a comma. If any, or all, fundamental data is missing it is set to zero or unknown. All text is recognised in upper or lower case.
You will find a sample file (the FTSE 100 back to 1984) in the Import folder in the ShareScope program folder.
Editing imported dataYou can edit imported data by selecting the relevant item in the List screen then selecting Edit Imported data from the context menu. You can also find this option, and the options to Delete imported data or Delete all imported data in Edit on the grey menu bar.
Exporting dataData can be exported from ShareScope for use in other programs (such as Excel). File : Export : Export this share’s prices… exports the price history for the selected share. The file name will default to the share’s EPIC code but you can use any name you choose. Make sure that the Save as type option is correct before you save. The options available are:
csv Comma separated format used by Excel
prn Used by Metastock
csq Special format for Quicken
exp General export format
The format for the General export format is determined by the Tools : Options... : Export settings (see Section 16) which also allows you to set further options.
File : Export : Export prices for shares in list… exports prices for all shares in the current list or portfolio. You need to choose the destination folder, whether you want all the prices in a single file or not, and the export format. At the bottom of the dialog it informs you how much disk space the generated files will take up. Only shares that have an EPIC code will be exported.
File : Export : Export table… exports the current table, as displayed in ShareScope, in the format set in Tools : Options... : Export. This gives the ability to, for example, export the latest price and value for all shares in your portfolio.
File : Export : Export this share’s details… exports the details of the current share.
File : Export : Export Graph…exports and saves graphs as a Windows Metafile (*.wmf) or an Enhanced Metafile (*.emf). These files can be opened directly with many software packages including: Adobe Illustrator and Corel Draw. This option will not be enabled if the current window you are viewing is not a graph window.
Please note that some data cannot be exported from ShareScope because of restrictions on the use of the data (e.g. Investors Chronicle Views).

Page 78 Section 14 Importing and exporting data
Importing and exporting Data Mining filtersData Mining filters can be imported or exported so that you can share your filters with other ShareScope members. For further details please see Section 10.

Page 79Section 14 Importing and exporting data
Section 15Dynamic data exchange
15

Page 80 Section 15 Dynamic data exchange
Section 15
Dynamic data exchange (DDE)The DDE facility within ShareScope allows you to make the latest OHLCV prices available to other applications (such as Microsoft Excel) for further analysis. The linked prices will update each time you update your ShareScope data. This is designed to add extra flexibility to ShareScope.
Creating a DDE linkWith ShareScope open, open your spreadsheet software and a new worksheet (this will normally happen as soon as you open the program). Once this worksheet is open, you can begin to enter the formulae to collect the data from ShareScope.
For example using an Excel spreadsheet, you will need to type a formula with the form:
=ShareScopeDDE|<EXCH>_<EPIC>!<DATA>
<EXCH> specifies a three or four letter code for the exchange that the item is listed on. This must be followed by an underscore. Usually, the code will be LSE (for London Stock Exchange), and when this is the case it can be omitted (along with the underscore) from the formula.
A few examples of the different Exchange Codes include:
LSE London Stock Exchange (default)
GILT Gilts
UKI UK Indices (e.g. FTSE 100)
NAS NASDAQ
ENXT Euronext (for CAC 40)
For a full list please see the on-screen Help.
For | use the Shift key and \.
For <EPIC> you will need to add the EPIC code of the share you wish to see, so if you were looking for Vodafone, this would be VOD. For the FTSE 100 you would type UKX. The EPIC code needs to be followed by an exclamation mark (!), as above.
The <DATA> in the formula is the price type you require. So if you wish to see the latest closing price this would be CLOSE. If you would prefer to see the latest opening price this would be OPEN.

Page 81Section 15 Dynamic data exchange
Below are some examples of formulae to help get you started:
1. GlaxoSmithKline London Stock Exchange
Closing Price =ShareScopeDDE|LSE_GSK!CLOSE
or simply (since the exchange is LSE)
=ShareScopeDDE|GSK!CLOSE
2. Centrica PLC London Stock Exchange
Latest Traded Volume =ShareScopeDDE|CNA!VOLUME
3. CAC 40 Euronext
Daily High Price =ShareScopeDDE|ENXT_CAC!HIGH
4. FTSE 100 UK indices
Open Price =ShareScopeDDE|UKI_UKX!OPEN
Once the formulae have been added as required you are then free to use all the functions of the relevant spreadsheet package to manipulate the information.
For more information on the functions of DDE links, please consult the Help menu in your spreadsheet package or the ShareScope on-screen Help.
Formula (DATA) DisplaysNAME Share's NameEPIC Share’s Exchange & EPIC CodeCURRENCY Share’s Price CurrencyPRICE or CLOSE Latest Closing Price OPEN Latest Opening PriceHIGH Latest High Price LOW Latest Low Price VOLUME Latest Traded Volume

Page 82 Section 15 Dynamic data exchange

Page 83Section 15 Dynamic data exchange
Section 16Options
61

Page 84 Section 16 Options
Section 16
OptionsThe Options box allows you to make adjustments to ShareScope’s features. Click on Tools : Options… and the dialog box will appear. There are several tabs to this box. The tick boxes and round radio buttons can be selected and deselected by clicking on them. Click to select the text/numerical boxes before typing your entry. Once your Options are customised to suit your preference, click OK at the bottom of the box to save them.
For further information about a particular control, please see the on-screen Help.
ListsPrefix non-Ord share names allows you to add/remove the single letter prefixes in Lists for shares that are not Ordinary.
Enable view cycling on the ‘Enter’ and ‘Esc’ keys allows you to cycle between screens using the Enter or Esc keys on your keyboard.
Double click to graph share from Lists and Details Screens gives a further way of reaching the Graph screen (you may also use Enter or the Graph button).
Include Investment Trusts in ‘Shares’ refers to the Shares list (viewed by the Shares button or F7).
Flicker-free drawing if ticked will prevent a list screen from flickering when you are scrolling through it. Unticking this option may speed up less powerful systems.
Enable Pop-up Graphs and Data Tips displays additional information about a share for name, EPIC, previous names, rank columns, and many of the results columns of a table when the mouse cursor is positioned over that data. Pop-up graphs and data tips can be disabled if required on a per-column basis, by using the context menu from the column heading. For more information on pop-up graphs and data tips, see pages 37 and 38.
Number of fixed columns when scrolling left or right refers to how many columns at the left of the screen you wish to remain in place when scrolling horizontally. Enter 0 if you want all the columns to move.
The Yield adjustment refers to the allowance for tax in calculation of yield figures.
Show historic shares lets you choose whether shares no longer on the market are shown or hidden. The Number of days option lets you decide how long you want to continue displaying a share in lists after price data stops being sent for that share. This option can also be turned on and off by clicking on View : Show historic shares.

Page 85Section 16 Options
GraphFlicker-free drawing prevents a graph screen from flickering when it is drawn.
Enhanced visual effects (ticked by default) will make best use of the drawing capabilities of modern graphics hardware, improving many transparency effects when multiple regions of different colour overlap. You may wish to disable these options if you are running ShareScope on an older PC which runs more slowly.
Show prices adjusted for splits and consolidations is selected so that the prices displayed on the status bar under the graph are adjusted automatically for splits, etc. You can view the unadjusted price by pressing the Shift key. If you deselect this option, the unadjusted prices will be shown and pressing Shift will reveal the adjusted price. Remember, you can view any share’s entire price history (showing adjusted and unadjusted prices) by pressing the ‘/’ key anywhere in ShareScope.
Automatically switch value axis from pence to pounds will switch the value axis from the minor currency unit (e.g. pence or cents) into the major currency unit (e.g. pounds or dollars) when the value of any price exceeds 1000.
Display the EPIC code in the title will add the share’s EPIC code alongside the full share name at the top of the graph.
Show event data tips will make a small data tip window pop up when you move your mouse over an event symbol on a graph. The window will show details of the event while the mouse is over its symbol, and will disappear when the mouse is moved on to another part of the graph.
There are three options for Price relative to… graphs:
Show original and deflated allows you to add a Price relative to... line to your graph, the original graph line remains on the screen.
Draw horizontal line draws a horizontal line across the graph when you select Price relative to... for easier comparison.
Draw percentage scale will give a percentage scale at the right hand edge of the graph when Price relative to… is selected, so that the relative performance of the added line can be read easily.

Page 86 Section 16 Options
Pre-set PortfoliosAlarm portfolio
Details of these options are covered in Section 9.
‘New Highs’ and ‘New Lows’ Portfolios
Allows you to adjust the period over which ShareScope searches for New Highs/Lows in the pre-set New Highs/Lows dynamic portfolios. Select Don't Check Back if you only want to see shares that have just reached a New High/Low, otherwise select a period to check back.
High/Low settings allow you to set the period over which High/Lows are calculated globally.
NewsThe News update options give you choices relating to how much news to download with the data updates (see Section 11 for details on how to download historical news).
Use full search for ‘Share’s news \’ selection will search in the text on each news item rather than just the header.
Limit search... if selected, the search will be limited to the number of weeks entered. Otherwise, the search can become slow if you keep a lot of historical news.
Selecting Automatic purge in the News purge type box will automatically purge the news archive either daily, weekly or monthly (as selected to the right) or when the purge limit (the amount of disk space used by News) is reached.
Remind me to purge calls up the purge dialog box on a daily, weekly or monthly basis (as selected) so that you can adjust how many stories to delete.
Selecting Manual purge means that ShareScope will never bring up the dialog and you can purge the news as and when you want to.
Under the purge options you can see and limit how many megabytes of hard drive the news archive takes up.
CommunicationsThe Update method is initially set to Internet. Clicking on the drop-down arrow at the end of the box will reveal options to update via Modem (Windows) or via Modem (Direct) i.e. bypassing your Windows driver. To change your update method, simply click on your preferred choice. The boxes below on the Communications tab will change accordingly.
Your ShareScope Account number and Comms password are displayed at the bottom of this tab.
Should you need more details, or have any problems updating the data please refer to Section 18 and the on-screen Help.

Page 87Section 16 Options
GeneralFast Epic find allows you to jump straight to a share once a complete EPIC code has been entered, rather than having to press OK on the Find box. This only applies when searching using the EPIC code.
If the “Ask ‘Fast EPIC find’ question” box is ticked, ShareScope will ask if you wish to use the fast EPIC find each time you select the EPIC search method. If you prefer not to be asked, make sure the box is not ticked.
Use ShareScope calculator: With this option selected, choosing Calculator from the Tools menu will bring up ShareScope’s own calculator. The tick boxes below this allow you to customise the display.
Use default Windows calculator means that choosing Calculator from the Tools menu will bring up the standard Windows calculator.
To copy a graph to the clipboard press Ctrl and C (hold the Ctrl key down and then press C) or click on Edit : Copy graph to clipboard. You can then paste the graph into a suitable application, for example MS Word or Adobe Illustrator, by pressing Ctrl and V.
Copy graph as a bitmap will copy the graph as a bitmap image. This will work best in conjunction with packages such as Adobe Photoshop, MS Paint and if posting an image on the web.
Copy graph as a vector graph will copy the current graph as a vector graphic and will generally produce a higher quality image in software that supports vector graphics, such as MS Word or Adobe Illustrator.
Use window size will create an image the same dimensions as the ShareScope graph window.
Use fixed size allows you to specify a fixed size for the copied graph. The dimensions are measured in pixels.
InfoCentre options lets you adjust the Settings for ShareScope InfoCentre. You can specify whether InfoCentre documents are viewed On start up or After an update. You can also customise the appearance of InfoCentre documents using the Page Display options and determine which categories (e.g. What's New, Events and Offers) are automatically displayed by ShareScope (Auto-view categories).
Reset all deletes any InfoCentre pages currently stored: you will still receive the latest InfoCentre documents next time you update (F9) ShareScope.
Use Wizard to add & edit criteria allows you to toggle the Data Mining Wizard on or off. When off, the Add Criterion dialog will be used.

Page 88 Section 16 Options
Portfolios & TransactionsIf you wish to see the portfolio balance include the value of the cash account tick the Include attached Cash balance(s) in Portfolio valuation box. If this is ticked you will see the combined value of the portfolio and any attached cash accounts displayed in the portfolio screen.
In the Adding shares to a portfolio box, you can adjust how often the warning box appears when you go to add shares to a portfolio. The Customise warning option is currently set so that the warning box will appear every time you add two or more shares to a portfolio. If you do add shares by mistake you can use Edit : Undo.
The Expenses box refers to how much detail you wish to see in the transaction dialog box. Select Show all expenses to have the option of entering the Broker, Stamp and Levy charges. Show expenses will change the transaction dialog to show a single Charges box.
CurrenciesThe currencies options menu can be used to enter exchange rates for other currencies. Click on Show All >> to see the full list. Double click a selected currency and click on Edit to change the details and choose to include the currency in the list of selected currencies.
ExportThis allows you to change the date format and the field separator when exporting in a format other than those listed – CSV (Excel), Metastock and Quicken. You may also choose whether or not to Use adjusted prices.
If you are exporting Transactions, there are options to include the Latest lines as well as whether to Export prices as pence.
You can also select to export the OHLCV data when exporting a share’s price history (if this is not selected, only the share’s closing prices will be exported).
The export choices are found under File : Export. See Section 14 for more details.
ImportAs with the export options, you can select the date format and field separators. There are further options to Use file name for share and to Allow comma as decimal point. See Section 14 and the on-screen Help for more details.

Page 89Section 16 Options
Section 17Toolbars
17

Page 90 Section 17 Toolbars
Section 17
ToolbarsToolbars provide a very quick and easy way to move around ShareScope. You can choose which buttons appear on your toolbar; change the position of the toolbar; set them for display on specific screens only; and create new toolbars.
Customising the toolbarRight click on any of the toolbar buttons to access the context menu. Click on Customise Toolbar… and the following dialog box will appear.
On the left of the screen, you can choose which toolbar you want to edit. There are four default toolbars (Graph, Main, News, Settings). To add a new toolbar, click on the Make new bar… button.
The Settings tab at the top of the dialog allows you to amend the position and appearance of the toolbar.
The toolbar can be positioned at the Top, Left, Right or Bottom of the screen and you can rename the toolbar by clicking on the Rename bar button and entering a new name.
Toolbar buttons can be displayed in three sizes to suit your preference: Large, Medium or Small. You can also choose to display a mnemonic of the button name (e.g. IT = Investment Trusts), and the keyboard shortcut (e.g. F9 to update).
You can choose how the toolbar button text is displayed. Show all text will display the full name for each button, Show selected text option enables you to select on a per button basis whether or not the name is displayed (see the section on the Buttons tab below) and Don’t show text will hide the names of all buttons.

Page 91Section 17 Toolbars
To display a larger font select Large size or check Wrapped to display text on more than one line when necessary.
The Visibility tick boxes allow you to specify which screens the toolbar will be displayed in. To display the toolbar in all the screens select All views (this will grey out all the other options).
The Buttons tab at the top of the dialog allows you to choose which buttons are included on each toolbar.
The items on the right are those currently displayed in the toolbar. The left hand list contains the extra buttons you can add including a -Spacer- which may be used to divide groups of buttons on the toolbar. Select items by clicking on them and use the > and < buttons to add and remove them (the >> and << buttons will move the entire list one way or the other). You can adjust the position of any item by clicking on it and using the ^ and V buttons. Click OK when you are happy with your selection.
You can assign colour flashes to List, Settings and Portfolio buttons. To add a colour flash, uncheck the required button in the right hand list and click on the Colour button. To change the displayed mnemonic, click on the Mnemonic button and type in up to three new characters.
The Presets button enables you to select from the ShareScope’s default toolbars settings and a number of additional configurations. You can reset all toolbars to the default settings by selecting Default Toolbars from the toolbar context menu.
Portfolio buttonsThe numbered portfolio buttons (1-9) can be assigned to specific portfolios. Once added to the right hand side of the dialog box, highlight the chosen button and attach it to a portfolio by clicking on the small drop-down menu arrow in the box below. Clicking on a portfolio toolbar button will then display that portfolio.
Special toolbar functionsClicking on toolbar buttons already selected lets you toggle certain options on or off.
If you click on the ALL button when it has already been selected, any limitations on the list will be removed. So it will not be restricted by New Highs, New Lows or a Selected Sector.
Clicking on the Graph toolbar button when it has already been selected will toggle the graph between linear (flat) and log scale.
Clicking on the Transactions toolbar button when it has already been selected will toggle between showing all transactions and showing just the latest lines.

Page 92 Section 17 Toolbars

Page 93Section 17 Toolbars
Section 18Updates
18

Page 94 Section 18 Updates
Section 18
UpdatesTo download the ShareScope end of day price updates you need either a modem or an Internet connection on your computer. ShareScope is initially set up to use the Internet. If you would prefer to use a modem method select Update : Comms Settings... From the communications dialog that appears, select one of the modem options from the Update method menu. Click OK to close the dialog.
Click on the Update Data button on the toolbar (or press F9). The program will connect to Ionic Information’s data service and all the latest data will be transferred to your computer automatically. A day’s data usually takes less than one minute to download. Emails will also be sent and received during this connection.
It will not matter if you do not update every day. However long you leave it, ShareScope will automatically fill in all the data from the last time you updated. For extended periods (i.e. several months), it is recommended that you visit http://www.sharescope.co.uk/downloads.php to download the latest version of the software.
If you have updating problems please refer to Appendix A and the on-screen Help.
Modem update methodsThe phone numbers available (often local rate - check with your provider) for updating are:
0845 602 4980
0845 601 6420
These are set up by the program automatically and ShareScope will use these numbers when you press the Update Data button. If you are not in the UK, the numbers you can dial in to are +44 20 7189 3100 or +44 20 7549 1130.
Please note that some of these numbers are scheduled to change in 2006. If you are having difficulty with these numbers please call Support on 0845 045 0111 or 020 7549 1104.
Modem (Windows)This method uses the default windows settings to update ShareScope from your modem.
Select Update : Comms Setting.... From the communications dialog that appears select Modem (Windows) from the Update method menu.
Check the telephone numbers below this. If there is an access digit required (e.g. for an outside line) make sure it is entered. Make any necessary adjustment(s) and click on OK. Try to update (F9).

Page 95Section 18 Updates
Modem (Direct)This method updates the data via your modem using the settings selected within ShareScope. Please note changes made in ShareScope will have no effect on your Windows modem settings.
Select Update : Comms Setting.... From the communications menu that appears, select Modem (Direct) from the Update method menu.
Below this you will see a Modem port number (e.g. COM 1). This is the communications port that ShareScope uses to dial out. To change this click on the arrow next to it and choose the correct COM port for your modem.
To check this for:
Windows 98
Go to the Start menu : Settings : Control Panel : Modems; select the Diagnostics tab at the top of the window. You should see a list of COM ports and be able to find which one your modem is connected to.
Windows XP
Go to the Start menu : Control Panel : Phone and Modem Options (or Printers and other Hardware, and then Phone and Modem Options); select the Modems tab at the top of the window. You should see your modem listed and the COM port that it is connected to.
Next to COM X you will see a speed indicator drop down menu. Select 57600 as the speed. If you experience problems you can try slowing the speed to 38400.
Check the ShareScope update phone numbers. Enter any access digits required. Click on OK and try and update.
Internet (best used with broadband, ADSL, ISDN, LAN)This method uses your Internet Service Provider (ISP) to update the data. It is ideal if used with a fixed rate internet connection.
Select Update : Comms Setting.... From the communications dialog that appears select Internet from the Update method menu.
Check that Dial Up Networking is set to Not used/LAN connection and that the update addresses are update.sharescope.co.uk and update2.sharescope.co.uk. Ensure your computer is connected to the Internet and try to update (F9).
Some dial-up connections can be configured so that ShareScope will connect to the Internet for you. Please contact ShareScope Support for information on how to do this.

Page 96 Section 18 Updates
UpgradesFrom time to time, new features are incorporated into ShareScope. You will receive these additions to the program along with your normal update. These downloads will be slightly longer than usual. When an upgrade is available, a dialog box will appear after the update and ask you if you wish to upgrade. This box will reappear every time you update until you have taken the upgrade. To avoid congestion there is a limit on how many customers get the upgrade at the same time.
The update messageDuring the update, a message box will be present on the screen giving details of the download in progress. Further information, relating to upgrades or other events which may be of interest, is also displayed. You can review this information at any time by selecting Update : Review Ionic message.

Page 97Section 18 Updates
Section 19Find a Share
91

Page 98 Section 19 Find a Share
Section 19
Find a ShareTo find a share, just type the first few letters of the name and a dialog box appears to enable you to find it quickly. If there is more than one share type for the chosen name, you will be offered a choice.
You can also search for shares using the EPIC code rather than the full company name by selecting the Use EPIC codes tick box at the bottom of the Find a Share window. If selected, you will be offered the choice to use the Fast EPIC search, which allows shares to be selected on entering the code without needing to click the OK button. You can disable this fast find feature from Tools : Options... : General.
The Find a Share option will only look for shares in the list you are currently in. So, for example, if you are currently viewing Investment Trusts, you will not be able to find BP. This also applies to lists restricted to, for instance, a single sector or if you are viewing New Highs or Lows. The status bar (at the bottom of the ShareScope window) displays this information.
In the Directors’ dealings screen, Find a Share will search for the name of the investor. In the News screen, the news search box activates when you start to type.
Note that if you begin typing when there is an open menu or dialog box, the Find a Share option will not function.
ShareScope uses the official London Stock Exchange Company names, e.g. ICI is shown as Imperial Chemical Industries. Therefore, unless you are using EPIC codes to locate shares, Find a Share can only search for these names.
If a share is not listed in ShareScope, but it is quoted on the London Stock Exchange, please contact us – we may be able to get it added for you.
New shares on the market are generally added to ShareScope within a few days of issue.
Hints on finding sharesIf you cannot find the share it may be that it is listed under a different name. For example the packaging company DS Smith is listed as Smith (DS) PLC. To find a share like this, click on the Start from first letter tick box to deselect it so that when you type DS, all those shares that contain DS will be displayed.
It is also important that you take note of dots and spaces between initials. For example, to find M.P. Evans Group PLC you should type M.P. – not MP or M P; to find GKN PLC, type GKN rather than G.K.N. or G K N.
Numbers should also be checked – First Technology is not listed as 1st Technology.
Another reason you might not find a share is if its name has been changed. For instance Kingsbridge PLC became Penmc PLC. Make sure that Start from first letter is not ticked and Find a Share will search on previous company names too. You can also look up name changes in InfoCentre using View : InfoCentre : Name Changes. See section 21 for more details on ShareScope InfoCentre.
Remember, you can always use the scroll bar to look through the Find a Share list.
Section 20Menus and the mouse
20

Section 20Menus and the mouse
20

Page 100 Section 20 Menus and the mouse
Section 20
Menus and the mouseThis section gives you some guidance on navigating the ShareScope menus and using the mouse or keyboard in ShareScope.
Menu barAt the top of the screen is the menu bar – starting with File, Edit etc. All options available within ShareScope can be found on these menus. Just click on each and a list of options will appear.
Context menusAs well as the menus along the top of the screen, many programs use context menus. These are menus which are displayed by right clicking on different screens or parts of the screen.
Nearly all the main functions in ShareScope can be found on context menus and, as the name suggests, the options appearing on these menus change depending on which screen you are viewing and also which part of the screen the mouse pointer is on. For instance, right clicking on one of the main toolbar buttons along the top will bring up a menu with options about the toolbar; right click on a column heading in the List screen and you will see options to do with the selection of columns.
Menu itemsAs you move the mouse pointer over the items on each menu, that item’s function will be displayed on the status bar at the bottom left of the screen. If you highlight a menu option (by placing the mouse pointer over it) and press F1 on your keyboard, you will call up the page from ShareScope’s on-screen Help on that item.
Items that end in ‘…’ (e.g. Tools : Options…) will bring up a box on the screen when selected (called a dialog box).
Items followed by a have sub-menus which appear whilst the mouse pointer is over that item.
If an item has a next to it, this means it is currently selected.
If an item has both a and a then turn that option on or off by going to the sub-menu and clicking on the ticked item there.

Page 101Section 20 Menus and the mouse
The mouse pointerAs the mouse pointer moves around the screen it sometimes changes shape to indicate that clicking will have a different function.
In the Graph screen, if you move the cursor to the top left or right corner, it changes to a horizontal arrow. If you then click the mouse, you will move to the next (if at the top right corner) or previous share (if at the top left) in the list, the same as using the Space bar or Shift and the Space bar.
Also on the Graph screen, if you move the mouse to the top of an analytic window it changes to an up/down arrow. You can then click and drag the mouse to resize the analytic window.
In Lists, the mouse turns to a left/right arrow when on a column heading border which allows you to resize column widths by clicking and dragging.
Alternatives to using the mouseIf you prefer not to use the mouse, ShareScope offers keyboard shortcuts to access menu items.
You may have noticed that one letter of every menu (and every menu item) is underlined. These are called keyboard accelerators. By holding down Alt and the underlined letter, you can select options from the menus using the keyboard. For example, if you want to go to the Shares list, you would press Alt and V (to select the View menu), and then S. The screen will now show all the ordinary shares as if you had pressed F6 or clicked on the Shares button in the toolbar. If you are using Windows XP the underline does not show until you press the Alt key.

Page 102 Section 20 Menus and the mouse

Page 103Section 20 Menus and the mouse
Section 21InfoCentre
21

Page 104 Section 21 InfoCentre
Section 21
InfoCentreInfoCentre is an extra information resource in ShareScope. It is designed to help you get more from ShareScope and become a better investor.
InfoCentre documents are downloaded when you update your data (see Section 18). Some documents are configured to display automatically the first time they are downloaded to your PC, such as a regular What’s New newsletter to tell you what information has been added.
ShareScope's Market Sentiment Survey is a running survey that pops up every two weeks; it should take just a few seconds to complete and you should find the results interesting. If you do not want these documents to auto-view you can switch them off (see below).
Accessing InfoCentreTo access InfoCentre, click on the View menu and select InfoCentre. A contents menu will be displayed listing the documents available. InfoCentre is divided into five main categories:
What’s New An overview of new features or products.
Data Library An archive of company name changes, historical shares and other securities, stock splits & consolidations, and suspensions.
Learning Zone Educational articles to help you get the best out of ShareScope and improve your investment technique.
Have Your Say Gauge the views of the ShareScope community on a range of issues such as stock market confidence.
Events & Offers News of exhibitions, seminars and special offers from ShareScope or other information providers that we think will be of value to you.
InfoCentre document displayTo open a document, click on the document name. The document will open in a new window.
If a section of InfoCentre (e.g. Learning Zone) contains more than one document, then each document will include a Next… button which will display the next document in the group.
Auto-view documents include a Later… button which will enable you to specify a more convenient time for viewing the document (see InfoCentre settings).
To close the document, click on the Finished button in the bottom right corner.

Page 105Section 21 InfoCentre
Context menuTo access the InfoCentre context menu, right-click in the main part of the display.
The context menu lets you go Back one page in the document, Print the current page, Copy the selected text to the Windows clipboard, or Find text in the document.
InfoCentre settingsInfoCentre settings can be accessed from the InfoCentre Contents menu or alternatively by selecting Tools : Options… and clicking on the General tab. The Settings button appears at the bottom right of the tab.
Auto-view InfoCentre documents
This section of the dialog lets you choose when InfoCentre automatically displays documents on your behalf.
You can choose to auto-view documents when you start up ShareScope (On start up) or after you have updated your database (After an update) or not at all (leave both boxes unticked). If you tick both boxes, at each of the chosen times, ShareScope will show the first InfoCentre document available (if any).
Once a document has been auto-viewed, it will not automatically display again unless you reviewed it at a later time.
Whether or not either option is ticked, InfoCentre documents are still available using the View : InfoCentre menu option. The menu option is always available unless you have no InfoCentre documents available for display.
Please note that most InfoCentre documents are NOT set to auto-view and must be viewed through the menu (View : InfoCentre).
Page Display
This section of the dialog lets you change the appearance of InfoCentre documents. These settings will apply to documents that do not have document-specific formatting defined by Ionic Information (e.g. highly graphical documents).
Text Edit the text colour, style and size.
Background Edit the background colour.
Alt Background
You can change the colour of each alternate row starting from row two.
Grid Lines You can change the colour of the lines drawn in tables.
White Space Use the slider bars to determine how much white space you have on this screen and how many horizontal lines are displayed.
Links Change the colour of links displayed which will make them more visible.
Visited Links You can change the colour of any links which you have already visited.
Click Light Default in order to reset the Page Display settings to their default values.
Click OK when you are happy with your choices.

Page 106 Section 21 InfoCentre
Auto-view categories
This section lets you choose exactly which types of InfoCentre document you want to auto-view.
To auto-view all documents in a given category, tick the box to the right of the category.
Clear a box to switch off auto-viewing of documents of that type.
Note: Auto-viewing will only happen at the times chosen by the Auto-view InfoCentre Documents options (see InfoCentre settings).
At the bottom of the Auto-view categories section is a special option for ShareScope's Sentiment surveys. Ticking Auto-view sentiment surveys lets you switch on auto-view for sentiment surveys only. This option is useful if you have already switched off auto-viewing of all Have Your Say documents using the category-based option.
Appendix AHelp and troubleshootingA

Page 107Section 21 InfoCentre
Appendix AHelp and troubleshootingA

Page 108 Appendix A Help and troubleshooting
Appendix A
Help and troubleshootingThere are a number of ways of getting help. Click on the Help (?) button on the toolbar and place the ‘?’ pointer over the area or menu item you need help with and click again. If this does not answer your query, try highlighting the option by placing the mouse pointer over it and pressing F1.
Alternatively, click on Help on the menu bar for choices of ways to get on-screen Help. It is useful to start by clicking on Help - Contents and Search : Contents and selecting the relevant option. Since this guide was printed, new features or enhancements may have been introduced. For details of these select Help : What’s New?.
There are special sections within the on-screen Help for troubleshooting. Please refer to these before calling ShareScope Support.
It is also worth checking in Update : Review Ionic message : Known issues.
In the on-screen Help, text written in green can be clicked on to bring up a further explanation. A little hand will appear instead of your mouse pointer to grab the heading so you can click on it easily. Click again to remove the extra help.
Troubleshooting on data updates
Error messages1. Unable to open port (Wrong com port for modem)
ShareScope is set to Modem (Direct) and is trying to update using the wrong COM port.
Make sure that any fax software is disabled and the Internet is not already in use.
See Modem (Direct) instructions in Section 18.
2. Unable to Dial/Unable to place TAPI call (The modem can’t dial out)
ShareScope is set to Modem (Direct) or Modem (Windows).
Make sure the line is not already in use.
Make sure that any fax software is disabled and the Internet is not already in use.
3. Dial Up Networking Error (Wrong Username and Password used for your ISP)
ShareScope is set to the Internet update method.
Make sure that the Internet Service Provider user name and password are correct in the configure window.
See Internet update instructions in Section 18.

Page 109Appendix A Help and troubleshooting
4. Call Dropped/Line Busy
Either disconnect from the internet, or set your update method to Internet.
See Internet update instructions in Section 18.
5. Update Failed (Firewall Settings)
If you have a firewall you will need to alter your firewall settings. ShareScope uses the following IP addresses:
85.159.80.16 & 85.159.84.7 (update.sharescope.co.uk)
212.227.21.63 & 217.146.97.201 (update2.sharescope.co.uk)
If you are unsure how to change this please call Support on 0845 045 0111 or 020 7549 1104.
6. Long update times
Check you are running the latest version of ShareScope. If not, you can reinstall from http://www.sharescope.co.uk/downloads.php.
Try updating without the news - Update : Update historic prices (no news).
Try switching off the email system (Update : Email on – make sure this is not ticked).
Some common problems with features1. All the toolbar buttons are grey
You may be in Training Mode. Press ESC or select Graph : Training Mode to exit.
2. Total value of portfolio is not shown at top of the Current Portfolio screen
Right click and select Investment Portfolio from the context menu.
3. Unable to see all the columns
Use the left and right keys on your keyboard to scroll.
4. Unable to see all the text in a column
Move the mouse pointer to the right hand edge of the column heading and when the pointer changes to a left/right arrow, click and drag the column border, or double click with your mouse.

Page 110 Appendix A Help and troubleshooting
5. The Legend has disappeared
If the Legend has disappeared it is possible it has become hidden behind the Windows Taskbar. To restore the legend, hold down the Shift key and then click on the Legend toolbar button, or the Legend context menu item, and the Legend will be restored to its default position.
6. Transactions lines are missing from the Transactions screen
Right click and click on Show latest only to deselect this.
Click the Transactions button again.
7. Some shares are missing from the Transactions screen
Right click and check if Show current holdings only is selected.

Page 111Appendix A Help and troubleshooting
Appendix BBacking up your data B

Page 112 Appendix B Backing up your data
Appendix B
Backing up your dataIt is good practice to back up all your files on a regular basis. This will help protect you against accidental loss of your files. This includes your portfolio files (which contain all your transactions), your configuration and graph files (which contain all your font, colour and appearance settings), and your imported data files if you have any. ShareScope lets you do this easily.
Backing up is usually done to a floppy disk, to any other directory on the computer’s hard drive (for burning to CD), or to an external storage device (e.g. a USB key).
Select File : Backup and follow the on-screen instructions. If you have lost your files, or need to move ShareScope to a new computer, reinstall ShareScope, then select File : Restore and follow the on-screen instructions.
The following files can be backed up or restored:
*.por Portfolio and transaction files
Imports.dat Imported data (optional)
Cash.dat Details of cash accounts
ShareS.cfg The columns, colours, and other settings
RTmsg.dat Real Time message (not used in ShareScope Gold)
Graph.cfg Graph lines & alarms
View.cfg Last screen layout
Currency.cfg Currency settings (not used in ShareScope Gold)
Toolbar.cfg Toolbar settings
Filter.cfg Data Mining filters and criteria settings
Editprice.cfg Historical prices changed on graphs
Email.cfg Email settings
Details.cfg Details screen layouts
Program passwordYou can password protect your program. Go to Tools : Program password... to choose your settings.
This password allows you to restrict access to ShareScope. If it is set you will be prompted every time you start ShareScope to enter the selected password. So if you set the password it is important to remember it.
Note that the program password is not case sensitive - i.e. ABcd is the same as abCD.
Appendix CShareScope files C

Page 113Appendix B Backing up your data
Appendix CShareScope files C

Page 114 Appendix C ShareScope files
Appendix C
ShareScope filesThis appendix gives a brief description of the ShareScope program files. Usually these can be found in the main ShareScope folder (C:\Program Files\ShareScope). Depending on your display settings you may or may not see the file extensions (the three characters after the dot). You can adjust the settings to show them if necessary.
• ShareScope.exe is the main ShareScope program file.
• ShareScope Gold.hlp is the help file. It contains all the help information and can be viewed independently of the program. There is also ShareScope Gold.cnt – the help contents file.
• ShareS.cfg, Graph.cfg, Filter.cfg and Toolbar.cfg hold details of your List Tables, Graph, Data Mining filters, Toolbar and other customised settings and are renewed every time you exit ShareScope.
• ShareSxxx.por (where xxx is a three digit number starting from 000) are your Portfolio files. Old or previous versions of your portfolios are kept under the name ShareSxxx.old.
• SSBackup.exe and SSRestore.exe have the same function as the Backup and Restore options within ShareScope. These can be run independently from ShareScope.
• SSemail.exe and SSemail.dll are used for sending and receiving email. Data for email is held in the Mailbox folder. The email program can be run independently from ShareScope.
• comms.log gives details of your computer’s update communications. This is useful if you ever have any problems updating.
• License.txt contains the license agreement.
The Data folder contains the various data files that ShareScope uses, these include:
• LSE_S.dat is the main LSE price database.
• LSE_C.dat contains the LSE company database.
• LSE_H.dat is the database for LSE Directors' dealings & holdings.
• UnitTrustW_S.dat holds the weekly unit trust price database.
• UnitTrustW_C.dat contains the weekly unit trust company database.
• Imports.dat contains manually imported share data.
• Cash.dat holds the data for your cash accounts.
• News.dat is the master news database file. There are also a number of news related files in the News sub-directory.
• The Content sub-directory contains InfoCentre documents and settings.
Please note, users with Plus and Pro may have additional databases.
While updating, a number of temporary files with the file extensions ‘.upd’ or ‘.tmp’ are created. These are of no long term importance and may be deleted. Do not delete anything else from this folder.

Page 115Appendix C ShareScope files
Appendix DHardware specification D

Page 116 Appendix D Hardware specification
Appendix D
Hardware specificationShareScope requires a PC with a Pentium processor (or better) running Microsoft Windows 95 or above (including Windows 98/ME/XP/NT and 2000). Other hardware requirements depend on the version of ShareScope as detailed below.
The exact resources required by your system depend on your individual computer set-up. For example, you may be able to run ShareScope with less memory than indicated. The amount of free disk space required excludes extra disk space that may be required for your operating system's virtual memory.
ShareScope Gold
Minimum System RecommendedRAM 64 MB (Windows 95/98/ME) 128 MB
128 MB (Windows XP/2000) 256MB
Free Disk Space 70 MB required 100MB
Video 800 x 600 (16 bit) 1024 x 768 or above
Communications Any modem 56K modem
Dial-up Internet Broadband Internet
To download the ShareScope end of day price updates you need either a modem or an Internet connection on your computer. Ionic Information supports direct connections for all modem speeds up to V90. ISDN connections are also supported using either the V110 or V120.
ShareScope Plus and Pro
Minimum System RecommendedRAM 128 MB (Windows 95/98/ME) 256 MB
256 MB (Windows XP/2000) 512 MB
Free Disk Space 100 MB required 200 MB
Video 1024 x 768 (16 bit) 1280 x 1024 or above
Communications 56K modem Broadband Internet
Dial-up Internet
To connect to the real time or intraday data feed you will need to be connected to the Internet (direct dial-up connections are not supported on the intraday feed). An ADSL (or faster) connection is recommended to receive a full data feed. However a 56K modem is sufficient to receive London Stock Exchange data and snapshot data for other exchanges.
Appendix EListed shares E

Page 117Appendix D Hardware specification
Appendix EListed shares E

Page 118 Appendix E Listed shares
Appendix E
Listed sharesShareScope covers all UK companies listed on the London Stock Exchange with either a full or AIM listing. If you are unable to find a share, check the name is entered as it appears on the London Stock Exchange (please refer to Section 19). If a share is not listed in ShareScope, but it is quoted on the London Stock Exchange, please contact us – we may be able to get it added for you.
New shares on the market are added by Ionic information. They usually appear within a few days of issue.
"Shares" in this guide refers to all investment instruments including Ordinary shares, Convertible shares, Preference shares, Warrants, Income shares and Capital shares.
Ordinary shares (normally abbreviated to Ord.) refer to standard shares. Other non-primary shares are distinguished in the List screens by a capital letter in front of the company name:
A ADR (American Depository Receipt)
I Index
M Income share
O Non-primary ordinary share
P Preference share
C Capital share
V Convertible share
W Warrant
Z Zero preference share
Data sourcesShareScope’s price data comes direct from the London Stock Exchange. Unlike many other sources, ShareScope’s historical prices are adjusted for share dilution (caused by share splits, consolidations, rights issues etc.). This gives a realistic view of a company’s progress.
Most of the fundamental data comes from Hemscott PLC and is maintained using information drawn from primary sources, mainly the company’s annual report and interim statement. The figures are adjusted (normalised) to account for unusual or non-recurring items so that a fair comparison can be made across all companies.
The Brokers’ consensus also comes from Hemscott. Brokers’ consensus earnings forecasts and buy/hold/sell recommendations are drawn from over 50 City institutions.
IC Views are provided by the Investors Chronicle.
The news stories are provided by AFX News and unit trust data is supplied by Financial Express.
The FTSE index values come direct from our FTSE GDS feed.

Page 119Appendix E Listed shares
Index In

Page 120 Index
A
Add a share or index 20Adding your own data 76Alarms 52Analytics 22
B
Backing up your data 112Backup and restore 14
C
Calculator 87Calendar 42Capital Gains Tax calculator 50Cash accounts 50Clipboard 87Closing the program 14Columns
Adding a column 37Changing a column heading 40Changing width 40Column context menu 37Formatting the display 41IC Views columns 39Moving a column 40News columns 66Note columns 38Numeric display 41Price columns 38Rank columns 39Removing a column 40Result columns 38Sorting a column 41Transaction columns 39, 48Wrapping columns 41
Communications options 86Context menus 100Copying to another portfolio 45
D
Data Mining 12, 54Adjusting criteria 56Adjusting the scatter graph 57Automatic range adjust 56Examples 59Importing and exporting filters 58, 78Locking criteria values 56Using the Wizard 54
Data sources 118Data updates 94Deleting news stories 66Deleting shares from a portfolio 45Details screen 10, 28
Context Menu 29Creating a box 30Customising the Details screen 29Deleting a box 31Moving or resizing a box 31Printing the Details screen 31
Directors' dealings 11, 68Discussion forums 73Dividend report 50Downloading historical news 66Downloading ShareScope 5, 94Drawing
Lines 21Shapes 21Trend lines 21
Dynamic data exchange 80Dynamic portfolios 46
E
EditingPrice data 24Transactions 49
Email 72EPIC codes 10, 87, 98Exporting data 77Export options 88
F
Files 114Find a Share 10, 98Forums 73
G
Graph 8, 16Changing the screen display 14Events on graphs 22Extending the graph into the future 21Graph Settings 12, 25, 58Graphing a list 36Graphing a portfolio 46Legend 19Options 85Pop-up graphs 42
Group portfolios 45

Page 121Index
H
Hardware specification 116Help 8
Common problems 109Troubleshooting 108
Highs & lows options 35, 86Horizontal scrolling 36How to use the guide 2
I
Import options 88Importing data 76Indicators - See AnalyticsInfoCentre 104
Auto-view 105, 106Context menu 105Document display 104Options 87Settings 105
Installing ShareScope 4Internet addresses 5, 73, 94Internet updates 95ISDN 95
L
Legend box 19Library 19List options 84List screen 10, 34
Changing the screen display 14List Tables 36Listed shares 118
M
Menu bar 100Menus 13 - See Context menusModem update methods 94Mouse 2, 100Moving averages 22
N
New highs/new lows 35News 11, 64
Columns 66Deleting news 66Downloading historical news 66Searching news 65Viewing news stories 64
Note columns 38Numeric display 41
O
Options 84
P
Password (comms) 86Password (program) 112Pop-up graphs 42Portfolio Transactions screen 48Portfolios 44
Adding shares to a portfolio 44Copying shares to other portfolios 45Creating a new portfolio 12, 44Current holdings only 50Dynamic portfolios 46, 58Group portfolios 45Moving shares to other portfolios 45Options 88Statistics 46Toolbar buttons 91
Price chart display 17Price list 38Price relative to...lines 20, 85Printing 14
Q
Quick reference 123
R
Rank columns 39Reinstalling ShareScope 5Restoring Settings - See Saving and
restoringRestoring your data 112Running ShareScope 4

Page 122 Index
S
Saving and restoring 19Graph Settings 19, 25Library 19Tables 36
Scrolling, horizontal 36Searching
News 65Shares - See Find a Share
Sectors 42Sector Analysis 42Sending and receiving email 72Shapes, drawing 21Slide show 24Sorting 11Status bar 12, 24Stop-gain 23Stop-loss 23
T
Tables in the List screen 10Tax calculators
Capital Gains Tax 50Dividend report 50
Terminology 2Text boxes 21Tip of the Day 8Toolbars 12, 90Training mode 23Transactions 48
Editing 49Recording 13, 49Sorting 49Types 49
Trend lines 21Troubleshooting 108Tutorial 8
U
Uninstalling ShareScope 4Updates 13, 94Update message 96Upgrades 96
V
Volume 18

Page 123Quick reference
Quick reference
Function key
Normal Shift Ctrl Shift and Ctrl together
F1 Context Sensitive Help
Help Arrow
F2, F3 and F4
List Tables or Graph Settings
List Tables or Graph Settings
List Tables or Graph Settings
List Tables or Graph Settings
F5 All FTSE 100 Non-index Convertibles
F6 Ordinary shares FTSE 250 AIM Income shares
F7 Investment Trusts
FTSE Small Cap Warrants Capital shares
F8 Indices FTSE Fledgling Preference Other shares
F9 Update Details Graph Select Current Cash Account
F10 Select the menu
Context menu Context menu
F11 Current Portfolio
Imported Data Directors’ Dealings
Cash Accounts
F12 Select Portfolio Data Mining Email Triggered Alarms
Generala-z (and 0-9) Find a Share or Search (in News screen)
Enter (Return) Graph Details List or Portfolio Graph
Esc (Escape) Graph List or Portfolio Details Graph
Space Select next item in current list
Shift and Space Select previous item in current list
/ View numerical price history for selected share (and / again to close)
\ View News for selected share (and \ again to return to previous screen)
Shift and \ View all News stories
. (full stop) View Directors' dealings for selected share (and return to previous screen)
- (minus sign) View Current Portfolio screen
- - (minus sign twice) Select Portfolio
+ (plus sign) View Transactions screen
> (Shift and full stop) View Key Dates

Graph screen onlyLeft / Right arrows Move cursor back/forward one trading day
Shift Left / Right arrows Scroll graph left/right
Shift and click & drag Draw a straight line
Ctrl and click & drag Draw a partial trend line
Alt and Enter Create a text box
Tab Select next line or text box
Delete Delete the selected line or text box
Shift and Delete Delete all lines and text boxes
Shift Display that day's unadjusted price on the status bar
Up / Down arrows Compress or expand the vertical scale of the graph
Shift Up / Down arrows Move the graph up or down the vertical axis
List screens onlyLeft / Right arrows Scroll columns left/right (if columns don't fit screen)
Double click on column heading
Sort list by that column (double click to reverse order)
Shift Home / End Select first/last item in current list
Page Down / Page Up View next/previous page of current list
Portfolio and Transactions screens onlyDelete Delete selected share or transaction
Shift and Delete Delete all items
Transactions screen only+ View Latest lines only (see Section 8)
, (comma) View CGT report for current tax year
< (Shift and comma) View CGT details for selected share
News screenEnter (Return) View selected story
Esc (Escape) Show all news stories
a-z (and 0-9) Search news
Page 124 Quick referencePage 124 Quick reference

Ionic Information LimitedIonic House, 3 Bath Place, Rivington Street, London, EC2A 3DR
Phone 020 7749 8500 • Fax 020 7749 8501Email [email protected] • Web www.sharescope.co.uk