string techniques notebook
TRANSCRIPT

String Techniques Semester Portfolio
Fall 2003 Compiled By: Jesse Nolan

2
Table of Contents
Instrument Setup…………………………………………………………………………………….….3 Playing Position…………………………………………………………………………………………..5 Open Strings/Ranges………………………………………………………………………………..…7 Physical Alignment……………………………………………………………………………………..10 Bow Hold/Balance………………………………………………………………………………………11 Finger Placement……………………………………………………………………………………..…14 Finger Dexterity……………………………………………………………………………………….…15 Creating a Quality Sound………………………………………………………………………….…16 Bow Strokes/Techniques……………………………………………………………………………..17 Shifting……………………………………………………………………………………….…………….20 Glissando……………………………………………………………………………………….………….21 Vibrato……………………………………………………………………………………….……………..22 Other Techniques……………………………………………………………………………………….24 Natural/Fingered Harmonics………………………………………………………………………26 Tuning/Beginning Theory……………………………………………………………………………27 Repair/Maintenance………………………………………………………………………………..…29 Accessories……………………………………………………………………………………….………..31 Pedagogical Philosophies…………………………………………………………………………….33 Method Book Evaluation…………………………………………………………………………….35 Terms……………………………………………………………………………………….……………….36 Handouts……………………………………………………………………………………….………….37 Playing Tests……………………………………………………………………………………….…….38 Quizzes/Tests……………………………………………………………………………………….……39 Guest Lecture Notes/Handouts………………………………………………………………..…40 Arranging Project…………………………………………………………………………………….…41 Teaching Project………………………………………………………………………………………..42 Observations…………………………………………………………………………………….…….…43

3
Instrument Setup
An essential step in playing a stringed instrument correctly is proper setup. Although each instrument is set-up slightly different, the goal of the setup procedure is always the same: to allow the student a comfortable and tension free playing experience. Before the setups are discussed it must first be said that the most important step in all of these setups is that the instrument be the correct size for the student. Stringed instruments come in a variety of different sizes, and it is pertinent that the instrument be selected according to the child’s size. This section will summarize the most important steps in setting up the instruments. Violin/Viola Since the violin and viola are similar instruments, although they differ in size and tuning, their setup is similar. To size the violin/viola correctly, the student must be able to reach their arm out to first position, with the instrument in playing position, and have a comfortable angle at their elbow. If there arm is stretched all the way out when they wrap their left hand around the scroll, then the instrument is too big. If the student seems cramped and the angle is to shallow, then the instrument is too small. The following are the steps in setting up the violin/viola.
1. Take the instruments out of their cases carefully. Always treat an instrument like it is your child. Be gentle and kind to it, and it will give you many years or musical enjoyment. 2. Remove the bow from the case and place it in a safe spot. 3. Attach a shoulder pad to the instrument. Various models exist and are detailed in the accessories section. 4. Make sure the bridge is properly aligned. It should be in between the two “f-holes” in the center of the instrument. Check for warping of the bridge. If the bridge is misaligned, it can be adjusted with the thumbs and forefingers by placing slight pressure at the base of the bridge. 5. Tune the instrument. For the first few years the teacher should tune all of the instruments. Make sure time is allotted for this process at the beginning of class.
Cello In order to select the proper size cello for a student, the teacher must make sure that the bottom of the peg box is level with t he child’s left ear when the lower bout is positioned correctly between their legs. The rest of the setup is similar to the violin/viola with a few exceptions.

4
1. To raise/lower the cello so that the peg box is in the correct place (level with the student’s left ear), one must unscrew the endpin wing nut and adjust the endpin accordingly. The top of the cello should rest against the student’s midsection.
2. It is most important that the cello be to the left of the students head and that the angle be correct. Many students will lean their bodies to one size for fear of the cello hitting them. Proper physical alignment is discussed in the physical alignment section.
Bass It is recommended that most elementary students start on a ½ size bass. Smaller students may start on a ¼ size. As the student grows, they will move up to a ¾ size bass. Again, many setup procedures are similar to the other stringed instruments, with a few exceptions.
1. The proper height of the bass is reached when the nut at the top of the fingerboard is at eye level. To adjust the height, the endpin must be unscrewed and raised/lowered accordingly. The bass must be carefully laid on its side to do so.

5
Playing Position
After proper setup is completed, the next step is to assure proper playing position. This section discusses the proper positions for each instrument. Violin/Viola In order to achieve proper playing position for the violin/viola, a few simple steps must be followed. These steps not only ensure a comfortable, tension free playing position, but also begin preparing students for techniques they will learn later in their string-playing careers.
1. Have the students stand up with their arms at their sides. Have them spread their feet into a “v.”
2. With the instrument held by the neck with the left hand and the strings facing away from the students, have them hold the instruments with the lower bout under their right arms and the back of the instrument against their body. This is called “rest position.”
3. While in rest position, have the students slide up and down on their “magic x,” which is an imaginary mark between the first and second knuckle joints of their left index fingers. The teacher should draw these x’s on the students in the beginning stages.
4. The teacher may also have students tap Kodaly rhythms on their fingerboards. These rhythms include, “tiri-tiri-ti-ti,” “ta-ta-titi-ta,” etc. Pneumonic devices may also be associated with these rhythms, such as “see-a-little-monkey” for “tiri-tiri-ti-ti.” 5. The Statue of Liberty exercise can then be used to ensure proper playing position. Have the students take their violins out of rest position and hold them above their heads like the Statue of Liberty for a few seconds. Next, stress that the instruments must be brought to the student, instead of the students bringing their bodies to the instruments. The violin/viola must rest on the collarbone. 6. Have the students shake their heads “yes” and “no” to assure that their necks and heads are not stiff and that the chin is not clamping down on the chinrest of the instrument.
7. Raise the bow and place it on the strings parallel to the bridge. Proper bow hold is discussed in the bow balance section.
Cello

6
Proper playing position for the cello is achieved in the following way: 1. Have the students stand up with their feet slightly apart (shoulder width).
2. The key to proper balance is the “sprinter’s start.” This is achieved by not locking the knees and keeping them relaxed and slightly bent. Have the students sway back and forth and bend their knees to ensure this looseness.
3. Next, the students should sit down, on the edge of their chairs. Make sure that they are sitting up straight. Instrument setup is crucial at this stage, because an instrument that is too low may cause slouching. Check that the students do not lean to one side, and make sure the cello is at the proper angle to the student’s left side. The cello should rest between the legs and should not be squeezed. It should be able to stand by itself. Use the rollercoaster exercise to check for this. 4. It is advantageous that the cello players tap over their fingerboards, or high dots, as well. They may also slide up and down the fingerboards into and out of thumb position. 5. Next, the curvature of the left hand must be established. It is important that the cello player must maintain a “C” shape in their left hand. To reinforce this, the a tennis ball may be used to create the curvature. The teacher should walk around and inspect each students’ left hand. 6. Place the bow on the strings parallel to the bridge.
Bass Proper playing position on the bass is achieved in the following manner:
1. Once the bass is at the correct height, the student should stand with the bass on their left side.
2. Next, the students must achieve the same “sprinter’s start” as the cello players. This can be accomplished in a similar manner as described above.
3. The bass must be placed away from the student so that it may lean into the student like a buddy leaning on them. The lower bout should rest against the inside of the left knee while the upper bout leans against the left hip. 4. The “C” curvature also applies to the bass. It is important that the teacher inspect the bassist’s thumbs to make sure they are rounded and not collapsed. 5. The bassists should also tap and slide up and down the fingerboard. The taping and sliding mentioned here and above is advantageous in preparing students for shifting and vibrato. 6. The bow should be placed on the strings parallel to the bridge.

7
Open Strings/Ranges
Violin The open strings for the violin are tuned as illustrated:
The range of the violin is as illustrated:
While the full range is above, the practical ranges for different stages of development are illustrated below:
Beginning Intermediate Advanced
Viola The open strings for the viola are tuned as illustrated:

8
The range of the viola is as illustrated:
While the full range is above, the practical ranges for different stages of
development are illustrated below: Beginning Intermediate Advanced
Cello The open strings of the cello are tuned as illustrated:
The range of the cello is as illustrated:
While the full range is above, the practical ranges for different stages of development are illustrated below:
Beginning Intermediate Advanced

9
Bass The open strings on the bass are tuned as illustrated:
***NOTE: The bass sounds one octave lower than illustrated. The range of the bass is as illustrated:
While the full range is above, the practical ranges for different stages of
development are illustrated below: Beginning Intermediate Advanced
10
Physical Alignment One of the most essential steps in assuring a students’ comfortable and tension free playing is the concept of physical alignment. The following are exercises that aid in aligning the body. IU Have students stand straight with their backs against a flat surface, preferably a wall. They should then make the “IU” sign, by first putting both arms straight above their head to make an “I” and then bending at the elbows to make a “U.” This helps relax the back and shoulder muscles and to help students learn how to stand up straight. Clock Students should stand up straight with their chest against a flat surface, preferably a wall. Next, the students make hitchhiker thumbs and extend their arms outward towards 9 and 3 on an imaginary clock face. Then slowly they should move up towards the 12 o-clock position, and then slowly back down. This also stretches the shoulders ad relaxes the arms and aids in aligning the spine. Cooked Spaghetti This is an imagery word that reminds students that their arms should always remain loose. Have students shake out their arms while keeping them loose like cooked spaghetti. The teacher can also raise the students arm and it should fall down to their side. Go around to students while they are playing, and after asking if you may touch them, make sure they are loose and remind them of cooked spaghetti. Hand over Hand This is an excellent exercise for aligning a student’s body while in playing position. Have students place their hands out in front of them in the center of their body with the elbows bent. Next have them place their left hand over their right. Then the students should move their left hand to playing position. The right hand is left in the proper position to hold a bow. Make sure the students are standing straight and not leaning, so that the spine is in line.

11
Bow Hold/Balance
The bow is the voice of the stringed instrument family. Without good bow technique it is impossible to create a beautiful sound on the instrument. Below are some guidelines for proper bow hold that enable the beginnings of correct technique and a good sound. More detail about creating a quality sound is in the section entitled creating a quality sound. Violin/Viola The violin/viola bow holds are very similar and will be discussed together. A main difference is that the viola bow is a bit larger in diameter, and thus weighs a bit more, so it is generally taken into the hand a little more. To achieve a proper bow hold, the following suggestions aid students in learning.
1. Use a pencil or another object to first establish the correct hand and finger position. Have the student drape his/her fingers over the top of a pencil and then curve their thumb in the back. Make sure the thumb is curved and the pinky is placed on top of the pencil, not draped over like the other fingers. The pinky must also remain curved and shouldn’t be stiff. Make sure the thumb is across from the middle finger. The fingers should be slightly spread apart. Using a pencil is easier for a beginner because a pencil is familiar and it is also lighter in weight. 2. The bow hold established by holding the pencil can now be transferred to the bow. Once the students pick up the bow and hold it for the first time, the teacher should go around and refine each students bow hold to show them how a correct bow hold looks and feels. 3. A pinky house should be made and used for the upper strings in order to keep their pinkies in the proper spot. 4. It is also ok to place a sticker near the eyelet to show the student where the right ring finger should be placed.
Cello/Bass The cello and bass bow holds are also similar, with exception of the German bass bow hold, which is discussed separately below. To ensure a proper bow hold, the following suggestions and exercises are recommended.
1. High Five: a great exercise for establishing the initial bow position for the lower strings is to ask the student to give you a high five. When they do so, have them freeze with their hand in the air. Place the bow in their hand and curve their

12
fingers around the top and place the thumb properly in the back, making sure it is curved and across from the middle finger. 2. A main difference in the bow holds of upper strings and lower strings is the pinky. On upper strings, the pinky rests on top of the end screw, while on lower strings, the pinky wraps over the front of the bow like the rest of the fingers. 3. When a cellist balances the bow on the string it is important that they have the proper angle of the bow arm. A good image to use with students is to have them imagine that they are looking at their watch to tell time. There will be a slight tilt to their hand and a tilt to their fingers on the bow. 4. German vs. French Bass Bow Grip: The French bow grip looks like a larger cello bow, and is held in a similar fashion. The German bow, on the other hand, is held differently. It is placed in the “crotch” of the thumb, while the first 2 fingers rest against the rubber on the stick of the bow. The 3rd finger curves into and around the frog area, while the pinky is placed beneath the frog. The French grip has an advantage in that it allows the arm to be extended more when playing.
Exercises for Bow Hold/Balance All of the following exercises are intended to reinforce the proper bow hold in a fun way and inventive way.
1. Tapping: The student should be able to tap each individual finger on the bow. This assures the looseness in the hand and fingers of the right hand.
2. Unicorn: Students place their bow on their head like a unicorn. The teacher can check the bow hold. 3. Rocket Ship: Students crouch and place the bow on the floor. The class counts down until blast off. 4. Thumb Bump: Ask the students to show their thumb bump. They will turn over their bow hand and the teacher can inspect to make sure the thumb is being kept round. 5. Windshield Wiper: Students wave the bow back and forth like a windshield wiper. 6. Pinocchio: Similar to unicorn, except the students place the bows on their noses like Pinocchio.

13
7. String Angles: Students change the angle of their bow so that they are resting the center of the bow on each string. This not only reinforces the proper bow hold, but begins to give students the feel of how the bow balances on the string. 8. Silent Bow Placement: This is an important exercise for students to get a feel for moving the bow. It also reinforces the string angles exercise above, because it forces students to not only use different parts of the bow but also makes them place the bow on different strings. 9. Vertical movement from fingers. 10. Horizontal motion: drawing the bow 11. Rotate between 2nd finger and thumb.

14
Finger Placement A crucial stage in learning how to play a string instrument properly is the placement of the fingers. In the beginning stages, it is important to be patient with the difficult concepts of fingerings, intonation, dexterity, etc.. The following steps and exercises are crucial for beginners.
1. Tapes: Many teachers place tapes on the fingerboard to indicate where the first and third fingers (and sometimes second as well) should be placed. This gives students a visual reference when they look down at the fingerboard. It also enables them to create a relatively in tune sound, as opposed to not using the tapes. Using tapes also trains students’ fingers and encourages muscle memory. Eventually the tapes can be removed.
2. Fourth Finger Placement: If students are having trouble placing the fourth finger, the teacher should have the student place the fourth finger first, and then put the lower 3 fingers down. This establishes the fourth finger placement. In the finger dexterity section there are suggestions for improving the dexterity of fingers, especially the weaker fourth finger.
3. Elevator Fingers: Another term that uses imagery to aid in student learning is elevator fingers. It describes the amount of pressure to put on the strings. To achieve the proper pressure the student should first bow an open string. Then, he/she should slowly place the finger down on the string until they hear a “good” sound. Then they have reached the correct amount of pressure.
4. Plop: Students shouldn’t have to force their fingers down. Instead, they should simply plop their fingers down on the strings. It requires less work and allows the fingers to be looser. When students plop their fingers down, a pitch becomes audible. Hearing this pitch reassures both the student and teacher that the student is placing his/her fingers correctly.

15
Finger Dexterity Once students learn the basics of placing the fingers down on the strings, the next step in advancing their abilities is to find ways to develop finger dexterity. Many simple exercises encourage this development, and most can be started at an early age.
1. Left hand pizzicato: Not only is this a technique found in advanced string music, but it also is an exercise even young students can do to build the muscles and dexterity of their weakest finger, the pinky. To do this exercise, the teacher has the student pluck an open strings with the fourth finger of the left hand.
2. Spider exercise: The spider exercise is a fun exercise, using the bow that builds finger dexterity. It involves “walking” the fingers up the bow stick from the frog to the tip and then back down again. Going back down is especially hard, but students will eventually master it. 3. Plop: The plopping exercise listed in the above section is also a good exercise for building finger dexterity. 4. 1,4,2,4 Finger Exercises: Various fingering patterns can be used to establish finger dexterity. The one listed is only one combination, but using these patterns in open strings builds finger strength and dexterity. To use this as an exercise, the student does the fingering pattern by plopping down the fingers and listening for the pitch discussed above.

16
Creating a Quality Sound So now you’re instruments are set up and proper playing position and bow hold have been established. Now what? The next step in this chain is the biggest transition a string student can make because creating a quality sound beckons at the heart of music: beauty. It is important that the standard be set high and that teachers direct student’s physical and mental activity toward always creating a beautiful sound, for as students get better, so will their sound. Since bow hold and balance have been discussed in previous sections, they will not be covered here, although these fundamentals are some of the most important aspects of creating a good sound. Detailed here, however, are some other ideas for helping students create a quality sound.
1. The Wave: The wave exercise explores the use of pressure, and begins to impart expressive playing qualities into the students’ ears. It is achieved by using long, slow bows, beginning at the frog and going to the tip. During each long bow, slight pressure is gradually applied to the bow by the index finger, and is then gradually released. The sound will make a crescendo and diminuendo according to the pressure. This helps create a quality, beautiful, and expressive sound while reinforcing even bow distribution. The teacher can introduce the student to doing 1,2,3,4,5,6, etc. waves per long bow.
2. Bow Wandering: This exercise allows students to explore parts of the bow and helps them understand the sonic characteristics of each portion of the bow. The student should start at the frog and wiggle the bow while gradually working their way toward the tip and back again. The students can do this individually or the teacher can lead while the class mimics, much like silent bow placement.
3. Bow Strokes: Quality bow strokes are essential to creating a good sound. The specifics of each stroke will be discussed in a section entitled bowing techniques.

17
Bow Strokes/Techniques Proper bowing techniques are perhaps the most important element to creating a good sound. Understanding these strokes is like understanding the vocabulary of a language and the ability to combine them in a piece is analogous to combing words to form a sentence or to tell a story. Bow Division In order to properly teach and learn the bow strokes and techniques below, students must understand the divisions of the bow and the general guidelines about bowing. It is advantageous to both the student and the teacher to place tapes on the bow that divide the bow into 4 parts. First place a tape that divides the bow in half, followed by 2 more tapes that further divide the bow into quarters. This way, students have a visual frame of reference when being instructed to play in a certain part of the bow. The tapes are also an easy way for students to measure whether or not they are bowing parallel to the bridge, the most important and fundamental of all bowing techniques. Bow Strokes
1. Martele: The most fundamental of all strokes, martele lays the foundation for many of the other bow strokes. Without understanding martele, a string player will not be able to execute other bow strokes correctly. Martele is an accented, or marked stroke, similar to marcato. It is executed with the bow “in” the string. To introduce martele the teacher should have the students place the bow on the string at the frog and give it a “tug” to make sure it is “in” the string. Then the forearm is quickly released and the bow goes to the tip and stops. The stroke sounds like a “poof,” and is followed by a ring.
2. Detache: Similar to martele, detache is executed the same way, but without stopping the bow in between strokes. Therefore, the stroke is characterized by an articulation similar to martele, but is absent of the ring because the bow keeps moving.
3. Legato: Legato is like detache, in that the bow does not stop moving. However, the beginning of each note is not accented. Instead, the change of bow is executed in as smooth of a manner as possible to give the longest, most continuous sound possible.
4. Staccato: Although staccato means “short and separated,” the bowing technique is similar to legato. To teach this stroke, the teacher should have the student do legato bows with space in between each one. First 2 notes per bow, then 3,4,5,6,etc. to achieve slurred staccato. The teacher should also have the space in between each notes get shorter and shorter until the staccato sound is achieved.

18
5. Ricochet: The ricochet bow stroke is unique in that is starts “above” the string. It is also executed with flat bow hair. Students need to be instructed to start with the bow above the string. To introduce students to this stroke, the teachers can instruct the students to bounce the bow in a vertical motion on the strings in quarter notes, 4 per string. To properly execute the stroke the arm must move as well as the wrist and hand. To use imagery, the teacher can describe it as analogous to bouncing a basketball. Once this fluid bouncing motion is achieved, the teacher instructs the students to add a horizontal motion to the stroke, and to allow the bow to bounce as many times as possible for the whole stroke of the bow. Ricochet can be executed with both up and down bows.
6. Spicatto: This stroke begins “on” the string. It is characterized by a short yet resonant sound. The stroke is performed at the balance point of the bow, which is within the lower half, usually the lower fourth. To prepare the student for spiccato, the teacher can go through the following sequence.
a. Silent bow bounces – let bow bounce off string. b. Use whole arm to bounce bow.
c. Make sure bow is free. Do not control the bow. Let it bounce naturally. d. Do 4 bounces per string, changing arm angles. e. Incorporate horizontal motion. Bow goes back and forth in a U shape. Do 4 bounces per string. f. Make sure arm is completely relaxed. g. Don’t force the stroke. No stiff motion. h. Make sure thumb is loose and across from 2nd finger.
7. Viotti: The most important thing to remember with the viotti bow stroke is that the player must “work on the short note and get the long note for free.” The viotti stroke is used when the rhythm of the music is something like the following examples:
OR
The stroke combines a tension element with that of a release by using a slower long bow for the first note, followed by a quick short bow in the same direction for the second note. Then the bow changes direction and the same sequence is repeated. The bowing pattern in this bow stroke is called “hooked” bowing. Playing this bow strokes in analogous to bouncing a ball or bouncing on a trampoline.

19
Bowing Techniques
1. Col Legno: This is a bowing technique where the wood of the bow stick is used to strike the string. It produces a very short and soft ticking sound, accompanied by the pitch of whatever note is being fingered.
2. Slurring: Slurring is a very important concept in music performance. It is the playing of more than one note on the same bow stroke. It can be used with a variety of different bow strokes from staccato to legato.
3. Sul Ponticello: This is a term that indicates bowing over the bridge. It creates a very shrill and brittle sound.
4. Sul Tasto: This is a term that indicates bowing over the fingerboard. It creates a thin, whispering sound of the pitch being fingered.

20
Shifting Once the basics of string playing are taught and understood, students will begin to advance to a higher level. With the exception of bass, shifting will occur after the basics are learned. The reason bass players are forced to shift right away is two fold: 1. because their strings are tuned differently, and 2. because they can only play 2 fingered scalar notes per position. The following guidelines and exercises apply to teaching shifting to string students. Preparatory Exercises
1. Pluck with left hand in 1st position, then slide up and pluck over high dot. This can be started at the end of the first year. 2. Slide up finger board and touch nose. Make sure the thumb stakes at the side of the fingerboard. 3. Have students bring an old sock or tennis ball to practice shifting to thumb position (cello and bass). 4. Iceberg Principle: the hand is like the top of the iceberg, and the arm and elbow are like the bottom. Therefore, the arm must move with the hand.
Types of Shifts
1. Delayed Shift: a delayed shift occurs on the new finger and new bow, and therefore it is audible to the ear. It is generally used to be more expressive. The shift can be soft and beautiful or much more aggressive, depending on the musical context.
2. Anticipated Shift: an anticipated shift occurs on the old finger and old bow, and is therefore inaudible to the ear. It is used when the expressiveness of a delayed shift is either not necessary or inappropriate.
Other Ideas
1. Think of shifting like an atlas or journey. If you go the wrong direction you won’t get to the right spot. 2. If there are 2 notes out of tune, the student probably missed a shift. 3. Make sure the student’s fingertips move forward first, then have the hand and arm follow – iceberg principle.

21
Glissando Glissando is a more advanced technique that is learned during the middle years (junior high) of instruction. It is an expressive technique that is common in orchestral music. Glissandi are characterized by moving from one pitch to another, while passing through all the pitches in between. Ideas for teaching and playing proper glissandi are below. 1. Think of slow shifts.
2. Finger Diet: Let up on the pressure on the string, but do not lift the finger entirely from the string. Just enough pressure to get the pitch is needed. This creates and thinner and smoother glissando. 3. A glissando can also be more aggressive, whereas a finger diet is not used, and the pressure on the string is maintained. This will usually be indicated in the score by a marking such as “full force.” 4. Iceberg Principle: Hand and arm move together. 5. Rhythmic, Shifting, Finger Diet: The 3 elements involved in creating a beautiful glissando. Rhythmically, glissando are tricky because it is desirable to have all those playing a glissando to move together. Therefore, rhythmic interpretation is extremely important when deciding when to shift to create the glissando. This takes much time and practice to refine.

22
Vibrato Perhaps the most important of all techniques learned after the introductory years is vibrato, because it is the expressive technique that defines the individual sound of every string player. No 2 string players’ vibratos are alike, and it is this technique that makes the instruments sound extremely beautiful. Vibrato should be introduced during middle school and/or when the student has good intonation. It contains 3 important components: 1. Arm 2. Wrist 3. Fingers Preparatory Exercises 1. Loose, rhythmic bouncing motion on collarbone.
2. Have students tap on fingerboard. This has been occurring since the first few lessons on the instrument! 3. Plop finger down and wiggle it after tapping. 4. Slide on magic x, place finger down, and then the teacher moves (wiggles) the finger for the student. This is perhaps the most important of pre-vibrato exercises, because it gets the proper feel of vibrato into the minds and fingers of students. The teacher must put their finger beneath the students in order to keep it curved and off the fingerboard and neck. In these beginning stages, a wide vibrato is good. 5. OK exercise: Have student make the OK sign with their thumb and each finger. The student should then wiggle/flex/and bend at the knuckle. The knuckles must be released for quality vibrato.
Vibrato Motion Exercises
1. For upper strings: Give students a shaker, or a card box with something in it, so that they can simulate the back and forth motion of arm vibrato while hearing the sound. The sound means they are doing it correctly. 2. For lower strings: A ketchup bottle works wonders for teaching vibrato, because the motion for vibrato on lower strings is just like shaking a ketchup bottle. This is a fun and easy way to get students involved in learning how to create a good vibrato.

23
Vibrato Exercises
1. Siren: Have students start with a very wide vibrato and then make it faster and faster until it is as fast as possible. REMEMBER – fingers should always move below the notated pitch, never above. 2. Arm vibrato exercise: Student sets hand on upper bout. Teacher puts finger between upper bout and hand. Student moves from arm. 3. Wiggles: Wiggles are perhaps the most important exercise for vibrato because the looseness of the knuckles creates a beautiful vibrato. The exercise also breaks down vibrato to its smallest motion. This exercise is for older students (high school). The sequence of the exercise is as follows: a. use metronome. Set it on 60 bpm. b. have student wiggle down to the pitch on half notes. c. the use 2 wiggles per half note. d. the 3 wiggles per half note, etc. This exercise should be introduced and monitored individually, because it is at this stage that students begin refining and developing their characteristic vibrato.

24
Other Techniques
1. Pizzicato: pizzicato is a technique introduced earlier on in the career of a young string musician. In fact, many methods introduce pizzicato in rest position, plucking the open strings like a guitar. Pizzicato can then be transferred to playing position. Pizzicato is usually notated with the abbreviated “pizz” above the music. The proper way to play pizzicato is as follows: 1. The thumb is placed on the side of the fingerboard. 2. The first finger is placed on the side of the string. 3. The string is plucked outward and allowed to ring.
For jazz bass players, the pizzicato is created by using the whole part of the first finger to get a full sound. The player also plucks to the side. Sometimes two fingers (1st and 2nd) are used.
2. Bartok pizzicato: this type of pizzicato is a special technique found in the music of Bartok and other later composers. It is created by plucking the string outwards and allowing it to snap back and hit the fingerboard. It is notated as follows:
It should not be confused with the notation for a fingered harmonic. 3. Practicing scales (see handouts section): There are many interesting ways to practice scales that can challenge students. Below are six of them. 1. Martele: 2 strokes on each note. Get used to starting with both up and down bows. Get the intonation correct (ask students to adjust) 2. Twinkle Twinkle: Use twinkle, twinkle variations. 3. Displaced slurs: Use the following bowing pattern to practice scales
4. Reversed bowings: It is important to practice the reverse. If a student were practicing the above example, it would advantageous and challenging to practice the following.

25
5. 3 part harmony for scales. 6. 4 part scales with extended harmonies.
4. Prosody: Prosody is the natural phrasing of music according to its rhythm. Much like speech has natural phrases because of the inflection and rhythm of words, so does music. Advanced musicians in high school and college understand this concept and use it to their advantage to create musical phrases that feel natural.
26
Natural/Fingered Harmonics
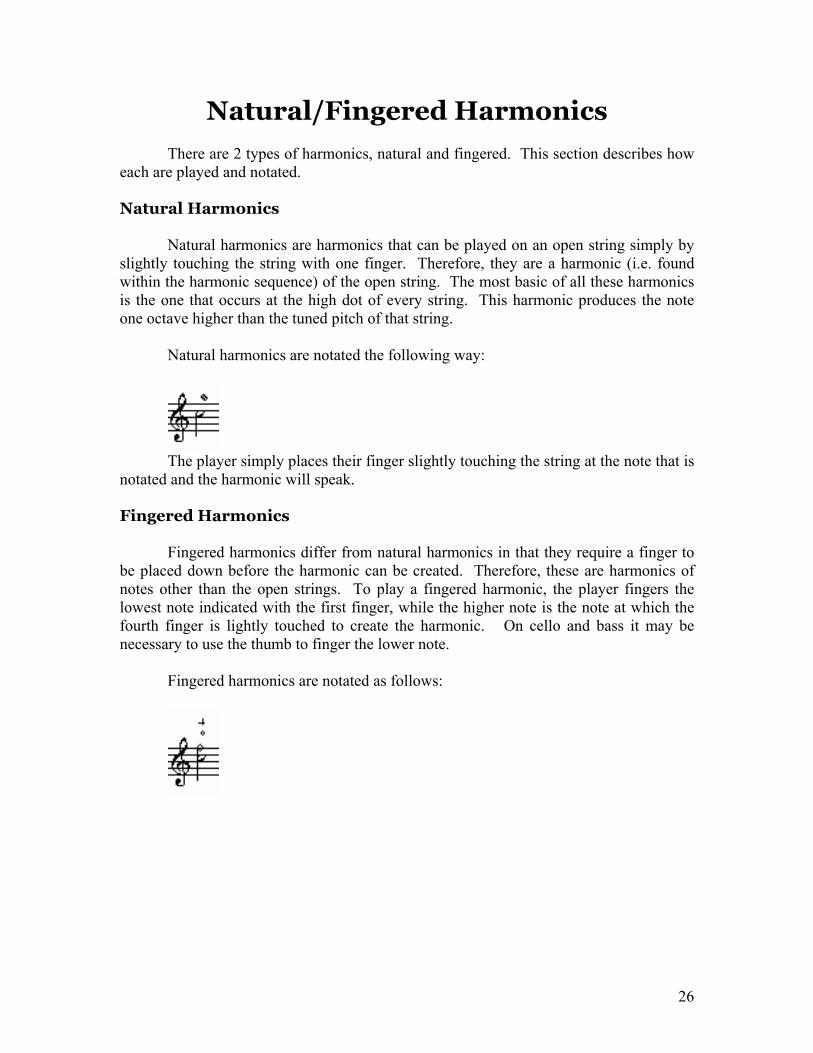
There are 2 types of harmonics, natural and fingered. This section describes how each are played and notated. Natural Harmonics Natural harmonics are harmonics that can be played on an open string simply by slightly touching the string with one finger. Therefore, they are a harmonic (i.e. found within the harmonic sequence) of the open string. The most basic of all these harmonics is the one that occurs at the high dot of every string. This harmonic produces the note one octave higher than the tuned pitch of that string. Natural harmonics are notated the following way:
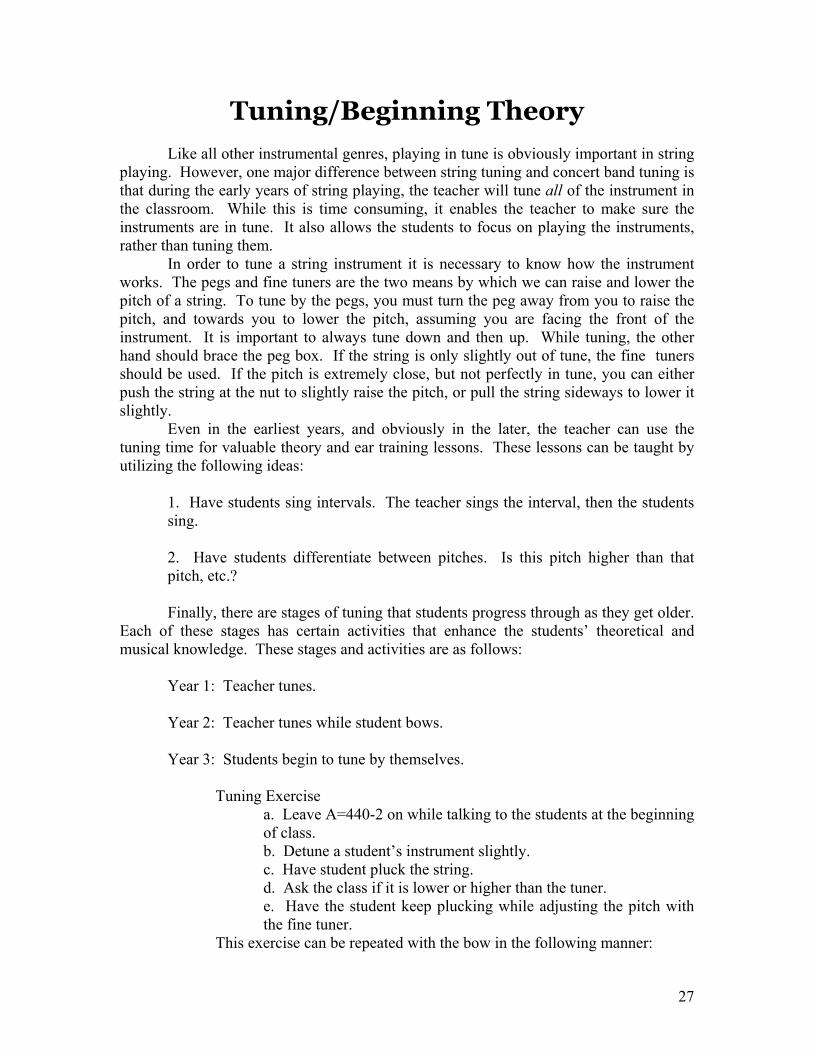
The player simply places their finger slightly touching the string at the note that is notated and the harmonic will speak. Fingered Harmonics Fingered harmonics differ from natural harmonics in that they require a finger to be placed down before the harmonic can be created. Therefore, these are harmonics of notes other than the open strings. To play a fingered harmonic, the player fingers the lowest note indicated with the first finger, while the higher note is the note at which the fourth finger is lightly touched to create the harmonic. On cello and bass it may be necessary to use the thumb to finger the lower note. Fingered harmonics are notated as follows:
27
Tuning/Beginning Theory Like all other instrumental genres, playing in tune is obviously important in string playing. However, one major difference between string tuning and concert band tuning is that during the early years of string playing, the teacher will tune all of the instrument in the classroom. While this is time consuming, it enables the teacher to make sure the instruments are in tune. It also allows the students to focus on playing the instruments, rather than tuning them. In order to tune a string instrument it is necessary to know how the instrument works. The pegs and fine tuners are the two means by which we can raise and lower the pitch of a string. To tune by the pegs, you must turn the peg away from you to raise the pitch, and towards you to lower the pitch, assuming you are facing the front of the instrument. It is important to always tune down and then up. While tuning, the other hand should brace the peg box. If the string is only slightly out of tune, the fine tuners should be used. If the pitch is extremely close, but not perfectly in tune, you can either push the string at the nut to slightly raise the pitch, or pull the string sideways to lower it slightly. Even in the earliest years, and obviously in the later, the teacher can use the tuning time for valuable theory and ear training lessons. These lessons can be taught by utilizing the following ideas:
1. Have students sing intervals. The teacher sings the interval, then the students sing. 2. Have students differentiate between pitches. Is this pitch higher than that pitch, etc.?
Finally, there are stages of tuning that students progress through as they get older. Each of these stages has certain activities that enhance the students’ theoretical and musical knowledge. These stages and activities are as follows: Year 1: Teacher tunes. Year 2: Teacher tunes while student bows. Year 3: Students begin to tune by themselves. Tuning Exercise
a. Leave A=440-2 on while talking to the students at the beginning of class. b. Detune a student’s instrument slightly. c. Have student pluck the string. d. Ask the class if it is lower or higher than the tuner. e. Have the student keep plucking while adjusting the pitch with the fine tuner.
This exercise can be repeated with the bow in the following manner:

28
a. Repeat steps a and b as above. b. Have student bow the string. c. Ask the class if it is higher or lower than the tuner. d. Adjust the tuner for the student while he/she bows. e. Eventually the student will be able to bow and adjust the tuner by themselves. In teaching a student how to tune an upper stringed instrument by themselves, it is important to note the following: 1. The instrument is supported by the shoulder and the neck. 2. The left hand comes under to work the tuners. For instruments without fine tuners, the student should bow while the teacher leans into the scroll of the instrument and tunes. In high school, a student should be able to bow while bringing their left hand under the scroll to tune at the pegs. It is important to maintain even bow speed, using long bows, with not too much pressure while tuning. Another important concept in string education is the introduction of basic music theory elements, such as reading music, clefs, the staff, etc. There are different ways to introduce these concepts, and many of them focus around how to introduce learning how to read the notes on a staff. A few are described here.
1. Color coding: teachers can create a color coding system that colors all the notes played on the C string in red, all the notes on the G string in green, etc., etc..
2. Note names: many method books write the name of the note inside the note head on the staff, and some even replace the entire note head with the letter. 3. Flashcards: flashcards are another great way to introduce students to not only notation, but also to dynamic markings, bowing instructions, etc.

29
Repair/Maintenance Some of the most frustrating issues an orchestra director can run into deal with repair and maintenance of instruments. Knowing how to fix simple problems can cut down on a lot of aggravation and can save time. Also, knowing which problems require a certified repairman is important as well, so as to not do any damage to an instrument by trying to fix a serious problem without the proper tools.
1. Rattles/Buzzes: rattles and buzzes may have a simple fix, or may require a repairman. If an instrument is rattling or buzzing, the teacher should check the following for the cause of the problem:
a. player’s personal jewelry or clothing (buttons, zippers, etc.) b. mute c. tuners d. chinrest e. cracks
The first 4 items that may rattle are simple fixes, but if a crack is suspected to be the cause of the problem then the instrument must be taken to a certified repairman.
2. Changing Strings: If a string should break, as they often do, changing a string can be a pain if one does not know how to do it. Here are the steps to changing a string. a. unwind the old string and remove it.
b. take out the new string and straighten it. It is advantageous to invest in a tube that strings can be placed in so that they are straightened prior to changing.
c. attach the string to the tailpiece or to the fine tuner. d. place the string in the hole in the peg. The string must be placed over the peg and into the hole, rather than under the peg. e. begin turning the peg away from you. Make sure that the string winds on the peg so that it does not cross itself. It should be wound neatly and horizontally along the peg. f. slowly bring the pitch up. The string will keep going flat for the next day or so. Keep adjusting it.
3. False Strings: another reason to change strings other than breakage is when they go “false.” This term refers to a point at which the strings no longer have a beautiful resonant tone. At this time the strings should be changed.
4. Cracking/Unwinding: If a string cracks or unwinds it needs to be changed.

30
5. Slipping Peg: If there is a peg that is slipping and won’t stay in tune, apply some chalk to it.
6. Stuck Peg: If a peg is stuck, you can apply some peg dope. For a cheaper fix, place the instrument by the air conditioner.
7. There are more maintenance and repair suggestions and fix-its included in the guest lecturer’s handout section. AS A GENERAL RULE: If you are unsure, and don’t know how to fix it…take it to a professional! 8. Instrument Storage: instruments should be stored in a room that is at room temperature and does not experience drastic shifts of temperature or extreme temperatures. NEVER leave an instrument in a hot or cold car. Another important component of instrument storage is the humidity factor. It is important to not let the air get too dry. Therefore a Dampit, or other type of humidifier works well. For instruments like the bass, a coffee can full of water should be kept inside the locker if a Dampit is not being used. 9. Bow: The bow should always be loosened before it is put away. It should be stored securely inside the case with the instrument or in a separate bow case.

31
Accessories
Like most instruments, there exists an innumerable amount of accessories for the string instruments. However, there are certain ones that every string player and/or orchestra director will deal with on a daily basis.
1. Shoulder pads: There are many different kinds of shoulder pads, and each individual student must chose which one is most comfortable for them. These include:
a. Kun or “Brooklyn Bridge”: this is the shoulder rest that most people are familiar with. It isn’t as good as others because it locks the violin in one place on the shoulder. b. Foam pad: This is a cheap alternative to use a shoulder pad and it actually works well in the beginning because muscles don’t get locked in place like with the Kun. c. Play on Air: This is an inflatable pillow filled with air. It works in a similar manner as the sponge but can be adjusted depending on how much air the player wants in the pillow.
2. Chin rest: There are many different types of chin rests. They come in many different shapes and can be made of many different materials. Some are made of wood, some plastic, while others are covered in animal skin. What is most important is that the player pick out which one is most comfortable for them. With a chinrest comes a chinrest key. It slips into a small hole on the bottom metal bracket of the chinrest, and is used to remove and/or adjust the chinrest as necessary. A paper clip may also work.
3. Dampit: A dampit, as discussed in the section on repair/maintenance is used to regulate the moisture inside the stringed instrument. It is a simple device that is filled with water and stored with the instrument inside the case. It is essential to proper care and storage of the instrument.
4. Mutes: String mutes are used to mute the sound of the instrument. They vary in size, according to the size of the instrument. They are simple rubber devices that are placed over the bridge of the instrument. Typically, violinists and violists keep their mutes on their instruments, below the bridge, while the lower strings who have larger mutes keep their instruments in their cases.
5. Wolf suppressor: A wolf suppressor is designed to eliminate the “wolf” of an instrument. The wolf is a dead, non-resonant pitch on an instrument. Another way to fix a wolf is to use more vibrato. These notes tend to be on the lower strings in the higher register.

32
6. Rosin: Rosin is essential in helping the bow make the violin speak. It creates the friction between the bow hair and the string. There are many different types of rosin. Pops rosin is the cost effective brand, while Kolstein is preferable. The bow needs to be rosined everyday, but it needs sticky, not powdery rosin.
7. Strings: 3 brand names of strings are Helicore (best response time), Coreli, and Pirastro.

33
Pedagogical Philosophies The following are some important string pedagogues and summaries of their philosophies on string education. Mimi Zweig Mimi Zweig is a professor of music at Indiana University. She runs the highly successful IU String Academy program. Her main focus areas of string education are: 1. Freedom of motion in playing. 2. Avoiding tension. 3. Proper support system for the student – teacher, parent, learning group. 4. Technical/Musical playing – students must be set up properly. Suzuki Suzuki is perhaps the most famous of all string pedagogues. He wrote the book “Nurtured by Love.” His philosophy centers around the following: 1. Environmental factors – support. 2. Ear Training
3. “Mother Tongue” – students should learn to play like they learn their native language. 5. Mastery of one skill before moving on to another. 6. Success by quality, not quantity.
Suzuki also stresses the following 4 elements: 1. Proper bowing 2. Production of a beautiful sound 3. Proper posture/playing position 4. Good intonation Paul Rolland Paul Rolland is another string pedagogue who has his roots at the University of Illinois where he was a professor. He stresses the simple concepts of string playing and looks at skill from big to small. His concepts include: 1. Physiological: what happens to the body when you play. 2. Physical: what you see/how you play. 3. Good rhythm concepts as basis for control.

34
Samuel Applebaum Samuel Applebaum is a pedagogue who is highly interested in rote learning. His concepts are: 1. Watch 2. Listen 3. Imitate Rainbow Practice Method
1. Form: know the form of the tune. Knowing the form will dictate how you practice. Many sections are similar in style, fingerings, and bowings, etc. 2. Fingers: the fingers must move correctly. Depending on the form, they may move in similar manners for certain sections.
3. Bow: use proper bowing techniques and good bow balance and bow hold. 4. Practice: in order to progress as a player, the student must practice.

35
Method Book Survey

36
Terms

37
Handouts

38
Playing Tests

39
Quizzes/Tests

40
Guest Lecture Notes/Handouts

41
Arranging Project

42
Teaching Project

43
Observations

44
Observation 1: Violin, Book 1 (Wednesday 12/3, 6-7pm)
Upon observing Mimi Zweig’s book 1 violin class I was absolutely astounded at
what these young students can do. Although they are small, and in some cases very
small, and playing and extremely small instruments, these students have an internal
knowledge of music that their teacher has no doubt imparted to them. They are also
extremely patient.
After the students entered the class, Mimi promptly tuned the instruments and
handed them back to the students. The students are so well trained that they knew to
stand in the center of the room and make a circle. Once this was accomplished, Mimi
began to go through a few exercises with the students. These included open string
plucking, bowing, and singing exercises. Then she took it one step further and went
around the room as each individual performed a simple exercise where each student plays
an open string, then 1 finger, then 2 fingers, then 3 fingers. Mimi would go up to each
student as they played and adjust anything that was necessary including bow arm, hold,
balance and especially where and how the students were placing their fingers. She would
tell them that the note was out of tune and show them how to fix it. She is really an
excellent teacher.
The rest of this rehearsal was devoted to the students playing for one another and
the book 2 class, who came in and watched. Since their winter concert was coming up,
each student had to prepare a solo. It is absolutely amazing that at this age these young
students feel comfortable performing alone for even 30 seconds in front of parents,
friends, and strangers. Many of them played a simple tune called “Monkey Song,” while

45
others played slightly more difficult songs. Throughout this whole process which took
roughly 20 minutes, because Mimi would go up to each student and help them fix and
intonation, bowing, physical alignment problems, etc. the other students where
completely quiet and respectful.
Mimi truly showed me how valuable a music education is and what kind of mark
it can make on a young child’s life.

46
Observation 2: Double Bass, Group 1 & 2 (Saturday 12/6, 9-10am)
Amidst the frantic holiday season and the preparations for their winter concert, the bass
group was a bit late in getting started this morning. However, as the students were setting up the
room, their teacher (Inez Wyrick), talked to the observers about the bass program. She first
mentioned that the students in the IU String Academy receive both a group and private lesson
every week. I was aware of the group lesson but not of the private. How do these teachers find
all this time? What a wonderful program Mimi has built for students of all ages.
This rehearsal period was run much like the second half of the violin rehearsal period.
The teacher just went around the room and had each student play through their recital piece a
couple of times. She didn’t make many comments, and I was even coming up with suggestions in
my head for how the student could fix intonation problems, etc. I found it slightly disheartening
that she would let a student struggle during a piece and then not offer an suggestions for making a
particular troubled passage any easier to play.
There was one student in the class who seems to have been playing for a few years
because he was far above the rest. I think the teacher mentioned that he comes to help her out in
the class because his recital piece was excellent. It was on the level of a piece to be prepared for
a college audition as an undergrad.
This class period was short, and I did not learn much from it because of the inefficiency
of the rehearsal. It seems like it would have been a better use of time to at least do some group
warm-ups in the beginning. A few tunes were played with 3 bass players, but no piece, or scale,
or warmup was played by all, except for maybe one D major scale. For all the drilling of
fundamentals that Mimi and the other teachers do, it seems like the bass students are missing out.

47
Observation 3: Cello, Book 2 (Saturday 12/6, 10-11am)
Above all, this was by far the most amazing young strings class I have ever
observed. The teacher whose name I don’t remember and whose signature is too illegible
to read, was a young girl with a gift for teaching young students. The kids in this class
were between the ages of 5-7, but there musical abilities seemed far beyond that age.
First of all, the teacher’s enthusiasm and energy during the class period was
excellent. She created a fun and exciting atmosphere just by her demeanor. She joked
lightly with her students at times, and seemed to really understand the psyche of a 6 year
old, which is something not many adults can grasp.
After she tuned the cellos, the first thing she did was an ear training exercise.
Since it was one of the student’s birthdays, she had the class play happy birthday what
ear and by watching and imitating what she did. In about 3 minutes the whole class was
playing almost every note!
I noticed during the course of the class that some of these students are already
developing their vibrato. Some of them have a very nice sound while others are still a
little shaky. But nonetheless, vibrato at the age of 6! This could be accomplished
because many of the students have good intonation. I didn’t notice a whole lot of tuning
problems and when kids would make a mistake they would fix it the next time around
without being told, which means they are using their ears successfully.
The teacher even had the students play a thumb position D major scale, first all
together, then in cannon by 2 groups, then 3 groups, and NO ONE got lost. I know my
high school cello group would have probably messed this one up.

48
Other things the teacher did that I liked included physically helping/correcting
issues with students posture, bow balance, fingers, etc. She would stop a student in the
middle of a piece and correct an intonation problem. She had excellent positive
reinforcement and had the class help her in evaluating students’ performances. After
each student played their solo, the teacher would ask the class, “What was one thing you
liked about that?” This keeps students engaged in the activity and allows them to use
their musical knowledge too evaluate the performance of others. She also would give
students practice techniques to aid in learning a particularly tough passage that had
difficult bowings or fingerings.
All in all the solos played by the student were excellent. Some were fairly long
too, well over 3 or 4 times the length of the short pieces played during the book 1 violin
class. There seems to be an amazing progression in the 1 or 2 years between book 1 and
2. Some of the cello students didn’t even have tape on their fingerboard.
This teacher was absolutely top notch! She was possibly one of the best teachers
I have ever had the privilege to observe and I made sure to congratulate her on her fine
teaching job at the end of the class.