micah stoddard mus 250 string techniques notebook...
TRANSCRIPT

Stoddard 1
Micah Stoddard
MUS 250
String Techniques Notebook
12/5/13

Stoddard 2
Table of Contents
CHAPTER 1: Right Hand Techniques Pages 4-9
Precursors to the Bow Hold: Page 4
How Hold Activities: Page 5
Pizzicato Formation: Pages 5-6
Bow Position: Page 6
Basic Bow Stroke: Page 7
String Crossing/Direction Changes: Pages 7-8
Double Stops: Page 8
Stopped/Hooked Bow: Pages 8-9
Off-String Strokes: Page 9
Bowing Principles (Guidelines): Page 9
Slurring: Page 9
CHAPTER 2: Left Hand Techniques Pages 10-14
Body Posture: Page 10
Instrument Position: Page 11
Hand Frame: Pages 12-13
Finger Position: Page 13
Finger Patterns 1, 2, and 3: Pages 13-14
Complex Finger Patterns: Page 14
Vibrato and Shifting: Page 14-15
CHAPTER 3: Pages 15-
Construction and Nomenclature: Pages 15-19
Care and Maintenance: Pages 19-20
Tuning: Pages20-21, 22-24

Stoddard 3
Developing String Programs/Recruiting: Pages 25-33
Method Book Criteria: Page 33
String Literature: Pages 34-47
Rehearsal Techniques: Pages 48-68, 69-78
Curriculum/Assessment: Pages 79-84
Identifying Technical Problems: Page 85
Handbooks: Pages 85-98, 99-114
Games: Page 115
Scales: Page 115
Fingering Charts: Page 131-132
Bibliography: Page 117
Anything else: Page 118-126, 127-133, 134-144

Stoddard 4
Right Hand Techniques
Precursors to the Bow Hold
Goals
o Thumb- supports the bow from the bottom
o Pinky- acts as a counter level
o Index Finger- Governs the weight (“power finger”)
o Middle Finger/Ring Finger- Used for stability
Violin/Viola
Cello/Bass
Activity: Pencil Hold
Step 1: Hold the pencil with the left hand at eye level.
Step 2: Hang the right hand fingers over the top of the pencil.

Stoddard 5
Step 3: For Violin and Viola, place the forth finger pinky on top of the pencil. For Cello and Bass,
the fourth finger pinky should hang over the pencil.
Step 4: The thumb should be slightly curved and be directly behind the second finger.
Step 5: For Violin and Viola, the first finger should rest on top of the pencil. For Cello and Bass,
the pencil should touch the first three fingers and touch the fourth finger at the first joint of the
finger.
Step 6: Remove the left hand, keeping the fingers relaxed. Practicing this will help with shaping
the hand for the bow hold.
How Hold Activities
Shake hand as if it is dead weight
“Bunny Hand”
o Make a “bunny” face with the thumb being between the middle finger and right finger
“Up like a Rocket” – keeping the bow hold, shoot the bow up into the air and then back down.
Back and forth – keeping the bow hold, wave the bow back and forth (like windshield wipers).
Circles – keeping the bow hold, place the left hand at the end of the bow, and then move the
bow in a circular motion clockwise and counter clockwise.
PVC pipe – Use the PVC pipe to practice bowing
Balloon Bonanza
o With blown up balloons, the students will attempt to keep the balloon up in the air with
the bow, while keeping the proper bow hold.
Spider Races
o Racing up and down the bow while keeping the bow hold.
Pizzicato Formation
Definition: Pizzicato: to pluck
Formation
o Form the right hand with the middle, ring and pinky down. The first finger and thumb
will be out as if forming the letter “L.”
o The hand has to be anchored in place at the side of the finger board.
This gives free rang to get at all of the strings.
o Plant the thumb at the side of the finger board.
o Using the middle of the pad of the finger, wiggle the string and then pull to the side and
let go.
Stoddard 6
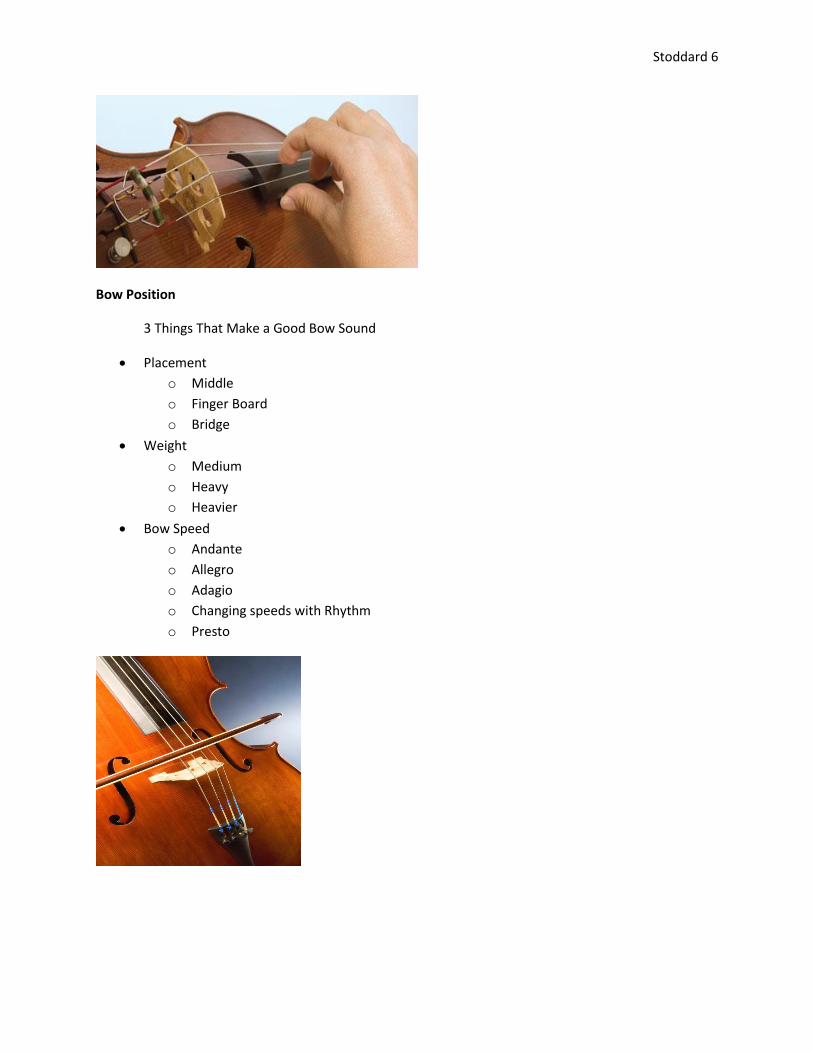
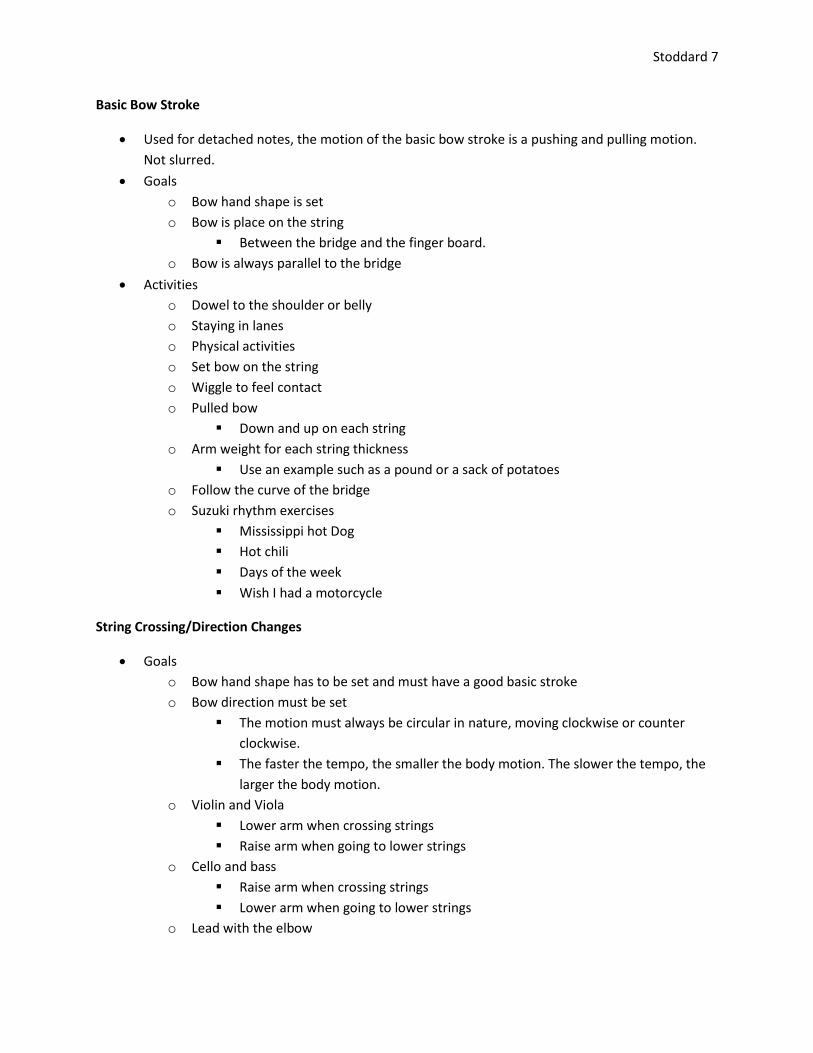
Bow Position
3 Things That Make a Good Bow Sound
Placement
o Middle
o Finger Board
o Bridge
Weight
o Medium
o Heavy
o Heavier
Bow Speed
o Andante
o Allegro
o Adagio
o Changing speeds with Rhythm
o Presto
Stoddard 7
Basic Bow Stroke
Used for detached notes, the motion of the basic bow stroke is a pushing and pulling motion.
Not slurred.
Goals
o Bow hand shape is set
o Bow is place on the string
Between the bridge and the finger board.
o Bow is always parallel to the bridge
Activities
o Dowel to the shoulder or belly
o Staying in lanes
o Physical activities
o Set bow on the string
o Wiggle to feel contact
o Pulled bow
Down and up on each string
o Arm weight for each string thickness
Use an example such as a pound or a sack of potatoes
o Follow the curve of the bridge
o Suzuki rhythm exercises
Mississippi hot Dog
Hot chili
Days of the week
Wish I had a motorcycle
String Crossing/Direction Changes
Goals
o Bow hand shape has to be set and must have a good basic stroke
o Bow direction must be set
The motion must always be circular in nature, moving clockwise or counter
clockwise.
The faster the tempo, the smaller the body motion. The slower the tempo, the
larger the body motion.
o Violin and Viola
Lower arm when crossing strings
Raise arm when going to lower strings
o Cello and bass
Raise arm when crossing strings
Lower arm when going to lower strings
o Lead with the elbow
Stoddard 8
Activities
o Tock the bow on the bridge
o Imagine a pencil on the tip of the bow; player should be able to draw a circle
o Practice string crossing by rote first
o Add rests between string crossings for practice
Double Stops
Definition: Playing on two adjacent strings at the same time.
Goals
o An even sound should come from both strings
o Player should have a good push and pull basic stroke
Activities
o Center the bow on both strings
o Play a D scale with the open string
Stopped/Hooked Bow
Staccato
o The note is a detached, separated, or disconnected not played with the bow remaining
on the string
o Stopped bowing
Martele
o A staccato stroke that is commonly referred to as a hammered stroke. Each stroke must
be prepared for with pressure before playing and then immediately followed by release
of pressure.
Tremolo
o This technique is moving the bow back and forth as rapidly as possible for the duration
of the note
Hooked Bowing
o To avoid awkward bowings or improper accents, this technique is tying or slurring notes
o Hooking two notes in one bowing
Loure
o A smoothly separated (pulsed) bowing, a semi staccato type of bowing
o Used to annunciate notes without having a pause between each of the notes
Sul Ponticello
o Playing with the hair of the bow as close to the bridge as possible
o Tilt the bow hair away from the bridge to get the desired affect
Col Legno
o Playing with the wood of the bow, the string is struck (tapped) with the wood side of the
bow
Sul Tasto
Stoddard 9
o Playing with the bow placed over the finger board
Colle
o The bow is placed on the string as if going into an up-bow spiccato
o Pinching the string lightly with a sharp attack, and then as soon as the note is sounded,
lift the bow for preparation of the next bow stroke
Scordatura Tuning
o Tuning to create an unusual effect
Off-String Strokes
Spiccato
o Referred as “bouncing bow”
o Moving in a horizontal direction like the basic bow stroke
o After each stroke there is a lift, which creates a bouncing effect
Bowing Principles (Guidelines)
Bowings are going to be in music for low level pieces
o In higher level pieces, teacher must be put in bowings
Nearly all the time, measures will begin with a down-bow
o Strong beats must begin with a down-bow
With an up-beat; use up-bow
Dotted eighths are usually played with a hook bowing
A succession of uninterrupted sixteenth notes without slurs should have each group of four
begin with a down-bow
A syncopated note should be played with a down-bow
Slurring
Goals
o Smoothly pull the bow in the same direction
o Connect two or more different pitches
Activities
o Fast finger (left hand) slow bow (right hand)
o Eighth notes with the left hand
o Quarter notes with the left hand
o Hook bow
Split the bow in half with each note
o Slow Scale

Stoddard 10
Left Hand Techniques
Body Posture
Goals
o Lengthening of the body
o Balanced
o Having the freedom to move
o Having a wide range of motions
Activities
o Sitting/standing
o Tripod
Feet flat on the ground
Torso lengthened
Shoulders back
o “Surveying” the land
o Acting the royalty
o “Growing and inch” by pretending there is a string on top of your head that you pull up
to “grow an inch”
o Balancing a book
o Bouncing knees- bounce up and down for balance
o “Hot Seat” – having to get up quickly from your seat
o “Elevator” – slowly getting up and down from your seat

Stoddard 11
Instrument Position
Cello/Bass
o Out in front of player
o Tuck instrument into the body
Cello should be in-between the knees
When standing, the peg box should come up to the player’s chin
When sitting, the neck and peg box should NOT rest on the player’s
shoulder
Bass should be against the player’s left thigh
When standing, the peg box should come up to at least the eye level of
the player
o Hug instrument
o Roll – rock the body back and forth
Violin/Viola
o “Statue of Liberty”
Have the instrument up above the player’s head
o “Helicopter”
Bring the instrument over to the left shoulder without placing on the shoulder
o “Landing”
Place the instrument on the shoulder of the player
o “Sniff”
Bring the head up and then place the chin on the chin rest
Cases should be on the left side of the chair
o This gives order to the setup and gives a path to get in-between students
o Make sure the cases are locked before the player picks the case up
o When getting the instrument out while sitting, make sure the handle of the case is by
the belly
o Knobs on the bottom of the case should be in the lap
Open the case
o Lift the instrument out by the neck with the left hand
o Close and lock the case and then place on the floor
When helping the high strings put on their shoulder rests, give the low strings a task to keep
them occupied
Check the low strings to make sure that everything is on task

Stoddard 12
Hand Frame
Goals
o Left shoulder needs to be relaxed
o Left elbow and arm should be at an appropriate level for the string needed
o Arm should be parallel to the floor for violin and viola. Arm should be up like a “chicken
wing” for cello and bass
o The back of the wrist should be straight for violin and viola
o With the cello and bass, the hand should make a “C.” The thumb and middle finger
should be together at all times. The thumb will be placed on the back of the neck so that
it is not seen.
o For violin and viola, the thumb is relaxed and facing toward the ceiling
BAD GOOD
Good Violin/Viola

Stoddard 13
Activities
o “Salute” (for violin and viola)
o Arm out “C”
For cello and bass, the player will bring their left arm out with the hand in the
shape of the “C.”
Player will then bring their arm in and place their left hand in the appropriate
place on the instrument
o Hand Shake and Wave (for violin and viola)
o Bear Claw (for Cello and bass)
o Pinky Strum
Players will strum with their pinky without loosing the proper left hand hold
o Tapping
To build finger strength, students do mini “finger push-ups.”
Finger Position
Thumb is relaxed
Fingers are curved, making table-tops and tunnels
Must keep fingers close to the strings
o Player should not bring their fingers away from the instrument. Keep fingers close to be
able to play quick passages
Finger Pattern One
Finger pattern one is based off of the tonic tetra chord of a major scale. Beginning on an open
string, it consists of the normal progression of two whole steps, a half step, and a whole step. This finger
pattern is a very natural position, and the most comfortable out of all the finger patterns. The first finger
will be a whole step up from the tonic open string. The second and third fingers for violin and viola will
be coupled together so that the player will achieve a whole step and then a half step. For cello and bass,
the third and fourth fingers will be coupled together to achieve a while step and then a half step.
Finger Pattern Two
Finger pattern two is based off of the tonic tetra chord of the natural minor scale. This
progression is a whole step, a half step, and two whole steps. On violin and viola, the first finger and
second finger a coupled together to achieve a while step and then a half step. On cello, the first and
second fingers will be coupled together to achieve a whole step and then a half step. On bass, the
second finger will be extended to achieve the half step needed.
Complex finger patterns (finger pattern three)
This pattern involves a finger extension for the cello. Cello will extend their first finger backward;
all other fingers will stay in their same basic finger pattern. The bass will move the entire hand one half
step back to lower the pitch. But, the fingers will be similar in relationship to the first finger pattern.

Stoddard 14
Complex Finger Patterns
Extensions
o Backward- move index finger backward, dropping the elbow to maintain relative hand
position
Half Positions (Bass moves hand one half step back)
o Finger patterns Three, Four, and Five employ extensions and half positions
Vibrato and Shifting
Using only one finger at a time
For upper strings the motion is even
o When using (arm vibrato), the arm, wrist, and hand function as a unit. The wrist is
straight, but relaxed. There should be a straight line from the elbow to the bass of the
hand.
o When using (wrist vibrato), the motion is generated by the wrist joint as a “waving”
motion. The finger flexes and there is minimal arm motion. The ring finger is normally
used with this vibrato.
For lower strings
o Arm vibrato is used. The motion is produced by rotating the lower arm, the elbow does
not move, rolling back and forth to function as a unit. When vibrating with the pinky,
player should add third finger.
Activities
o Cross the chest and massage the shoulder (for violin and viola)
o “shake the can”
o Polish the strings
Player will slide their fingers up and down on the strings
o Make the polishing smaller
Make the polishing smaller and smaller until player is down to one finger. The
vibrating should be between a major second and minor third.

Stoddard 15
o “Shadowing”
Flip the bow over and place onto lap. Pretend to slow bow while vibrating the
string on the instrument. Slow bow, fast left hand.
o Add the bow to the strings
Special Topics
Construction and Nomenclature
Viola Strings Violin Strings

Stoddard 16
Cello Strings Bass Strings
Materials
Body
o Spruce – used normally for the top of the instrument
o Maple – used for the scroll, peg box, neck, sides, and bridge
o Ebony – used for the finger board, nut, pegs, tail piece, and end button (on the violin
and viola)
o Metal – used for the brass pegs, fine tuners, and tail gut
o Plastic – used for the tail piece, fine tuners, chin rests, and tail gut
o Laminated Wood – used on school instruments for durability
Chin Rests
o Come in a variety of sizes
o Can be made out of ebony, boxwood, rosewood, or plastic
End Pins
o Found on the cello and bass
o Made out of steel
Pegs
o Used to tune the strings
o Types of pegs
Friction pegs

Stoddard 17
Tension pegs (caspiri)
Peg compound (aka dope) is used to loosen pegs
Bow
o Materials
Pernambuco and brazilwood
These are best for making a bow
Normally used by step-up students and professionals
Carbon fiber
o Coda bow
o Musicary
Frog
Found at the end of the bow, this is where you hold the bow
Normally made out of plastic
Hair
Made of either horse hair, or synthetic hair
Bass Bows
Two types (German and French)
Strings
Metal
o Found on the E string of the violin
o Metal wound metal
o Metal wound with synthetic
Giver warmer sound
Less responsive
o Metal wound with guy
Used on the cello G and C strings
o String Brands (students)
Glaesel Chrominum Steel
Dr. Thomastik (Germany)
Eudora
Wondertone
Gold Label
Red Label
Jarger (for cello)
o Rock Stops
Can be made out of metal, rubber, or player could use a
strap that attaches to the leg of the chair
o Shoulder Rests
Can be made out of sponge
More expensive brands:
Resonance (about $12)

Stoddard 18
Wolf (about $45, good for taller students)
Kun (about $30)
Play on the Air
Strad Pad
Viva
Muco (very similar to Kun)
o Rosin
Sticky substance use on the hair of the bow
Bass rosin
Different than basic rosin, somewhat thicker
Hill Rosin (brand)
Use for violin, viola, and cello
Sizing
o Violin
If the hand of the player comes up to the next of the
instrument, a ¾ size instrument is the correct size
In the hand of the player passes the peg box, a FULL size
instrument is the correct size
o Viola
Most students start on a 13”-14” viola
The standard size viola is 15”-16”
o Cello
With the endpin out, the top of the cello should come
up to the chin
The next and peg box of the instrument should clear the
shoulder
Student must be able to form a minor third with their
left hand (ex. E-G)
Sizes
½
¾
Full size (4/4)
o Bass
The height of the instrument should be so that the nut
is level with the student’s eyes
The left hand needs to form a major second from the
index finger to the pinky finger
Sizes
¾
½

Stoddard 19
When the bow is on the strings, the shoulders of the
student need to be horizontal
Cases
o Types
Upper strings
Oblong
Hard
Plastic
Basic
Soft
Lower Strings
Soft
Hard (chellos)
** Bow MUST come out first when removing a cello or bass from a soft case
Care and Maintenance
Things to remember
o Keep the room at an even temperature. The room should be humidified.
o Make sure that every student has a cleaning cloth and that they clean off the rosin from
the body of the instrument every way.
o Fine tuners should not be turned all the way down
o Make sure to have peg dope
Strings
o Professionals will put new strings on every six months.
o At a school, new strings should be put on every year.
Except on bass, the strings last longer, so there is no need to replace them every
year.
Bow
o Bow should be re-haired once a year.
Maintenance
o Strings need to be even on the finger board.
Take fingers to the feet of the bridge and move it over until the strings are
straight and even.
Bridge needs to be straight.
Indentation lines up with the bridge.
If the bridge is slanted, then it is warped.
o Chin rest can get loose.
Take a paper clip and tighten the chin rest.
o End pins
Watch to make sure the nut does not strip.
o Fine tuners

Stoddard 20
If the fine tuners are really stiff then they should be replaced
o Finger board
Plane the finger board if grooves appear.
o Sound post
Invest in a sound post adjuster to fix the sound post.
o Strings
If frayed at the nut or down at the bridge the string will break. Strings must be
replaced in this case.
o Tail gut
The tail gut can get loose. It also can get too tight.
o Bow
The grip can get loose.
The stick can get warped or cracked at the tip.
The frog can crack.
Winding tip can strip.
If you cannot tighten the bow anymore, then the bow should be taken into the
shop.
o Cases
Fasteners won’t latch
Handles will fall off
Bow clip will not hold the bow
Zippers on the soft cases will not work
Send to the shop if:
o The bow needs to be re-haired
o If there are open seams
o If there are cracks on the instrument
o If the end pun needs replacing
TUNING
While the students are learning the basics, the teacher needs to tune the instruments. This will
save a lot of time.
To save time, just tune the D and A strings at the beginning of learning.
A quick method of tuning is using pizzicato to tune. To make the instrument sound more in tune,
use the bow to tune.
Make sure there are fine tuners on the instruments, except for bass.
Once students can recognize pitch, have the students start to tune on their own.
Sequence Tuning
o Tuning position without bow
o Tuning position with bow
o Manipulate the pitch with the fine tuners
o Discriminate whether it is in or out of tune

Stoddard 21
o Tune one string at a time (A, D, G, C, E)
o Controlled double stop (playing two strings at once)
Strategies of Tuning
o Difference between high and low
Okay and then have the students tell whether the pitch is higher or lower
o Teacher plays up-bow, on the down-bow, students play softly so that they can tune
o Teacher gives pitch, students pluck string without the bow
o How to tune in fifths
Listen for the evenness in the waves
Tuning the Bass (Bass Harmonics)
o Start on the D string in third position, using the fourth finger (A harmonic)
o Take first finger and place it on the A string octave
o Take fourth finger on the A string in third position and put the first finger on the E string
o Take the first finger and place it on the D string, then put the fourth finger on the G
string

Stoddard 22
Structuring the Rehearsal
Principles of Delivery
o Non-verbal
Not using any words to teach (keeps the students attention and keeps them
engaged)
o Eye contact
Use a lot of eye contact, students could get distracted and then not pay
attention
o Gestures
Conduct how you would play
Use hand and body gestures
o Proximity
Get in a close proximity of the students. But not too close!
o Vocal inflections
Use non-verbal vocal inflections to get the student’s attention
o Pedagogical touch
Small touches such as lifting someone’s elbow or a slight push on the back to
get the student to sit up straight
o Choosing words carefully
Try to use three words or less
Less is always more
Games
Spider races
o To help in learning and retaining the bow hold, try adding candy into the game. Put a life
saver at the tip of the bow, and in order to get the candy, the player has to successfully
complete the spider race without dropping the candy.
Balloon Bonanza
o To help in learning and retaining the bow hold
Bibliography
Scales (2 OCTAVES NOT 1!!!!!)
G Major:
Violin/Viola: 0 1 2 3 0 1 2 3
G A B C D E F# G
Cello: 0 1 3 4 0 1 3 4

Stoddard 23
Bass: 2 0 1 2 0 1 4 0
D Major:
Violin/Viola: 0 1 2 3 0 1 2 3
D E F# G A B C# D
Cello: 0 1 3 4 0 1 3 4
Bass: 0 1 4 0 1 4 -2 4
Bibliography
Anne Thompson
Becky Busy
Carol J. Johnson
Cooper Middle School (Patricia Cleaton)

Stoddard 24
Forest Hills Eastern
Jstore/MENC: The National Association for Music Education
Southwestern Musician (Dr. Michael Alexander)