sample nhd exhibits with ideas and tips nhd exhibits with ideas and tips ... what does that mean?...
TRANSCRIPT

Sample NHD Exhibits
With Ideas and Tips
National History Day in Wisconsin

What is an exhibit?
• According to the NHD Rulebook, an exhibit is: – A visual representation of your research and
interpretation of your topic’s significance in history.
– Similar to a small museum exhibit.
• What does that mean? – You will use the exhibit to make an ARGUMENT about
your topic.
– You will use your own words, images, captions, labels, objects, etc. to explain and support this argument for the viewer.
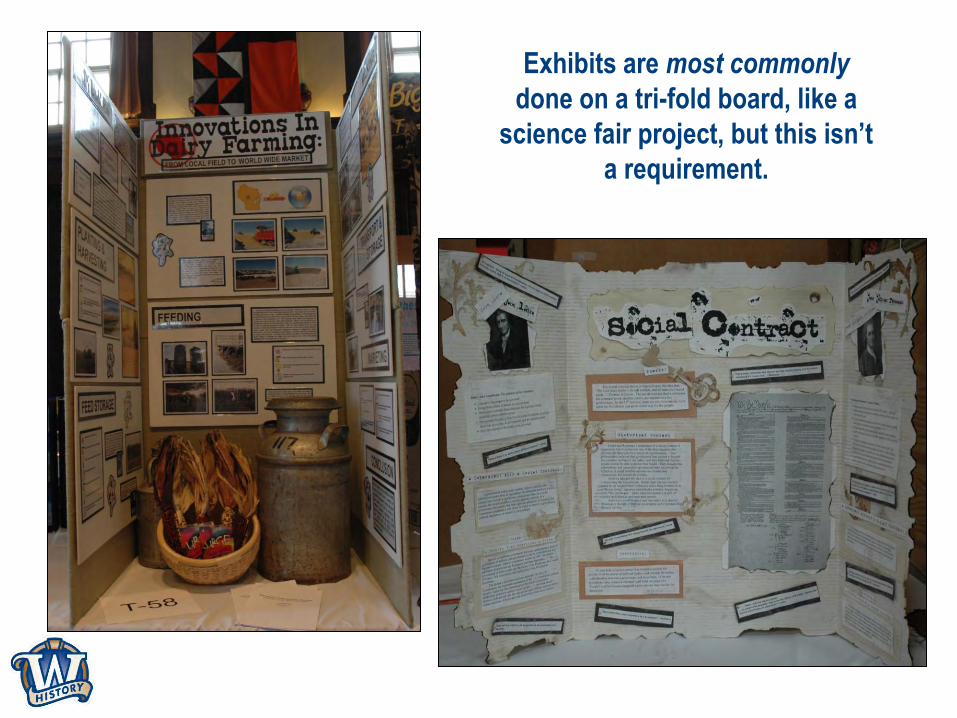
Exhibits are most commonly
done on a tri-fold board, like a
science fair project, but this isn’t
a requirement.

Exhibits sometimes take on
interesting shapes, connected to
the topic.
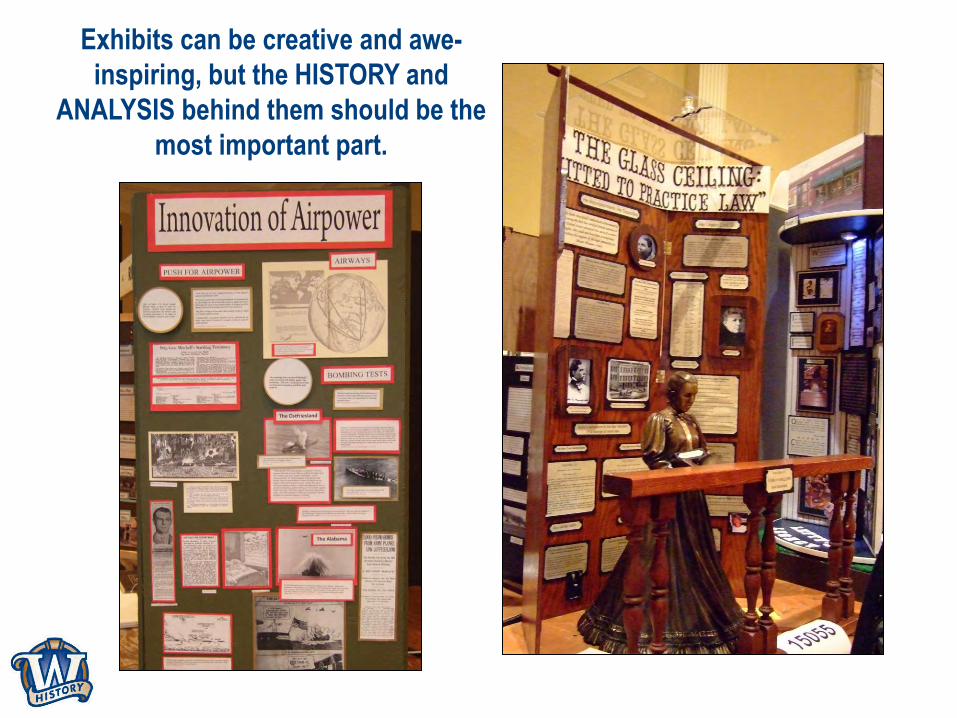
Exhibits can be creative and awe-
inspiring, but the HISTORY and
ANALYSIS behind them should be the
most important part.

Why pick the exhibit category?
• A good exhibit is more than just gluing things to a board.
– You must carefully select the images, text, captions and other illustrations to include on the exhibit.
• Don’t pick this category because you think it’s easy.
– Narrowing down your information to only 500-student composed words can be hard!
• Select the exhibit category because you’re creative, you like making things, and you have images, illustrations, and documents to support your argument.

But how do you go from….
A pile of research and a
bunch of ideas
To an effective History
Day exhibit?

Let’s take a closer look
Title
Thesis
Images, Illustrations
and Documents
Captions/Labels
Smart Color
Choices
Good Font
Selection
Strong
Organization
Annotated
Bibliography &
Process Paper
Text

Start with the research
• Do good research.
– Use a variety of primary and secondary sources!
• Develop your thesis statement.
– What is the argument you are making?
• Outline your exhibit script.
– What sections do you need to support your argument?
• Your annotated bibliography is included with your exhibit!

Design Your Layout
Draft your exhibit on paper first.

How are you going to organize it?
• Identify the sections you need.
• Each section should be directly connected to supporting your thesis.
• Organize those sections in a logical way.
Thesis Back-
ground
Impact ??
??
??

Sections help your viewer know
where to look first and see the
flow to your project.
Your eye looks at the title first,
since it’s the largest text on the
exhibit.
Right below the title is the
thesis statement. It’s a smaller
font size than the title, but still
in slightly larger than other
text.

The rest of the exhibit is divided into sections that support the argument
these students are making about Susan B. Anthony’s role in education.

Make your thesis stand out
• It’s the most important “thing” on your
exhibit.
• Your thesis must be clear on your exhibit
itself.
• You don’t need to label it as “thesis.”
• Instead use the font size, placement, and
design elements to help it stand out.
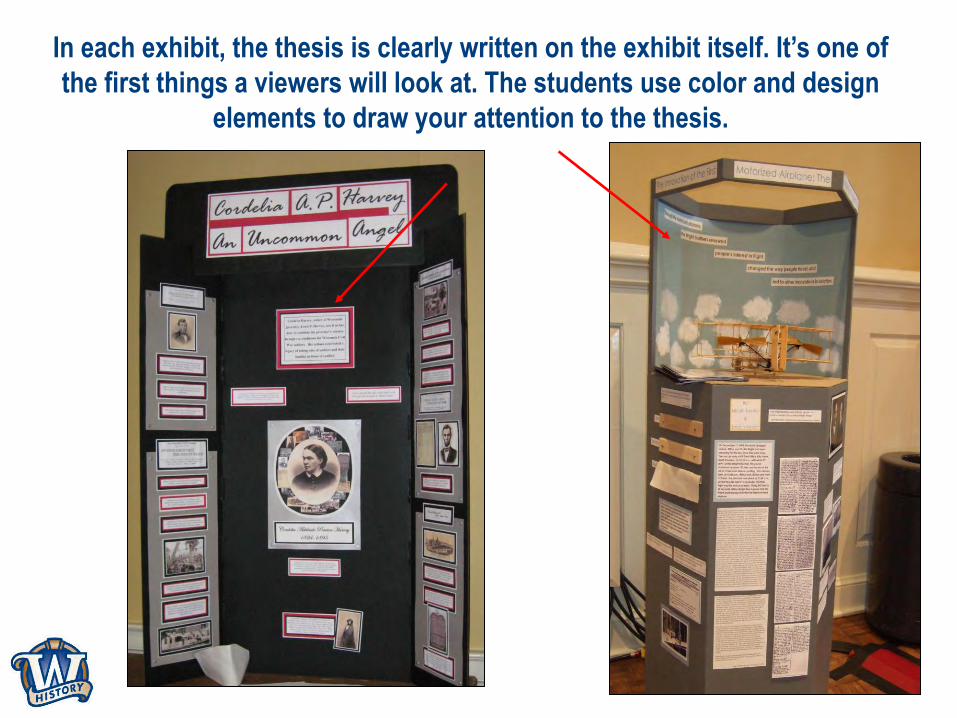
In each exhibit, the thesis is clearly written on the exhibit itself. It’s one of
the first things a viewers will look at. The students use color and design
elements to draw your attention to the thesis.

Identify the supporting materials
• What images, illustrations, documents, or other media can you incorporate?
• Each item should have a DIRECT connection to the argument you are making.
• Narrow it down! You will likely have found much more than you can put on your exhibit.

A map shows
you where this
took place.
Newspaper
headlines
provide
additional
information.
Photographs
help the viewer
to see what
happened.
Quotes or
passages from
interviews
provide
evidence for the
argument.

Write interpretive captions
• Brief citations tell the viewer where you found the
image/illustration.
– “Photo from Wisconsin Historical Society”
– These do NOT count towards your word limit.
• Interpretive captions analyze the supporting material.
– They’re important to show why the image/illustration is
there. What does it mean?
– These DO count towards your word limit.

Instead of just including these three
political cartoons on her exhibit, the
student also included an
interpretive caption.
She uses it to explain how the
cartoons connect to her topic and
provide evidence for her thesis.
“These three political cartoons
illustrate the conflict between
workers and their employers. If we
look at how the inspector is
portrayed, we see that the artist
was sympathetic to the workers
and believed that the lack of
regulation contributed to the
deaths.”

Choose your colors
• The right color choice sets the tone for your project.
• The wrong colors can be confusing or even offensive.
• Which colors would you use for an exhibit about the American Revolution? The Green Bay Packers? The women’s suffrage movement in the United States?

This exhibit about biological warfare is
in somber tones. The exhibit about
Earth Day is in blues and greens.

Find Your Fonts
• Fonts can be creative, but they should still be easy to read.
• Save the fancy font for titles and section headers.
• Use a more common font - Ariel, Times New Roman - for the main text.
• Be sure to use a font size is large enough to read from about 2-3 feet away. That’s how far away your judges will stand from the exhibit.

All these exhibits used
fonts that reminded
viewers of the topics.
The fancy fonts are
easy to read and used
only in titles and
headings. The main
text is written in a
plain font.

Remember the Hierarchy
• Varying the size of your font helps viewers to go from the big ideas to the supporting evidence.
The Title Should Be the Biggest!
Section Headers can be a little smaller.
Text in the body of your exhibit should be smaller yet.

Interactive Elements
• Use interactive elements to engage viewers with
your exhibit.
• They don’t have to be complicated or use lots of
technology.
• They must be DIRECTLY connected to your
topic and RELEVANT in proving your argument.
• Don’t forget you can use the space in front of
your exhibit, on the table.

This exhibit lets you see and feel
the differences in airplane
construction materials.
This exhibit includes a sample of
the model home. You can look
inside to see the layout!

Think About Your Title
• Make it snazzy… but also make sure it
describes your topic.
• “Susan B. Anthony: or… “Votes for Women: Susan
B. Anthony and the Fight for Suffrage”
• “Agriculture in the 20th Century” or “Adapt or Die: The
Impact of Revolutionary Changes in Agriculture in the
20th Century”
• “Louis Pasteur” or “Pasteurization: The Concept that
Changed the Way You Look at Milk “

Technology
• You CAN include media in your exhibit.
• The Rules: – Media devices (DVD players, projectors, video monitors,
computer) used in an exhibit must not run for more than a total of 3 minutes and are subject to the 500-word limit.
– Viewers and judges must be able to control media devices.
– Any media devices must fit within the size limits of the exhibit.
– Any media devices used should be integral to the exhibit – not a method to bypass the prohibition against live student involvement.

Technology
• Make sure technology is DIRECTLY connected to supporting your argument.
• NHD events often take place in public buildings. Be careful about including valuables.
• This might include clips of primary source video footage or audio from a participant discussing their experiences.

Be Creative!

As long as your exhibit fits within
the size requirements, you have
almost limitless creativity about
your design.

Think beyond the tri-fold
board.

A good design gives you hints about the topic of the exhibit
before you even read this. What do you think this exhibit
might be about?

But don’t forget to focus on the HISTORY in National
History Day.

Keep Working!
•Just because your
exhibit is “done,” doesn’t
mean you are.
•Use the judges’
comments from previous
competitions to improve
your project.
•Be proud of your hard
work!

Have Fun!
Collecting, Preserving and Sharing Stories Since 1846