programming microcontroller introes first steps with win
TRANSCRIPT
Programming MicrocontrollerIntroES
First Steps with WIN AVR and AVR Studio
Dipl.- Ing. Falk Salewski
Lehrstuhl Informatik XIRWTH Aachen
WS 05/06
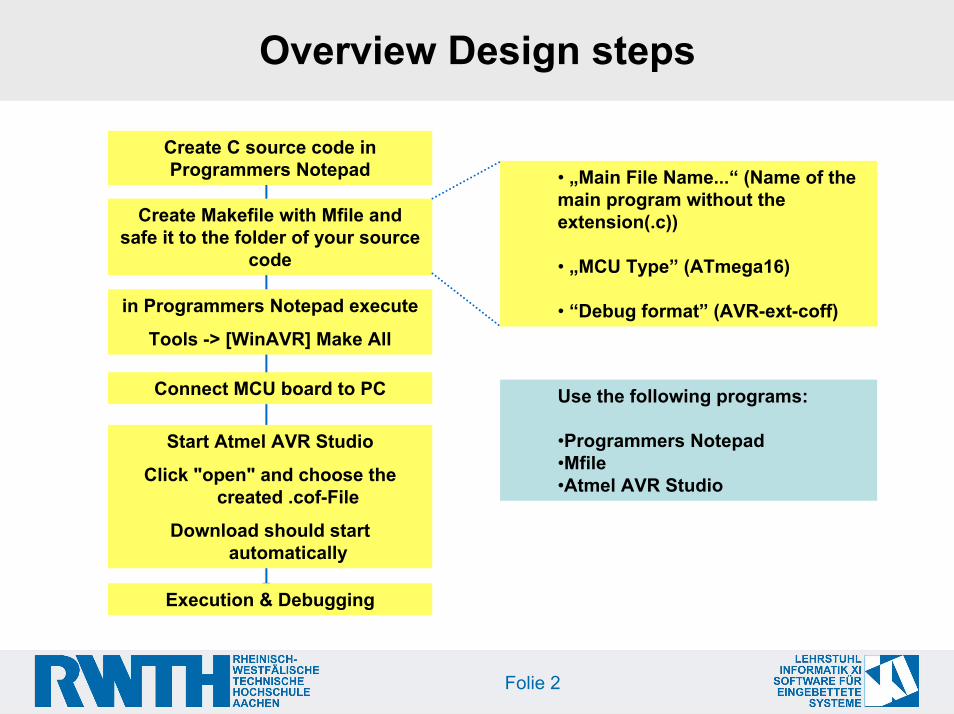
Overview Design steps
Create C source code in Programmers Notepad
Create Makefile with Mfile and safe it to the folder of your source
code
in Programmers Notepad execute
Tools -> [WinAVR] Make All
Connect MCU board to PC
Start Atmel AVR Studio
Click "open" and choose the created .cof-File
Download should start automatically
Execution & Debugging
• „Main File Name...“ (Name of the main program without the extension(.c))
• „MCU Type” (ATmega16)
• “Debug format” (AVR-ext-coff)
Use the following programs:
•Programmers Notepad•Mfile•Atmel AVR Studio
Folie 2
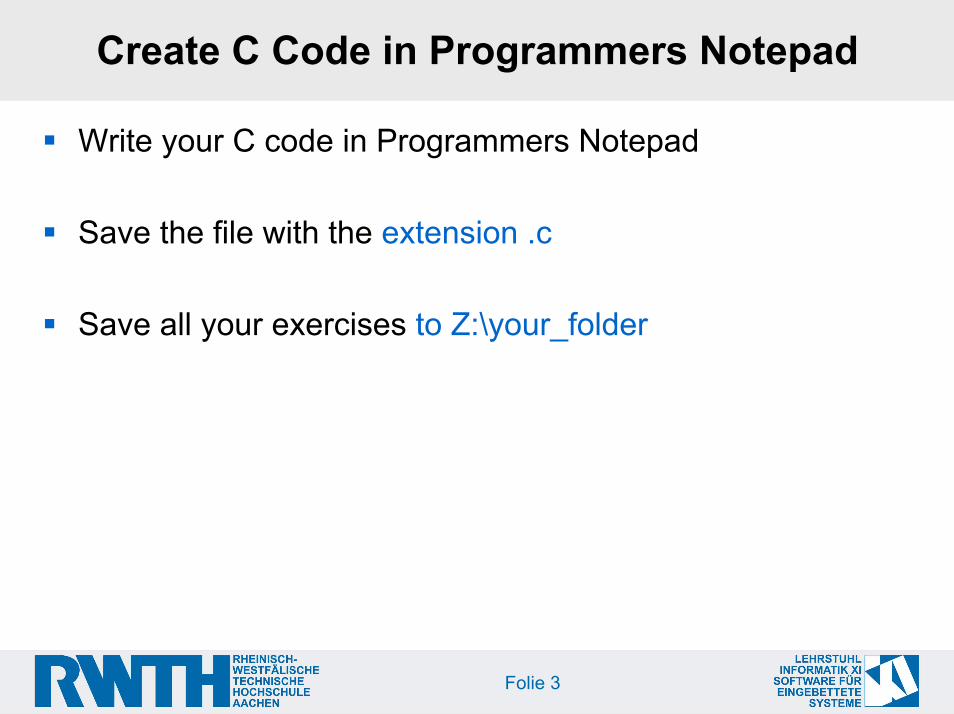
Create C Code in Programmers Notepad
Write your C code in Programmers Notepad
Save the file with the extension .c
Save all your exercises to Z:\your_folder
Folie 3
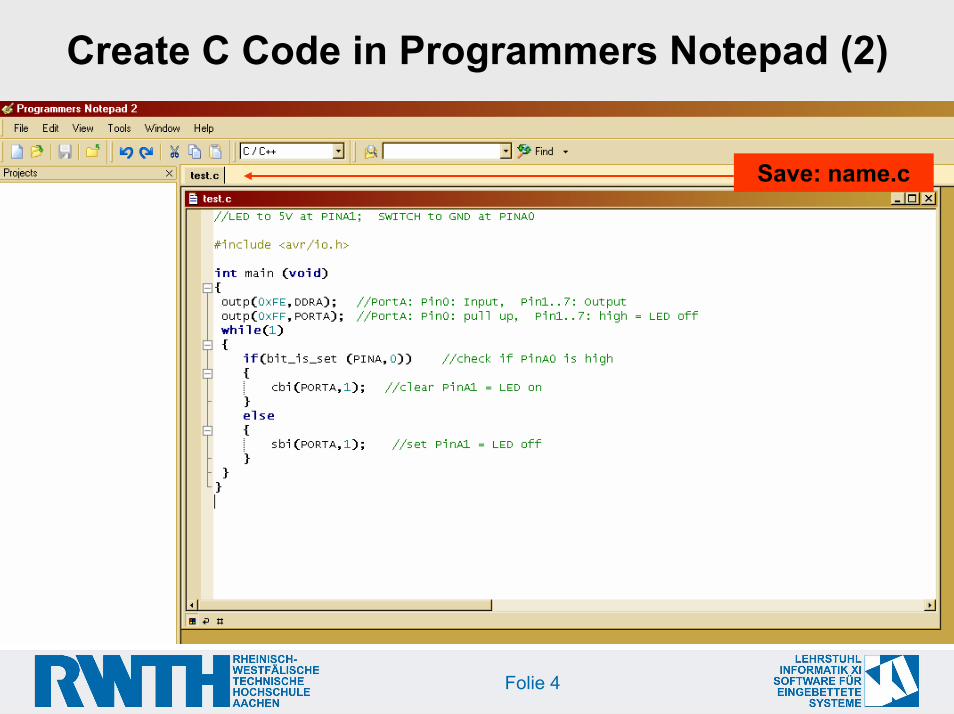
Create C Code in Programmers Notepad (2)
Save: name.c
Folie 4
Create Makefile
In order to give the compiler information about the usedtarget device and the desired output format a makefile has to be created.This can be done with help of a software tool called MfileStart MfileFollow the steps on the following slides
Folie 5

Using Mfile (1)
Click Makefile > Main file name…Type in the name of your C-file without the extension .c
Folie 6

Using Mfile (2)
Choose the MCU type (ATmega16 in this case)
Folie 7
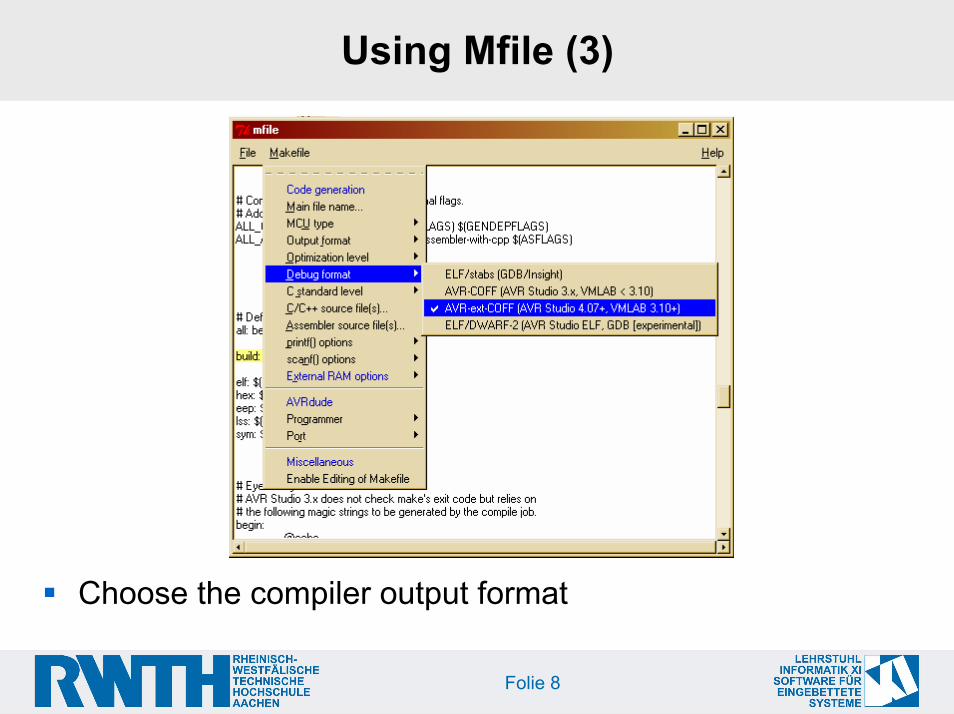
Using Mfile (3)
Choose the compiler output format
Folie 8
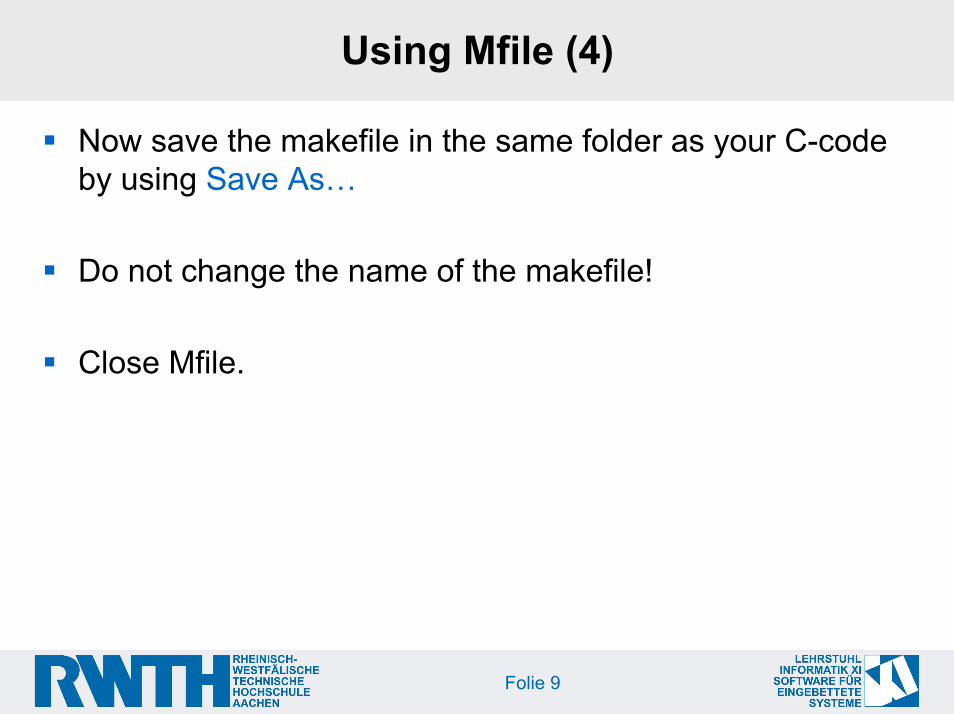
Using Mfile (4)
Now save the makefile in the same folder as your C-codeby using Save As…
Do not change the name of the makefile!
Close Mfile.
Folie 9
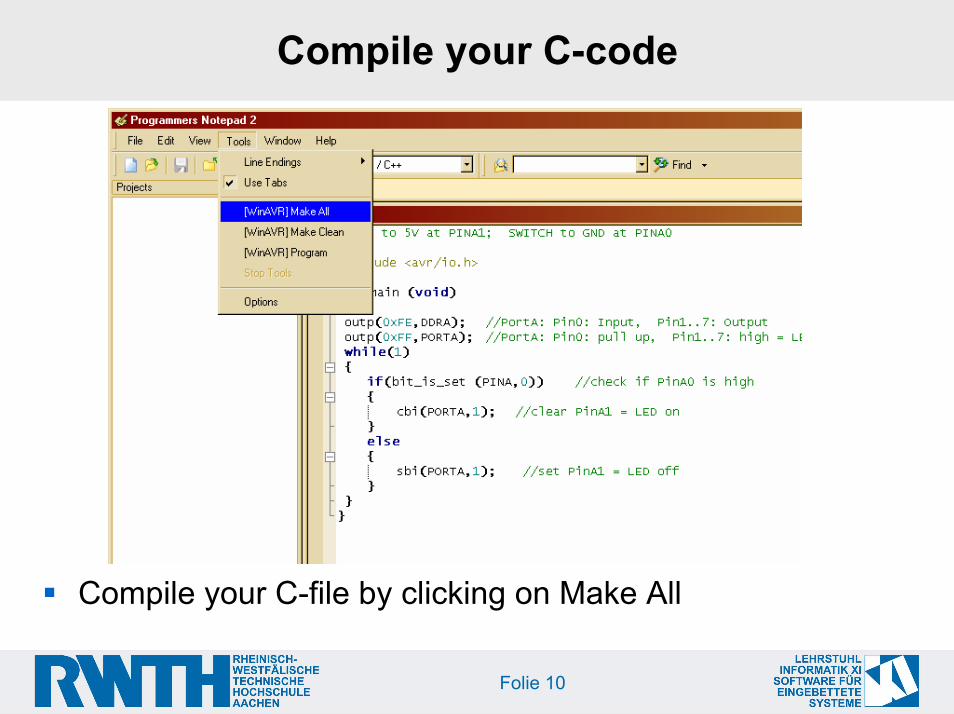
Compile your C-code
Compile your C-file by clicking on Make All
Folie 10

Using AVR Studio
During compilation serveral output files are generated.
The file name.cof will be used as input file for the AVR studio.
Now start AVR studio
Folie 11

Using AVR Studio (2)
Open the according .cof file (test.cof in this case)
Folie 12
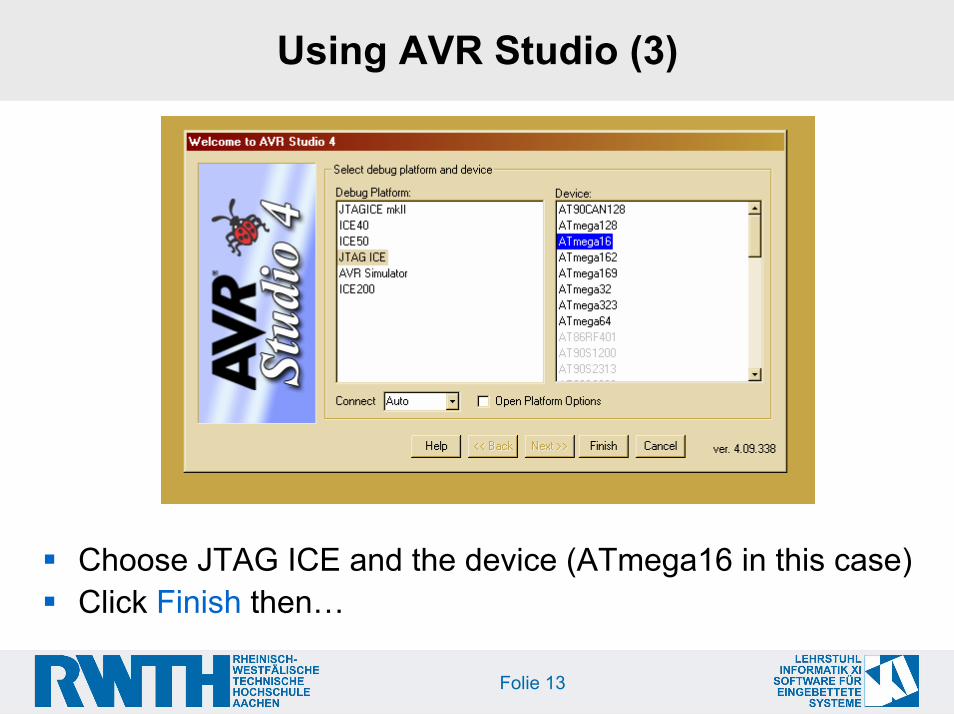
Using AVR Studio (3)
Choose JTAG ICE and the device (ATmega16 in this case)Click Finish then…
Folie 13
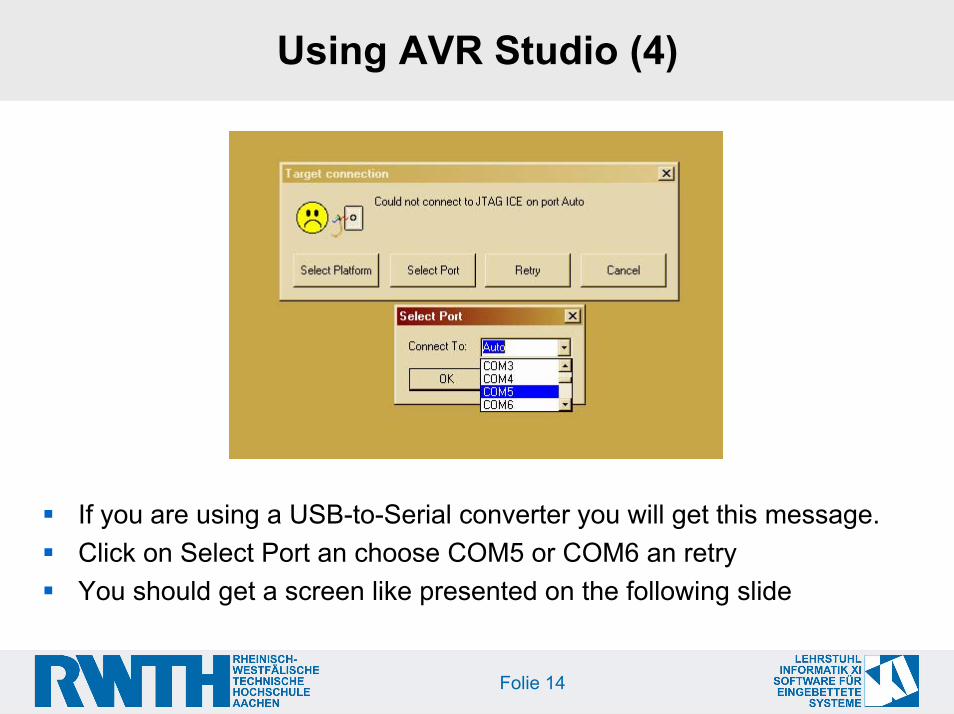
Using AVR Studio (4)
If you are using a USB-to-Serial converter you will get this message. Click on Select Port an choose COM5 or COM6 an retryYou should get a screen like presented on the following slide
Folie 14

Folie 15

Folie 16
Start Debugging
StopDebugging
Start Execution
Click
1. Stop Debugging
2. Start Debugging
3. Start Execution
Break Execution

Using AVR Studio (5)
Now the code is running on the microcontroller.If you click on Break you stop the executionDuring break the following can be done- Check where in the code you stopped the execution (yellow
arrow)- Look at all registers of the MCU- Add certain variables to watch window
The code mentioned above is assembly codeYou can also debugg the according C-code. This isdescribed on the following slide
Folie 17
Folie 18
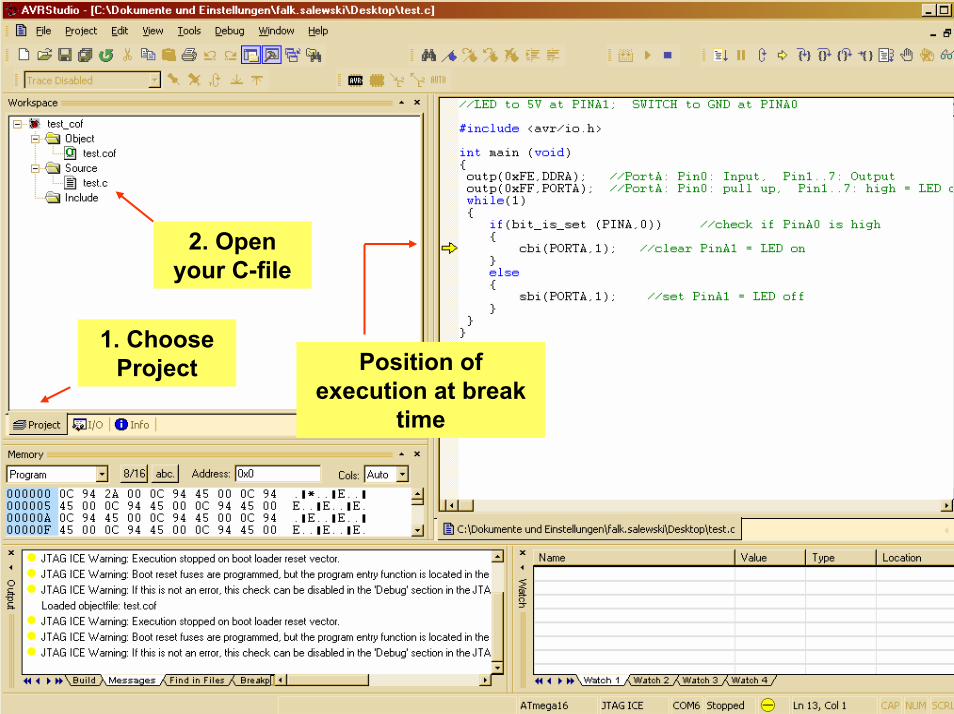
1. ChooseProject
2. Open your C-file
Position of execution at break
time
Folie 19
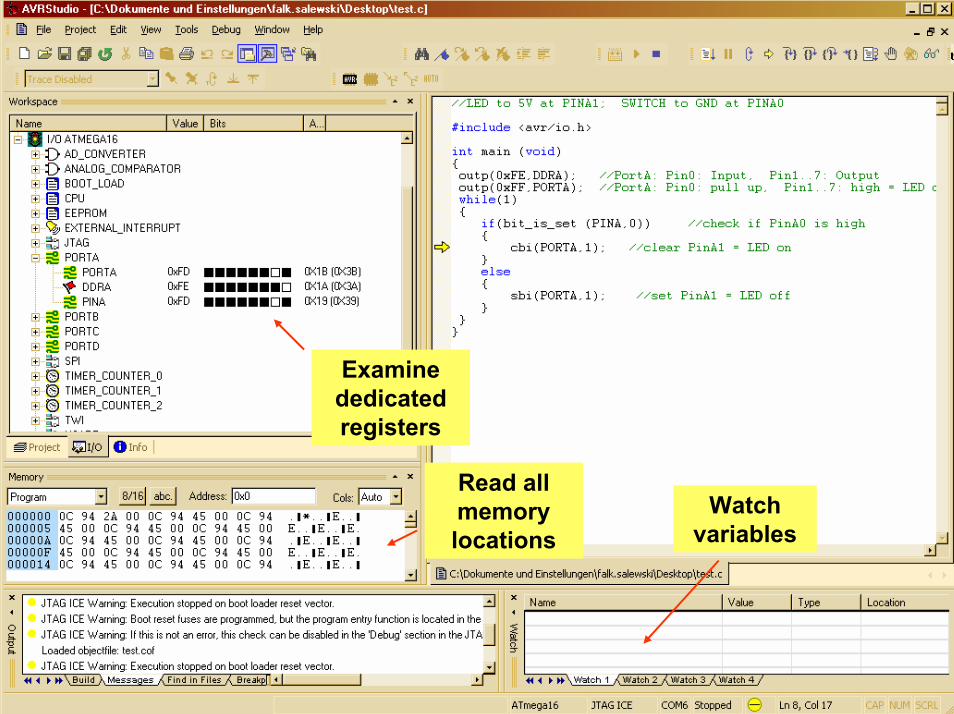
Read all memorylocations
Watchvariables
Examinededicatedregisters
Folie 20
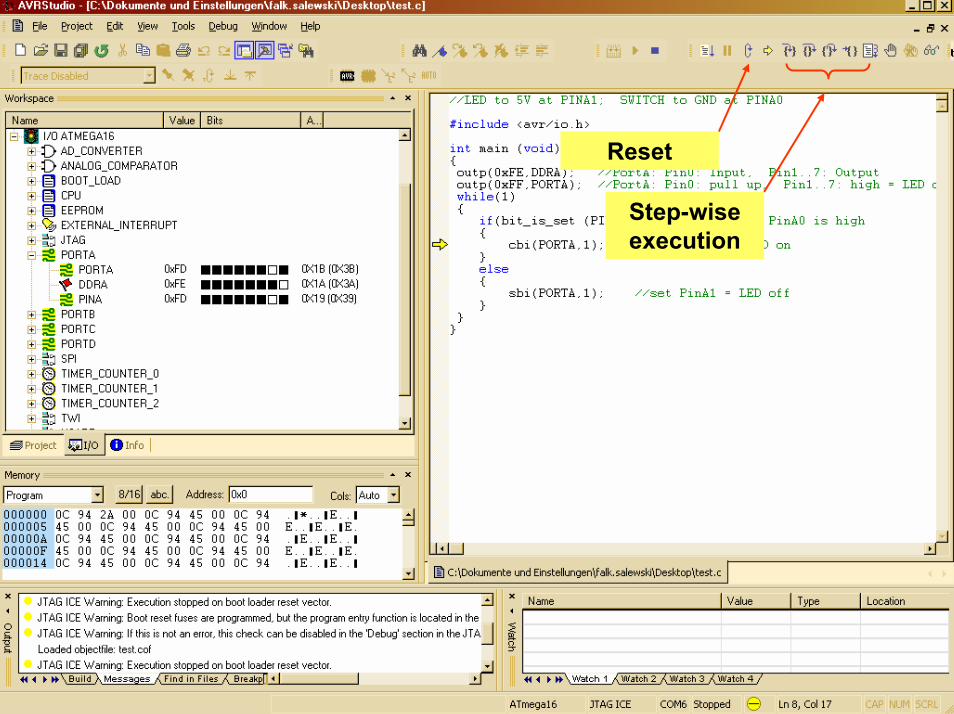
Reset
Step-wiseexecution
Folie 21
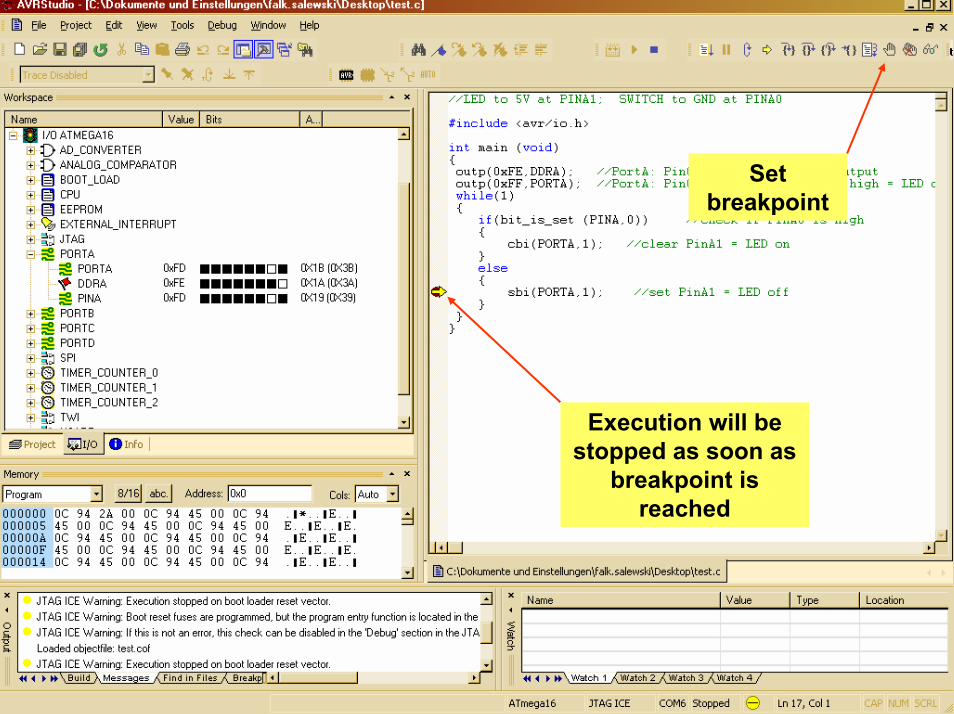
Set breakpoint
Execution will bestopped as soon as
breakpoint isreached

More Information
http://www.atmel.com/dyn/products/tools_card.asp?tool_id=2725http://sourceforge.net/projects/winavrhttp://www.mikrocontroller.net/ (GERMAN only)
Folie 22