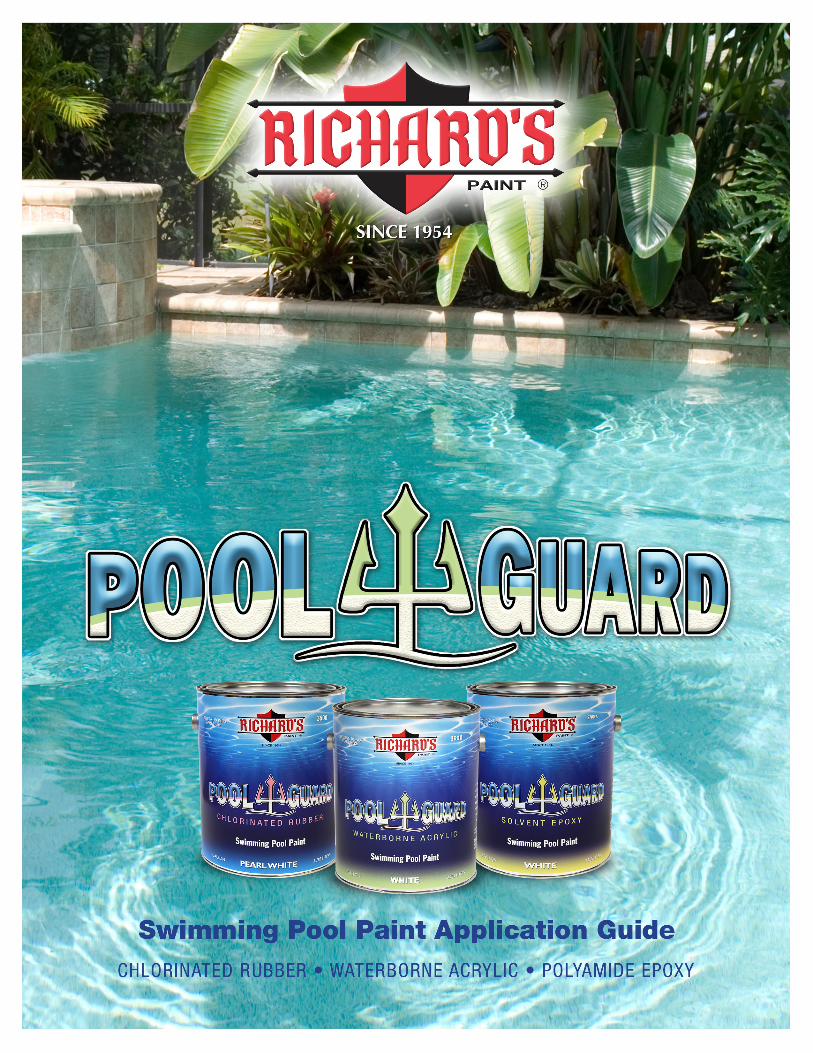
poolguard application guide - richard's paint
TRANSCRIPT
1
POOLGUARD Application Guide

2
POOLGUARD Application Guide
3500 Chlorinated Rubber
2700 Polyamide Epoxy
3600 Waterborne Acrylic
Interior √ √ √
Exterior √ √ √
Concrete √ √ √
Marcite √ √ √
Gunite √ √ √
Fiberglass √
Vinyl / Vinyl Lined
Metal √
Existing Pool Paint:Chlorinated Rubber √ *Use 3650 Tie Coat
Epoxy √ *Use 3650 Tie Coat
Waterbase Acrylic √
Reference individual product data sheets for additional product details and specifications.
Where to Use Chart The chart below shows typical uses for each product type.
3600 Line Waterborne Acrylic
Pool Guard Waterborne Acrylic Swimming Pool Paint delivers last-ing protection in a truly user-friendly waterbase formula. It is effective against chlorine, shock and algae, and has excellent color retention.
Thin and clean up with water, and skip solvent fumes and odors.
Use 3650 Pool Guard Tie Coat Primer when overcoating old chlori-nated rubber or epoxy pool paint.
*Use 3650 Pool Guard Tie Coat Primer when overcoating old chlorinated rubber or epoxy pool paint.
POOLGUARD Line of Swimming Pool Paints
2700 Line Solvent Epoxy
Pool Guard Polyamide Epoxy Pool Paint is a premium 2-part solvent base gloss epoxy that provides maximum protection for seasonal and year-around service. The tough chemical-ly-cured film withstands the de-mands of continuous immersion service and the various chemi-cals typically used in residential and commercial pools.
3500 INFO 2700 INFO 3600 INFO
3500 Line Chlorinated Rubber
Pool Guard Chlorinated Rubber Swimming Pool Paint provides high performance in both new and old swimming pools. It pro-vides excellent durability, resists fresh and salt water, chlorine, UV light, fading, fungus, algae and is alkali resistant.
It is self-priming, resists chalking, chipping, peeling, chemicals, chlorine, lime and extreme tem-perature fluctuations.
3
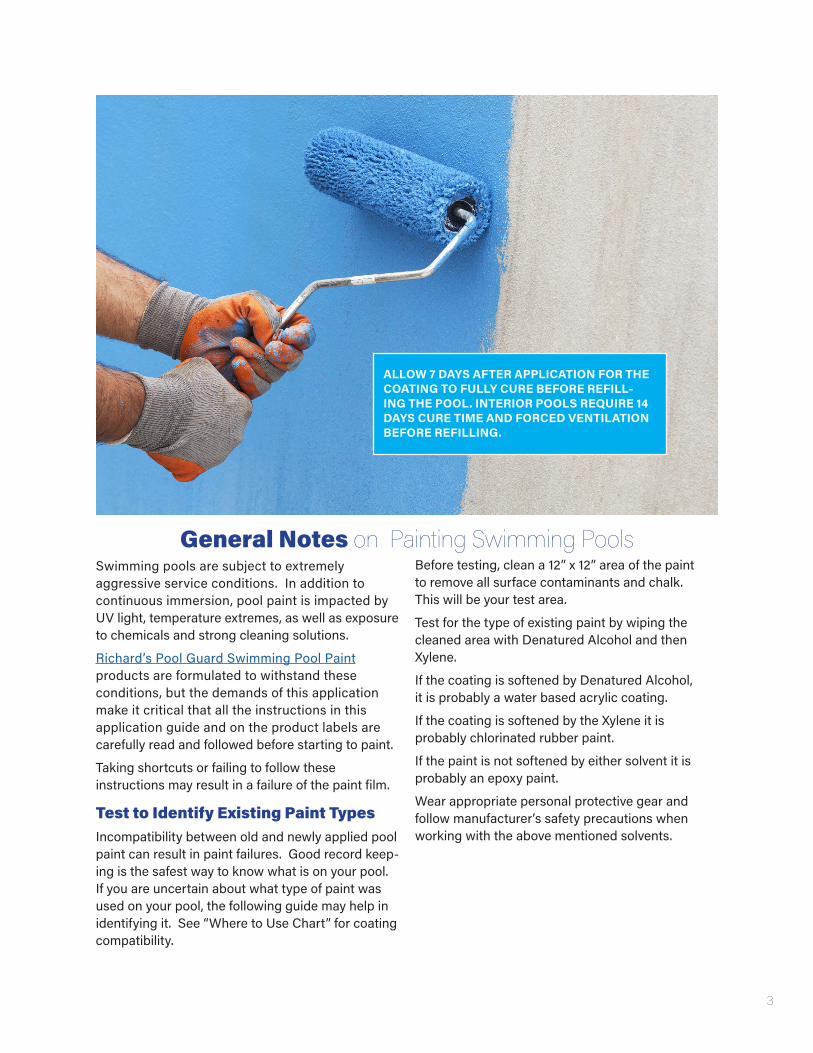
Swimming pools are subject to extremely aggressive service conditions. In addition to continuous immersion, pool paint is impacted by UV light, temperature extremes, as well as exposure to chemicals and strong cleaning solutions.
Richard’s Pool Guard Swimming Pool Paint products are formulated to withstand these conditions, but the demands of this application make it critical that all the instructions in this application guide and on the product labels are carefully read and followed before starting to paint.
Taking shortcuts or failing to follow these instructions may result in a failure of the paint film.
Test to Identify Existing Paint TypesIncompatibility between old and newly applied pool paint can result in paint failures. Good record keep-ing is the safest way to know what is on your pool. If you are uncertain about what type of paint was used on your pool, the following guide may help in identifying it. See “Where to Use Chart” for coating compatibility.
Before testing, clean a 12” x 12” area of the paint to remove all surface contaminants and chalk. This will be your test area.
Test for the type of existing paint by wiping the cleaned area with Denatured Alcohol and then Xylene.
If the coating is softened by Denatured Alcohol, it is probably a water based acrylic coating.
If the coating is softened by the Xylene it is probably chlorinated rubber paint.
If the paint is not softened by either solvent it is probably an epoxy paint.
Wear appropriate personal protective gear and follow manufacturer’s safety precautions when working with the above mentioned solvents.
General Notes on Painting Swimming Pools
ALLOW 7 DAYS AFTER APPLICATION FOR THE COATING TO FULLY CURE BEFORE REFILL-ING THE POOL. INTERIOR POOLS REQUIRE 14 DAYS CURE TIME AND FORCED VENTILATION BEFORE REFILLING.

4
POOLGUARD Application Guide
The overall scope of surface preparation required will be determined by first evaluating the condition of the existing coatings.
If the overall condition of the existing paint is free of blisters, cracking, peeling or any adhesion failure, do not conduct cross-cut adhesion testing.
If the existing paint is showing any degree of blisters, cracking, peeling or adhesion failure, test the adhesion of the existing paint by cutting an X in the paint with a single edge razor blade. Apply a 5” piece of duct tape firmly over the X scribe and remove the tape with one quick pull. If more than 10% of the paint comes off with the tape, the old coating must be completely removed.
Perform one or two tests adjacent to any failing coatings. If failures are widespread over the entire pool surface, remove all old coatings by chemical or mechanical means.
Surface RepairProperly repairing all surface breaks and cracks is one of the most important procedures of surface preparation. If the surface repair is not properly completed, severe problems can arise. Surface repairs should be conducted as follows:
1. Repairs to cracks, holes, and surface breaks should be done with a patching material designed for application to concrete and/or Marcite swim-ming pools carefully following the manufacturer’s directions.
2. After the necessary repairs have been made, allow all the repaired surfaces to dry thoroughly before proceeding.
Surface Preparation – General
5
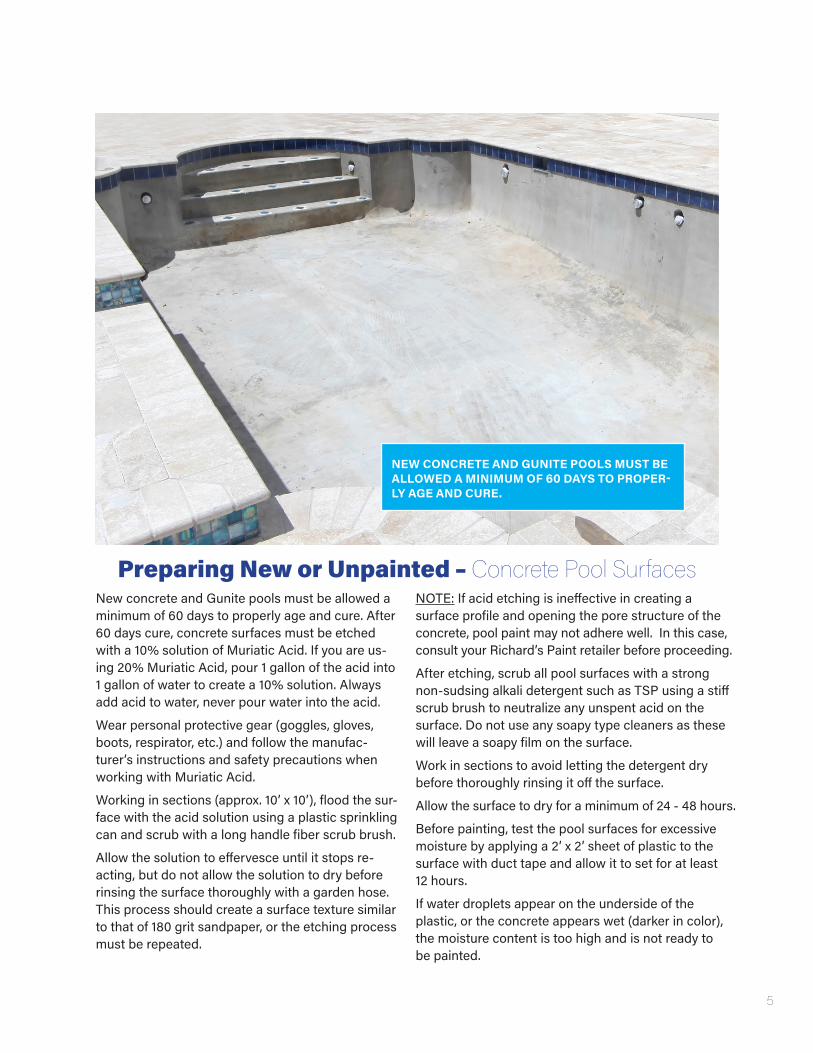
New concrete and Gunite pools must be allowed a minimum of 60 days to properly age and cure. After 60 days cure, concrete surfaces must be etched with a 10% solution of Muriatic Acid. If you are us-ing 20% Muriatic Acid, pour 1 gallon of the acid into 1 gallon of water to create a 10% solution. Always add acid to water, never pour water into the acid.
Wear personal protective gear (goggles, gloves, boots, respirator, etc.) and follow the manufac-turer’s instructions and safety precautions when working with Muriatic Acid.
Working in sections (approx. 10’ x 10’), flood the sur-face with the acid solution using a plastic sprinkling can and scrub with a long handle fiber scrub brush.
Allow the solution to effervesce until it stops re-acting, but do not allow the solution to dry before rinsing the surface thoroughly with a garden hose. This process should create a surface texture similar to that of 180 grit sandpaper, or the etching process must be repeated.
NOTE: If acid etching is ineffective in creating a surface profile and opening the pore structure of the concrete, pool paint may not adhere well. In this case, consult your Richard’s Paint retailer before proceeding.
After etching, scrub all pool surfaces with a strong non-sudsing alkali detergent such as TSP using a stiff scrub brush to neutralize any unspent acid on the surface. Do not use any soapy type cleaners as these will leave a soapy film on the surface.
Work in sections to avoid letting the detergent dry before thoroughly rinsing it off the surface.
Allow the surface to dry for a minimum of 24 - 48 hours.
Before painting, test the pool surfaces for excessive moisture by applying a 2’ x 2’ sheet of plastic to the surface with duct tape and allow it to set for at least 12 hours.
If water droplets appear on the underside of the plastic, or the concrete appears wet (darker in color), the moisture content is too high and is not ready to be painted.
Preparing New or Unpainted – Concrete Pool Surfaces
NEW CONCRETE AND GUNITE POOLS MUST BE ALLOWED A MINIMUM OF 60 DAYS TO PROPER-LY AGE AND CURE.
6
POOLGUARD Application Guide
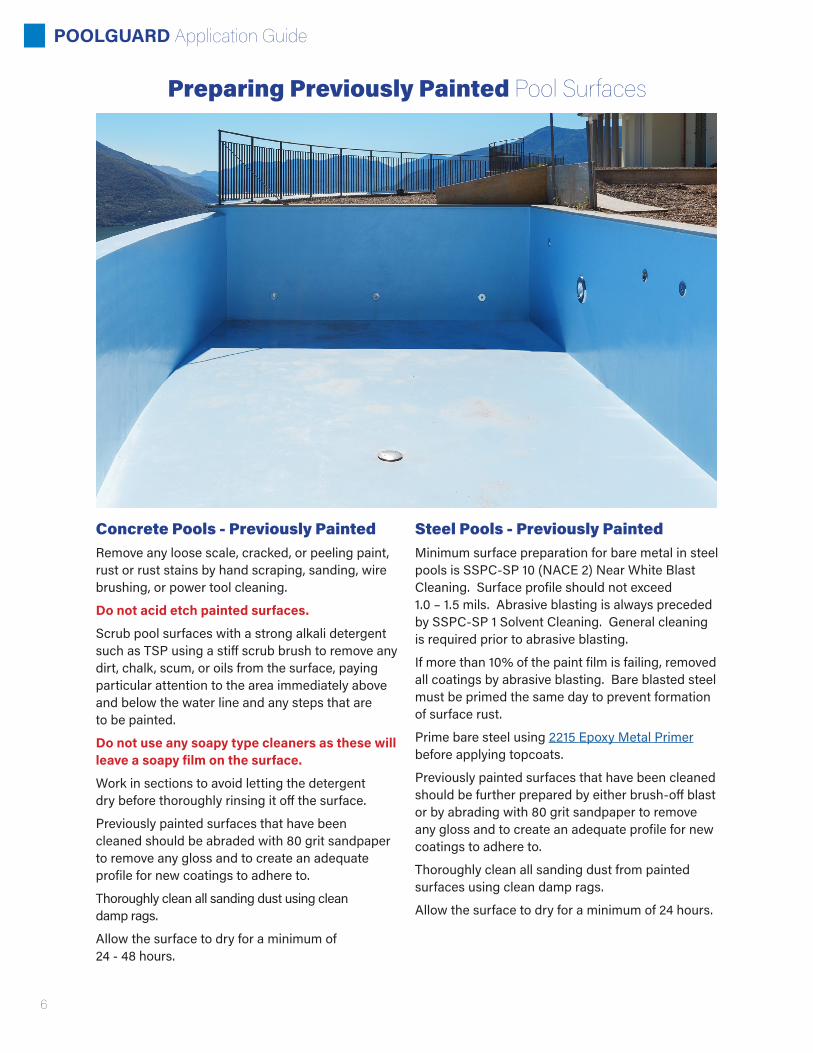
Concrete Pools - Previously PaintedRemove any loose scale, cracked, or peeling paint, rust or rust stains by hand scraping, sanding, wire brushing, or power tool cleaning.
Do not acid etch painted surfaces.
Scrub pool surfaces with a strong alkali detergent such as TSP using a stiff scrub brush to remove any dirt, chalk, scum, or oils from the surface, paying particular attention to the area immediately above and below the water line and any steps that are to be painted.
Do not use any soapy type cleaners as these will leave a soapy film on the surface.
Work in sections to avoid letting the detergent dry before thoroughly rinsing it off the surface.
Previously painted surfaces that have been cleaned should be abraded with 80 grit sandpaper to remove any gloss and to create an adequate profile for new coatings to adhere to.
Thoroughly clean all sanding dust using clean damp rags.
Allow the surface to dry for a minimum of 24 - 48 hours.
Steel Pools - Previously Painted Minimum surface preparation for bare metal in steel pools is SSPC-SP 10 (NACE 2) Near White Blast Cleaning. Surface profile should not exceed 1.0 – 1.5 mils. Abrasive blasting is always preceded by SSPC-SP 1 Solvent Cleaning. General cleaning is required prior to abrasive blasting.
If more than 10% of the paint film is failing, removed all coatings by abrasive blasting. Bare blasted steel must be primed the same day to prevent formation of surface rust.
Prime bare steel using 2215 Epoxy Metal Primer before applying topcoats.
Previously painted surfaces that have been cleaned should be further prepared by either brush-off blast or by abrading with 80 grit sandpaper to remove any gloss and to create an adequate profile for new coatings to adhere to.
Thoroughly clean all sanding dust from painted surfaces using clean damp rags.
Allow the surface to dry for a minimum of 24 hours.
Preparing Previously Painted Pool Surfaces
7
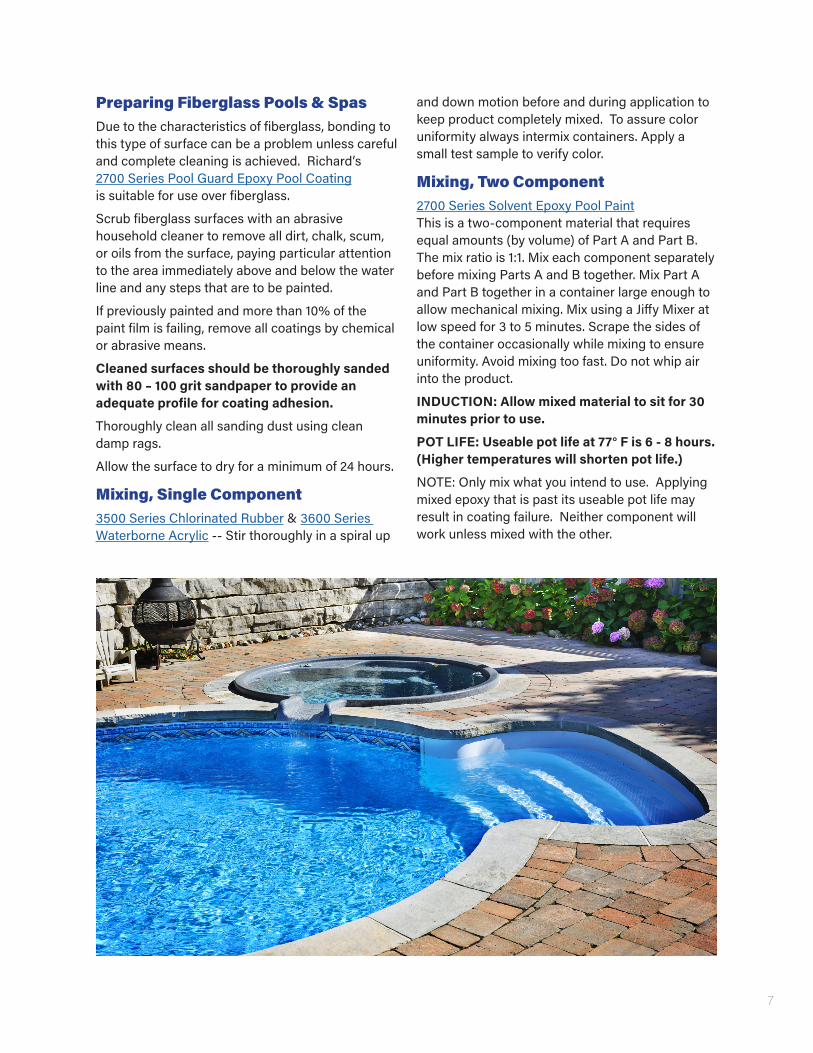
Preparing Fiberglass Pools & SpasDue to the characteristics of fiberglass, bonding to this type of surface can be a problem unless careful and complete cleaning is achieved. Richard’s 2700 Series Pool Guard Epoxy Pool Coating is suitable for use over fiberglass.
Scrub fiberglass surfaces with an abrasive household cleaner to remove all dirt, chalk, scum, or oils from the surface, paying particular attention to the area immediately above and below the water line and any steps that are to be painted.
If previously painted and more than 10% of the paint film is failing, remove all coatings by chemical or abrasive means.
Cleaned surfaces should be thoroughly sanded with 80 – 100 grit sandpaper to provide an adequate profile for coating adhesion.
Thoroughly clean all sanding dust using clean damp rags.
Allow the surface to dry for a minimum of 24 hours.
Mixing, Single Component3500 Series Chlorinated Rubber & 3600 Series Waterborne Acrylic -- Stir thoroughly in a spiral up
and down motion before and during application to keep product completely mixed. To assure color uniformity always intermix containers. Apply a small test sample to verify color.
Mixing, Two Component2700 Series Solvent Epoxy Pool Paint This is a two-component material that requires equal amounts (by volume) of Part A and Part B. The mix ratio is 1:1. Mix each component separately before mixing Parts A and B together. Mix Part A and Part B together in a container large enough to allow mechanical mixing. Mix using a Jiffy Mixer at low speed for 3 to 5 minutes. Scrape the sides of the container occasionally while mixing to ensure uniformity. Avoid mixing too fast. Do not whip air into the product.
INDUCTION: Allow mixed material to sit for 30 minutes prior to use.
POT LIFE: Useable pot life at 77° F is 6 - 8 hours. (Higher temperatures will shorten pot life.)
NOTE: Only mix what you intend to use. Applying mixed epoxy that is past its useable pot life may result in coating failure. Neither component will work unless mixed with the other.

8
POOLGUARD Application Guide
Richard’s Swimming Pool Paint may be applied with a quality brush, roller, or airless spray equipment. Pay careful attention to make sure 100% of your pool’s surface is coated without skips, holidays or pinholes.
The preferred application method is by brush and roller. Brush application is suitable for smaller surface areas, such as cutting-in corners, edges and trim areas.
If applying with a roller, apply a smooth and generous coat in one direction, then re-wet roller and cross-roll previously applied coating. Maintain a proper wet edge during application.
If applying by airless spray, use a unit with a minimum pressure of 3500 psi and a 0.015 - 0.019 spray tip. During spray application, painted surfaces must be back-rolled to ensure complete coverage and proper adhesion.
On new or unpainted swimming pools, it is recommended to apply two (2) finish coats for maximum performance.
Avoid paint application in direct sunlight by starting in the shaded area of the pool and follow the shade around the pool. Chlorinated rubber pool paint is prone to bubbling when applied in direct sunlight, as the liquid solvents may vaporize and form small bubbles. If this happens, allow the paint to dry overnight. Then sand the bubbles smooth with a medium grit sandpaper and re-apply chlorinated rubber, avoiding direct sunlight.
Apply when surface and ambient temperatures are above 55° F and below 90° F. Do not paint when surface or air temperatures are within 5 degrees of the dew point, which is often the case in the early morning and evening. Avoid paint application outside when weather conditions are threatening and late in the afternoon when there is a threat of moisture condensing on wet paint.
See individual product data sheets for application rates, thinning instructions and dry time recommendations.
Cure Time Before Filling Your PoolFilling a swimming pool with water before the coat-ings are fully cured can cause early paint failure by blistering, bubbling or premature fading and color loss. Resist the temptation of filling your pool too soon.
Swimming pools are commonly painted in the springtime when the ground is still cool and night time temperatures can also be very cool. There are numerous factors that affect how fast pool paint cures, including the applied film thickness, recoat intervals, surface and air temperatures, humidity and air circulation. These are the reasons we strongly caution against filling your pool ahead of schedule.
Application
ALLOW 7 DAYS AFTER APPLICATION FOR THE COAT-ING TO FULLY CURE BEFORE REFILLING THE POOL. INTERIOR POOLS REQUIRE 14 DAYS CURE TIME AND FORCED VENTILATION BEFORE REFILLING.
15 x 30 Pool . . . . . . . . . . . . . . . . .6 Gallons . . . . . . . . . . . . . . . . . . . . . . .1 Gallon 20 x 50 Pool . . . . . . . . . . . . . . . . 12 Gallons . . . . . . . . . . . . . . . . . . . . . 2 Gallons 25 x 50 Pool . . . . . . . . . . . . . . . . 14 Gallons . . . . . . . . . . . . . . . . . . . . . 3 Gallons 25 x 100 Pool . . . . . . . . . . . . . . . .27 Gallons . . . . . . . . . . . . . . . . . . . . . 4 Gallons 30 x 70 Pool . . . . . . . . . . . . . . . 22 Gallons . . . . . . . . . . . . . . . . . . . . . 4 Gallons 30 x 100 Pool . . . . . . . . . . . . . . . 30 Gallons . . . . . . . . . . . . . . . . . . . . . 5 Gallons 35 x 75 Pool . . . . . . . . . . . . . . . .27 Gallons . . . . . . . . . . . . . . . . . . . . . 4 Gallons 35 x 100 Pool . . . . . . . . . . . . . . . 35 Gallons . . . . . . . . . . . . . . . . . . . . . 5 Gallons
45 x 100 Pool . . . . . . . . . . . . . . . 42 Gallons . . . . . . . . . . . . . . . . . . . . . 7 Gallons 45 x 140 Pool . . . . . . . . . . . . . . . .57 Gallons . . . . . . . . . . . . . . . . . . . . 10 Gallons 50 x 100 Pool . . . . . . . . . . . . . . . 45 Gallons . . . . . . . . . . . . . . . . . . . . . 7 Gallons 50 x 150 Pool . . . . . . . . . . . . . . . 65 Gallons . . . . . . . . . . . . . . . . . . . . . 11 Gallons 75 x 150 Pool . . . . . . . . . . . . . . . 93 Gallons . . . . . . . . . . . . . . . . . . . . 15 Gallons 75 x 200 Pool . . . . . . . . . . . . . . . 121 Gallons . . . . . . . . . . . . . . . . . . . . 18 Gallons 100 x 150 Pool . . . . . . . . . . . . . . .120 Gallons . . . . . . . . . . . . . . . . . . . . 18 Gallons 100 x 200 Pool . . . . . . . . . . . . . . . 157 Gallons . . . . . . . . . . . . . . . . . . . . 25 Gallons
POOL SIZE ESTIMATED PAINT EST. THINNER POOL SIZE ESTIMATED PAINT EST. THINNER
The above estimated gallonage are approximate only. Actual gallonage may differ depending on the type of application and the porosity of the surface to be painted.
Pearl White Blue Lagoon Emerald Sea Sea Blue BlackChlorinated Rubber . . . . . . . . . . . . . . 35 00Waterborne Acrylic . . . . . . . . . . . . . . 36 00Epoxy Part A & B . . . . . . . . . . . . . . . . .27 00
Chlorinated Rubber . . . . . . . . . . . . . . 35 05Waterborne Acrylic . . . . . . . . . . . . . . 36 05Epoxy Part A & B . . . . . . . . . . . . . . . . .27 05
Chlorinated Rubber . . . . . . . . . . . . . . . 35 10Waterborne Acrylic . . . . . . . . . . . . . . . 36 10Epoxy Part A & B . . . . . . . . . . . . . . . . . 27 10
Chlorinated Rubber . . . . . . . . . . . . . . . 35 15Waterborne Acrylic . . . . . . . . . . . . . . . 36 15Epoxy Part A & B . . . . . . . . . . . . . . . . . 27 15
Chlorinated Rubber . . . . . . . . . . . . . . .35 20Waterborne Acrylic . . . . . . . . . . . . . . 36 20
Estimated Usage Guide
RP21-1909R6