mpn(s): mnrsprdr
TRANSCRIPT

-
MPN(s): MNRSPRDR
SKU(s): 191360
UPC(s): 840009210792

2
Table of Contents
General Warnings and Rules………………………………………………………...3
Hazard Signal Word Definitions……………………………………………………...4
Controls and Features Identification………………………………………………...5
Assembly Instructions……………………………………………………………...6, 7
Operating Instructions.…………………………………………….…………………8
Maintenance and Storage……………………………………………………………9
Parts Drawing and Parts List………………………………………………10, 11, 12
3
GENERAL WARNINGS
READ and UNDERSTAND this manual completely before using the Manure Spreader.
Operators must read and understand all safety and warning information, operating instructions, maintenance and storage instructions before operating this equipment. Failure to properly operate and maintain the manure spreader could result in serious injury to the operator or bystanders.
Operation Warnings
Never carry passengers. Do not sit or stand on the manure spreader. Do not allow children to play on, stand upon or climb on the manure spreader. Always inspect the manure spreader before use for missing or loose hardware. Replace or repair damaged or worn parts immediately. Always check and tighten hardware and assembled parts before operation. Avoid large holes and ditches when transporting loads. Be careful when operating on steep grades (hills) as the manure spreader may tip over. Do not pull close to creeks, ditches or public highways. Do not use the manure spreader in windy conditions. Always use caution when loading and unloading the manure spreader. Only tow the manure spreader using a lawn tractor, ATV or golf cart at a speed of no greater than 5 mph for
spreading. Crush and Cut Hazards
Always keep hands and feet clear from moving parts while operating the manure spreader. Always keep the work area clean and clear of debris. Always wear safety gear, eye protection, gloves and work boots while operating the manure spreader.
WARNING
The warnings, cautions, and instructions outlined in this instruction manual cannot cover all possible conditions or situations that may occur. It must be understood by the operator that common sense and caution are factors which cannot be built into this product and must be supplied by the operator.
PROP 65 WARNING
This product can expose you to chemicals including lead and lead compounds which are known to the State of California to cause cancer and birth defects or other reproductive harm. For more information, go to www.P65Warnings.ca.gov
Assembly Is Required
This product requires assembly before use. See “Assembly” section for instructions. INSPECT ALL COMPONENTS closely upon receipt to make sure no components are missing or damaged.
4
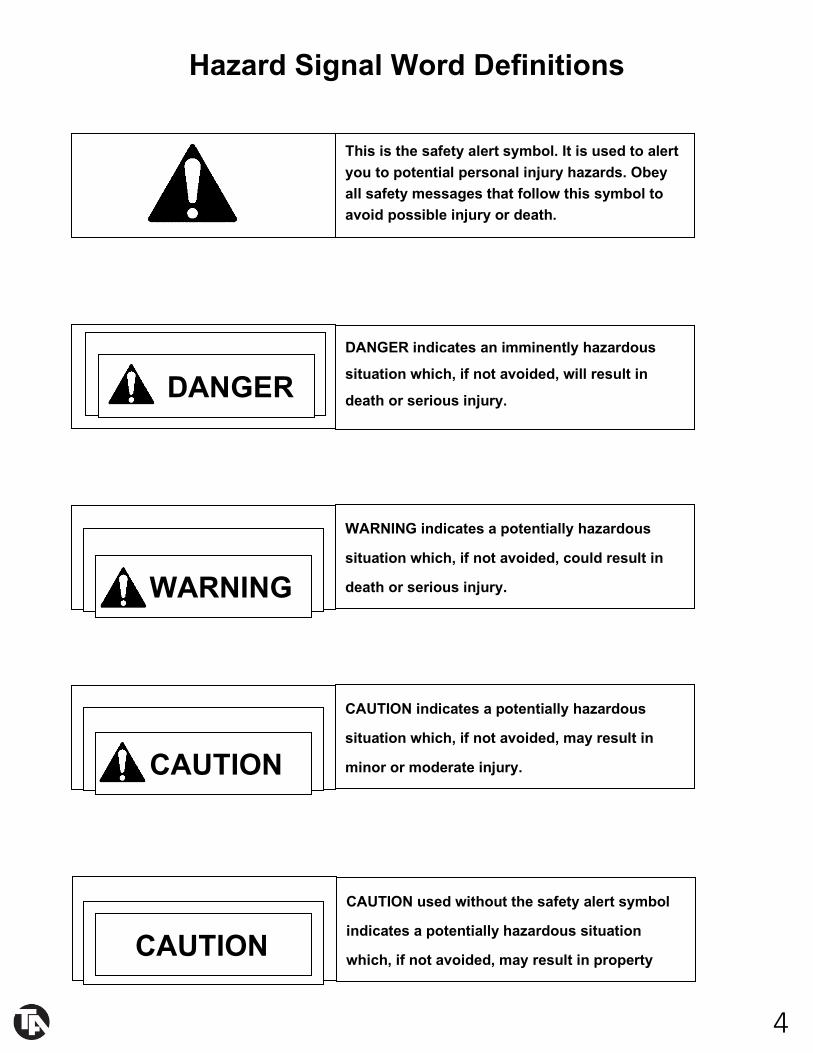
Hazard Signal Word Definitions
This is the safety alert symbol. It is used to alert you to potential personal injury hazards. Obey all safety messages that follow this symbol to avoid possible injury or death.
DANGER indicates an imminently hazardous
situation which, if not avoided, will result in
death or serious injury. DANGER
WARNING indicates a potentially hazardous
situation which, if not avoided, could result in
death or serious injury. WARNING
CAUTION indicates a potentially hazardous
situation which, if not avoided, may result in
minor or moderate injury. CAUTION
CAUTION used without the safety alert symbol
indicates a potentially hazardous situation
which, if not avoided, may result in property
CAUTION

5
1) Hopper
2) 2” Coupler
3) Spreading Drum
4) Spreading Engagement Lever
5) Agitator
6) Relief Panel
CAUTION
Read and follow all instructions for assembly and operation. Failure to properly assemble this equipment could result in serious injury to the user or bystanders and/or cause equipment damage.
MANURE SPREADER COMPONENT PARTS AND ASSEMBLY
Before beginning to assemble the manure spreader, take all parts out of the shipping crate and inspect components to ensure there are no missing pieces. Carefully follow assembly steps 1 through 2.
TOOLS REQUIRED
• 13mm Wrench • 17mm Wrenches (2 Each)

6

7

8

9
1) Attach the manure spreader to the vehicle using either the 2” ball coupler or the clevis hitch.
2) Rotate the agitator so that the rubber wheels are resting on the manure spreader drum.
3) Fill the manure spreader with manure.
4) Drive the manure spreader to the desired spreading location.
5) Flip the spreading engagement lever to engage the spreading drum on either both wheels or one wheel.
- Engage only one wheel when making a large number of turns while spreading. Engage the wheel opposite of the way you will be turning. For example, if you are turning left, engage the right wheel. – Engage both wheels for heavy loads of manure and straight-line spreading.
6) Spread the manure while maintaining safe driving speeds.
Adjusting the manure spreader discharge rate and pattern.
- The spreader discharges manure from between the drum and discharge plate. The spring force of the discharge plate against the drum breaks up the manure as the spreader discharges the manure.
- Using the adjustment plate to change the size of the holes in the discharge plate allows for further adjustment of the manure spread pattern and ability to control the discharge rate.
Operating Instructions
Lever Engaged
Lever Disengaged
10
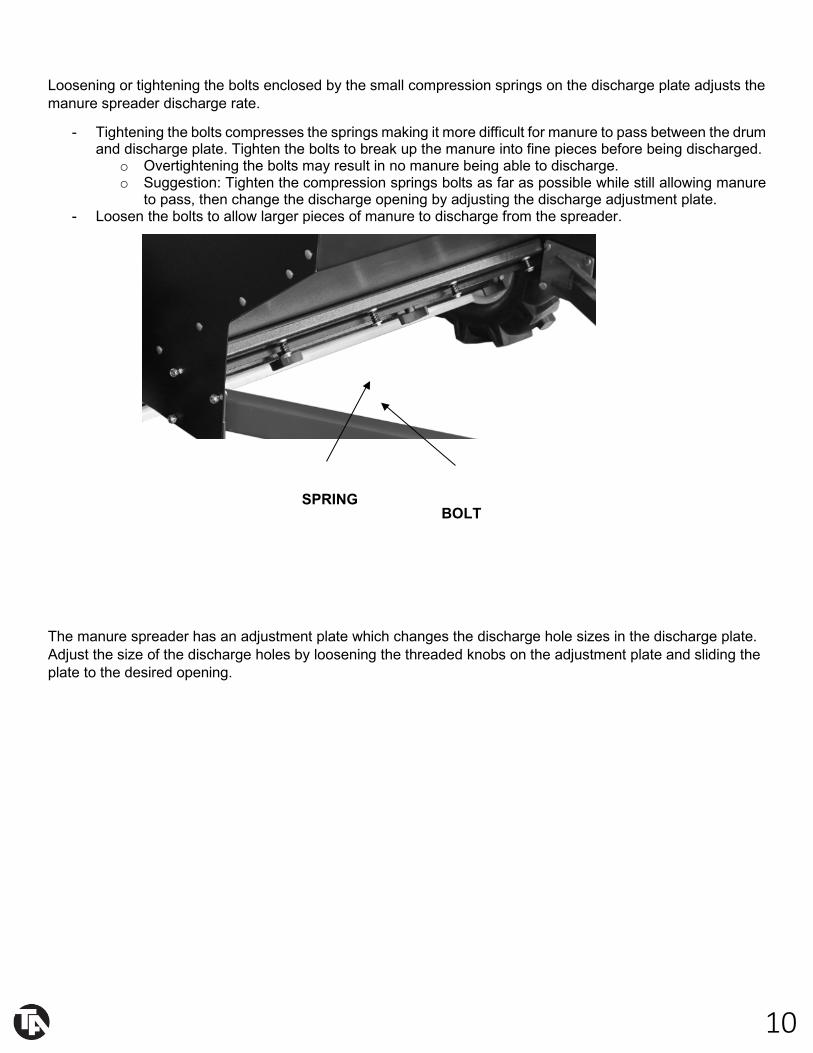
Loosening or tightening the bolts enclosed by the small compression springs on the discharge plate adjusts the manure spreader discharge rate.
- Tightening the bolts compresses the springs making it more difficult for manure to pass between the drum and discharge plate. Tighten the bolts to break up the manure into fine pieces before being discharged.
o Overtightening the bolts may result in no manure being able to discharge. o Suggestion: Tighten the compression springs bolts as far as possible while still allowing manure
to pass, then change the discharge opening by adjusting the discharge adjustment plate. - Loosen the bolts to allow larger pieces of manure to discharge from the spreader.
The manure spreader has an adjustment plate which changes the discharge hole sizes in the discharge plate. Adjust the size of the discharge holes by loosening the threaded knobs on the adjustment plate and sliding the plate to the desired opening.
SPRING BOLT
11
WARNING
Improper maintenance and storage of the manure spreader may void the warranty.
MAINTENANCE • After each use, carefully clean material out of the hopper. • Rinse and dry the inside and outside of the manure spreader after each use. • Prior to each use, inspect and verify that all hardware is tight. • Before initial use, add grease to the two grease zerks on each side of the wheels. • Check and periodically add grease to the wheels. • After every use, spray out the hopper and the spreading drum. Cleaning the spreader will keep debris
and manure from clogging the spreading drum and damaging the spreader. • Check the rubber guard after every use and replace as needed.
IMPORTANT:
When replacing parts be sure to only use parts that meet the manufacturer’s specifications. Replacement parts that do not meet the manufacturer’s specifications may result in safety hazards and/ or poor machine operation and may void the warranty.
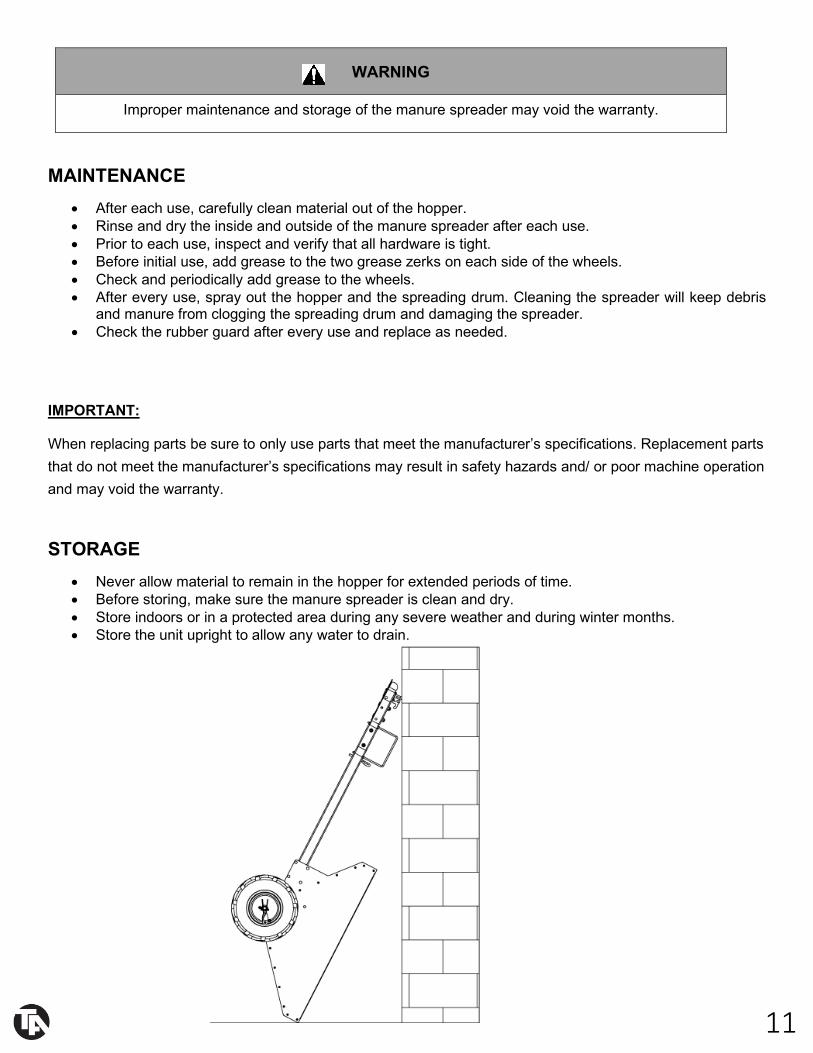
STORAGE • Never allow material to remain in the hopper for extended periods of time. • Before storing, make sure the manure spreader is clean and dry. • Store indoors or in a protected area during any severe weather and during winter months. • Store the unit upright to allow any water to drain.

12
This concludes the MNRSPRDR Owner’s Manual.
If applicable to your product, make sure to tighten all
nut-and-bolt combinations before use.
Enjoy!
DISCLAIMER This equipment must be used with care by capable and competent individuals under supervision, if necessary. The use of any equipment, including this one, involves the potential risk of injury. You accept and assume full responsibility for any and all injuries, damages (both economic and non-economic), and losses of any type, which may occur, and you fully and forever release and discharge Titan, its insurers, employees, officers, directors, associates, and agents from any and all claims, demands, damages, rights of action, or causes of action, present or future, whether the same be known or unknown, anticipated, or unanticipated, resulting from or arising out of the use of said equipment. TITAN MAKES NO WARRANTY WHATSOEVER WITH RESPECT TO THE EQUIPMENT, INCLUDING ANY WARRANTY OF MERCHANTABILITY OR WARRANTY OF FITNESS FOR A PARTICULAR PURPOSE, WHETHER EXPRESS OR IMPLIED BY LAW, COURSE OF DEALING, COURSE OF PERFORMANCE, USAGE OF TRADE OR OTHERWISE. BUYER ASSUMES ALL LIABILITY IN USE OF THE EQUIPMENT.
NEED HELP?
CONTACT US FIRST.
1 (800) 605-8241
Business Hours: Monday–Friday • 8:00 a.m.–5:00 p.m. (CT)