modular messaging outlook client user guide - avaya...
TRANSCRIPT

Modular Messaging Release 3Restricted Microsoft Outlook Client User Guide
February 2007

© 2007 Avaya Inc.All Rights Reserved.
NoticeWhile reasonable efforts were made to ensure that the information in this document was complete and accurate at the time of printing, Avaya Inc. can assume no liability for any errors. Changes and corrections to the information in this document might be incorporated in future releases.
Documentation disclaimerAvaya Inc. is not responsible for any modifications, additions, or deletions to the original published version of this documentation unless such modifications, additions, or deletions were performed by Avaya. Customer and/or End User agree to indemnify and hold harmless Avaya, Avaya's agents, servants and employees against all claims, lawsuits, demands and judgments arising out of, or in connection with, subsequent modifications, additions or deletions to this documentation to the extent made by the Customer or End User.
Link disclaimerAvaya Inc. is not responsible for the contents or reliability of any linked Web sites referenced elsewhere within this documentation, and Avaya does not necessarily endorse the products, services, or information described or offered within them. We cannot guarantee that these links work all the time and we have no control over the availability of the linked pages.
WarrantyAvaya Inc. provides a limited warranty on this product. Refer to your sales agreement to establish the terms of the limited warranty. In addition, Avaya�s standard warranty language, as well as information regarding support for this product, while under warranty, is available through the Avaya Support Web site:http://www.avaya.com/support
LicenseUSE OR INSTALLATION OF THE PRODUCT INDICATES THE END USER'S ACCEPTANCE OF THE TERMS SET FORTH HEREIN AND THE GENERAL LICENSE TERMS AVAILABLE ON THE AVAYA WEB SITE http://support.avaya.com/LicenseInfo/ ("GENERAL LICENSE TERMS"). IF YOU DO NOT WISH TO BE BOUND BY THESE TERMS, YOU MUST RETURN THE PRODUCT(S) TO THE POINT OF PURCHASE WITHIN TEN (10) DAYS OF DELIVERY FOR A REFUND OR CREDIT.Avaya grants End User a license within the scope of the license types described below. The applicable number of licenses and units of capacity for which the license is granted will be one (1), unless a different number of licenses or units of capacity is specified in the Documentation or other materials available to End User. "Designated Processor" means a single stand-alone computing device. "Server" means a Designated Processor that hosts a software application to be accessed by multiple users. "Software" means the computer programs in object code, originally licensed by Avaya and ultimately utilized by End User, whether as stand-alone Products or pre-installed on Hardware. "Hardware" means the standard hardware Products, originally sold by Avaya and ultimately utilized by End User.
License Type(s)Designated System(s) License (DS). End User may install and use each copy of the Software on only one Designated Processor, unless a different number of Designated Processors is indicated in the Documentation or other materials available to End User. Avaya may require the Designated Processor(s) to be identified by type, serial number, feature key, location or other specific designation, or to be provided by End User to Avaya through electronic means established by Avaya specifically for this purpose.Concurrent User License (CU). End User may install and use the Software on multiple Designated Processors or one or more Servers, so long as only the licensed number of Units are accessing and using the Software at any given time. A "Unit" means the unit on which Avaya, at its sole discretion, bases the pricing of its licenses and can be, without limitation, an agent, port or user, an e-mail or voice mail account in the name of a person or corporate function (e.g., webmaster or helpdesk), or a directory entry in the administrative database utilized by the Product that permits one user to interface with the Software. Units may be linked to a specific, identified Server.CPU License (CP). End User may install and use each copy of the Software on a number of Servers up to the number indicated by Avaya provided that the performance capacity of the Server(s) does not exceed the performance capacity specified for the Software. End User may not re-install or operate the Software on Server(s) with a larger performance capacity without Avaya's prior consent and payment of an upgrade fee. Named User License (NU). Customer may: (i) install and use the Software on a single Designated Processor or Server per authorized Named User (defined below); or (ii) install and use the Software on a Server so long as only authorized Named Users access and use the Software. "Named User," means a user or device that has been expressly authorized by Avaya to access and use the Software. At Avaya's sole discretion, a "Named User" may be, without limitation, designated by name, corporate function (e.g., webmaster or helpdesk), an e-mail or voice mail account in the name of a person or corporate function, or a directory entry in the administrative database utilized by the Product that permits one user to interface with the Product. Shrinkwrap License (SR). With respect to Software that contains elements provided by third party suppliers, End user may install and use the Software in accordance with the terms and conditions of the "shrinkwrap" or "clickwrap" license accompanying the Software ("Shrinkwrap License"). The text of the Shrinkwrap License will be available from Avaya upon End User's request (see "Copyright" below for more information).
Copyright Except where expressly stated otherwise, the Product is protected by copyright and other laws respecting proprietary rights. Unauthorized reproduction, transfer, and or use can be a criminal, as well as a civil, offense under the applicable law.
Third-party ComponentsCertain software programs or portions thereof included in the Product may contain software distributed under third party agreements ("Third Party Components"), which may contain terms that expand or limit rights to use certain portions of the Product ("Third Party Terms"). Information identifying Third Party Components and the Third Party Terms that apply to them is available on the Avaya Support Web site:http://support.avaya.com/ThirdPartyLicense/
Third-party royalty-free license agreementsThis product and future updates and service packs to this product might contain third-party royalty-free technology which is provided to you under terms and conditions which are different from your Avaya product license agreement. A file containing these third-party royalty-free licenses, 3plirdme.txt or a similar name, is in the root directory of the product CD. Your use of this technology described in this file is subject to the terms and conditions of such other license agreements, and not the Avaya product license agreement.
Preventing Toll Fraud"Toll fraud" is the unauthorized use of your telecommunications system by an unauthorized party (for example, a person who is not a corporate employee, agent, subcontractor, or is not working on your company's behalf). Be aware that there might be a risk of toll fraud associated with your system and that, if toll fraud occurs, it can result in substantial additional charges for your telecommunications services.
Avaya Fraud InterventionIf you suspect that you are being victimized by toll fraud and you need technical assistance or support, call Technical Service Center Toll Fraud Intervention Hotline at +1-800-643-2353 for the United States and Canada. For additional support telephone numbers, see the Avaya Support Web site:http://www.avaya.com/support
Providing Telecommunications SecurityTelecommunications security (of voice, data, and/or video communications) is the prevention of any type of intrusion to (that is, either unauthorized or malicious access to or use of) your company's telecommunications equipment by some party.Your company's "telecommunications equipment" includes both this Avaya product and any other voice/data/video equipment that can be accessed by this Avaya product (that is, "networked equipment").An "outside party" is anyone who is not a corporate employee, agent, subcontractor, or is not working on your company's behalf. Whereas, a "malicious party" is anyone (including someone who might be otherwise authorized) who accesses your telecommunications equipment with either malicious or mischievous intent.Such intrusions might be either to/through synchronous (time-multiplexed and/or circuit-based), or asynchronous (character-, message-, or packet-based) equipment, or interfaces for reasons of:
� Utilization (of capabilities special to the accessed equipment)� Theft (such as, of intellectual property, financial assets, or toll facility access)� Eavesdropping (privacy invasions to humans)� Mischief (troubling, but apparently innocuous, tampering)� Harm (such as harmful tampering, data loss or alteration, regardless of
motive or intent)Be aware that there might be a risk of unauthorized intrusions associated with your system and/or its networked equipment. Also realize that, if such an intrusion should occur, it might result in a variety of losses to your company (including but not limited to, human/data privacy, intellectual property, material assets, financial resources, labor costs, and/or legal costs).
Responsibility for Your Company�s Telecommunications SecurityThe final responsibility for securing both this system and its networked equipment rests with you � Avaya�s customer system administrator, your telecommunications peers, and your managers. Base the fulfillment of your responsibility on acquired knowledge and resources from a variety of sources including but not limited to:
� Installation documents� System administration documents� Security documents� Hardware-/software-based security tools� Shared information between you and your peers� Telecommunications security experts
To prevent intrusions to your telecommunications equipment, you and your peers should carefully program and configure:
� Your Avaya-provided telecommunications systems and their interfaces� Your Avaya-provided software applications, as well as their underlying
hardware/software platforms and interfaces� Any other equipment networked to your Avaya products
TCP/IP FacilitiesCustomers might experience differences in product performance, reliability and security depending upon network configurations/design and topologies, even when the product performs as warranted.
Standards ComplianceAvaya Inc. is not responsible for any radio or television interference caused by unauthorized modifications of this equipment or the substitution or attachment of connecting cables and equipment other than those specified by Avaya Inc. The correction of interference caused by such unauthorized modifications, substitution or attachment is the responsibility of the user. Pursuant to Part 15 of the Federal Communications Commission (FCC) Rules, the user is cautioned that changes or modifications not expressly approved by Avaya Inc. might void the user�s authority to operate this equipment.

Federal Communications Commission Statement
Part 15:
Canadian Department of Communications (DOC) Interference InformationThis Class A digital apparatus complies with Canadian ICES-003.Cet appareil numérique de la classe A est conforme à la norme NMB-003 du Canada.This equipment meets the applicable Industry Canada Terminal Equipment Technical Specifications. This is confirmed by the registration number. The abbreviation, IC, before the registration number signifies that registration was performed based on a Declaration of Conformity indicating that Industry Canada technical specifications were met. It does not imply that Industry Canada approved the equipment.
European Union Declarations of Conformity
Avaya Inc. declares that the equipment specified in this document bearing the "CE" (Conformité Europeénne) mark conforms to the European Union Radio and Telecommunications Terminal Equipment Directive (1999/5/EC), including the Electromagnetic Compatibility Directive (89/336/EEC) and Low Voltage Directive (73/23/EEC).Copies of these Declarations of Conformity (DoCs) can be obtained by contacting your local sales representative and are available on the Avaya Support Web site:http://www.avaya.com/support
TrademarksAvaya and Octel are registered trademark of Avaya Inc.All non-Avaya trademarks are the property of their respective owners.
Document ordering information:Avaya Publications CenterFor the most current versions of documentation, go to the Avaya Support Web site:http://www.avaya.com/support
COMPASThis document is also available from the COMPAS database. The COMPAS ID for this document is 122570.
Avaya supportAvaya provides a telephone number for you to use to report problems or to ask questions about your product. The support telephone number is 1-800-242-2121 in the United States. For additional support telephone numbers, see the Avaya Support Web site:http://www.avaya.com/support
Note: This equipment has been tested and found to comply with the limits for a Class A digital device, pursuant to Part 15 of the FCC Rules. These limits are designed to provide reasonable protection against harmful interference when the equipment is operated in a commercial environment. This equipment generates, uses, and can radiate radio frequency energy and, if not installed and used in accordance with the instruction manual, may cause harmful interference to radio communications. Operation of this equipment in a residential area is likely to cause harmful interference in which case the user will be required to correct the interference at his own expense.


5February 2007
Contents
Preface
Chapter 1 Introduction to Avaya Modular Messaging Restricted Microsoft Outlook ClientOverview . . . . . . . . . . . . . . . . . . . . . . . . . . . . . . . . . . . . . . . . . . . . . . . . . . . . . . . . . 1-1
Handling messages in Avaya Modular Messaging . . . . . . . . . . . . . . . . . . . . . . . 1-2Modular Messaging Restricted Outlook Client . . . . . . . . . . . . . . . . . . . . . . . . . . . 1-3Using Modular Messaging Restricted Outlook Client. . . . . . . . . . . . . . . . . . . . . . 1-3
Restrictions imposed by Modular Messaging Restricted Outlook Client . . . . . 1-4Modular Messaging Voice Form . . . . . . . . . . . . . . . . . . . . . . . . . . . . . . . . . . . . . 1-6
Opening the Voice Form. . . . . . . . . . . . . . . . . . . . . . . . . . . . . . . . . . . . . . . . . . 1-6Using the Voice Form . . . . . . . . . . . . . . . . . . . . . . . . . . . . . . . . . . . . . . . . . . . . 1-6
Modular Messaging Voice Recorder . . . . . . . . . . . . . . . . . . . . . . . . . . . . . . . . . . 1-7Opening the Voice Recorder . . . . . . . . . . . . . . . . . . . . . . . . . . . . . . . . . . . . . . 1-7Using the Voice Recorder. . . . . . . . . . . . . . . . . . . . . . . . . . . . . . . . . . . . . . . . . 1-7
Subscriber Options . . . . . . . . . . . . . . . . . . . . . . . . . . . . . . . . . . . . . . . . . . . . . . . 1-7
Chapter 2 Installing Avaya Modular Messaging Restricted Microsoft Outlook ClientIntroduction . . . . . . . . . . . . . . . . . . . . . . . . . . . . . . . . . . . . . . . . . . . . . . . . . . . . . . . 2-1
Before you begin installing Modular Messaging Restricted Outlook Client . . . . . 2-1Hardware and software requirements . . . . . . . . . . . . . . . . . . . . . . . . . . . . . . . . . . . 2-3Installing the Modular Messaging Restricted Outlook Client . . . . . . . . . . . . . . . . . . 2-4
Installation wizard. . . . . . . . . . . . . . . . . . . . . . . . . . . . . . . . . . . . . . . . . . . . . . . . . 2-5Command line installation . . . . . . . . . . . . . . . . . . . . . . . . . . . . . . . . . . . . . . . . . . 2-7Silent installation . . . . . . . . . . . . . . . . . . . . . . . . . . . . . . . . . . . . . . . . . . . . . . . . . 2-7Remote deployment of Modular Messaging Restricted Outlook Client . . . . . . . . 2-8
SMS Software Distribution . . . . . . . . . . . . . . . . . . . . . . . . . . . . . . . . . . . . . . . . 2-8Group Policy-Based Software Deployment . . . . . . . . . . . . . . . . . . . . . . . . . . . 2-8
Uninstalling the Modular Messaging Restricted Outlook Client . . . . . . . . . . . . . . . . 2-9

Modular Messaging Outlook Client User Guide
6 February 2007
Chapter 3 Configuring Avaya Modular Messaging Restricted Microsoft Outlook ClientIntroduction . . . . . . . . . . . . . . . . . . . . . . . . . . . . . . . . . . . . . . . . . . . . . . . . . . . . . . . 3-1Configuring Modular Messaging Restricted Outlook Client for MSS message store3-2
Configuring Service Providers for Outlook 2002/ Outlook 2003 . . . . . . . . . . . . . . 3-2Avaya Modular Messaging MSP Configuration dialog box . . . . . . . . . . . . . . . . . . . 3-4
Connection tab . . . . . . . . . . . . . . . . . . . . . . . . . . . . . . . . . . . . . . . . . . . . . . . . . . . 3-4Directory Settings tab . . . . . . . . . . . . . . . . . . . . . . . . . . . . . . . . . . . . . . . . . . . . . . 3-5General tab. . . . . . . . . . . . . . . . . . . . . . . . . . . . . . . . . . . . . . . . . . . . . . . . . . . . . . 3-5Advanced tab . . . . . . . . . . . . . . . . . . . . . . . . . . . . . . . . . . . . . . . . . . . . . . . . . . . . 3-6
Chapter 4 Modular Messaging Voice FormGetting started . . . . . . . . . . . . . . . . . . . . . . . . . . . . . . . . . . . . . . . . . . . . . . . . . . . . . 4-1
Opening and closing the Voice Form . . . . . . . . . . . . . . . . . . . . . . . . . . . . . . . . . . 4-2Customizing the Voice Form . . . . . . . . . . . . . . . . . . . . . . . . . . . . . . . . . . . . . . . . . . 4-3
Setting automatic playback. . . . . . . . . . . . . . . . . . . . . . . . . . . . . . . . . . . . . . . . . . 4-4Setting voice message recording and playing option . . . . . . . . . . . . . . . . . . . . . . 4-5
Composing and sending voice messages . . . . . . . . . . . . . . . . . . . . . . . . . . . . . . . . 4-6Recording voice messages . . . . . . . . . . . . . . . . . . . . . . . . . . . . . . . . . . . . . . . . . 4-7Sending voice messages . . . . . . . . . . . . . . . . . . . . . . . . . . . . . . . . . . . . . . . . . . . 4-9
Addressing voice messages . . . . . . . . . . . . . . . . . . . . . . . . . . . . . . . . . . . . . . . 4-9Assigning delivery options . . . . . . . . . . . . . . . . . . . . . . . . . . . . . . . . . . . . . . . 4-10Sending voice messages . . . . . . . . . . . . . . . . . . . . . . . . . . . . . . . . . . . . . . . . 4-13
Working with incoming voice messages . . . . . . . . . . . . . . . . . . . . . . . . . . . . . . . . 4-14Listening to voice messages . . . . . . . . . . . . . . . . . . . . . . . . . . . . . . . . . . . . . . . 4-15
Opening a voice message . . . . . . . . . . . . . . . . . . . . . . . . . . . . . . . . . . . . . . . 4-15Listening to a voice message . . . . . . . . . . . . . . . . . . . . . . . . . . . . . . . . . . . . . 4-15 . . . . . . . . . . . . . . . . . . . . . . . . . . . . . . . . . . . . . . . . . . . . . . . . . . . . . . . . . . . . 4-16Closing a voice message . . . . . . . . . . . . . . . . . . . . . . . . . . . . . . . . . . . . . . . . 4-16Navigating between voice messages in your mailbox . . . . . . . . . . . . . . . . . . 4-16
Navigating through a voice message . . . . . . . . . . . . . . . . . . . . . . . . . . . . . . . . . 4-18Skip back and forward in a voice message. . . . . . . . . . . . . . . . . . . . . . . . . . . 4-18Navigating between message parts in a multipart voice message . . . . . . . . . 4-18
Replying to messages . . . . . . . . . . . . . . . . . . . . . . . . . . . . . . . . . . . . . . . . . . . . 4-20Replying to voice messages with voice messages . . . . . . . . . . . . . . . . . . . . . 4-20Replying to e-mail messages with voice messages . . . . . . . . . . . . . . . . . . . . 4-20
Forwarding voice messages. . . . . . . . . . . . . . . . . . . . . . . . . . . . . . . . . . . . . . . . 4-22Deleting voice messages . . . . . . . . . . . . . . . . . . . . . . . . . . . . . . . . . . . . . . . . . . . . 4-23
Chapter 5 Modular Messaging Voice RecorderGetting started . . . . . . . . . . . . . . . . . . . . . . . . . . . . . . . . . . . . . . . . . . . . . . . . . . . . . 5-1
Opening and closing the Modular Messaging Voice Recorder. . . . . . . . . . . . . . . 5-2Reviewing voice recordings . . . . . . . . . . . . . . . . . . . . . . . . . . . . . . . . . . . . . . . . . . . 5-3

7February 2007
Reviewing voice recordings from within a document . . . . . . . . . . . . . . . . . . . . . . 5-4Reviewing voice recordings by opening the Modular Messaging Voice Recorder5-5Reviewing voice recordings received as separate files . . . . . . . . . . . . . . . . . . . . 5-6
Managing voice recordings . . . . . . . . . . . . . . . . . . . . . . . . . . . . . . . . . . . . . . . . . . . 5-7Composing a voice recording . . . . . . . . . . . . . . . . . . . . . . . . . . . . . . . . . . . . . . . 5-8Sending a voice recording . . . . . . . . . . . . . . . . . . . . . . . . . . . . . . . . . . . . . . . . . . 5-9Saving a voice recording . . . . . . . . . . . . . . . . . . . . . . . . . . . . . . . . . . . . . . . . . . 5-10Inserting voice recordings into documents. . . . . . . . . . . . . . . . . . . . . . . . . . . . . 5-11
Inserting voice recordings into a document by dragging the recordings . . . . 5-11Inserting a voice recording into a document. . . . . . . . . . . . . . . . . . . . . . . . . . 5-11Inserting an empty voice recording into a document . . . . . . . . . . . . . . . . . . . 5-12
Frequently asked questions (FAQs)
Reference Information
Modular Messaging and Fax . . . . . . . . . . . . . . . . . . . . . . . . . . . . . . . . . . . . . . . . . RI-1Sending a Fax . . . . . . . . . . . . . . . . . . . . . . . . . . . . . . . . . . . . . . . . . . . . . . . . . . RI-2Viewing a fax message . . . . . . . . . . . . . . . . . . . . . . . . . . . . . . . . . . . . . . . . . . . RI-3Managing fax messages for TUI access . . . . . . . . . . . . . . . . . . . . . . . . . . . . . . RI-3
Glossary
Index

Modular Messaging Outlook Client User Guide
8 February 2007

February 2007 9
Preface
Overview
This guide describes how to install and configure the Avaya Modular Messaging Restricted Microsoft Outlook Client from your desktop. It explains how you can use the Modular Messaging Restricted Outlook Client and customize it to suit your environment.
Note: In the current release, only Modular Messaging�MSS version supports Modular Messaging Restricted Outlook Client.
Audience
This guide is intended for users and administrators of the client software for Modular Messaging Restricted Outlook Client.

Modular Messaging Restricted Outlook Client User Guide
10 February 2007
Summary of chapters
This guide includes the following chapters:
Modular Messaging Documentation
For more information about Modular Messaging, see the following documentation available on the Avaya Modular Messaging Release 3 Documentation CD-ROM:
! Avaya Modular Messaging Release 3 Subscriber Options User Guide
Provides information on using the Avaya Modular Messaging Subscriber Options to record greetings and customizing the call and message handling features.
! Avaya Modular Messaging Release 3 Telephone User Interface Guide
Provides information on how to use Avaya Modular Messaging�s telephone user interface (TUI).
Chapter Summary
Chapter 1, Introduction to Avaya Modular Messaging Restricted Microsoft Outlook Client.
Introduces you to the various components of the Avaya Modular Messaging Restricted Microsoft Outlook Client.
Chapter 2, Installing Avaya Modular Messaging Restricted Microsoft Outlook Client.
Provides instructions on installing the client software.
Chapter 3, Configuring Avaya Modular Messaging Restricted Microsoft Outlook Client.
Provides instructions on configuring the Modular Messaging Restricted Outlook Client in your Outlook profile.
Chapter 4, Modular Messaging Voice Form.
Describes how to compose, send, and manage voice messages using the Voice Form.
Chapter 5, Modular Messaging Voice Recorder.
Describes how to compose and play voice messages using the Voice Recorder.

Preface
February 2007 11
Conventions
The following conventions are used in this guide:S
Convention Description
Initial Capitals
Names of applications, programs, menu items, and dialog boxes appear in Initial Capitals. For example, the Change Setup Language dialog box.
italic Document titles appear in italics. For example, Avaya Modular Messaging Release 3 Subscriber Options User Guide
bold Field names, button names, and menu items appear in bold. For example, Click Next to continue with the installation.
KEY+KEY Key combinations in which you press and hold down one key and then press another.For example, Press the Ctrl + Down arrow.
<Standard Outlook name>/<VoiceMail name>
Menu names, menu item names, field names, and button names that differ in the Standar Outlook terminology and VoiceMail terminology.For example, Click File/Create >Close

Modular Messaging Restricted Outlook Client User Guide
12 February 2007

February 2007 1-11-1
1Introduction to Avaya Modular
Messaging RestrictedMicrosoft Outlook Client
Overview
The Modular Messaging Restricted Outlook Client consists of the following components:
! Modular Messaging Service Providers
! Modular Messaging Voice Form
! Modular Messaging Voice Recorder
! Modular Messaging Subscriber Options
and setting up see Chapter 2, Installing Avaya Modular Messaging Restricted Microsoft Outlook Client.
For more information on configuring the , see Chapter 3, Configuring Avaya Modular Messaging Restricted Microsoft Outlook Client.
For more information on using the Modular Messaging Voice Form, see Chapter 4, Modular Messaging Voice Form.
For more information on using the Modular Messaging Voice Recorder, see Chapter 5, Modular Messaging Voice Recorder.
For more information on the Modular Messaging Subscriber Options, see the Avaya Modular Messaging Release 3 Subscriber Options User Guide.
For more information on using the Avaya Modular Messaging Telephone User Interface (TUI), see the Avaya Modular Messaging Release 3 Telephone User Interface Guide.
These documents are available on the software installation CD. Your system administrator will provide this information.

Modular Messaging Restricted Outlook Client User Guide
1-2 February 2007
Handling messages in Avaya Modular Messaging
Avaya Modular Messaging treats voice and fax messages just like e-mail messages. You can send, retrieve, reply to, and forward any message, and even store messages in personal folders. The different icons that indicate the type of message (voice, e-mail, or fax), the subject of the message, and the sender name, allows you to quickly and easily select a message and act on it.
The Modular Messaging�Message Storage Server (MSS) version voice mailbox has a separate e-mail address. Depending on the configuration, your voice and fax messages are stored directly in your e-mail mailbox or in a separate mailbox. In Avaya Modular Messaging�Microsoft Exchange and Avaya Modular Messaging�IBM Lotus Dominos versions, e-mail, voice, and fax messages are stored in your e-mail mailbox.
In Modular Messaging�Message Storage Server (MSS) version, voice and fax messages are stored in a separate mailbox. If you have separate mailboxes for your e-mail and voice mails, you can receive e-mail messages into your regular mailbox or in your Modular Messaging mailbox.
Note: In the current release, only Modular Messaging�MSS version supports Modular Messaging Restricted Outlook Client.
Avaya Modular Messaging provides telephone access to messages. You can use Modular Messaging over the telephone to:
! Send, forward, reply, and listen to voice and text messages.
! Use text-to-speech to play text messages and fax subjects.
! Reply to a text message using a voice message.
! Send text messages and faxes to a printer.
When you are away from the office, you can dial into your mailbox through the telephone user interface (TUI) to check your messages. In Modular Messaging�MSS version, the Modular Messaging text-to-speech feature converts text messages and fax subjects, so you can listen to them as conveniently as you can to voice messages. Modular Messaging also notifies you of fax messages.

Introduction to Avaya Modular Messaging Restrict-
February 2007 1-3
Modular Messaging Restricted Outlook Client
Modular Messaging Restricted Outlook Client integrates with your Microsoft Outlook e-mail program and allows you to manage voice and text messages from within Microsoft Outlook or using the telephone.
Note: Modular Messaging�Exchange and Modular Messaging�Domino versions does not support Modular Messaging Restricted Outlook Client.
You can use the Modular Messaging Restricted Outlook Client from your computer to:
! Send, forward, reply, and listen to voice and text messages.
! View the subjects of fax messages and launch a fax viewer.
! Use text-to-speech to play text messages and subjects of fax messages received in your Modular Messaging mailbox.
! Record and play back greetings.
! Create fax using Windows Fax Print Driver and send it using Modular Messaging.
Using Modular Messaging Restricted Outlook Client
After you install the Avaya Modular Messaging Restricted Microsoft Outlook Client, three new icons will appear on the Standard toolbar in your e-mail application. They are:
New Voice Message: Use this icon for creating a new voice message.
Reply with Voice: Use this icon for replying to a message with a voice message.
Reply to All with Voice: Use this icon for replying to all recipients with a voice message.
You will also notice a new folder, Outgoing Queue, in your e-mail application. Modular Messaging Restricted Outlook Client stores all voice messages that you want to send in the Outgoing Queue folder. Once a voice message is successfully sent the voice message is removed from the Outgoing Queue folder. However, if there are messages in the Outgoing Queue folder and you close the e-mail application, Modular Messaging Restricted Outlook Client permanently deletes the messages.

Modular Messaging Restricted Outlook Client User Guide
1-4 February 2007
Modular Messaging Restricted Outlook Client supports two types of terminologies, Standard Outlook and VoiceMail, for the menu, option, and button names. When you use the Standard Outlook terminology, the default menu, option, and button names of Microsoft Outlook and Modular Messaging Restricted Outlook Client like Inbox, Reply, Forward are retained. However, when you use the VoiceMail terminology, the default menu, option, and button names of Microsoft Outlook and Modular Messaging Restricted Outlook Client are replaced by Voice Mail specific names like VoiceMail, Answer, Give.
In this guide both the Standard Outlook and VoiceMail terminologies are provided. For menus, options, and buttons that have different names in the Standard Outlook and VoiceMail terminology the names are presented in the <Standard Outlook name>/<VoiceMail name> format.
Note: By default, Modular Messaging Restricted Outlook Client supports the Standard Outlook terminology. If you want to use the VoiceMail terminology, select VoiceMail Only Terminology in the Custom Setup dialog box of the Modular Messaging Restricted Outlook Client installation wizard. For more information on the Modular Messaging Restricted Outlook Client installation wizard, see Installation wizard, on page 2-5.
Restrictions imposed by Modular Messaging Restricted Outlook Client
To maintain the integrity of voice content in the voice messages, Modular Messaging Restricted Outlook Client imposes certain restrictions on the operations that you can perform on a voice message. Some of the restrictions include:
! You can address voice messages only to Modular Messaging subscribers, both local and remote subscribers
Note: You can address voice messages only to Modular Messaging remote subscribers whose voice mails are networked to your Messaging System.
! You cannot drag and drop voice messages to the desktop or a folder
! You cannot save voice messages on to your system

Introduction to Avaya Modular Messaging Restrict-
February 2007 1-5
! You cannot perform the following tasks on the voice messages stored in the Outgoing Queue folder:
� Moving of voice messages to another folder
� Deletion of voice messages
� Drag and Drop of voice messages to a new location
Due to the restrictions imposed by Modular Messaging Restricted Outlook Client, the options available on the context menu that is displayed when you right click on a voice message is different from the options available for text messages. Modular Messaging Restricted Outlook Client displays the following options on the context menu for a voice message:
! Open: Opens the selected voice message in Voice Form.
! Reply/Answer: Opens the selected voice message in Voice Form and appends the subject of the message with �RE:/A:�. In the Voice Form, you can send a reply to the sender for the voice message.
Note: In Modular Messaging Restricted Outlook Client, you can reply to voice messages received from only Modular Messaging subscribers.
! Reply to All/Answer All: Opens the selected voice message in Voice Form and appends the subject of the message with �RE:/A:�. In the Voice Form, you can send an reply to all the senders of the voice message.
! Forward/Give: Opens the selected voice message in Voice Form and appends the subject of the message with �FW:/G:�. In the Voice Form, you can forward the voice message to another Modular Messaging subscriber.
! Mark as Unread/Mark as Not Heard: Changes the status of the voice message from Read to Unread. If the current status of the voice message is Unread, the status is retained.
! Delete: Displays a message box that prompts whether the voice message must be deleted or not. When you confirm the deletion the message is deleted permanently.

Modular Messaging Restricted Outlook Client User Guide
1-6 February 2007
Modular Messaging Voice Form
The Modular Messaging Voice Form facilitates easy recording, sending, and playing back of voice messages from within your e-mail application. The upper part of the Voice Form is similar to an e-mail message form. The lower part of the form is similar to the controls on a CD player or tape recorder. You can record and play back a message using these playback controls.
Opening the Voice Form
You can open the Modular Messaging Voice Form from your e-mail application in any of the following ways:
! Click one of the new voice message icons on the Standard toolbar.
OR
! From Microsoft Outlook, click Actions > New Voice Message.
Using the Voice Form
Use the Voice Form to listen to voice mails and to record and send your voice messages.
See �Customizing the Voice Form� on page 4-3 for information on setting the Voice Form to:
! Determine whether a voice message is played automatically when you open it.
! Choose whether to play or record voice messages using telephone or multimedia.
See �Composing and sending voice messages� on page 4-6 for information about using the Voice Form to:
! Record your voice message using the telephone or multimedia.
! Send your voice message and select the delivery options.
See �Working with incoming voice messages� on page 4-14 for information about using the Voice Form to:
! Listen to voice messages.
! Navigate through a voice message and parts of voice messages.
! Reply to voice messages with voice or e-mail.
! Forward voice messages and also record and attach your voice message with the original message.
See �Deleting voice messages� on page 4-23 for information about using the Voice Form to delete voice messages.

Introduction to Avaya Modular Messaging Restrict-
February 2007 1-7
Modular Messaging Voice Recorder
You can use the Modular Messaging Voice Recorder to record voice comments and embed them into another OLE2 or ActiveX application such as Microsoft Word, Microsoft Excel, or Lotus 1-2-3. You can also use the Voice Recorder to create messages quickly without having to open your e-mail application.
Once a recording is embedded, you can listen to and change it by displaying the Voice Recorder toolbar within the application in which you are currently working or by opening the Voice Recorder window.
The Voice Recorder works independently from your e-mail application and Modular Messaging Voice Form. You can also use it to send voice messages.
Opening the Voice Recorder
You can open the Modular Messaging Voice Recorder from the Windows Start menu. To open the Modular Messaging Voice Recorder, click Start > Programs > Avaya Modular Messaging > Voice Recorder
Using the Voice Recorder
See �Reviewing voice recordings� on page 5-3 for information about using the Voice Recorder to:
! Listen to a voice recording embedded in a document.
! Edit a voice recording.
! Move backwards and forwards in a voice message.
See �Managing voice recordings� on page 5-7 for information about using the Voice Recorder to:
! Record voice.
! Send a voice recording.
! Save a voice recording.
! Insert voice recordings into documents created by an OLE2 or ActiveX application.
Subscriber Options
You can use Subscriber Options to change your mailbox settings for incoming call and message handling, and to create and manage your Personal Distribution Lists (PDLs). Use the Voice Mail tab to access Subscriber Options from within Microsoft Outlook. The Voice Mail tab appears as an additional property page in your e-mail options pages.

Modular Messaging Restricted Outlook Client User Guide
1-8 February 2007
To display the Voice Mail tab from Microsoft Outlook:
1. Click Tools > Options.
2. Click the Voice Mail tab.
The following options are displayed on the Voice Mail tab:
Call Answering (Call Answering Options button) for:
! Setting personalized call handling features
! Recording greetings from your desktop
Telephone User Interface (Telephone User Interface Options button) for:
! Working with Modular Messaging through the TUI
! Setting up rules
! Managing Personal Distribution Lists
Desktop User Interface (Desktop User Interface Options button) for:
! Working with the Modular Messaging Restricted Outlook Client from the desktop
! Selecting the display language
! Sorting the messages in your Inbox\VoiceMail based on priority settings
! Specifying the default number for printing faxes
For information on Subscriber Options and these features, see Avaya Modular Messaging Release 3 Subscriber Options User Guide.

February 2007 2-1-
2Installing Avaya Modular
Messaging RestrictedMicrosoft Outlook Client
Introduction
To install the Modular Messaging Restricted Outlook Client software, you only have to run the Setup program. The rest is done automatically.
The Setup program installs the following components:
! Avaya Modular Messaging Voice Form
! Avaya Modular Messaging Voice Recorder
! Avaya Modular Messaging Subscriber Options
! Avaya Modular Messaging Service Providers
After installation, you must configure the Modular Messaging Restricted Outlook Client to your Microsoft Outlook profile.
See Configuring Avaya Modular Messaging Restricted Microsoft Outlook Client, on page 3-1 for more information.
You might want to configure Modular Messaging Restricted Outlook Client further, for example, to customize the call handling facilities. To do this, use the Avaya Modular Messaging Subscriber Options.
For more information, see Avaya Modular Messaging Release 3 Subscriber Options User Guide.
Before you begin installing Modular Messaging Restricted Outlook Client
You must close your Microsoft Outlook application before starting the installation.

Modular Messaging Restricted Outlook Client User Guide
2-2 February 2007
Ensure that Microsoft Outlook is the default e-mail application:
1. Click Start > Settings > Control Panel.
2. Double-click on Internet Options.
3. Click the Programs tab.
4. In the E-mail field, ensure that Microsoft Outlook is selected.
For the voice player component of Modular Messaging Restricted Outlook Client to work, you must do the following:
1. Click Start > Settings > Control Panel.
2. Double-click on Sounds and Multimedia.
3. Click the Audio tab.
4. Under Recording, check whether Use only preferred devices option is selected.
If it is selected, clear it.
Installing Avaya Modular Messaging Restricted Microsoft Outlook Client
February 2007 2-3
Hardware and software requirements
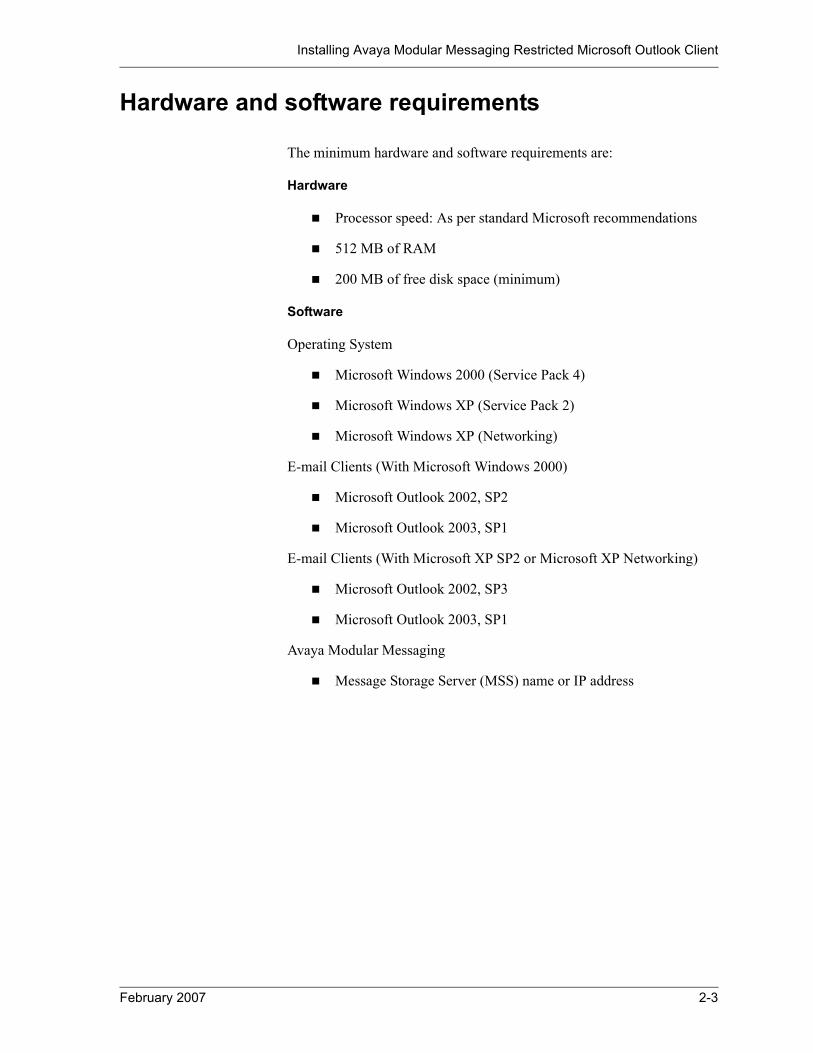
The minimum hardware and software requirements are:
Hardware
! Processor speed: As per standard Microsoft recommendations
! 512 MB of RAM
! 200 MB of free disk space (minimum)
Software
Operating System
! Microsoft Windows 2000 (Service Pack 4)
! Microsoft Windows XP (Service Pack 2)
! Microsoft Windows XP (Networking)
E-mail Clients (With Microsoft Windows 2000)
! Microsoft Outlook 2002, SP2
! Microsoft Outlook 2003, SP1
E-mail Clients (With Microsoft XP SP2 or Microsoft XP Networking)
! Microsoft Outlook 2002, SP3
! Microsoft Outlook 2003, SP1
Avaya Modular Messaging
! Message Storage Server (MSS) name or IP address

Modular Messaging Restricted Outlook Client User Guide
2-4 February 2007
Installing the Modular Messaging Restricted Outlook Client
You can find the Modular Messaging Restricted Outlook Client Setup program in the Client Distrib subdirectory of the Modular Messaging directory on your network or on the CD-ROM where the Setup program is stored. Contact your system administrator for more information.
Note: Modular Messaging Restricted Outlook Client, Modular Messaging Outlook Client, and Modular Messaging Lotus Notes Client cannot exist on the same personal computer. If Modular Messaging Outlook Client is installed on the subscriber�s personal computer, Modular Messaging uninstalls Modular Messaging Outlook Client during the installation of Modular Messaging Restricted Outlook Client. If Modular Messaging Lotus Notes Client is installed on the subscriber�s personal computer, Modular Messaging does not allow the installation of Modular Messaging Restricted Outlook Client.
You can install Modular Messaging Restricted Outlook Client using any one of the following methods:
! Installation wizard (recommended)
! Command line installation
! Silent installation
! Remote Deployment
Note: The Modular Messaging Restricted Outlook Client can be deployed using commercially available deployment software. For more information on creating a .msi from the Setup program (Setup.exe), see How do I create a .msi file from the Modular Messaging Restricted Outlook Client Setup program (Setup_ROC.exe)?, on page 6-2.

Installing Avaya Modular Messaging Restricted Microsoft Outlook Client
February 2007 2-5
Installation wizard
You can install Avaya Modular Messaging Restricted Microsoft Outlook Client by double-clicking the Setup program. To install Modular Messaging Restricted Outlook Client, perform the following actions:
1. Open Windows Explorer.
2. Select the drive and the Client Distrib subdirectory of the Modular Messaging directory on your network or the CD-ROM where the Setup program is stored.
3. Double-click the Setup_ROC.exe.
The system displays the Welcome dialog box.
4. Read the information on the Welcome dialog box and click Next.
The system displays the Customer Information dialog box.
5. Type your name and the name of your organization.
6. Click Next.
The system displays the Setup Type dialog box.
7. Do any one of the following:
! Select Typical to install the Modular Messaging Restricted Outlook Client and the Subscriber Options for the message store.
! Select Custom to choose features that you want to install.
Note: You must select Custom if you want to install only the Subscriber Options or want to use the VoiceMail terminology.
8. Click Next.
Depending on the setup type you selected in the Setup Type dialog box, do any one of the following:
! If you had selected Typical:
The system displays the Destination Folder dialog box.
(1) Click Change, to change the destination folder.
The system displays the Change Current Destination Folder dialog box.
(2) Click OK, to approve the destination folder change or click Cancel.

Modular Messaging Restricted Outlook Client User Guide
2-6 February 2007
(3) Click Next.
The system displays the Ready to Install the Program dialog box.
! If you had selected Custom:
The system displays the Custom Setup dialog box.
(1) Select the feature or features you want to install.
(2) Click Change, to change the destination folder.
The system displays the Change Current Destination Folder dialog box.
(3) Click OK, to approve the destination folder change or click Cancel.
(4) Click Next.
The system displays the Ready to Install the Program dialog box.
9. Click Install.
The system displays the Completed dialog box when installation is complete.
Note: If Modular Messaging Outlook Client is installed on your computer, the Modular Messaging Restricted Outlook Client installation wizard automatically uninstalls Modular Messaging Outlook Client.
10. Click Finish to complete the installation program.
11. Restart your computer, if prompted.
This completes the installation of the Modular Messaging Restricted Outlook Client on your computer.
Important: Before you start using the Modular Messaging Restricted Outlook Client software, you have to configure your Outlook profile. For Modular Messaging�Message Storage Server (MSS), configure the Outlook profile with Microsoft Exchange Server and Modular Messaging Message Service. See Configuring Avaya Modular Messaging Restricted Microsoft Outlook Client, on page 3-1.

Installing Avaya Modular Messaging Restricted Microsoft Outlook Client
February 2007 2-7
Command line installation
System administrators can also install Avaya Modular Messaging Restricted Microsoft Outlook Client from the command prompt.
The command format for the Modular Messaging Restricted Outlook Client installation is as follows:
Setup_ROC.exe
where,
Setup_ROC.exe - is the name of the Modular Messaging Restricted Outlook Client Setup program.
Important: If the Modular Messaging Restricted Outlook Client Setup program is located at a different location, system administrators must instruct users to run the installation command on the folder where the Setup program is located.
Silent installation
System administrators can also create a batch file for a �silent� installation of the Modular Messaging Restricted Outlook Client software. This will require little or no intervention from the user. Administrators can inform and instruct users to run a command at the system command prompt. This command installs the Modular Messaging Restricted Outlook Client software in the background and does not display the installation wizard screens.
The command format for the silent installation is as follows:
Setup_ROC.exe /s /v�/qn STORE_TYPE=mss LANGUAGE_ID=language�
where,
Setup_ROC.exe - is the name of the Modular Messaging Restricted Outlook Client Setup program.
mss - indicates that the voice mail storage is in the MSS.
language - is the hexadecimal ID of the language file. You can specify only the language ID of the English language pack, 409, as Modular Messaging Restricted Outlook Client is available only in the English language.
You may have to restart your computer for the changes to take effect.

Modular Messaging Restricted Outlook Client User Guide
2-8 February 2007
Remote deployment of Modular Messaging Restricted Outlook Client
Modular Messaging supports remote deployment of the Modular Messaging Restricted Outlook Client software. This feature allows system administrators to distribute and install the software on subscribers' computers, over a network.
A system administrator can deploy Modular Messaging Restricted Outlook Client by using any of the following software distribution technologies:
! Microsoft Systems Management Server (SMS) Software Distribution
! Group Policy-Based Software Deployment.
SMS Software Distribution
Using SMS, a system administrator can deploy the Modular Messaging Restricted Outlook Client Setup program on all the computers in a network. After deploying the Setup program, the administrator can perform a silent installation of Modular Messaging Restricted Outlook Client on the computers.
Note: During the installation of Modular Messaging Restricted Outlook Client on a computer, the administrator must make sure that Microsoft Outlook and Voice Form is not running on the computer.
If you want to generate different installation configurations, create a transform (.mst file) of the Modular Messaging Restricted Outlook Client Setup program. You can use SMS to push the transform to all the computers in the network.
You can create a transform of the Modular Messaging Restricted Outlook Client Setup program by using a third party tool such as, Wise InstallTailor1.
Group Policy-Based Software Deployment
System administrators or domain controllers can install the Modular Messaging Restricted Outlook Clientsoftware using Group Policy object with Active Directory for Windows 2000 or Windows XP. You must create a package for the Modular Messaging Restricted Outlook Client Setup program in the Active Directory administrative tool and then assign the software to be installed on users' computers at startup.
This method helps the system administrators or the domain controllers to install the Modular Messaging Restricted Outlook Client software on all the systems in a network domain.
1. Transforms created using Wise InstallTailor, are supported only by MSI version 2.00.2600.1106.

Installing Avaya Modular Messaging Restricted Microsoft Outlook Client
February 2007 2-9
Uninstalling the Modular Messaging Restricted Outlook Client
You can permanently remove Modular Messaging Restricted Outlook Client software from your computer.
To remove Modular Messaging Restricted Outlook Client software:
1. Close Microsoft Outlook.
2. Open the Control Panel and double-click Add/Remove Programs.
3. Select Avaya Modular Messaging Restricted Microsoft Outlook Client and click Remove.
4. Click Yes when asked if you want to remove the Avaya Modular Messaging Restricted Microsoft Outlook Client.
The system removes Modular Messaging Restricted Outlook Client software from your computer.
5. Restart your computer, if prompted.

Modular Messaging Restricted Outlook Client User Guide
2-10 February 2007

February 2007 3-1
3Configuring Avaya Modular
Messaging RestrictedMicrosoft Outlook Client
Introduction
Avaya Modular Messaging Restricted Microsoft Outlook Client Release 3 supports only the Avaya Modular Messaging�Message Storage Server (MSS) message store server. You need to configure the Modular Messaging Restricted Outlook Client for your message store server before using the Modular Messaging Restricted Outlook Client software.
Once you configure the Modular Messaging Restricted Outlook Client, you can perform the following tasks from within Microsoft Outlook:
! Access your messages stored on the message store server (MSS), using the industry-standard IMAP4 protocol.
! Send messages to the Modular Messaging server using the SMTP protocol.
! Access Modular Messaging LDAP server for retrieving subscriber addresses.

Modular Messaging Restricted Outlook Client User Guide
3-2 February 2007
Configuring Modular Messaging Restricted Outlook Client for MSS message store
The prerequisite for configuring the Modular Messaging Restricted Outlook Client for MSS message store is that you must have installed Modular Messaging Restricted Outlook Client for MSS.
With MSS message store, you need to configure the Modular Messaging Service Providers before you start using Modular Messaging Restricted Outlook Client. The Modular Messaging Service Providers act as an interface between your e-mail application (Microsoft Outlook) and the Modular Messaging servers.
Note: You can also create a new Outlook profile and then configure the Service Providers to that profile.
Configuring Service Providers for Outlook 2002/ Outlook 2003
To configure the Service Providers in Outlook 2002/ Outlook 2003:
1. Start Microsoft Outlook 2002/ Outlook 2003.
2. Click Tools > Options.
3. On the Mail Setup tab, click E-mail Accounts.
The system displays the E-mail Accounts dialog box.
4. Under E-mail, select the Add a new e-mail account option.
5. Click Next.
6. Under Server Type, select the Additional Server Types option.
7. Click Next.
8. Under Additional Server Types, select MM Message Service.
9. Click OK.
The system displays the Avaya Modular Messaging MSP Configuration dialog box. See �Avaya Modular Messaging MSP Configuration dialog box� on page 3-4 for more information on the service provider settings.
Configuring Avaya Modular Messaging Restricted Microsoft Outlook Client
February 2007 3-3
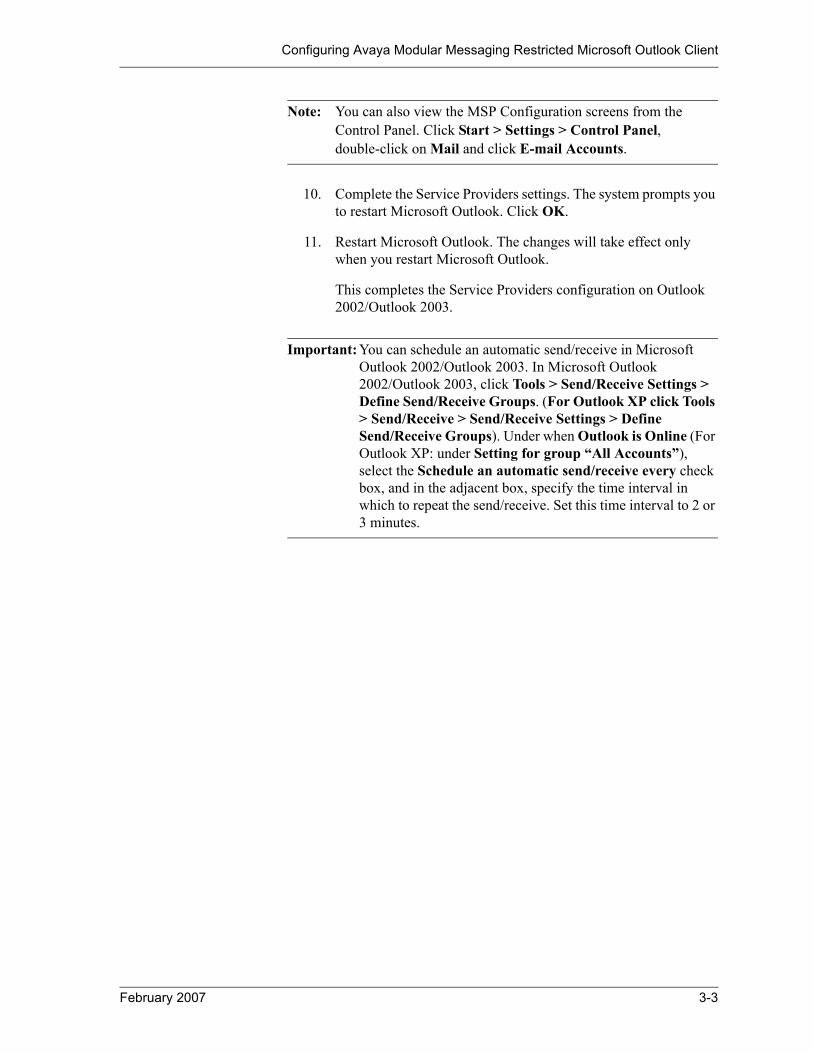
Note: You can also view the MSP Configuration screens from the Control Panel. Click Start > Settings > Control Panel, double-click on Mail and click E-mail Accounts.
10. Complete the Service Providers settings. The system prompts you to restart Microsoft Outlook. Click OK.
11. Restart Microsoft Outlook. The changes will take effect only when you restart Microsoft Outlook.
This completes the Service Providers configuration on Outlook 2002/Outlook 2003.
Important: You can schedule an automatic send/receive in Microsoft Outlook 2002/Outlook 2003. In Microsoft Outlook 2002/Outlook 2003, click Tools > Send/Receive Settings > Define Send/Receive Groups. (For Outlook XP click Tools > Send/Receive > Send/Receive Settings > Define Send/Receive Groups). Under when Outlook is Online (For Outlook XP: under Setting for group �All Accounts�), select the Schedule an automatic send/receive every check box, and in the adjacent box, specify the time interval in which to repeat the send/receive. Set this time interval to 2 or 3 minutes.

Modular Messaging Restricted Outlook Client User Guide
3-4 February 2007
Avaya Modular Messaging MSP Configuration dialog box
Complete the following details on the Avaya Modular Messaging MSP Configuration dialog box.
Connection tab
On the Connection tab, ensure that you complete the following:
! Message storage server: Type the full name (Fully Qualified Domain Name, FQDN) or the IP address of the Message Storage Server (MSS). Your system administrator will provide this information.
! Mailbox number: Type your Modular Messaging mailbox number.Typically this is your phone number.
Important: Do not include any spaces, or dashes in the phone number.
! Password: Type your numeric mailbox password.
! Remember password: Select this check box if you do not want Modular Messaging to prompt you for a password each time you log in to your Modular Messaging mailbox.
! Connect at logon: Select this check box to connect to the message storage server when you log in to your mailbox.

Configuring Avaya Modular Messaging Restricted Microsoft Outlook Client
February 2007 3-5
Directory Settings tab
On the Directory settings tab, ensure that the following information displays:
! Directory service name: The Modular Messaging Directory service name. The default name is MM Address Book.
! Search timeout in seconds: The waiting time (in seconds) for displaying the LDAP search results.
! Search limit: The number of entries displayed from the LDAP search results at a time. The search limit ranges from a minimum of 20 to a maximum of 2000 entries. The default value is 500.
! Search base: The base of the search tree from which to start the search. For example, ou=people, dc=avaya. Your system administrator will provide this information.
Accept the default values or contact your system administrator.
General tab
On the General tab, complete the following:
! Voice mail account name: Type a name by which you want to refer to this account By default, the name of the voice mail account is set to Avaya Account.
When you complete the Service Providers configuration, a new folder bearing this Voice mail account name is created in Outlook. The Modular Messaging messages are displayed in this folder. If you cannot see this folder, then on the Outlook menu bar click View > Folder List to display all the folders on the left of the screen.
Modular Messaging Restricted Outlook Client User Guide
3-6 February 2007
Advanced tab
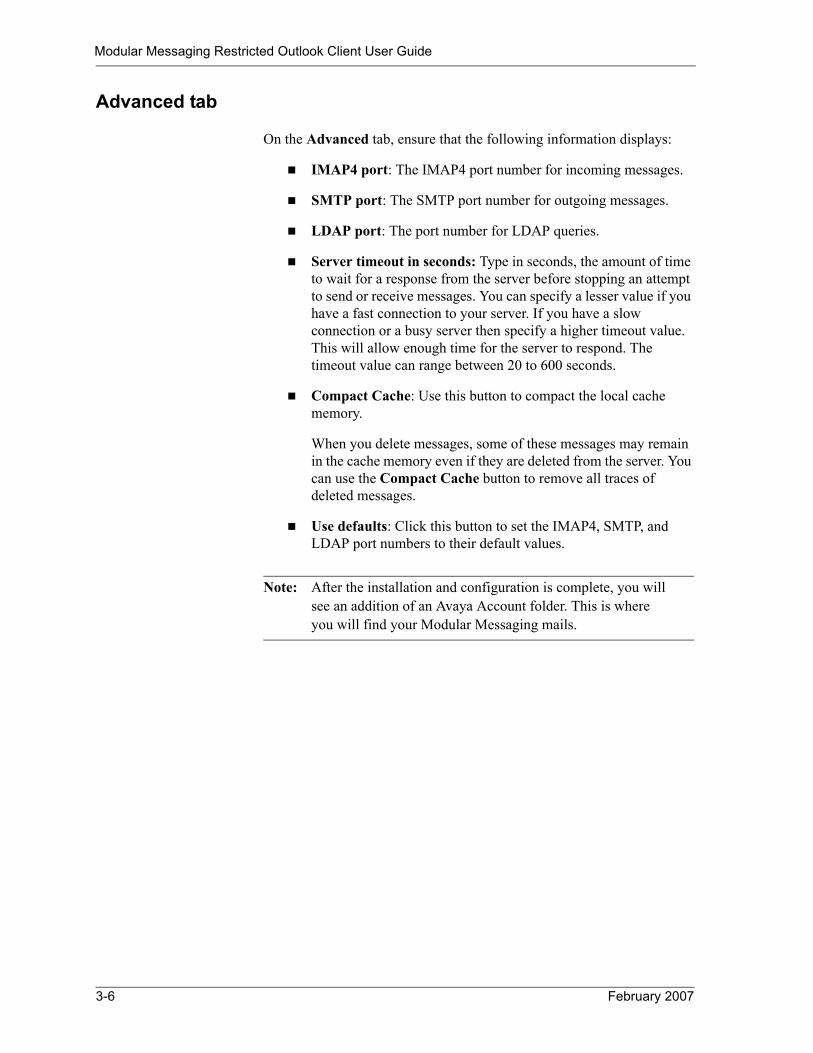
On the Advanced tab, ensure that the following information displays:
! IMAP4 port: The IMAP4 port number for incoming messages.
! SMTP port: The SMTP port number for outgoing messages.
! LDAP port: The port number for LDAP queries.
! Server timeout in seconds: Type in seconds, the amount of time to wait for a response from the server before stopping an attempt to send or receive messages. You can specify a lesser value if you have a fast connection to your server. If you have a slow connection or a busy server then specify a higher timeout value. This will allow enough time for the server to respond. The timeout value can range between 20 to 600 seconds.
! Compact Cache: Use this button to compact the local cache memory.
When you delete messages, some of these messages may remain in the cache memory even if they are deleted from the server. You can use the Compact Cache button to remove all traces of deleted messages.
! Use defaults: Click this button to set the IMAP4, SMTP, and LDAP port numbers to their default values.
Note: After the installation and configuration is complete, you will see an addition of an Avaya Account folder. This is where you will find your Modular Messaging mails.

February 2007 4-14-1
4Modular Messaging Voice
Form
Getting started
Avaya Modular Messaging Restricted Microsoft Outlook Client uses a specially designed Voice Form to record, send, and play back voice messages within Microsoft Outlook. The Voice Form integrates with Outlook so that you can use it from within the e-mail application.
The upper part of the Modular Messaging Restricted Outlook Client Voice Form is similar to an e-mail message form (with the usual To/Calling address field). However, the CC, BCC, and Subject fields are not available in the Modular Messaging Restricted Outlook Client Voice Form. The lower part of the form is similar to the controls on a CD player or a tape recorder (with Play, Stop, Forward, Rewind options). You can record and play back a message using these playback controls.

Modular Messaging Restricted Outlook Client User Guide
4-2 February 2007
Opening and closing the Voice Form
Opening the Modular Messaging Voice Form
To compose a new voice message using the Voice Form, do one of the following in Microsoft Outlook:
! On the toolbar, click New Voice Message .
! Click Actions > New Voice Message.
To open the Modular Messaging Voice Form:
! Select the voice message and press Enter, or double-click on a voice message.
Closing the Voice Form
To close the Modular Messaging Voice Form:
! Click File/Create > Close.

Modular Messaging Voice Form
February 2007 4-3
Customizing the Voice Form
You can change the default Voice Form settings to best suit your needs and usage habits. You can customize the Modular Messaging Voice Form to perform the following tasks:
! Determine whether a voice message is played back automatically when you open it.
! Choose whether to play or record voice messages using telephone or multimedia.

Modular Messaging Restricted Outlook Client User Guide
4-4 February 2007
Setting automatic playback
When opening a voice message, you can choose whether the voice message is played back automatically or whether you have to select Play from the Player menu or click Play on the Voice Player after the message is opened. The default is not to play back the voice message automatically.
Note: If you forward your calls to another extension and automatic playback is enabled, it could happen that when you open a voice message and a call is coming through at the same time, the voice message is forwarded to the extension to which your calls are forwarded. As soon as you answer this extension, the system automatically plays back your voice message.
To set automatic playback:
1. Open the Voice Form.
See �Opening and closing the Voice Form� on page 4-2.
2. Click View > Options.
3. Click the Client Access tab.
4. Select the Play voice messages automatically when opened check box. A voice message will be played back automatically when you open it. The default is not to play back messages automatically.
5. Click one of the following:
! Apply, if you set the other options on the Client Access tab.
! OK, to accept the setting and return to the Voice Form.
! Cancel, to return to the Voice Form without saving the settings.
Note: If you no longer want to play voice messages automatically, clear the Play voice messages automatically when opened check box. You will have to choose Play from the Player menu or click the Play button on the Voice Player after opening a voice message.

Modular Messaging Voice Form
February 2007 4-5
Setting voice message recording and playing option
When recording or playing voice messages, you can choose to either use the telephone or multimedia. By default, Modular Messaging Restricted Outlook Client is configured to record and play back voice messages using multimedia.
If you require to record or play back voice messages using telephone, you need to configure the telephone to work with Modular Messaging Restricted Outlook Client. To reconfigure the Voice Form to use multimedia, Similarly, if you require to use multimedia
To configure a telephone for recording or playing voice messages:
1. Open the Voice Form.
See �Opening and closing the Voice Form� on page 4-2.
2. Click View > Options.
3. Click the Media Setup tab.
4. In the When composing voice messages field, select Telephone, to use Telephone for recording voice messages.
5. Click Configure and set the properties of the telephone. For more information, see Avaya Modular Messaging Release 3 Subscriber Options User Guide.
6. In the When reviewing voice messages field, select Telephone, to use Telephone for playing back voice messages.
7. Click Configure and set the properties of the telephone. For more information, see Avaya Modular Messaging Release 3 Subscriber Options User Guide.
8. Click one of the following:
! Apply, if you want to set the other options on the Media Setup tab.
! OK, to accept the setting and return to the Voice Form.
! Cancel, to return to the Voice Form without saving the settings.
Note: If you want to reconfigure Voice Form to use multimedia, select Multimedia in the When composing voice messages field and the When reviewing voice messages field.

Modular Messaging Restricted Outlook Client User Guide
4-6 February 2007
Composing and sending voice messages
The Modular Messaging Voice Form facilitates recording of voice messages using the telephone or multimedia. You can send across these voice messages to the desired recipients using Voice Form.

Modular Messaging Voice Form
February 2007 4-7
Recording voice messages
You can record a voice message by using the telephone or multimedia. If you want Modular Messaging Voice Form to either use telephone or multimedia to record all voice messages, you need to first configure your option of choice in Modular Messaging Voice Form. See �Setting voice message recording and playing option� on page 4-5.
Note: You can retrieve messages by using the telephone user interface (TUI) at any time.
To record a voice message using a telephone:
1. Open the Voice Form.
See �Opening and closing the Voice Form� on page 4-2.
2. Click Player > Record, or click Record .
3. When your telephone rings, pick up the receiver and record your message after the tone.
Note: When using Modular Messaging from the desktop with the telephone, the system automatically disconnects you if you exceed the time limit set by your system administrator. To reconnect, hang up the telephone and press Record again.
4. After you have finished recording, click Player > Stop or click Stop .
To record a voice message using multimedia:
1. Open the Voice Form.
See �Opening and closing the Voice Form� on page 4-2.
2. Click Player > Record, or click Record .
3. Record your message.
4. After you have finished recording, click Player > Stop or click Stop .

Modular Messaging Restricted Outlook Client User Guide
4-8 February 2007
To review your recording
1. After you have finished recording, click Player > Stop or Stop on the Voice Form.
The system returns you to the beginning of the message.
Note: If you only want to interrupt your recording, click Player > Pause or Pause .
2. Click Player > Play or Play . Use the playback controls ( ) to navigate through the message.
3. If you want to continue recording, go to the end of the message and click Record .

Modular Messaging Voice Form
February 2007 4-9
Sending voice messages
When you send a voice message you need to first address the message to the desired recipients. After addressing the voice message assign the required delivery options to your voice message. Once you are through with addressing the voice message and assigning the delivery options you can send the voice message.
Addressing voice messages
! You can address a voice message before or after you record it. Modular Messaging Restricted Outlook Client allows you to address voice messages only to Modular Messaging subscribers, both local and remote subscribers and Personal Distribution Lists created in Modular Messaging Restricted Outlook Client.
To address a voice message
! On the Voice Form, type the e-mail ID of the intended recipient in the To/Calling field.
OR
! On the Voice Form, type the first few letters of the desired e-mail ID (or name or mailbox number or numeric address) in the To/Calling field and press Ctrl + K.
The system will resolve this entry and display the e-mail IDs that begin with the characters that you typed. Select the desired e-mail ID from the list. If you type in a numeric value the search will be on the mailbox number and the numeric address. Note that the
Notes:
! You can address voice messages only to Modular Messaging remote subscribers whose voice mails are networked to your Messaging System.
! If you have Modular Messaging Outlook Client on your system and you install Modular Messaging Restricted Outlook Client to replace it, the PDLs created in Modular Messaging Outlook Client are not deleted. You can address voice messages to these PDLs from Modular Messaging Restricted Outlook Client.
Modular Messaging Restricted Outlook Client User Guide
4-10 February 2007
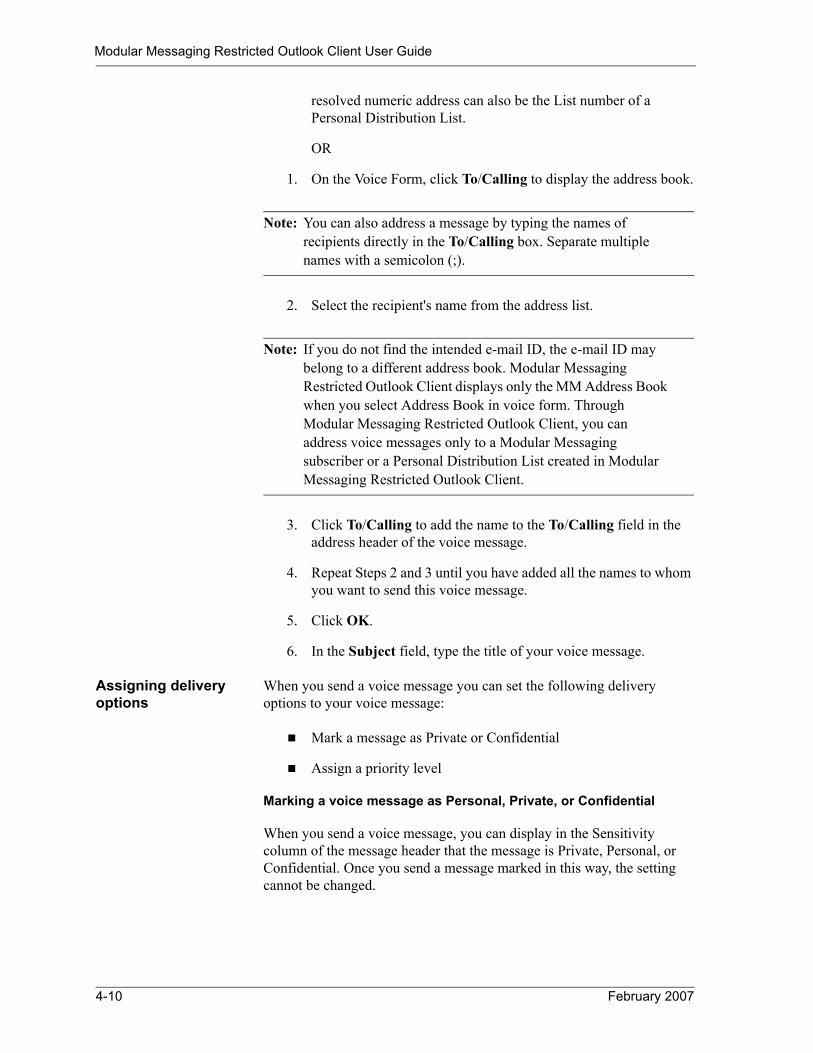
resolved numeric address can also be the List number of a Personal Distribution List.
OR
1. On the Voice Form, click To/Calling to display the address book.
Note: You can also address a message by typing the names of recipients directly in the To/Calling box. Separate multiple names with a semicolon (;).
2. Select the recipient's name from the address list.
Note: If you do not find the intended e-mail ID, the e-mail ID may belong to a different address book. Modular Messaging Restricted Outlook Client displays only the MM Address Book when you select Address Book in voice form. Through Modular Messaging Restricted Outlook Client, you can address voice messages only to a Modular Messaging subscriber or a Personal Distribution List created in Modular Messaging Restricted Outlook Client.
3. Click To/Calling to add the name to the To/Calling field in the address header of the voice message.
4. Repeat Steps 2 and 3 until you have added all the names to whom you want to send this voice message.
5. Click OK.
6. In the Subject field, type the title of your voice message.
Assigning delivery options
When you send a voice message you can set the following delivery options to your voice message:
! Mark a message as Private or Confidential
! Assign a priority level
Marking a voice message as Personal, Private, or Confidential
When you send a voice message, you can display in the Sensitivity column of the message header that the message is Private, Personal, or Confidential. Once you send a message marked in this way, the setting cannot be changed.

Modular Messaging Voice Form
February 2007 4-11
To mark a voice message as Personal, Private, or Confidential:
1. On the Voice Form, click File/Create > Properties.
2. In the Sensitivity field, select:
! Normal - The message carries no sensitivity. This is the default.
! Personal - The message is marked as Personal.
! Private - The message is marked as Private.
Note: Managing private messages depends on the Privacy Enforcement Level (PEL) parameter and the Restrict client access feature. Therefore, before marking a message as private contact your system administrator to understand the PEL and the Restrict client access feature settings on the Modular Messaging server. If PEL on the Modular Messaging servers is set to Partial or Notification Only and Restrict client access to mailbox is enabled, the Modular Messaging Restricted Outlook Client allows you to forward, reply with original, or do a Save As to private messages. In a Modular Messaging�Message Storage Server (MSS) version, if PEL is set to Full, subscribers cannot access the mailbox.
You can also click the button on the Voice Form toolbar to mark a message as Private.
! Confidential - The message is marked as Confidential.
3. Click OK.
Note: See the documentation supplied with your e-mail application for information on how to display the Sensitivity for your e-mail messages in your Inbox/VoiceMail view.
Assigning priority levels
When sending a voice message, you can change the default setting of Normal and assign High or Low importance to this message. Depending on how your mail server is set up, messages with High importance can be delivered sooner than messages assigned Normal or Low importance.
In your Inbox\VoiceMail, messages with a priority level other than Normal are displayed in the Importance column:

Modular Messaging Restricted Outlook Client User Guide
4-12 February 2007
! With an exclamation mark for messages of high importance.
! With a down arrow for messages of low importance.
To assign a priority level:
1. On the Voice Form, click File/Create > Properties.
2. Under Options for this item, click:
! Low, or click Importance: Low on the toolbar.
! Normal, the default.
! High, or click Importance: High on the toolbar.
3. Click OK.

Modular Messaging Voice Form
February 2007 4-13
Sending voice messages
When you have recorded your voice message, entered the recipients' names and, where necessary, set delivery options, you can send the message.
To send a voice message
! Click File/Create > Send on the Voice Form, or click Send on the toolbar.
Notes:
! If a recipient of a voice message uses an e-mail system different from your e-mail application, the message might not appear as a Modular Messaging voice message in the recipient�s mailbox. It might be attached to an e-mail message. For example, if you send an voice message from Microsoft Office Outlook 2003 and the recepient Modular Messaging subscriber uses Microsoft Outlook Express, the voice message will be sent as an attachment to the recepient. The recipient, can listen to the attachment by using any standard voice player.
! When sending a voice message, Modular Messaging Restricted Outlook Client automatically checks whether the recipient is a Modular Messaging subscriber. If not, the system does not allow you to send the voice message.

Modular Messaging Restricted Outlook Client User Guide
4-14 February 2007
Working with incoming voice messages
Using Modular Messaging Voice Form, you can perform the following tasks on the voice messages that you receive:
! Listen to any voice messages
! Navigate through a voice message
! Reply to voice messages with voice or e-mail
! Forward voice messages and also record and attach your voice message with the original message

Modular Messaging Voice Form
February 2007 4-15
Listening to voice messages
When you receive a voice message, you must first open the voice message to listen to the message. After listening to the voice message you can close the voice message and navigate to other voice messages in your mailbox.
Opening a voice message
New voice messages are stored in your Inbox\VoiceMail. These messages are indicated by the icon.
To open a voice message:
Do one of the following:
! Double-click the voice message.
! Select a voice message, and press Enter.
Listening to a voice message
You receive new voice messages in your e-mail application Inbox\VoiceMail. Voice messages are indicated by the icon.
To listen to a voice message:
1. Double-click the voice message.
2. Do one of the following:
! If you are using a telephone, wait for the ring, pick up the receiver, and listen to the message.
! If you are using multimedia, listen to the message.
You can use the Voice Player to navigate through the message or to start and stop.
Note: If you are playing back a message while it is being downloaded and you click on the slider or drag the slider to the right of the progress bar, the message playback is paused automatically. Choose Player > Play, or click Play to continue playback.

Modular Messaging Restricted Outlook Client User Guide
4-16 February 2007
Closing a voice message
To close a voice message:
! Click File/Create > Close.
Navigating between voice messages in your mailbox
If you receive several messages, you can navigate from one message to the next without having to close a message and open the next one. Navigating among messages works in exactly the same way as in your e-mail application.
Note: These commands are available only when you listen to voice messages.
To navigate between voice messages:
! On the Voice Form, click View menu and click:
� Previous Voice Mail to go to the previous message.
� Next Voice Mail to go to the next message.
Notes:
! If your voice message consists of several parts, use the previous part command and next part command to skip to different parts of the message.
See �Navigating between message parts in a multipart voice message� on page 4-18
! If you look at messages in your e-mail application at the same time as you dial into your mailbox using the telephone user interface (TUI), any changes you make to the message status in your e-mail application do not take effect until the next time you dial into your mailbox. For example, if you dial into your mailbox to listen to new messages and you open one of the messages in your e-mail application, the message is still treated as new until the next time you dial into your mailbox.
! If you receive a message with an e-mail attachment that has been forwarded through the telephone user interface (TUI), you see a message with the subject �Trouble playing this message?� also attached to it. Read this message if Avaya Modular Messaging Restricted Microsoft Outlook Client is not installed on your desktop. Otherwise, ignore this attachment.

Modular Messaging Voice Form
February 2007 4-17
Depending on your selection, the Voice Form plays the previous or the next voice message.
If you are on the first message in your mailbox and you click View > Previous Voice Mail, the system closes Voice Form. Similarly, if you are on the last message in your mailbox and you click View > Next Voice Mail, the system closes Voice Form

Modular Messaging Restricted Outlook Client User Guide
4-18 February 2007
Navigating through a voice message
When playing back a voice message, you can find information by:
! Skipping back and forward in a voice message to find the information you need.
! Navigating between different message parts in a voice message.
Skip back and forward in a voice message
You can navigate through a voice message by using the recording and playback controls on the Voice Player.
To skip forward, do one of the following:
! Click Player > Skip Forward.
! Click Skip Forward on the Voice Player.
! Click to the right of the slider or drag it to the position in the voice message where you want the playback to start.
Note: If you are playing back a message while it is being downloaded and you click on the slider or drag the slider to the right of the progress bar, the message playback is paused automatically. Click Player > Play, or click Play to continue playback.
To skip back, do one of the following:
! Click Player > Skip Back.
! Click Skip Back on the Voice Player.
! Click to the left of the slider.
Navigating between message parts in a multipart voice message
When playing back a multipart voice message, Modular Messaging Restricted Outlook Client plays back all message parts starting with the most current part. If you do not want to listen to all the parts of the message, you can navigate between them.
Note: These commands are not available if a voice message consists of one part only.

Modular Messaging Voice Form
February 2007 4-19
To navigate between message parts:
1. From the Player menu, click one of the following:
! Previous Part, or click Go to Previous Part on the Voice Player.
If you listen to a voice message containing the original and the voice message added while forwarding, the previous message part is the voice message added while forwarding.
! Next Part, or click Go to Next Part on the Voice Player.
If you listen to a voice message containing the original and the voice message added while forwarding, the next message part is the original.
2. Use the slider to move between message parts. Message parts are marked by part dividers.
Note: When downloading a voice message, you might use the slider to skip forward to a message part that has not been downloaded yet, in other words, to the right of the progress bar. Modular Messaging Restricted Outlook Client then starts downloading this part and all subsequent parts before downloading the parts you have skipped.

Modular Messaging Restricted Outlook Client User Guide
4-20 February 2007
Replying to messages
Using Modular Messaging Voice Form, you can reply to all e-mail messages you receive, with voice messages. However, you can reply to only voice messages that you receive from a Modular Messaging subscriber.
When replying, you can decide whether to send the message to the sender only or to all recipients of the message. Modular Messaging Restricted Outlook Client supports the following ways of replying to messages:
! Reply to a voice message with a voice message.
! Reply to an e-mail message with a voice message.
Replying to voice messages with voice messages
When replying to a voice message with a voice message, you can reply to the sender only, or to all recipients.
To reply to a voice message with a voice message:
1. Select or open the voice message to which you want to reply.
2. Do one of the following:
! To reply to the sender only, click Actions > Reply/Answer , or click Reply/Answer on the toolbar.
! To reply to everyone who received the original message, click Actions > Reply to All/Answer All .
Note: When you click Answer or Answer All to reply to a voice message, the system appends the string, A:, to the subject of the message. Similarly, when you click Reply or Reply to All to reply to a voice message, the system appends the string, RE:, to the subject of the message.
3. Record your reply. See �Recording voice messages� on page 4-7.
4. Click File/Create > Send, or click Send on the toolbar.
Replying to e-mail messages with voice messages
When you reply to an e-mail message with a voice message, you can reply to the sender only or to all recipients.
To reply to an e-mail message with a voice message:
1. Select or open the e-mail message to which you want to reply.
2. Do one of the following:

Modular Messaging Voice Form
February 2007 4-21
! To reply to the sender only, click Actions > Reply with Voice/Answer with Voice or click Reply with Voice/Answer with Voice on the toolbar.
! To reply to everyone who received the original message, click Actions > Reply to All with Voice/Answer All with Voice or click Reply to All with Voice/Answer All with Voice on the toolbar.
3. Record your reply. See �Recording voice messages� on page 4-7.
4. Click File/Create > Send, or click Send on the toolbar.
Notes:
! You cannot include the original e-mail message in the voice message you are sending.
! Since not all recipients of e-mail messages are equipped to listen to voice messages, Avaya allows these users to listen to voice messages through any standard wav file player. The recipient must have a computer with multimedia capabilities and any standard wav file player installed on the computer.

Modular Messaging Restricted Outlook Client User Guide
4-22 February 2007
Forwarding voice messages
When you forward a voice message to other recipients, you can record your messages and attach them to the original message. You can forward voice messages you receive from Modular Messaging subscribers and non-Modular Messaging subscribers. However, you can forward voice messages only to Modular Messaging subscribers.
To forward voice messages with voice messages:
1. Open the message from your e-mail application folder, if it is not already opened.
2. Click Actions > Forward/Give, or click Give on the toolbar.
Note: When you click Give to forward a voice message, the system appends the string, G:, to the subject of the message. Similarly, when you click Forward to forward a voice message, the system appends the string, FW:, to the subject of the message.
3. In the To/Calling field, specify the recipients.
4. Record your comments, if required. See �Recording voice messages� on page 4-7.
5. Click File/Create > Send, or click Send on the toolbar.

Modular Messaging Voice Form
February 2007 4-23
Deleting voice messages
Since voice messages take up a considerable amount of storage space, make sure that you delete voice messages regularly. When you delete a voice message, the system permanently removes the message from the mail storage server.
To delete a voice message:
1. Select the voice message.
2. Click Edit > Delete, or click Delete , or press Shift and then press Delete, or press Ctrl and then press Delete.
The system prompts you to confirm whether to delete the message permanently, or not.
3. Click Yes, to permanently delete the message, or click No.
Note: You can also open the voice message in Voice Form and then delete the message. To delete a voice message in Voice Form, click File/Create > Delete, or click Delete on the toolbar.
When deleting several items at the same time, do one of the following:
� If the items are listed sequentially, press Shift while pressing the Down Arrow key, to select the entire group of items. Release the keys once you select the last item you want to delete.
� If the items are not listed sequentially, press Ctrl while you click each of the individual items. Release the keys once you select the last item you want to delete.

Modular Messaging Restricted Outlook Client User Guide
4-24 February 2007

February 2007 5-15-1
5Modular Messaging Voice
Recorder
Getting started
You can use the Modular Messaging Voice Recorder to record voice comments and embed them in another OLE2 or ActiveX application such as Microsoft Word, Microsoft Excel, or Lotus 1-2-3. You can also use the Modular Messaging Voice Recorder to create messages quickly without having to open your e-mail application.
Once you embed a recording, you can listen to it and change it in one of the following two ways:
! By displaying the Modular Messaging Voice Recorder toolbar within the application in which you are currently working
! By opening the Modular Messaging Voice Recorder window
The Modular Messaging Voice Recorder works independently from your e-mail application and Modular Messaging Voice Forms. You can also use the Modular Messaging Voice Recorder to send voice messages.

Modular Messaging Restricted Outlook Client User Guide
5-2 February 2007
Opening and closing the Modular Messaging Voice Recorder
To open Modular Messaging Voice Recorder
Do one of the following:
! Click Start > Programs > Avaya Modular Messaging > Voice Recorder.
! Double-click on a voice recording you received as a part of an e-mail message.
! In an OLE2 or ActiveX application, such as Microsoft Word or Lotus 1-2-3, click Insert > Object, and select Modular Messaging Voice Document from the list.
To close the Modular Messaging Voice Recorder
! Click File > Exit.

Modular Messaging Voice Recorder
February 2007 5-3
Reviewing voice recordings
Using Modular Messaging Voice Recorder you can review voice recordings in the following ways:
! Reviewing voice recordings from within documents
! Reviewing voice recordings by opening the Modular Messaging Voice Recorder
! Reviewing voice recordings received as separate files
! Navigating through a recording
By skipping back and forward in a voice message to find the information you need. See �Skip back and forward in a voice message� on page 4-18

Modular Messaging Restricted Outlook Client User Guide
5-4 February 2007
Reviewing voice recordings from within a document
You can listen to a voice recording that is embedded in a document by displaying the Voice Recorder menu and toolbar in the application that is currently active.
To play back an embedded voice recording from within a document:
1. Double-click in the Modular Messaging Voice Recorder.
2. Click Player > Play, or click Play at the top of your window.
! If you are using the telephone:
When the telephone rings, pick up the receiver and listen to the recording.
! If you are using multimedia:
Listen to the recording.
Note: You can use the Voice Player on the Avaya Modular Messaging Restricted Microsoft Outlook Client Voice Recorder or in the Player menu to move within the recording or to start and then stop playback.
Modular Messaging Voice Recorder
February 2007 5-5
Reviewing voice recordings by opening the Modular Messaging Voice Recorder
You can listen to a voice recording that is embedded in a document by opening the Modular Messaging Voice Recorder from within the document and then by listening to the recording.
To play back a voice recording by opening the Modular Messaging Voice Recorder:
1. From the application into which the recording is embedded, click Edit > Modular Messaging Messenger Voice Object.
2. Click Modular Messaging Voice Object > Open.
3. Click Player > Play, or click Play on the Voice Player.
! When using the telephone:
When the telephone rings, pick up the receiver and listen to the recording.
! When using multimedia:
Listen to the recording.
Note: You can use the Voice Player on the Avaya Modular Messaging Restricted Microsoft Outlook Client Voice Recorder or in the Player menu to move around in the recording or to start and then stop playback.

Modular Messaging Restricted Outlook Client User Guide
5-6 February 2007
Reviewing voice recordings received as separate files
If you receive a voice recording as a separate file, you can listen to and edit it by using the Modular Messaging Voice Recorder.
Note: You can listen to and edit files that are in .IVM format only.
To play back a voice recording:
1. On the Voice Recorder, click File > Open.
2. From the Open window, select the recording you want to listen to and click Open.
Note: The file must be in .IVM format.
3. Click Player > Play, or click Play on the Voice Player.
! When using the telephone:
When your telephone rings, pick up the receiver and listen to the recording.
! When using multimedia:
Listen to the recording.
Note: You can use the Voice Player on the Avaya Modular Messaging Restricted Microsoft Outlook Client Voice Recorder or in the Player menu to move within the recording or to start and stop playback.

Modular Messaging Voice Recorder
February 2007 5-7
Managing voice recordings
Using the Modular Messaging Voice Recorder you can:
! Compose a voice recording
! Send a voice recording
! Save a voice recording
! Insert voice recordings into documents
Modular Messaging Restricted Outlook Client User Guide
5-8 February 2007
Composing a voice recording
You can create a voice recording using the telephone or multimedia.
To compose a voice recording:
1. Click Player > Record or click Record on the Voice Recorder toolbar.
2. If you are using multimedia, record the voice recording. If you are using the telephone, when your telephone rings, pick up the receiver and record after the tone.
Note: To preserve system resources, the system automatically disconnects you if you exceed the time limit set by your system administrator. To reconnect, hang up the telephone and press Record again.
3. Click Player > Stop, or click Stop on the Voice Recorder when you have finished recording.
To review your recording
1. Click Player > Stop, or click Stop on the Voice Recorder. You are returned to the beginning of the recording.
2. Click Player > Play, or click Play on the Voice Recorder. Use the playback controls to navigate through the recording.
3. If you want to continue recording, go to the end of the recording, and click Record on the Voice Player.
Note: When you close the Modular Messaging Voice Recorder after creating a recording, you are prompted to save the recording.

Modular Messaging Voice Recorder
February 2007 5-9
Sending a voice recording
After you have created a voice recording you can send it to other Modular Messaging subscribers, other e-mail users, or Personal Distribution Lists.
To send a voice recording:
1. Open the Modular Messaging Voice Recorder.
2. Compose the voice recording. See �Composing a voice recording� on page 5-8.
3. Click File > Send, or click Send on the toolbar.
4. Address the voice recording. You address a voice recording in exactly the same way as an e-mail message. For more information, see the information supplied with your e-mail application.
5. In the Address Book dialog box, click OK to send the message.

Modular Messaging Restricted Outlook Client User Guide
5-10 February 2007
Saving a voice recording
You can save a voice recording you have created.
To save a voice recording:
1. From the File menu, click:
! Save, if you want to save the recording.
! Save As, if you want to rename and save the recording.
Note: The file is saved in .IVM format.
2. In the File name field, type a name.
3. Select the location where you want to store the recording.
4. Click Save.

Modular Messaging Voice Recorder
February 2007 5-11
Inserting voice recordings into documents
You can insert voice recordings into documents created by an OLE2 or ActiveX application, such as Microsoft Word or Lotus 1-2-3. Modular Messaging Voice Recorder supports the following ways of inserting voice recording into documents:
! Inserting voice recordings into documents by dragging
! Inserting voice recordings into documents using Copy All
! Inserting empty voice recordings into a document
Inserting voice recordings into a document by dragging the recordings
You can compose the voice recording first with the Modular Messaging Voice Recorder, and then drag and drop the recording into the document.
To drag and drop a voice recording into a document:
1. Record the voice message.
2. Open the document into which you want to insert the voice message.
3. If the voice message is still open, make this window your current window.
If the voice message is not open, open it by clicking File > Open or by clicking Open on the toolbar.
4. Make sure that both the document and the Modular Messaging window are visible.
5. Click the Voice in Motion area, and hold the left mouse button.
6. Release the left mouse button at the point where the voice message needs to be inserted into the document.
Inserting a voice recording into a document
You can copy the contents of a voice recording to the Clipboard and insert the recording into a document created by an OLE2 or ActiveX application, such as Microsoft Word or Lotus 1-2-3.
Note: Annotating a document with a voice recording can increase the size of a document considerably.

Modular Messaging Restricted Outlook Client User Guide
5-12 February 2007
To insert a voice recording into a document by copying the content to the Clipboard:
1. Open the voice recording you want to copy.
2. Click Edit > Copy All, or click Copy All on the toolbar.
The text is copied to the Clipboard.
3. Position the cursor where you want to insert the voice recording into the document.
4. Click Edit > Paste.
The voice recording is inserted into the document.
Note: Annotating a document with a voice recording can increase the size of a document considerably.
Inserting an empty voice recording into a document
You can insert the empty voice recording into your document first and then compose your recording.
To insert an empty voice recording into a document:
1. Open the document into which you want to insert the voice recording.
2. Place the insertion point where you want to insert the voice object.
3. Click Insert > Object.
Note: In some applications, you have to click the Create New tab.
4. Under Object Type, select Modular Messaging Voice Document.
5. Click OK.
The Modular Messaging Voice Recorder displays.
You can now create the recording by using the Voice Player in the Modular Messaging Voice Recorder.
February 2007 6-16-1
6Frequently asked questions
(FAQs)
Where is the log file for the Modular Messaging Restricted Outlook Client created?
The Modular Messaging Restricted Outlook Client Setup program creates the log file (MM_Install_log.txt) in the Windows temp folder.
If the Modular Messaging Outlook Client Release 1.1, or Release 2.0, or Release 3.0 is installed on my system. Do I need to uninstall it to upgrade to the Modular Messaging Restricted Outlook Client Release 3.1?
No, you do not need to uninstall previous versions of the Modular Messaging Outlook Client. To upgrade the Modular Messaging Outlook Client, run the Setup program of Modular Messaging Restricted Outlook Client Release 3.1. The Setup program first uninstalls the previous version of the Modular Messaging Outlook Client and then installs the Modular Messaging Restricted Outlook Client Release 3.1.
My computer is not connected to the MAS or the MAS is not running. Can I still install the Modular Messaging Restricted Outlook Client?
Yes, you can install the Modular Messaging Restricted Outlook Client if your computer is not connected to the MAS or the MAS is not running. In the absence of MAS you need to install the Modular Messaging Restricted Outlook Client from the command prompt.
The command format for the Modular Messaging Restricted Outlook Client installation is as follows:
Setup_ROC.exe /s /v �STORE_TYPE=mss�
where,
Setup_ROC. exe - is the name of the Modular Messaging Restricted Outlook Client executable.
Modular Messaging Restricted Outlook Client User Guide
6-2 February 2007
mss - indicates that the version of the Modular Messaging message store server is MSS.
How do I create a .msi file from the Modular Messaging Restricted Outlook Client Setup program (Setup_ROC.exe)?
Perform the following actions to create a .msi file from Setup_ROC.exe:
1. Type the following at the system command prompt:
Setup_ROC.exe /a
Important: If the Modular Messaging Restricted Outlook Client Setup program is located at a different location, you must run the installation command on the folder where the Setup program is located.
2. Press Enter.
The system displays the Choose Setup Language dialog box.
3. Select the display language for the Setup program and click OK.
The system displays the Welcome dialog box.
4. Read the information on the Welcome dialog box and click Next.
The system displays the Network Location dialog box.
5. Specify the location where your want to store the .msi file and click Install.
The system displays the Completed dialog box when installation is complete.
6. Click Finish.
This completes the creation of the .msi file from the Modular Messaging Restricted Outlook Client Setup program.
How do I install Modular Messaging Restricted Outlook Client for a restricted user account?
You must have Local Administrator rights or elevated privileges for the computer on which you are installing Modular Messaging Restricted Outlook Client.

Frequently asked questions (FAQs)
February 2007 6-3
The domain controller or the local administrator can enable elevated privileges for restricted user accounts.
Note: You must enable the elevated privileges for Computer Configuration and User Configuration.
My voice message did not reach the recipient and I received a Delivery Status Notification (DSN) message. However, the original voice message that I had sent to the recipient was not attached to the DSN message. What happened to the original voice message?
The system sends DSN messages if your voice message did not reach the recipient for reasons like the mailbox of the recipient is full. To maintain the integrity of the voice message, the system does not attach the original voice message to the DSN message. The original voice message is discarded.
I have a PDL created in Modular Messaging Outlook Client and it contains email addresses of non-Modular Messaging subscribers. Can I address a voice message to the PDL? Will the voice message be sent to the non-Modular Messaging subscribers?
When you install Modular Messaging Restricted Outlook Client on a system where a previous version of Modular Messaging Outlook Client exist, the Setup program automatically uninstalls Modular Messaging Outlook Client. However, the PDLs created in Modular Messaging Outlook Client are not deleted. You can address voice messages to these PDLs from Modular Messaging Restricted Outlook Client.
If the old PDLs contain email addresses of non-Modular Messaging subscribers, the voice message will be sent to the non-Modular Messaging addresses too.
Note: When you create a PDL in Modular Messaging Restricted Outlook Client, you can add email addresses of only Modular Messaging subscribers.

Modular Messaging Restricted Outlook Client User Guide
6-4 February 2007

February 2007 -1RI -1
Reference Information
Modular Messaging and Fax
Avaya Modular Messaging Restricted Microsoft Outlook Client allows you to send and receive fax messages just like your e-mail messages from within Microsoft Outlook.
You can create a fax message using the standard fax feature provided by Microsoft Windows and send the message through Modular Messaging. You can convert a binary file such as a Microsoft Word document or a graphic file such as a gif or a jpeg by converting it into a Tagged Information File format (.tif file), and send it as an e-mail attachment.
To create a fax message using Microsoft Windows, you need to install and set up (if you have not already done so) a fax device such as a fax modem that supports fax capabilities. You also need to set up the fax printer (also called as a fax print driver).
Note: You need to set up a modem even though you may not have a modem physically connected to your computer.
Once you have set up a fax device and a fax printer, you can convert a binary file into a .tif file. To convert a file into a .tif file, use any Windows-based program that contains a Print command.
You can send the .tif file as an e-mail attachment using the Modular Messaging Restricted Outlook Client
See �Sending a Fax� on page RI -2 for more information on sending a fax or a .tif file using the Modular Messaging Restricted Outlook Client.

Modular Messaging Restricted Outlook Client User Guide
RI -2 February 2007
Sending a Fax
Use the following instructions to send a fax from within Microsoft Outlook using the Modular Messaging system.
1. Start Microsoft Outlook.
2. Create a new e-mail message.
3. In the To field on the New Message window, type [email protected], where nnnn is the fax number of the recipient, and mss.domain.com is the message storage server and the domain name. Your system administrator will provide this information.
4. Press TAB or CTRL + K so that the fax address is resolved and appears underlined.
5. Right-click on the fax address in the To field, and select Properties.
6. On the E-mail Properties window, click Custom Type and type MM in the E-mail type: field. This will tell Outlook to send the message using Modular Messaging. If you do not specify this, the fax will not be delivered
Note: The E-mail type field will display SMTP as the default value if you have any other account configured in your Outlook profile.
7. In the Subject field, type the desired text.
8. Attach the .tif file, if any, to the message.
9. In the message body, type the desired text.
10. Click Send.
Once you send a fax, Modular Messaging sends a fax delivery status notification message (fax delivery successful or failed) to your Modular Messaging mailbox.
When you send a fax using the Modular Messaging system, the system automatically attaches a default cover page. You can edit the cover page details from the Fax settings in Modular Messaging. Contact your system administrator for more information.

Reference Information
February 2007 RI -3
You can also use Modular Messaging to fax a binary file such as a Word document or a graphic. You have to convert the binary file into a .tif file and send it as an e-mail attachment. Modular Messaging sends the attached tif file as a fax. See Avaya Modular Messaging Release 3 Client Access to a Subscriber Mailbox for more information.
Note: You can fax a binary file only if the binary file is sent as .tif file attachment to a fax message.
Viewing a fax message
Faxes in the Modular Messaging mailbox appear as e-mail messages with .tif attachments. You can view these files in any Windows image viewer such as Imaging for Windows or other TIFF viewers.
Click on the tif attachment, and select whether to open it or save it to your computer.
Managing fax messages for TUI access
You can handle fax messages using the TUI.
1. Log in to your mailbox.
2. Do one of the following:
! In Aria TUI, press 1 to access messages, browse to the required fax message, and then press 1 again to listen to your fax message.
! In AUDIX TUI, press 2 to access messages, browse to the required fax message, and then press 0 again to listen to your fax message.
! In Serenade TUI, press 5 to access messages, browse to the required fax message, and then press 5 again to listen to your fax message.
Note: Modular Messaging moves the fax message to the "saved" or "old" message category, if you have already accessed the message through Outlook.
3. If the fax is no longer in your Modular Messaging mailbox (for example, you have saved it to a local folder on your PC), you can forward the message from Outlook back to your Modular Messaging mailbox and then log in to the TUI.

Modular Messaging Restricted Outlook Client User Guide
RI -4 February 2007
For more information on handling fax messages using the TUI, see the Avaya Modular Messaging Release 3 Telephone User Interface Guide. This document should be available from your system administrator.

February 2007 GL-1
Glossary
.UMA FileA file that contains a Caller Application. By default, the file type in which the Caller Applications Editor will choose to save applications is .UMA. Although the user can choose any legal name type for the application, the internal format will always be the same.
.WAV A file extension used for Windows multimedia format audio data.
access control list A list of people in a voice mail domain who have access to Modular Messaging applications and tools.
AccuCall+ A utility for Microsoft Windows that allows you to build and edit tone tables.
Active DirectoryThe directory service that stores information about objects on a network and makes this information available to users and network administrators. Active Directory gives network users access to permitted resources anywhere on the network using a single logon process. It provides network administrators with an intuitive, hierarchical view of the network and a single point of administration for all network objects.
Adaptive Differential Pulse Code Modulation A speech encoding method that produces a digital signal with a lower bit rate than standard pulse code modulation (PCM). ADPCM calculates the difference between two consecutive speech samples in standard PCM coded telecom voice signals. The ADPCM encoding rate is 32 kilobit per second.
average hold time (AHT) The sum of the lengths of all telephone calls (in minutes or seconds) during the busiest hour of the day divided by the number of calls.
February 2007GL-2
busy hour A method used to calculate the number of ports required when sizing a system. It represents the busiest hour of the day, when the volume of calls generated by internal subscribers and external callers reaches its peak.
call handling A feature of the Modular Messaging that allows you to set up the system can be set up to screen or block calls, or to play specify greetings when an extension is busy or not answered.
call information packet A string of DTMF digits sent by the PBX to the messaging application server in inband integration. The call information packet contains information on the type of call received (known as the �call packet type�), the called party id, the calling party id and the trunk id.
call management A component of the messaging application server that provides an interface between the voice cards and Modular Messaging telephony applications.
call packet type A string of DTMF digits that form a code for the type of call received during inband integration, such as a direct call, a forwarded call or a diverted call. Also known as a reason code.
canonical addressing A method of addressing that specifies the full location, including country code and area code, in the following order:
+CountryCode [(AreaCode)] SubscriberNumber
For example, +1 (408) 345 800
carried traffic The total busy hour traffic that was offered to the group of ports minus the blocked calls
Centum Call Second (CCS) A unit of measurement for call time. The formula for a CCS is the number of calls per hour multiplied by their average duration in seconds, all multiplied by 100. A CCS is 1/36th of an Erlang.
Class of Service (COS) A category used to determine a subscriber�s access to system options and features. The administrator assigns a Class Of Service to each subscriber.
DIDSee Direct Inward Dialing (DID).
Digital Meridian Integration Device (DMID) A device that provides integration with Nortel switches, such as the Meridian M-1. The DMID physically sits between the PBX and the messaging application server and appears as one or two digital telephones to the PBX, depending on the number of analog ports required. Analog line circuits for the voice path appear on the digital set of the DMID. When a call is received on the DMID, it simultaneously rings at the analog port. The DMID interprets the call display information and transmits it to the messaging application server, which answers the caller with the appropriate personal greeting.

Glossary
GL-3February 2007
Direct Inward Dialing (DID)Using DID, a caller can dial inside an organization to reach someone�s telephone extension directly without going through a receptionist.
DMID See Digital Meridian Integration Device (DMID).
Dual Tone Multifrequency (DTMF) A combination of two tones that uniquely identify each button on a telephone keypad.
envelope information Information that shows who sent a message, the date and time sent, and message length.
Erlang A unit of measurement for call time. One Erlang is equivalent to 60 call minutes or 36 Centum Call Seconds (CCS).
event A significant occurrence in a voice mail system that is of interest to an administrator for diagnostic or reporting purposes.
fax routing address An e-mail address consisting of a string of digits that uniquely identify the subscriber to the fax server.
firmware file A file containing instructions that are permanently loaded into memory.
forest A collection of one or more Windows 2000 domains that share a common schema, configuration, and global catalog and are linked with two-way transitive trusts.
forwardA command that is used to forward a copy of a message.
Global System for Mobile Communications (GSM) An audio encoding format with an encoding rate of approximately 13 kilobit per second. This is a format for storing sound files. Files encoded in this format can be opened using Microsoft Sound Recorder.
grade of service (GOS) The probability, expressed as a percentage of callers who call during the busy hour, that an incoming call is blocked (the caller hears a busy signal) because all ports are in use.
GSM (Remove)See Global System for Mobile Communications (GSM).
home messaging application server Any machine in the voice mail domain from which you administer a Modular Messaging configuration.
hunt group A group of telephone lines where the incoming calls are distributed according to a priority scheme.

February 2007GL-4
in-band signaling A method of connecting the messaging application server to the PBX as if it were a series of single-line telephones or a series of trunks in a hunt group. The term �in-band� is used because all of the call identification information is passed from the PBX to the messaging application server using DTMF signals on the same line as the voice connection.
Integrated Services Digital Network (ISDN) A set of standards for transmission of simultaneous voice, data, and video information over fewer channels than would otherwise be needed, through the use of out-of-band signaling.
IP telephony The use of networks running Internet Protocol (IP) to send and receive messages, such as voice data.
IVM A format for storing sound in files used for Modular Messaging voice messages.
Microsoft Management Console (MMC) A common console framework for Microsoft management applications. MMC does not provide any management functionality, but forms a common environment for modular management components called snap-ins.
Octel Analog Networking A networking application that allows users on one Avaya system to exchange messages with users on other Avaya systems. Octel Analog Networking uses the public or private telephone network for message transport.
offered traffic The total traffic offered to a group of ports during the busy hour, including calls that are blocked.
operation history database A temporary storage area for events generated by Modular Messaging. The Operation History Viewer is used for viewing events in this database.
Operation History Viewer A diagnostic tool that displays events generated by Modular Messaging activity and logged in the operation history database. By creating a session, administrators can restrict the number of events to only those that meet their criteria. They can view live events as they are added to the operation history database, or view historical events.
operator The person to whom callers are transferred when they request to speak with an operator, exceed the maximum number of errors permitted on the system, or call from a rotary telephone. Individual mailboxes may have an operator that is different from the designated system operator, for example, a personal assistant.
PBXSee properties.
PBX integrationA method that establishes communication between the PBX and the voice mail system. The PBX supplies information such as who is calling on internal calls and the extension that the caller is trying to reach.

Glossary
GL-5February 2007
peer e-mail server The mail server that acts as host e-mail server for the messaging application server of the Modular Messaging.
port group A group of ports allocated to a specific application, such as the PC client, the telephone user interface, or Octel Analog Networking. Port groups are configured using the Voice Mail System Configuration application.
Port MonitorA diagnostic tool that provides a graphical user interface for checking and changing the status of ports on a particular messaging application server.
properties See envelope information.
QSIG A protocol for ISDN-based inter-PBX signaling based on the European Q.931, Q.9212 and DPNSS protocols.
read receipt Notification indicating the date and time a message that you sent was opened by the recipients.
reason code See call packet type.
Reporting Tool A tool for generating reports that monitors the usage of the voice mail system, planning capacity and tracking security. Once a report is generated, administrators can view the report on screen or print it for easy reference. Administrators can also export the report to many popular file formats or attach the report to a message sent through a MAPI-enabled e-mail system.
set emulation A digital protocol used to connect digital telephones to switches in order to emulate digital telephone sets.
Simplified Message Desk Interface (SMDI) A protocol for sending PBX integration data, that does not require a caller to reenter the telephone number if the extension is busy or not answered.
switchSee properties.
telephony interface An interface that enables communication between the voice boards and Modular Messaging. Depending on the voice boards that you are using, you can configure Analog or Aculab T-1 telephony interface types.
text-to-speech (TTS)The conversion of text into speech (speech synthesis). Using text-to-speech, Modular Messaging subscribers can listen to their e-mail messages over the telephone.
tone file A file that enables the application to recognize the tones generated by a PBX.

February 2007GL-6
tracing server A separate server that records operational information about activity in the voice mail domain.
tracing system A system that captures information related to the operation of messaging application servers, for both diagnostic and reporting purposes. The tracing system maintains connections with all messaging application servers in the voice mail domain and receives notification of events from each of them. These events are written to two storage areas: the Operation History and the transaction databases. An administrator can generate reports summarizing voice mail activity using the Reporting Tool.
transaction database A storage area where voice messaging events happening in the voice mail domain are written. It is a permanent database containing summary information that is used by the Reporting Tool.
TTSSee text-to-speech (TTS).
TUISee telephony interface.
tutorial Modular Messaging�s setup tutorial that guides you through personalizing your mailbox. You only hear it the first time you dial into your mailbox.
Modular Messaging Subscriber Administration An administration tool that allows administrators to enable subscribers, groups, or contacts to use Modular Messaging.
Visual Voice Editor An administration tool that allows the recording of customized prompts used by Modular Messaging. The tool allows recording using multimedia or the telephone user interface. When modifying a prompt, the user is presented with a graphical rendering of the sound, which allows precise editing of the audio data.
Voice Mail System Configuration An administration tool used to configure the attributes of a voice mail domain, or group of messaging application servers.

IN-1February 2007
Index
Symbols.UMA File
definition, GL-1AAculab T-1, GL-5addressing voice messages, 4-9 to 4-10, 4-13addressing voice recordings, 5-9automatic playback, 4-4
disabling, 4-4setting, 4-4
average hold timedefinition, GL-1
Bbusy hour
definition, GL-2Ccall handling
definition, GL-2call information packet
definition, GL-2call management
definition, GL-2cancelling voice messages, 4-23canonical addressing
definition, GL-2carried traffic
definition, GL-2Centum Call Seconds (CCS)
definition, GL-2Class Of Service
definition, GL-2closing, 4-2, 4-15
Modular Messaging Voice Form, 4-2voice messages, 4-15
composing voice messages, 4-6 to 4-7
composing voice recordings, 5-8confidential voice messages, 4-10copying voice recordings, 5-12creating voice messages, 4-7creating voice recordings, 5-8Ddeleting voice messages, 4-23Direct Inward Dialing (DID)
definition, GL-2displaying properties in multi-part messages, 4-23documents, 5-12documents, inserting voice recordings into, 5-12DTMF
definition, GL-3Ee-mail messages, 4-20
replying to voice message, 4-20replying with voice message, 4-20
embedding, 5-4 to 5-5, 5-12embedding, playing back embedded recordings, 5-4embedding, voice recordings into documents, 5-12envelope information
definition, GL-3envelope information, displaying, 4-23Erlang
definition, GL-3events
definition, GL-3Ffax routing address
definition, GL-3forest

Modular Messaging Restricted Outlook Client User Guide
IN-2 February 2007
definition, GL-3forwarding
definition, GL-3Ggrade of service (GOS)
definition, GL-3GSM
definition, GL-3Hhome voice server
definition, GL-3hunt group
definition, GL-3Iin-band signaling
definition, GL-4inserting voice recordings into documents, 5-12inserting voice recordings into documents, empty recordings, 5-12Integrated Services Digital Network (ISDN), GL-4IP telephony
definition, GL-4IVM file
definition, GL-4Llistening to embedded voice recordings, 5-4 to 5-5listening to embedded voice recordings, by opening Modular Messaging Voice Recorder, 5-5listening to embedded voice recordings, from within documents, 5-4listening to voice messages, 4-15Mmaking voice recordings, 5-8marking voice messages as Personal, Private or Confidential, 4-10message navigation, setting, 4-6MMC
definition, GL-4Modular Messaging Restricted Outlook Client
introduction, 1-3types of terminologies, 1-4voice mail restrictions, 1-4
Modular Messaging Voice Formintroduction, 1-6
Modular Messaging Voice Recorderintroduction, 1-7
multi-part messages, 4-23displaying info in, 4-23
MWIdefinition, GL-4
MWI. See Message Waiting Indicator, GL-4NNotify Me
definition, GL-4Ooffered traffic, GL-4opening, 4-2, 4-15
Modular Messaging Voice Form, 4-2voice messages, 4-15
operation history databasedefinition, GL-4
Operation History Viewerdefinition, GL-4
operatordefinition, GL-4
Outgoing Queue, 1-3PPBX integration
definition, GL-4PBXs
definition, GL-5peer e-mail server
definition, GL-5personal voice messages, 4-10playing back embedded recordings, 5-5playing back embedded voice recordings, 5-4 to 5-5playing back embedded voice recordings, by open-ing Modular Messaging Voice Recorder, 5-5playing back embedded voice recordings, from with-in documents, 5-4playing back voice messages, 4-15playing back voice recordings received as separate files, 5-6port group
definition, GL-5Port Monitor
definition, GL-5private voice messages, 4-10properties, displaying, 4-23QQSIG
definition, GL-5RRead receipt
definition, GL-5recording, 4-7, 5-8
voice messages, 4-7recording, voice recordings, 5-8Remote Deployment
Group Policy-Based Software Deployment, 2-8
SMS Software Distribution, 2-8Remote deployment, 2-8removing voice messages, 4-23replying to, 4-20

Index
February 2007 IN-3
e-mail messages with voice messages, 4-20overview, 4-20voice messages with e-mail messages, 4-20voice messages with voice messages, 4-20
Reporting Tooldefinition, GL-5
requesting a receipt, 4-10Ssaving voice recordings, 5-10sending voice messages, 4-13sending voice recordings, 5-9set emulation
definition, GL-5Simplified Message Desk Interface (SMDI)
definition, GL-5Storing messages
IBM Lotus Dominos version, 1-2Message Storage Server (MSS) version, 1-2Microsoft Exchange version, 1-2
Subscriber Optionsintroduction, 1-7
Ttelephony interface
definition, GL-5text-to-speech
definition, GL-5tracing server
definition, GL-6tracing system
definition, GL-6
transaction databasedefinition, GL-6
tutorialdefinition, GL-6
VVisual Voice Editor
definition, GL-6Voice Mail System Configuration
definition, GL-6voice messages, 4-7, 4-9 to 4-10, 4-13, 4-15, 4-20, 4-23
addressing, 4-9deleting, 4-23listening to, 4-15recording, 4-7replying to with voice message, 4-20replying with e-mail message, 4-20sending, 4-13setting delivery options, 4-10
voice recordings, 5-4 to 5-6, 5-8 to 5-10, 5-12voice recordings, creating, 5-8voice recordings, inserting into documents, 5-12voice recordings, playing back, 5-4 to 5-6voice recordings, recording, 5-8voice recordings, saving, 5-10voice recordings, sending, 5-9WWAV file
definition, GL-1

Modular Messaging Restricted Outlook Client User Guide
IN-4 February 2007