lightroom classic cc - rice university
TRANSCRIPT

LightroomClassic CC

Page 2
TABLE OF CONTENTSINTRODUCTION ................................. 3
IMPORT FILES ...................................... 4
IMPORT FILES, PT. 2 ............................ 5
LIBRARY ............................................... 6
LIBRARY, PT. 2 ..................................... 7
DEVELOP ............................................. 8
RATINGS, FLAGS, & COLORS ........... 9
KEYWORDS ...................................... 10
FILTERS ................................................11
COLLECTIONS ...................................12
EXPORTING ....................................... 13

Page 3
INTRODUCTIONObjective
Become familiar enough with Lightroom to be able to: 1) perform basic photo editing 2) use the organizational tools
Lightroom Classic CC vs Lightroom CC

Page 4
Non-destructiveLightroom preserves your original files and saves a virtual record of your edits. When you edit in Lightroom, you are not altering the original photo at all.
Importing1. Add
i. Adds without moving the file from it’s original location2. Move
i. Adds while moving the file to a new location3. Copy
i. Duplicates the files to a new locationii. Best if loading from an external drive where you want to
retain the original files4. Copy as DNG
i. Works like Copyii. Converts file to DNG, another type of raw formatiii. Don’t use this. It isn’t necessary at all.
IMPORT FILES

Page 5
Set the destination on the right.
IMPORT FILES, PT. 2
Set import presets at the bottom.

Page 6
LIBRARYLeft Right
Quickly apply presets and small changes
We’ll cover thison page 10
Detailed infoabout photo
Stores all edits, ratings, etc.
Actual locations onyour computer. (add more with
plus sign)
We’ll cover thison page 12
Quickly upload to your favorite services

Page 7
LIBRARY, PT. 2
Bottom
Film Strip
View Options

Page 8
DEVELOP
Editing Presets.Save new presets with the plus sign.
Left Right
Histogram
Saves an edit. Useful for experimenting with multiple “looks”.
Saves every step you make if you need to go back in time to undo a series of edits.
All of your editing tools.

Page 9
RATINGS, FLAGS, & COLORS
Lightroom is a powerful tool for organizing your photos.
Right-click your image. There are three useful tools for quickly marking your images into different kinds of categories:
1. Ratingi. 1-5 starsii. Hotkeys: num1-num5
2. Flagi. Useful for maybe flagging as
rejected and reevaluating the rejected photos later
ii. Hotkeys: ‘P’ for pick, ‘X’ for reject3. Color Label
i. Arbitrary labels - adhere to your own system
ii. Hotkeys: num6-num9 (no hotkey for purple by default)

Page 10
With a photo selected in the Library, type in keywords in the Keyword Tags box. Separate them with commas.
The Keyword Set contains all of the keywords you have used in your Library. Click on them to add them to your selected photo(s). The keywords will be highlighted in white if they are already added to your photo, which is also reflected in the Keyword Tags box.
In the Keyword List, hover your mouse over a keyword. Click the small arrow that shows up to the right to select all of the photos contain that keyword.
KEYWORDS
Page 11
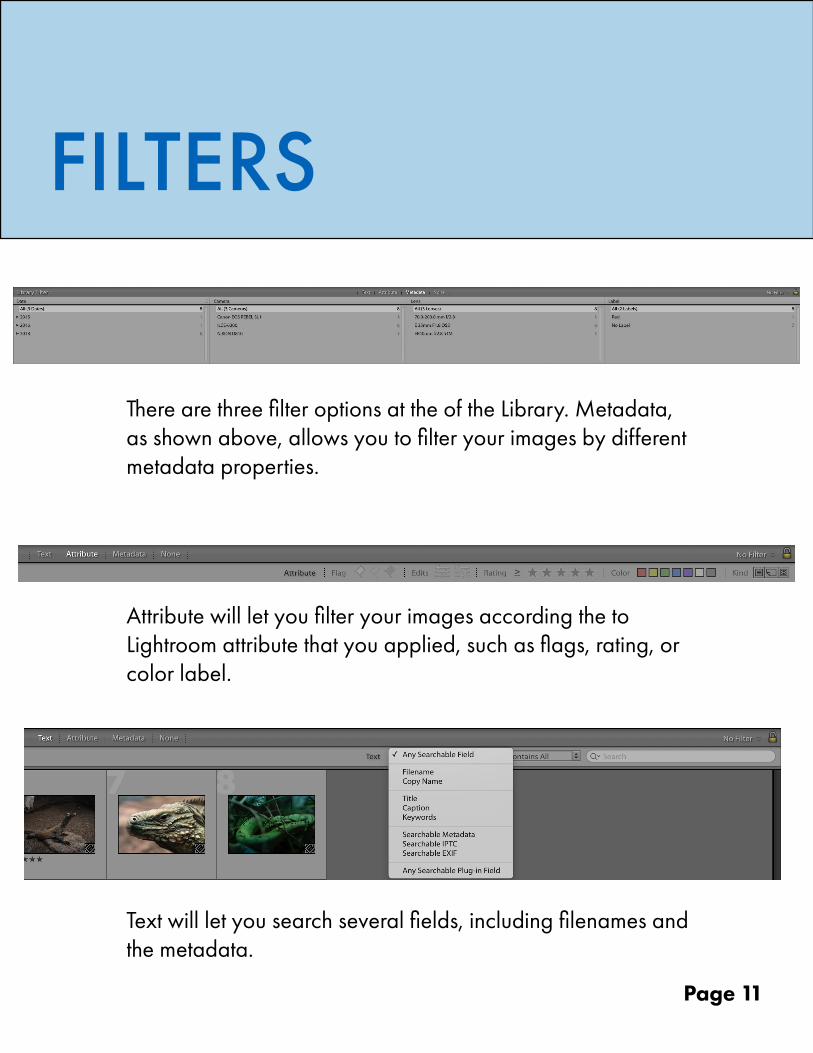
There are three filter options at the of the Library. Metadata, as shown above, allows you to filter your images by different metadata properties.
Attribute will let you filter your images according the to Lightroom attribute that you applied, such as flags, rating, or color label.
Text will let you search several fields, including filenames and the metadata.
FILTERS

Page 12
COLLECTIONSCollections is a virtual file structure within Lightroom that lets you easily organize all of your photos by different categories, without actually duplicating them into new locations.
A Collection Set contains Collections. It does not directly contain photos. In the example on the right, “2019” is a Collection Set. “Zoo Photos” is a Collection. To add photos to the Collection, simply drag them in from the Library grid view.
Smart Collections will automatically store photos according to parameters that you set up. In the example, you can see that photos are being stored according to their attributes, such as photos that have been rated Five Stars.

Page 13
EXPORTINGTo export, return to the Library. Select the photos you would like to export and either Right Click > Export or you can click the Export button in the bottom left.
In the export dialog, you can change multiple export settings.
On the left side, you can save export presets using the Add button at the bottom.