lesson plans - littleathletics.com.au · participated in the skill development activities contained...
TRANSCRIPT
LAANSW ASAP Level 3
Lesson Plans
3
Introduction
••••
The following section provides twenty-seven ready-to-implement lesson plans for teachers. The section is divided into four smaller sub-sections.
Early Stage 1 (5 year olds)Stage 1 (6/7 year olds)Stage 2 (8/9 year olds)Stage 3 (10 years and above)
Each sub-section contains lesson plans suitable for children in these age groups.
The lesson plans assume classes of up to thirty students and a time limit of 30-45 minutes, however a teacher can adapt the ideas to suit their particular circumstances.
Each lesson plan generally follows the same format, being: Aim; Equipment; Warm Up; Skill Development; Games. In relevant places, topics such as safety aspects and various hints that will help the teacher organise and conduct a successful lesson are included. The lesson plans at times assume prior learning, ie. that the children have participated in the skill development activities contained in preceding lessons designed for the earlier levels.
The activities featured in the lesson plans are based on fun, skill development, maximum group participation and a sound, logical progression. The lesson plans form the foundation of a class athletics unit.
29
LAANSW ASAP Level 3
Early Stage 1Lesson Plans
•
•
•
Running
Jumping
Throwing
- Lesson 1- Lesson 2
- Lesson 1- Lesson 2
- Lesson 1- Lesson 2
30
LAANSW ASAP Level 3
Running Lesson Plan
Warm Up
Skill Development
Lesson 1
Early Stage 1
1.
2.•••
1.
•••
2.
•••
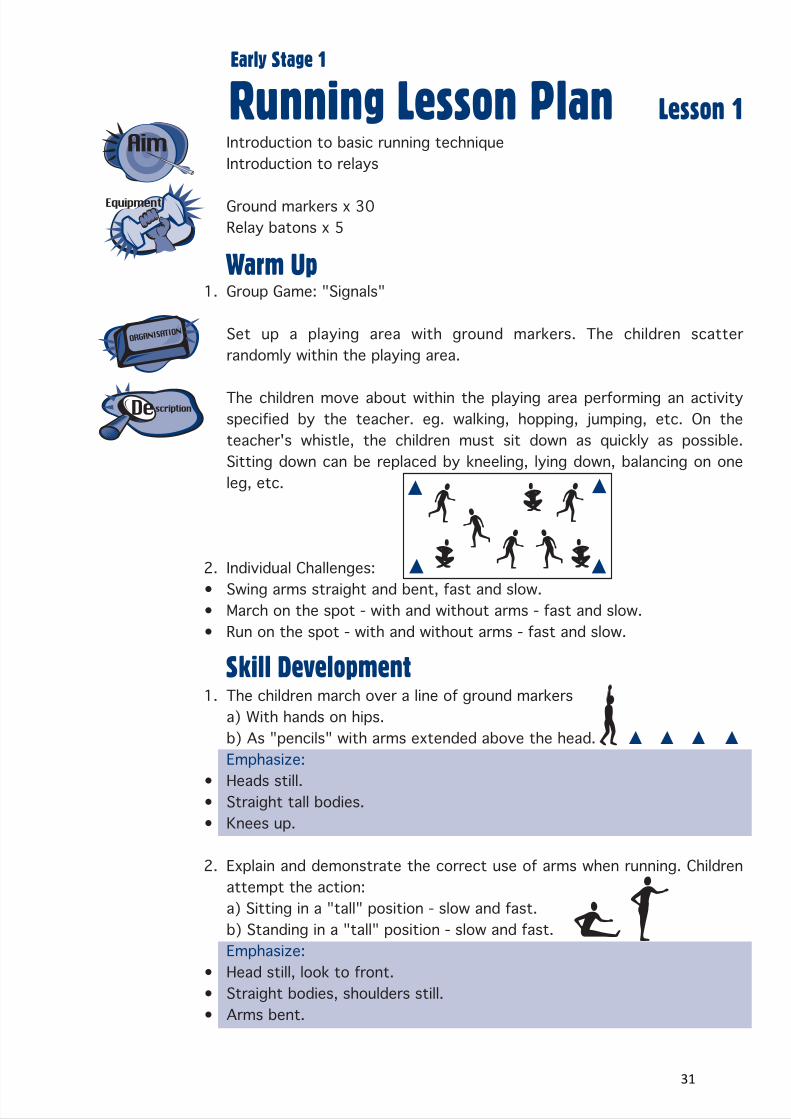
Introduction to basic running techniqueIntroduction to relays
Ground markers x 30Relay batons x 5
Group Game: "Signals"
Set up a playing area with ground markers. The children scatter randomly within the playing area.
The children move about within the playing area performing an activity specified by the teacher. eg. walking, hopping, jumping, etc. On the teacher's whistle, the children must sit down as quickly as possible. Sitting down can be replaced by kneeling, lying down, balancing on one leg, etc.
Individual Challenges:Swing arms straight and bent, fast and slow.March on the spot - with and without arms - fast and slow.Run on the spot - with and without arms - fast and slow.
The children march over a line of ground markersa) With hands on hips.b) As "pencils" with arms extended above the head.Emphasize:Heads still.Straight tall bodies.Knees up.
Explain and demonstrate the correct use of arms when running. Children attempt the action:a) Sitting in a "tall" position - slow and fast.b) Standing in a "tall" position - slow and fast.Emphasize:Head still, look to front.Straight bodies, shoulders still.Arms bent.
31

Running Lesson Plan Lesson 1
Early Stage 1
3.
4.
••
1.
•
•
Running game
Instruct the children to run on the spot at various speeds, using an arm and leg action.The children run over the line of ground markers.Emphasize:Use of arms.Quick, light steps.
Game: "Up and back relay"
Select teams of 4-6. Children line up in teams behind a ground marker. Another marker is placed 10m-15m in front of each team. Each team is given a relay baton.
The children run up to the marker, touch the marker with the baton, then run back to their team to pass the baton to the next person in line. The relay is finished when all children have had their designated number of turns.
Hints:At this stage, don't be too concerned about the children's baton passing technique. Concentrate on the general concept of shuttle relay running.
When organising the relay, if possible, have each team stand behind different coloured markers. Give each team a baton that is the same or a similar colour to their markers. This will help the children to remember to where they have to run and hopefully avoid some confusion when the relay begins! Also, place the teams far enough apart to help avoid collisions and accidental changing of teams.
Touch the marker with the baton
32
LAANSW ASAP Level 3
Running Lesson Plan
Warm Up
Skill Development
Lesson 2
Early Stage 1
1.
2.•••
1.
•••
•
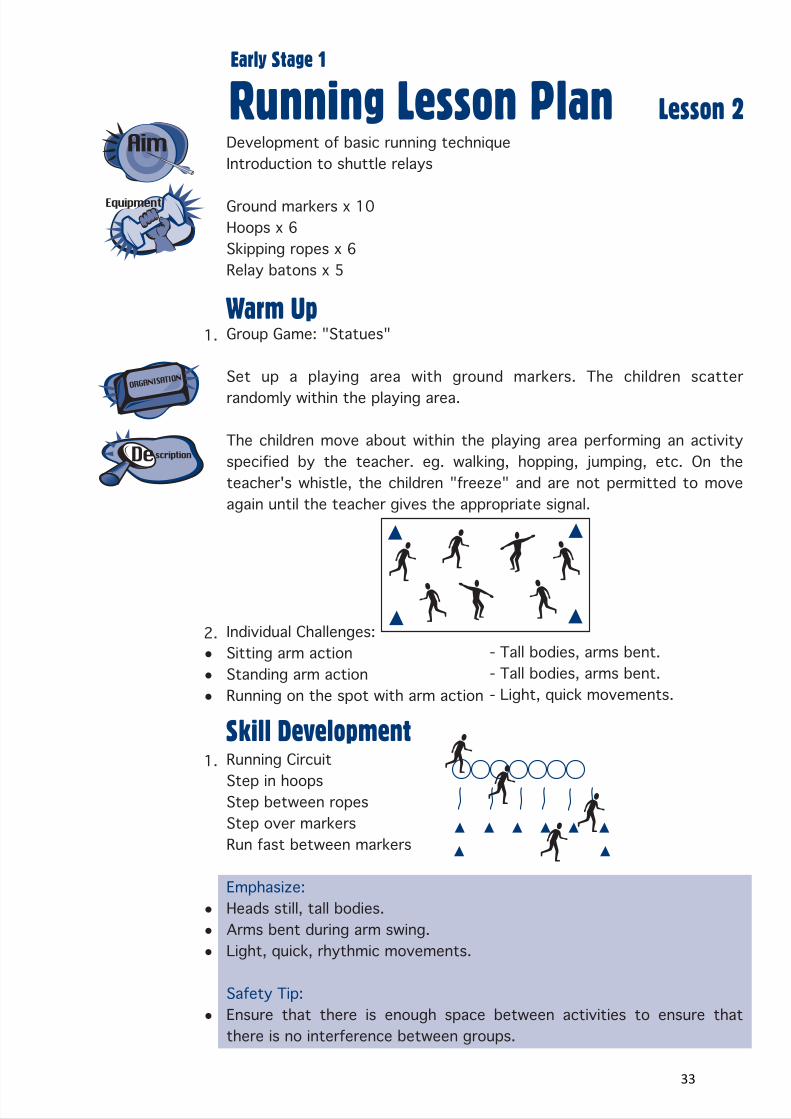
Development of basic running techniqueIntroduction to shuttle relays
Ground markers x 10Hoops x 6Skipping ropes x 6Relay batons x 5
Group Game: "Statues"
Set up a playing area with ground markers. The children scatter randomly within the playing area.
The children move about within the playing area performing an activity specified by the teacher. eg. walking, hopping, jumping, etc. On the teacher's whistle, the children "freeze" and are not permitted to move again until the teacher gives the appropriate signal.
Individual Challenges:Sitting arm actionStanding arm actionRunning on the spot with arm action
Running CircuitStep in hoopsStep between ropesStep over markersRun fast between markers
Emphasize:Heads still, tall bodies.Arms bent during arm swing.Light, quick, rhythmic movements.
Safety Tip:Ensure that there is enough space between activities to ensure that there is no interference between groups.
- Tall bodies, arms bent.- Tall bodies, arms bent.- Light, quick movements.
33
Running Lesson Plan Lesson 2
Early Stage 1
•
•
1.
•
•
Running game
Safety Tip cont.Only one person should be permitted on each station at a time. Children do not enter a station until the person in front of them has completed that station.On completing a station, the children walk back around the station to the end of the line. They do not go back through the station in the opposite direction.
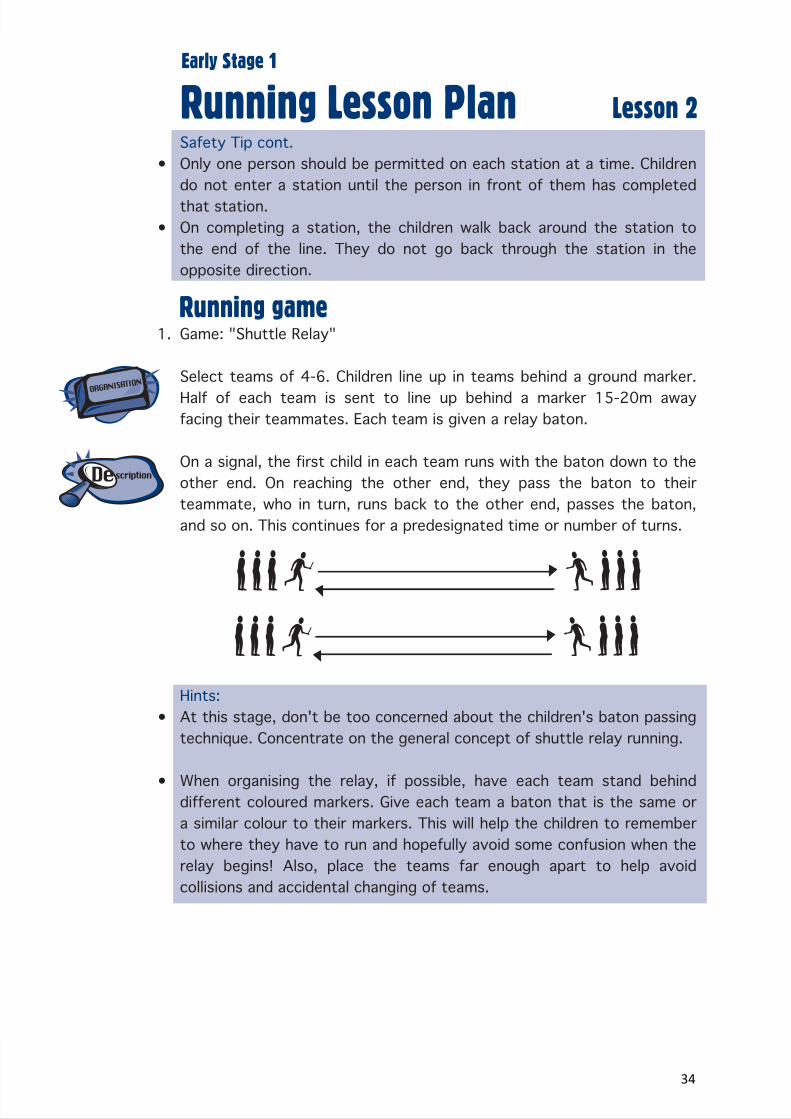
Game: "Shuttle Relay"
Select teams of 4-6. Children line up in teams behind a ground marker. Half of each team is sent to line up behind a marker 15-20m away facing their teammates. Each team is given a relay baton.
On a signal, the first child in each team runs with the baton down to the other end. On reaching the other end, they pass the baton to their teammate, who in turn, runs back to the other end, passes the baton, and so on. This continues for a predesignated time or number of turns.
Hints:At this stage, don't be too concerned about the children's baton passing technique. Concentrate on the general concept of shuttle relay running.
When organising the relay, if possible, have each team stand behind different coloured markers. Give each team a baton that is the same or a similar colour to their markers. This will help the children to remember to where they have to run and hopefully avoid some confusion when the relay begins! Also, place the teams far enough apart to help avoid collisions and accidental changing of teams.
34
LAANSW ASAP Level 3
Jumping Lesson Plan
Warm Up
Skill Development
Lesson 1
Early Stage 1
1.
2.
1.
•
•2.
Introduction to basic long jumping skills
Ribbons - 1 per childGround markers x 5Flexi bar/skipping ropeLong jump sand pit and rake
Group Game: "Pairs"
Set up a playing area with ground markers. The children scatter randomly within the playing area.
The children move within the playing area performing an activity specified by the teacher. Eg. Walking, hopping, jumping, etc. On the teacher's whistle, the children find a partner as quickly as possible and stand with them. Repeat. The children must find a different partner each time.
Individual Challenges:With ribbons, make various patterns: Circles, waves, zig-zags, whips, sweeps, helicopters.Throw up ribbons and catch them.
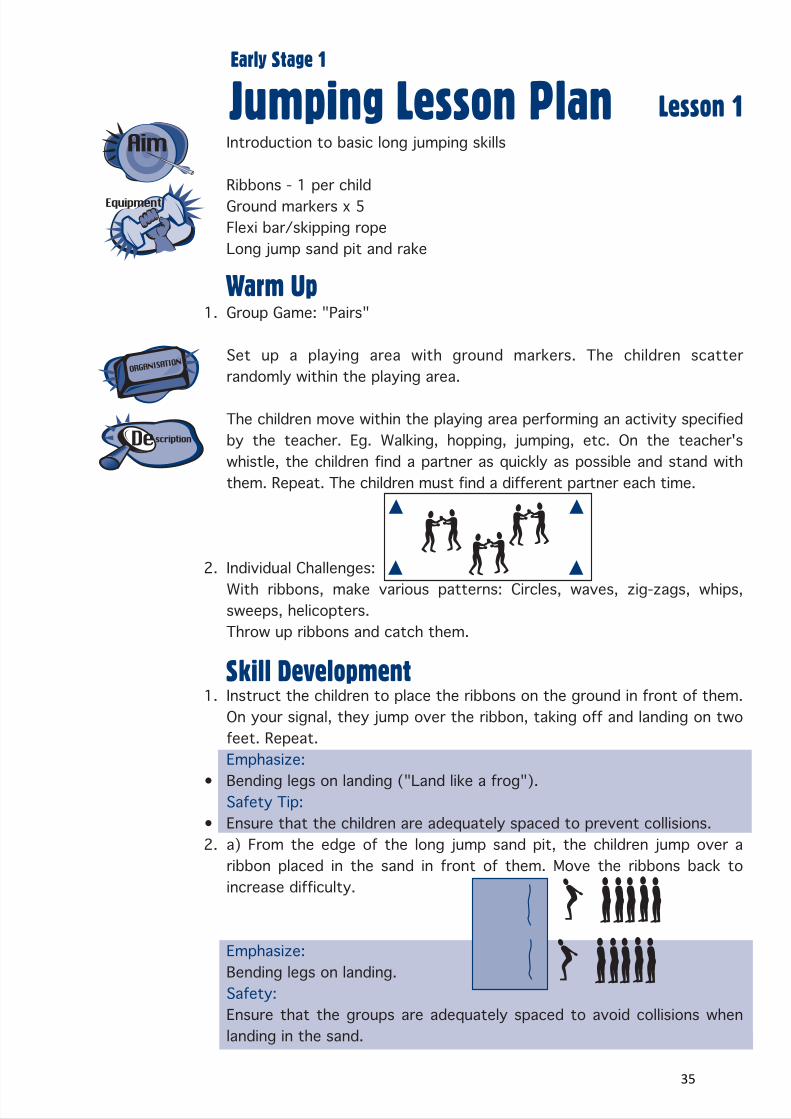
Instruct the children to place the ribbons on the ground in front of them. On your signal, they jump over the ribbon, taking off and landing on two feet. Repeat.Emphasize:Bending legs on landing ("Land like a frog").Safety Tip:Ensure that the children are adequately spaced to prevent collisions.a) From the edge of the long jump sand pit, the children jump over aribbon placed in the sand in front of them. Move the ribbons back toincrease difficulty.
Emphasize:Bending legs on landing.Safety:Ensure that the groups are adequately spaced to avoid collisions when landing in the sand.
35

Jumping Lesson Plan Lesson 1
Early Stage 1
•
••
•
••
•
Jumping Game
Use a jumping signal. Ask the children not to jump until you give them the signal.b) The children jump over the ribbons, taking off from one foot andlanding on two feet. Instruct them to balance on one leg at the side ofthe pit, push off, and land on two feet. Repeat.Emphasize:One foot take off; two foot landing.Bending legs on landing.Safety:As above.c) Move the children back from the side of the pit. On the signal, they jogin and jump into the pit, taking off from one foot and landing on two feet.
Emphasize:One foot take off, two foot landing.Bending legs on landing.Safety:As above. Ensure that the landing area is wide enough to ensure a safe landing.
Game: "Jump the Snake"
Lie a flexi bar or skipping rope in the sand. The children line up 10 metres back from the end of the pit.
One at a time, the children run in and attempt to jump over the "snake" without "waking it up".
Emphasize: One foot take off, two foot landing.Safety:Use a jumping signal - verbal or other. The children are not permitted to run in until you have given them the signal.Hint:To avoid problems with long lines, send only one group at a time to jump. The rest of the class sit in their lines by the side of the it and clap their class members' performances. Alternatively, use a circuit or tabloid to promote maximum activity.
•
•
•
10 metres
36
LAANSW ASAP Level 3
Jumping Lesson Plan
Warm Up
Skill Development
Lesson 2
Early Stage 1
1.
2.•••
1.
•••
••
•
•
Basic jumping skills
Ground markers x 10Hoops x 5Flexi bar/skipping ropeLong jump sand pit and rake
Group Game: "Circles"
Children move about within playing area. On the whistle the class must form a circle as quickly as possible.
Individual Challenges:Balance on one leg - arms in various positions.Hop on the spot - try each leg."Rockets" - The children bend their legs, then jump vertically as high into the air as possible, stretching out "like a rocket".
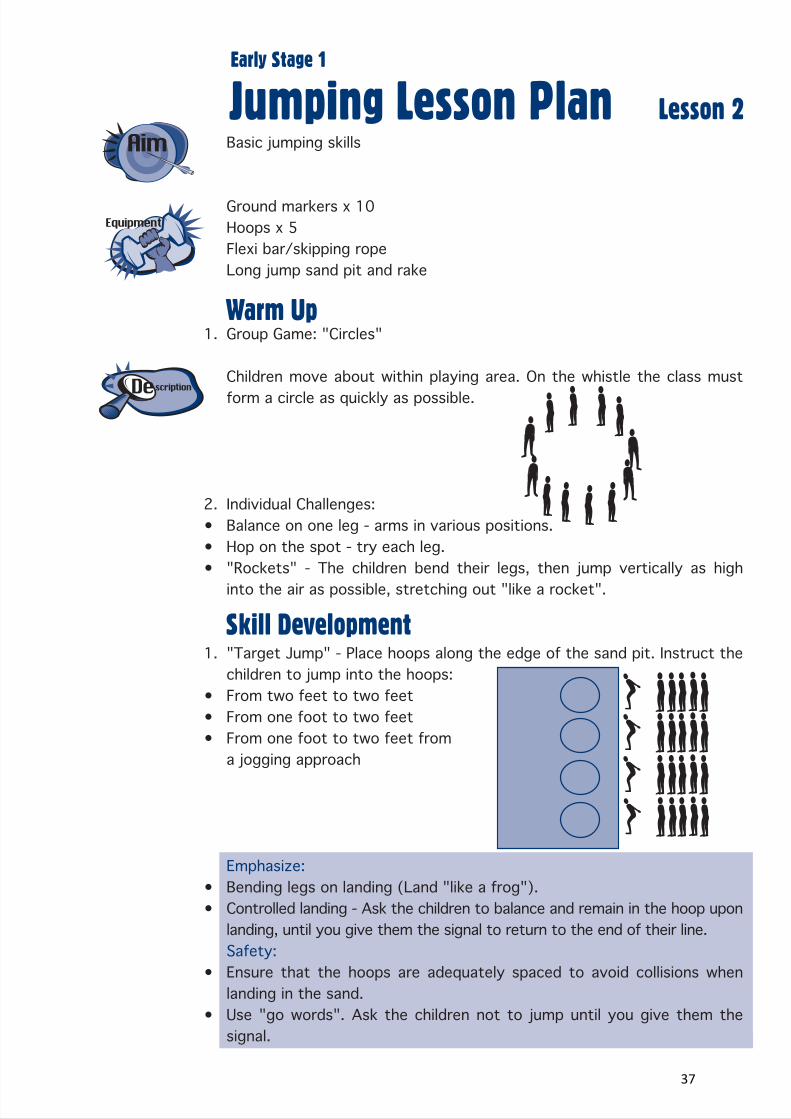
"Target Jump" - Place hoops along the edge of the sand pit. Instruct the children to jump into the hoops:From two feet to two feetFrom one foot to two feetFrom one foot to two feet froma jogging approach
Emphasize:Bending legs on landing (Land "like a frog").Controlled landing - Ask the children to balance and remain in the hoop upon landing, until you give them the signal to return to the end of their line.Safety:Ensure that the hoops are adequately spaced to avoid collisions when landing in the sand.Use "go words". Ask the children not to jump until you give them the signal.
37

Jumping Lesson Plan Lesson 2
Early Stage 1
1.
••
•
•
2.
Jumping GameGame: "Jump the Snake (2)"
With the help of a student assistant, hold a flexi bar/skipping rope just above the sand. The children line up 10 metres back from the end of the pit.
One at a time, the children run in and attempt to jump over the "snake" without "waking it up".
Emphasize: One foot take off, two foot landing.Bending the legs on landing.Safety:Use "go words". The children are not permitted to run in until you have given the signal.Hint:To avoid problems with long lines, send only one group at a time to jump. The rest of the class sit in their lines by the side of the pit and clap their class members' performances. Alternatively, use a circuit or tabloid to promote maximum activity.
Game: "Big jump"
The children line up 10 metres back from the end of the pit.
One at a time, the children run in and jump as far into the sand as possible.
Emphasize: As above.Safety:As above.Hint:As above.
•
•
•
Jumping Game
10 metres
10 metres
38
Throwing Lesson Plan
Warm Up
Skill Development
Lesson 1
Early Stage 1
1.
2.••••
1.
•••
Introduction of basic throwing skills - pushing/shot put
Ground markers - one for each studentHoops - Up to one for each pairBean bags - One for each studentBuckets/boxes
Group Game: "Bean Bag Command"
Set up a playing area with ground markers. Scatter the area with bean bags - one for each child. Children scatter randomly within the playing area.
The children move about within the playing area, performing an activity specified by the teacher eg. walking, hopping, jumping etc. On the teacher's whistle, the children find a bean bag and put their foot on it. Placing a foot on the bean bag can be replaced by touching the bean bag with elbows, knees, noses, etc.
Individual Challenges:Balance bean bag on head, foot, shoulder, knee, elbow, etc.Walk around with bean bag on head, foot, etc.On all fours, place bean bag on back and shake it off.Throw bean bags into the air to make it "rain bean bags".
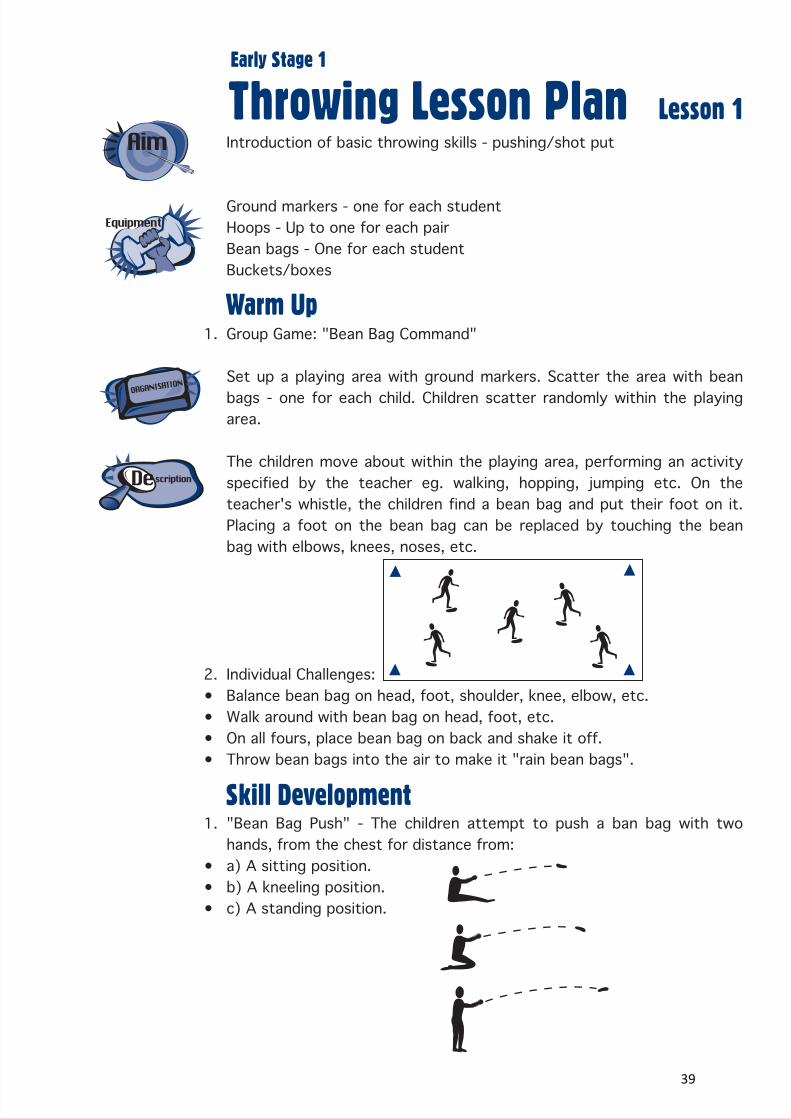
"Bean Bag Push" - The children attempt to push a ban bag with two hands, from the chest for distance from:a) A sitting position.b) A kneeling position.c) A standing position.
39

Throwing Lesson Plan Lesson 1
Early Stage 1
••
•••
1.
Emphasize: Pushing action.Hold bean bag in fingers, not in the palm of the hand.Hint:Place throwers a minimum of 2m apart.Use a throwing command and a retrieval signal.If there is enough equipment and space, have the children working in pairs to avoid long lines and waiting times. One child pushes the bean bag while the other awaits their turn. ie. In a class of thirty, fifteen should throw at a time. Smaller classes may see all active at once.
Game: "Target Throw"
In pairs, the children line up behind ground markers. One of each pair stands behind the front marker, facing their target (eg. hoops, boxes, buckets) placed five metres away, while the other child stands back behind a second marker awaiting their turn.
On a signal, the children attempt to land the bean bag in the target, using a pushing action. One partner is active while the other partner waits behind the second marker.
Emphasize: A correct pushing action. (Hands "reach" out to target).Hints:Use a throwing and a retrieval signal.Space pairs far enough apart to avoid confusion. (Recommended 2m distance).
•
••
Throwing Game
40
Throwing Lesson Plan
Warm Up
Skill Development
Lesson 2
Early Stage 1
1.
2.
•
1.
•••
2.
Introduction of basic throwing skills - slinging/discus
Ground markersTennis balls/soft balls - one between two (one each if possible)Skipping ropesHoops - Up to one for each pairBasketballs/volleyballs/netballs x 6
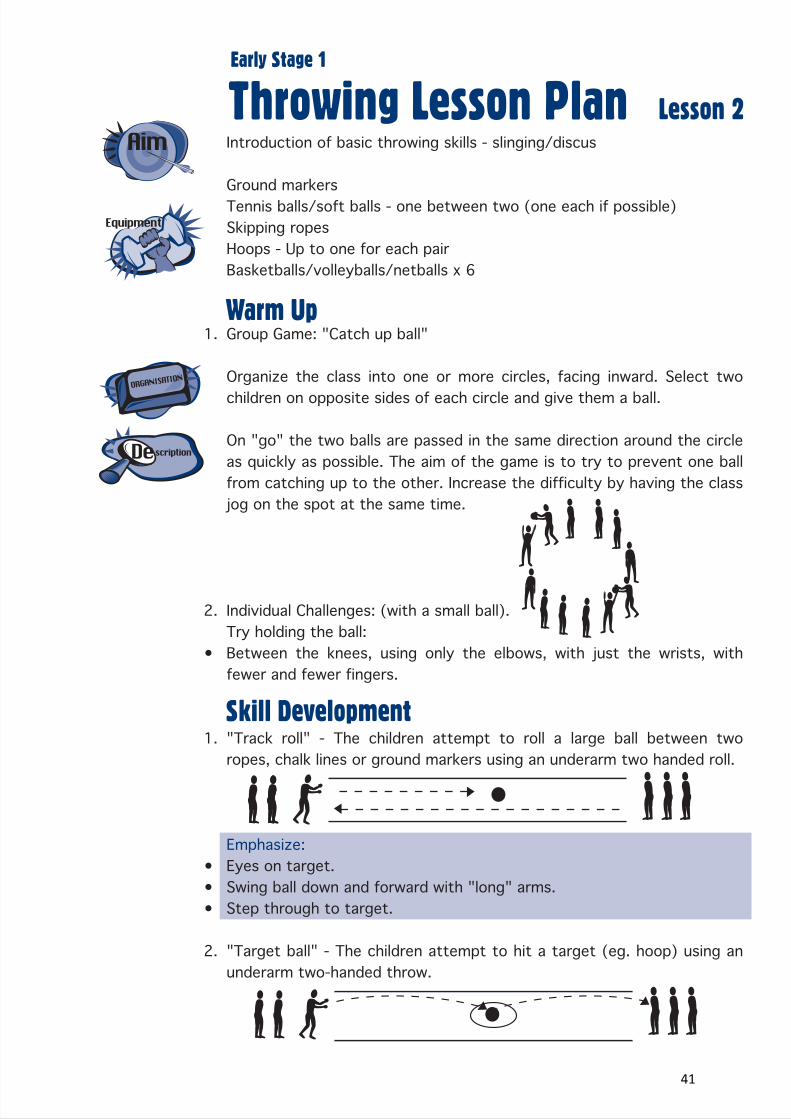
Group Game: "Catch up ball"
Organize the class into one or more circles, facing inward. Select two children on opposite sides of each circle and give them a ball.
On "go" the two balls are passed in the same direction around the circle as quickly as possible. The aim of the game is to try to prevent one ball from catching up to the other. Increase the difficulty by having the class jog on the spot at the same time.
Individual Challenges: (with a small ball).Try holding the ball:Between the knees, using only the elbows, with just the wrists, with fewer and fewer fingers.
"Track roll" - The children attempt to roll a large ball between two ropes, chalk lines or ground markers using an underarm two handed roll.
Emphasize:Eyes on target.Swing ball down and forward with "long" arms.Step through to target.
"Target ball" - The children attempt to hit a target (eg. hoop) using an underarm two-handed throw.
41
Throwing Lesson Plan Lesson 2
Early Stage 1
3.
••••
1.
••••
•
"Roller ball" - The children attempt to roll a small ball with one hand to a target (eg. hoop).Emphasize: Eyes on targetStep forward on opposite foot as ball is rolledRelease the ball close to the groundSwing rolling arm in direction of target
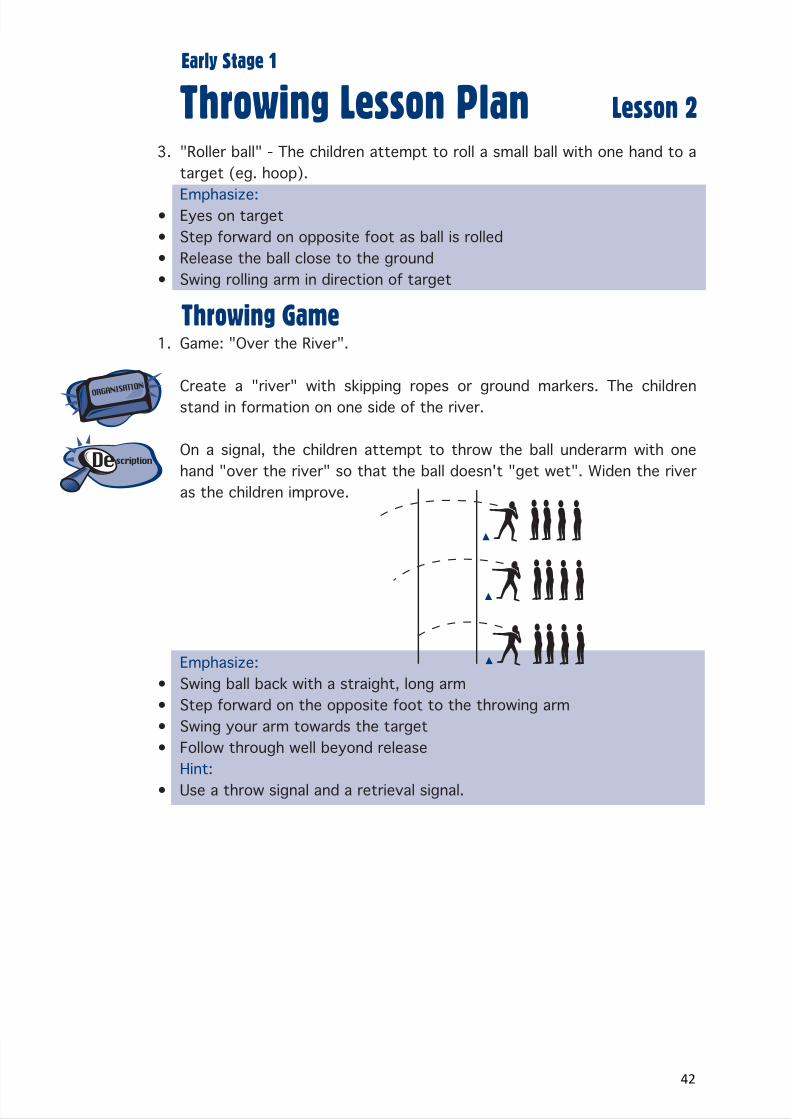
Game: "Over the River".
Create a "river" with skipping ropes or ground markers. The children stand in formation on one side of the river.
On a signal, the children attempt to throw the ball underarm with one hand "over the river" so that the ball doesn't "get wet". Widen the river as the children improve.
Emphasize: Swing ball back with a straight, long armStep forward on the opposite foot to the throwing armSwing your arm towards the targetFollow through well beyond releaseHint:Use a throw signal and a retrieval signal.
Throwing Game
42
Stage 1Lesson Plans
•
•
•
Running
Jumping
Throwing
- Lesson 1- Lesson 2
- Lesson 1
- Lesson 1- Lesson2
- Lesson 2
43
LAANSW ASAP Level 3
Running Lesson Plan
21
Warm Up
Skill Development
Lesson 1
Stage 1
1.
2.
•••
1.
Development of running techniqueIntroduction to the standing start
Ground markers x 30
Group Game: "Numbers"
Create a playing area with ground markers. The children scatterrandomly within the playing area.
The players move about randomly within the playing area, performing an action selected by the teacher, eg. skipping, hopping, jumping, etc. The leader then blows a whistle and calls out a number. The children are required to quickly form groups of this size ie. If the leader calls "3", the children must form groups of this size. Change the action that the children are to perform each time.
Individual Challenges:Run on the spot:With arms folded; behind back; kept straight.With hands on head; hands on shoulders; hands on hips.With bent swinging arms.Which is best?
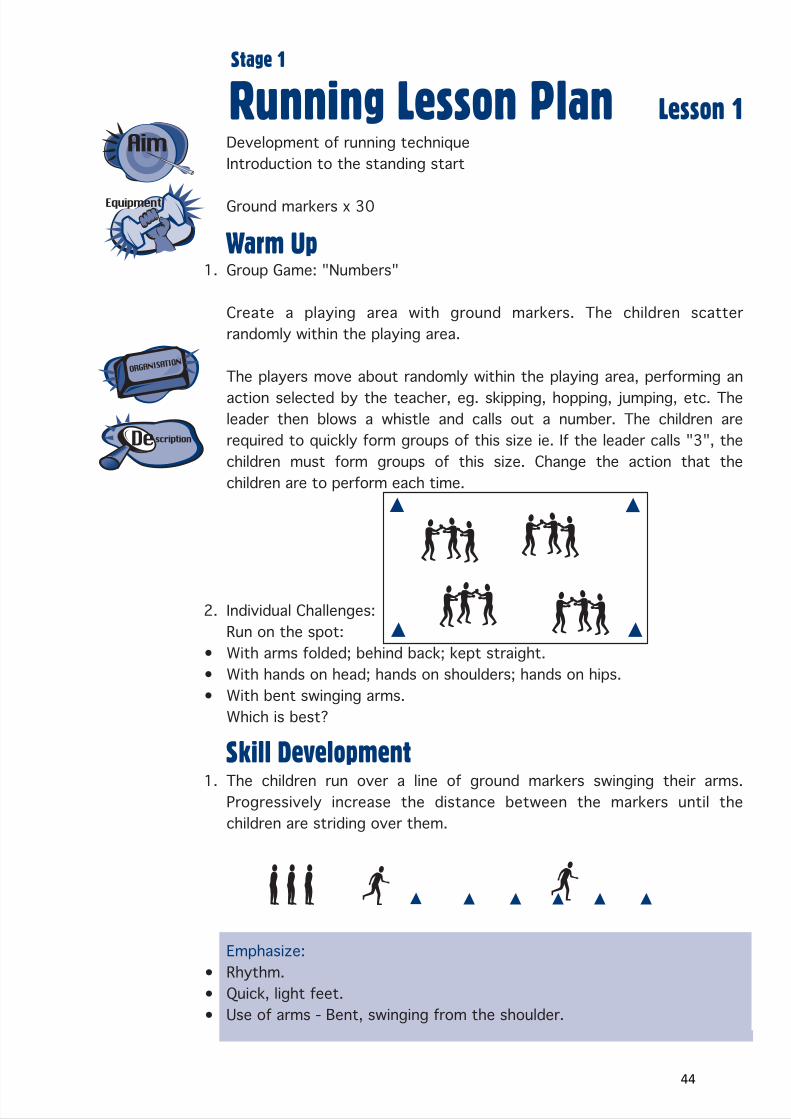
The children run over a line of ground markers swinging their arms. Progressively increase the distance between the markers until the children are striding over them.
Emphasize:Rhythm.Quick, light feet.Use of arms - Bent, swinging from the shoulder.
•••
44
Running Lesson Plan Lesson 1
Stage 1
2.
i)•
••ii)•••iii)
•
1.Starting Game
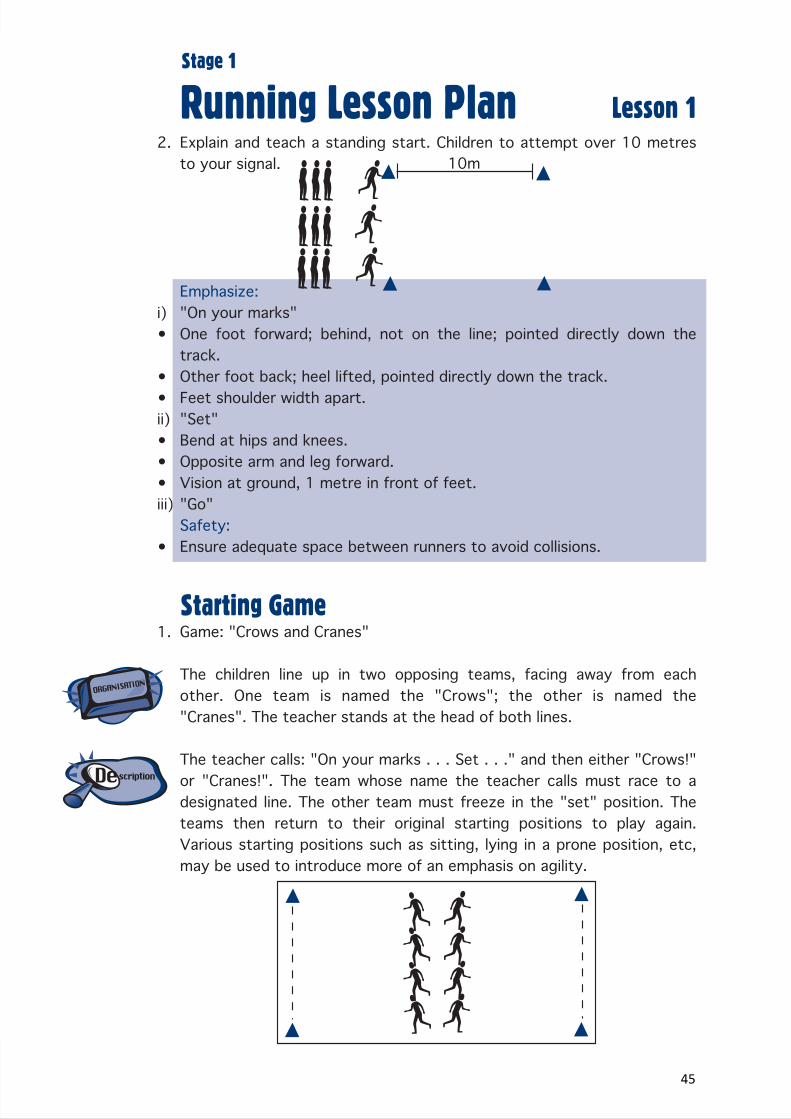
Explain and teach a standing start. Children to attempt over 10 metres to your signal.
Emphasize:"On your marks"One foot forward; behind, not on the line; pointed directly down the track.Other foot back; heel lifted, pointed directly down the track.Feet shoulder width apart."Set"Bend at hips and knees.Opposite arm and leg forward.Vision at ground, 1 metre in front of feet."Go"Safety:Ensure adequate space between runners to avoid collisions.
Game: "Crows and Cranes"
The children line up in two opposing teams, facing away from each other. One team is named the "Crows"; the other is named the "Cranes". The teacher stands at the head of both lines.
The teacher calls: "On your marks . . . Set . . ." and then either "Crows!" or "Cranes!". The team whose name the teacher calls must race to a designated line. The other team must freeze in the "set" position. The teams then return to their original starting positions to play again. Various starting positions such as sitting, lying in a prone position, etc, may be used to introduce more of an emphasis on agility.
10m
45

LAANSW ASAP Level 3
Running Lesson Plan
Warm Up
Lesson 2
Stage 1
1.
•••••••
2.
Development of running techniqueCorrect shuttle relay baton passing technique
Ground markers x 10Hoops x 6
Group Game: "Command"
Create a square playing area with ground markers. The children scatter within the playing area.
This game is based on the traditional game of "Shipwreck" however relates to athletics. The leader gives various commands and the players must quickly respond within the playing area. Commands and the required actions can include:"Front Straight" - Children run to designated side of the playing area."Back Straight" - As above."Start Line" - As above."Finish Line" - As above."On your marks" - Children assume an "on your marks" position."Warm Up" - Children perform a warm up exercise."Personal Best" - Children jump up and down.
Partner Challenge: "Circle Slap"
Children in pairs, scattered within the playing area.
Person A stands still with their hand held up, palm facing outwards. Person B must gently slap Person A's hand and then run in a circle around them before they slap the hand again and run back around in the opposite direction. Repeat for a predetermined number of repetitions that players attempt to complete as quicklyas possible. Reverse roles.
Skipping ropes x 6Relay batons x 5
46
Running Lesson Plan Lesson 2
Stage 1
1.
•••
2.
i)ii)••iii)•••
1.
•
Relay Game
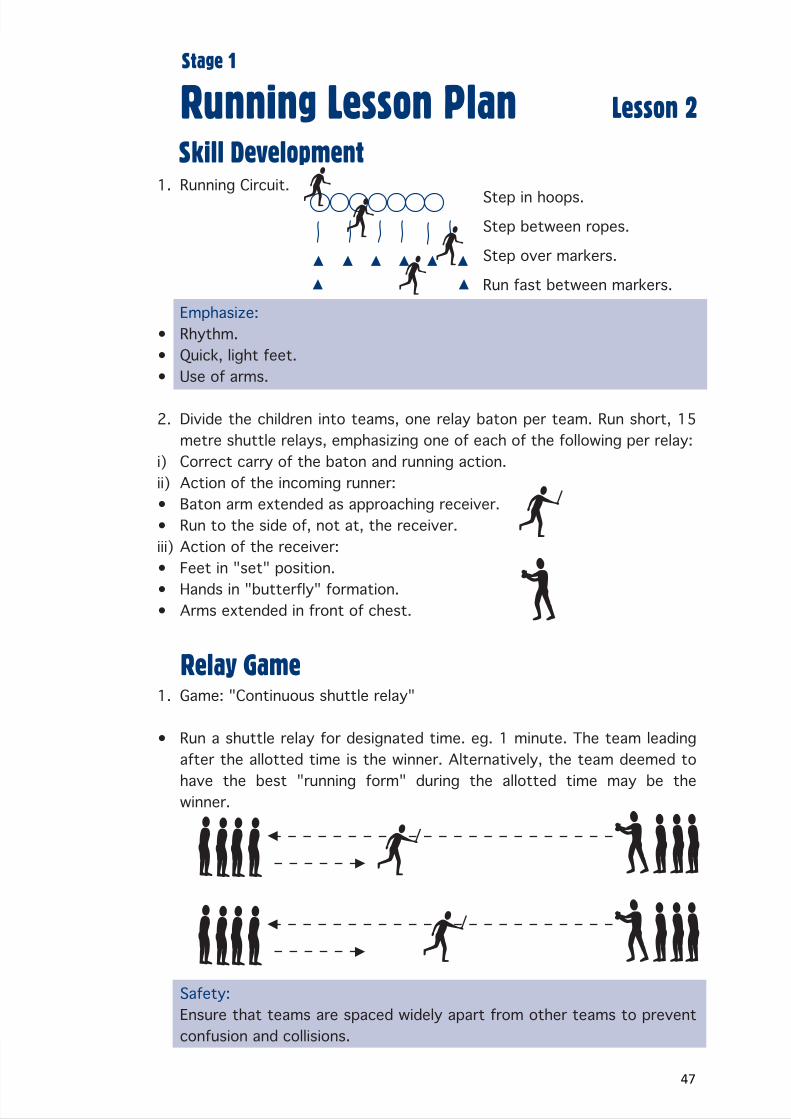
Skill DevelopmentRunning Circuit.
Emphasize:Rhythm.Quick, light feet.Use of arms.
Divide the children into teams, one relay baton per team. Run short, 15 metre shuttle relays, emphasizing one of each of the following per relay:Correct carry of the baton and running action.Action of the incoming runner:Baton arm extended as approaching receiver.Run to the side of, not at, the receiver.Action of the receiver:Feet in "set" position.Hands in "butterfly" formation.Arms extended in front of chest.
Game: "Continuous shuttle relay"
Run a shuttle relay for designated time. eg. 1 minute. The team leading after the allotted time is the winner. Alternatively, the team deemed to have the best "running form" during the allotted time may be the winner.
Safety:Ensure that teams are spaced widely apart from other teams to prevent confusion and collisions.
Step in hoops.
Step between ropes.
Step over markers.
Run fast between markers.
47
LAANSW ASAP Level 3
Jumping Lesson Plan
Warm Up
Lesson 1
Stage 1
1.
2.
Long Jump with run up
Ground markers x 10Long jump sand pit and rake
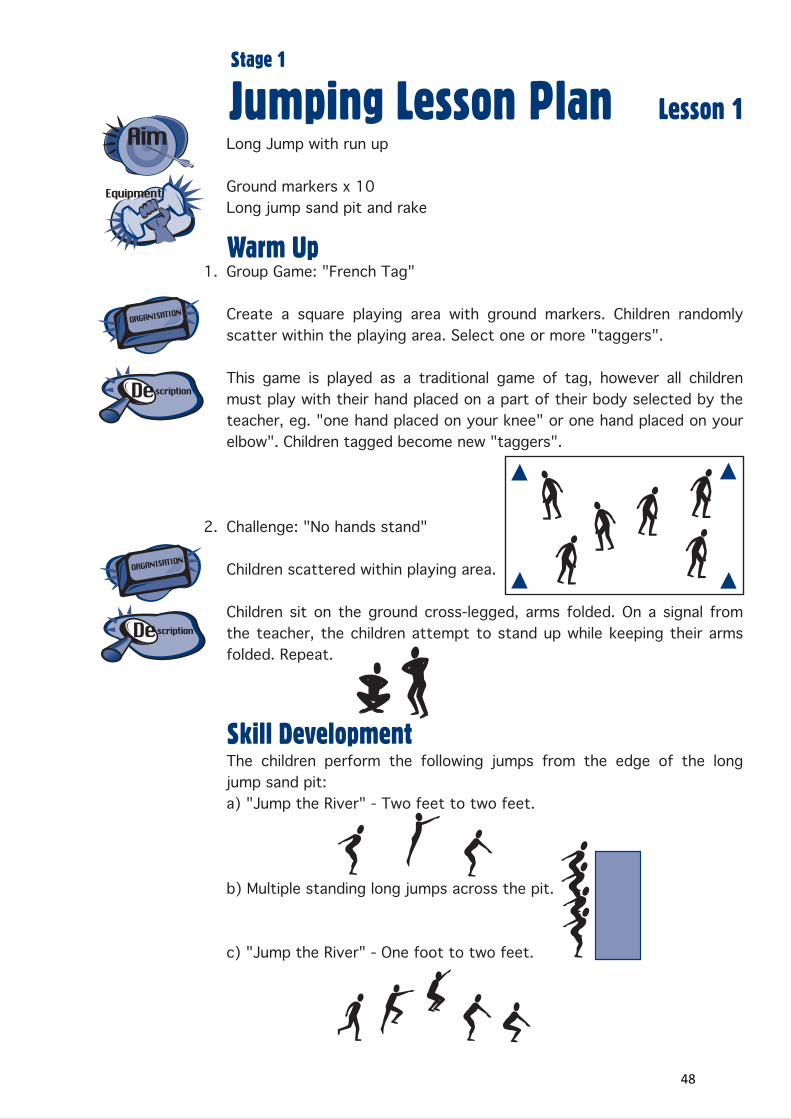
Group Game: "French Tag"
Create a square playing area with ground markers. Children randomlyscatter within the playing area. Select one or more "taggers".
This game is played as a traditional game of tag, however all children must play with their hand placed on a part of their body selected by the teacher, eg. "one hand placed on your knee" or one hand placed on your elbow". Children tagged become new "taggers".
Challenge: "No hands stand"
Children scattered within playing area.
Children sit on the ground cross-legged, arms folded. On a signal from the teacher, the children attempt to stand up while keeping their arms folded. Repeat.
The children perform the following jumps from the edge of the long jump sand pit:a) "Jump the River" - Two feet to two feet.
b) Multiple standing long jumps across the pit.
c) "Jump the River" - One foot to two feet.
Skill Development
48
Jumping Lesson Plan Lesson 1
Stage 1
••
••
2.
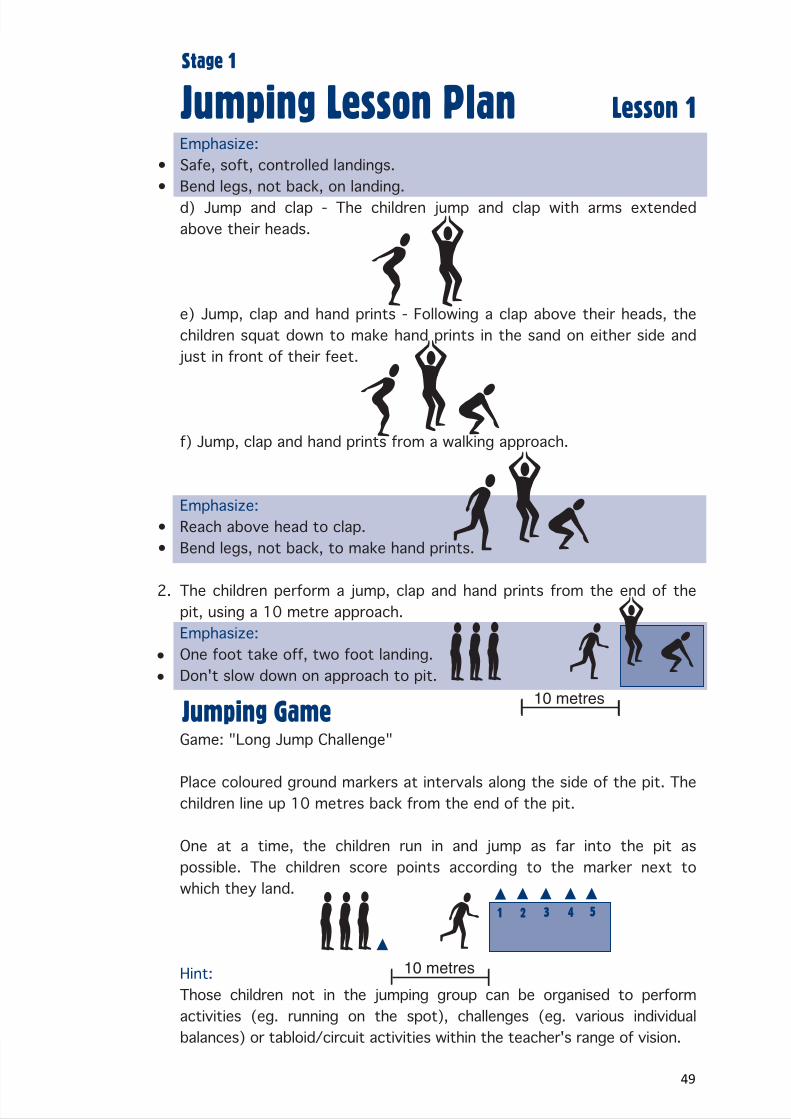
Emphasize:Safe, soft, controlled landings.Bend legs, not back, on landing.d) Jump and clap - The children jump and clap with arms extendedabove their heads.
e) Jump, clap and hand prints - Following a clap above their heads, thechildren squat down to make hand prints in the sand on either side andjust in front of their feet.
f) Jump, clap and hand prints from a walking approach.
Emphasize:Reach above head to clap.Bend legs, not back, to make hand prints.
The children perform a jump, clap and hand prints from the end of the pit, using a 10 metre approach.Emphasize:One foot take off, two foot landing.Don't slow down on approach to pit.
Game: "Long Jump Challenge"
Place coloured ground markers at intervals along the side of the pit. The children line up 10 metres back from the end of the pit.
One at a time, the children run in and jump as far into the pit as possible. The children score points according to the marker next to which they land.
Hint:Those children not in the jumping group can be organised to perform activities (eg. running on the spot), challenges (eg. various individual balances) or tabloid/circuit activities within the teacher's range of vision.
••
Jumping Game10 metres
10 metres
1 2 3 4 5
49
LAANSW ASAP Level 3
Jumping Lesson Plan
Warm Up
Lesson 2
Stage 1
1.
2.
Scissors jump for height
Ground markers x 10Skipping ropes x 16Hoops x 6
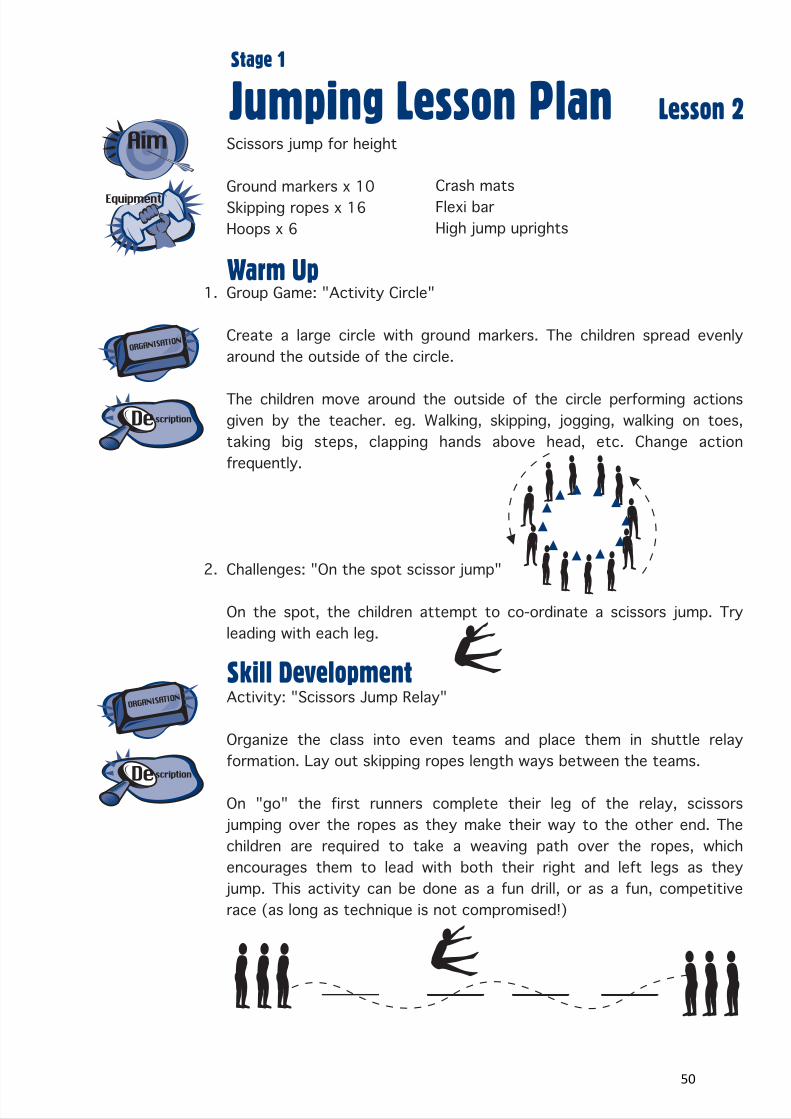
Group Game: "Activity Circle"
Create a large circle with ground markers. The children spread evenly around the outside of the circle.
The children move around the outside of the circle performing actions given by the teacher. eg. Walking, skipping, jogging, walking on toes, taking big steps, clapping hands above head, etc. Change action frequently.
Challenges: "On the spot scissor jump"
On the spot, the children attempt to co-ordinate a scissors jump. Try leading with each leg.
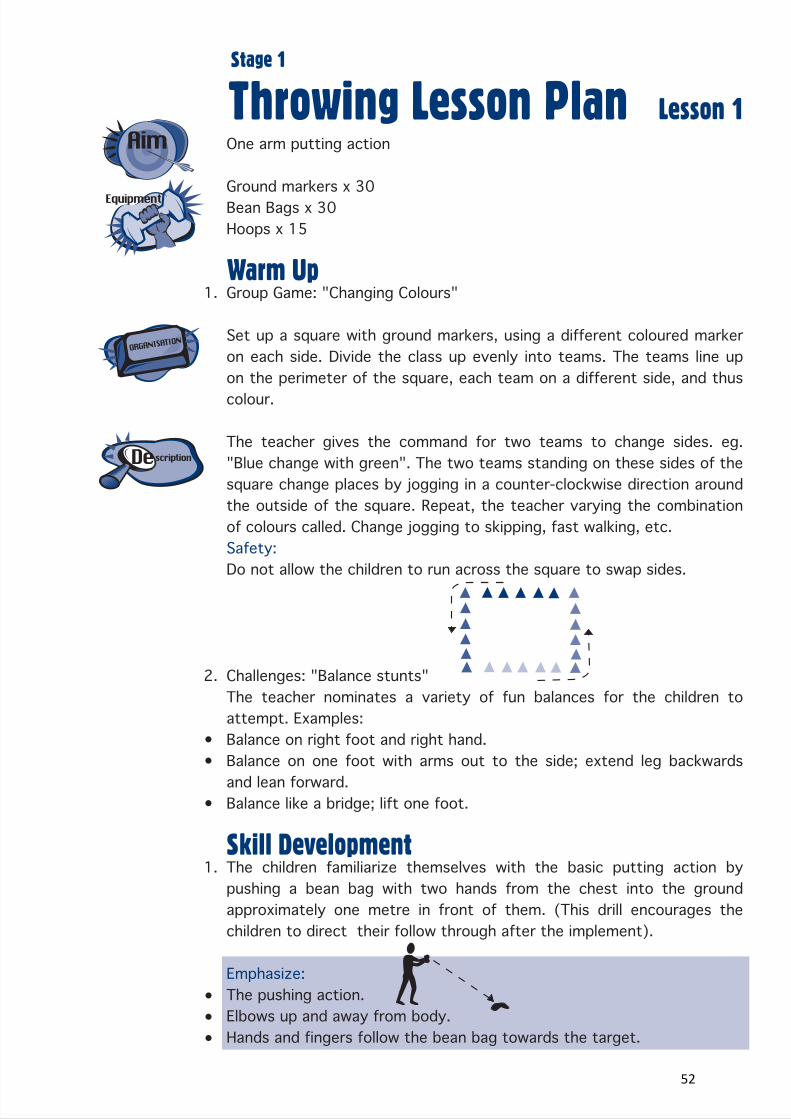
Activity: "Scissors Jump Relay"
Organize the class into even teams and place them in shuttle relay formation. Lay out skipping ropes length ways between the teams.
On "go" the first runners complete their leg of the relay, scissors jumping over the ropes as they make their way to the other end. The children are required to take a weaving path over the ropes, which encourages them to lead with both their right and left legs as they jump. This activity can be done as a fun drill, or as a fun, competitive race (as long as technique is not compromised!)
Skill Development
Crash matsFlexi barHigh jump uprights
50

Jumping Lesson Plan Lesson 2
Stage 1
••
2.
1.
Emphasize:Leg closest to the rope over first.Lift both legs to the front.
Jumping Circuit.
Game: "Electric Fence"
Set up a high jump flexi bar (electric fence) between two uprights; a crash mat is placed on the other side of the bar. Half of the class lines up preparing to approach the bar from one side (5m distance), while half of the class in lined up on the other side.
One at a time, on the teacher's command, the children attempt to run in and scissors jump the "electric fence". The bar begins at mat height and is increased as the children gain skill and confidence. Once a child has a jump, they proceed to the other line in preparation to approach from the other side, thus having to lead with their other leg.
Emphasize:Leg closest to the "fence" over first.Must land on feet in standing position.SafetyUse a jumping signal ie. The children may not proceed to jump until you have given a signal.
••
•
Jumping Game
Scissor over ropes
Scissor over ropes- Left leg lead
Scissor over ropes- Right leg lead
Hop in hoops
51
LAANSW ASAP Level 3
Throwing Lesson Plan
Warm Up
Lesson 1
Stage 1
1.
2.
••
•
1.
One arm putting action
Ground markers x 30Bean Bags x 30Hoops x 15
Group Game: "Changing Colours"
Set up a square with ground markers, using a different coloured marker on each side. Divide the class up evenly into teams. The teams line up on the perimeter of the square, each team on a different side, and thus colour.
The teacher gives the command for two teams to change sides. eg. "Blue change with green". The two teams standing on these sides of the square change places by jogging in a counter-clockwise direction around the outside of the square. Repeat, the teacher varying the combination of colours called. Change jogging to skipping, fast walking, etc. Safety:Do not allow the children to run across the square to swap sides.
Challenges: "Balance stunts"The teacher nominates a variety of fun balances for the children to attempt. Examples:Balance on right foot and right hand.Balance on one foot with arms out to the side; extend leg backwards and lean forward.Balance like a bridge; lift one foot.
The children familiarize themselves with the basic putting action by pushing a bean bag with two hands from the chest into the ground approximately one metre in front of them. (This drill encourages the children to direct their follow through after the implement).
Emphasize:The pushing action.Elbows up and away from body.Hands and fingers follow the bean bag towards the target.
Skill Development
•••
52
Throwing Lesson Plan Lesson 1
Stage 1
2.•••
3.
••••
4.
•••
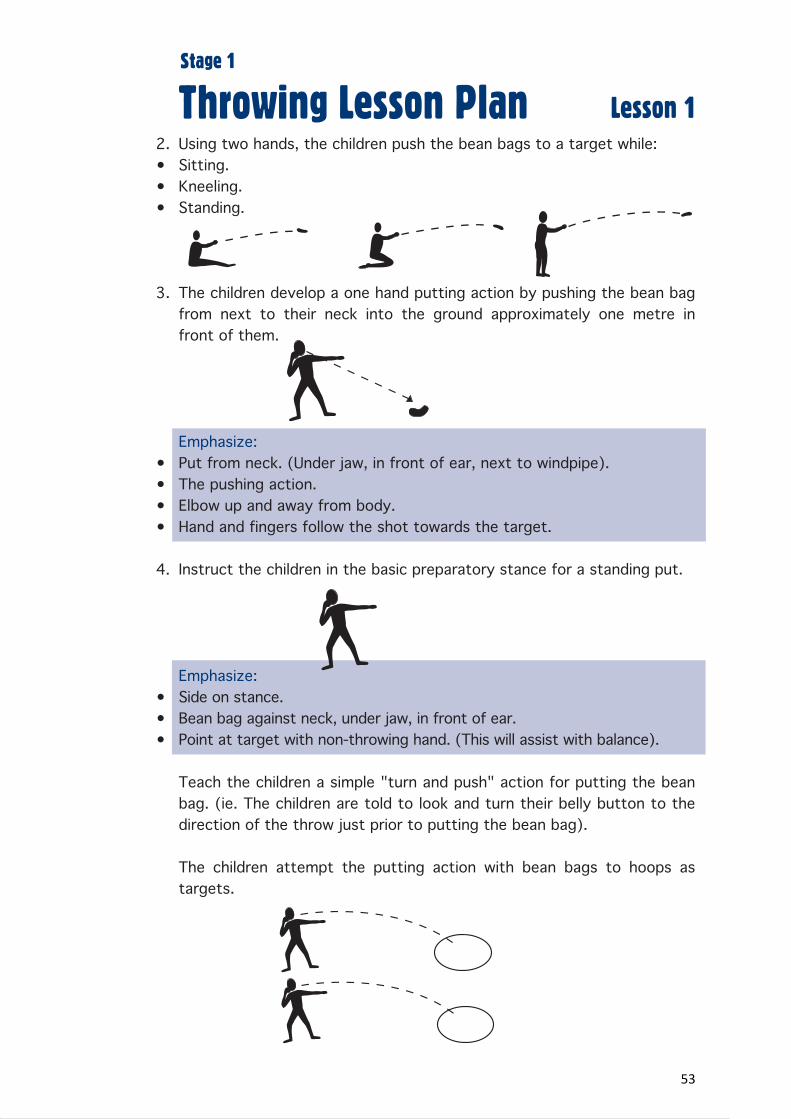
Using two hands, the children push the bean bags to a target while:Sitting.Kneeling.Standing.
The children develop a one hand putting action by pushing the bean bag from next to their neck into the ground approximately one metre in front of them.
Emphasize:Put from neck. (Under jaw, in front of ear, next to windpipe).The pushing action.Elbow up and away from body.Hand and fingers follow the shot towards the target.
Instruct the children in the basic preparatory stance for a standing put.
Emphasize:Side on stance.Bean bag against neck, under jaw, in front of ear.Point at target with non-throwing hand. (This will assist with balance).
Teach the children a simple "turn and push" action for putting the bean bag. (ie. The children are told to look and turn their belly button to the direction of the throw just prior to putting the bean bag).
The children attempt the putting action with bean bags to hoops as targets.
53
LAANSW ASAP Level 3
Throwing Lesson PlanThrowing Game
Lesson 1
Stage 1
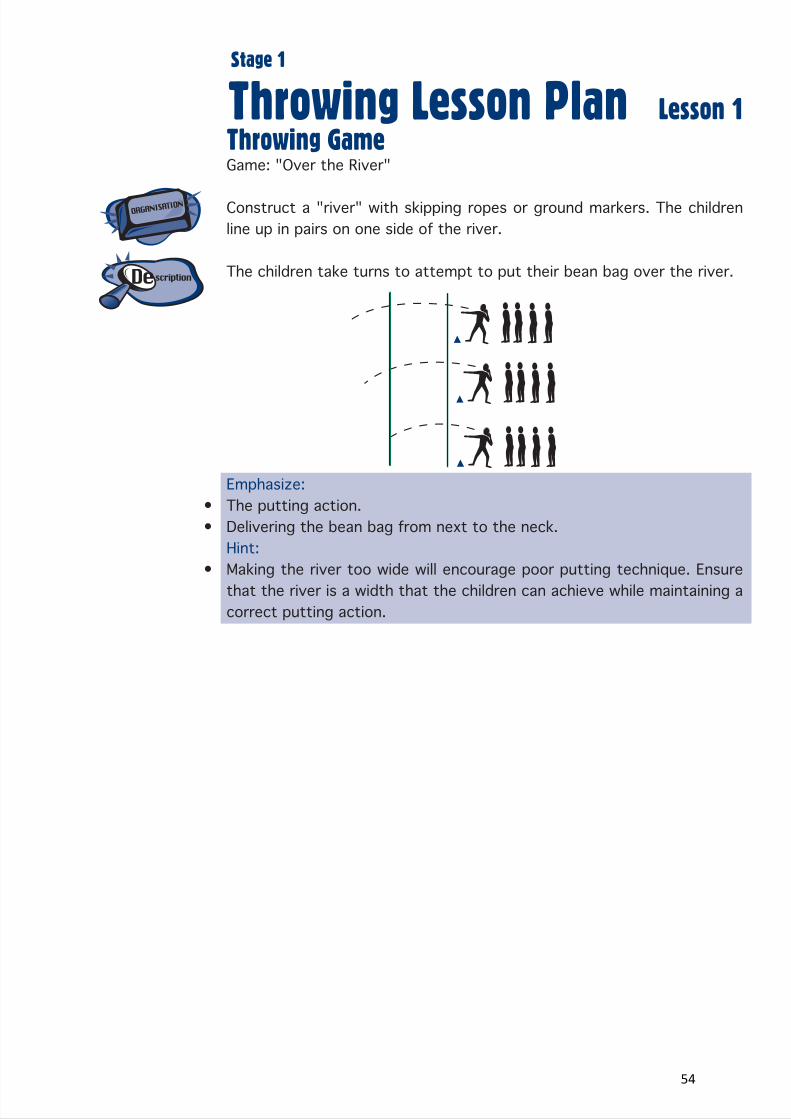
Game: "Over the River"
Construct a "river" with skipping ropes or ground markers. The children line up in pairs on one side of the river.
The children take turns to attempt to put their bean bag over the river.
Emphasize:The putting action.Delivering the bean bag from next to the neck.Hint:Making the river too wide will encourage poor putting technique. Ensure that the river is a width that the children can achieve while maintaining a correct putting action.
••
•
54
LAANSW ASAP Level 3
Throwing Lesson Plan
Warm Up
Lesson 2
Stage 1
1.
1.
••••
•
Skill Development
A slinging action
Ground markers x 15Hoops/quoits - one between twoWitches hat; cricket stumps; batting tee; etc. for target during discus quoits
Group Game: "Surprise"
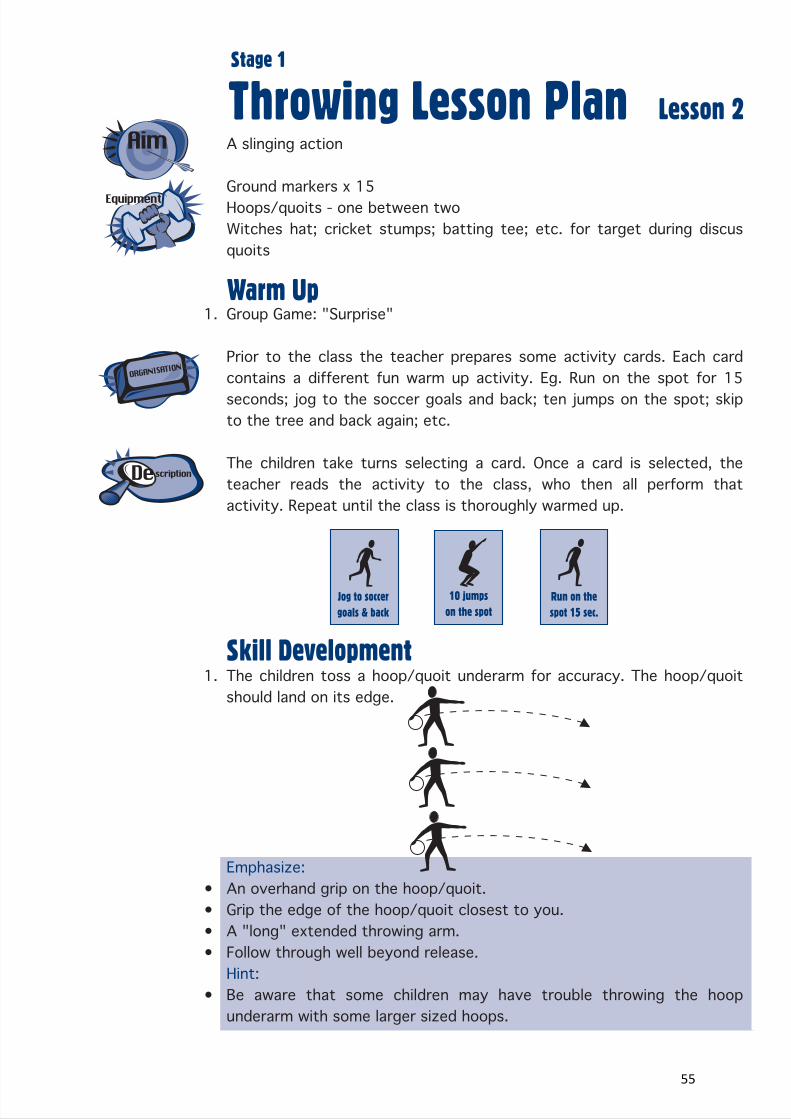
Prior to the class the teacher prepares some activity cards. Each card contains a different fun warm up activity. Eg. Run on the spot for 15 seconds; jog to the soccer goals and back; ten jumps on the spot; skip to the tree and back again; etc.
The children take turns selecting a card. Once a card is selected, the teacher reads the activity to the class, who then all perform that activity. Repeat until the class is thoroughly warmed up.
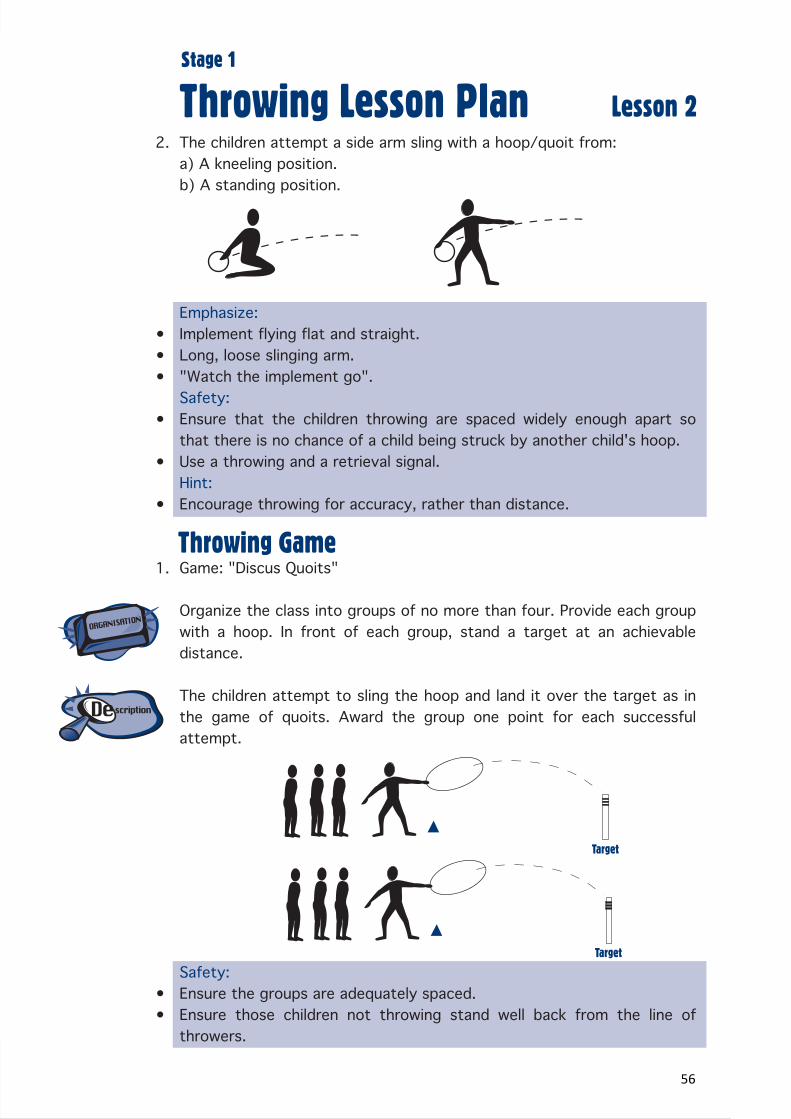
The children toss a hoop/quoit underarm for accuracy. The hoop/quoit should land on its edge.
Emphasize:An overhand grip on the hoop/quoit.Grip the edge of the hoop/quoit closest to you.A "long" extended throwing arm.Follow through well beyond release.Hint:Be aware that some children may have trouble throwing the hoop underarm with some larger sized hoops.
10 jumpson the spot
Run on thespot 15 sec.
Jog to soccergoals & back
55
Throwing Lesson Plan Lesson 2
Stage 1
2.
•••
•
•
•
1.
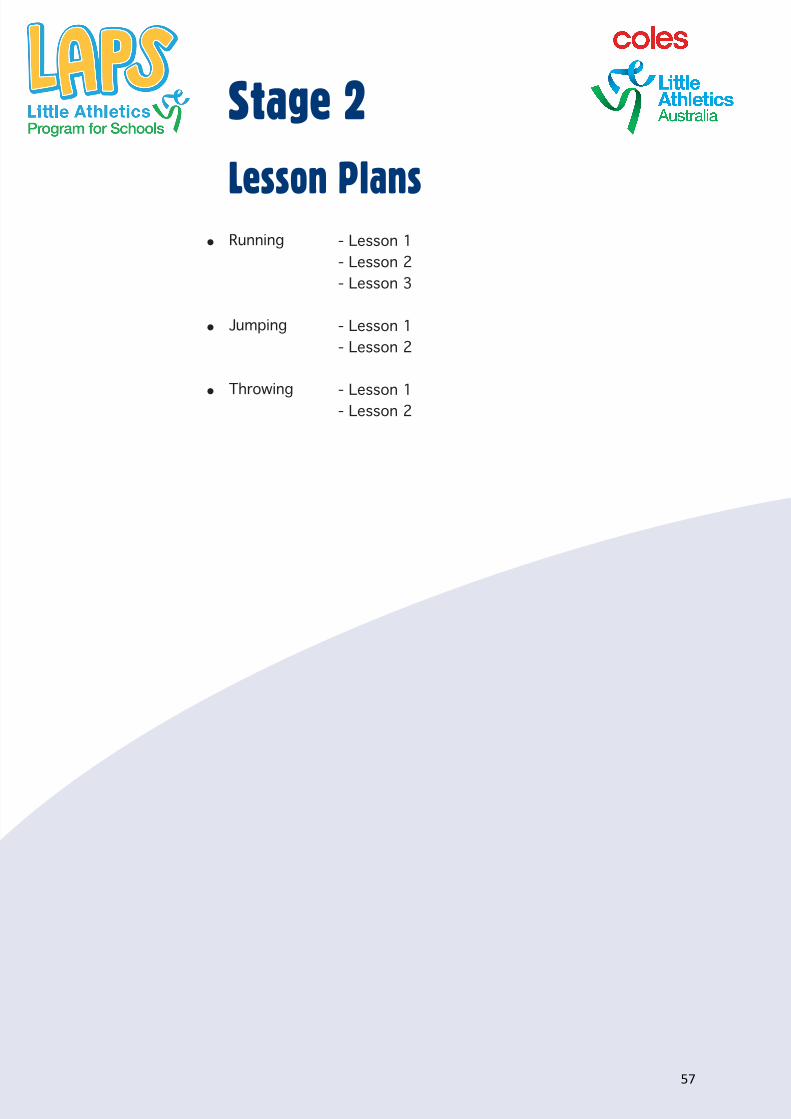
The children attempt a side arm sling with a hoop/quoit from:a) A kneeling position.b) A standing position.
Emphasize:Implement flying flat and straight.Long, loose slinging arm."Watch the implement go".Safety:Ensure that the children throwing are spaced widely enough apart so that there is no chance of a child being struck by another child's hoop.Use a throwing and a retrieval signal.Hint:Encourage throwing for accuracy, rather than distance.
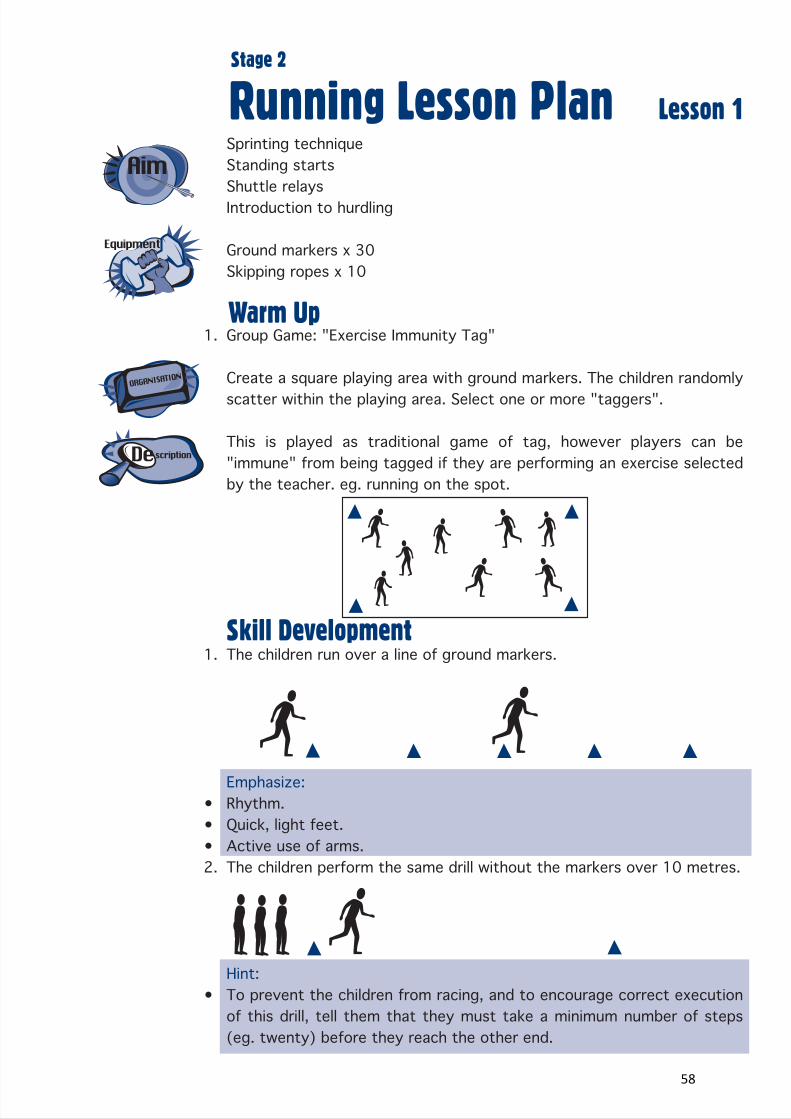
Game: "Discus Quoits"
Organize the class into groups of no more than four. Provide each group with a hoop. In front of each group, stand a target at an achievable distance.
The children attempt to sling the hoop and land it over the target as in the game of quoits. Award the group one point for each successful attempt.
Safety:Ensure the groups are adequately spaced.Ensure those children not throwing stand well back from the line of throwers.
••
Throwing Game
Target
Target
56
LA
Stage 2Lesson Plans
•
•
•
Running
Jumping
Throwing
- Lesson 1- Lesson 2- Lesson 3
- Lesson 1- Lesson 2
- Lesson 1- Lesson 2
57
LAANSW ASAP Level 3
Stage 2Lesson Plans
•
•
•
Running
Jumping
Throwing
- Lesson 1- Lesson 2- Lesson 3
- Lesson 1- Lesson 2
- Lesson 1- Lesson 2
LAANSW ASAP Level 3
Running Lesson Plan
Warm Up
Lesson 1
Stage 2
1.
1.
•••2.
•
Skill Development
Sprinting techniqueStanding startsShuttle relaysIntroduction to hurdling
Ground markers x 30Skipping ropes x 10
Group Game: "Exercise Immunity Tag"
Create a square playing area with ground markers. The children randomly scatter within the playing area. Select one or more "taggers".
This is played as traditional game of tag, however players can be "immune" from being tagged if they are performing an exercise selected by the teacher. eg. running on the spot.
The children run over a line of ground markers.
Emphasize:Rhythm.Quick, light feet.Active use of arms.The children perform the same drill without the markers over 10 metres.
Hint:To prevent the children from racing, and to encourage correct execution of this drill, tell them that they must take a minimum number of steps (eg. twenty) before they reach the other end.
58
Running Lesson Plan Lesson 1
Stage 2
JU
MP
S
TA
RT
:
L
es
so
n
Pl
an
s
an
d
Te
ac
he
rs
N
ot
es
1.
••
•••2.
i)•••ii)•••iii)•
1.Running Game
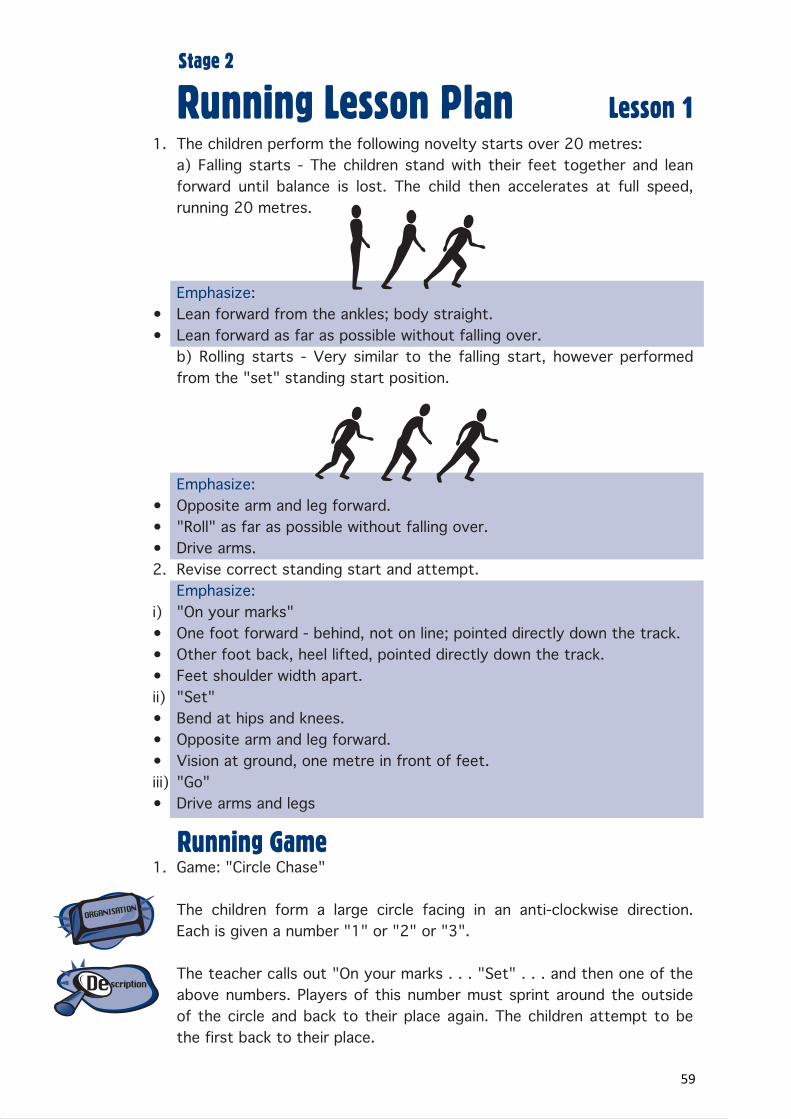
The children perform the following novelty starts over 20 metres:a) Falling starts - The children stand with their feet together and leanforward until balance is lost. The child then accelerates at full speed,running 20 metres.
Emphasize:Lean forward from the ankles; body straight.Lean forward as far as possible without falling over.b) Rolling starts - Very similar to the falling start, however performedfrom the "set" standing start position.
Emphasize:Opposite arm and leg forward."Roll" as far as possible without falling over.Drive arms.Revise correct standing start and attempt.Emphasize:"On your marks"One foot forward - behind, not on line; pointed directly down the track.Other foot back, heel lifted, pointed directly down the track.Feet shoulder width apart."Set"Bend at hips and knees.Opposite arm and leg forward.Vision at ground, one metre in front of feet."Go"Drive arms and legs
Game: "Circle Chase"
The children form a large circle facing in an anti-clockwise direction. Each is given a number "1" or "2" or "3".
The teacher calls out "On your marks . . . "Set" . . . and then one of the above numbers. Players of this number must sprint around the outside of the circle and back to their place again. The children attempt to be the first back to their place.
59

JU
MP
S
TA
RT
:
L
es
so
n
Pl
an
s
an
d
Te
ac
he
rs
N
ot
es
Running Lesson Plan Lesson 1
Stage 2
2.
i)ii)••iii)•••
3.
Safety:Instruct the children to only overtake other runners by passing them on their outside. Children not running must not interfere with runners as they go by.
Game: "Shuttle Relay"
Select teams of 4-6. Children line up in teams behind a ground marker. Half of each team is sent to line up behind a marker 15-20 metres away, facing their teammates. Each team is given a relay baton.
On a signal, the first child in each team runs with the baton down to the other end. On reaching the other end, they pass the baton to their teammate, who in turn, runs back to the other end, passes the baton, and so on. This continues for a predesignated time or number of turns.
Emphasize:Correct carry of the baton and running action.Action of the incoming runner:Baton arm extended as approaching receiver.Run to the side of, not at, the receiver.Action of the receiver:Feet in "set" position.Hands in "butterfly" formation.Arms extended in front of chest.
Game: "Jump the River Relay"
Organize the children into a traditional shuttle relay formation with two skipping ropes placed one metre apart in the path of each team.
Conducted as per a traditional shuttle relay, the children must hurdle or leap over the gap between the ropes.
2 1
1
2
3
32
2
1
1
3
3
60
LAANSW ASAP Level 3
Stage 3Lesson Plans
•
•
•
Running
Jumping
Throwing
- Lesson 1- Lesson 2- Lesson 3- Lesson 4
- Lesson 1- Lesson 2
- Lesson 1- Lesson 2
LAANSW ASAP Level 3
JU
MP
S
TA
RT
:
L
es
so
n
Pl
an
s
an
d
Te
ac
he
rs
N
ot
es
Running Lesson Plan
Warm Up
Lesson 2
Stage 2
1.
1.
•
•
2.
Skill Development
Introduction to circular relays
Ground markers x 20Relay batons - up to 15
Group Game: "Frost and Thaw"
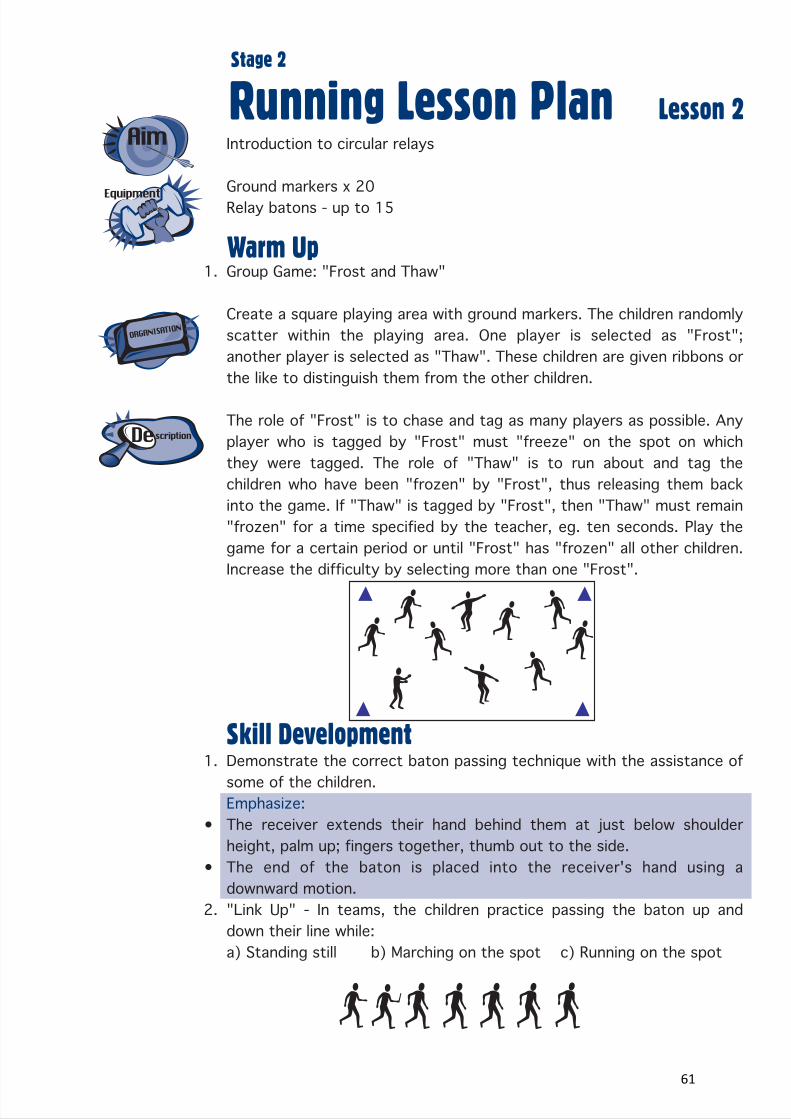
Create a square playing area with ground markers. The children randomly scatter within the playing area. One player is selected as "Frost"; another player is selected as "Thaw". These children are given ribbons orthe like to distinguish them from the other children.
The role of "Frost" is to chase and tag as many players as possible. Any player who is tagged by "Frost" must "freeze" on the spot on which they were tagged. The role of "Thaw" is to run about and tag the children who have been "frozen" by "Frost", thus releasing them back into the game. If "Thaw" is tagged by "Frost", then "Thaw" must remain "frozen" for a time specified by the teacher, eg. ten seconds. Play the game for a certain period or until "Frost" has "frozen" all other children. Increase the difficulty by selecting more than one "Frost".
Demonstrate the correct baton passing technique with the assistance of some of the children.Emphasize:The receiver extends their hand behind them at just below shoulder height, palm up; fingers together, thumb out to the side.The end of the baton is placed into the receiver's hand using a downward motion."Link Up" - In teams, the children practice passing the baton up and down their line while:a) Standing still b) Marching on the spot c) Running on the spot
61

Running Lesson Plan Lesson 2
Stage 2
JU
MP
S
TA
RT
:
L
es
so
n
Pl
an
s
an
d
Te
ac
he
rs
N
ot
es
1.
2.
Baton Passing Game
Emphasize:Non-visual pass - receiver's eyes to the front.Receiving hand held steady.Baton to be placed firmly into the receiver's hand. (But not too firmly!).Hint:When the baton gets to the front, simply ask everyone to turn and face the other way. The relay baton is now at the rear of the line and the drill is repeated.
Game: "Fast Baton"
Divide the class into teams. The children line up behind a ground marker in their teams. They stand in single file, arms length apart. The person at the rear of the line is given a relay baton.
On "Go", the children pass the baton down the line as quickly as possible, using non-visual exchanges. When the first person receives the baton they must quickly raise it above their head, signaling that they have finished. The first team to do this is the winner.
Disqualify teams for incorrect baton passing technique, visual passes, etc.
Game: "Baton vs Runner"
Divide the class into teams of at least six players in each. The teams line up in single file, arm's length apart, behind a marker. The last child in each line is selected as the "runner" and is instructed to stand at a marker an appropriate distance behind the team. (eg. 10 metres). The player who is now last in line begins with the baton.
On "Go", the team passes the baton to the front of the line. At the same time, the "runner" sprints past the team and to the front of the line in an effort to beat the baton to this point.Safety:Ensure that the teams are spaced wide enough apart from other teams to ensure a safe corridor for the runner.
•••
•
62
LAANSW ASAP Level 3
JU
MP
S
TA
RT
:
L
es
so
nP
la
ns
a
nd
T
ea
ch
er
s
No
te
s
Running Lesson Plan Lesson 2
Stage 2
3.
•
•
The more children in each team, the further the runner should have to run. Organize this distance so that the time it takes the runner to reach the front of the line is similar to the time it takes the baton to reach this point.Alternative:Play this game so that the runner has to be in position at the front of the line to receive the baton when it gets there.
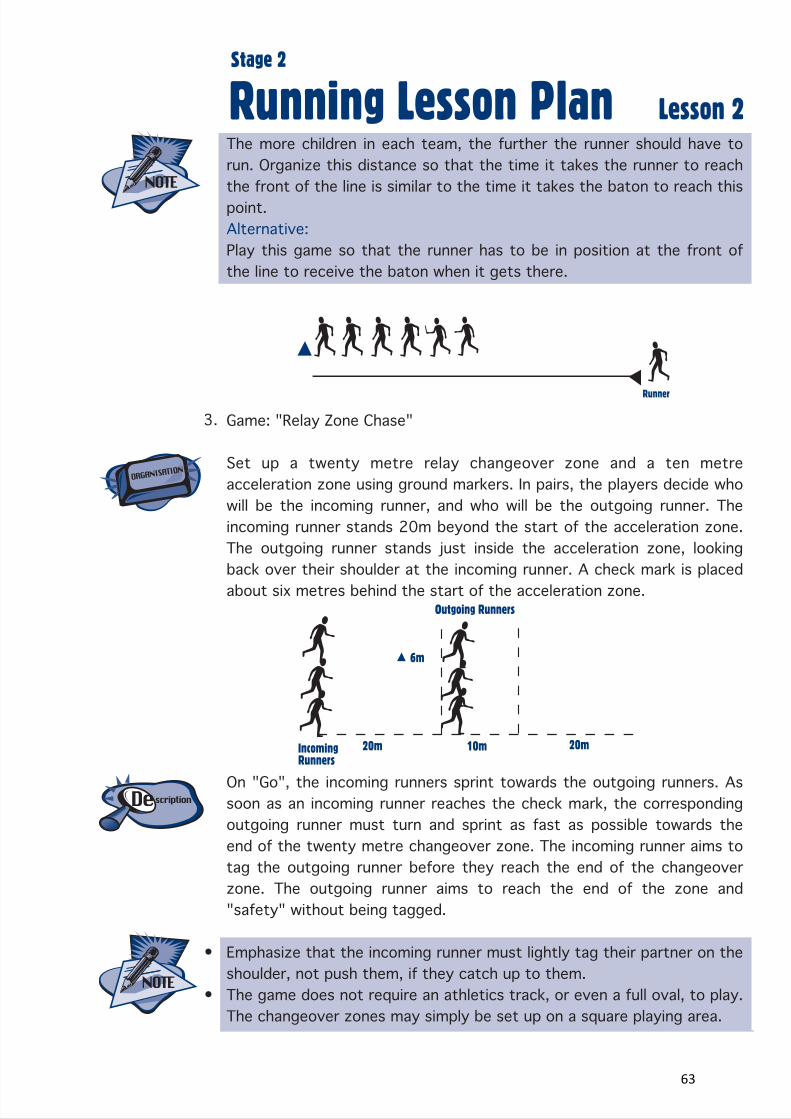
Game: "Relay Zone Chase"
Set up a twenty metre relay changeover zone and a ten metre acceleration zone using ground markers. In pairs, the players decide who will be the incoming runner, and who will be the outgoing runner. The incoming runner stands 20m beyond the start of the acceleration zone. The outgoing runner stands just inside the acceleration zone, looking back over their shoulder at the incoming runner. A check mark is placed about six metres behind the start of the acceleration zone.
On "Go", the incoming runners sprint towards the outgoing runners. As soon as an incoming runner reaches the check mark, the corresponding outgoing runner must turn and sprint as fast as possible towards the end of the twenty metre changeover zone. The incoming runner aims to tag the outgoing runner before they reach the end of the changeover zone. The outgoing runner aims to reach the end of the zone and "safety" without being tagged.
Emphasize that the incoming runner must lightly tag their partner on the shoulder, not push them, if they catch up to them.The game does not require an athletics track, or even a full oval, to play. The changeover zones may simply be set up on a square playing area.
Runner
Outgoing Runners
20m 20m10m
6m
IncomingRunners
63

Running Lesson Plan Lesson 2
Stage 2
JU
MP
S
TA
RT
:
L
es
so
n
Pl
an
s
an
d
Te
ac
he
rs
N
ot
es
•
4.
If space does not permit a 10m acceleration area, the game may be played without it. Simply use the 20m changeover zone as the chasing area. Also, the incoming runner does not necessarily need a 20m run in before reaching the chasing area. Finally, while it is ideal to use a 20m changeover zone, shortening this area by a few metres will not overly affect the game. It should be noted that as the chasing area is decreased, it may be necessary to move the check mark, suggested to be 6m behind the acceleration line, slightly closer to the chasing area.
Game: "Relay Zone Race"
Set up as per "Relay Zone Chase". The outgoing runners can stand anywhere inside the acceleration zone (as per a relay race), however all incoming runners must begin running from the same line 20m behind the acceleration line. Each incoming runner carries a baton.
The aim of this game is for each pair to attempt to be the first to carry the baton past the end of the 20m changeover zone. On "Go", all incoming runners sprint towards the outgoing runners in an attempt to make a fast, smooth baton exchange in the 20m changeover zone. The outgoing runner, on receiving the baton, sprints to the end of the changeover zone, carrying the baton.
Pairs are encouraged to make legal baton changes.
Acceleration Zone
Changeover Zone
20m 20m10m
64
LAANSW ASAP Level 3
JU
MP
S
TA
RT
:
L
es
so
n
Pl
an
s
an
d
Te
ac
he
rs
N
ot
es
Running Lesson Plan
Warm Up
Lesson 3
Stage 2
1.
•
•
1.Skill Development
•
"the pits"
Introduction to sustained running (Middle distance and cross country)
Ground markers x 20Relay batons x 6
Group Game: "Racing Cars"
Set up a large square or circular playing area with ground markers. Thechildren spread out evenly around the outside of the perimeter of the playing area.
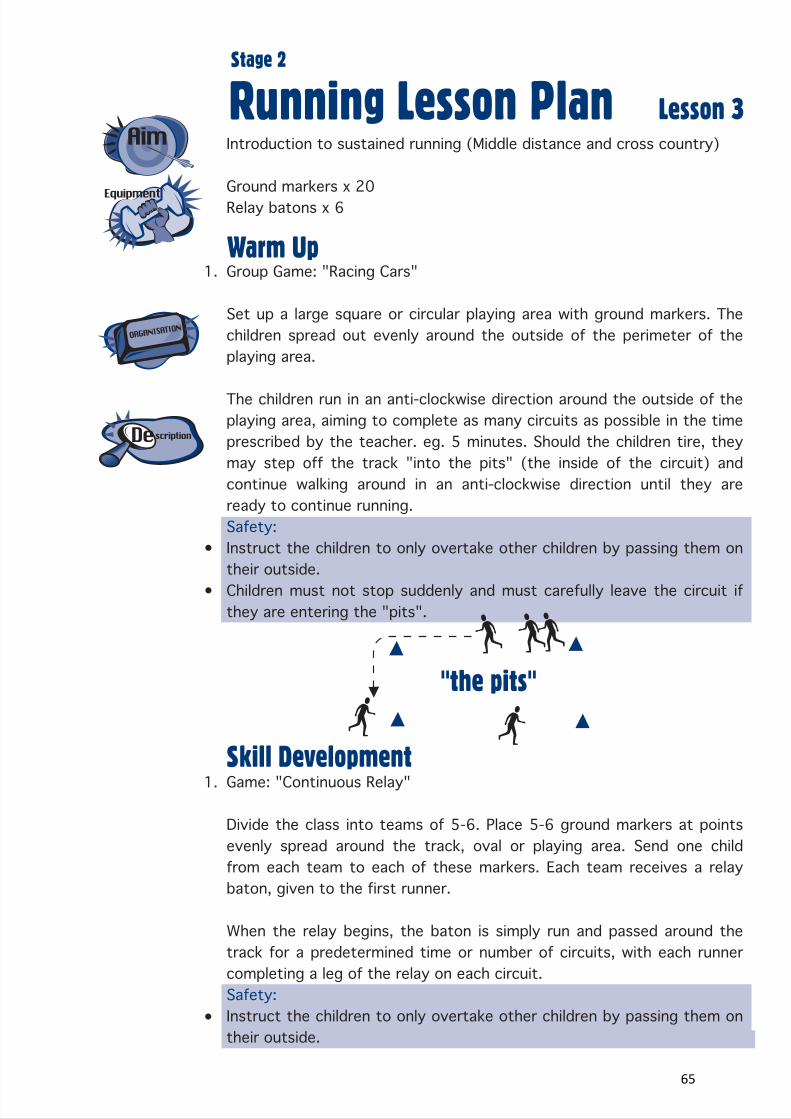
The children run in an anti-clockwise direction around the outside of the playing area, aiming to complete as many circuits as possible in the time prescribed by the teacher. eg. 5 minutes. Should the children tire, they may step off the track "into the pits" (the inside of the circuit) and continue walking around in an anti-clockwise direction until they are ready to continue running.Safety:Instruct the children to only overtake other children by passing them on their outside.Children must not stop suddenly and must carefully leave the circuit if they are entering the "pits".
Game: "Continuous Relay"
Divide the class into teams of 5-6. Place 5-6 ground markers at points evenly spread around the track, oval or playing area. Send one child from each team to each of these markers. Each team receives a relay baton, given to the first runner.
When the relay begins, the baton is simply run and passed around the track for a predetermined time or number of circuits, with each runner completing a leg of the relay on each circuit.Safety:Instruct the children to only overtake other children by passing them on their outside.
65
Running Lesson Plan Lesson 3
Stage 2
JU
MP
S
TA
RT
:
L
es
so
n
Pl
an
s
an
d
Te
ac
he
rs
N
ot
es
••
1.
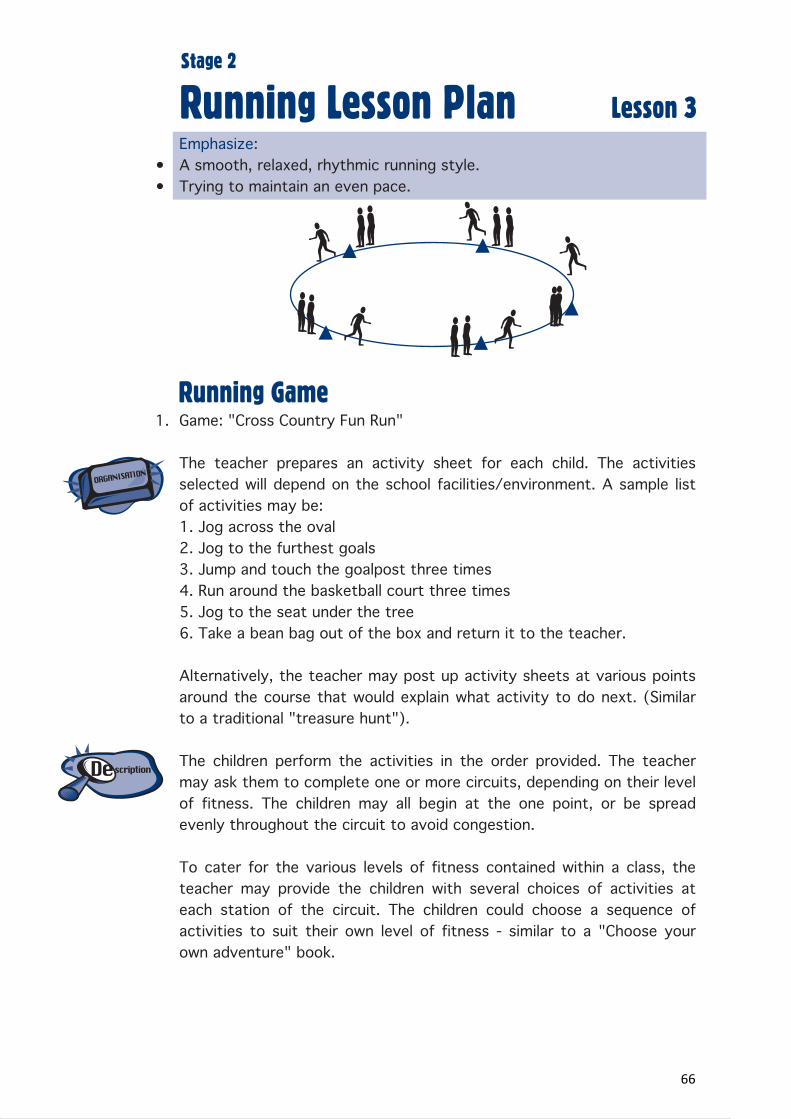
Emphasize:A smooth, relaxed, rhythmic running style.Trying to maintain an even pace.
Game: "Cross Country Fun Run"
The teacher prepares an activity sheet for each child. The activities selected will depend on the school facilities/environment. A sample list of activities may be:1. Jog across the oval2. Jog to the furthest goals3. Jump and touch the goalpost three times4. Run around the basketball court three times5. Jog to the seat under the tree6. Take a bean bag out of the box and return it to the teacher.
Alternatively, the teacher may post up activity sheets at various points around the course that would explain what activity to do next. (Similar to a traditional "treasure hunt").
The children perform the activities in the order provided. The teacher may ask them to complete one or more circuits, depending on their level of fitness. The children may all begin at the one point, or be spread evenly throughout the circuit to avoid congestion.
To cater for the various levels of fitness contained within a class, the teacher may provide the children with several choices of activities at each station of the circuit. The children could choose a sequence of activities to suit their own level of fitness - similar to a "Choose your own adventure" book.
Running Game
66
LAANSW ASAP Level 3
JU
MP
S
TA
RT
:
Jumping Lesson Plan
Warm Up
Lesson 1
Stage 2
1.
1.
•••
2.
Skill Development
•••
Development of long jump skills
Ground markers x 20Long jump sand pit and rake
Group Game: "Ostrich Tag"
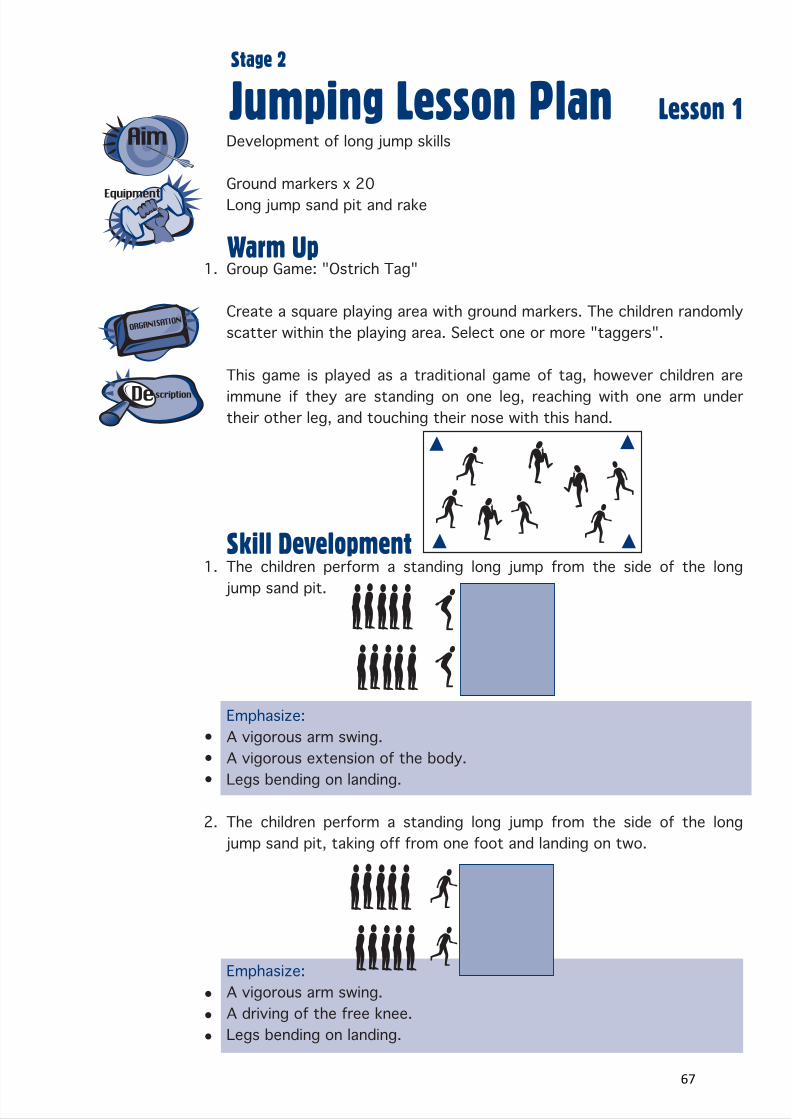
Create a square playing area with ground markers. The children randomly scatter within the playing area. Select one or more "taggers".
This game is played as a traditional game of tag, however children are immune if they are standing on one leg, reaching with one arm under their other leg, and touching their nose with this hand.
The children perform a standing long jump from the side of the long jump sand pit.
Emphasize:A vigorous arm swing.A vigorous extension of the body.Legs bending on landing.
The children perform a standing long jump from the side of the long jump sand pit, taking off from one foot and landing on two.
Emphasize:A vigorous arm swing.A driving of the free knee.Legs bending on landing.
67

Jumping Lesson Plan Lesson 1
Stage 2
JU
MP
S
TA
RT
:
L
es
so
n
Pl
an
s
an
d
Te
ac
he
rs
N
ot
es
•••
1.
1.
"Jump to the Trapeze" - From a walk or jog approach, the children jump, visualising that they are jumping to grab hold of a trapeze at the circus and swinging on it.
Emphasize:Reaching of arms above head.A driving of the free knee.Legs bending on landing.
Game: "Long Jump Relay"
Mark a ten metre long jump run up. Landing is in a long jump pit marked in three even zones. The first zone begins about one metre from the take off area. A ground marker is placed three metres beyond the end of the last zone.
The children line up at the start of the ten metre run up. The first child runs in, jumps, lands in the pit, runs around the marker at the end of the pit, and runs back to tag the next child in line. Each jump scores points according to the zone landed in. See how many points the players can score in a pre-determined time limit. Eg. 5 minutes.
Away from the pit, instruct the children in how to measure a long jump run up*. Allow them to practice in small groups, away from the pit.
1 2 3
Long Jump Game
Skill Development
68
LAANSW ASAP Level 3
JU
MP
S
TA
RT
:
L
es
so
n
Pl
an
s
an
d
Te
ac
he
rs
N
ot
es
Jumping Lesson Plan Lesson 1
Stage 2
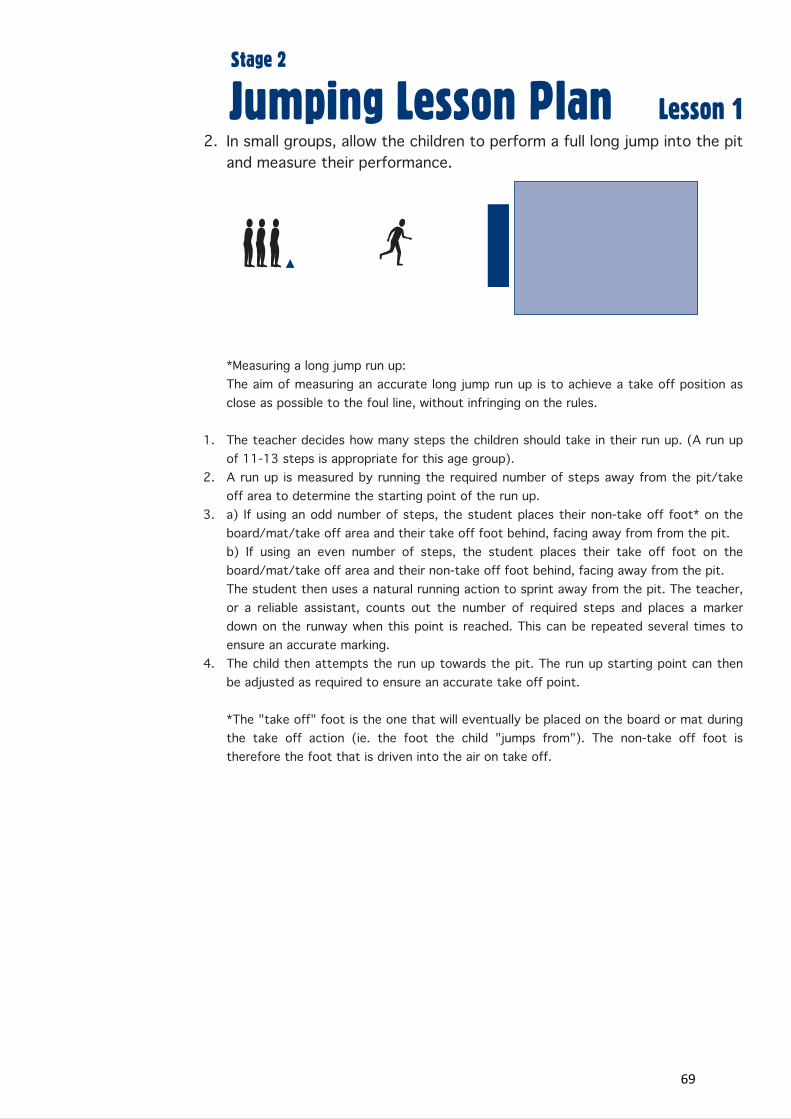
2. In small groups, allow the children to perform a full long jump into the pitand measure their performance.
*Measuring a long jump run up:The aim of measuring an accurate long jump run up is to achieve a take off position asclose as possible to the foul line, without infringing on the rules.
The teacher decides how many steps the children should take in their run up. (A run up of 11-13 steps is appropriate for this age group).A run up is measured by running the required number of steps away from the pit/take off area to determine the starting point of the run up.a) If using an odd number of steps, the student places their non-take off foot* on theboard/mat/take off area and their take off foot behind, facing away from from the pit.b) If using an even number of steps, the student places their take off foot on theboard/mat/take off area and their non-take off foot behind, facing away from the pit.The student then uses a natural running action to sprint away from the pit. The teacher,or a reliable assistant, counts out the number of required steps and places a markerdown on the runway when this point is reached. This can be repeated several times toensure an accurate marking.The child then attempts the run up towards the pit. The run up starting point can thenbe adjusted as required to ensure an accurate take off point.
*The "take off" foot is the one that will eventually be placed on the board or mat duringthe take off action (ie. the foot the child "jumps from"). The non-take off foot istherefore the foot that is driven into the air on take off.
1.
2.
3.
4.
69
LAANSW ASAP Level 3
JU
MP
S
TA
RT
:
L
es
so
n
Pl
an
s
an
d
Te
ac
he
rs
N
ot
es
Jumping Lesson Plan
Warm Up
Lesson 2
Stage 2
1.
1.
•••
Skill Development
High Jump Game
Development of a high jump scissors technique
Ground markers x 20Skipping ropes x 6High jump landing area, uprights, flexi bar
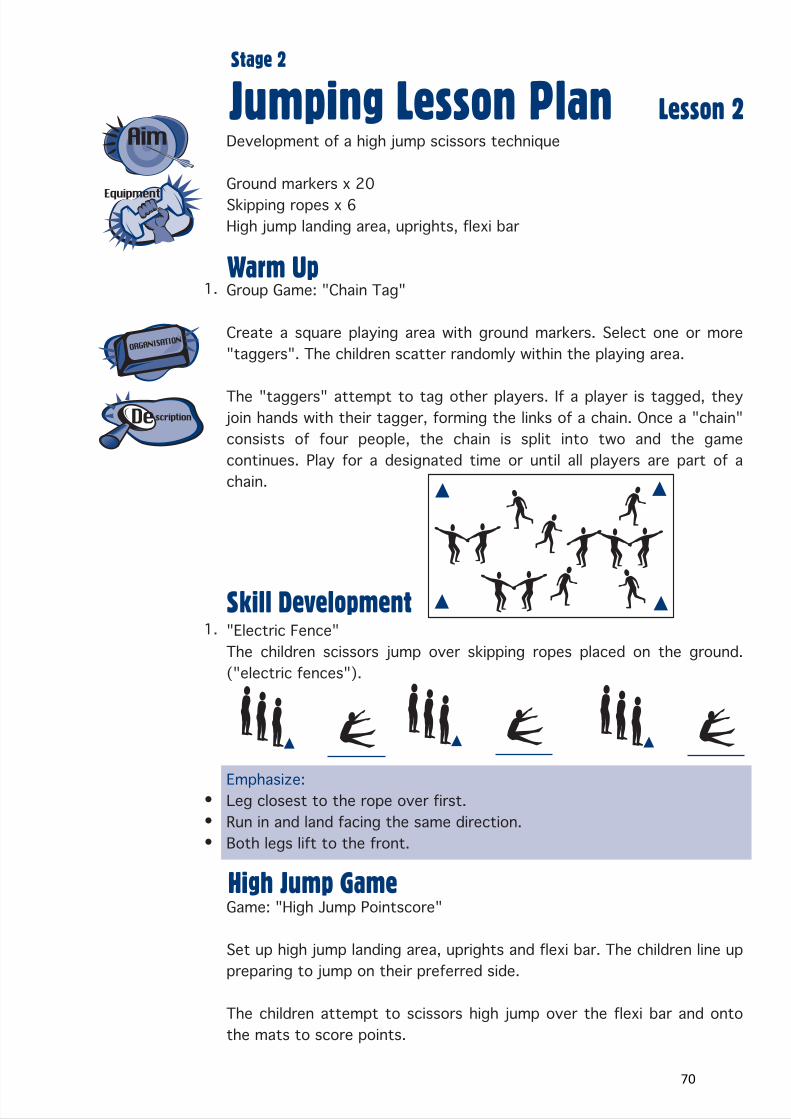
Group Game: "Chain Tag"
Create a square playing area with ground markers. Select one or more "taggers". The children scatter randomly within the playing area.
The "taggers" attempt to tag other players. If a player is tagged, they join hands with their tagger, forming the links of a chain. Once a "chain" consists of four people, the chain is split into two and the game continues. Play for a designated time or until all players are part of a chain.
"Electric Fence"The children scissors jump over skipping ropes placed on the ground. ("electric fences").
Emphasize:Leg closest to the rope over first.Run in and land facing the same direction.Both legs lift to the front.
Game: "High Jump Pointscore"
Set up high jump landing area, uprights and flexi bar. The children line up preparing to jump on their preferred side.
The children attempt to scissors high jump over the flexi bar and onto the mats to score points.
70
Jumping Lesson Plan Lesson 2
Stage 2
JU
MP
S
TA
RT
:
L
es
so
n
Pl
an
s
an
d
Te
ac
he
rs
N
ot
es
1.
The point score is:Correct take offer foot = 1 pointUpright landing = 1 pointClear bar = 1 pointThe teacher provides feedback to the children on their score. Players keep their individual total, or may add their points to a progressive team score.
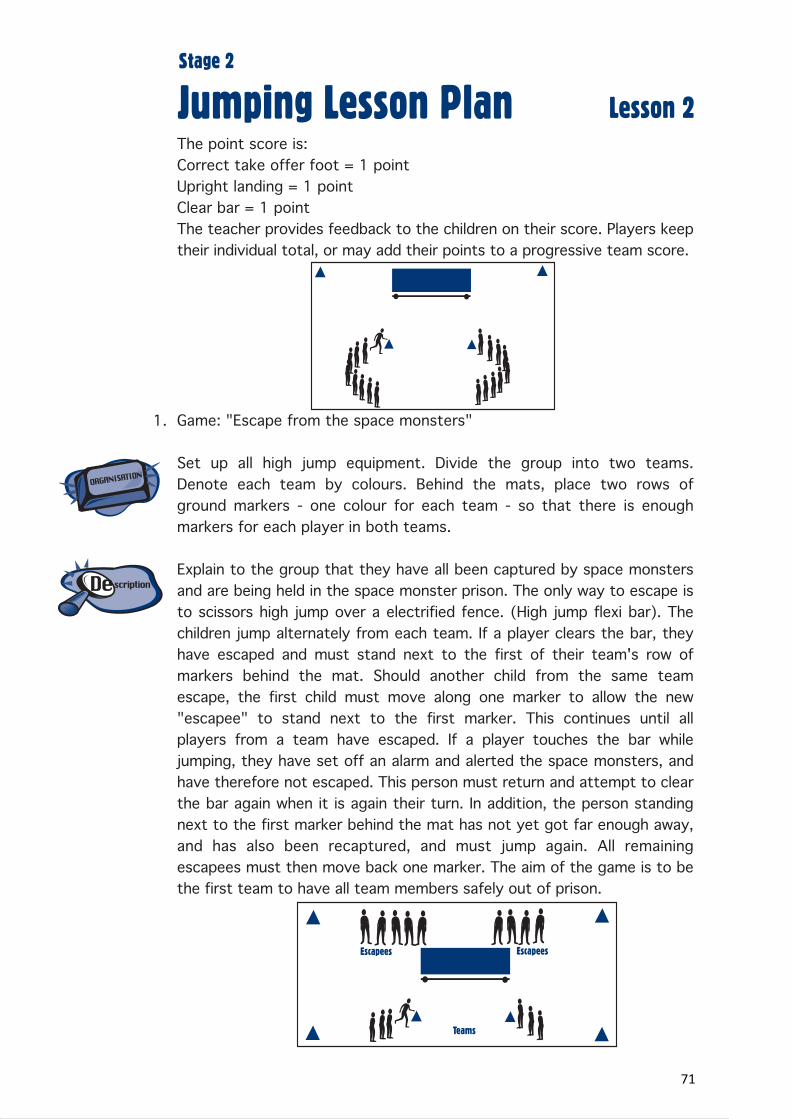
Game: "Escape from the space monsters"
Set up all high jump equipment. Divide the group into two teams. Denote each team by colours. Behind the mats, place two rows of ground markers - one colour for each team - so that there is enough markers for each player in both teams.
Explain to the group that they have all been captured by space monsters and are being held in the space monster prison. The only way to escape is to scissors high jump over a electrified fence. (High jump flexi bar). The children jump alternately from each team. If a player clears the bar, they have escaped and must stand next to the first of their team's row of markers behind the mat. Should another child from the same team escape, the first child must move along one marker to allow the new "escapee" to stand next to the first marker. This continues until all players from a team have escaped. If a player touches the bar while jumping, they have set off an alarm and alerted the space monsters, and have therefore not escaped. This person must return and attempt to clear the bar again when it is again their turn. In addition, the person standing next to the first marker behind the mat has not yet got far enough away, and has also been recaptured, and must jump again. All remaining escapees must then move back one marker. The aim of the game is to be the first team to have all team members safely out of prison.
EscapeesEscapees
Teams
71
LAANSW ASAP Level 3
JU
MP
S
TA
RT
:
L
es
so
n
Pl
an
s
an
d
Te
ac
he
rs
N
ot
es
Throwing Lesson Plan
Warm Up
Lesson 1
Stage 2
1.
2.•
1.
•
Development of a standing shot put technique
Ground markers x 20Shots* of appropriate size (minimum of six - one between two better)Hoops x 6-15(*Schools without enough shots can use softballs, etc., to substitute for real implement. Teachers should be aware, however, that the lighter the substitute implement, the more tempted the children will be to use an incorrect throwing arm action.
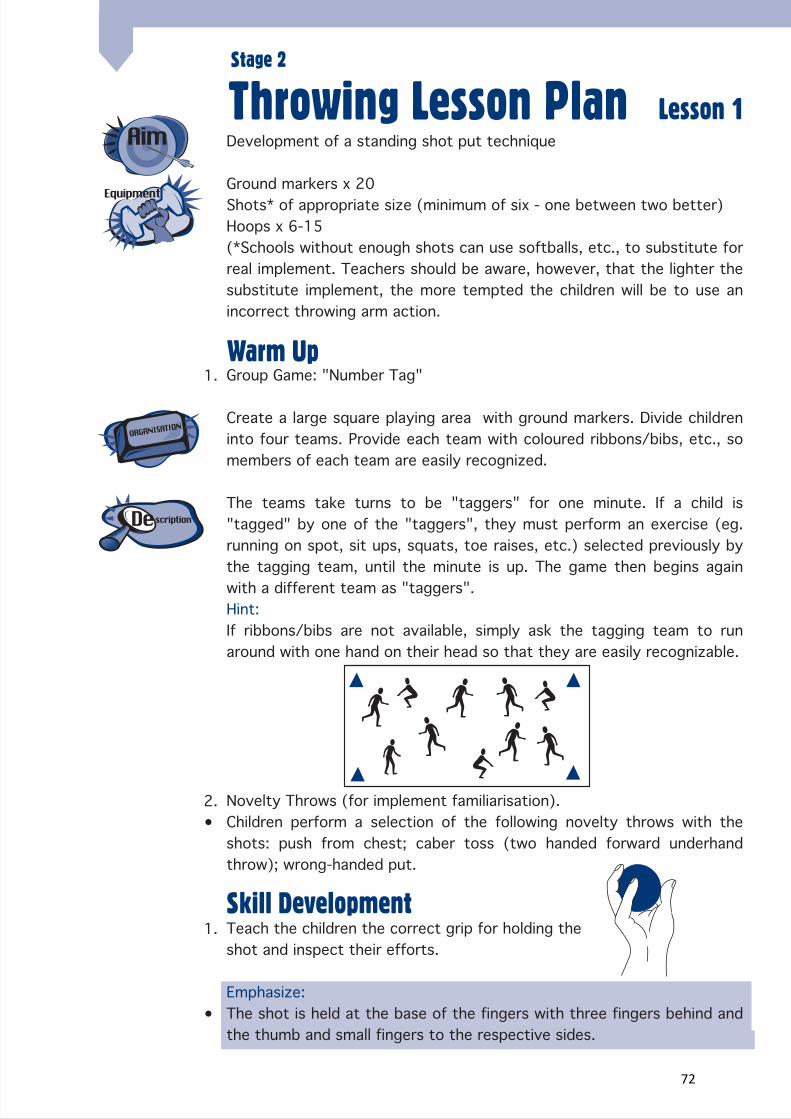
Group Game: "Number Tag"
Create a large square playing area with ground markers. Divide children into four teams. Provide each team with coloured ribbons/bibs, etc., so members of each team are easily recognized.
The teams take turns to be "taggers" for one minute. If a child is "tagged" by one of the "taggers", they must perform an exercise (eg. running on spot, sit ups, squats, toe raises, etc.) selected previously by the tagging team, until the minute is up. The game then begins again with a different team as "taggers".Hint:If ribbons/bibs are not available, simply ask the tagging team to run around with one hand on their head so that they are easily recognizable.
Novelty Throws (for implement familiarisation).Children perform a selection of the following novelty throws with the shots: push from chest; caber toss (two handed forward underhand throw); wrong-handed put.
Teach the children the correct grip for holding theshot and inspect their efforts.
Emphasize:The shot is held at the base of the fingers with three fingers behind and the thumb and small fingers to the respective sides.
Skill Development
72
Throwing Lesson Plan Lesson 1
Stage 2
JU
MP
S
TA
RT
:
L
es
so
n
Pl
an
s
an
d
Te
ac
he
rs
N
ot
es
2.
•
3.
••
4.
••
•
•
1.
1 2 3 4 5
Ensure that the children understand the correct positioning of the shot prior to performing a put.Emphasize:Shot against neck, under jaw, in front of ear. (Hold shot next to windpipe).
The children put the shot into the ground to a target approximately 1 -1.5m away.
Emphasize:Correct grip.Throwing hand follows shot towards target; drive shot down to target.
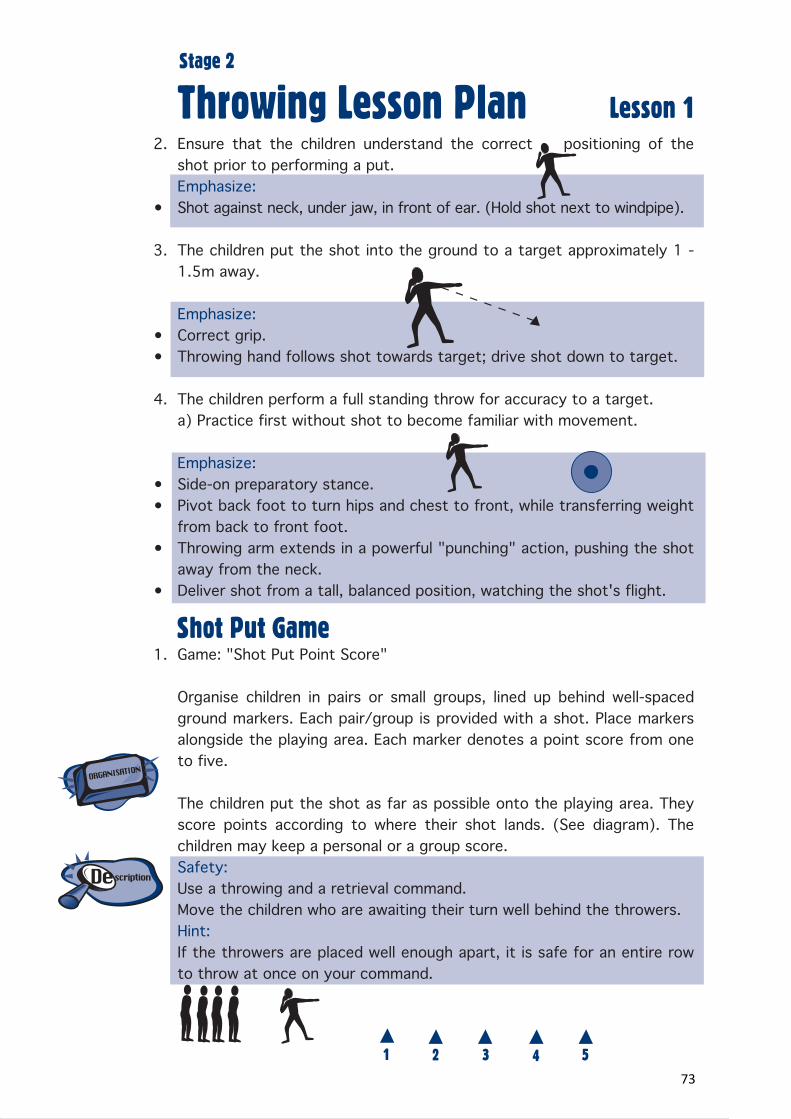
The children perform a full standing throw for accuracy to a target.a) Practice first without shot to become familiar with movement.
Emphasize:Side-on preparatory stance.Pivot back foot to turn hips and chest to front, while transferring weight from back to front foot.Throwing arm extends in a powerful "punching" action, pushing the shot away from the neck.Deliver shot from a tall, balanced position, watching the shot's flight.
Game: "Shot Put Point Score"
Organise children in pairs or small groups, lined up behind well-spaced ground markers. Each pair/group is provided with a shot. Place markers alongside the playing area. Each marker denotes a point score from one to five.
The children put the shot as far as possible onto the playing area. They score points according to where their shot lands. (See diagram). The children may keep a personal or a group score.Safety:Use a throwing and a retrieval command.Move the children who are awaiting their turn well behind the throwers.Hint:If the throwers are placed well enough apart, it is safe for an entire row to throw at once on your command.
Shot Put Game
73
JU
MP
S
TA
RT
:
L
es
so
n
Pl
an
s
an
d
Te
ac
he
rs
N
ot
es
Throwing Lesson Plan
Warm Up
Lesson 2
Stage 2
1.
1.
•••
2.
3.
Skill Development
Introduction to the standing discus throw
Ground markers x 20Discus of appropriate size (minimum of six - more better)Hoops x 6-15
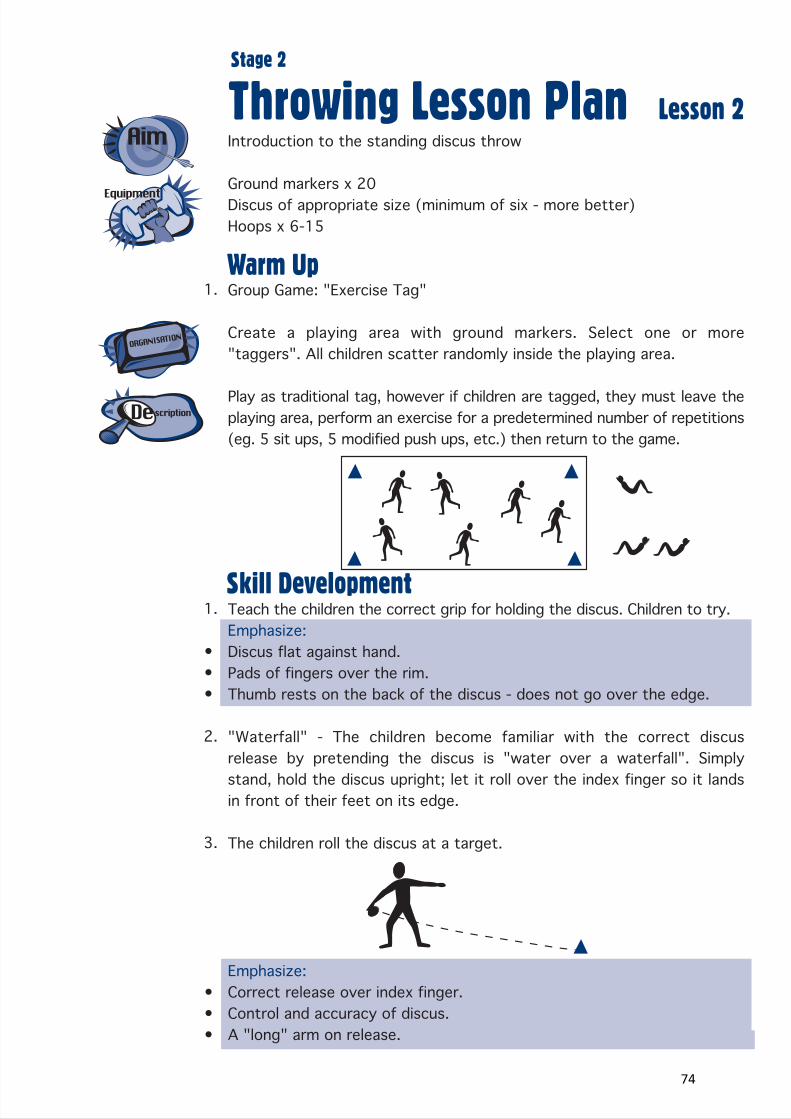
Group Game: "Exercise Tag"
Create a playing area with ground markers. Select one or more "taggers". All children scatter randomly inside the playing area.
Play as traditional tag, however if children are tagged, they must leave the playing area, perform an exercise for a predetermined number of repetitions (eg. 5 sit ups, 5 modified push ups, etc.) then return to the game.
Teach the children the correct grip for holding the discus. Children to try.Emphasize:Discus flat against hand.Pads of fingers over the rim.Thumb rests on the back of the discus - does not go over the edge.
"Waterfall" - The children become familiar with the correct discus release by pretending the discus is "water over a waterfall". Simply stand, hold the discus upright; let it roll over the index finger so it lands in front of their feet on its edge.
The children roll the discus at a target.
Emphasize:Correct release over index finger.Control and accuracy of discus.A "long" arm on release.
•••
74
Stage 3Lesson Plans
•
•
•
Running
Jumping
Throwing
- Lesson 1- Lesson 2- Lesson 3- Lesson 4
- Lesson 1- Lesson 2
- Lesson 1- Lesson 2
75

JU
MP
S
TA
RT
:
L
es
so
n
Pl
an
s
an
d
Te
ac
he
rs
N
ot
es
Running Lesson Plan
Warm Up
Lesson 1
Stage 3
1.
1.
••
2.
3.
Skill Development
Development of running techniqueIntroduction to the crouch start
Ground markers x 30
Group Game: "Optional Tag"
Divide a square playing area into two halves. Select one "tagger" for each half of the playing area. The other children scatter anywhere within the playing area.
The "taggers" must remain within their half of the playing area. The other children may run anywhere within the playing area. If tagged, a child becomes the new tagger in the half of the playing area in which they were tagged.
The children march over a line of ground markers with their hands:a) On their hips.b) On their heads.c) Stretched out to the sides at shoulder level.
Emphasize:Upper body control.Stepping over the opposite knee.
Attempt the same as above, but stepping quickly (running), maintaining upper body control.
a) The children sit down in a "tall" position and practice the correct useof their arms.b) Ask them to swing their arms quickly while maintaining sound postureand arm control.
The children run over the markers, using their arms, maintaining a sound technique.
4.
76

Running Lesson Plan Lesson 1
Stage 3
JU
MP
S
TA
RT
:
L
es
so
n
Pl
an
s
an
d
Te
ac
he
rs
N
ot
es
••
4.
•••••
••
•
1.
Emphasize:Light, rhythmic steps.Bent swinging arms.
Instruct the children in how to perform a crouch start.
Emphasize:"On your marks"Front foot a forearm's length behind the line (finger tips to elbow).Knee placed on ground next to toes of front foot.Fist-width between foot and knee.Hands shoulder-width apart; behind, not on line.Head down; vision down."Set"Raise hips slightly higher than shoulders.Front leg approximately 90 degrees; back leg approximately 120 degrees."Go"Drive arms and legs.
Game: "Dominoes".
The children arrange themselves in a straight line, all facing in the same direction, towards a designated "finish line".
Standing at the head of the line, the teacher calls "On your marks . . . Set . . ." but does not call "Go". Instead, they tap the child closest to them on the elbow or shoulder as a signal for this child to start running to the finish line. Each child in turn then begins running as the child immediately before them in line starts. This creates a domino effect. The game can be made competitive by asking players to attempt to pass the person who started immediately before them.
To complete the lesson, simply allow the children to compete in some fun races.
2.
Starting Game
77
JU
MP
S
TA
RT
:
L
es
so
n
Pl
an
s
an
d
Te
ac
he
rs
N
ot
es
Running Lesson Plan
Warm Up
Lesson 2
Stage 3
1.
1.
•
•
2.
•••
Skill Development
•
Development of an effective circular relay baton passing technique
Relay baton (as many as possible) - minimum of 5
Group Game: "Whistle Command"
Create a square playing area with ground markers. The children spread out around the perimeter.
The children jog around the outside of the area, all moving in the same direction. One blow of the teacher's whistle = perform an exercise selected by the teacher (eg. three sit ups); two blows of the whistle = perform a different exercise selected by the teacher (eg. three tuck jumps); three blows of the whistle = change running direction. Play for a designated time. The children may also skip, hop, etc. around playing area.
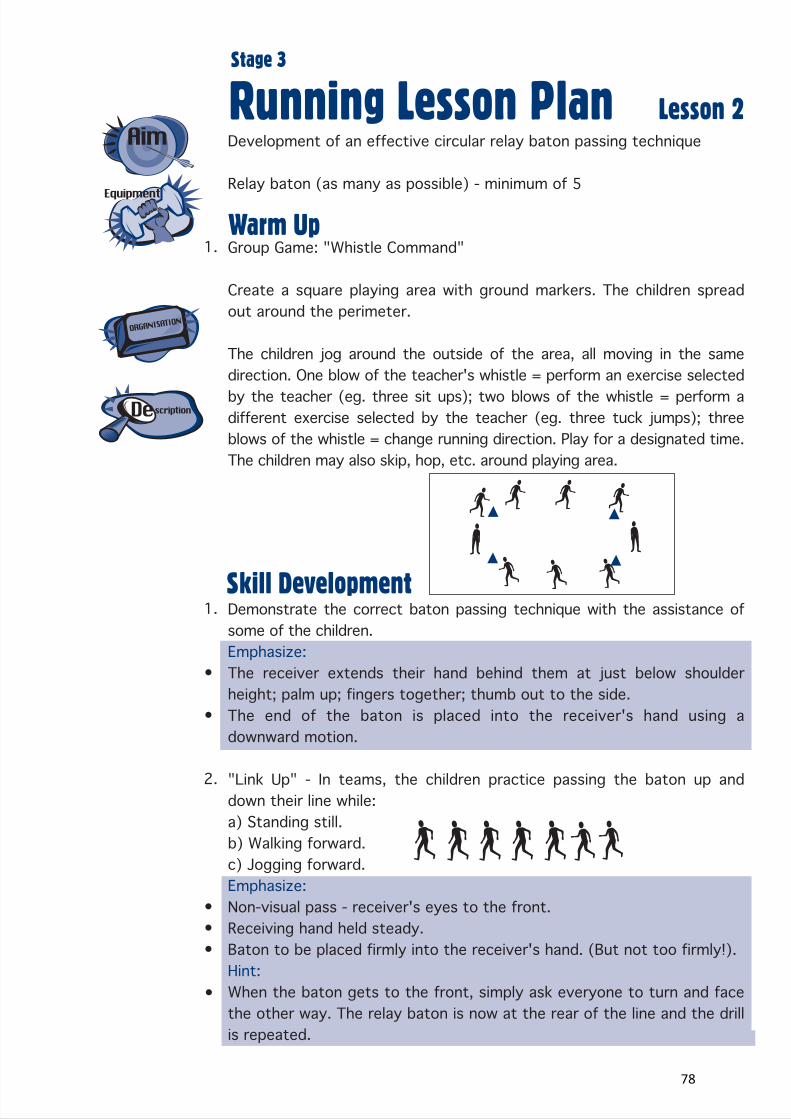
Demonstrate the correct baton passing technique with the assistance of some of the children.Emphasize:The receiver extends their hand behind them at just below shoulder height; palm up; fingers together; thumb out to the side.The end of the baton is placed into the receiver's hand using a downward motion.
"Link Up" - In teams, the children practice passing the baton up and down their line while:a) Standing still.b) Walking forward.c) Jogging forward.Emphasize:Non-visual pass - receiver's eyes to the front.Receiving hand held steady.Baton to be placed firmly into the receiver's hand. (But not too firmly!).Hint:When the baton gets to the front, simply ask everyone to turn and facethe other way. The relay baton is now at the rear of the line and the drillis repeated.
78

Running Lesson Plan Lesson 2
Stage 3
JU
MP
S
TA
RT
:
L
es
so
n
Pl
an
s
an
d
Te
ac
he
rs
N
ot
es
3. Game: "Relay Zone Changeover"
Set up a twenty metre relay changeover zone and a ten metreacceleration zone using ground markers. In pairs, the players decide whowill be the incoming runner, and who will be the outgoing runner. Theincoming runner stands 20m beyond the start of the acceleration zone.The outgoing runner stands just inside the acceleration zone, lookingback over their shoulder at the incoming runner. A check mark is placedabout six metres behind the start of the acceleration zone.
On "Go", the incoming runners sprint towards the outgoing runners. Assoon as an incoming runner reaches the check mark, the correspondingoutgoing runner must turn and sprint as fast as possible towards the endof the twenty metre changeover zone, with their receiving hand extended.The incoming runner aims to place the baton firmly into the outgoingrunner's hand before he/she reaches the end of the changeover zone.
The game does not require an athletics track, or even a full oval, to play.The changeover zones may simply be set up on a square playing area.If space does not permit a 10m acceleration area, the game may be playedwithout it. Simply use the 20m changeover zone as the changeover area.Also, the incoming runner does not necessarily need a 20m run in beforereaching the changeover area. Finally, while it is ideal to use 20mchangeover zone, shortening this area by a few metres will not overlyaffect the game. It should be noted that as the changeover area isdecreased, it may be necessary to move the check mark, suggested to be6m behind the acceleration line, slightly closer to the changeover area.
Game: "Two vs One"
The changeover and acceleration areas, and the check marks, are set up as in "Relay Zone Changeover". In groups of three, the children decide who will compete against the other two. The incoming runner and single runner stand 20m beyond the start of the acceleration zone. The outgoing runner stands just inside the acceleration zone, looking back over their shoulder at the incoming runner.
1.Relay Game
Acceleration zone
Changeover ZoneCheck mark Distance
20m 20m10m
6m
79
JU
MP
S
TA
RT
:
L
es
so
n
Pl
an
s
an
d
Te
ac
he
rs
N
ot
es
Running Lesson Plan Lesson 2
Stage 3
2.
3.
Acceleration zone
Changeover ZoneCheck mark Distance
20m 20m10m
6m
On "Go", the incoming runner and outgoing runner attempt to make a fast and clean baton exchange within the changeover zone. At the same time, the single runner attempts to beat the baton to the end of the changeover zone.
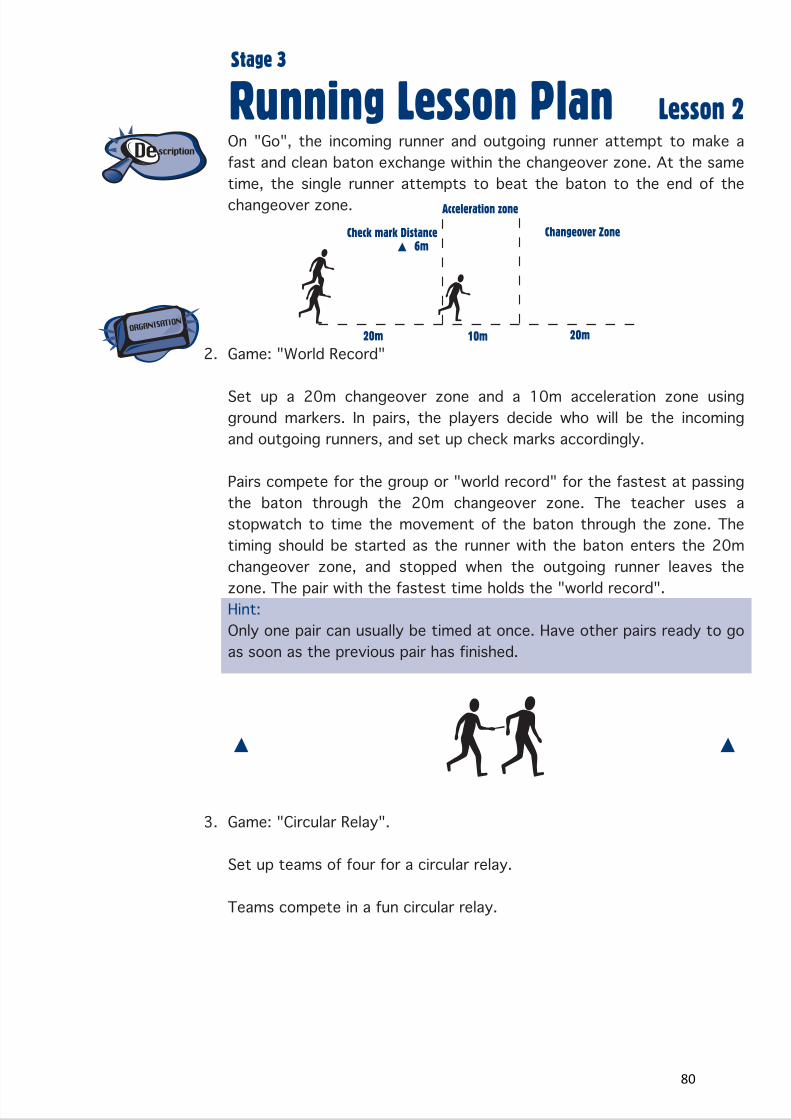
Game: "World Record"
Set up a 20m changeover zone and a 10m acceleration zone using ground markers. In pairs, the players decide who will be the incoming and outgoing runners, and set up check marks accordingly.
Pairs compete for the group or "world record" for the fastest at passing the baton through the 20m changeover zone. The teacher uses a stopwatch to time the movement of the baton through the zone. The timing should be started as the runner with the baton enters the 20m changeover zone, and stopped when the outgoing runner leaves the zone. The pair with the fastest time holds the "world record".Hint:Only one pair can usually be timed at once. Have other pairs ready to go as soon as the previous pair has finished.
Game: "Circular Relay".
Set up teams of four for a circular relay.
Teams compete in a fun circular relay.
80
JU
MP
S
TA
RT
:
Running Lesson Plan
Warm Up
Lesson 3
Stage 3
1.
1.Skill Development
••
Development of middle distance/cross country running skills
Ground markers x 30
Group Game: "Turn over the hats"
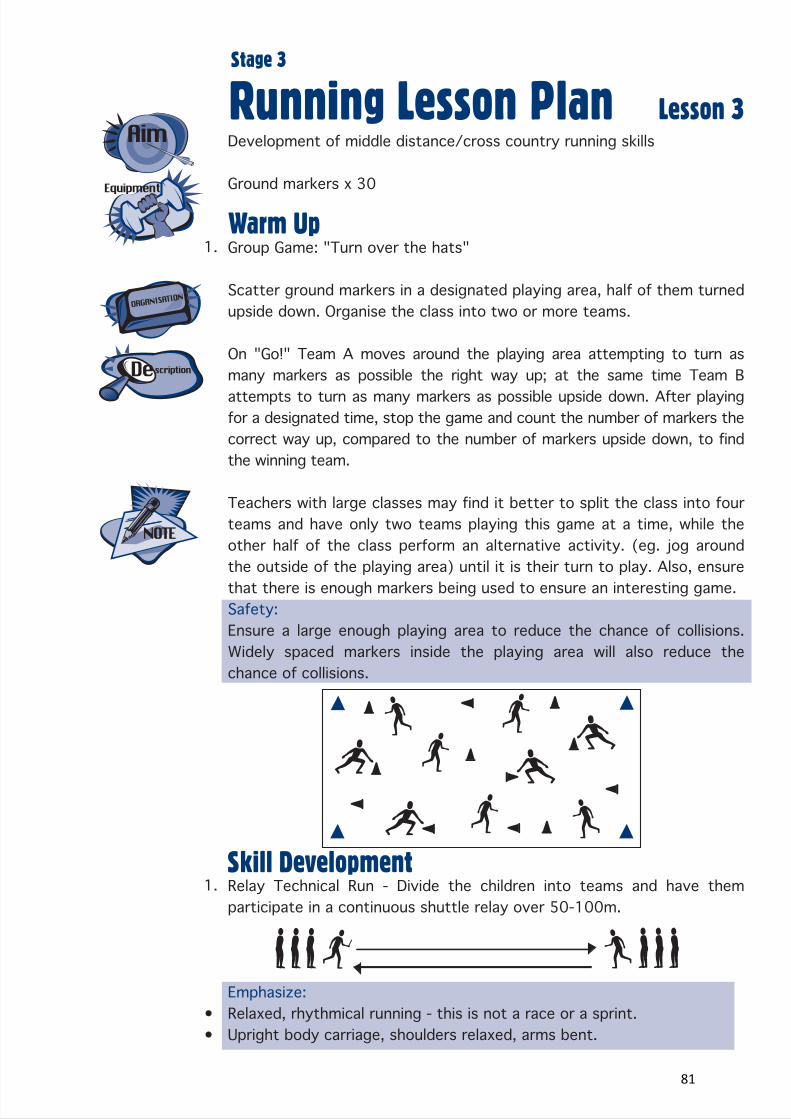
Scatter ground markers in a designated playing area, half of them turned upside down. Organise the class into two or more teams.
On "Go!" Team A moves around the playing area attempting to turn as many markers as possible the right way up; at the same time Team B attempts to turn as many markers as possible upside down. After playing for a designated time, stop the game and count the number of markers the correct way up, compared to the number of markers upside down, to find the winning team.
Teachers with large classes may find it better to split the class into four teams and have only two teams playing this game at a time, while the other half of the class perform an alternative activity. (eg. jog around the outside of the playing area) until it is their turn to play. Also, ensure that there is enough markers being used to ensure an interesting game.Safety:Ensure a large enough playing area to reduce the chance of collisions. Widely spaced markers inside the playing area will also reduce the chance of collisions.
Relay Technical Run - Divide the children into teams and have them participate in a continuous shuttle relay over 50-100m.
Emphasize:Relaxed, rhythmical running - this is not a race or a sprint.Upright body carriage, shoulders relaxed, arms bent.
81
Running Lesson Plan Lesson 3
Stage 3
1.
2.
3.
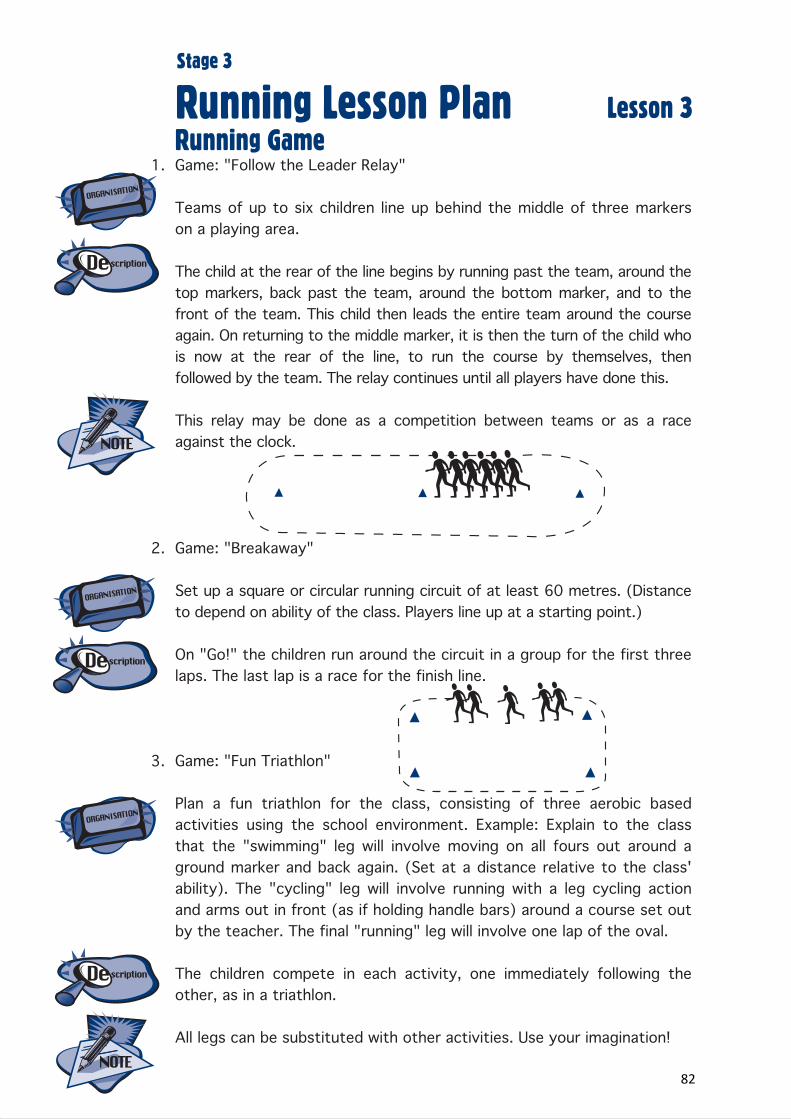
Game: "Follow the Leader Relay"
Teams of up to six children line up behind the middle of three markers on a playing area.
The child at the rear of the line begins by running past the team, around the top markers, back past the team, around the bottom marker, and to the front of the team. This child then leads the entire team around the course again. On returning to the middle marker, it is then the turn of the child who is now at the rear of the line, to run the course by themselves, then followed by the team. The relay continues until all players have done this.
This relay may be done as a competition between teams or as a race against the clock.
Game: "Breakaway"
Set up a square or circular running circuit of at least 60 metres. (Distance to depend on ability of the class. Players line up at a starting point.)
On "Go!" the children run around the circuit in a group for the first three laps. The last lap is a race for the finish line.
Game: "Fun Triathlon"
Plan a fun triathlon for the class, consisting of three aerobic based activities using the school environment. Example: Explain to the class that the "swimming" leg will involve moving on all fours out around a ground marker and back again. (Set at a distance relative to the class' ability). The "cycling" leg will involve running with a leg cycling action and arms out in front (as if holding handle bars) around a course set out by the teacher. The final "running" leg will involve one lap of the oval.
The children compete in each activity, one immediately following the other, as in a triathlon.
All legs can be substituted with other activities. Use your imagination!
Running Game
82
Running Lesson Plan
Warm Up
Lesson 4
Stage 3
1.
1.
•
2.
Skill Development
••••
Development of hurdling skills
Ground markers x 30Soft hurdles x 10 - appropriate height for age group
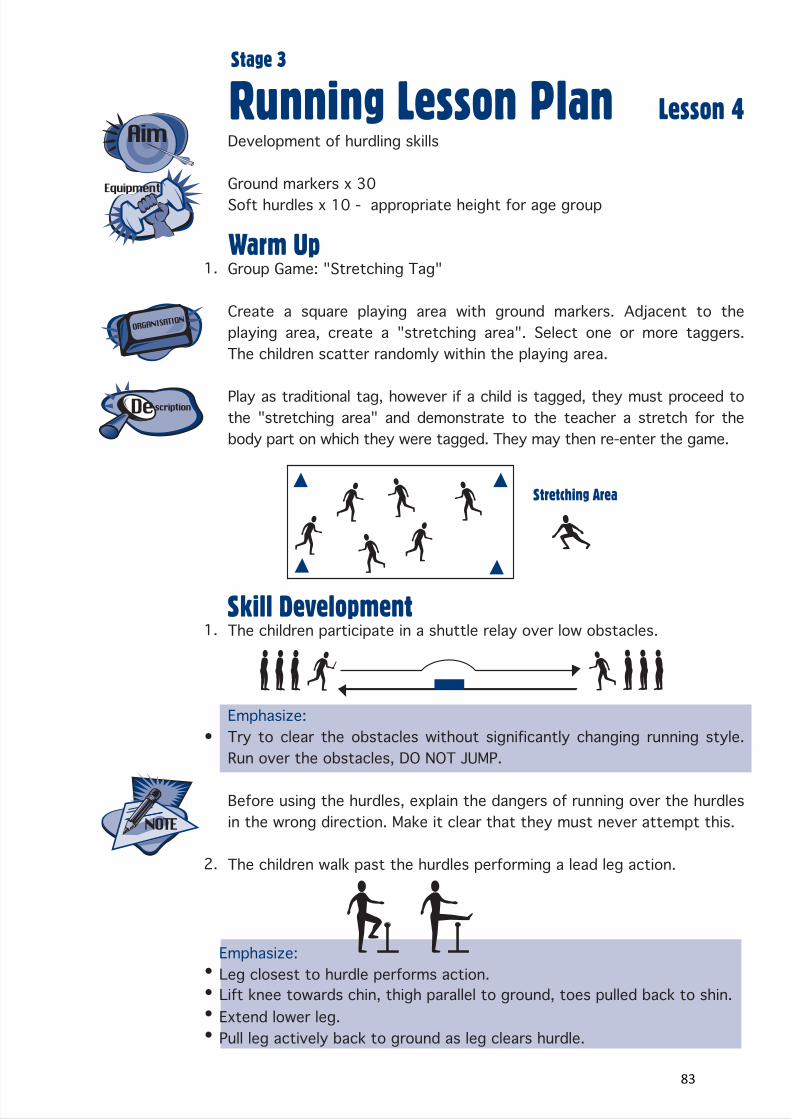
Group Game: "Stretching Tag"
Create a square playing area with ground markers. Adjacent to the playing area, create a "stretching area". Select one or more taggers. The children scatter randomly within the playing area.
Play as traditional tag, however if a child is tagged, they must proceed to the "stretching area" and demonstrate to the teacher a stretch for the body part on which they were tagged. They may then re-enter the game.
The children participate in a shuttle relay over low obstacles.
Emphasize:Try to clear the obstacles without significantly changing running style. Run over the obstacles, DO NOT JUMP.
Before using the hurdles, explain the dangers of running over the hurdles in the wrong direction. Make it clear that they must never attempt this.
The children walk past the hurdles performing a lead leg action.
Emphasize:Leg closest to hurdle performs action.Lift knee towards chin, thigh parallel to ground, toes pulled back to shin. Extend lower leg.Pull leg actively back to ground as leg clears hurdle.
Stretching Area
83

Running Lesson Plan Lesson 4
Stage 3
JU
MP
S
TA
RT
:
L
es
so
n
Pl
an
s
an
d
Te
ac
he
rs
N
ot
es
3.
•••
•
1.Running Game
The children walk past the hurdles performing a trail leg action.
Emphasize:Leg closest to hurdle performs action.Step past hurdle with lead leg before commencing trail leg.Heel to bottom, knee to chest, stride through.Hint:The trail leg action is very complex. Do not expect any child to be able to perform it competently after one lesson. It can take weeks, months or even years of practice to master a competent trail leg action. The lead leg is far less complex and progression will often be seen after one practice.
Game: "Up and back hurdle relay"
Divide the class into teams. For each team, set up two soft hurdles the correct distance from the start line and the correct distance apart. Ten metres past the second hurdle, place a ground marker.
On "Go!" the first member of each team runs over the two hurdles, around the marker, and back along past the hurdles to their team. (DO NOT allow runners to run back over hurdles). When this runner returns to their team, the second runner performs the same activities, and so on until all children have had a turn. Once the children are competent at the activity, the relay can be made competitive.
84
JU
MP
S
TA
RT
:
Jumping Lesson Plan
Warm Up
Lesson 1
Stage 3
1.
1.
••••2.
3.
Skill Development
•
Develop long jump run up, take off and landing skills
Ground markers x 30Long jump sand pit and rakeStop watches
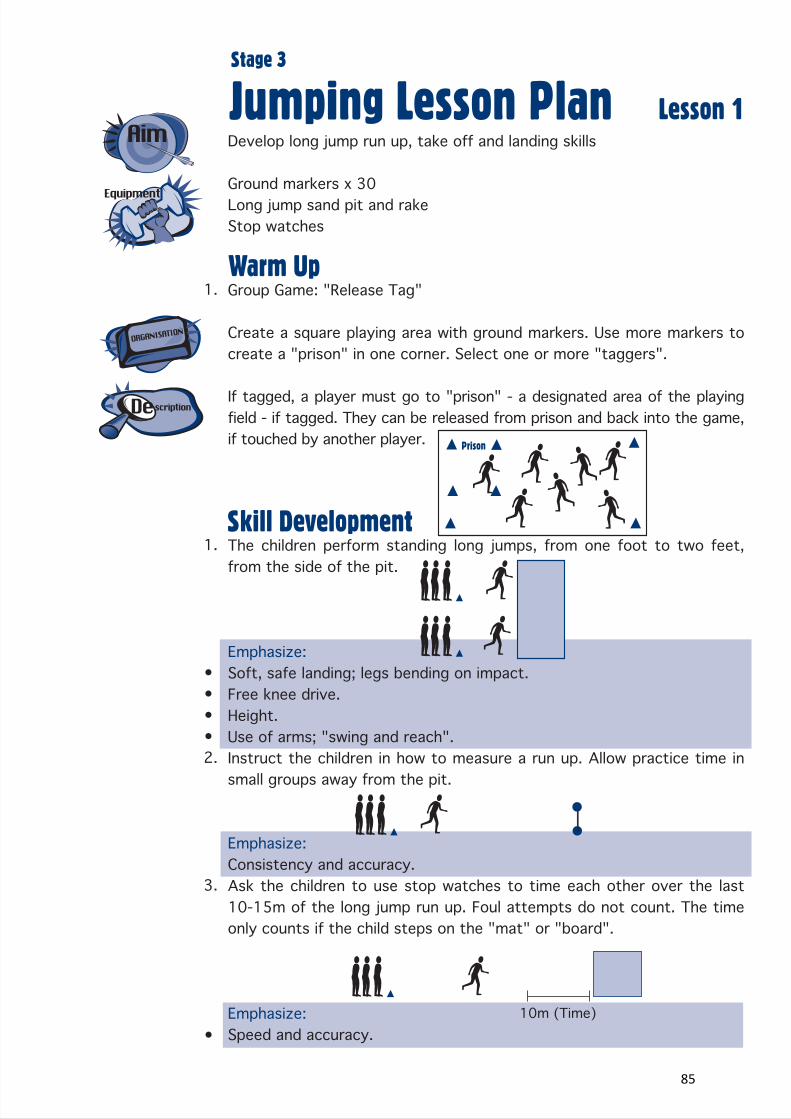
Group Game: "Release Tag"
Create a square playing area with ground markers. Use more markers to create a "prison" in one corner. Select one or more "taggers".
If tagged, a player must go to "prison" - a designated area of the playing field - if tagged. They can be released from prison and back into the game, if touched by another player.
The children perform standing long jumps, from one foot to two feet, from the side of the pit.
Emphasize:Soft, safe landing; legs bending on impact.Free knee drive.Height.Use of arms; "swing and reach".Instruct the children in how to measure a run up. Allow practice time in small groups away from the pit.
Emphasize:Consistency and accuracy.Ask the children to use stop watches to time each other over the last 10-15m of the long jump run up. Foul attempts do not count. The timeonly counts if the child steps on the "mat" or "board".
Emphasize:Speed and accuracy.
Prison
10m (Time)
85
Jumping Lesson Plan Lesson 1
Stage 3
JU
MP
S
TA
RT
:
L
es
so
n
Pl
an
s
an
d
Te
ac
he
rs
N
ot
es
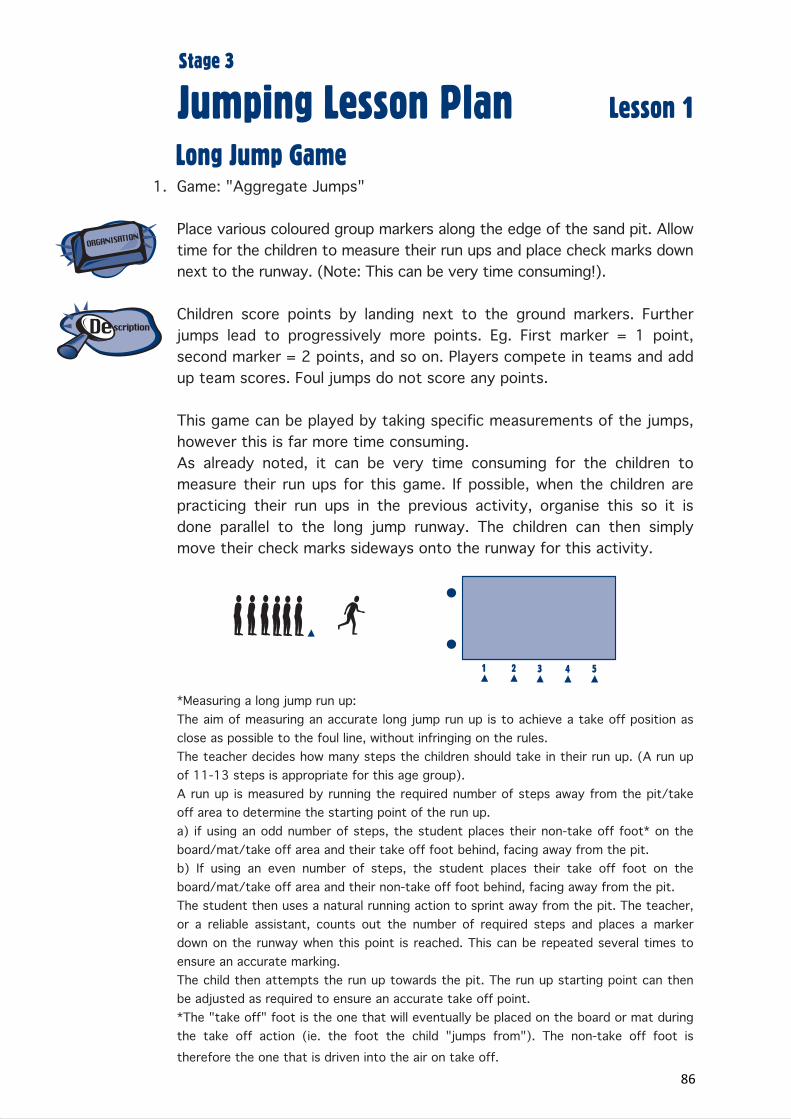
1. Game: "Aggregate Jumps"
Place various coloured group markers along the edge of the sand pit. Allowtime for the children to measure their run ups and place check marks downnext to the runway. (Note: This can be very time consuming!).
Children score points by landing next to the ground markers. Furtherjumps lead to progressively more points. Eg. First marker = 1 point,second marker = 2 points, and so on. Players compete in teams and addup team scores. Foul jumps do not score any points.
This game can be played by taking specific measurements of the jumps,however this is far more time consuming.As already noted, it can be very time consuming for the children tomeasure their run ups for this game. If possible, when the children arepracticing their run ups in the previous activity, organise this so it isdone parallel to the long jump runway. The children can then simplymove their check marks sideways onto the runway for this activity.
*Measuring a long jump run up:The aim of measuring an accurate long jump run up is to achieve a take off position asclose as possible to the foul line, without infringing on the rules.The teacher decides how many steps the children should take in their run up. (A run upof 11-13 steps is appropriate for this age group).A run up is measured by running the required number of steps away from the pit/takeoff area to determine the starting point of the run up.a) if using an odd number of steps, the student places their non-take off foot* on theboard/mat/take off area and their take off foot behind, facing away from the pit.b) If using an even number of steps, the student places their take off foot on theboard/mat/take off area and their non-take off foot behind, facing away from the pit.The student then uses a natural running action to sprint away from the pit. The teacher,or a reliable assistant, counts out the number of required steps and places a markerdown on the runway when this point is reached. This can be repeated several times toensure an accurate marking.The child then attempts the run up towards the pit. The run up starting point can thenbe adjusted as required to ensure an accurate take off point.*The "take off" foot is the one that will eventually be placed on the board or mat duringthe take off action (ie. the foot the child "jumps from"). The non-take off foot istherefore the one that is driven into the air on take off.
Long Jump Game
1 2 3 4 5
86
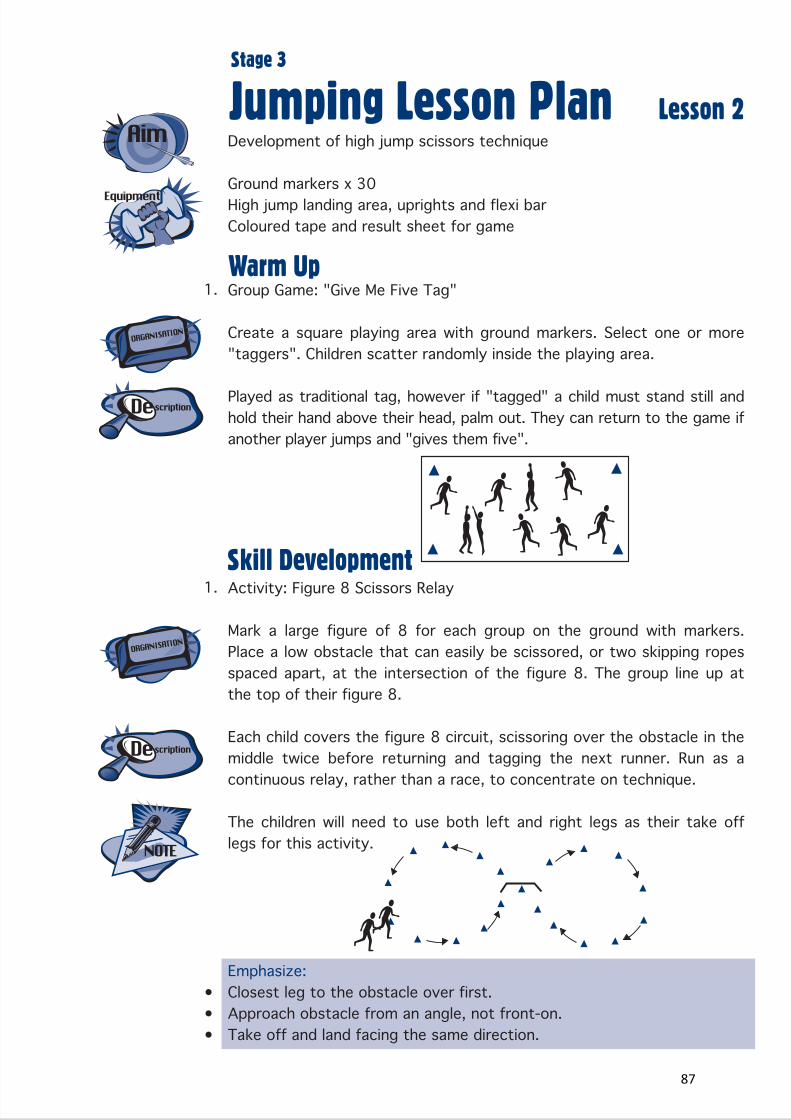
Jumping Lesson Plan
Warm Up
Lesson 2
Stage 3
1.
1.Skill Development
•••
Development of high jump scissors technique
Ground markers x 30High jump landing area, uprights and flexi barColoured tape and result sheet for game
Group Game: "Give Me Five Tag"
Create a square playing area with ground markers. Select one or more "taggers". Children scatter randomly inside the playing area.
Played as traditional tag, however if "tagged" a child must stand still and hold their hand above their head, palm out. They can return to the game if another player jumps and "gives them five".
Activity: Figure 8 Scissors Relay
Mark a large figure of 8 for each group on the ground with markers. Place a low obstacle that can easily be scissored, or two skipping ropes spaced apart, at the intersection of the figure 8. The group line up at the top of their figure 8.
Each child covers the figure 8 circuit, scissoring over the obstacle in the middle twice before returning and tagging the next runner. Run as a continuous relay, rather than a race, to concentrate on technique.
The children will need to use both left and right legs as their take off legs for this activity.
Emphasize:Closest leg to the obstacle over first.Approach obstacle from an angle, not front-on.Take off and land facing the same direction.
87
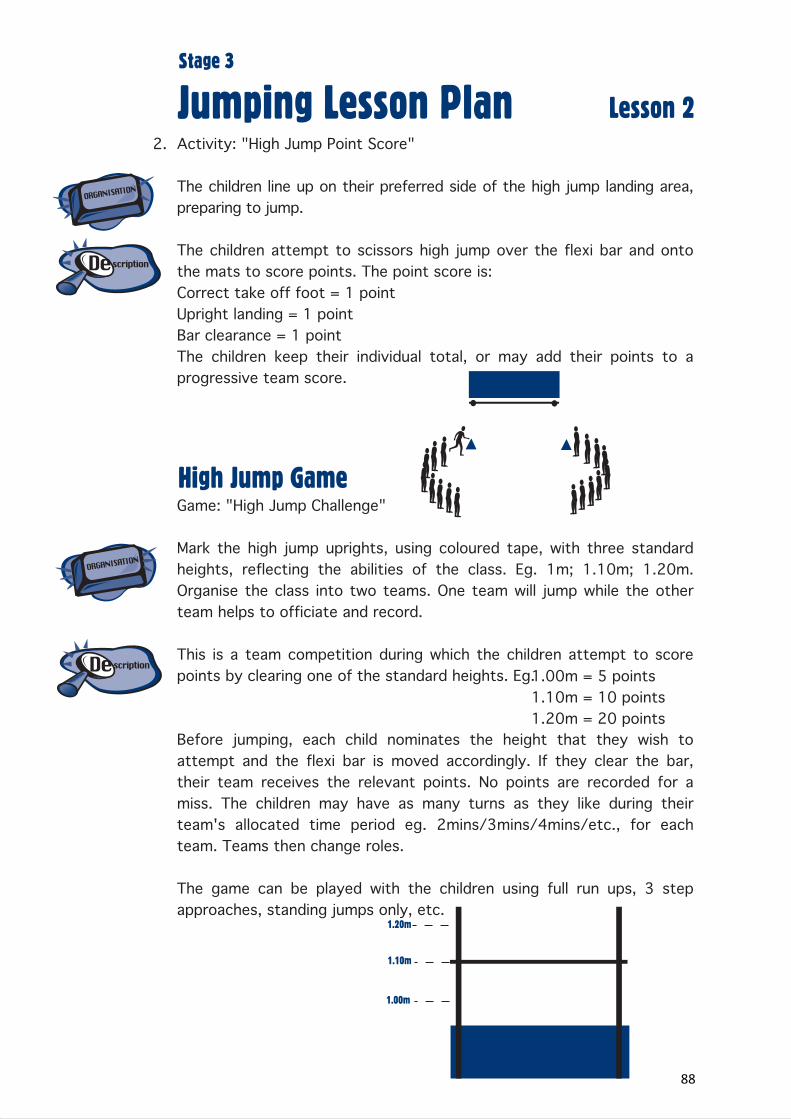
Jumping Lesson Plan Lesson 2
Stage 3
JU
MP
S
TA
RT
:
L
es
so
n
Pl
an
s
an
d
Te
ac
he
rs
N
ot
es
2. Activity: "High Jump Point Score"
The children line up on their preferred side of the high jump landing area,preparing to jump.
The children attempt to scissors high jump over the flexi bar and ontothe mats to score points. The point score is:Correct take off foot = 1 pointUpright landing = 1 pointBar clearance = 1 pointThe children keep their individual total, or may add their points to aprogressive team score.
Game: "High Jump Challenge"
Mark the high jump uprights, using coloured tape, with three standard heights, reflecting the abilities of the class. Eg. 1m; 1.10m; 1.20m. Organise the class into two teams. One team will jump while the other team helps to officiate and record.
This is a team competition during which the children attempt to score points by clearing one of the standard heights. Eg.
Before jumping, each child nominates the height that they wish to attempt and the flexi bar is moved accordingly. If they clear the bar, their team receives the relevant points. No points are recorded for a miss. The children may have as many turns as they like during their team's allocated time period eg. 2mins/3mins/4mins/etc., for each team. Teams then change roles.
The game can be played with the children using full run ups, 3 step approaches, standing jumps only, etc.
1.00m = 5 points1.10m = 10 points1.20m = 20 points
1.00m
1.10m
1.20m
High Jump Game
88
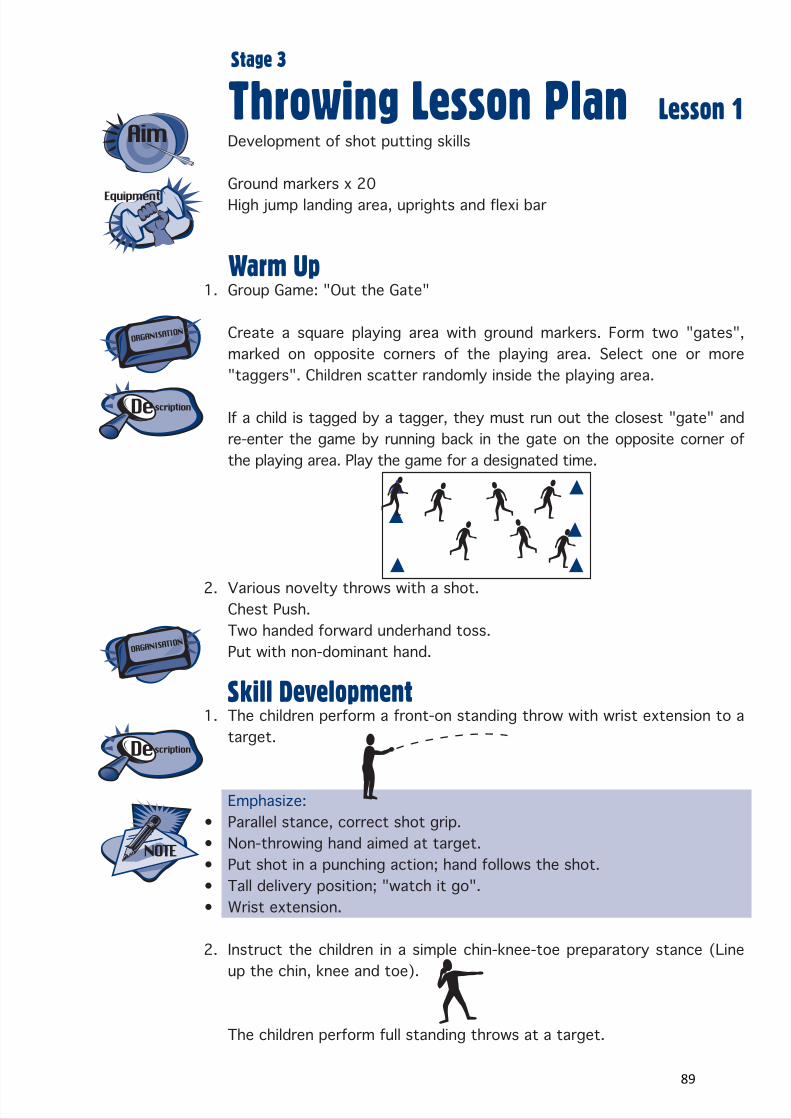
JU
MP
S
TA
RT
:
L
es
so
n
Pl
an
s
an
d
Te
ac
he
rs
N
ot
es
Throwing Lesson Plan
Warm Up
Lesson 1
Stage 3
1.
2.
1.
•••••
2.
Skill Development
Development of shot putting skills
Ground markers x 20High jump landing area, uprights and flexi bar
Group Game: "Out the Gate"
Create a square playing area with ground markers. Form two "gates", marked on opposite corners of the playing area. Select one or more "taggers". Children scatter randomly inside the playing area.
If a child is tagged by a tagger, they must run out the closest "gate" and re-enter the game by running back in the gate on the opposite corner of the playing area. Play the game for a designated time.
Various novelty throws with a shot.Chest Push.Two handed forward underhand toss.Put with non-dominant hand.
The children perform a front-on standing throw with wrist extension to a target.
Emphasize:Parallel stance, correct shot grip.Non-throwing hand aimed at target.Put shot in a punching action; hand follows the shot.Tall delivery position; "watch it go".Wrist extension.
Instruct the children in a simple chin-knee-toe preparatory stance (Line up the chin, knee and toe).
The children perform full standing throws at a target.
89
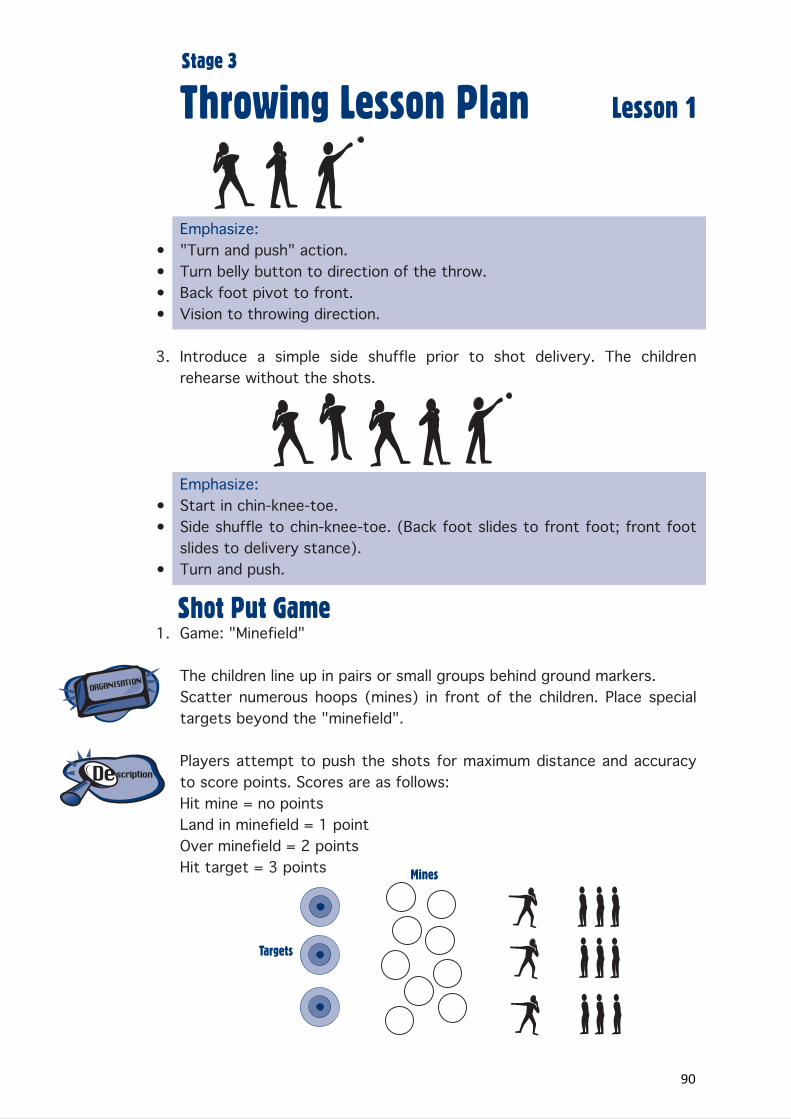
Throwing Lesson Plan Lesson 1
Stage 3
JU
MP
S
TA
RT
:
L
es
so
n
Pl
an
s
an
d
Te
ac
he
rs
N
ot
es
••••
3.
••
•
1.Shot Put Game
Emphasize:"Turn and push" action.Turn belly button to direction of the throw.Back foot pivot to front.Vision to throwing direction.
Introduce a simple side shuffle prior to shot delivery. The children rehearse without the shots.
Emphasize:Start in chin-knee-toe.Side shuffle to chin-knee-toe. (Back foot slides to front foot; front foot slides to delivery stance).Turn and push.
Game: "Minefield"
The children line up in pairs or small groups behind ground markers.Scatter numerous hoops (mines) in front of the children. Place special targets beyond the "minefield".
Players attempt to push the shots for maximum distance and accuracy to score points. Scores are as follows:Hit mine = no pointsLand in minefield = 1 pointOver minefield = 2 pointsHit target = 3 points
Targets
Mines
90
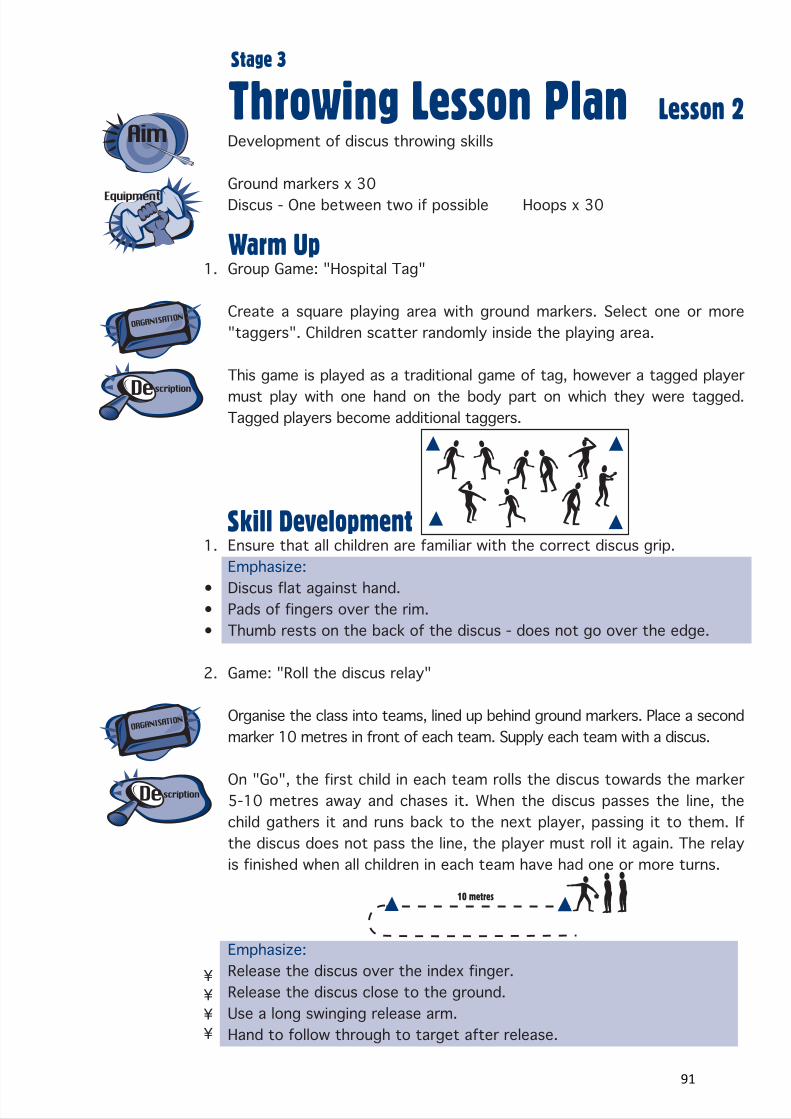
JU
MP
S
TA
RT
:
Throwing Lesson Plan
Warm Up
Lesson 2
Stage 3
1.
1.
•••
2.
Skill Development
Development of discus throwing skills
Ground markers x 30Discus - One between two if possible Hoops x 30
Group Game: "Hospital Tag"
Create a square playing area with ground markers. Select one or more "taggers". Children scatter randomly inside the playing area.
This game is played as a traditional game of tag, however a tagged player must play with one hand on the body part on which they were tagged. Tagged players become additional taggers.
Ensure that all children are familiar with the correct discus grip.Emphasize:Discus flat against hand.Pads of fingers over the rim.Thumb rests on the back of the discus - does not go over the edge.
Game: "Roll the discus relay"
Organise the class into teams, lined up behind ground markers. Place a second marker 10 metres in front of each team. Supply each team with a discus.
On "Go", the first child in each team rolls the discus towards the marker 5-10 metres away and chases it. When the discus passes the line, thechild gathers it and runs back to the next player, passing it to them. Ifthe discus does not pass the line, the player must roll it again. The relayis finished when all children in each team have had one or more turns.
Emphasize:Release the discus over the index finger.Release the discus close to the ground.Use a long swinging release arm.Hand to follow through to target after release.
10 metres
¥¥¥¥
91
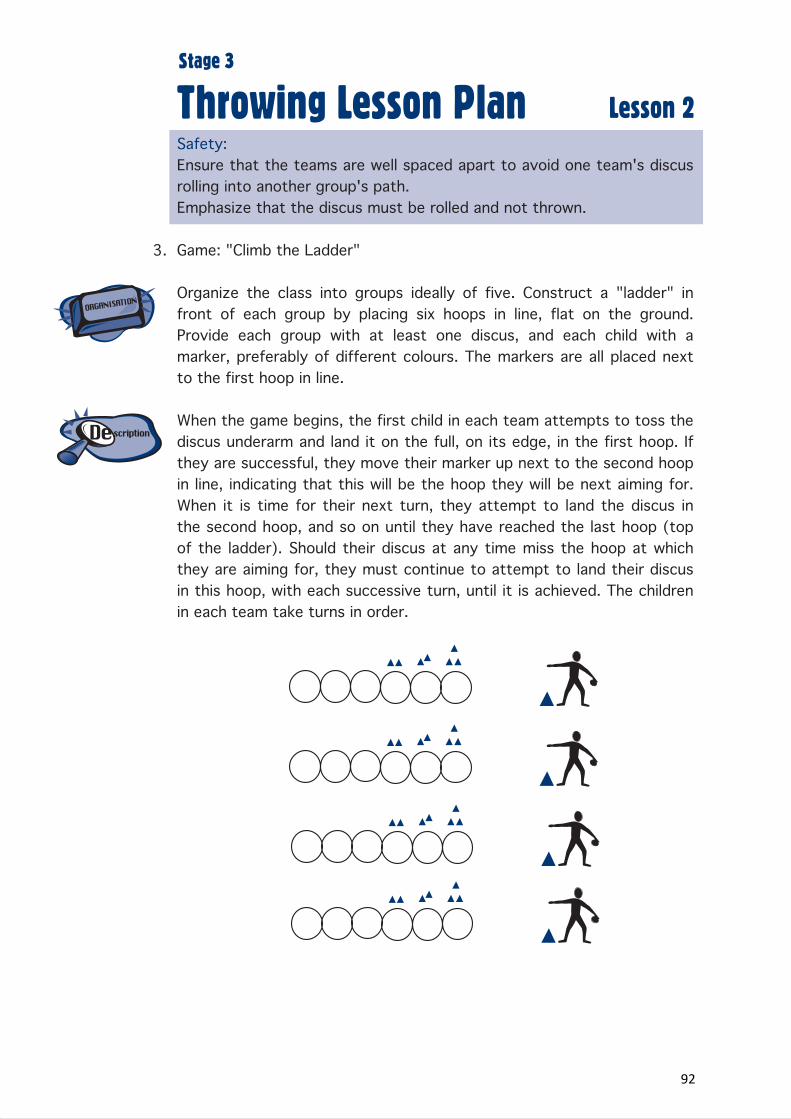
Throwing Lesson Plan Lesson 2
Stage 3
JU
MP
S
TA
RT
:
L
es
so
n
Pl
an
s
an
d
Te
ac
he
rs
N
ot
es
3.
Safety:Ensure that the teams are well spaced apart to avoid one team's discus rolling into another group's path.Emphasize that the discus must be rolled and not thrown.
Game: "Climb the Ladder"
Organize the class into groups ideally of five. Construct a "ladder" in front of each group by placing six hoops in line, flat on the ground. Provide each group with at least one discus, and each child with a marker, preferably of different colours. The markers are all placed next to the first hoop in line.
When the game begins, the first child in each team attempts to toss the discus underarm and land it on the full, on its edge, in the first hoop. If they are successful, they move their marker up next to the second hoop in line, indicating that this will be the hoop they will be next aiming for. When it is time for their next turn, they attempt to land the discus in the second hoop, and so on until they have reached the last hoop (top of the ladder). Should their discus at any time miss the hoop at which they are aiming for, they must continue to attempt to land their discus in this hoop, with each successive turn, until it is achieved. The children in each team take turns in order.
92

JU
MP
S
TA
RT
:
L
es
so
n
Pl
an
s
an
d
Te
ac
he
rs
N
ot
es
Throwing Lesson PlanDiscus Game
Lesson 2
Stage 3
1.
••
Game: "Discus Cricket"
Divide the group into an even number of teams. Select one team in each game to begin as the "batting" team and the other as the "bowling" team. Set up a target or "wicket" for the bowling team to aim for at least 10m from where they are standing. Set up five markers (more for advanced groups), each 5 metres apart, for the batting team to use as a scoring area. Each team goes to their designated area.
Two teams compete against each other. The "batting" team scores "runs" by taking turns throwing a discus to land in the their scoring area. One point is awarded if the discus lands past the first marker, two points if the discus lands past the second marker, and so on. No points are awarded if the discus does not reach the first marker. The "bowling" team takes turns to roll a discus at the wicket to "dismiss" the batters. Wickets are taken by hitting the target.Play until a predetermined number of wickets have been taken, then swap roles.
No "batter" or "bowler" may have two consecutive throws or rolls.Even when wickets are taken by the bowling team, batters are not out of the game. They continue taking turns as normal.
Batters
Bowlers
1234
1234
93