jing&pdf&tutorialtemplate -...
TRANSCRIPT

1 Amber Barnes Microsoft PowerPoint 2011 Mac
Jing PDF Tutorial Template
Developer Name: Amber Barnes
Microsoft App Utilized: Microsoft Power Point 2011 Mac
Video URL from Jing: http://screencast.com/t/zTmS2s9Lg7k
Table of Contents
Function 1 ……………………………………………………………………………………………………pg. 2
Function 2 ……………………………………………………………………………………………………pg.3
Function 3 …………………………………………………………………………………………………pg. 4-‐5
Function 4 …………………………………………………………………………………………………… pg.6
Function 5 ……………………………………………………………………………………………………pg.7
2 Amber Barnes Microsoft PowerPoint 2011 Mac
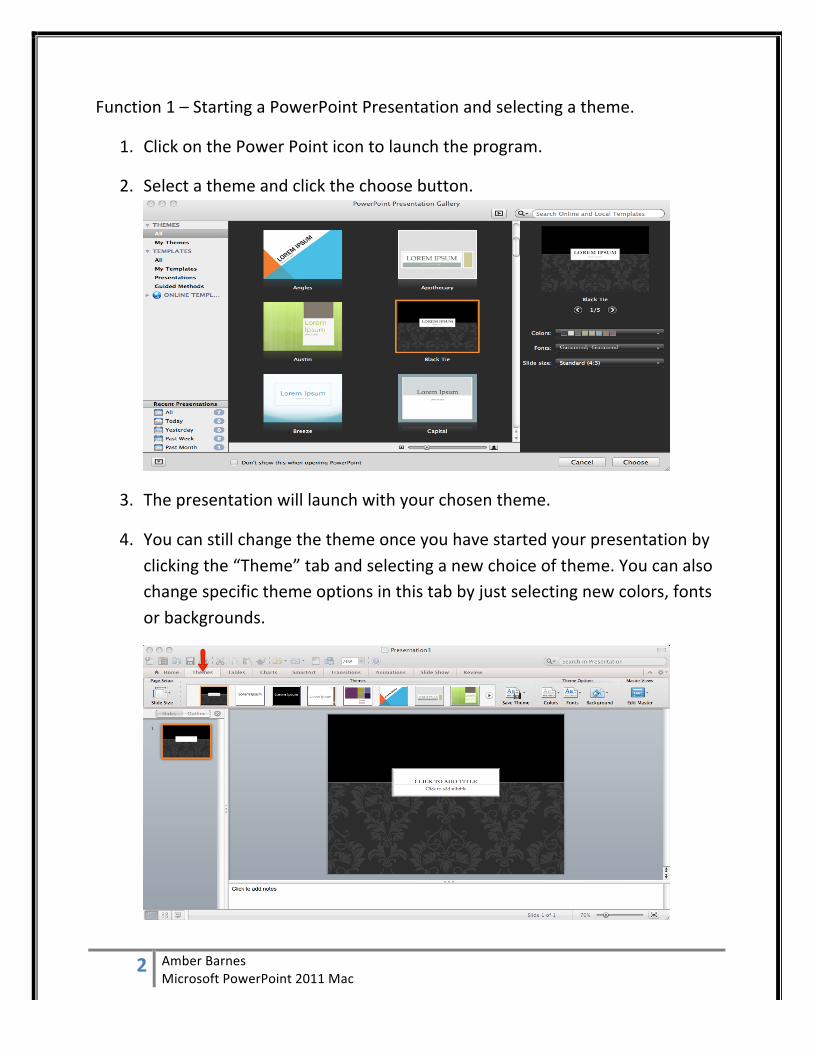
Function 1 – Starting a PowerPoint Presentation and selecting a theme.
1. Click on the Power Point icon to launch the program.
2. Select a theme and click the choose button.
3. The presentation will launch with your chosen theme.
4. You can still change the theme once you have started your presentation by clicking the “Theme” tab and selecting a new choice of theme. You can also change specific theme options in this tab by just selecting new colors, fonts or backgrounds.

3 Amber Barnes Microsoft PowerPoint 2011 Mac
Function 2 – Saving and naming project
1. On slide 1 type the title of your presentation and your name.
2. At the top of your screen click the word “File”.
3. Then choose “Save”. Or you could use the keyboard shortcut “Command + S”.
4. The save menu will open. In the save as box (red arrow) title your power point with your name and title. In the where box (yellow arrow) put the presentation in a easy to find location (ex. My documents or desktop). When that is complete click the “Save” button (green arrow).
4 Amber Barnes Microsoft PowerPoint 2011 Mac
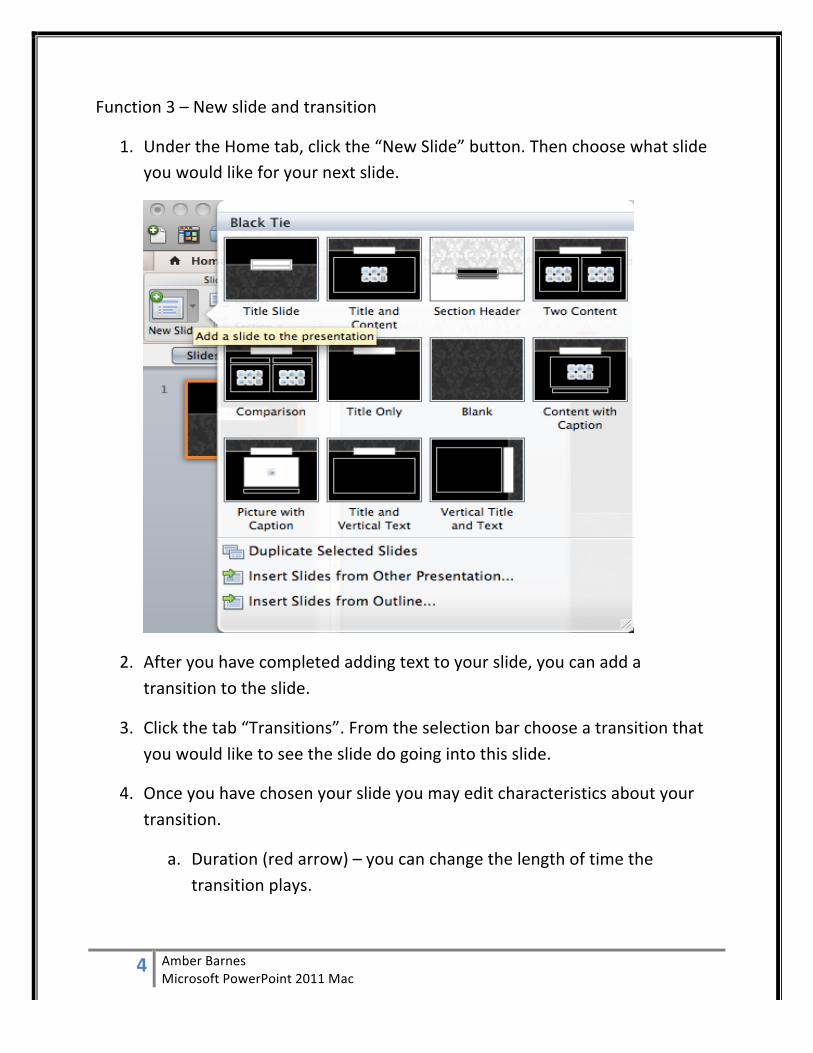
Function 3 – New slide and transition
1. Under the Home tab, click the “New Slide” button. Then choose what slide you would like for your next slide.
2. After you have completed adding text to your slide, you can add a transition to the slide.
3. Click the tab “Transitions”. From the selection bar choose a transition that you would like to see the slide do going into this slide.
4. Once you have chosen your slide you may edit characteristics about your transition.
a. Duration (red arrow) – you can change the length of time the transition plays.
5 Amber Barnes Microsoft PowerPoint 2011 Mac
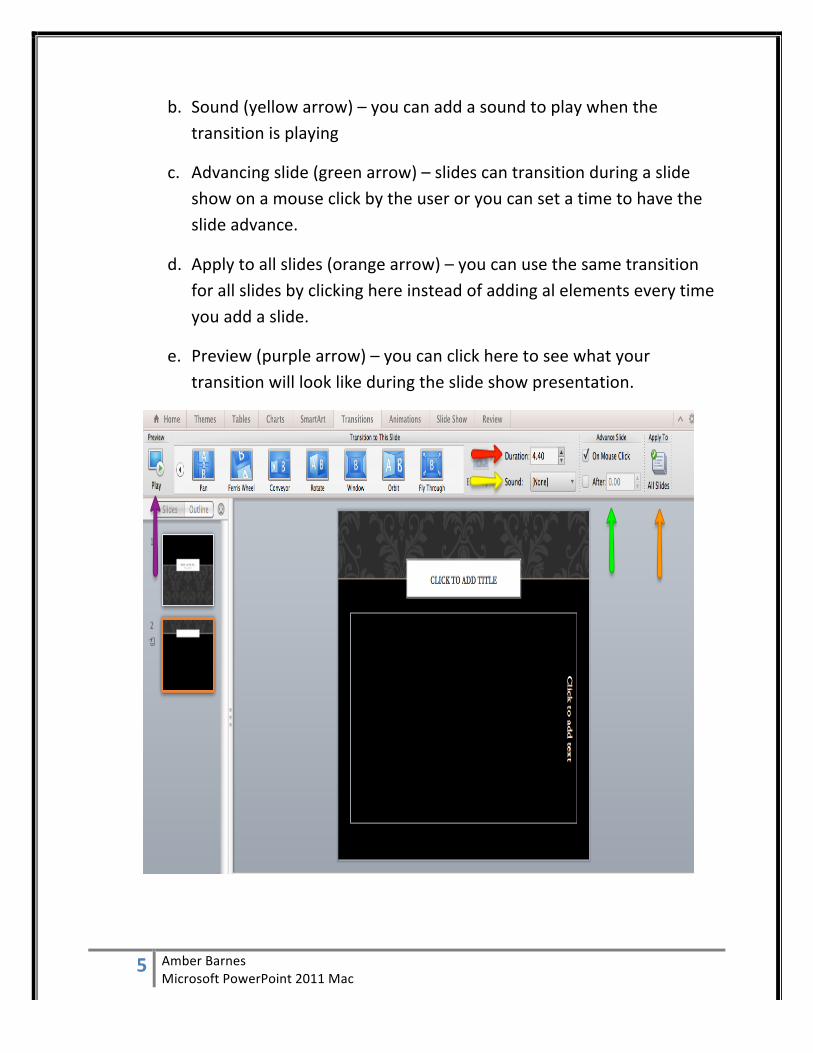
b. Sound (yellow arrow) – you can add a sound to play when the transition is playing
c. Advancing slide (green arrow) – slides can transition during a slide show on a mouse click by the user or you can set a time to have the slide advance.
d. Apply to all slides (orange arrow) – you can use the same transition for all slides by clicking here instead of adding al elements every time you add a slide.
e. Preview (purple arrow) – you can click here to see what your transition will look like during the slide show presentation.

6 Amber Barnes Microsoft PowerPoint 2011 Mac
Function 4 – Inserting and formatting a picture that is already saved to your computer.
1. At the top of your screen click the word “Insert”. On the drop down menu, hoover over the word “Photo” and click on “Picture from File”.
2. In the “Choose a Picture” box click on the picture and the click on the word “Insert.”
3. Once the image has been placed into your slide the format picture tab will open.
4. You can now use the many features in Power Point to edit your picture for your slide (red highlighted area). Some features are cropping, compressing, borders, aligning, rotating and transparency.
7 Amber Barnes Microsoft PowerPoint 2011 Mac
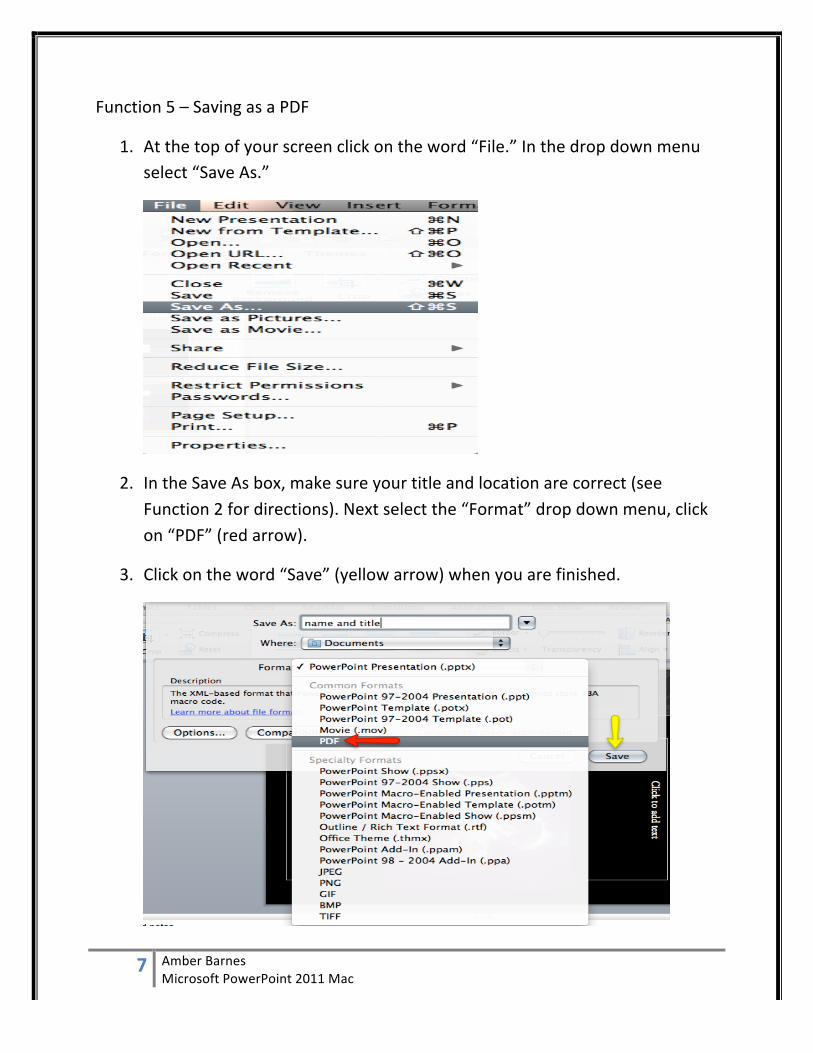
Function 5 – Saving as a PDF
1. At the top of your screen click on the word “File.” In the drop down menu select “Save As.”
2. In the Save As box, make sure your title and location are correct (see Function 2 for directions). Next select the “Format” drop down menu, click on “PDF” (red arrow).
3. Click on the word “Save” (yellow arrow) when you are finished.