invision - ionic wordpress app€¢integration with cordova and phonegap •easy to style and change...
TRANSCRIPT

Invision - Ionic WordPress App
A STYLISH IONIC POWERED WORDPRESS APP Invision theme is a blog/magazine style theme built with Ionic Framework and now made to work with your WordPress site. If you are interested in our theme you can buy it from here.
TRY BEFORE YOU BUY Download the APK from here for Android based devices. If you don’t want to download it or you are using iOS device, use the great Ionic View app provided by Ionic Team.
1. Download Ionic View app. 2. Open the app on your phone. 3. Enter the following APP ID: 60C029D9

ADVANTAGES OF USING IONIC
• One source for all the supported platforms (mainly Android and OSX). • Main development in HTML, CSS and JS, which almost all web developers know. • Built On Angular • Integration with Cordova and PhoneGap • Easy to style and change layout using inbuilt SCSS
INSTALLATION
• First you should have Ionic Framework installed on your computer. Detailed steps can be found here: http://ionicframework.com/getting-started/
• Open Terminal App on your Mac or Windows Command Line (CMD) on you windows machine
• Choose where to start your project and run the following command: $ ionic start myApp blank
(myApp is the name of your app and can be changed to anything you want)
• Browse to the newly created folder: $ cd myApp
• Unzip the content of the downloaded ZIP file to this folder using your favourite ZIP
program and override the files and folders when prompted. • Run the following command to setup SASS:
$ ionic setup sass
• Run the following command to view the theme:
$ ionic serve
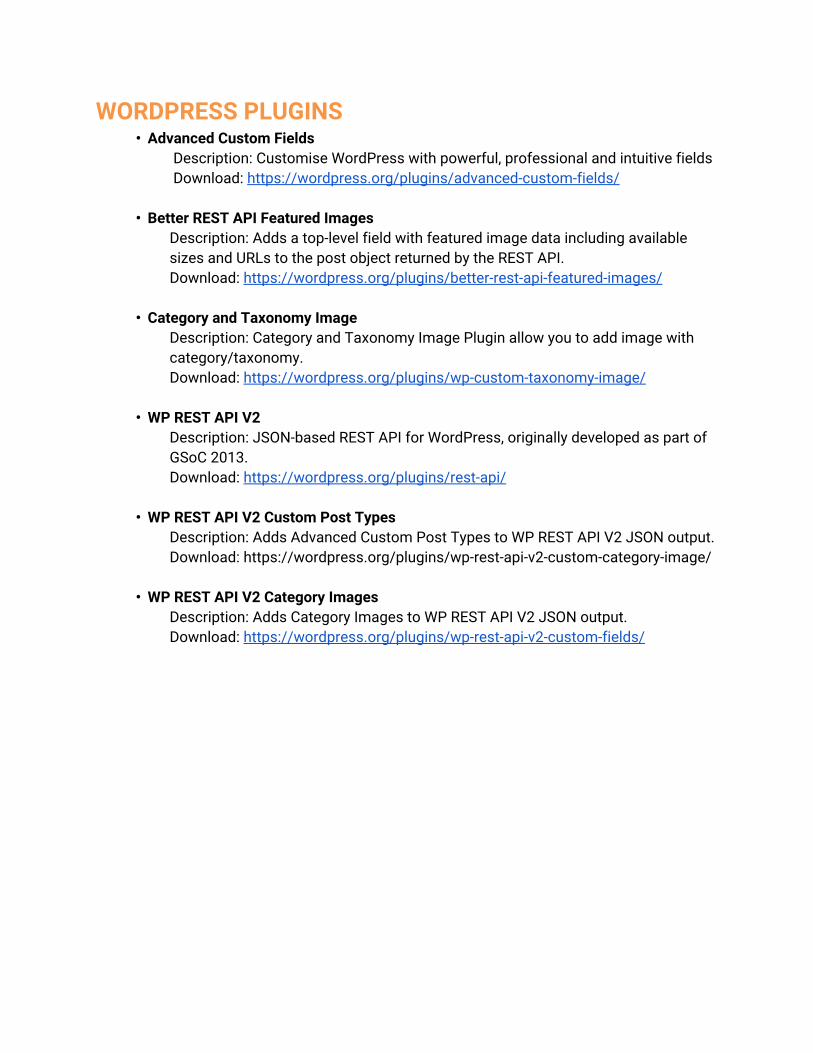
WORDPRESS PLUGINS • Advanced Custom Fields
Description: Customise WordPress with powerful, professional and intuitive fields Download: https://wordpress.org/plugins/advanced-custom-fields/
• Better REST API Featured Images
Description: Adds a top-level field with featured image data including available sizes and URLs to the post object returned by the REST API. Download: https://wordpress.org/plugins/better-rest-api-featured-images/
• Category and Taxonomy Image
Description: Category and Taxonomy Image Plugin allow you to add image with category/taxonomy. Download: https://wordpress.org/plugins/wp-custom-taxonomy-image/
• WP REST API V2
Description: JSON-based REST API for WordPress, originally developed as part of GSoC 2013. Download: https://wordpress.org/plugins/rest-api/
• WP REST API V2 Custom Post Types
Description: Adds Advanced Custom Post Types to WP REST API V2 JSON output. Download: https://wordpress.org/plugins/wp-rest-api-v2-custom-category-image/
• WP REST API V2 Category Images
Description: Adds Category Images to WP REST API V2 JSON output. Download: https://wordpress.org/plugins/wp-rest-api-v2-custom-fields/
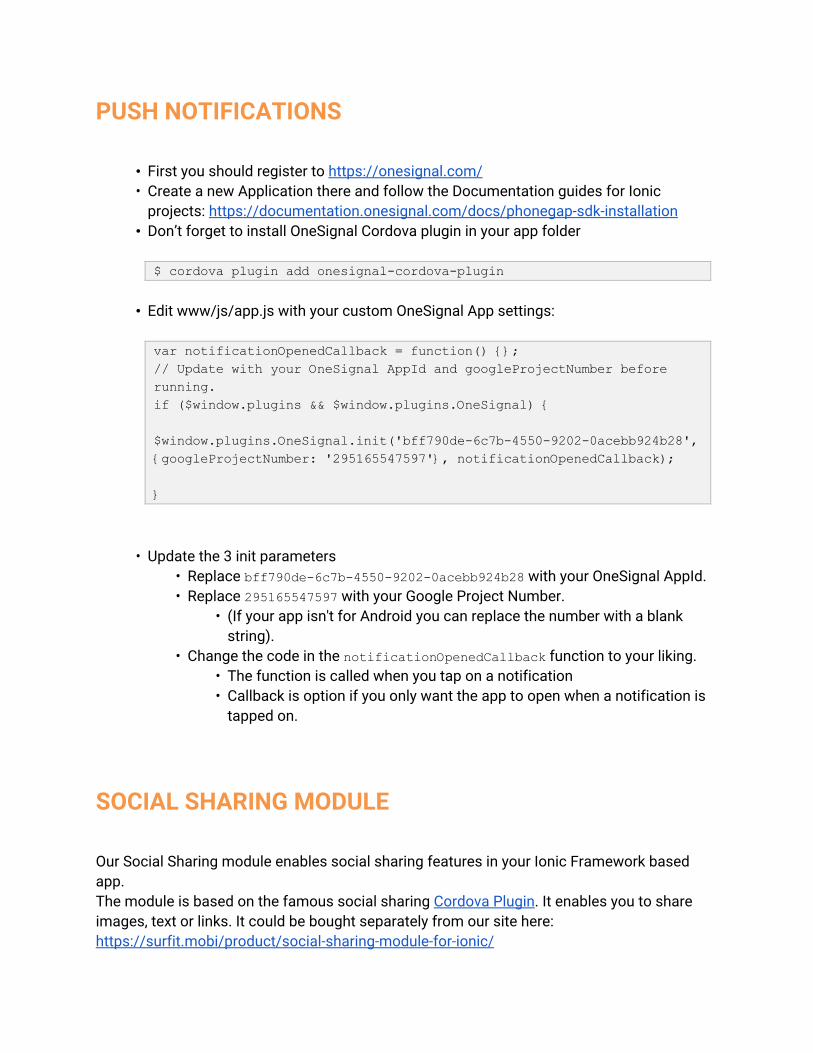
PUSH NOTIFICATIONS
• First you should register to https://onesignal.com/ • Create a new Application there and follow the Documentation guides for Ionic
projects: https://documentation.onesignal.com/docs/phonegap-sdk-installation • Don’t forget to install OneSignal Cordova plugin in your app folder
$ cordova plugin add onesignalcordovaplugin
• Edit www/js/app.js with your custom OneSignal App settings:
var notificationOpenedCallback = function() ; // Update with your OneSignal AppId and googleProjectNumber before running. if ($window.plugins && $window.plugins.OneSignal)
$window.plugins.OneSignal.init('bff790de6c7b455092020acebb924b28', googleProjectNumber: '295165547597', notificationOpenedCallback);
• Update the 3 init parameters • Replace bff790de6c7b455092020acebb924b28 with your OneSignal AppId. • Replace 295165547597 with your Google Project Number.
• (If your app isn't for Android you can replace the number with a blank string).
• Change the code in the notificationOpenedCallback function to your liking. • The function is called when you tap on a notification • Callback is option if you only want the app to open when a notification is
tapped on.
SOCIAL SHARING MODULE Our Social Sharing module enables social sharing features in your Ionic Framework based app. The module is based on the famous social sharing Cordova Plugin. It enables you to share images, text or links. It could be bought separately from our site here: https://surfit.mobi/product/social-sharing-module-for-ionic/
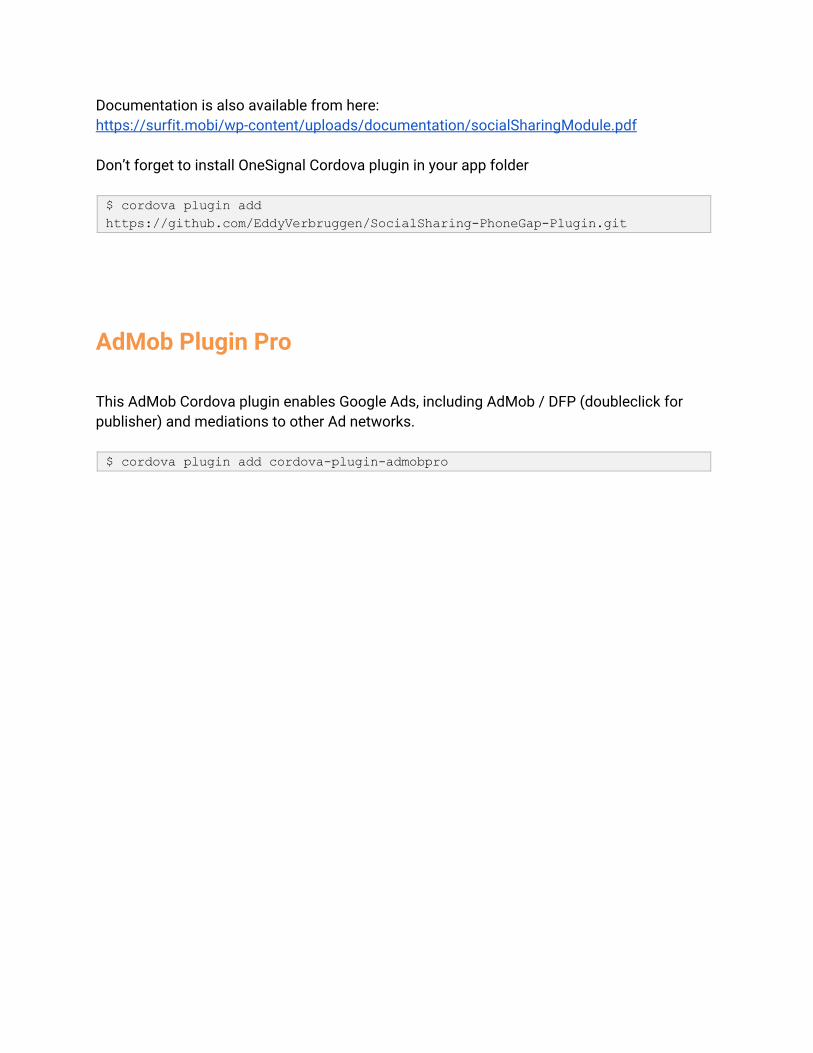
Documentation is also available from here: https://surfit.mobi/wp-content/uploads/documentation/socialSharingModule.pdf Don’t forget to install OneSignal Cordova plugin in your app folder $ cordova plugin add https://github.com/EddyVerbruggen/SocialSharingPhoneGapPlugin.git
AdMob Plugin Pro This AdMob Cordova plugin enables Google Ads, including AdMob / DFP (doubleclick for publisher) and mediations to other Ad networks. $ cordova plugin add cordovapluginadmobpro

PAGES
CATEGORIES Features:
• Tabs with different sorting options • List categories with image and title
CATEGORY ITEMS Features:
• List all items in category • Item Image • Item Title • Item Source • Item Date

CATEGORY WITH FEATURED ITEMS Features:
• List all items in category • One or more items are set as featured and have
more appealing design • Featured Item Image • Item Title • Item Source • Item Date
ITEM Features:
• Big Image • Item Title • Item Source • Item Date • Category Link • Quote Design • Youtube video iframe takes all the width of the
window • Social Sharing Icons • Design for next item

COMMENTS Features:
• Avatar • Name • Comment
SIDE MENU Features:
• Background image • Menu Items Icons

SLIDESHOW Features:
• Could be started on app open or from a menu • Takes the whole width/height of the window • Close button
MODAL WINDOW Features:
• Tabs • List categories

TERMS AND CONDITIONS Features:
• Heading tags example • Sample text page
HELP Features:
• Two Columns • Multiple rows • Links

FILES STRUCTURE OF THE THEME Ionic apps are built with Cordova. Cordova is a means of packaging html/css/js into apps that can run on mobile and desktop devices and provides a plugin architecture for accessing native functionality beyond the reach of JS run from a web browser. As such, Ionic apps have the Cordova file structure. Once you download the project, you will find the following files structure:
resources - there are two files in this folder:
icon.psd
splash.psd
These files are used for Ionic to be able to create icon and splashscreen images
for your application. The PSD files are fully editable and you can use them as
starting point. For more info check:
http://ionicframework.com/docs/cli/icon-splashscreen.html
scss: is for your app’s SASS file. ionic.app.scss: is the root file. It contains all links to the used SASS files in the
project. www: is where your app is developed and where you’ll spend most of your time when
building an Ionic app. css: contains either your app’s specific CSS file, or your SCSS generated output
file, should you use it, along with any other CSS files you wish to add. CSS is added to your project by a <link> tag in your index.html
img: images.
js: all the javascript code such as controllers, directives and routing. In order to change the URL to your WordPress site you have to edit the
following file: www/js/providers/constants/routes-config.js and change siteURL variable.
Lazy Loading of Wordpress Items is currently set to 2 items. It could be changed in www\js\providers\constants\app-config.js
lib: is where Ionic and any other libraries you use can be placed. It follows the
Bower formatting, and new libs can be added and updated using Bower.

modules: Here are all the files for our social-sharing module.
templates: is where your view files go. Your project does have a main
index.html file in the WWW directory, but your app likely contains many
template views that are added dynamically. Unlike your CSS and JS files, views
files do not need to be mentioned in your index.html file. You define them in
your $state definition, and UI Router and Ionic will take care of the rest, including
pre-loading the template file. These files are Angular templates and are parsed
before being added to the DOM.
We organized the view files according to the app components for example:
categories.html, comments.html, item.html, login.html etc.
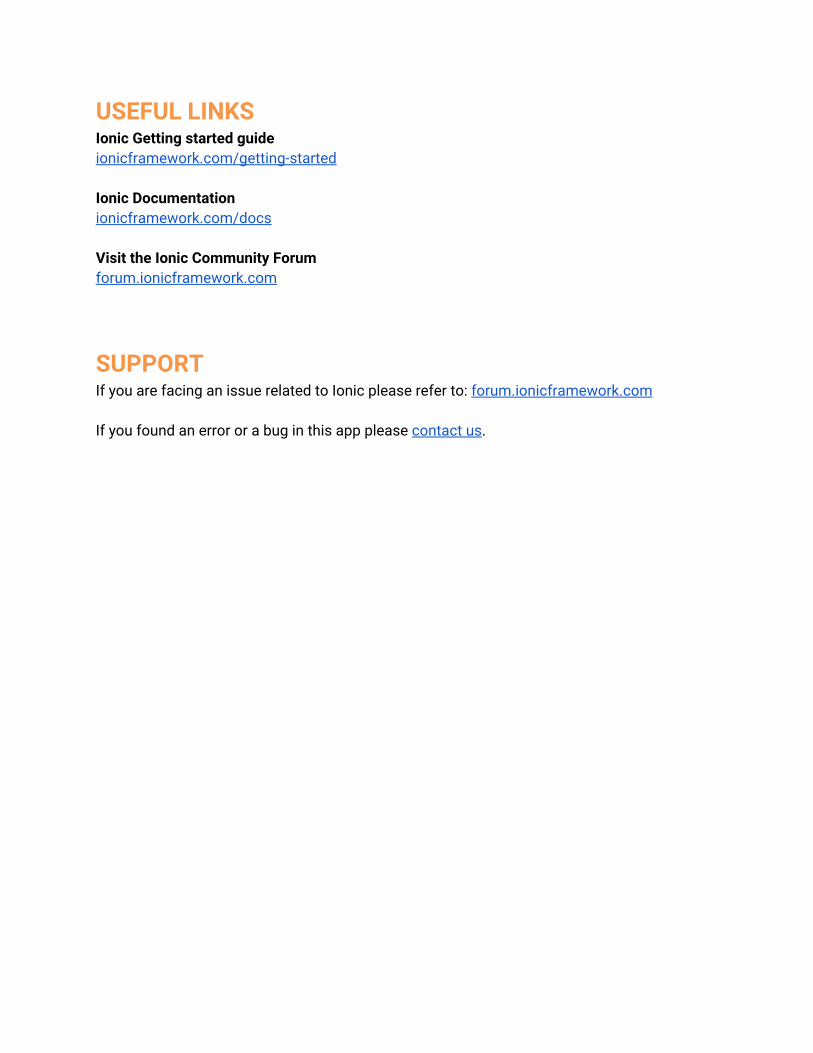
USEFUL LINKS Ionic Getting started guide ionicframework.com/getting-started Ionic Documentation ionicframework.com/docs Visit the Ionic Community Forum forum.ionicframework.com
SUPPORT If you are facing an issue related to Ionic please refer to: forum.ionicframework.com If you found an error or a bug in this app please contact us.