interactive disassembler for qdos and sms2 - kilgus… · 7 disa idea disa provides you with...
TRANSCRIPT

2
3
Interactive Disassembler for QDOS and SMS2
© 1990-2017 Jochen Hassler

2

3
Table of Contents License agreement .............................................................................................. 5 Getting started ..................................................................................................... 6 DISA idea............................................................................................................. 7 The menu............................................................................................................. 8 The different menu items as an overview ............................................................ 9
Move sprite [^F4] .................................................................................... 9 Window sprite [^F3] ................................................................................ 9 Sleep sprite [^F1] .................................................................................... 9 ESC sprite [ESC] .................................................................................... 9 STATUS window [F1] .............................................................................. 9 DISA menu item [F2] ............................................................................... 9 FILES window [F3] .................................................................................. 9 SEARCH window [F4] ............................................................................. 9 EDITOR menu item [F5] ......................................................................... 9 dc.b ... ascii menu items [b,w,l,p,a,d,t,c,s] ............................................. 10
STATUS menu [F1] ................................................................................... 10 Default device and path [#] ................................................................... 10 Comment Field [F] ................................................................................ 10 Comment Character [O] ........................................................................ 10 QDOS / SMS2 [Q],[M] ........................................................................... 10 (PC) [P] ................................................................................................. 10 >Bcc [>] .............................................................................................. 10 CAPS [C] ............................................................................................. 10 a6=BASIC DEVICE [B],[D] .................................................................... 11 H/V [H] ................................................................................................. 11 SOUND [O] ......................................................................................... 11 Cmd1, Cmd2 [1],[2] .............................................................................. 11
FILES menu [F3]........................................................................................ 12 1. Load program code from file [f] ......................................................... 12 2. Load program code from memory [m] ............................................... 12 3. Load an index file [f] .......................................................................... 12 4. SAVE a disassembly [l] ..................................................................... 14 5. SAVE an index file [i] ........................................................................ 14
SEARCH menu [F4]................................................................................... 15 The SEARCH functions in detail: .................................................................. 16
Line [e] ................................................................................................. 16 Text [t] .................................................................................................. 16 Label [l] ............................................................................................... 16 Figure [f] ............................................................................................... 16 Abs.Adr [a] .......................................................................................... 16 Mark No [n] .......................................................................................... 16 illg [i] .................................................................................................. 17 Up [u] ................................................................................................. 17

4
Down [d] .............................................................................................. 17 0 [0] ..................................................................................................... 17
Attributes to be edited ........................................................................................ 18 code attribute [c] ................................................................................... 18 dc.b attribute [b] .................................................................................... 18 dc.w attribute [w] ................................................................................... 18 dc.l attribute [l]....................................................................................... 18 text attribute [t] ...................................................................................... 19 prel attribute [p] ..................................................................................... 19 arel attribute [a] ..................................................................................... 20 ascii attribute [s] .................................................................................... 21 defp attribute [d] .................................................................................... 22 delete attributes: ....................................................................................... 22
Enhanced editing .......................................................................................... 23 Cutting off code words .................................................................................. 23 Joining code words ....................................................................................... 23 Setting and deleting markers ........................................................................ 24 Setting and deleting M-Label ........................................................................ 24
EDITOR menu item [F5] ................................................................................. 25 Tips and Tricks .................................................................................................. 26 Release Notes DISA 3 ....................................................................................... 31

5
License agreement The software is provided free of charge and without any support or guarantees whatsoever. Selling copies is prohibited.

6
Getting started DISA runs as a job under the extended Pointer Environment from QJUMP (see chapter The Pointer Environment). You must load ptr_gen V1.38 or later, and wman V1.33 or later, before you can start DISA. If these are not present, you will get an error report. In addition, you may load resident menu_rext (from Jochen Merz). The File-Select menu will then be used on loading or saving files. If QPAC2 is active, DISA may sleep in the button frame. DISA is started as a normal job, just by typing EX DISA, or by QPAC2 or Cueshell
start button. DISA is written as romable, "clean" assembler code which does not change itself on run time. Thus it is possible to run DISA directly out of an Eprom, start it as a THING, or define a hotkey and start several jobs from the same code. There are no problems or restrictions on a 68020/68030 - system with cache. The start syntax accepts a command string, e.g.: EX flp1_DISA;"flp2_testcode"

7
DISA idea DISA provides you with listings, regained from 68000-machine code, for assembling. This cannot be done automatically, however. In this sense DISA is not an 'intelligent' disassembler. The main problem on disassembling is to distinguish program code from data structures. It is nearly impossible to do this automatically, and it always remains erroneous. Therefore the DISA idea goes like this: The user sees several lines of normal disassembly on the screen as if it were an editor. He himself decides if it is program code or some kind of data code. From within the context, this is rather easy and secure. The user should have a basic understanding of the Motorola-68000-assembler language, of course. A graphic menu environment as well as numerous predefined functions facilitate this job. The result may immediately be seen, and, if necessary, be corrected. The editing is done by attaching attributes to program lines, like code or dc.w, depending on how the line concerned and the following lines of the "_dis"-listing are to be presented. All informations about the new listing are written to a special file, the so called "index-file". This index-file may be saved to disk and reloaded later.

8
The menu DISA has been written as a mouse driven program. Program control is possible with arrow- and select keys too, but it is not as comfortable and more slowly (!) than with mouse control. The selection keys are underlined or follow the normal convention. The left mouse button ( HIT = SPACE ) means select or deselect, the right mouse button ( DO = ENTER ) means direct action. NOTE: In general, the left and right mouse buttons have different reaction. The mouse pointer normally looks like a little arrow pointing upwards. Sometimes it changes in shape. The meanings are: - an arrow pointing downwards: text moving back - a watch: DISA is very busy, it may last. This option can be cancelled
immediately by a HIT (but with care!). - an arrow pointing straight to the left: here you can set a marker - an arrow pointing straight to the right: here you can set an M-label - a little box with an arrow pointing down: put the code word to the next line down - a little box with an arrow pointing up: put this code word back to the previous
line again If you do not use a mouse until now, please think it over again. It may be a good idea. Why not take the famous "SERMouse" (from Albin Hessler Software), and plug in a normal PC-mouse into ser2. All done! The different menu items as an overview

9
The different menu items as an overview
Move sprite [^F4] Move around the whole job on the screen.
Window sprite [^F3] The job window grows or shrinks in size. You can have 5...32 lines, depending on your screen. On a normal QL screen there are 5...16 lines, on an Atari screen perhaps a little more.
Sleep sprite [^F1] The job gets a button. This is only possible, if QPAC2 is installed. If not, there will be a nasty beep.
ESC sprite [ESC] The job is cancelled and removed. All data will be lost. If you have not already saved the data, DISA kindly asks you to do so by presenting the FILES pull down menu. You may ignore this and exit with another [ESC].
STATUS window [F1] Pull down menu to configure DISA at run time. All changes get valid immediately.
DISA menu item [F2] Start the internal disassembler to reconstruct all labels and pointers. Be patient, this action will take a little time...
FILES window [F3] Pull down menu to load and save data. With a DEMO VERSION, it is not possible to save data.
SEARCH window [F4] Pull down menu to search pointers, text, hex figures and to jump to lines and labels. With a HIT: present pull down window With a DO: repeat or continue last action
EDITOR menu item [F5] with a HIT: switch between EDITOR and WINDOW mode with a DO: select EDITOR mode and jump to the next label
10
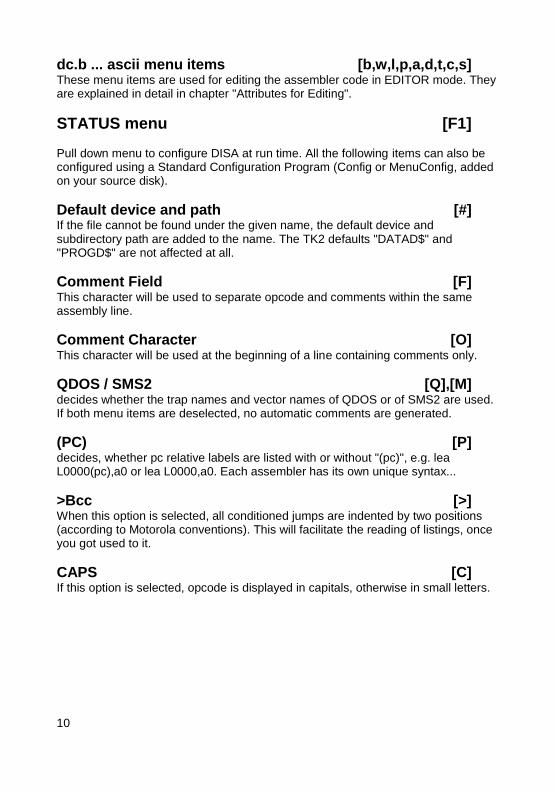
dc.b ... ascii menu items [b,w,l,p,a,d,t,c,s] These menu items are used for editing the assembler code in EDITOR mode. They are explained in detail in chapter "Attributes for Editing".
STATUS menu [F1] Pull down menu to configure DISA at run time. All the following items can also be configured using a Standard Configuration Program (Config or MenuConfig, added on your source disk).
Default device and path [#] If the file cannot be found under the given name, the default device and subdirectory path are added to the name. The TK2 defaults "DATAD$" and "PROGD$" are not affected at all.
Comment Field [F] This character will be used to separate opcode and comments within the same assembly line.
Comment Character [O] This character will be used at the beginning of a line containing comments only.
QDOS / SMS2 [Q],[M] decides whether the trap names and vector names of QDOS or of SMS2 are used. If both menu items are deselected, no automatic comments are generated.
(PC) [P] decides, whether pc relative labels are listed with or without "(pc)", e.g. lea L0000(pc),a0 or lea L0000,a0. Each assembler has its own unique syntax...
>Bcc [>] When this option is selected, all conditioned jumps are indented by two positions (according to Motorola conventions). This will facilitate the reading of listings, once you got used to it.
CAPS [C] If this option is selected, opcode is displayed in capitals, otherwise in small letters.

11
a6=BASIC DEVICE [B],[D] This fixes the meaning of address register a6: BASIC: a6 points to the SuperBasic area e.g. SuperBasic extension code DEVICE: a6 points to the system variables
e.g. Device driver deselected: a6 has no fixed meaning e.g. job code
H/V [H] decides whether labels pointing out of the code area before code start (V-label) or behind code end (H-label) are listed as equ-lines or not.
SOUND [O] gives a BEEP with error and status messages. Switch it off if it makes you nervous.
Cmd1, Cmd2 [1],[2] these texts are automatically inserted into the header of a listing. They are meant as standard assembler directives. e.g. "section", "nolist", etc.

12
FILES menu [F3] Pull down window to load and save data. Within the files menu, the following conventions are valid: Select the desired menu item with the left mouse button HIT: - immediate input and line editing The default device and subdirectory path is tried if needed. Select the desired menu item with the right mouse button DO - if menu_rext is not active, immediate input and line editing as above - if menu_rext is active, call the file select menu from menu_rext. When calling the file select menu, the default device and subdirectory path will be used (ref STATUS window). Closing the files menu will write back the setting of device and path last used and is taken as a new default on the next call.
1. Load program code from file [f] Enter and edit the desired filename in the LOAD file window and press the right mouse button (DO). The file will be loaded. In the LOAD memory window file length (in Hex bytes) and absolute address in memory used will appear. In the SAVE file window a default file name for the disassembled listing (extension _dis) is proposed, and in the SAVE index window a default file name for the index file (extension _idx) is proposed. It is possible of course to alter and edit these names, extensions included. If no index file has been created in an earlier session, you will now exit the LOAD menu with a DO or ESC. DISA automatically creates a new index file on disassembling the whole file for the first time. Please be patient, this will perhaps take a little time.
2. Load program code from memory [m] Instead of program code out of a file, it is possible to define directly an area in memory to be taken as program code. Syntax: "startaddress endaddress" (both in Hex, no preceding "$") into the LOAD memory window. Then the same procedure as above. A memory area greater than 256 kb = $3FFFF bytes will not be accepted (?!).
3. Load an index file [f] A saved index file (see later) created earlier can be loaded in the LOAD file window. It is provided that a code file (or a memory area) is loaded, and that the index file really belongs to the code. In this case, no new index file will be created on exit. The file name of the index file is not of any interest, and the extension _idx is not necessary. It is not possible however to load an index file from DISA Version 1.03

13
or older into a DISA Version 2.00 or later because of some major differences in index file structure.

14
4. SAVE a disassembly [l] Enter and edit the desired filename in the SAVE file window and press the right mouse button (DO). The file will be saved as a disassembler text file in the _dis file. No control characters or non printable characters are used at all (except LF, of course). If the whole file has been properly edited, every assembler can reassemble the text. The syntax needed by the own assembler version (Qmac, Quanta, C1,...) can be adjusted with the STATUS window, the ascii attribute and the assembler directives. Remark: There should be enough free space on your diskette. As a rule: _dis file length = 10 x code file length (or even more).
5. SAVE an index file [i] Enter and edit the desired filename in the SAVE index window and press the right mouse button (DO). The file will be saved as an index file, normally ending with _idx. So it is possible to end a lengthy session, save all the work done and continue the other day.

15
SEARCH menu [F4] Pull down window to search pointers, text, Hex figures and to select line numbers and labels. Within the SEARCH window, the following conventions are valid: - pressing the left mouse button (HIT): select, but no action. - pressing the right mouse button (DO): enter or edit item. exception: go to top / bottom is done immediately. - DO the window: do the selected item(s). The action starts with the first line seen in the window. If you want to start action at the top of file, select the UP item in addition. - quit with ESC: do nothing, close SEARCH window. To continue the search, it is not necessary to pull down the SEARCH window. DO-ing the SEARCH menu item again will do it. The name of the SEARCH menu item will change according to the last action used. The SEARCH functions can be used from within both the EDITOR mode and the WINDOW mode. The line found is centred in the window and highlighted with a red border. If nothing (more) can be found, there will be a nasty beep.

16
The SEARCH functions in detail:
Line [e] The given line number is searched and centred in the window. If this line does not exist, the next nearest line will be presented.
Text [t] The given text is searched. Upper case and lower case are not the same. The text can contain 1...8 characters.
Label [l] A label is given as a line number (without preceding "L"). The code is disassembled and searched for the desired pointer(s). It is a good idea to start DISA action (menu item [F2]) first in order to get the line itself to which the pointers are pointing.
Figure [f] The given hex number is searched. Enter as usual without preceding "$". The hex number can be a byte, a word or a long word. Words and longwords must be aligned to even addresses, bytes must not. With the mask [m] the bit wise AND is performed prior to the search. In this way it is possible to mask out individual bits or groups of bits. The internal disassembler of DISA uses this principle to analyse the code. Some examples how to use bit masks are described in section Tips and Tricks.
Abs.Adr [a] The program code is disassembled and each instruction is examined if an absolute address is used. If the address mode "absolute short" or "absolute long" is found in this instruction, either as "source" or "destination", this line is presented. With this option, you can find the well known but unbeloved direct accesses to system variables ($28000) and the screen memory ($20000...$2FFFF), or to the QL hardware ($18021 etc.), or to the operating system ($0000...$BFFF). Or if the "#" is missing with "immediate data"... You can specify a range to show abs.adr: The line Abs.Adr. C0 =>to: 180 for example presents all calls to QDOS vectors, which are in the range of $00C0 to $0180 (Minerva). The line Abs.Adr. 180 =>to: C0 instead for example presents all instructions using absolute addresses, but no QDOS vectors.
Mark No [n] Enter the number as 0...9, A...F. The given marker is selected if set. Otherwise there will be a beep. With a number greater F (e.g. FF), all markers set are toggled around. This is the default setting.

17
illg [i] The code is disassembled and scanned for illegal instructions. After editing, no illegal instruction should be found. This would indicate that there are unrecognised data areas or jump tables left unedited.
Up [u] If Up is selected, an option is started off from line 1. Do-ing this item will jump directly to top.
Down [d] Do-ing this item will jump directly to bottom.
0 [0] Deselect all items.
18
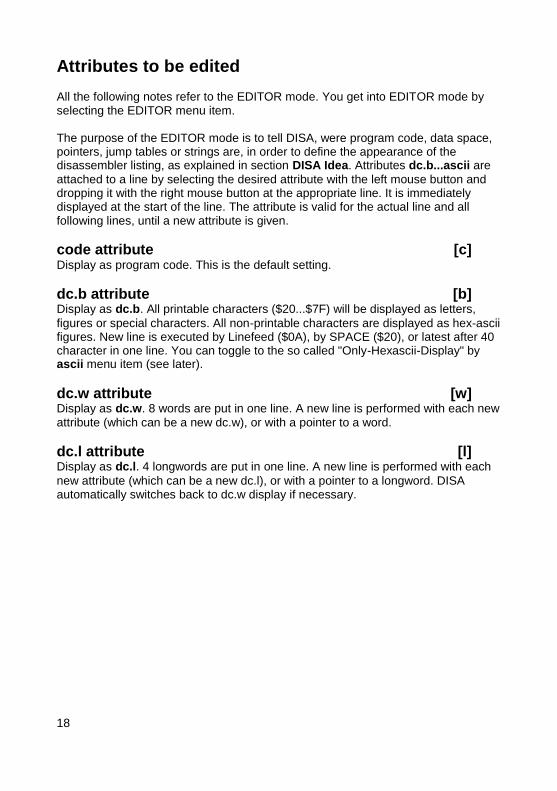
Attributes to be edited All the following notes refer to the EDITOR mode. You get into EDITOR mode by selecting the EDITOR menu item. The purpose of the EDITOR mode is to tell DISA, were program code, data space, pointers, jump tables or strings are, in order to define the appearance of the disassembler listing, as explained in section DISA Idea. Attributes dc.b...ascii are
attached to a line by selecting the desired attribute with the left mouse button and dropping it with the right mouse button at the appropriate line. It is immediately displayed at the start of the line. The attribute is valid for the actual line and all following lines, until a new attribute is given.
code attribute [c] Display as program code. This is the default setting.
dc.b attribute [b] Display as dc.b. All printable characters ($20...$7F) will be displayed as letters,
figures or special characters. All non-printable characters are displayed as hex-ascii figures. New line is executed by Linefeed ($0A), by SPACE ($20), or latest after 40 character in one line. You can toggle to the so called "Only-Hexascii-Display" by ascii menu item (see later).
dc.w attribute [w] Display as dc.w. 8 words are put in one line. A new line is performed with each new
attribute (which can be a new dc.w), or with a pointer to a word.
dc.l attribute [l] Display as dc.l. 4 longwords are put in one line. A new line is performed with each
new attribute (which can be a new dc.l), or with a pointer to a longword. DISA automatically switches back to dc.w display if necessary.
19
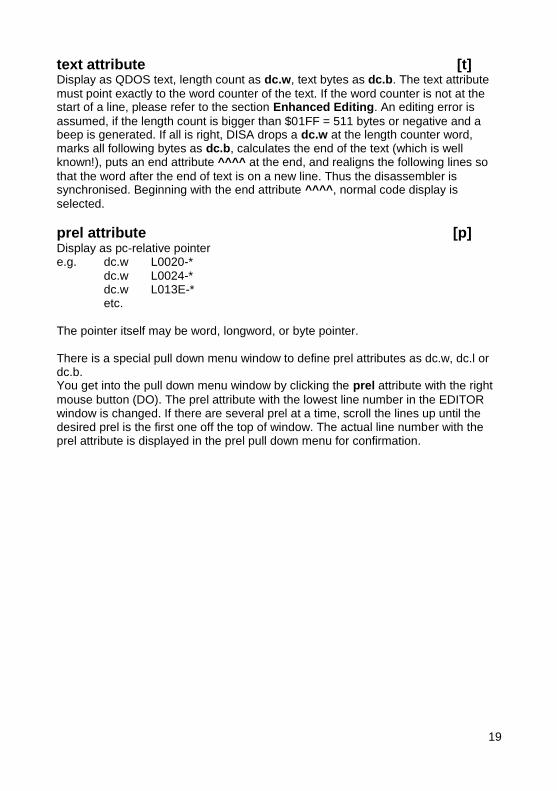
text attribute [t] Display as QDOS text, length count as dc.w, text bytes as dc.b. The text attribute
must point exactly to the word counter of the text. If the word counter is not at the start of a line, please refer to the section Enhanced Editing. An editing error is
assumed, if the length count is bigger than $01FF = 511 bytes or negative and a beep is generated. If all is right, DISA drops a dc.w at the length counter word, marks all following bytes as dc.b, calculates the end of the text (which is well known!), puts an end attribute ^^^^ at the end, and realigns the following lines so
that the word after the end of text is on a new line. Thus the disassembler is synchronised. Beginning with the end attribute ^^^^, normal code display is
selected.
prel attribute [p] Display as pc-relative pointer e.g. dc.w L0020-* dc.w L0024-* dc.w L013E-* etc. The pointer itself may be word, longword, or byte pointer. There is a special pull down menu window to define prel attributes as dc.w, dc.l or dc.b. You get into the pull down menu window by clicking the prel attribute with the right
mouse button (DO). The prel attribute with the lowest line number in the EDITOR window is changed. If there are several prel at a time, scroll the lines up until the desired prel is the first one off the top of window. The actual line number with the prel attribute is displayed in the prel pull down menu for confirmation.

20
arel attribute [a] Display as address-relative pointer e.g. dc.w L0020-L0010 dc.w L0022-L0010 dc.w L013A-L0010 etc. The pointer itself may be word, longword, or byte pointer. There is a special pull down menu window to define arel attributes as dc.w, dc.l or dc.b. To get into the pull down menu window see above (prel attribute). As base address the line number containing the arel attribute is taken. In the example above, this would be line number 0010. But things are not so easy. It often happens, that the line containing the arel attribute is really not the base address of a jump table. For this reason, the menu item Offset in the arel pull down menu is provided. To start with, you see the same number in the Offset item and the Line item (that means Offset = Line, base address = base of jump table). Now you can change the reference line in the Offset item. Consider the example above. Assume the reference line to be line number 0. If you change the number in the Offset item to 0, you will get the following display: e.g. dc.w L0010-L0000 dc.w L0012-L0000 dc.w L012A-L0000 etc. There is another menu item in the arel pull down window with name last. This means a reference line of a previous arel attribute. If selected, the reference line is no longer the line containing the current arel attribute, but the line containing the last arel attribute with last item not selected. This is true, even if there are other attributes (like dc.w etc.) in between different arel attributes. Such sophisticated data structures are common to operating systems. But the actual reference line is calculated and displayed immediately in the Offset item to give you a chance...

21
ascii attribute [s] ascii/alternate display. This is a special attribute because it is not an attribute for itself, but changes the display of other attributes. - with "#immediate data" hex <-> ascii.
e.g. move.l #$464C5030,d0 <-> #'FLP0',d0 the #-data may be bytes, words or longwords
- with "'immediate data" signed <-> unsigned.
e.g. moveq #-$01,d0 <-> #$FF,d0 the #-data may be bytes, words or longwords
- with dc.b-Attribut ascii <-> hex.
e.g. dc.b $00,$01,'AB' <-> dc:b $00,$01,$41,$42 The dc.b is displayed as dc:b with Only-Hex-Display
- with link-instruction signed <-> unsigned.
e.g. link a6,#-$00C0 <-> a6,#$FF40 - with prel-attribute 0 and -1 as data <-> as pointer
e.g. on line 0020 dc.w $0000 <-> dc.w L0020-* - with arel-attribute 0 and -1 as data <-> as pointer
e.g. on line 0020 dc.w $0000 <-> dc.w L0020-L0020
22
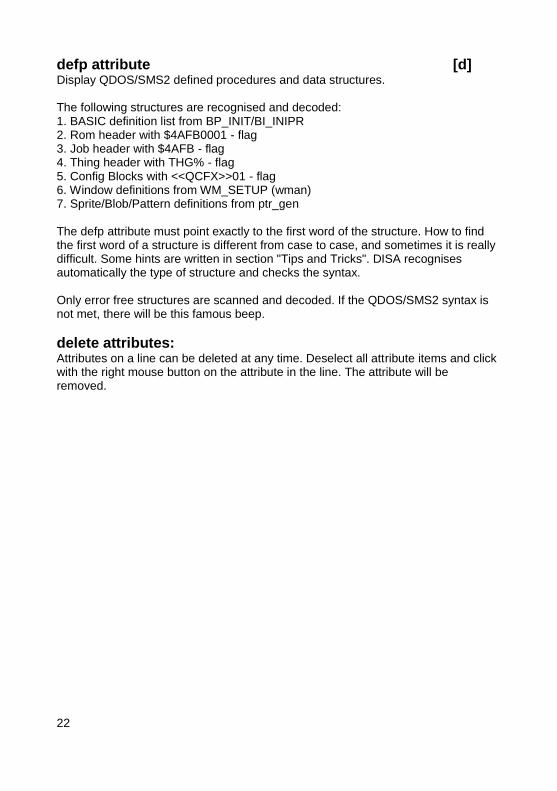
defp attribute [d] Display QDOS/SMS2 defined procedures and data structures. The following structures are recognised and decoded: 1. BASIC definition list from BP_INIT/BI_INIPR 2. Rom header with $4AFB0001 - flag 3. Job header with $4AFB - flag 4. Thing header with THG% - flag 5. Config Blocks with <<QCFX>>01 - flag 6. Window definitions from WM_SETUP (wman) 7. Sprite/Blob/Pattern definitions from ptr_gen The defp attribute must point exactly to the first word of the structure. How to find the first word of a structure is different from case to case, and sometimes it is really difficult. Some hints are written in section "Tips and Tricks". DISA recognises automatically the type of structure and checks the syntax. Only error free structures are scanned and decoded. If the QDOS/SMS2 syntax is not met, there will be this famous beep.
delete attributes: Attributes on a line can be deleted at any time. Deselect all attribute items and click with the right mouse button on the attribute in the line. The attribute will be removed.

23
Enhanced editing There are four more editing functions when you are in EDITOR mode: Cutting off code words Joining code words Setting and deleting markers Setting and deleting M-Label They are, however, not accessible during normal editing, to avoid their activation by mistake. They will become accessible by selecting a line (line turns green or black, depending on paper colour).
Cutting off code words Often, during the process of disassembling of data areas, quite arbitrarily senseless lines may be generated (the disassembler doesn't know better...). Therefore the possibility to re synchronise the disassembler has been provided. This is needed, when you want an attribute to point exactly to a certain code word, for example with QDOS texts. Just move the cursor in a selected (green) line to the second, third or so code word. The cursor will change into a small box with an arrow pointing to the lower left corner. Hitting the right mouse button will cut off the last word in this line and forces the disassembler to start disassembling from this word on. All lines newly disassembled are now also displayed in green. This may be repeated until only one word is left in a line. (Try it ...).
Joining code words This has the opposite effect from Cutting off code words. Move the cursor to the first code word in a selected line. When the standard cursor changes into a small box with an arrow pointing to the upper right corner, you have found a code word that has formerly been cut off. Hitting the right mouse button moves the code word back to the preceding line, and all following lines will be newly disassembled. Only those words may be joined, which have been cut off before.
24
Setting and deleting markers Move the cursor to the right end of a selected line. The mouse pointer changes shape to an arrow pointing to the left. With a click on the right mouse button you can drop a new marker with number <==0...<==9, <==A...<==F, or remove a marker, if it was already there. There is a maximum of 16 markers possible. They are saved in the index file (see SAVE window), and restored on load.
Setting and deleting M-Label On some occasions it may be useful to put a label on a line, even if no pointer is pointing to it. Move the cursor to the left end of a selected line. The mouse pointer changes shape to an arrow pointing to the right. With a click on the right mouse button you can drop an M-label, or remove one, if it was already there.

25
EDITOR menu item [F5] Toggles between EDITOR- and WINDOW-mode. In WINDOW mode you can see the disassembled code according to the attributes
set. By changing between EDITOR- and WINDOW-mode, you have full control over the effects of your editing. If the result does not look like you feel it should, you can easily change it. From time to time, it is worth while to start the DISA action [F2] to calculate label and pointers, and to delete pointers pointing into the nirvana. The display in WINDOW mode is controlled by the settings in the STATUS window
(look there). Traps #0...#4, QDOS-vectors $C0...$180 and QDOS error codes -1...-25 are named. The syntax is taken from the Technical Guide (Sinclair-QL) and from the QDOS/SMS2 Reference Manual (Tony Tebby/Jochen Merz). A blank line is inserted after each "rts", "bra.l" and "jmp" instruction for clarity and readability. Known QDOS/SMS2 structures decoded with defp are written out with headlines and commentaries. In WINDOW mode, the result of your editing is displayed in the same way as it is saved later in the "_dis" file. If you don't need a listing to work with, you need not save the "_dis" file itself. It is totally sufficient to save the index along with the original code file. This is faster, files are smaller, but the whole information is preserved.

26
Tips and Tricks Let us assume that you want to disassemble a not too small program. Let us further assume that you already know that it contains some BASIC procedures, that it is a Pointer Environment program using the thing system and that it is configurable with the standard config level 1. This could be the QPAC2demo, which you can find on the DISA disk... OK, let's go! After loading the code, DISA generates the index automatically (this is a data field where the attributes of the disassembly are stored. Initially the index is empty, i.e. set to code by default from the first byte). Now switch to the WINDOW mode by HITing the EDITOR item. There you can find the instruction "filetype 0". This means that the code was not a job (filetype 1), but a program for resident load. Is there a ROM-Flag $4AFB0001 at the beginning? Unfortunately no, so the program seems to be intended to be CALLed. Now switch into the EDITOR-Mode. You can see some readable text strings. Don't follow the temptation to mark these with text too fast, as DISA may probably do this for you. So you should first try to find out whether these text strings belong to predefined QDOS structures. If you edit such a structure with defp, all text passages belonging to this structure will be marked automatically. This is faster and additionally the structure itself will be commented by a header line. Let us start with Things. Therefore you select (HIT) the SEARCH item, type the Thing-Flag "THG%" into the Text item of the SEARCH menu and let DISA search for it from the start. On line 2BE8 it will be found. But there it is not a thing header but "Immediate Data" of a "move.l" instruction. You may like to hit the ascii item to toggle from $54484725 to 'THG%' and v.v.. Go on searching by DOing (selecting with the right mouse button or ENTER) the SEARCH item, which actually has changed to TEXT. On line 2C34 again such a flag is found. This is the first Thing header. Mark it with defp. Lines 2C34 to 2C4C will be edited with attributes according to the Thing header definition automatically. You can switch to the WINDOW mode to see it. There you also find a pointer to L0012. Go to line 0012. But STOP! It is better to mark line 2C4C (or some-where nearby) to return and continue editing from here easily. HIT the line and move the pointer to the end of the line, then DO it. Now the marker <==0 is set.

27
At line 0012 and below you can see the comment "Job Header" and the text "Things V1.01 " already edited. The first Thing Header at line 2C34 is an "executable Thing", Thing Type 1, and the pointer L0012 points to the job. Now search for the next THG%-flag. You'll find it at line 2E92, and so on... Sometimes it may be necessary to bring the Thing flag to the line start (see Extended Editing). Sometimes you may find THG% flags which are already edited without you. This may happen with Things which form part of a linked list, as DISA scans and edits the whole list at once. Besides, I could not find any other program containing as much Things as QPAC2... Now you may look for config blocks. Therefore you type "<<QCFX>>", which is the flag for config blocks, into the Text item of the SEARCH menu. Don't forget to HIT the iiii item, to make DISA search from the beginning. The first flag will be found on line 1E4E. Mark it with defp. As with Things also then a lot of automatic editing will be done. Search again for "<<QCFX>>" and mark it with defp until DISA finds no more config flags. QPAC2 has many config blocks... Next we'll try to find the definition list of SuperBASIC procedures. We already know that Basic commands are linked with the QDOS vector $110 (BP_INIT) and that a1 must point to the list. So we could search for the absolute address Abs.Adr. $110 => to: $112 from the beginning. Unfortunately DISA is not yet synchronised so it is better (this generally applies to unknown code) to search for the instruction "movea.w $0100,an" as a hex figure. So type "30780110" into the Figure item, and then "F1FFFFFF" into the Mask item. Let DISA search from the beginning. DISA searches for a while, as the code must be disassembled, and finally finds it at line 31CE. Unfortunately there the address pointer is not loaded into register a1. Therefore we must look where the Label L31CC is jumped from and assume the address is set there. So we type "31cc" into the Label item of the SEARCH menu and start searching from the beginning again. Again it will take a while as the code must be disassembled again. Finally we find that a jump to subroutine to L31CC on line 2AF8. Directly before this instruction L3156(pc) is loaded to register a1, so this must be the Basic-Defproc-List. Entering 3156 into the Line item of the SEARCH menu will bring you there directly. It looks fine, so we HIT the line with defp selected. Then the list is edited automatically and you can see the result by switching to the WINDOW mode (HIT the EDITOR item). The list tells us to have five Basic Procedures, though in fact it only has four (this is due to the BP_INIT arithmetic), "BT_SLEEP", "BT_HOTKEY", "BT_WAKE" and "BT_EXEC" and no functions. Now it's time to start the DISA item. By this the whole code is disassembled and all labels are calculated according to the attributes actually already set. If DISA seems to be locked, HIT the DISA item twice again to force DISA to run. Just for fun you may jump to line 3272 in WINDOW mode. There you can see the four Basic Procedures with a comment line giving the name of each procedure. Straight after that the Thing-Headers and parameter definitions can be found.

28
Now you've already invested a lot of time for editing the code, so it would be a good idea to make a safety copy. Therefore it is sufficient to save the index file, as all the work you've done is stored there. Select the FILES item to open the files menu. There you must HIT the Index item with the name of the index file. Naturally you can edit the name. If you select it with DO, the FILE-SELECT menu will appear but only if you've loaded the menu extensions menu_rext. It may happen that DISA runs automatically before saving the index to update the pointers. Next come the most difficult but most important defp structures, window definitions (as processed by WM_SETUP). In case a program is developed using menu definitions generated with the EASYPTR development system (Albin Hessler Software) it is quite easy to find them. Just search for the text "menu". The EASYMENU header is described in the EASYPTR manual. Just after the header the window definition starts, and if you HIT there with defp selected, the whole definition is edited automatically. See example "Cueshell_Demo". QPAC2 window definitions are not generated using EASYMENU, but with the QPTR assembler macros. Here you may find the start of window definitions in a way similar to that described above for Basic procedures. Look after the Hex Figure $4EAA0004. This is the call to WM_SETUP which is window manager vector 4. There register a3 must point to the window definition. Search for the location where this register is set, there you should find the pointer to the start of the window definition. HIT there with defp selected, and if you don't get a beep it's OK. In QPAC2 unfortunately it is a little bit more difficult as there register a3 is not set directly but selected from a list of pointers. This makes very compact and effective code, but is very hard to edit. There is no way other than analysing the code to understand how this works. Only then you have a chance to find all pointers to window definitions. If you want to see it ready, just load the index file "Qpac2demo_idx", where all is already edited. Now, how to find sprite, blob and pattern definitions: most of them will form part of a window definition where DISA will find and edit them automatically. Sometimes there are also independent definitions, e.g. those used at run time to change the shape of the mouse pointer, etc... Look for the hex number $01000000 (QL 4 colours) or $01010000 (QL 8 colours). The chance to find a sprite, blob or pattern definition is rather good. Just try HITing with defp selected. If you get a beep, you're unlucky but nothing worse happened. Now go to the code start and SEARCH for illegal instructions, selecting the illg item for the search. If you find such an illegal instruction, the code still needs some editing. Often you may have found a text, e.g. error messages... If it seems to be a QDOS text string with a leading length word, DO that word with text selected. Often another text may follow directly. Therefore the end marker will be set such that it points to the next location after the previous text. If it is also a text you just may DO that line again. If you get a beep it is very likely that there is not a standard text following. So probably normal code restarts there.

29
Another reason for illegal instructions may be jump tables. Also here there is no help other than analysing the code by hand and deciding whether it is likely to be a prel or an arel table. If such a piece of code is not of your special interest you may simply mark it dc.w. So you may avoid wrong labels if it is not a table but also risk for unknown labels if it is a table. There is another possibility for illegal instructions, those belonging to the 68020/68030 instruction set, which DISA actually does not know yet. Now you may scroll once through the whole code in WINDOW mode. Have a special eye for "dead code", which is code apparently unused as not pointed to by a label. Often those pointers are hidden in jump tables not recognised yet. Naturally there may also be really "dead code", often if a program was assembled using libraries. Also have a special look on the remarks label not on code boundary and label on odd address, which may appear as comment lines. Normally those labels result from data structures not edited correctly as text, dc.w or dc.b. To find the reason, search for the label to find the origin and analyse the code there. If there really seems to be normal program code, then you may have to deal with a program altering its code at run time. This may also happen from within a configuration routine, so it must not be necessarily an impure program. Now some additional hints, which can be useful for you when working with DISA: 1. Often you'll not be interested in a complete program, but only a small part, e.g. a
single routine which you want to study and understand. In such a case you don't need to save the whole listing in a "_dis" file. You can also save only a part of it. Select the FILES menu and set the first memory address which initially is set to 000000 (i.e. code start) to the line you want to start with and the second number which initially is set to the code length (i.e. pointing to the end of the code) to the end line you want. Make sure that the third number which gives the base address of your code in memory is not changed. If you select SAVE now, only the listing within the given boundaries is saved to file. Before you should have deselected the H/V item in the STATUS menu. This is to avoid long list of H- and V-labels which you don't need in this case. To restore the old (complete) boundaries, reset the first number to 0 and the second number (naturally you've forgotten the old value) to a very large amount (e.g. 3FFFF), it is automatically restricted to the initially loaded length of the file.

30
Sometimes you may be interested in a certain group of assembler instructions. Therefore the mask in the SEARCH menu is intended to be of some help. This works like this: when searching a hex number, DISA ANDs the mask with a number taken from the code and compares it with the hex number to search for. Assume you want to find all calls to window manager vectors in the QPAC2demo. These calls are in the form "jsr $00xx(a2)" or "jmp $00xx(a2)". In hex this is "4EEA00xx" or "4EAA00xx". The wman-vectors are in the range $0004 ... $007F. Enter "4EAA0000" as the hex number to search for and "FFAFFF80" as mask. Then you will find all wman calls subsequently. As you're an assembler programmer you certainly will soon find some other useful examples...
2. Sometimes DISA may stutter when scrolling in WINDOW-mode. Why? If you
load a very large code file into DISA, e.g. $C000 bytes (the Minerva operating system seems to be very popular), and then jump to a location far at the end without editing, then anytime DISA is forced to scroll back or forth it must look for the next attribute. This may take a certain time if the next attribute is very far away. To avoid this you can simply set an attribute somewhere before the code you're actually interested in. Then scrolling in this area will happen much faster.

31
Release Notes DISA 3 Last Update: 2017-03-11 V1.04 Feb.94
BETA-Version of DISA 2, first distributed in Bielefeld V2.00 Mar.94
New Version of DISA 2, new manual. V2.01 Apr.94
Cursor/pointer bug fixed.
movec instruction implemented:
'movec' ; 68020 Move Control Register
'sfc' ; 68020 Source Function Code register
'dfc' ; 68020 Destination "
'cacr' ; 68020 Cache Control Register
'tc' ; 68040 MMU Translation Control Register
'itt0' ; 68040 Instruction Transparent Translation Register 0
'itt1' ; 68040 Instruction Transparent Translation Register 1
'dtt0' ; 68040 Data Transparent Translation Register 0
'dtt1' ; 68040 Data Transparent Translation Register 1
'usp' ; 68020 User Stack Pointer
'vbr' ; 68020 Vector Base Register
'caar' ; 68020 Cache Address Register
'msp' ; 68020 Master Stack Pointer
'isp' ; 68020 Interrupt Stack Pointer
'mmusr' ; 68040 MMU Stat. Pointer
'urp' ; 68040 User Route Pointer
'srp' ; 68040 Supervisor Route Pointer
size attribute added to instructions to/from sr/ccr V2.02 May.94
Address pointers now checked against index range on reading This is to avoid overflow errors on QVME and QXL cards. Unfortunately it is no longer possible to decode structures pointing out of code range.
Better handling of file names
Endflag position in Config Block Item Description corrected V2.03 May.94
Red border bug on QVME and QXL cards fixed
QXL text bug fixed
Data space for DISA job now the same with or without config block V2.04 June.95
Jump to Label and Return to Label feature implemented:

32
o Select line. Move cursor over L-Label. Klick right mouse button. To return to where you came from select line and move the cursor over a memonic. The cursor will change if a return adress is set. Then klick right mouse button.
o Up to 8 return levels are possible. V2.05 Aug.95 -------> BETA - Version of DISA 3 <--------
Code and Opcode memonic string search implemented.
Select SEARCH pulldown window and type in the desired code and/or opcode string. "^" is the ignore character. The number of spaces between code and opcode is not significant. An INSTR-Function is performed for both the code and opcode strings. Attributes are treated as keywords and are searched for first. e.g. "moveq #$00,d0" find this and only this instruction
"moveq #-$^^,d0" find all negative moveq to d0 "movec" find movec with any opcode "^ $00(a6,d1.l)" find any instruction with this opcode "^ ,(a6) find all instructions with (a6) as destination "bra L0" find all bra, bra.s, bra.l to Label L0... "code" find all "code" attributes. (The file should
have been edited first.)
NOTE: The syntax is taken from the WINDOW-mode representation of the disassembly ( _dis-File ). So "moveq #0,d0" will never match, but "moveq 0,d0 will!
Decode Config Level 02 implemented.
DISA Config Block upgraded to Level 02
MC 68020 Instruction Set Extensions implemented: (coprocessor instruction set not yet implemented) Bcc, BRA, BSR, CHK supports 32 bit displacements DIVS, DIVU, MULS, MULU supports 32/64 bit operands CMPI, TST supports pc relative addressing modes BFxxxx9 different bit field instructions BKPT, CALLM, CAS, CAS2, CHK2, CMP2, MOVES, MOVEC, PACK, RTM, TRAPcc, UNPK 12 new instructions addressing modes memory indirect, scaled index, 16/32 bit
base and outer displacements
QDOS, SMSQ and PDOS disassembly
Status items o Processor type (68000/20/30) o Operating System (QDOS/SMSQ/PDOS) o a5 usage (SYRAM/OFF) o a6 usage (SYSV/BASIC/TBC/OFF)

33
are preserved in the index file.
Codefile up to 1 Mb possible length
Index files are automatically loaded after the Codefile, if found in the same directory with the default name.
V3.00 April 96 --> D I S A 3 first distributed in Eindhoven <--
no crash with illegal 68020 address modes !
dc.b new line after LF,$00-Character or Space V3.01 April 96
movem.l Label(pc),reg_list and movem.l Label(pc,xn),reg_list now correct
"exg Ax,Ay" is decoded as "exg Ay,Ax", because all known assemblers (not only for the QL!) do it in the wrong way! If you want to use the right Motorola syntax, you can toggle with the "ascii"-attribute. The syntax for "exg Dx,Dy" and "exg Dx,Ay" is not affected.
V3.02 Oct. 96
Load Index file from ramdisc Level 3 now works
Bug with very small files and very large windows corrected. V3.03 June 97
Application menu sub-windows processed by WM.SMENU are decoded.
IOF.TRNC - bug with win-drives corrected
"undefined error" if d0 greater than error list length
SMSQ iof - trap #3 names corrected V3.04 Jan 99
Label creation routine corrected. Labels pointing out of prel or arel lists could not be found, if some internally used attributes happened to be in that list.
V3.05 Jan 17
Release for WMAN2 (by Marcel Kilgus)