installing iphone 3g front panel
TRANSCRIPT

Installing iPhone 3G Front PanelAuthor: Luke Soules
Tools used in this guideHeat gun or hair dryer (1)
Metal Spudger (1)
Phillips #00 Screwdriver (1)
Small suction cup (1)
Spudger (1)
Parts relevant to this guideiPhone 3G Front Panel Kit (1)
iPhone 3G Front Panel (1)
iPhone 3G Front Panel Adhesive Strips (1)
Installing iPhone 3G Front Panel
© 2011 iFixit — CC BY-NC-SA www.iFixit.com Page 1 of 9
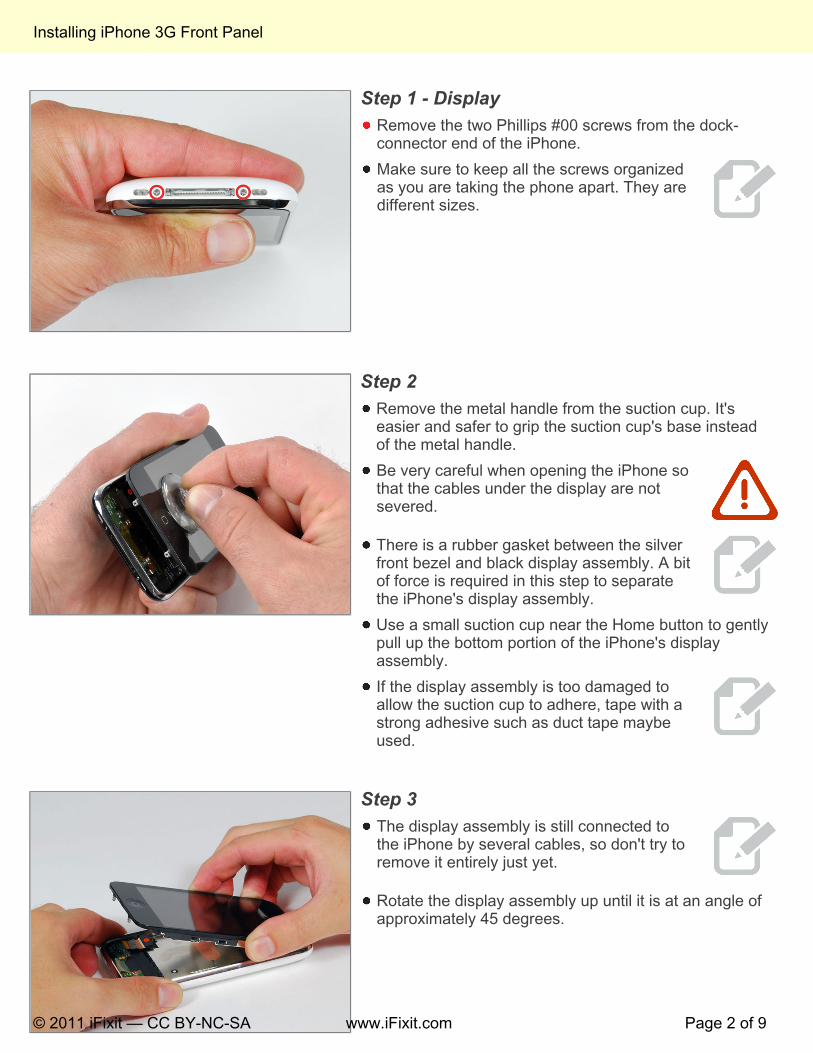
Step 1 - Display Remove the two Phillips #00 screws from the dock-connector end of the iPhone.Make sure to keep all the screws organized as you are taking the phone apart. They are different sizes.
Step 2 Remove the metal handle from the suction cup. It's easier and safer to grip the suction cup's base instead of the metal handle.Be very careful when opening the iPhone so that the cables under the display are not severed.
There is a rubber gasket between the silver front bezel and black display assembly. A bit of force is required in this step to separate the iPhone's display assembly.
Use a small suction cup near the Home button to gently pull up the bottom portion of the iPhone's display assembly.If the display assembly is too damaged to allow the suction cup to adhere, tape with a strong adhesive such as duct tape maybe used.
Step 3 The display assembly is still connected to the iPhone by several cables, so don't try to remove it entirely just yet.
Rotate the display assembly up until it is at an angle of approximately 45 degrees.
Installing iPhone 3G Front Panel
© 2011 iFixit — CC BY-NC-SA www.iFixit.com Page 2 of 9

Step 4 Continue to hold the display assembly with one hand, and use your other hand and a spudger to disconnect the black ribbon cable labeled "1."Ribbon cable "1" is connected with a plug style connector. The block at the end of the cable is the plug which is simply pushed into a socket on the circuit board. No other locking mechanism is used.
Step 5 Rotate the display assembly up until it is roughly vertical. This will allow easier access for disconnecting the remaining cables.Use a spudger to disconnect the black ribbon cable labeled "2."
Installing iPhone 3G Front Panel
© 2011 iFixit — CC BY-NC-SA www.iFixit.com Page 3 of 9

Step 6 Ribbon cable "3" is held in place by a FPC style connector. You must unlock this connector before sliding the ribbon cable out. The locking mechanism is on the opposite side of where the cable is inserted - it swivels upwards 90 degrees. Use a plastic spudger to lift the locking mechanism.
The FPC locking latch is very delicate and is typically a different color than the body of the connector. (see the detail image of FPC connector open and closed)
Slide the ribbon cable out of the connector, and remove the display assembly from the iPhone.
It's impossible to properly reinsert a ribbon into an FPC connector unless the lock is disengaged. Make sure the locking latch is open when attaching/detaching the cable.
Step 7 Remove the single Phillips #00 screw from the corner of the display assembly.
Installing iPhone 3G Front Panel
© 2011 iFixit — CC BY-NC-SA www.iFixit.com Page 4 of 9

Step 8 Remove the two Phillips #00 screws from the right side of the display assembly.
Step 9 Turn the display over, and if there is a thin strip of black tape on the edge of the display assembly, carefully peel it up.Keeping the tape from sticking to itself can be tricky. We recommend placing the tape on a wax-coated piece of paper (any sticker backing will do).
Step 10 Remove the three Phillips #00 screws from the left side of the display assembly.
Installing iPhone 3G Front Panel
© 2011 iFixit — CC BY-NC-SA www.iFixit.com Page 5 of 9

Step 11 Carefully insert a metal spudger between the two metal rails along the edge of the display assembly. Gently rotate the spudger to lift the LCD up from the glass.
Step 12 Turn the display assembly over and again carefully insert a metal spudger between the two metal rails along the edge of the display assembly. Gently rotate the spudger to lift the LCD up from the glass.
Step 13 Separate the LCD and glass by sliding the LCD panel away from the ribbon cables on the glass.
Installing iPhone 3G Front Panel
© 2011 iFixit — CC BY-NC-SA www.iFixit.com Page 6 of 9
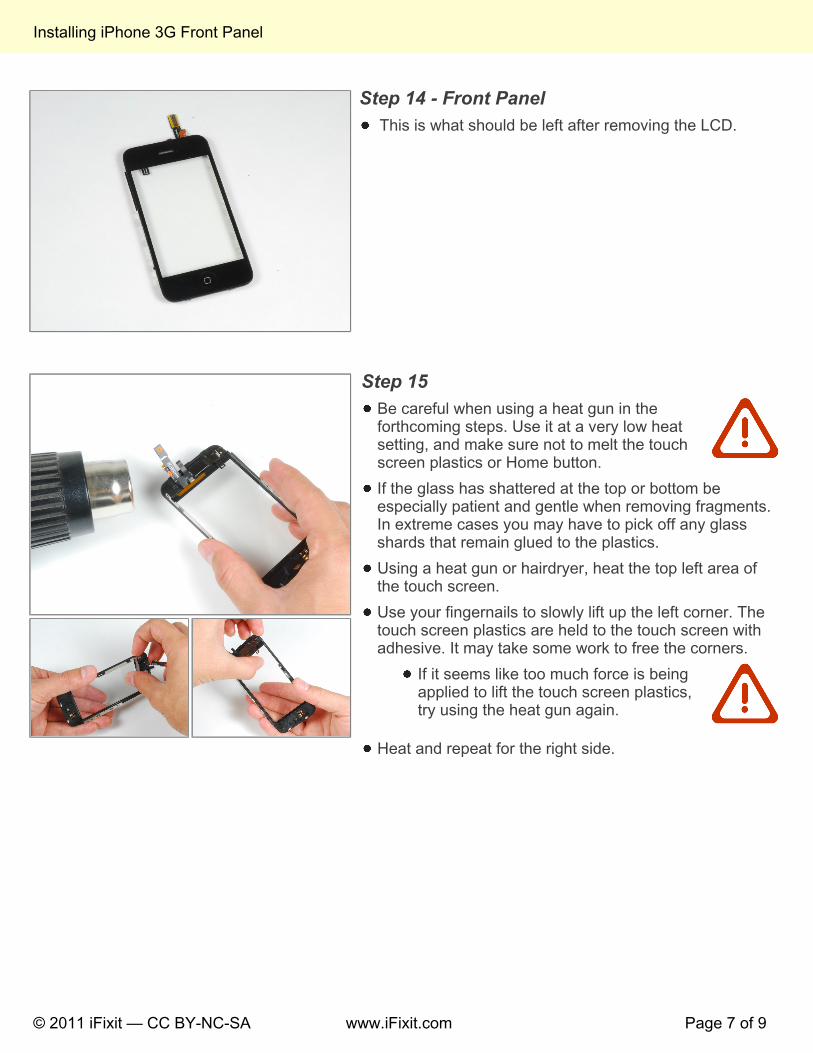
Step 14 - Front Panel This is what should be left after removing the LCD.
Step 15 Be careful when using a heat gun in the forthcoming steps. Use it at a very low heat setting, and make sure not to melt the touch screen plastics or Home button.
If the glass has shattered at the top or bottom be especially patient and gentle when removing fragments. In extreme cases you may have to pick off any glass shards that remain glued to the plastics.Using a heat gun or hairdryer, heat the top left area of the touch screen.Use your fingernails to slowly lift up the left corner. The touch screen plastics are held to the touch screen with adhesive. It may take some work to free the corners.
If it seems like too much force is being applied to lift the touch screen plastics, try using the heat gun again.
Heat and repeat for the right side.
Installing iPhone 3G Front Panel
© 2011 iFixit — CC BY-NC-SA www.iFixit.com Page 7 of 9
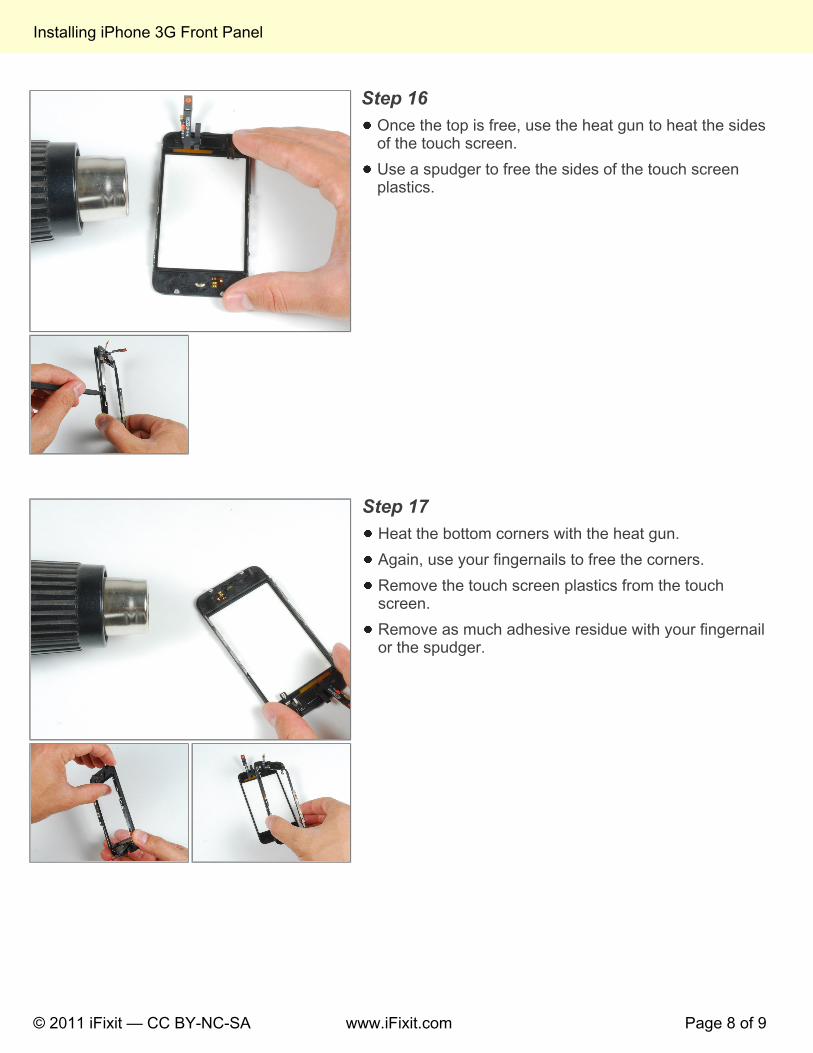
Step 16 Once the top is free, use the heat gun to heat the sides of the touch screen.Use a spudger to free the sides of the touch screen plastics.
Step 17 Heat the bottom corners with the heat gun.Again, use your fingernails to free the corners.Remove the touch screen plastics from the touch screen.Remove as much adhesive residue with your fingernail or the spudger.
Installing iPhone 3G Front Panel
© 2011 iFixit — CC BY-NC-SA www.iFixit.com Page 8 of 9
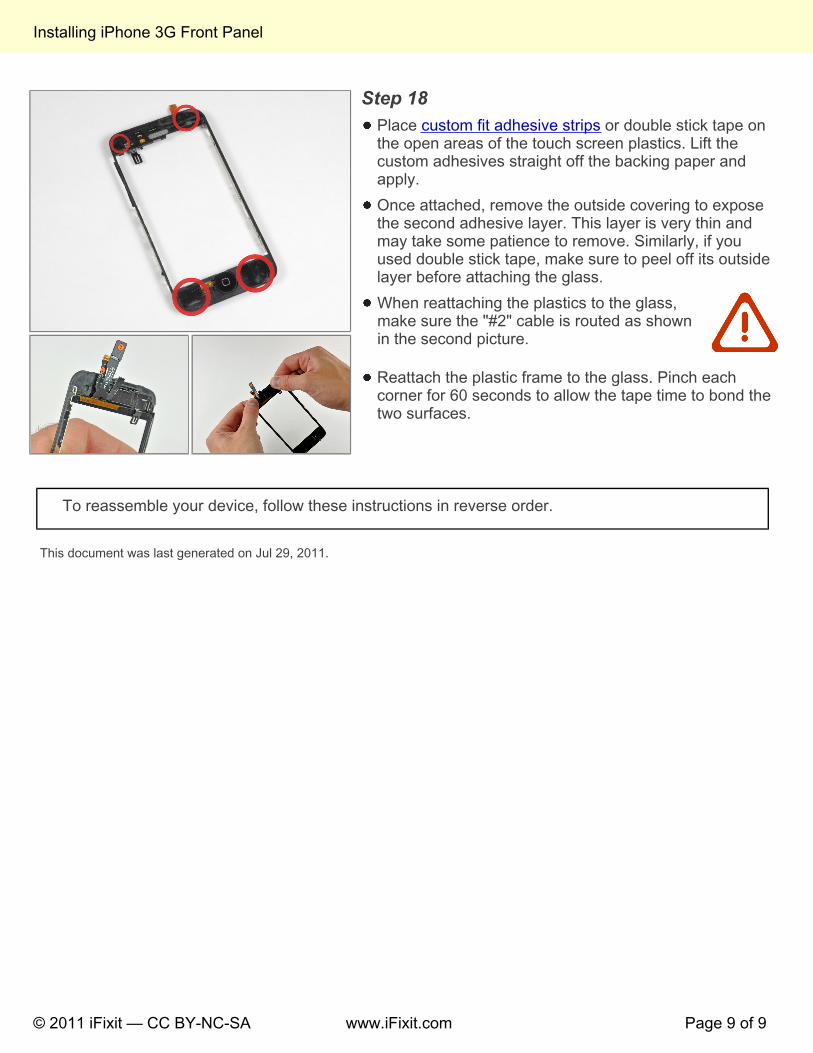
Step 18 Place custom fit adhesive strips or double stick tape on the open areas of the touch screen plastics. Lift the custom adhesives straight off the backing paper and apply.Once attached, remove the outside covering to expose the second adhesive layer. This layer is very thin and may take some patience to remove. Similarly, if you used double stick tape, make sure to peel off its outside layer before attaching the glass.When reattaching the plastics to the glass, make sure the "#2" cable is routed as shown in the second picture.
Reattach the plastic frame to the glass. Pinch each corner for 60 seconds to allow the tape time to bond the two surfaces.
To reassemble your device, follow these instructions in reverse order.
This document was last generated on Jul 29, 2011.
Installing iPhone 3G Front Panel
© 2011 iFixit — CC BY-NC-SA www.iFixit.com Page 9 of 9