gca software installation -...
TRANSCRIPT

GCA Software Installation Guide

Disable the existing hard disks backup/restoration programs such as Deep Freeze, goBack.
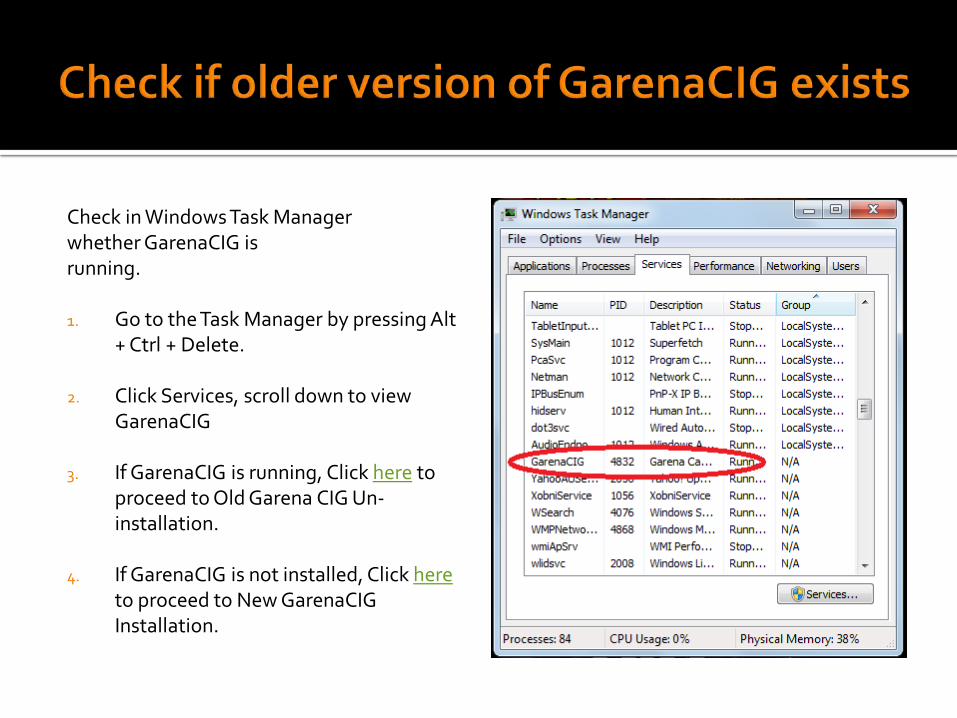
Check in Windows Task Manager whether GarenaCIG is running.
1. Go to the Task Manager by pressing Alt
+ Ctrl + Delete.
2. Click Services, scroll down to view GarenaCIG
3. If GarenaCIG is running, Click here to proceed to Old Garena CIG Un-installation.
4. If GarenaCIG is not installed, Click here to proceed to New GarenaCIG Installation.

1. Right click GarenaCIG. 2. Run as Administrator.
(Alternatively on some computers, double click Garena CIG program)

1. Click Uninstall on the Prompt shown.
2. A new prompt will show that the un-installation is successful. 3. Proceed to the next page for New GarenaCIG Installation.
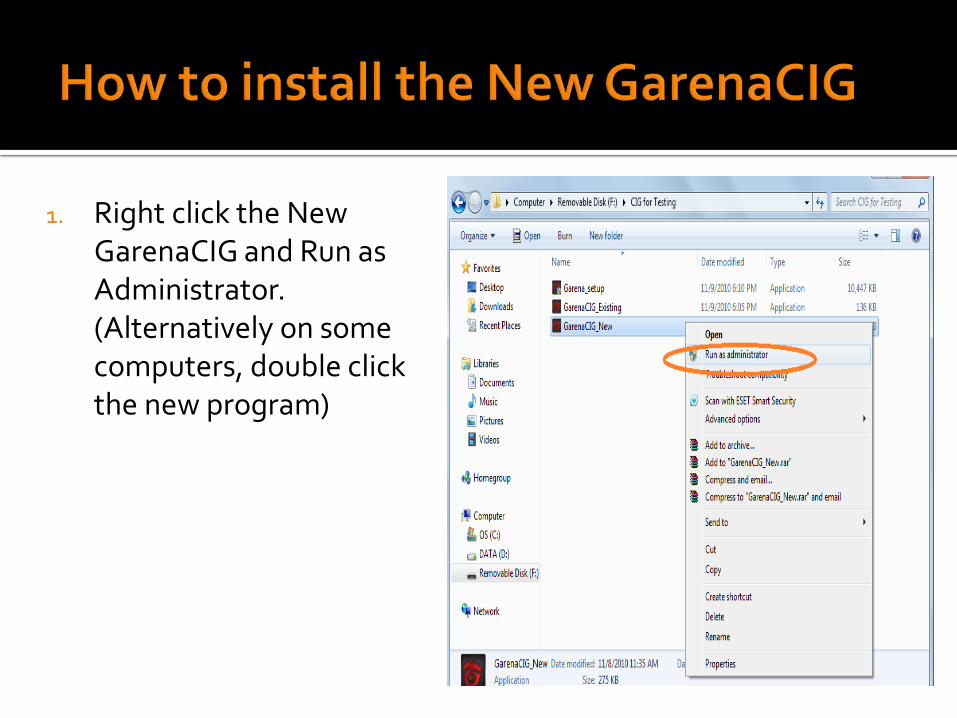
1. Right click the New GarenaCIG and Run as Administrator. (Alternatively on some computers, double click the new program)

1. Input GCA Key and click install.
2. A new prompt will show message: Installation completed.
1. Check the GarenaCIG icon.
2. Check Garena Messenger.
3. Check Garena Client.

1. Click Garena CIG icon located at the lower right corner of the monitor.
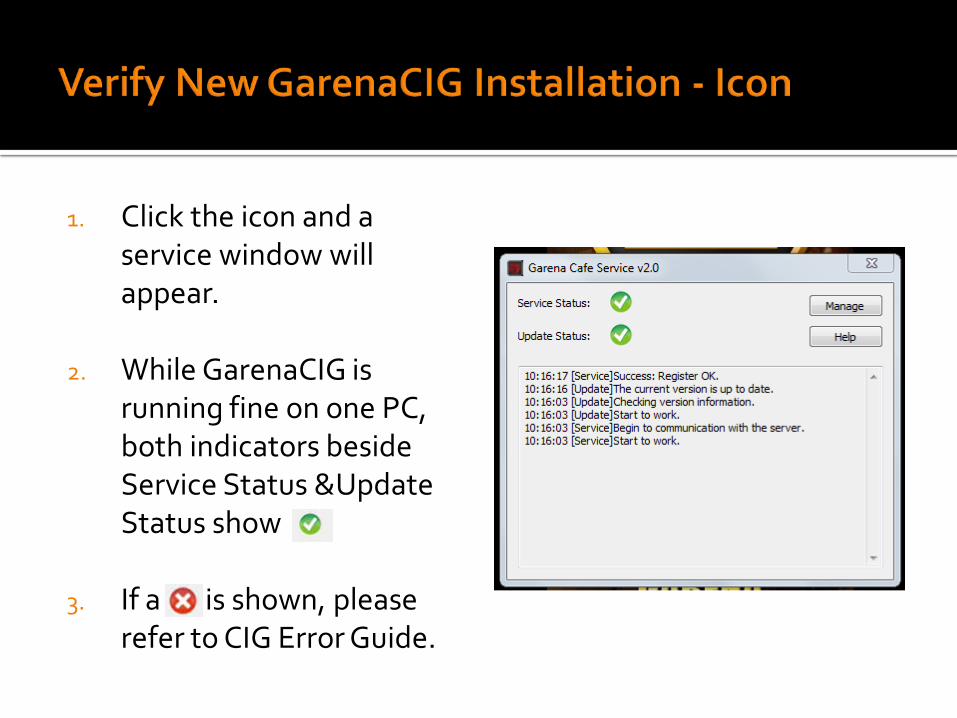
1. Click the icon and a service window will appear.
2. While GarenaCIG is running fine on one PC, both indicators beside Service Status &Update Status show
3. If a is shown, please refer to CIG Error Guide.

1. Log in with your Garena Username and Password 2. Gold Member Status is shown on the top right besides Member Type.

Gold Member Status is shown on the top right Corner.

If verification succeed:
1. Enable the hard disks backup/restoration programs.
2. Restart the computers.

THANK YOU.