feature configuration for cisco jabber 11 · table 1: feature quick reference feature name...
TRANSCRIPT

Feature Configuration for Cisco Jabber 11.8First Published: 2016-11-29
Last Modified: 2017-12-06
Americas HeadquartersCisco Systems, Inc.170 West Tasman DriveSan Jose, CA 95134-1706USAhttp://www.cisco.comTel: 408 526-4000 800 553-NETS (6387)Fax: 408 527-0883

THE SPECIFICATIONS AND INFORMATION REGARDING THE PRODUCTS IN THIS MANUAL ARE SUBJECT TO CHANGE WITHOUT NOTICE. ALL STATEMENTS,INFORMATION, AND RECOMMENDATIONS IN THIS MANUAL ARE BELIEVED TO BE ACCURATE BUT ARE PRESENTED WITHOUT WARRANTY OF ANY KIND,EXPRESS OR IMPLIED. USERS MUST TAKE FULL RESPONSIBILITY FOR THEIR APPLICATION OF ANY PRODUCTS.
THE SOFTWARE LICENSE AND LIMITEDWARRANTY FOR THE ACCOMPANYING PRODUCT ARE SET FORTH IN THE INFORMATION PACKET THAT SHIPPED WITHTHE PRODUCT AND ARE INCORPORATED HEREIN BY THIS REFERENCE. IF YOU ARE UNABLE TO LOCATE THE SOFTWARE LICENSE OR LIMITED WARRANTY,CONTACT YOUR CISCO REPRESENTATIVE FOR A COPY.
The Cisco implementation of TCP header compression is an adaptation of a program developed by the University of California, Berkeley (UCB) as part of UCB's public domain versionof the UNIX operating system. All rights reserved. Copyright © 1981, Regents of the University of California.
NOTWITHSTANDINGANYOTHERWARRANTYHEREIN, ALL DOCUMENT FILES AND SOFTWARE OF THESE SUPPLIERS ARE PROVIDED “AS IS"WITH ALL FAULTS.CISCO AND THE ABOVE-NAMED SUPPLIERS DISCLAIM ALL WARRANTIES, EXPRESSED OR IMPLIED, INCLUDING, WITHOUT LIMITATION, THOSE OFMERCHANTABILITY, FITNESS FORA PARTICULAR PURPOSEANDNONINFRINGEMENTORARISING FROMACOURSEOFDEALING, USAGE, OR TRADE PRACTICE.
IN NO EVENT SHALL CISCO OR ITS SUPPLIERS BE LIABLE FOR ANY INDIRECT, SPECIAL, CONSEQUENTIAL, OR INCIDENTAL DAMAGES, INCLUDING, WITHOUTLIMITATION, LOST PROFITS OR LOSS OR DAMAGE TO DATA ARISING OUT OF THE USE OR INABILITY TO USE THIS MANUAL, EVEN IF CISCO OR ITS SUPPLIERSHAVE BEEN ADVISED OF THE POSSIBILITY OF SUCH DAMAGES.
Any Internet Protocol (IP) addresses and phone numbers used in this document are not intended to be actual addresses and phone numbers. Any examples, command display output, networktopology diagrams, and other figures included in the document are shown for illustrative purposes only. Any use of actual IP addresses or phone numbers in illustrative content is unintentionaland coincidental.
Cisco and the Cisco logo are trademarks or registered trademarks of Cisco and/or its affiliates in the U.S. and other countries. To view a list of Cisco trademarks, go to this URL: https://www.cisco.com/go/trademarks. Third-party trademarks mentioned are the property of their respective owners. The use of the word partner does not imply a partnershiprelationship between Cisco and any other company. (1721R)
© 2018 Cisco Systems, Inc. All rights reserved.

C O N T E N T S
P r e f a c e New and Changed Information vii
New and Changed Information vii
C H A P T E R 1 Getting Started 1
About Cisco Jabber 1
Purpose of this Guide 1
Feature Configuration Overview 1
C H A P T E R 2 Chat and Presence 7
Browser Click to Call 7
Click to Call from Google Chrome 8
Click to Call from Mozilla Firefox 8
Click to Call from Internet Explorer 8
Custom Emoticons 8
Emoticon Definitions 10
DND Status Cascading 12
Enterprise Groups for Cisco Unified Communications Manager IM and Presence Service 12
Enable Enterprise Groups 14
File Transfers and Screen Captures 15
Enable File Transfers and Screen Captures 15
Enable File Transfer and Screen Captures for Group Chats and Chat Rooms 16
Enable File Transfer and Screen Captures for Peer to Peer Chats Only 16
Configuring Maximum File Transfer Size 17
My Jabber Chats and My Jabber Files Directory Location 17
Multiple Device Messaging for Cloud and On-Premises Deployments 18
Enable Multiple Device Messaging 18
Persistent Chat Rooms 19
Feature Configuration for Cisco Jabber 11.8 iii
Configure Persistent Chat 19
Administer and Moderate Persistent Chat Rooms 23
Enable Persistent Chat Room Passwords 24
Prompts for Presence Subscription Requests 24
Push Notification Service for IM 26
Restore Chats on Login 26
Temporary Presence 27
Blocked Domain Support for WebEx Messenger Users 27
C H A P T E R 3 Voice and Video 29
Bridge Escalations 29
Call Park 30
Configure Clusterwide Call Park 31
Configure a Partition for Call Park 31
Configure a Call Park Number 32
Call Park Configuration Fields 33
Call Pickup 34
Configure Call Pickup Group 36
Assign Directory Number 36
Configure Other Call Pickup 37
Configure Directed Call Pickup 38
Auto Call Pickup 38
Configure Auto Call Pickup 39
Collaboration Meeting Rooms 39
Dial via Office 40
Set Up Cisco Unified Communications Manager to Support Dial via Office 42
Set Up Enterprise Feature Access Number 42
Set Up Mobility Profile 43
Verify Device COP File Version 43
Set Up Dial via Office for Each Device 44
Add Mobility Identity 44
Enable Dial via Office on Each Device 46
Far End Camera Control (FECC) 46
Flexible DSCP Values 47
Hunt Group 47
Feature Configuration for Cisco Jabber 11.8iv
Contents

Line Group 48
Configure Line Group 48
Hunt List 49
Configure Hunt List 49
Add Line Group to Hunt List 50
Hunt Pilot 50
Configure Hunt Pilot 51
Jabber to Jabber Call 51
Jabber to Jabber Hybrid Mode 53
Jabber to Jabber Bandwidth 54
Mobile Connect 54
Enable Mobile Connect 54
Add Remote Destination (Optional) 56
Move to Mobile 57
Enable Handoff from VoIP to Mobile Network 58
Set Up Handoff DN 59
Match Caller ID with Mobility Identity 59
Set Up User and Device Settings for Handoff 60
Enable Transfer from VoIP to Mobile Network 61
Personal Rooms 61
URI Dialing 62
Associate URIs to Directory Numbers 62
Automatically Populate Directory Numbers with URIs 62
Configure Directory Numbers with URIs 63
Associate the Directory URI Partition 64
Enable FQDN in SIP Requests for Contact Resolution 64
Voicemail Avoidance 65
Set Up Timer-Controlled Voicemail Avoidance 65
Set Up User-Controlled Voicemail Avoidance 65
Set Up Cisco Unified Communications Manager to Support Voicemail Avoidance 66
Enable Voicemail Avoidance on Mobility Identity 66
Enable Voicemail Avoidance on Remote Destination 67
C H A P T E R 4 Security and Monitoring 69
Logout Inactivity Timer 69
Feature Configuration for Cisco Jabber 11.8 v
Contents

Problem Reporting 69
Decrypt the Problem Report 70
Set Device PIN 71
Silent Monitoring and Call Recording 72
Telemetry 72
C H A P T E R 5 Platform 75
Custom Embedded Tabs 75
Custom Embedded Tab Definitions 75
User Custom Tabs 77
Custom Icons 77
Chats and Calls from Custom Tabs 77
UserID Tokens 77
JavaScript Notifications 78
Show Call Events in Custom Tabs 80
Custom Embedded Tab Example 81
C H A P T E R 6 Third Party Integrations 83
Calendar Integration and Contact Resolution 83
Chat History in Microsoft Outlook 85
Set Parameter to Save Chat History in Outlook 85
Limitations for Saving Chat History to an Outlook Folder 85
Authentication Modes 86
Authenticate Using Single Sign On for the Operating System 86
Authenticate by Synching Credentials 86
Specify Server Addresses 87
Detect Server Addresses Automatically 87
Define Server Addresses 87
IBM Notes Contact Search and Calendar Integration 88
Integration with Microsoft Products 88
Microsoft Outlook Calendar Events 90
Microsoft Outlook Presence Integration 90
Enable Presence with the Active Directory User and Computers Tool 91
Add Local Contacts from Microsoft Outlook 91
Feature Configuration for Cisco Jabber 11.8vi
Contents

New and Changed Information
• New and Changed Information, page vii
New and Changed InformationWhen DocumentedWhere DocumentedDescription of Change
May 2017Chat History in MicrosoftOutlook
Added Office 365 for supported Microsoftplatforms
March. 2017See the Table of ContentsBlocked Domain Support for WebExMessenger Users
Feb, 2017See the Table of Contents.Added Push Notification Service for IM topic
Dec, 2016See the Table of Contents.Updated topics are:
• Chat History in Microsoft Outlook
• Enable Dial via Office on Each Device
• Feature Configuration Overview
• Set Device PIN
• Restore Chats on Login
Feature Configuration for Cisco Jabber 11.8 vii

Feature Configuration for Cisco Jabber 11.8viii
New and Changed InformationNew and Changed Information
C H A P T E R 1Getting Started
• About Cisco Jabber, page 1
• Purpose of this Guide, page 1
• Feature Configuration Overview, page 1
About Cisco JabberCisco Jabber is a suite of Unified Communications applications that allow seamless interaction with yourcontacts from anywhere. Cisco Jabber offers IM, presence, audio and video calling, voicemail, and conferencing.
The applications in the Cisco Jabber family of products are:
• Cisco Jabber for Android
• Cisco Jabber for iPhone and iPad
• Cisco Jabber for Mac
• Cisco Jabber for Windows
For more information about the Cisco Jabber suite of products, see https://www.cisco.com/go/jabber.
Purpose of this GuideThis document describes some of the features of Cisco Jabber. Configuration information and the list ofsupported clients is given for each feature.
Feature Configuration OverviewThe following table provides an alphabetical list of the features described in this document, and lists whichclients are supported for each feature.
Feature Configuration for Cisco Jabber 11.8 1

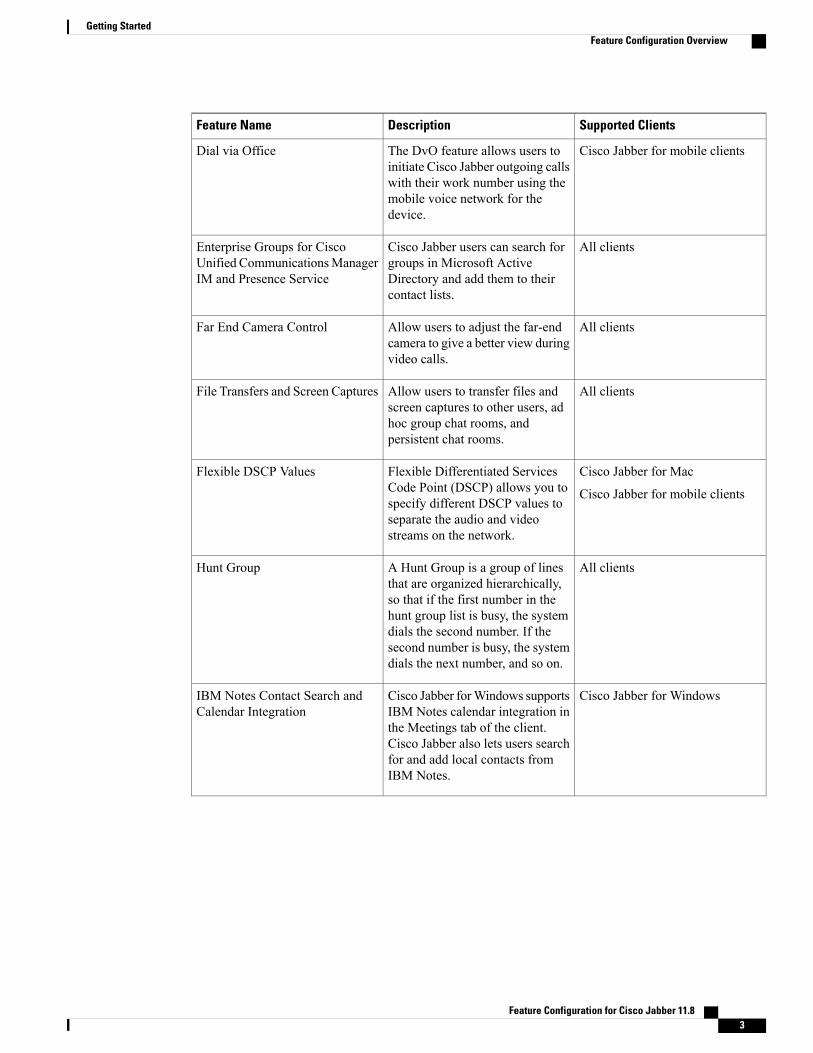
Table 1: Feature Quick Reference
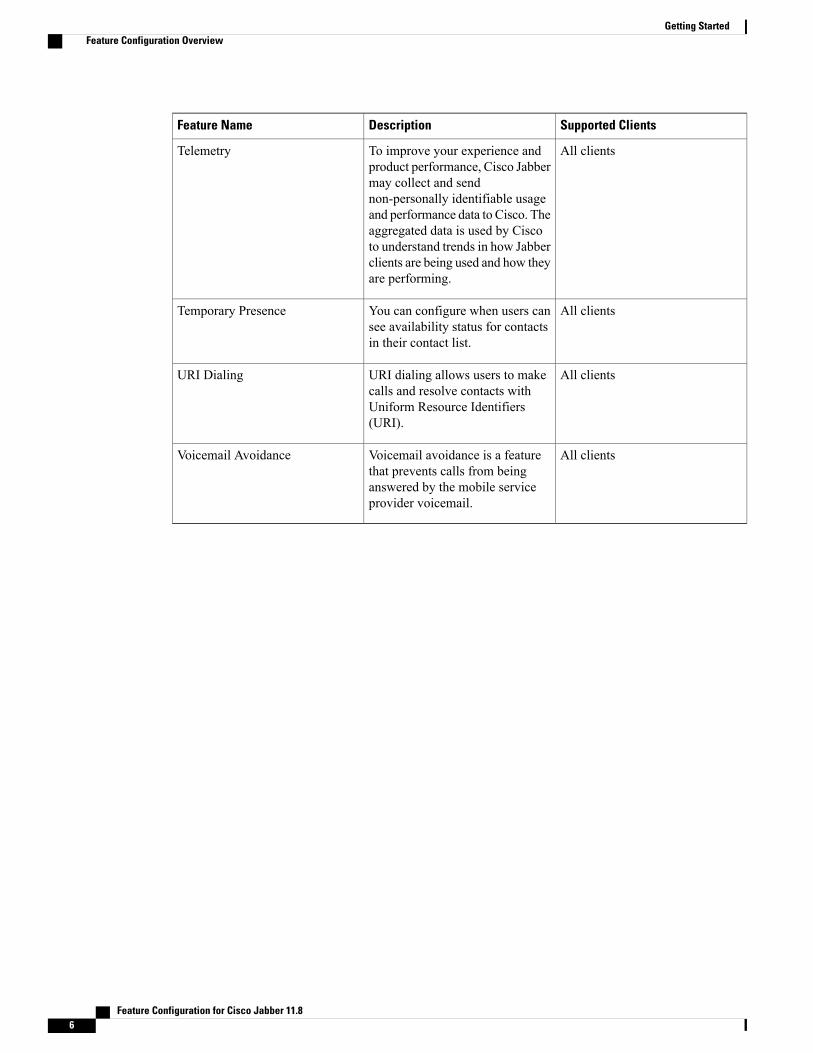
Supported ClientsDescriptionFeature Name
All clientsBridge escalations allow users toquickly escalate a group chat to aconference call.
Bridge Escalations
Cisco Jabber for WindowsUsers can start a call from abrowser by right-clicking on anynumber, URI, or alphanumericalstring.
Browser Click to Call
Cisco Jabber for Windows
Cisco Jabber for mobile clients
Let users search for and addcontacts from their localMicrosoftOutlook or IBMNotes contact lists.Let users integrate their localcalendar (Microsoft Outlook, IBMNotes, or Google Calendar) andview meetings events from theMeetings tab on the client.
Calendar Integration and ContactResolution
Cisco Jabber for mobile clientsYou can use call park to place acall on hold and pick it up fromanother phone in a CiscoUnifiedCommunication Managersystem.
Call Park
Cisco Jabber for Windows
Cisco Jabber for Mac
Call pickup allows users to pick upincoming calls within their owngroup.
Call Pickup
Cisco Jabber for Windows
Cisco Jabber for Mac
Allow users to automatically savechat histories to a Cisco JabberChats folder in the user's MicrosoftOutlook application.
Chat History inMicrosoft Outlook
All clientsCisco Collaboration MeetingRooms (CMR) Cloud provideseasy access for users to join or starta Cisco WebEx meeting.
Collaboration Meetings Rooms
All clientsCustom embedded tabs displayHTML content in the clientinterface.
Custom Embedded Tabs
Cisco Jabber for WindowsAdd custom emoticons to CiscoJabber for Windows by creatingemoticon definitions in an XMLfile and saving it to the file system.
Custom Emoticons
Feature Configuration for Cisco Jabber 11.82
Getting StartedFeature Configuration Overview
Supported ClientsDescriptionFeature Name
Cisco Jabber for mobile clientsThe DvO feature allows users toinitiate Cisco Jabber outgoing callswith their work number using themobile voice network for thedevice.
Dial via Office
All clientsCisco Jabber users can search forgroups in Microsoft ActiveDirectory and add them to theircontact lists.
Enterprise Groups for CiscoUnified CommunicationsManagerIM and Presence Service
All clientsAllow users to adjust the far-endcamera to give a better view duringvideo calls.
Far End Camera Control
All clientsAllow users to transfer files andscreen captures to other users, adhoc group chat rooms, andpersistent chat rooms.
File Transfers and Screen Captures
Cisco Jabber for Mac
Cisco Jabber for mobile clients
Flexible Differentiated ServicesCode Point (DSCP) allows you tospecify different DSCP values toseparate the audio and videostreams on the network.
Flexible DSCP Values
All clientsA Hunt Group is a group of linesthat are organized hierarchically,so that if the first number in thehunt group list is busy, the systemdials the second number. If thesecond number is busy, the systemdials the next number, and so on.
Hunt Group
Cisco Jabber for WindowsCisco Jabber forWindows supportsIBM Notes calendar integration inthe Meetings tab of the client.Cisco Jabber also lets users searchfor and add local contacts fromIBM Notes.
IBM Notes Contact Search andCalendar Integration
Feature Configuration for Cisco Jabber 11.8 3
Getting StartedFeature Configuration Overview

Supported ClientsDescriptionFeature Name
Cisco Jabber for Windows
Cisco Jabber for Mac
Cisco Jabber supports a range ofMicrosoft products that integratewith the application:
• Internet Explorer
• Microsoft Office
• Microsoft Office 365
• Microsoft SharePoint
IntegrationwithMicrosoft Products
All clientsJabber to Jabber voice and videocalling provides basic callingcapabilities between two CiscoJabber clients without using CiscoUnified CommunicationsManager.
Jabber to Jabber Call
All clientsThe sign out inactivity timer allowsyou to automatically sign users outof the client after a specifiedamount of time of inactivity.
Logout Inactivity Timer
Cisco Jabber for WindowsDisplay Microsoft Outlookcalendar events in theMeetings tabof Cisco Jabber.
Microsoft OutlookCalendar Events
Cisco Jabber for Windows
Cisco Jabber for Mac
Display presence status inMicrosoft Outlook
Microsoft Outlook PresenceIntegration
Cisco Jabber for mobile clientsMobile connect allows incomingcalls to the user's enterprise numberto extend to the iPhone or Androiddual-mode device through themobile voice network.
Mobile Connect
Cisco Jabber for mobile clientsUsers can transfer an active VoIPcall from Cisco Jabber to theirmobile phone number on themobile network.
Move to Mobile
All clientsUsers who are signed into multipledevices can see all sent andreceived IMs on each deviceregardless of which device isactive.
Multiple Device Messaging forCloud Deployments
Feature Configuration for Cisco Jabber 11.84
Getting StartedFeature Configuration Overview

Supported ClientsDescriptionFeature Name
Cisco Jabber for WindowsSpecify a directory location forsaved instant messages and filetransfers, or let users specify theirown location.
My Jabber Chats and My JabberFiles Directory Location
Cisco Jabber for Windows
Cisco Jabber for Mac
Persistent chat is a permanent chatroom that offers ongoing access toa discussion thread. It is availableeven if no one is currently in thechat room and remains availableuntil explicitly removed from thesystem.
Persistent Chat Rooms
All clientsA personal room is a virtualconference room that is alwaysavailable and can be used to meetwith people. Cisco Jabber uses thepersonal room feature of CiscoWebEx Meeting Center to allowusers to easily meet with theircontacts using the Meet Nowoption in the client.
Personal Rooms
All clientsProblem reporting enables users tosend a summary of issues that theyencounter with the client.
Problem Reporting
All clientsYou can enable or disable promptsfor presence subscription requestsfrom contacts within yourorganization.
Prompts for Presence SubscriptionRequests
All clientsAllows users to specify if open 1:1chat sessions are restored on nextsign in.
Restore Chats on Login
Cisco Jabber for mobile clientsYou can configure if Jabber checksthat the device is secured with aPIN.
Set Device PIN
All clientsSilent call monitoring allows asupervisor to hear both callparticipants, but neither of the callparticipants can hear thesupervisor. Call recording enablesa recording server to archive agentconversations.
Silent Monitoring and CallRecording
Feature Configuration for Cisco Jabber 11.8 5
Getting StartedFeature Configuration Overview
Supported ClientsDescriptionFeature Name
All clientsTo improve your experience andproduct performance, Cisco Jabbermay collect and sendnon-personally identifiable usageand performance data to Cisco. Theaggregated data is used by Ciscoto understand trends in how Jabberclients are being used and how theyare performing.
Telemetry
All clientsYou can configure when users cansee availability status for contactsin their contact list.
Temporary Presence
All clientsURI dialing allows users to makecalls and resolve contacts withUniform Resource Identifiers(URI).
URI Dialing
All clientsVoicemail avoidance is a featurethat prevents calls from beinganswered by the mobile serviceprovider voicemail.
Voicemail Avoidance
Feature Configuration for Cisco Jabber 11.86
Getting StartedFeature Configuration Overview
C H A P T E R 2Chat and Presence
• Browser Click to Call , page 7
• Custom Emoticons, page 8
• DND Status Cascading, page 12
• Enterprise Groups for Cisco Unified Communications Manager IM and Presence Service, page 12
• File Transfers and Screen Captures, page 15
• My Jabber Chats and My Jabber Files Directory Location, page 17
• Multiple Device Messaging for Cloud and On-Premises Deployments, page 18
• Persistent Chat Rooms, page 19
• Prompts for Presence Subscription Requests, page 24
• Push Notification Service for IM, page 26
• Restore Chats on Login, page 26
• Temporary Presence, page 27
• Blocked Domain Support for WebEx Messenger Users, page 27
Browser Click to CallApplies to: Cisco Jabber for Windows
With Browser Click to Call, users can start a call from any of the following browsers:
• Internet Explorer, from version 9
• Mozilla Firefox, from version 38.0a1
• Google Chrome, from version 45
Users can highlight and right-click on any number, URI, or alphanumerical string and choose one of thefollowing options:
• Call—Spaces and punctuation are stripped and the call is started.
Feature Configuration for Cisco Jabber 11.8 7

• Call with Edit—Spaces and punctuation are stripped and the number is displayed in the Search box ofthe hub window. Users can edit the number before starting the call.
Browser Click to Call is enabledwith the CLICK2X installation parameter. If this parameter is set to ENABLED(default value), the feature is enabled. To disable this feature, you must set the CLICK2X installation parameterto DISABLE. For more information about the CLICK2X parameter, see the Deployment Guide for yourrelease.
Click to Call from Google ChromeClick to Call from the Google Chrome browser requires user input before it can be enabled. After users installand sign into Cisco Jabber, they must restart the Google Chrome browser. When the browser opens, a popupdisplays requesting users to allow installation of the “Jabber Call” extension. Users must allow the installationby clicking Enable Extension. The extension is installed and users can now make calls by highlighting andright-clicking on any phone number that is displayed in the browser.
If users do not have administrator privileges for their machine, they do not receive the popup requesting themto allow installation of the “Jabber Call” extension. In this case, users must contact their system administratorto install the extension.
Click to Call from Mozilla FirefoxClick to Call from the Mozilla Firefox browser requires user input before it can be enabled. After users installCisco Jabber, they must restart the Firefox browser. When the browser opens, a popup displays requestingusers to allow installation of the “JabberCallAddOn” add-on. Users must allow the installation by clickingAllow this installation and Continue. The add-on is installed and users can now make calls by highlightingand right-clicking on any phone number that is displayed in the browser.
Click to Call from Internet ExplorerClick to Call from the Internet Explorer browser does not require any user permissions or installations.
Custom EmoticonsApplies to: Cisco Jabber for Windows
You can add custom emoticons to Cisco Jabber for Windows by creating emoticon definitions in an XMLfile and saving it to the file system.
Feature Configuration for Cisco Jabber 11.88
Chat and PresenceClick to Call from Google Chrome
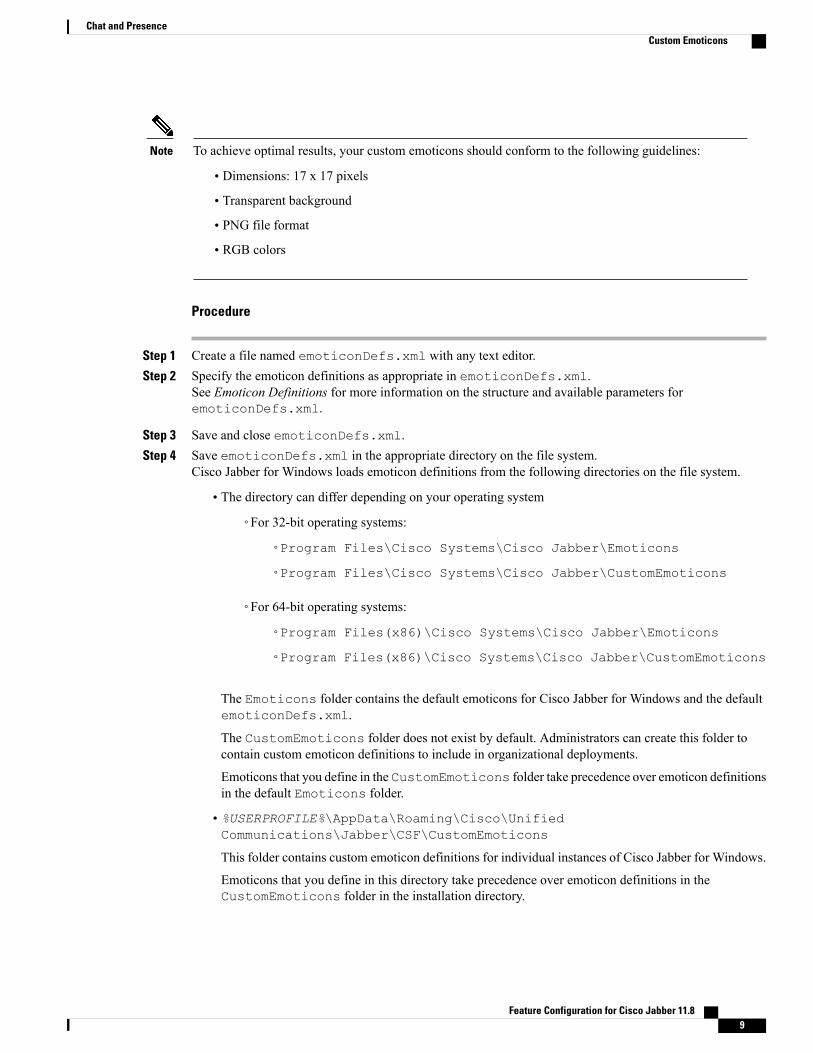
To achieve optimal results, your custom emoticons should conform to the following guidelines:Note
• Dimensions: 17 x 17 pixels
• Transparent background
• PNG file format
• RGB colors
Procedure
Step 1 Create a file named emoticonDefs.xml with any text editor.Step 2 Specify the emoticon definitions as appropriate in emoticonDefs.xml.
See Emoticon Definitions for more information on the structure and available parameters foremoticonDefs.xml.
Step 3 Save and close emoticonDefs.xml.Step 4 Save emoticonDefs.xml in the appropriate directory on the file system.
Cisco Jabber for Windows loads emoticon definitions from the following directories on the file system.
• The directory can differ depending on your operating system
◦For 32-bit operating systems:
◦Program Files\Cisco Systems\Cisco Jabber\Emoticons
◦Program Files\Cisco Systems\Cisco Jabber\CustomEmoticons
◦For 64-bit operating systems:
◦Program Files(x86)\Cisco Systems\Cisco Jabber\Emoticons
◦Program Files(x86)\Cisco Systems\Cisco Jabber\CustomEmoticons
The Emoticons folder contains the default emoticons for Cisco Jabber for Windows and the defaultemoticonDefs.xml.
The CustomEmoticons folder does not exist by default. Administrators can create this folder tocontain custom emoticon definitions to include in organizational deployments.
Emoticons that you define in the CustomEmoticons folder take precedence over emoticon definitionsin the default Emoticons folder.
• %USERPROFILE%\AppData\Roaming\Cisco\UnifiedCommunications\Jabber\CSF\CustomEmoticons
This folder contains custom emoticon definitions for individual instances of Cisco Jabber for Windows.
Emoticons that you define in this directory take precedence over emoticon definitions in theCustomEmoticons folder in the installation directory.
Feature Configuration for Cisco Jabber 11.8 9
Chat and PresenceCustom Emoticons
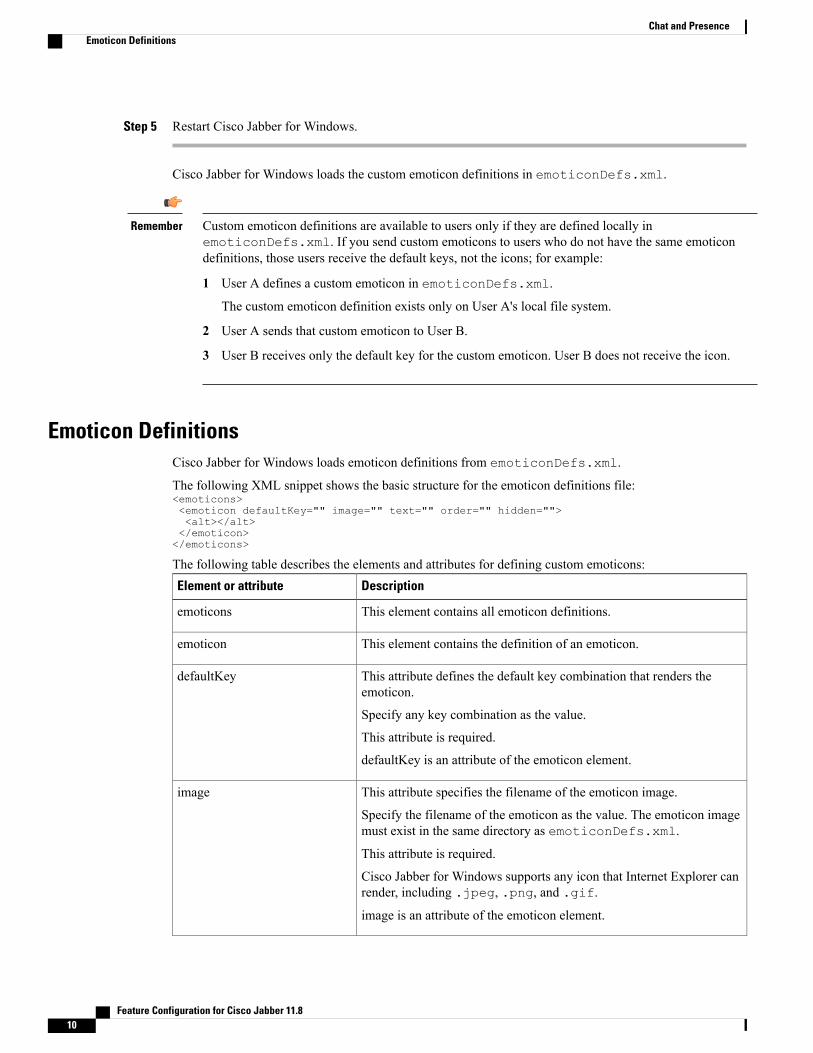
Step 5 Restart Cisco Jabber for Windows.
Cisco Jabber for Windows loads the custom emoticon definitions in emoticonDefs.xml.
Custom emoticon definitions are available to users only if they are defined locally inemoticonDefs.xml. If you send custom emoticons to users who do not have the same emoticondefinitions, those users receive the default keys, not the icons; for example:
Remember
1 User A defines a custom emoticon in emoticonDefs.xml.
The custom emoticon definition exists only on User A's local file system.
2 User A sends that custom emoticon to User B.
3 User B receives only the default key for the custom emoticon. User B does not receive the icon.
Emoticon DefinitionsCisco Jabber for Windows loads emoticon definitions from emoticonDefs.xml.
The following XML snippet shows the basic structure for the emoticon definitions file:<emoticons><emoticon defaultKey="" image="" text="" order="" hidden=""><alt></alt></emoticon></emoticons>
The following table describes the elements and attributes for defining custom emoticons:DescriptionElement or attribute
This element contains all emoticon definitions.emoticons
This element contains the definition of an emoticon.emoticon
This attribute defines the default key combination that renders theemoticon.
Specify any key combination as the value.
This attribute is required.
defaultKey is an attribute of the emoticon element.
defaultKey
This attribute specifies the filename of the emoticon image.
Specify the filename of the emoticon as the value. The emoticon imagemust exist in the same directory as emoticonDefs.xml.
This attribute is required.
Cisco Jabber for Windows supports any icon that Internet Explorer canrender, including .jpeg, .png, and .gif.
image is an attribute of the emoticon element.
image
Feature Configuration for Cisco Jabber 11.810
Chat and PresenceEmoticon Definitions
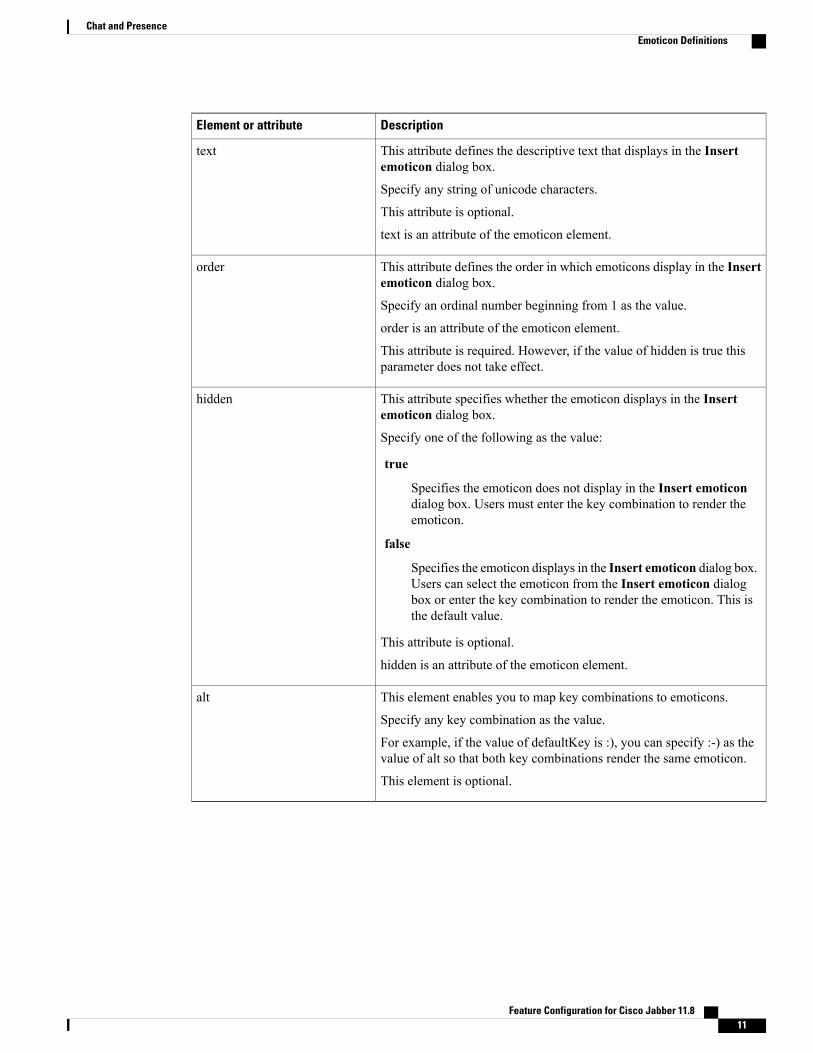
DescriptionElement or attribute
This attribute defines the descriptive text that displays in the Insertemoticon dialog box.
Specify any string of unicode characters.
This attribute is optional.
text is an attribute of the emoticon element.
text
This attribute defines the order in which emoticons display in the Insertemoticon dialog box.
Specify an ordinal number beginning from 1 as the value.
order is an attribute of the emoticon element.
This attribute is required. However, if the value of hidden is true thisparameter does not take effect.
order
This attribute specifies whether the emoticon displays in the Insertemoticon dialog box.
Specify one of the following as the value:
true
Specifies the emoticon does not display in the Insert emoticondialog box. Users must enter the key combination to render theemoticon.
false
Specifies the emoticon displays in the Insert emoticon dialog box.Users can select the emoticon from the Insert emoticon dialogbox or enter the key combination to render the emoticon. This isthe default value.
This attribute is optional.
hidden is an attribute of the emoticon element.
hidden
This element enables you to map key combinations to emoticons.
Specify any key combination as the value.
For example, if the value of defaultKey is :), you can specify :-) as thevalue of alt so that both key combinations render the same emoticon.
This element is optional.
alt
Feature Configuration for Cisco Jabber 11.8 11
Chat and PresenceEmoticon Definitions

The default emoticons definitions file contains the following key combinations that enable users to requestcalls from other users:
Remember
• :callme
• :telephone
These key combinations send the callme emoticon, or communicon. Users who receive this emoticon canclick the icon to initiate an audio call. You should include these key combinations in any custom emoticonsdefinition file to enable the callme emoticon.
Emoticon Definition Example<emoticons><emoticon defaultKey=":)" image="Emoticons_Smiling.png" text="Smile" order="1"><alt>:-)</alt><alt>^_^</alt></emoticon><emoticon defaultKey=":(" image="Emoticons_Frowning.png" text="Frown" order="2"><alt>:-(</alt></emoticon></emoticons>
DND Status CascadingApplies to: All Clients
The following scenario occurs when the IM Presence service is supported only by Cisco UnifiedCommunications Manager IM and Presence Service.
When a user manually sets the IM Presence status as Do Not Disturb from the Cisco Jabber client, then thestatus is cascaded down to all the phone devices that are owned by the particular user.
However, if the user manually sets the status as Do Not Disturb from any of the phone devices, then the statusis not cascaded to any of the phone devices that are owned by that particular user.
Enterprise Groups for Cisco Unified Communications ManagerIM and Presence Service
Applies to: All clients
Users can add groups to their contact lists in Cisco Jabber. The groups are created in the enterprise's MicrosoftActive Directory and then are imported into Cisco Unified CommunicationsManager IM and Presence Service.When enterprise groups are set up and enabled on Cisco Unified Communications Manager IM and PresenceService, Cisco Jabber users can add enterprise groups to their contact list from the client.
Using enterprise groups is supported when on the Expressway for Mobile and Remote Access.
Prerequisites for Enabling Enterprise Groups in Cisco Jabber
• Cisco Unified Communications Manager Release 11.0(1) or later
• Cisco Unified Communications Manager IM and Presence Service Release 11.0 or later
Feature Configuration for Cisco Jabber 11.812
Chat and PresenceDND Status Cascading

Before you can set up enabling adding enterprise groups to contact lists for your users, you must configurethe feature on the server, see Enable Enterprise Groups section. For more information about enterprise groups,see the Feature Configuration Guide for Cisco Unified Communications Manager, Release 11.0(1) .
Limitations
• Enterprise Groups for Cisco Unified Communications Manager IM and Presence Service is availableto on-premises deployments only. Enterprise Groups are already supported on cloud deployments.
• Security Group is supported from Cisco Unified Communications Manager IM and Presence Service11.5 or later.
• Presence is unsupported for contacts in enterprise groups of over 100 people who are IM-enabled, unlessthe user has other presence subscriptions for a contact. For example, if users have someone added totheir personal contact list who is also listed in an enterprise group of over 100 people, then presence isstill displayed for that person. Users who are not IM-enabled do not affect the 100 person presence limit.
• Nested groups cannot be imported as part of an enterprise group. For example, in an AD group, onlygroup members are imported, not any embedded groups within it.
• If your users and ADGroup are in different organizational units (OUs), then before you add the contactsto the AD Group, you must sync both OUs with Cisco Unified Communications Manager, and not justthe OU that the AD Group is in.
• If you have the minimum character query set to the default value of 3 characters, then user searches forenterprise groups will exclude any two letter group names (for example: HR). To change the minimumcharacter query for CDI or UDS connections, change the value of theMinimumCharacterQuery parameter.
• Enterprise groups with special characters cannot be located during searches if the special characters areamong the first 3 characters (or whatever value you have defined as the minimum character query) ofthe name.
•We recommend that you only change the distinguished name of enterprise groups outside of core businesshours, as it would cause unreliable behavior from the Cisco Jabber client for users.
• If you make changes to enterprise groups, you must synch the Active Directory with Cisco UnifiedCommunications Manager afterwards in order for the changes to be applied.
•When a directory group is added to Cisco Jabber, the profile photos are not displayed immediatelybecause of the sudden load that the contact resolution places on the directory server. However, if youright-click on each group member to view their profile, the contact resolution is resolved and the photois downloaded.
• Intercluster peering with a 10.x cluster: If the synced group includes group members from a 10.xintercluster peer, users on the higher cluster cannot view the presence of synced members from the 10.xcluster. This is due to database updates that were introduced in Cisco Unified CommunicationsManagerRelease 11.0(1) for the Enterprise Groups sync. These updates are not a part of the Cisco UnifiedCommunications Manager Releases 10.x. To guarantee that users homed on higher cluster can view thepresence of group members homed on the 10.x cluster, users on the higher cluster should manually addthe 10.x users to their contact lists. There are no presence issues for manually added user.
UDS Limitations (Applies to Users on the Expressway for Mobile and Remote Access or with UDS on-premises)
There is no search capability for enterprise groups when connecting using UDS, so users must know the exactenterprise group name that they want to add to their contact lists. There is a search capability for enterprisegroups when connecting using EDI or BDI.
Feature Configuration for Cisco Jabber 11.8 13
Chat and PresenceEnterprise Groups for Cisco Unified Communications Manager IM and Presence Service

Enterprise group names are case-sensitive.
If two enterprise groups within an AD Forest have the same name, then users get an error when trying to addthe group. This issue does not apply to clients using CDI.
Enable Enterprise GroupsThe enterprise parameter Directory Group Operations on Cisco IM and Presence in the EnterpriseParameter Configuration window allows you to enable or disable the Enterprise Groups feature. Followthese steps to enable the Enterprise Groups feature.
Before You Begin
The Cisco DirSync feature service must be running.
Procedure
Step 1 From Cisco Unified CM Administration, choose System > Enterprise Parameters.The Enterprise Parameters Configuration window appears.
Step 2 In the User Management Parameters section, from the Directory Group Operations on Cisco IM andPresence drop-down list, select Enabled .
Step 3 (Optional) From the Syncing Mode for Enterprise Groups drop-down list, choose one of the following:
• None—If you choose this option, the Cisco Intercluster Sync Agent service does not synchronize theenterprise groups and the group membership records between IM and Presence Service clusters.
• Differential Sync—This is the default option. If you choose this option, after all the enterprise groupsand group membership records from remote IM and Presence Service cluster are synchronized, thesubsequent syncs synchronize only the records that were updated since the last sync occurred.
• Full Sync—If you choose this option, after all the enterprise groups and group membership recordsfrom the remote IM and Presence Service cluster are synchronized, all the records are synchronizedduring each subsequent sync.
If the Cisco Intercluster Sync Agent service is not running for more than 24 hours, we recommendthat you select the Full Sync option to ensure that the enterprise groups and group membershiprecords synchronize completely. After all the records are synchronized, that is, when the CiscoIntercluster Sync Agent has been running for about 30 minutes, choose the Differential Sync optionfor the subsequent syncs. Keeping the value of this parameter set to 'Full Sync' for a longer periodcould result in extensive CPU usage and therefore we recommend that you use the Full Sync optionduring off-business hours.
Note
Step 4 (Optional) Set the LDAP Directory Synchronization Schedule parameters in the LDAP DirectoryConfigurationwindow to configure the interval at whichMicrosoft Active Directory groups are synchronizedwith Cisco Unified Communications Manager. For more information, see the online help.
Step 5 (Optional) Enter a value for themaximum amount of users each group can contain, in theMaximumEnterpriseGroup Size to allow Presence Information field. The permitted range is from 1 to 200 users. The defaultvalue is 100 users.
Step 6 Click Save.
Feature Configuration for Cisco Jabber 11.814
Chat and PresenceEnable Enterprise Groups
File Transfers and Screen CapturesApplies to: All clients
File transfers and screen captures are enabled in Cisco Unified Communications Manager IM and PresenceService. There are additional parameters that are specified in the Cisco Jabber client configuration file. Formore information on these parameters, see the Policies parameters.
To configure file transfers and screen captures in Cisco Unified Communications Manager IM and PresenceService 9.x or later, see Enable File Transfers and Screen Captures.
Cisco Unified CommunicationsManager IM and Presence Service, release 10.5(2) or later provides additionalfile transfer options:
• For peer to peer chats, see Enable File Transfer and Screen Captures for Peer to Peer Chats only.
• For group chats and chat rooms, see Enable File Transfer and Screen Captures for Group Chat Rooms.
• To configure maximum file transfer size, see Configuring Maximum File Transfer Size.
If your deployment includes earlier versions of the Cisco Jabber client that do not support these additionalfile transfer methods, there is an option to select Managed and Peer-to-Peer File Transfer. For more detailedinformation, see the Configuration and Administration of IM and Presence Service on Cisco UnifiedCommunications Manager, Release 10.5(2) guide.
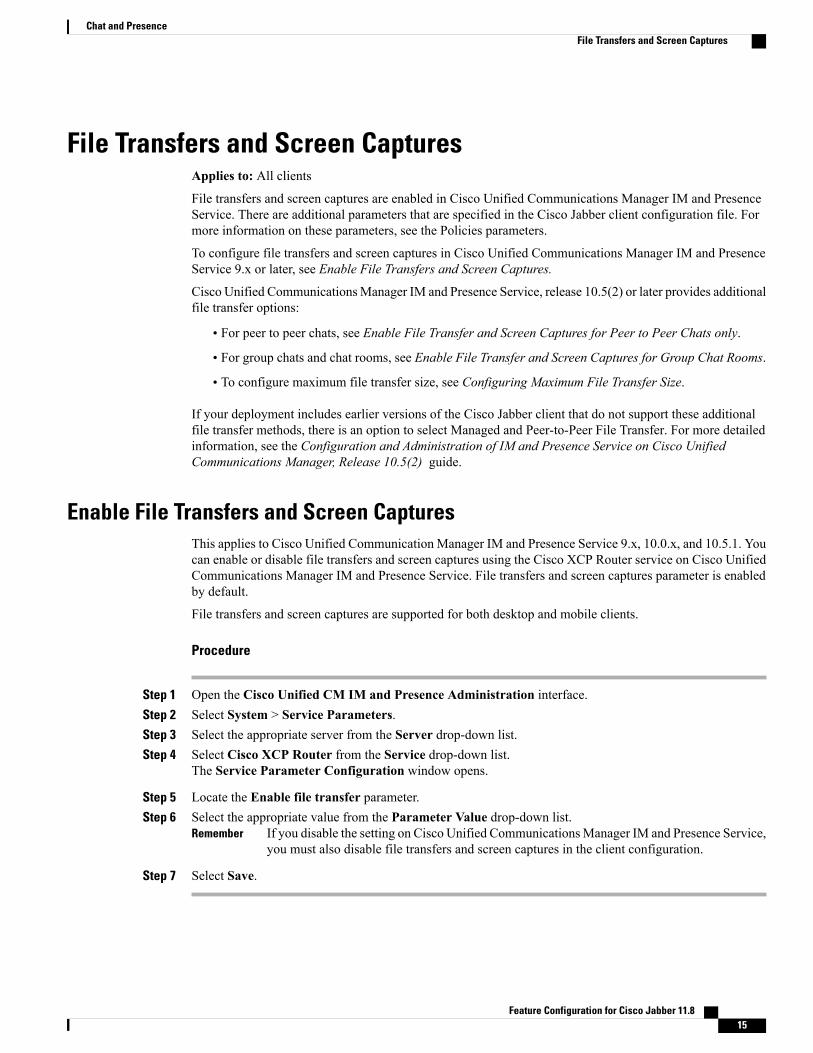
Enable File Transfers and Screen CapturesThis applies to Cisco Unified Communication Manager IM and Presence Service 9.x, 10.0.x, and 10.5.1. Youcan enable or disable file transfers and screen captures using the Cisco XCP Router service on Cisco UnifiedCommunications Manager IM and Presence Service. File transfers and screen captures parameter is enabledby default.
File transfers and screen captures are supported for both desktop and mobile clients.
Procedure
Step 1 Open the Cisco Unified CM IM and Presence Administration interface.Step 2 Select System > Service Parameters.Step 3 Select the appropriate server from the Server drop-down list.Step 4 Select Cisco XCP Router from the Service drop-down list.
The Service Parameter Configuration window opens.
Step 5 Locate the Enable file transfer parameter.Step 6 Select the appropriate value from the Parameter Value drop-down list.
If you disable the setting on Cisco Unified CommunicationsManager IM and Presence Service,you must also disable file transfers and screen captures in the client configuration.
Remember
Step 7 Select Save.
Feature Configuration for Cisco Jabber 11.8 15
Chat and PresenceFile Transfers and Screen Captures
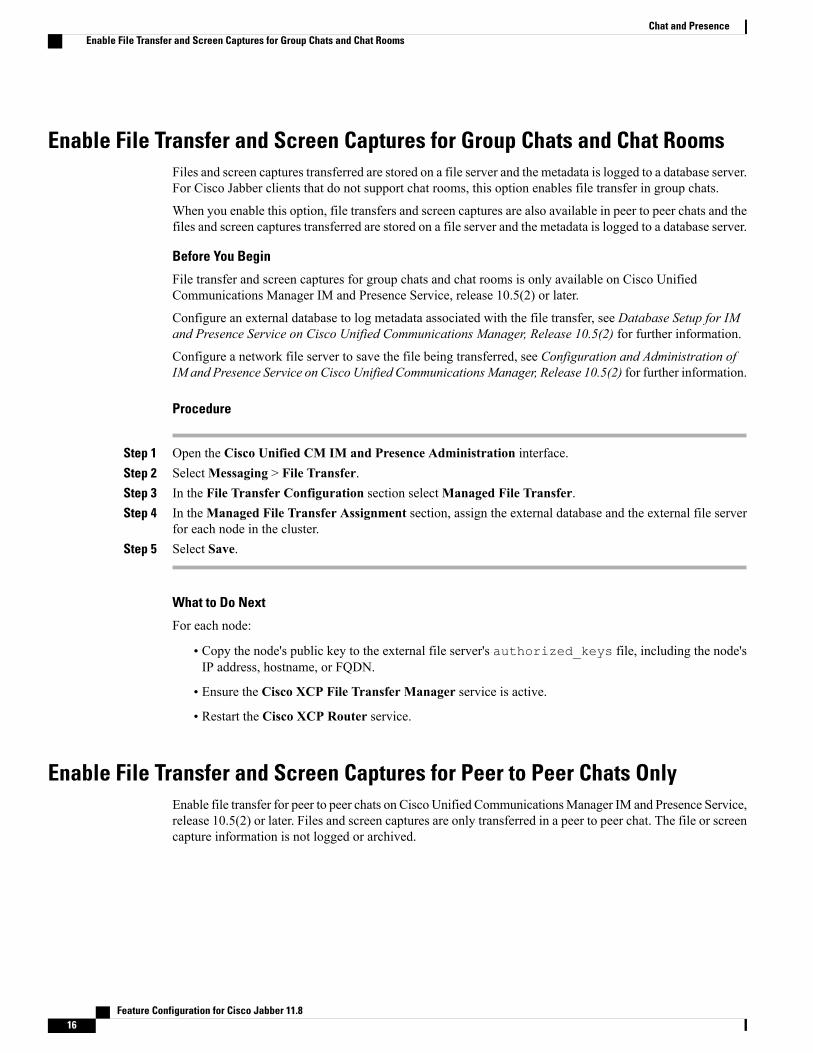
Enable File Transfer and Screen Captures for Group Chats and Chat RoomsFiles and screen captures transferred are stored on a file server and the metadata is logged to a database server.For Cisco Jabber clients that do not support chat rooms, this option enables file transfer in group chats.
When you enable this option, file transfers and screen captures are also available in peer to peer chats and thefiles and screen captures transferred are stored on a file server and the metadata is logged to a database server.
Before You Begin
File transfer and screen captures for group chats and chat rooms is only available on Cisco UnifiedCommunications Manager IM and Presence Service, release 10.5(2) or later.
Configure an external database to log metadata associated with the file transfer, see Database Setup for IMand Presence Service on Cisco Unified Communications Manager, Release 10.5(2) for further information.
Configure a network file server to save the file being transferred, see Configuration and Administration ofIM and Presence Service on Cisco Unified CommunicationsManager, Release 10.5(2) for further information.
Procedure
Step 1 Open the Cisco Unified CM IM and Presence Administration interface.Step 2 SelectMessaging > File Transfer.Step 3 In the File Transfer Configuration section selectManaged File Transfer.Step 4 In theManaged File Transfer Assignment section, assign the external database and the external file server
for each node in the cluster.Step 5 Select Save.
What to Do Next
For each node:
• Copy the node's public key to the external file server's authorized_keys file, including the node'sIP address, hostname, or FQDN.
• Ensure the Cisco XCP File Transfer Manager service is active.
• Restart the Cisco XCP Router service.
Enable File Transfer and Screen Captures for Peer to Peer Chats OnlyEnable file transfer for peer to peer chats on Cisco Unified CommunicationsManager IM and Presence Service,release 10.5(2) or later. Files and screen captures are only transferred in a peer to peer chat. The file or screencapture information is not logged or archived.
Feature Configuration for Cisco Jabber 11.816
Chat and PresenceEnable File Transfer and Screen Captures for Group Chats and Chat Rooms
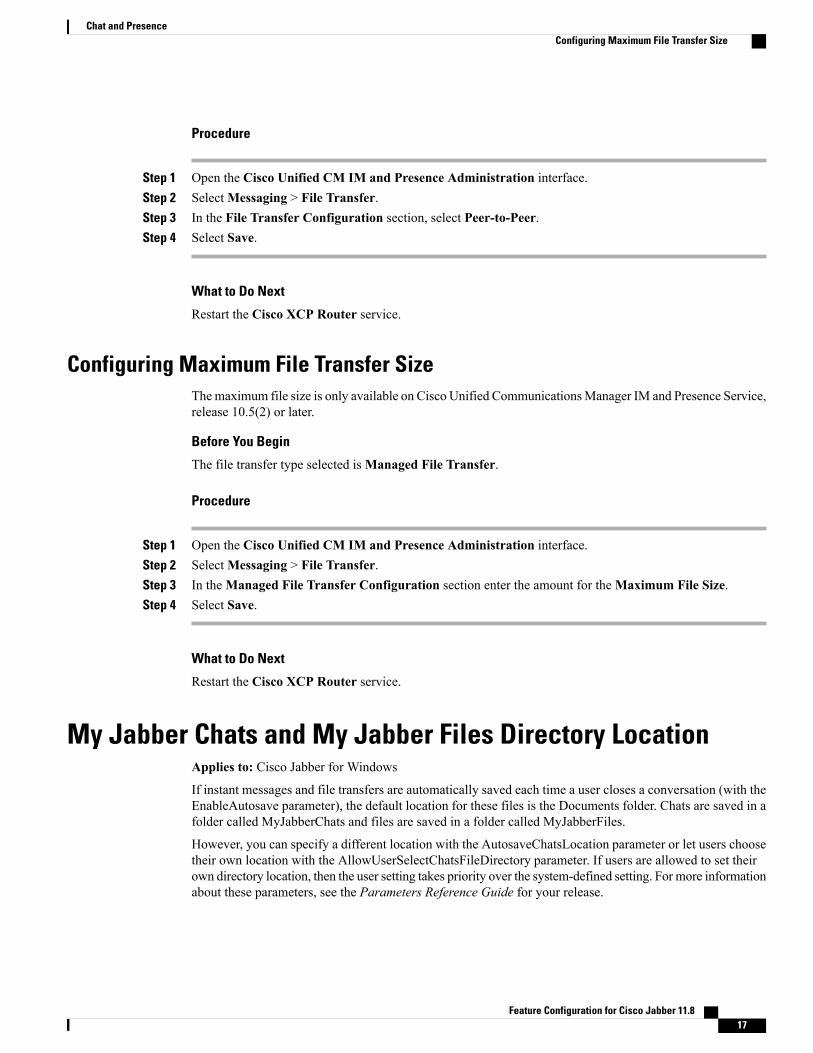
Procedure
Step 1 Open the Cisco Unified CM IM and Presence Administration interface.Step 2 SelectMessaging > File Transfer.Step 3 In the File Transfer Configuration section, select Peer-to-Peer.Step 4 Select Save.
What to Do Next
Restart the Cisco XCP Router service.
Configuring Maximum File Transfer SizeThemaximum file size is only available on Cisco Unified CommunicationsManager IM and Presence Service,release 10.5(2) or later.
Before You Begin
The file transfer type selected isManaged File Transfer.
Procedure
Step 1 Open the Cisco Unified CM IM and Presence Administration interface.Step 2 SelectMessaging > File Transfer.Step 3 In theManaged File Transfer Configuration section enter the amount for theMaximum File Size.Step 4 Select Save.
What to Do Next
Restart the Cisco XCP Router service.
My Jabber Chats and My Jabber Files Directory LocationApplies to: Cisco Jabber for Windows
If instant messages and file transfers are automatically saved each time a user closes a conversation (with theEnableAutosave parameter), the default location for these files is the Documents folder. Chats are saved in afolder called MyJabberChats and files are saved in a folder called MyJabberFiles.
However, you can specify a different location with the AutosaveChatsLocation parameter or let users choosetheir own location with the AllowUserSelectChatsFileDirectory parameter. If users are allowed to set theirown directory location, then the user setting takes priority over the system-defined setting. For more informationabout these parameters, see the Parameters Reference Guide for your release.
Feature Configuration for Cisco Jabber 11.8 17
Chat and PresenceConfiguring Maximum File Transfer Size

Multiple Device Messaging for Cloud and On-PremisesDeployments
Applies to: All clients, for cloud and on-premises deployments.
Multiple Device Messaging for on-premises deployments requires Cisco Unified Communications ManagerIM and Presence 11.5.
Users who are signed into multiple devices can see all sent and received IMs on each device regardless ofwhich device is active. Notifications are synchronized; if an IM is read on one device, it shows as read onother signed-in devices. This feature is enabled by default, but can be disabled with theDisable_MultiDevice_Message parameter. The following limitations apply:
• Clients must be signed-in—Signed-out clients do not display sent or received IMs or notifications.
• File transfer is not supported—Files are available only on the active devices that sent or received thefile.
• Group chat is not supported.
• Multiple device messaging cannot be enabled if AES encryption is required.
DescriptionFeature Functionality
Sent and received messages are displayed for the entireconversation.
Active Jabber clients enabled for MultipleDevice Messaging
Sent and received messages are displayed for the entireconversation.
Inactive Jabber clients enabled for MultipleDevice Messaging but signed in
Sent messages are only seen on sending device. Receivedmessages are displayed on active devices only.
Non-Multiple Device Messaging enabledJabber clients and AES Encryption enabledJabber clients
For more information on parameters, see the latest Parameters Reference Guide for Cisco Jabber.
Enable Multiple Device MessagingThis configuration procedure is applicable for on-premises deployment.
Feature Configuration for Cisco Jabber 11.818
Chat and PresenceMultiple Device Messaging for Cloud and On-Premises Deployments

Procedure
Step 1 In Cisco Unified CM IM and Presence Administration, choose System > Service Parameters.Step 2 From the Server drop-down list, choose the IM and Presence Service Publisher node.Step 3 From the Service drop-down list, choose Cisco XCP Router (Active).Step 4 Choose Enabled or Disabled, from the Enable Multi-Device Messaging drop-down list.Step 5 Click Save.
Persistent Chat RoomsApplies to: Cisco Jabber for Windows, Cisco Jabber for Mac
Configure Persistent ChatPersistent chat must be enabled and configured on Cisco Unified Communications Manager IM and PresenceService before it can be used by the client.
Before You Begin
Persistent chat is only available on Cisco Unified Communications Manager IM and Presence Service 10.0and later.
Refer to Database Setup for IM and Presence Service on Cisco Unified Communications Manager for yourrelease for information on the database configuration necessary to support the persistent chat feature. Databaseconfiguration must be performed before continuing with this task.
Local chat message archiving must be enabled for persistent chat. Local chat message archiving is enabledon Cisco Unified Communications Manager IM and Presence Service using the Allow clients to log instantmessage history setting, for more information, see the Enable Message Settings topic.
Procedure
Step 1 Open the Cisco Unified CM IM and Presence Administration interface.Step 2 SelectMessaging > Group Chat and Persistent Chat.Step 3 Select Enable Persistent Chat.Step 4 Ensure the settingsHow many users can be in a room at one time andHow many hidden users can be in
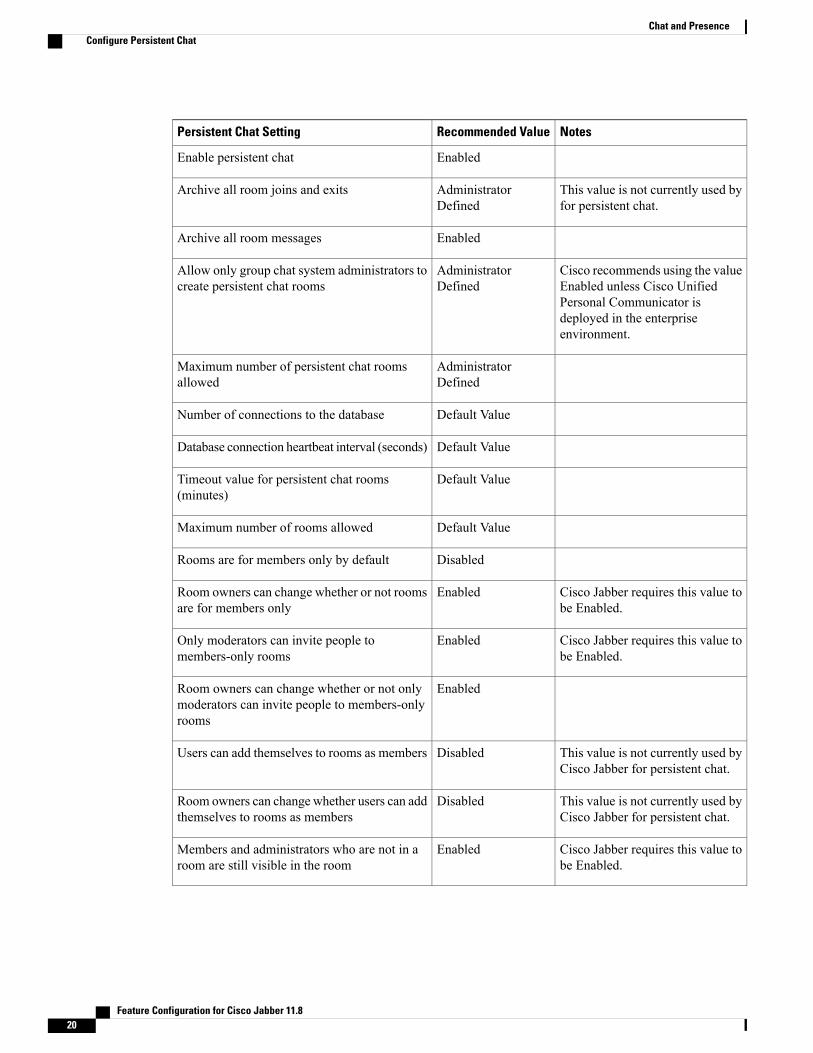
a room at one time under the Occupancy Settings section contain the same, non-zero value.Step 5 Configure the remaining settings as appropriate for your persistent chat deployment. We recommend the
persistent chat settings in the following table.NotesRecommended ValuePersistent Chat Setting
DisabledSystem automatically manages primary groupchat server aliases
Feature Configuration for Cisco Jabber 11.8 19
Chat and PresencePersistent Chat Rooms
NotesRecommended ValuePersistent Chat Setting
EnabledEnable persistent chat
This value is not currently used byfor persistent chat.
AdministratorDefined
Archive all room joins and exits
EnabledArchive all room messages
Cisco recommends using the valueEnabled unless Cisco UnifiedPersonal Communicator isdeployed in the enterpriseenvironment.
AdministratorDefined
Allow only group chat system administrators tocreate persistent chat rooms
AdministratorDefined
Maximum number of persistent chat roomsallowed
Default ValueNumber of connections to the database
Default ValueDatabase connection heartbeat interval (seconds)
Default ValueTimeout value for persistent chat rooms(minutes)
Default ValueMaximum number of rooms allowed
DisabledRooms are for members only by default
Cisco Jabber requires this value tobe Enabled.
EnabledRoom owners can change whether or not roomsare for members only
Cisco Jabber requires this value tobe Enabled.
EnabledOnly moderators can invite people tomembers-only rooms
EnabledRoom owners can change whether or not onlymoderators can invite people to members-onlyrooms
This value is not currently used byCisco Jabber for persistent chat.
DisabledUsers can add themselves to rooms as members
This value is not currently used byCisco Jabber for persistent chat.
DisabledRoom owners can change whether users can addthemselves to rooms as members
Cisco Jabber requires this value tobe Enabled.
EnabledMembers and administrators who are not in aroom are still visible in the room
Feature Configuration for Cisco Jabber 11.820
Chat and PresenceConfigure Persistent Chat

NotesRecommended ValuePersistent Chat Setting
EnabledRoom owners can change whether members andadministrators who are not in a room are stillvisible in the room
This value is not currently used byCisco Jabber for persistent chat.
DisabledRooms are backwards-compatible with olderclients
This value is not currently used byCisco Jabber for persistent chat.
DisabledRoom owners can change whether rooms arebackwards-compatible with older clients
This value is not currentlysupported by Cisco Jabber forpersistent chat. Cisco Jabber cannotjoin anonymous rooms.
DisabledRooms are anonymous by default
This value is not currentlysupported by Cisco Jabber forpersistent chat. Cisco Jabber cannotjoin anonymous rooms.
DisabledRoom owners can change whether or not roomsare anonymous
This value is not currently used byCisco Jabber for persistent chat.
Default ValueLowest participation level a user can have toinvite others to the room
This value is not currently used byCisco Jabber for persistent chat.
DisabledRoom owners can change the lowestparticipation level a user can have to inviteothers to the room
Cisco recommends using thedefault value.
AdministratorDefined
How many users can be in a room at one time
AdministratorDefined
Howmany hidden users can be in a room at onetime
Default ValueDefault maximum occupancy for a room
Default ValueRoom owners can change default maximumoccupancy for a room
Default ValueLowest participation level a user can have tosend a private message from within the room
Default ValueRoom owners can change the lowestparticipation level a user can have to send aprivate message from within the room
ModeratorLowest participation level a user can have tochange a room's subject
Feature Configuration for Cisco Jabber 11.8 21
Chat and PresenceConfigure Persistent Chat
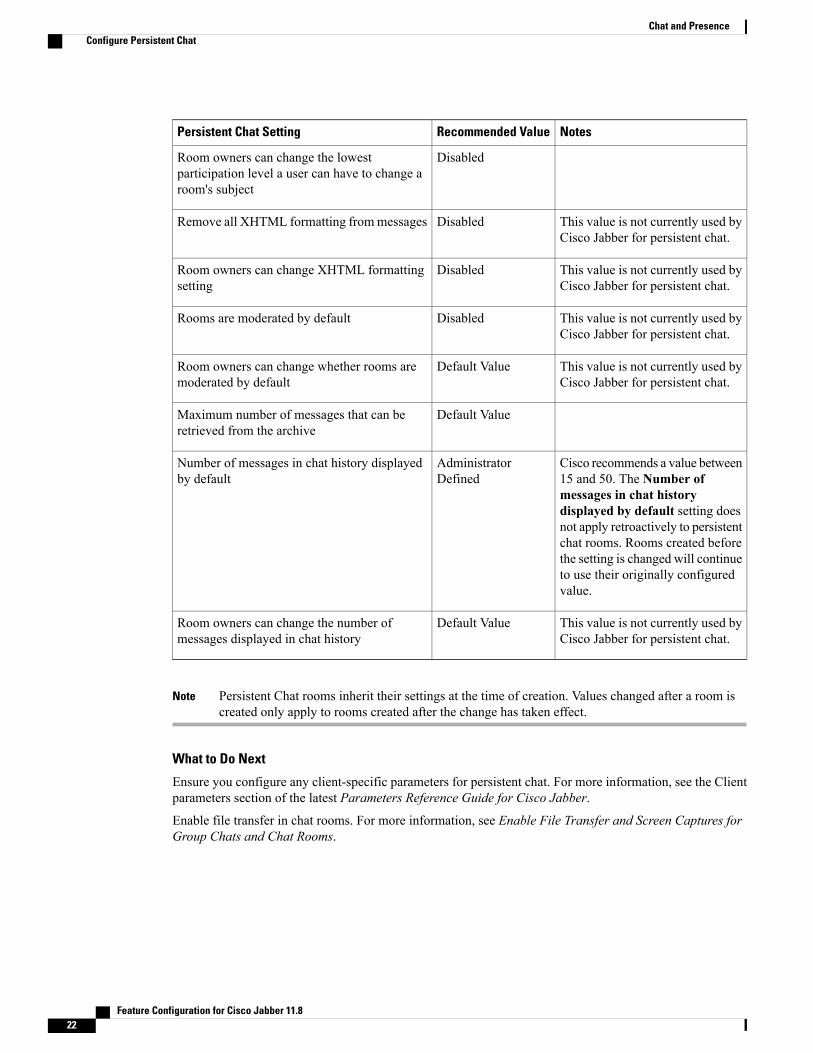
NotesRecommended ValuePersistent Chat Setting
DisabledRoom owners can change the lowestparticipation level a user can have to change aroom's subject
This value is not currently used byCisco Jabber for persistent chat.
DisabledRemove all XHTML formatting frommessages
This value is not currently used byCisco Jabber for persistent chat.
DisabledRoom owners can change XHTML formattingsetting
This value is not currently used byCisco Jabber for persistent chat.
DisabledRooms are moderated by default
This value is not currently used byCisco Jabber for persistent chat.
Default ValueRoom owners can change whether rooms aremoderated by default
Default ValueMaximum number of messages that can beretrieved from the archive
Cisco recommends a value between15 and 50. The Number ofmessages in chat historydisplayed by default setting doesnot apply retroactively to persistentchat rooms. Rooms created beforethe setting is changed will continueto use their originally configuredvalue.
AdministratorDefined
Number of messages in chat history displayedby default
This value is not currently used byCisco Jabber for persistent chat.
Default ValueRoom owners can change the number ofmessages displayed in chat history
Persistent Chat rooms inherit their settings at the time of creation. Values changed after a room iscreated only apply to rooms created after the change has taken effect.
Note
What to Do Next
Ensure you configure any client-specific parameters for persistent chat. For more information, see the Clientparameters section of the latest Parameters Reference Guide for Cisco Jabber.
Enable file transfer in chat rooms. For more information, see Enable File Transfer and Screen Captures forGroup Chats and Chat Rooms.
Feature Configuration for Cisco Jabber 11.822
Chat and PresenceConfigure Persistent Chat

Administer and Moderate Persistent Chat Rooms
Note • Persistent Chat Rooms and their administration is for on-premises deployments only.
• Persistent Chat Rooms are not available for mobile clients.
You administer persistent chat rooms from the Jabber client by creating rooms, delegating their moderators,and specifying members. The node on which the room is created is created automatically, although you canoverride it and specify a specific node. Administrators and moderators are privileged users in Persistent Chatrooms. You can administer Persistent Chat rooms on any service node that you are an administrator for onCisco Unified Communications Manager IM and Presence servers.
Administrator Capabilities
Administrators can perform the following tasks from the All Rooms tab of Persistent Chat in the client hubwindow:
• Create rooms. When you create a room, you automatically become the room administrator.
• Define and change up to 30 moderators for a chat room (who become room owners).
• Specify and change the room name.
• Define the maximum number of participants in a room. This number cannot be less than the number ofparticipants already in a room.
• Add and remove room members.
• Block, remove, and revoke participants.
• Destroy rooms (which removes it from the server, but the history is not deleted).
Moderator Capabilities
Up to 30moderators can be defined by an administrator for one Persistent Chat room.Moderators can performthe following tasks:
• Change the subject of a room.
• Edit members (which includes adding, removing, and banning them).
Room Creation
When creating a room, you can provide the following types of information:
• Room name (required, maximum 200 characters)
• Description
• Room type (public or restricted)
After the room type has been defined, it cannot be changed by anyone.
• Specify whether to add the room to yourMy Rooms tab (off by default)
Feature Configuration for Cisco Jabber 11.8 23
Chat and PresenceAdminister and Moderate Persistent Chat Rooms

• Add up to 30 moderators (who must have a valid Jabber ID to moderate a room).
• Room password
After you create the room, you have the option to add members to the room immediately or at a later time.Refresh the All Rooms list in order to see your new room in the list of available rooms.
Enable Persistent Chat Room PasswordsPersistent chat rooms that are password protected means that when users enter a roomwithin a Jabber session,they must enter the password. Password protected rooms comply with the XEP-0045 specification from theXMPP Standards Foundation.
Procedure
Step 1 To set a password for a room, from the Chat Rooms tab on the hub window, select All rooms > New room> Password.
Step 2 To change the password for a room, open the chat room, click on Edit Room, select Password, then edit andsave the password.
Prompts for Presence Subscription RequestsApplies to: All clients
You can enable or disable prompts for presence subscription requests from contacts within your organization.The client always prompts users for presence subscription requests from contacts outside your organization.
Users specify privacy settings in the client as follows:
Feature Configuration for Cisco Jabber 11.824
Chat and PresenceEnable Persistent Chat Room Passwords
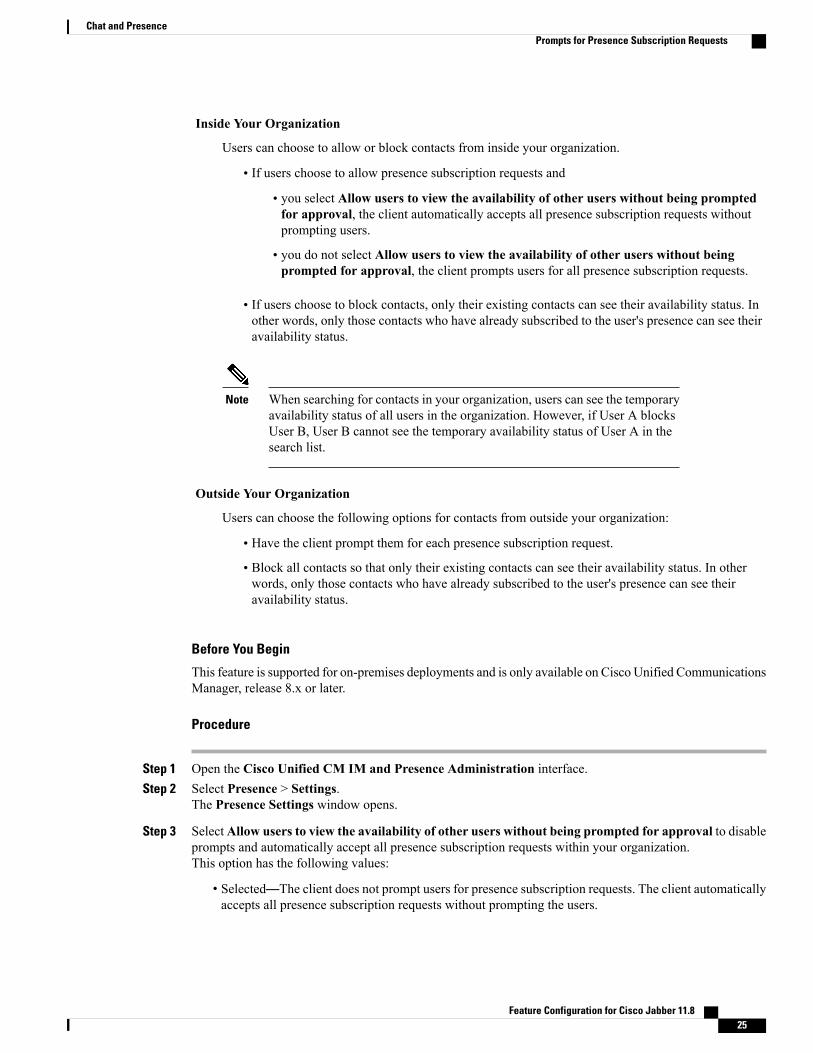
Inside Your Organization
Users can choose to allow or block contacts from inside your organization.
• If users choose to allow presence subscription requests and
• you select Allow users to view the availability of other users without being promptedfor approval, the client automatically accepts all presence subscription requests withoutprompting users.
• you do not select Allow users to view the availability of other users without beingprompted for approval, the client prompts users for all presence subscription requests.
• If users choose to block contacts, only their existing contacts can see their availability status. Inother words, only those contacts who have already subscribed to the user's presence can see theiravailability status.
When searching for contacts in your organization, users can see the temporaryavailability status of all users in the organization. However, if User A blocksUser B, User B cannot see the temporary availability status of User A in thesearch list.
Note
Outside Your Organization
Users can choose the following options for contacts from outside your organization:
• Have the client prompt them for each presence subscription request.
• Block all contacts so that only their existing contacts can see their availability status. In otherwords, only those contacts who have already subscribed to the user's presence can see theiravailability status.
Before You Begin
This feature is supported for on-premises deployments and is only available on Cisco Unified CommunicationsManager, release 8.x or later.
Procedure
Step 1 Open the Cisco Unified CM IM and Presence Administration interface.Step 2 Select Presence > Settings.
The Presence Settings window opens.
Step 3 SelectAllow users to view the availability of other users without being prompted for approval to disableprompts and automatically accept all presence subscription requests within your organization.This option has the following values:
• Selected—The client does not prompt users for presence subscription requests. The client automaticallyaccepts all presence subscription requests without prompting the users.
Feature Configuration for Cisco Jabber 11.8 25
Chat and PresencePrompts for Presence Subscription Requests
• Cleared—The client prompts users to allow presence subscription requests. This setting requires usersto allow other users in your organization to view their availability status.
Step 4 Select Save.
Push Notification Service for IMApplies to Cisco Jabber for iPhone and iPad.
The Push Notification service for IM forwards the new IM notification to Cisco Jabber, even if Cisco Jabberis inactive. The Push Notification service is supported on both Cloud and On-premise deployment modes.
To deploy Push Notification service on On-premise and Cloud, see the documentDeploying Push Notificationsfor iPhone and iPad with the IM and Presence Service and WebEx Messenger from https://www.cisco.com/c/en/us/support/unified-communications/unified-communications-manager-callmanager/products-configuration-examples-list.html.
To receive Push Notification service, you need to have the ports 5223 and 443 open. For more details on ports,see the Ports and Protocols section of the Planning Guide for Cisco Jabber.
To enable Push Notification service, you need to configure the parameter Push_Notification_Enabled. Formore information about configuring the parameter, see the latest Parameter Reference Guide for Cisco Jabber.
If you are using the Push Notification service:
• Disable Advance Encryption Standard (AES) encoding for IM. However, push notification service isautomatically disabled, when AES is enabled.
• Disable push notification service and relaunch Cisco Jabber to use peer to peer call functions, becausepeer to peer call function does not work with push notification service.
The following are the Push Notification service limitations:
•When there is a server failover, all the unread messages are lost.
• The server clears all messages if the user has not signed in for 72 hours or the number of messages hasreached 2000.
• If Cisco Jabber is running in the background, the file transfer notification is not received.
Restore Chats on LoginApplies to:All clients.
This feature allows users to specify if open chat sessions are restored on next sign in. This only applies to 1:1chats.
For desktop clients, this feature is configured using the RestoreChatOnLogin parameter. When the parameteris true the Remember my open conversations check box is selected on the General tab of the clients. Thecheck box is not checked by default when users sign into Cisco Jabber for the first time.
Feature Configuration for Cisco Jabber 11.826
Chat and PresencePush Notification Service for IM
For mobile clients, this feature is configured using the RememberChatList parameter. When the parameter isset to on then the user's chat list is saved and restored after relaunching Jabber. Also, Save chat list option isavailable in the client.
For more information on parameters, see the Parameter Reference Guide for your release.
Temporary PresenceApplies to: All clients
Disable temporary presence to increase privacy control. When you configure this parameter, Cisco Jabberdisplays availability status only to contacts in a user's contact list.
Before You Begin
This feature is supported for on-premises deployment and requires Cisco Unified Communications Manager,release 9.x or later.
Procedure
Step 1 Open the Cisco Unified CM IM and Presence Administration interface.Step 2 Select Presence > Settings > Standard Configuration.Step 3 Uncheck Enable ad-hoc presence subscriptions and then select Save.
Cisco Jabber does not display temporary presence. Users can see availability status only for contacts in theircontact list.
Blocked Domain Support for WebEx Messenger UsersApplies to: Cisco Jabber for Mac
WebEx Messenger users can now add a specific domain or a contact from a specific domain to the blockedlist. Contacts from the specified domain cannot view your availability or send you instant messages.
This feature can be used to prevent spam messages from the non-approved domains. Enterprise complianceis maintained by allowing communications only between organization approved domains.
Procedure
Step 1 Select Jabber > Preferences > Privacy.Step 2 Choose the Policies section and selectManaged Blocked People.Step 3 Add the contact ID or domain in the Blocked list.
Feature Configuration for Cisco Jabber 11.8 27
Chat and PresenceTemporary Presence

Feature Configuration for Cisco Jabber 11.828
Chat and PresenceBlocked Domain Support for WebEx Messenger Users
C H A P T E R 3Voice and Video
• Bridge Escalations, page 29
• Call Park, page 30
• Call Pickup, page 34
• Collaboration Meeting Rooms, page 39
• Dial via Office, page 40
• Far End Camera Control (FECC), page 46
• Flexible DSCP Values, page 47
• Hunt Group, page 47
• Jabber to Jabber Call, page 51
• Mobile Connect, page 54
• Move to Mobile, page 57
• Personal Rooms, page 61
• URI Dialing, page 62
• Voicemail Avoidance, page 65
Bridge EscalationsApplies to: All clients
Bridge escalations allow users to quickly escalate a group chat to a conference call. Participants areautomatically added without the need to merge them into the conference call.
Feature Configuration for Cisco Jabber 11.8 29
Procedure
Step 1 Enable bridge escalations in Cisco Jabber clients by setting the EnableBridgeConferencing parameter to truein the jabber-config.xml file.
Step 2 (Optional) Specify a mask for the room URI in the UserBridgeUriAdmin parameter in thejabber-config.xml file. If you don't specify a mask the user can enter a DN or a SIP URI in the client.
Step 3 Enable URI dialing to allow your users enter a SIP URI for the conference call number. For more informationon URI dialing, see the URI Dialing topic.
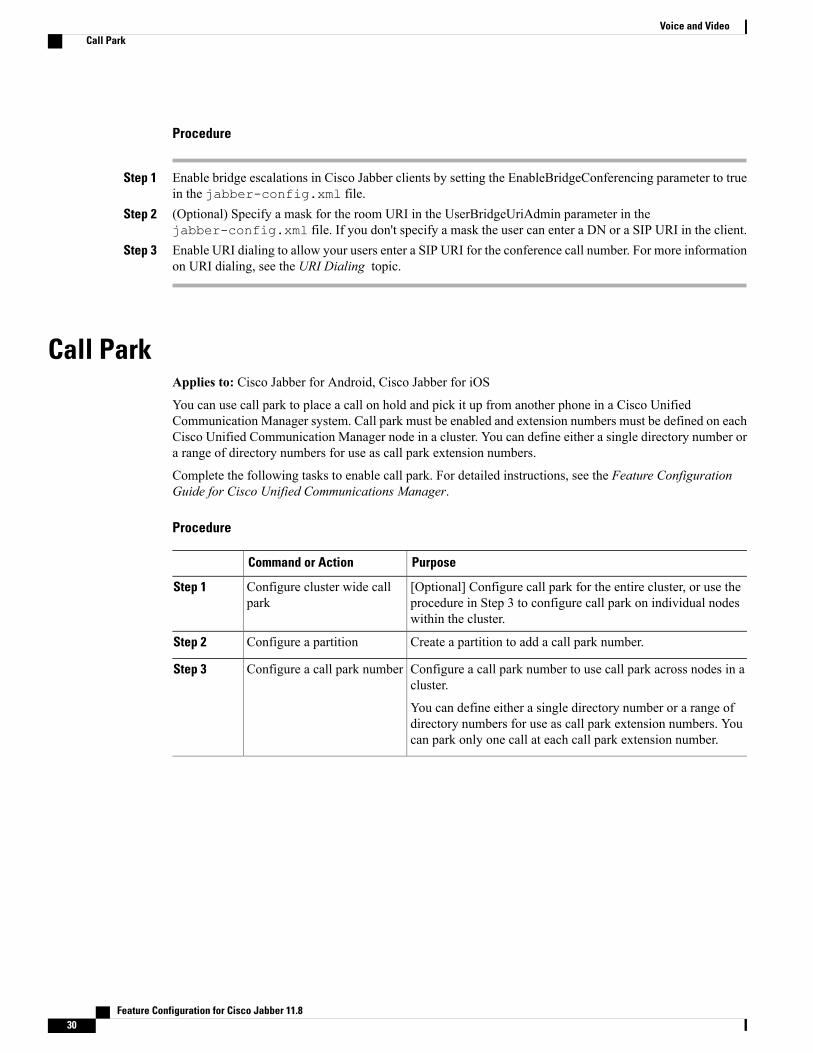
Call ParkApplies to: Cisco Jabber for Android, Cisco Jabber for iOS
You can use call park to place a call on hold and pick it up from another phone in a Cisco UnifiedCommunication Manager system. Call park must be enabled and extension numbers must be defined on eachCisco Unified Communication Manager node in a cluster. You can define either a single directory number ora range of directory numbers for use as call park extension numbers.
Complete the following tasks to enable call park. For detailed instructions, see the Feature ConfigurationGuide for Cisco Unified Communications Manager.
Procedure
PurposeCommand or Action
[Optional] Configure call park for the entire cluster, or use theprocedure in Step 3 to configure call park on individual nodeswithin the cluster.
Configure cluster wide callpark
Step 1
Create a partition to add a call park number.Configure a partitionStep 2
Configure a call park number to use call park across nodes in acluster.
Configure a call park numberStep 3
You can define either a single directory number or a range ofdirectory numbers for use as call park extension numbers. Youcan park only one call at each call park extension number.
Feature Configuration for Cisco Jabber 11.830
Voice and VideoCall Park
Configure Clusterwide Call Park
Procedure
Step 1 Choose System > Service Parameters.Step 2 Select the desired node as Server and the service as Cisco CallManager (active).Step 3 Click the Advanced button.
The advanced service parameters are displayed in the window.
Step 4 In Clusterwide Parameter(Feature- General) section set theEnable cluster-wide Call Park Number/Rangesto True.The default value is False. This parameter determines whether the Call Park feature is implemented clusterwideor restricted to a specific Unified CM node.
Step 5 Set the Call Park Display Timer for each server in a cluster that has the Cisco CallManager service and CallPark configured.The default is 10 seconds. This parameter determines how long a Call Park number displays on the phonethat parked the call.
Step 6 Set the Call Park Reversion Timer for each server in a cluster that has the Cisco Unified CommunicationsManager service and Call Park configured.The default is 60 seconds. This parameter determines the time that a call remains parked. When this timerexpires, the parked call returns to the device that parked the call. If a hunt group member parks a call thatcomes through a hunt pilot, the call goes back to the hunt pilot when the Call Park Reversion Timer expires.
If you enter a Call Park Reversion Timer value that is less than the Call Park Display Timer, CallPark numbers may not display on the phone.
Note
Step 7 Click Save.Step 8 Restart all Cisco Unified Communications Manager services.
Configure a Partition for Call ParkConfigure partitions to create a logical grouping of directory numbers (DNs) and route patterns with similarreachability characteristics. Partitions facilitate call routing by dividing the route plan into logical subsets thatare based on organization, location, and call type. You can configure multiple partitions.
Procedure
Step 1 From Cisco Unified CM Administration, choose Call Routing > Class of Control > Partition.Step 2 Click Add New to create a new partition.Step 3 In the Partition Name, Description field, enter a name for the partition that is unique to the route plan.
Partition names can contain alphanumeric characters, as well as spaces, hyphens (-), and underscore characters(_). See the online help for guidelines about partition names.
Step 4 Enter a comma (,) after the partition name and enter a description of the partition on the same line.
Feature Configuration for Cisco Jabber 11.8 31
Voice and VideoConfigure Clusterwide Call Park
The description can contain up to 50 characters in any language, but it cannot include double quotes ("),percentage sign (%), ampersand (&), backslash (\), angle brackets (<>), or square brackets ([ ]). If you do notenter a description, Cisco Unified Communications Manager automatically enters the partition name in thisfield.
Step 5 To create multiple partitions, use one line for each partition entry.Step 6 From the Time Schedule drop-down list, choose a time schedule to associate with this partition.
The time schedule specifies when the partition is available to receive incoming calls. If you chooseNone, thepartition remains active at all times.
Step 7 Select one of the following radio buttons to configure the Time Zone:
• Originating Device—When you select this radio button, the system compares the time zone of thecalling device to theTime Schedule to determine whether the partition is available is available to receivean incoming call.
• Specific Time Zone—After you select this radio button, choose a time zone from the drop-down list.The system compares the chosen time zone to the Time Schedule to determine whether the partition isavailable is available to receive an incoming call.
Step 8 Click Save.
Configure a Call Park NumberIf you want to use Call Park across servers in a cluster, you must configure Call Park extension numbers oneach server.
Ensure that each Call Park directory number, partition, and range is unique within the Cisco UnifiedCommunications Manager. Each Cisco Unified Communications Manager to which devices are registeredrequires its own unique Call Park directory number and range. Cisco Unified Communications ManagerAdministration does not validate the Call Park numbers or range that you use to configure Call Park. To helpidentify invalid numbers or ranges and potential range overlaps, use the Cisco Unified CommunicationsManager Dialed Number Analyzer tool.
Procedure
Step 1 Choose Call Routing > Call Park.Step 2 Perform one of the following tasks:
• To add a new Call Park number, click Add New.
• To copy a Call Park number, find the Call Park number or range of numbers and then click the Copyicon.
• To update a Call Park number, find the Call Park number or range of numbers.
Feature Configuration for Cisco Jabber 11.832
Voice and VideoConfigure a Call Park Number
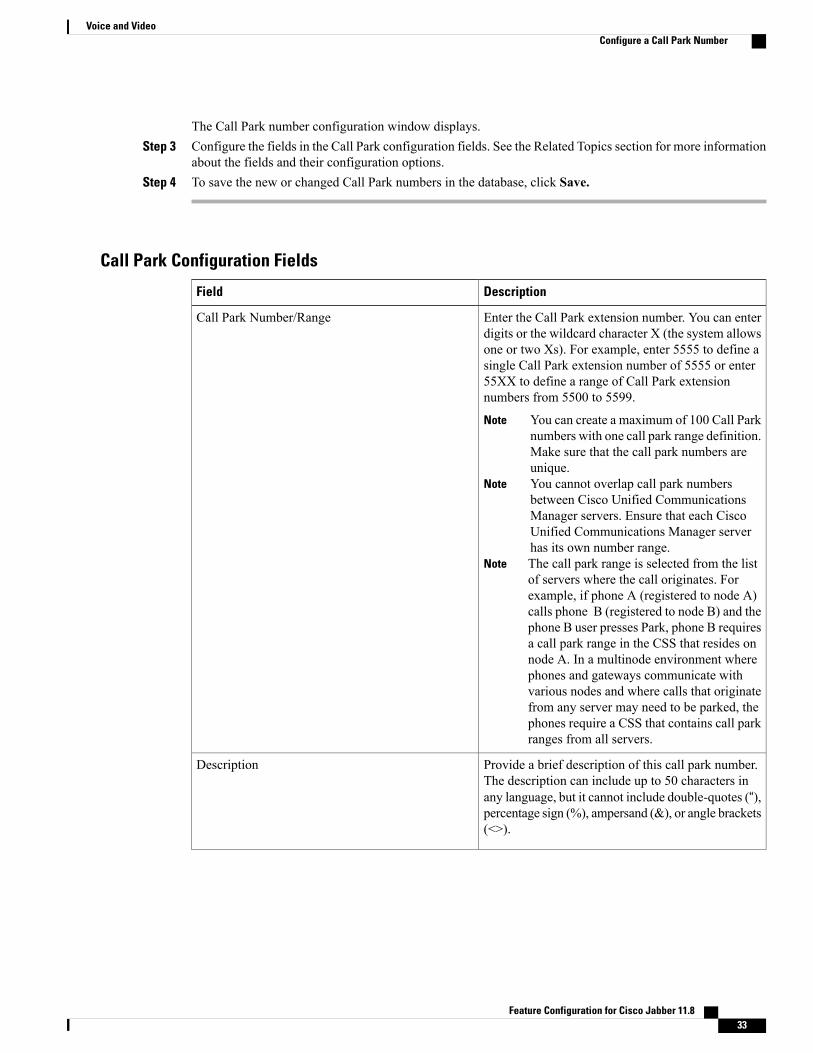
The Call Park number configuration window displays.Step 3 Configure the fields in the Call Park configuration fields. See the Related Topics section for more information
about the fields and their configuration options.Step 4 To save the new or changed Call Park numbers in the database, click Save.
Call Park Configuration Fields
DescriptionField
Enter the Call Park extension number. You can enterdigits or the wildcard character X (the system allowsone or two Xs). For example, enter 5555 to define asingle Call Park extension number of 5555 or enter55XX to define a range of Call Park extensionnumbers from 5500 to 5599.
You can create a maximum of 100 Call Parknumbers with one call park range definition.Make sure that the call park numbers areunique.
Note
You cannot overlap call park numbersbetween Cisco Unified CommunicationsManager servers. Ensure that each CiscoUnified Communications Manager serverhas its own number range.
Note
The call park range is selected from the listof servers where the call originates. Forexample, if phone A (registered to node A)calls phone B (registered to node B) and thephone B user presses Park, phone B requiresa call park range in the CSS that resides onnode A. In a multinode environment wherephones and gateways communicate withvarious nodes and where calls that originatefrom any server may need to be parked, thephones require a CSS that contains call parkranges from all servers.
Note
Call Park Number/Range
Provide a brief description of this call park number.The description can include up to 50 characters inany language, but it cannot include double-quotes (“),percentage sign (%), ampersand (&), or angle brackets(<>).
Description
Feature Configuration for Cisco Jabber 11.8 33
Voice and VideoConfigure a Call Park Number
DescriptionField
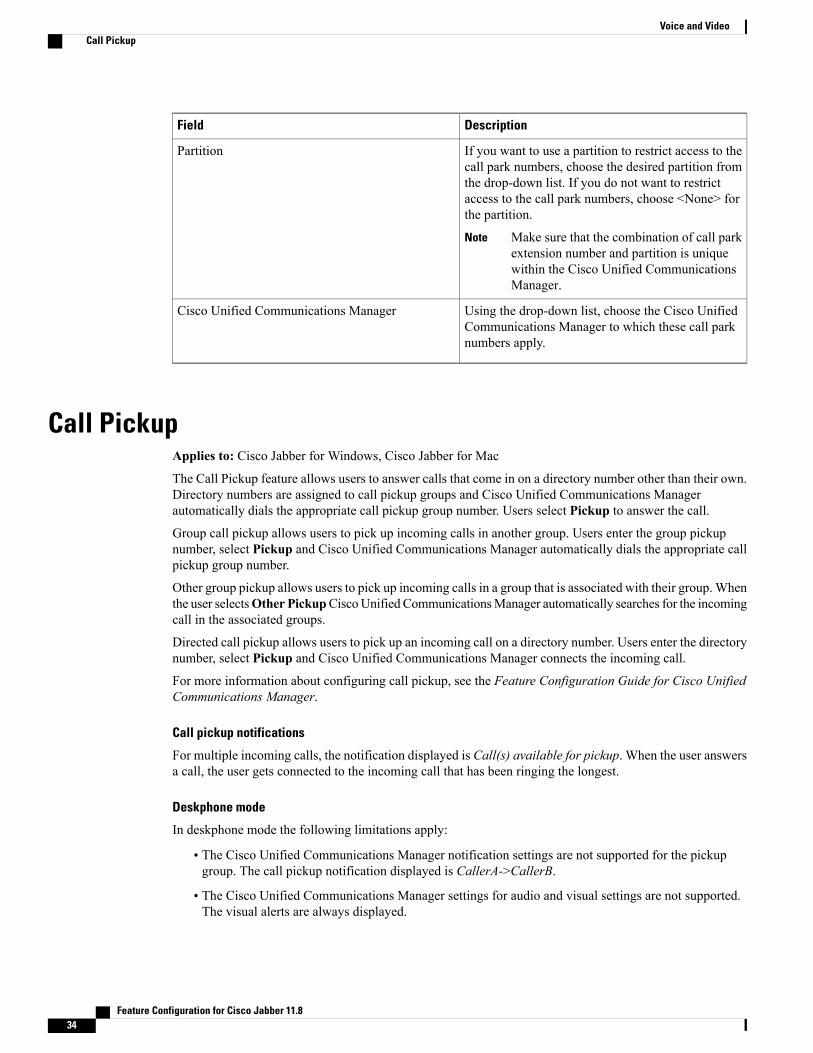
If you want to use a partition to restrict access to thecall park numbers, choose the desired partition fromthe drop-down list. If you do not want to restrictaccess to the call park numbers, choose <None> forthe partition.
Make sure that the combination of call parkextension number and partition is uniquewithin the Cisco Unified CommunicationsManager.
Note
Partition
Using the drop-down list, choose the Cisco UnifiedCommunications Manager to which these call parknumbers apply.
Cisco Unified Communications Manager
Call PickupApplies to: Cisco Jabber for Windows, Cisco Jabber for Mac
The Call Pickup feature allows users to answer calls that come in on a directory number other than their own.Directory numbers are assigned to call pickup groups and Cisco Unified Communications Managerautomatically dials the appropriate call pickup group number. Users select Pickup to answer the call.
Group call pickup allows users to pick up incoming calls in another group. Users enter the group pickupnumber, select Pickup and Cisco Unified Communications Manager automatically dials the appropriate callpickup group number.
Other group pickup allows users to pick up incoming calls in a group that is associated with their group.Whenthe user selectsOther PickupCiscoUnified CommunicationsManager automatically searches for the incomingcall in the associated groups.
Directed call pickup allows users to pick up an incoming call on a directory number. Users enter the directorynumber, select Pickup and Cisco Unified Communications Manager connects the incoming call.
For more information about configuring call pickup, see the Feature Configuration Guide for Cisco UnifiedCommunications Manager.
Call pickup notifications
For multiple incoming calls, the notification displayed is Call(s) available for pickup. When the user answersa call, the user gets connected to the incoming call that has been ringing the longest.
Deskphone mode
In deskphone mode the following limitations apply:
• The Cisco Unified Communications Manager notification settings are not supported for the pickupgroup. The call pickup notification displayed is CallerA->CallerB.
• The Cisco Unified Communications Manager settings for audio and visual settings are not supported.The visual alerts are always displayed.
Feature Configuration for Cisco Jabber 11.834
Voice and VideoCall Pickup
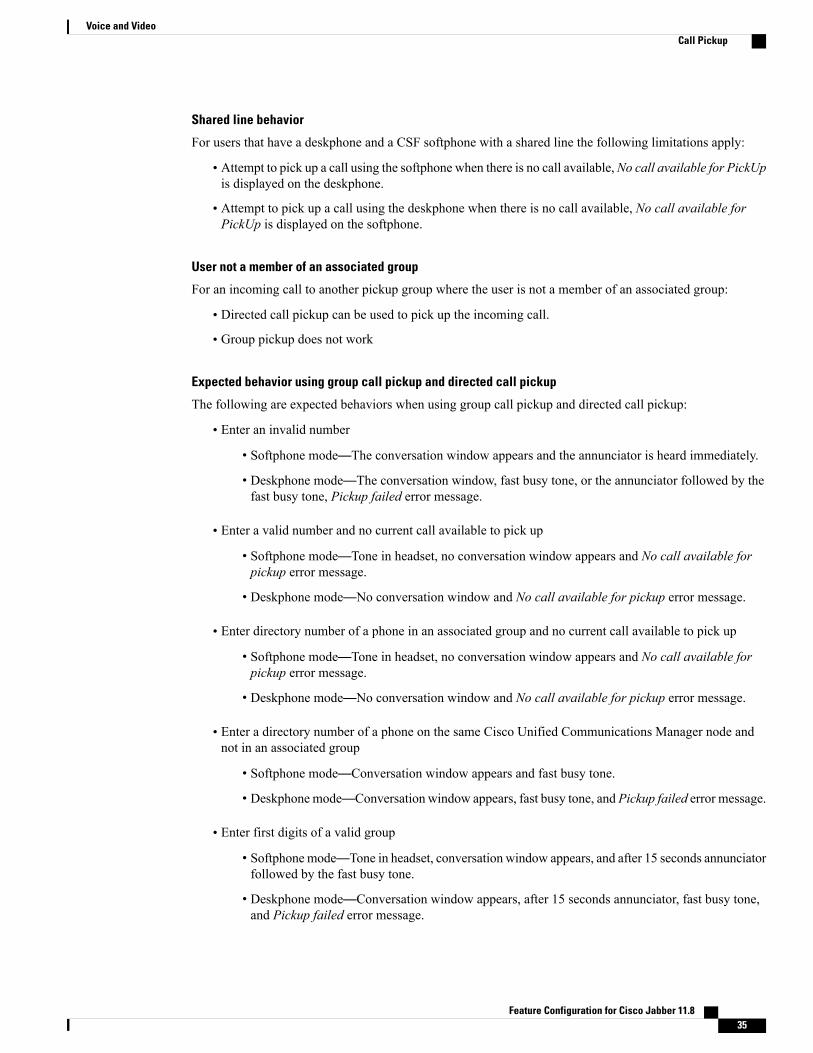
Shared line behavior
For users that have a deskphone and a CSF softphone with a shared line the following limitations apply:
• Attempt to pick up a call using the softphone when there is no call available,No call available for PickUpis displayed on the deskphone.
• Attempt to pick up a call using the deskphone when there is no call available, No call available forPickUp is displayed on the softphone.
User not a member of an associated group
For an incoming call to another pickup group where the user is not a member of an associated group:
• Directed call pickup can be used to pick up the incoming call.
• Group pickup does not work
Expected behavior using group call pickup and directed call pickup
The following are expected behaviors when using group call pickup and directed call pickup:
• Enter an invalid number
• Softphone mode—The conversation window appears and the annunciator is heard immediately.
• Deskphone mode—The conversation window, fast busy tone, or the annunciator followed by thefast busy tone, Pickup failed error message.
• Enter a valid number and no current call available to pick up
• Softphone mode—Tone in headset, no conversation window appears and No call available forpickup error message.
• Deskphone mode—No conversation window and No call available for pickup error message.
• Enter directory number of a phone in an associated group and no current call available to pick up
• Softphone mode—Tone in headset, no conversation window appears and No call available forpickup error message.
• Deskphone mode—No conversation window and No call available for pickup error message.
• Enter a directory number of a phone on the same Cisco Unified Communications Manager node andnot in an associated group
• Softphone mode—Conversation window appears and fast busy tone.
• Deskphone mode—Conversation window appears, fast busy tone, and Pickup failed error message.
• Enter first digits of a valid group
• Softphonemode—Tone in headset, conversation window appears, and after 15 seconds annunciatorfollowed by the fast busy tone.
• Deskphone mode—Conversation window appears, after 15 seconds annunciator, fast busy tone,and Pickup failed error message.
Feature Configuration for Cisco Jabber 11.8 35
Voice and VideoCall Pickup

Call pickup using a deskphone that is not in a call pickup group
If a user attempts a call pickup from a deskphone that is not in a call pickup group, the conversation windowappears for a moment. The user should not be configured to use the call pickup feature if they are not membersof a call pickup group.
Original recipient information not available
When the Cisco Unified Communications Manager Auto Call Pickup Enabled setting is true, the recipientinformation is not available in the client when the call is picked up in softphone mode. If the setting is false,the recipient information is available.
Configure Call Pickup GroupCall pickup groups allow users to pick up incoming calls in their own group.
Procedure
Step 1 Open the Cisco Unified Communication Manager interface.Step 2 Select Call Routing > Call Pickup Group
The Find and List Call Pickup Groups window opens.
Step 3 Select Add NewThe Call Pickup Group Configuration window opens.
Step 4 Enter call pickup group information:a) Specify a unique name for the call pickup group.b) Specify a unique directory number for the call pickup group number.c) Enter a description.d) Select a partition.
Step 5 (Optional) Configure the audio or visual notification in theCall PickupGroup Notification Settings section.a) Select the notification policy.b) Specify the notification timer.For further information on call pickup group notification settings see the call pickup topics in the relevantCisco Unified Communications Manager documentation.
Step 6 Select Save.
What to Do Next
Assign a call pickup group to directory numbers.
Assign Directory NumberAssign a call pickup group to a directory number. Only directory numbers that are assigned to a call pickupgroup can use call pickup, group call pickup, other group pickup, and directed call pickup.
Feature Configuration for Cisco Jabber 11.836
Voice and VideoConfigure Call Pickup Group
Before You Begin
Before you assign a call pickup group to a directory number, you must create the call pickup group.
Procedure
Step 1 Open the Cisco Unified Communications Manager Administration interface.Step 2 Assign a call pickup group to a directory number using one of the following methods:
• SelectCall Routing >Directory Number, find and select your directory number and in the Call Forwardand Call Pickup Settings area select the call pickup group from the call pickup group drop down list.
• Select Device > Phone, find and select your phone and in the Association Information list choose thedirectory number to which the call pickup group will be assigned.
Step 3 To save the changes in the database, select Save.
Configure Other Call PickupOther Group Pickup allows users to pick up incoming calls in an associated group. Cisco UnifiedCommunications Manager automatically searches for the incoming call in the associated groups to make thecall connection when the user selects Other Pickup.
Before You Begin
Before you begin, configure call pickup groups.
Procedure
Step 1 Open the Cisco Unified Communication Manager Administration interface.Step 2 Select Call Routing > Call Pickup Group
The Find and List Call Pickup Groups window opens.
Step 3 Select your call pickup group.The Call Pickup Group Configuration window opens.
Step 4 In the Associated Call Pickup Group Information section, you can do the following:
• Find call pickup groups and add to current associated call pickup groups.
• Reorder associated call pickup groups or remove call pickup groups.
Step 5 Select Save.
Feature Configuration for Cisco Jabber 11.8 37
Voice and VideoConfigure Other Call Pickup

Configure Directed Call PickupDirected call pickup allows you to pick up a incoming call directly. The user enters the directory number inthe client and selects Pickup. Cisco Unified Communications Manager uses the associated group mechanismto control if the user can pick up an incoming call using Directed Call Pickup.
To enable directed call pickup, the associated groups of the user must contain the pickup group to which thedirectory number belongs.
When the user invokes the feature and enters a directory number to pick up an incoming call, the user connectsto the call that is incoming to the specified phone whether or not the call is the longest incoming call in thecall pickup group to which the directory number belongs.
Procedure
Step 1 Configure call pickup groups and add associated groups. The associated groups list can include up to 10groups.For more information, see topics related to defining a pickup group for Other Group Pickup.
Step 2 Enable the Auto Call Pickup Enabled service parameter to automatically answer calls for directed call pickups.For more information, see topics related to configuring Auto Call Pickup.
Auto Call PickupYou can automate call pickup, group pickup, other group pickup, and directed call pickup by enabling theAuto Call Pickup Enabled service parameter. When this parameter is enabled, Cisco Unified CommunicationsManager automatically connects users to the incoming call in their own pickup group, in another pickup group,or a pickup group that is associated with their own group after users select the appropriate pickup on thephone. This action requires only one keystroke.
Auto call pickup connects the user to an incoming call in the group of the user. When the user selects Pickupon the client, Cisco Unified Communications Manager locates the incoming call in the group and completesthe call connection. If automation is not enabled, the user must select Pickup and answer the call, to makethe call connection.
Auto group call pickup connects the user to an incoming call in another pickup group. The user enters thegroup number of another pickup group and selects Pickup on the client. Upon receiving the pickup groupnumber, Cisco Unified Communications Manager completes the call connection. If auto group call pickup isnot enabled, dial the group number of another pickup group, select Pickup on the client, and answer the callto make the connection.
Auto other group pickup connects the user to an incoming call in a group that is associated with the group ofthe user. The user selectsOther Pickup on the client. Cisco Unified Communications Manager automaticallysearches for the incoming call in the associated groups in the sequence that the administrator enters in theCall Pickup Group Configuration window and completes the call connection after the call is found. Ifautomation is not enabled, the user must selectOther Pickup, and answer the call to make the call connection.
Auto directed call pickup connects the user to an incoming call in a group that is associated with the groupof the user. The user enters the directory number of the ringing phone and selects Pickup on the client. Upon
Feature Configuration for Cisco Jabber 11.838
Voice and VideoConfigure Directed Call Pickup
receiving the directory number, Cisco Unified Communications Manager completes the call connection. Ifauto directed call pickup is not enabled, the user must dial the directory number of the ringing phone, selectPickup, and answer the call that will now ring on the user phone to make the connection.
For more information about Call Pickup, see the Feature Configuration Guide for Cisco UnifiedCommunications Manager.
Configure Auto Call Pickup
Procedure
Step 1 Open the Cisco Unified CM Administration interface.Step 2 Select System > Service ParametersStep 3 Select your server from the Server drop down list and then select the Cisco Call Manager service from the
Service drop down list.Step 4 In the Clusterwide Parameters (Feature - Call Pickup) section, select one of the following for Auto Call
Pickup Enabled:
• true—The auto call pickup feature is enabled.
• false—The auto call pickup feature is not enabled. This is the default value.
Step 5 Select Save.
Collaboration Meeting RoomsApplies to: All clients
Cisco Collaboration Meeting Rooms (CMR) Cloud provides easy access for users to join or start a CiscoWebEx meeting. Cisco Jabber provides users with the ability to access the meeting either using Cisco WebExinterface or join using video.
There is a limitation on CMR Cloud join experience for attendees of scheduled CMR Cloud meetings. Thislimitation impacts Mac users and Windows users who have not enabled Outlook calendar integration. Due toa server limitation, attendees for these deployment scenarios will only receive the option to join the meetingusing Cisco WebEx. Hosts will enjoy the full experience, as will anyone invited to join ad hoc CMR Cloudmeetings.
Users who are in CTI control mode will only be able to join using WebEx.
Before You Begin
Cisco Collaboration Meeting Rooms Cloud is available on Cisco WebEx Meeting Center.
Feature Configuration for Cisco Jabber 11.8 39
Voice and VideoCollaboration Meeting Rooms

Procedure
Step 1 Configure the Collaboration Meeting Room options using the configuration guides available here: https://www.cisco.com/c/en/us/support/conferencing/webex-meeting-center/products-installation-and-configuration-guides-list.html
Step 2 Ensure Collaboration Meeting Rooms are enabled for your users on Cisco WebEx Meeting Center.Step 3 Collaboration Meeting Room features uses SIP URI, you must enable URI dialing for your users on Cisco
Unified Communications Manager. For more information on URI dialing, see the URI Dialing topic.
Dial via OfficeApplies to: Cisco Jabber for Android, Cisco Jabber for iOS
The following features are not supported if the Dial via Office-Reverse (DvO-R) feature is enabled:Important
• URI dialing
• Secure Phone
User-controlled voicemail avoidance, which can be used in conjunction with the DvO feature, is availableonly on Cisco Unified Communications Manager release 9.0 and later. Timer-controlled voicemailavoidance is available on Cisco Unified Communications Manager release 6.0 and later.
You can make DvO-R calls over Expressway for Mobile and Remote Access when you are outsidecorporate network. DvO-R is supported on Cisco Expressway X8.7 and Cisco Unified CommunicationsManager 11.0(1a)SU1.
The DvO feature allows users to initiate Cisco Jabber outgoing calls with their work number using the mobilevoice network for the device.
Cisco Jabber supports DvO-R (DvO-Reverse) calls, which works as follows:
1 User initiates a DvO-R call.
2 The client notifies Cisco Unified Communications Manager to call the mobile phone number.
3 Cisco Unified Communications Manager calls and connects to the mobile phone number.
4 Cisco Unified Communications Manager calls and connects to the number that the user dialed.
5 Cisco Unified Communications Manager connects the two segments.
6 The user and the called party continue as with an ordinary call.
Incoming calls use either Mobile Connect or the Voice over IP, depending on which Calling Options the usersets on the client. Dial via Office does not require Mobile Connect to work. However, we recommend thatyou enable Mobile Connect to allow the native mobile number to ring when someone calls the work number.From the Cisco Unified Communications Manager user pages, users can enable and disable Mobile Connect,and adjust Mobile Connect behavior using settings (for example, the time of day routing and Delay Before
Feature Configuration for Cisco Jabber 11.840
Voice and VideoDial via Office

Ringing Timer settings). For information about setting up Mobile Connect, see the Set Up Mobile Connecttopic.
The users do not receive incoming calls on Cisco Jabber in the following situations:Note
• If users select theMobile Voice Network calling option on any network and the Single NumberReach (SNR) is not configured for their device, they will not receive incoming calls on Cisco Jabber.
• If users select theMobile Voice Network calling option on any network and the Single NumberReach (SNR) is configured with the Ring Schedule, they will not receive incoming calls on CiscoJabber beyond the time set in the Ring Schedule.
The following table describes the calling methods used for incoming and outgoing calls. The calling method (VoIP, Mobile Connect,DvO-R, or native cellular call) varies depending on the selected Calling Options and the network connection.
Table 2: Calling Methods used with Calling Options over Different Network Connections
Calling Options
Connection AutoselectMobile Voice NetworkVoice over IP
Incoming: VoIPOutgoing: VoIP
Incoming: MobileConnectOutgoing:DvO-RIncoming:
VoIPOutgoing:VoIP
Corporate Wi-Fi
NoncorporateWi-Fi
Incoming: MobileConnect
Outgoing: DvO-RMobile Network
(3G, 4G)
Outgoing Native Cellular CallPhone Services arenot registered Incoming Mobile Connect
To set up Dial via Office-Reverse (DvO-R), you must do the following:
1 Set up the Cisco Unified Communications Manager to support DvO-R. See the Set Up Cisco UnifiedCommunications Manager to Support DvO topic for more information.
2 Enable DvO on each Cisco Dual Mode for iPhone device. See the Set Up Dial via Office for Each Devicetopic for more information.
3 Enable DvO on each Cisco Dual Mode for Android device. See the Set Up Dial via Office for Each Devicetopic for more information.
Feature Configuration for Cisco Jabber 11.8 41
Voice and VideoDial via Office
Set Up Cisco Unified Communications Manager to Support Dial via OfficeTo set up Cisco Unified Communications Manager to support Dial via Office-Reverse ( DvO-R), perform thefollowing procedures:
1 Complete one or both of the following procedures.
• Set Up Enterprise Feature Access Number
• Set Up Mobility Profile
2 Complete the Verify Device COP File Version procedure.
3 If necessary, create application dial rules to allow the system to route calls to the Mobile Identity phonenumber to the outbound gateway. Ensure that the format of the Mobile Identity phone number matchesthe application dial rules.
Set Up Enterprise Feature Access NumberUse this procedure to set up an Enterprise Feature Access Number for all Cisco Jabber calls that are madeusing Dial via Office-Reverse.
The Enterprise Feature Access Number is the number that Cisco Unified Communications Manager uses tocall the mobile phone and the dialed number unless a different number is set up in Mobility Profile for thispurpose.
Before You Begin
• Reserve a Direct Inward Dial (DID) number to use as the Enterprise Feature Access Number (EFAN).This procedure is optional if you already set up a mobility profile.
• Determine the required format for this number. The exact value you choose depends on the phone numberthat the gateway passes (for example, 7 digits or 10 digits). The Enterprise Feature Access Number mustbe a routable number.
Procedure
Step 1 Open the Cisco Unified CM Administration interface.Step 2 Select Call Routing >Mobility > Enterprise Feature Access Number Configuration.Step 3 Select Add New.Step 4 In the Number field, enter the Enterprise Feature Access number.
Enter a DID number that is unique in the system.
To support dialing internationally, you can prepend this number with \+.
Step 5 From theRoute Partition drop-down list, choose the partition of the DID that is required for enterprise featureaccess.This partition is set under System > Service Parameters, in theClusterwide Parameters (System -Mobility)section, in the Inbound Calling Search Space for Remote Destination setting. This setting points either tothe Inbound Calling Search Space of the Gateway or Trunk, or to the Calling Search Space assigned on thePhone Configuration window for the device.
Feature Configuration for Cisco Jabber 11.842
Voice and VideoSet Up Cisco Unified Communications Manager to Support Dial via Office
If the user sets up the DvOCallback Number with an alternate number, ensure that you set up the trunk CallingSearch Space (CSS) to route to destination of the alternate phone number.
Step 6 In the Description field, enter a description of the Mobility Enterprise Feature Access number.Step 7 (Optional) Check the Default Enterprise Feature Access Number check box if you want to make this
Enterprise Feature Access number the default for this system.Step 8 Select Save.
Set Up Mobility ProfileUse this procedure to set up a mobility profile for Cisco Jabber devices. This procedure is optional if youalready set up an Enterprise Feature Access Number.
Mobility profiles allow you to set up the Dial via Office-Reverse settings for a mobile client. After you setup a mobility profile, you can assign it to a user or to a group of users, such as the users in a region or location.
Procedure
Step 1 Open the Cisco Unified CM Administration interface.Step 2 Select Call Routing >Mobility >Mobility Profile.Step 3 In theMobility Profile Information section, in the Name field, enter a descriptive name for the mobility
profile.Step 4 In the Dial via Office-Reverse Callback section, in the Callback Caller ID field, enter the caller ID for the
callback call that the client receives from Cisco Unified Communications Manager.Step 5 Click Save.
Verify Device COP File VersionUse the following procedure to verify that you are using the correct device COP file for this release of CiscoJabber.
Procedure
Step 1 Open the Cisco Unified CM Administration interface.Step 2 Select Device > Phone.Step 3 Click Add New.Step 4 From the Phone Type drop-down list, choose Cisco Dual Mode for iPhone.Step 5 From the Phone Type drop-down list, choose Cisco Dual Mode for Android.Step 6 Click Next.Step 7 Scroll down to the Product Specific Configuration Layout section, and verify that you can see the Video
Capabilities drop-down list.If you can see the Video Capabilities drop-down list, the COP file is already installed on your system.
Feature Configuration for Cisco Jabber 11.8 43
Voice and VideoSet Up Cisco Unified Communications Manager to Support Dial via Office

If you cannot see the Video Capabilities drop-down list, locate and download the correct COP file.
Set Up Dial via Office for Each DeviceUse the following procedures to set up Dial via Office - Reverse for each TCT device.
Use the following procedures to set up Dial via Office - Reverse for each BOT device.
1 Add a Mobility Identity for each user.
2 Enable Dial via Office on each device.
3 If you enabled Mobile Connect, verify that Mobile Connect works. Dial the desk phone extension andcheck that the phone number that is specified in the associated Mobile Identity rings.
Add Mobility IdentityUse this procedure to add a mobility identity to specify the mobile phone number of the mobile device as thedestination number. This destination number is used by features such as Dial via Office or mobile connect.
You can specify only one number when you add a mobility identity. If you want to specify an alternate numbersuch as a second mobile phone number for a mobile device, you can set up a remote destination. The mobilityidentity configuration characteristics are identical to those of the remote destination configuration.
Procedure
Step 1 Open the Cisco Unified CM Administration interface.Step 2 Navigate to the device that you want to configure as follows:
a) Select Device > Phone.b) Search for the device that you want to configure.c) Select the device name to open the Phone Configuration window.
Step 3 In the Associated Mobility Identity section, select Add a New Mobility Identity.Step 4 Enter the mobile phone number as the destination number.
You must be able to rout this number to an outbound gateway. Generally, the number is the full E.164 number.
If you enable the Dial via Office— Reverse feature for a user, you must enter a destination numberfor the user's mobility identity.
If you enable Dial via Office— Reverse and leave the destination number empty in the mobilityidentity:
Note
• The phone service cannot connect if the user selects the Autoselect calling option while usinga mobile data network and VPN.
• The phone service cannot connect if the user selects theMobile Voice Network calling optionon any type of network.
• The logs do not indicate why the phone service cannot connect.
Feature Configuration for Cisco Jabber 11.844
Voice and VideoSet Up Dial via Office for Each Device
Step 5 Enter the initial values for call timers.These values ensure that calls are not routed to the mobile service provider voicemail before they ring in theclient on the mobile device. You can adjust these values to work with the end user's mobile network. For moreinformation, see the online help in Cisco Unified Communications Manager.
The following is an example of mobility Identity timers' information in Cisco Unified CommunicationsManager 9.x.
Suggested Initial ValueSetting
3000Answer Too Soon Timer
20000Answer Too Late Timer
0
This setting does not apply to DvO-Rcalls.
Note
Delay Before Ringing Timer
The following is an example of mobility Identity timers' information in Cisco Unified CommunicationsManager 10.x.
Suggested Initial ValueSetting
0.0 secondsWait * before ringing this phone when my businessline is dialed.*
3.0 secondsPrevent this call from going straight to this phone'svoicemail by using a time delay of * to detect whencalls go straight to voicemail.*
20.0 secondsStop ringing this phone after * to avoid connectingto this phone's voicemail.*
Step 6 Do one of the following:
• Cisco Unified Communications Manager release 9 or earlier— Check the Enable Mobile Connectcheck box.
• Cisco Unified CommunicationsManager release 10—Check theEnable Single Number Reach checkbox.
Step 7 If you are setting up the Dial via Office feature, in the Mobility Profile drop-down list, select one of thefollowing options.
DescriptionOption
Choose this option if you want users to use the Enterprise Feature AccessNumber (EFAN).
Leave blank
Feature Configuration for Cisco Jabber 11.8 45
Voice and VideoSet Up Dial via Office for Each Device

DescriptionOption
Choose the mobility profile that you just created if you want users to use amobility profile instead of an EFAN.
Mobility Profile
Step 8 Set up the schedule for routing calls to the mobile number.Step 9 Select Save.
Enable Dial via Office on Each DeviceUse this procedure to enable Dial via Office on each device.
Procedure
Step 1 Open the Cisco Unified CM Administration interface.Step 2 Navigate to the device that you want to configure as follows:
a) Select Device > Phone.b) Search for the device that you want to configure.c) Select the device name to open the Phone Configuration window.
Step 3 In the Device Information section, check the Enable Cisco Unified Mobile Communicator check box.Step 4 In the Protocol Specific Information section, in theRerouting Calling Search Space drop-down list, select
a Calling Search Space (CSS) that can route the call to the DvO callback number.Step 5 In the Product Specific Configuration Layout section, set the Dial via Office drop-down list to Enabled.Step 6 Select Save.Step 7 Select Apply Config.Step 8 Instruct the user to sign out of the client and then to sign back in again to access the feature.
DVO enabled devices may encounter issues registering with Cisco Unified CommunicationsManager.Resetting the device from the Cisco Unified CommunicationsManager administrative interface fixesthis issue.
Note
What to Do Next
Test this feature.
Far End Camera Control (FECC)Applies to: All clients
In calls that support far-end camera control (FECC), you can adjust the far-end camera to give you a betterview during video calls. FECC is available to users if the endpoint that they are calling supports it.
Feature Configuration for Cisco Jabber 11.846
Voice and VideoFar End Camera Control (FECC)

You can configure whether users can access FECC-enabled endpoints. Disabling the configuration parametermeans that users are not provided with the ability to control far-end camera endpoints, even if the endpointis capable. From a user experience, with FECC disabled, it works the same as dialing in to an endpoint thatis not FECC enabled.
To disable FECC, set the EnableFecc parameter to false. For more information about this parameter, see theParameters Reference Guide.
Limitations
FECC is only supported in point-to-point calls, but not in group calls or conferences where multiple videoconnections are connecting to the same bridge.
FECC is only supported in Softphone mode.
Flexible DSCP ValuesApplies to: Cisco Jabber for Mac, Cisco Jabber for Android, Cisco Jabber for iOS
Flexible Differentiated Services Code Point (DSCP) allows you to specify different DSCP values to separatethe audio and video streams on the network.
The EnableDSCPPacketMarking parameter is used to enable or disable DSCP packet marking in the client.
You can configure the DSCP values for audio calls, video calls, audio portion for video calls, and audio portionfor telepresence calls separately. For better bandwidth management and to protect audio stream degradation,separate the audio stream from the higher-bandwidth video stream. This can help when the network is congestedor the call quality is impacted.
DSCP values are configured on Cisco Unified Communications Manager. For more information, see theConfigure Flexible DSCP Marking and Video Promotion Policy section of the System Configuration Guidefor Cisco Unified Communications Manager.
Hunt GroupApplies to: All clients
A Hunt Group is a group of lines that are organized hierarchically, so that if the first number in the hunt grouplist is busy, the system dials the second number. If the second number is busy, the system dials the next number,and so on. Every hunt group has a pilot number that is also called as hunt pilot. A hunt pilot contains a huntpilot number and an associated hunt list. Hunt pilots provide flexibility in network design. They work withroute filters and hunt lists to direct calls to specific devices and to include, exclude, or modify specific digitpatterns.
A hunt pilot number is the number that a user dials. A hunt list contains a set of line groups in a specific order.A line group comprises a group of directory numbers in a specific order. The order controls the progress ofthe search for available directory numbers for incoming calls. A single-line group can appear in multiple huntlists.
Cisco Unified CommunicationsManager identifies a call that is to be routed through a defined hunt list, CiscoUnified Communications Manager finds the first available device on the basis of the order of the line groupsthat a hunt list defines.
You can let a user log in to hunt groups by configuring EnableHuntGroup parameter. For more information,see the latest Parameters Reference Guide for Cisco Jabber.
Feature Configuration for Cisco Jabber 11.8 47
Voice and VideoFlexible DSCP Values

Cisco Unified Communications Manager 9.x and later allows configuring of automatic log out of a huntmember when there is no answer. Once the user is logged out, the system displays a log out notificationregardless of whether the user is auto logged out, manually logged out, or logged out by the Cisco UnifiedCommunications Manager administrator.
Hunt group features supported by the Cisco Jabber clients:
Desktop ClientsMobile ClientsFeatures
SupportedNot supportedLog in to hunt group and log outof hunt group
SupportedSupportedCall, answer, and decline
Line GroupA line group allows you to designate the order in which directory numbers are chosen. Cisco UnifiedCommunications Manager distributes a call to an idle or available member of a line group based on the calldistribution algorithm and on the Ring No Answer (RNA) Reversion timeout setting.
Users cannot pick up calls to a DN that belongs to a line group by using the directed call pickup feature.
Configure Line Group
Before You Begin
Configure directory numbers.
Procedure
Step 1 Open the Cisco Unified CM Administration interface.Step 2 Select Call Routing > Route/Hunt > Line Group.
The Find and List Line Groups window opens.
Step 3 Select Add New.The Line Group Configuration window opens.
Step 4 Enter settings in the Line Group Information section as follows:
1 Specify a unique name in the Line Group Name field.
2 Specify number of seconds for RNA Reversion Timeout.
3 Select a Distribution Algorithm to apply to the line group.
Step 5 Enter settings in the Hunt Options section as follows:
• Select a value for No Answer from the drop-down list.
• Select Automatically Logout Hunt Member on No Answer to configure auto logout of the hunt list.
Feature Configuration for Cisco Jabber 11.848
Voice and VideoLine Group

• Select a value for Busy from the drop-down list.
• Select a value for Not Available from the drop-down list.
Step 6 In the Line Group Member Information section, you can do the following:
• Find directory numbers or route partitions to add to the line group.
• Reorder the directory numbers or route partitions in the line group.
• Remove directory numbers or route partitions from the line group.
Step 7 Select Save.
What to Do Next
Configure a hunt list and add the line group to the hunt list.
Hunt ListA hunt list contains a set of line groups in a specific order. A hunt list associates with one or more hunt pilotsand determines the order in which those line groups are accessed. The order controls the progress of the searchfor available directory numbers for incoming calls.
A hunt list comprises a collection of directory numbers as defined by line groups. After Cisco UnifiedCommunications Manager determines a call that is to be routed through a defined hunt list, Cisco UnifiedCommunications Manager finds the first available device on the basis of the order of the line group(s) that ahunt list defines.
A hunt list can contain only line groups. Each hunt list should have at least one line group. Each line groupincludes at least one directory number. A single line group can appear in multiple hunt lists.
The group call pickup feature and directed call pickup feature do not work with hunt lists.Note
Configure Hunt List
Procedure
Step 1 Open the Cisco Unified CM Administration interface.Step 2 Select Call Routing > Route/Hunt > Hunt List.
The Find and Hunt List Groups window opens.
Step 3 Select Add New.The Hunt List Configuration window opens.
Step 4 Enter settings in the Hunt List Information section as follows:
1 Specify a unique name in the Name field.
Feature Configuration for Cisco Jabber 11.8 49
Voice and VideoHunt List
2 Enter a description for the Hunt List.
3 Select a Cisco Unified Communications Manager Group from the drop-down list.
4 The system selects Enable this Hunt List by default for a new hunt list when the hunt list is saved.
5 If this hunt list is to be used for voice mail, select For Voice Mail Usage.
Step 5 Select Save to add the hunt list.
What to Do Next
Add line groups to the hunt list.
Add Line Group to Hunt List
Before You Begin
You must configure line groups and configure a hunt list.
Procedure
Step 1 Open the Cisco Unified CM Administration interface.Step 2 Select Call Routing > Route/Hunt > Hunt List.
The Find and Hunt List Groups window opens.
Step 3 Locate the hunt list to which you want to add a line group.Step 4 To add a line group, select Add Line Group.
The Hunt List Detail Configuration window displays.
Step 5 Select a line group from the Line Group drop-down list.Step 6 To add the line group, select Save.Step 7 To add additional line groups, repeat Step 4 to Step 6.Step 8 Select Save.Step 9 To reset the hunt list, select Reset. When the dialog box appears, select Reset.
Hunt PilotA hunt pilot comprises a string of digits (an address) and a set of associated digit manipulations that routecalls to a hunt list. Hunt pilots provide flexibility in network design. They work in conjunction with routefilters and hunt lists to direct calls to specific devices and to include, exclude, or modify specific digit patterns.For more information about hunt pilots, see the SystemConfiguration Guide for Cisco Unified CommunicationsManager.
For more detailed information on the configuration options for hunt pilots, see the relevant Cisco UnifiedCommunications Manager documentation.
Feature Configuration for Cisco Jabber 11.850
Voice and VideoHunt Pilot
Configure Hunt Pilot
Procedure
Step 1 Open the Cisco Unified CM Administration interface.Step 2 Select Call Routing > Route/Hunt > Hunt Pilot.
The Find and List Hunt Pilots window opens.
Step 3 Select Add New.The Hunt Pilot Configuration window opens.
Step 4 Enter the hunt pilot, including numbers and wildcards.Step 5 Select a hunt list from the Hunt List drop-down list.Step 6 Enter any additional configurations in theHunt Pilot Configuration window. For more information on hunt
pilot configuration settings, see the relevant Cisco Unified Communications Manager documentation.Step 7 Select Save.
Jabber to Jabber CallApplies to: All clients
Jabber to Jabber voice and video calling provides basic calling capabilities between two Cisco Jabber clientswithout using Cisco Unified Communications Manager. If Cisco Jabber users are not registered with CiscoUnified Communications Manager, they can still make Jabber to Jabber calls from Cisco Jabber.
Note • Jabber to Jabber calling is only supported for users who authenticate to the CiscoWebExMessengerservice.
• For Cisco Jabber for Windows clients, we recommend running Internet Explorer 10 or greater whileusing the Jabber to Jabber calling feature. Using the feature with previous versions of InternetExplorer or with Internet Explorer in Compatibility Mode can cause issues. These issues are withCisco Jabber client login (non-SSO setup) or Jabber to Jabber calling capability (SSO setup).
Jabber to Jabber Call Experience
A Jabber to Jabber call does not support all the features of a Cisco Unified Communication Manager call.Users can make a Jabber to Jabber call with only one contact at a time. In a Jabber to Jabber call, users canexperience any of the following scenarios:
• Cisco Jabber for mobile clients does not support HD video in portrait mode. To achieve HD video, youneed to rotate the phone from portrait to landscape mode during the call.
• If two users start a Jabber to Jabber call to each other at the same time, the call is automatically connected.In such case, users do not receive any incoming call notification.
Feature Configuration for Cisco Jabber 11.8 51
Voice and VideoJabber to Jabber Call

•When users are on a Jabber to Jabber call and start another call, the ongoing call ends immediately, evenif the person they called does not answer.
•When on a Jabber to Jabber call and they receive an incoming Jabber to Jabber call, the End Call AndAnswer option is displayed. When they select this button, the ongoing Jabber to Jabber call ends andthe incoming call is answered.
• For Jabber to Jabber calls on Cisco Jabber for mobile clients:
• Cisco Jabber for mobile clients does not support HD video in portrait mode. To achieve HD video,you need to rotate the phone from portrait to landscape mode during the call.
•When users are on a Jabber to Jabber call and they make a phone call, the ongoing Jabber to Jabbercall ends immediately, even if the remote party does not answer.
•When users are on a mobile call, they cannot answer any Jabber to Jabber call. The incomingJabber to Jabber call is listed as a missed call.
•When users are on a Jabber to Jabber call and they receive an incoming mobile call:
• On an iPhone, the Jabber to Jabber call ends immediately, even if they do not answer thecall.
• On an Android phone, the Jabber to Jabber call ends immediately when they answer theincoming mobile call.
Supported In-Call Features
The following features are supported during a Jabber to Jabber call:
• End a Jabber to Jabber call
• Mute or unmute the audio
• Start or stop the video
• Volume control
• Open or close or move the self-video
• Switch to front or back camera. This feature is only supported on the Cisco Jabber mobile clients.
Jabber to Jabber Call Cloud Deployment
Cloud deployment for Jabber to Jabber call uses the SDP/HTTPS setup. For cloud deployment, ensure thefollowing:
• Install the following root certificate to use the Jabber to Jabber call feature: GoDaddy Class 2Certification Authority Root Certificate. To resolve anywarnings about this certificatename, install the required GoDaddy certificate.
• Include the following servers in the proxy server bypass list:
• https://locus-a.wbx2.com/locus/api/v1
• https://conv-a.wbx2.com/conversation/api/v1
Feature Configuration for Cisco Jabber 11.852
Voice and VideoJabber to Jabber Call

For information on proxy server lists, see the Configure Proxy Settings in the Cisco Jabber DeploymentGuides.
• Enable the range of media ports and protocols for RTP/SRTP over UDP: 33434-33598 and 8000-8100.For Jabber to Jabber call setup over HTTPS, enable port 443.
• Before you enable the Jabber to Jabber calling feature, complete the following tasks:
• Contact the Cisco Customer Support team or your Cisco Customer Success Manager to requestthat your organization is added to the Cisco Common Identity server. This process to add users tothe Common Identity server takes some time to complete and is necessary to access Jabber toJabber calling capabilities.
• For Single Sign On (SSO) users, you must set up SSO for Common Identity. For more informationabout configuring SSO, see the Cisco WebEx Messenger documentation at this link: https://www.cisco.com/c/en/us/support/unified-communications/webex-messenger/products-installation-guides-list.html.
For cloud deployments, Jabber to Jabber calling is configured on the CiscoWebExMessenger Administrationtool with one of the following methods:
• Using the P2P settings in the Configuration Tab section. For more information, see the Cisco WebExMessenger Administrator's Guide.
• Using the Internal VoIP and External VoIP settings in the policy editor for Cisco WebEx MessengerAdministration tool. You can control the video services for Jabber to Jabber calls using the InternalVideo and External Video policy actions. For more information, see the Policy Editor section of theCisco WebEx Messenger Administration Guide.Jabber to Jabber calling can be enabled for groups ofusers or all users.
Jabber to Jabber Hybrid Mode
Jabber to Jabber Call Experience in Hybrid Mode
In addition to the limitations for Jabber to Jabber, the following are the scenarios that occur when using Jabberto Jabber calls and Cisco Unified Communications Manager calls:
•When users are on a Jabber to Jabber call and make a Cisco Unified Communications Manager call, theongoing Jabber to Jabber call ends immediately, even if the remote party does not answer.
•When users are on a Jabber to Jabber call and resume a Cisco Unified Communications Manager callfrom on hold, the Jabber to Jabber call ends immediately.
•When users are on a Jabber to Jabber call and receive an incoming Cisco Unified CommunicationsManager call, a notification with an End Call And Answer button displays. If your user selects thisbutton the ongoing Jabber to Jabber call ends and the incoming call is answered.
•When users receive a Cisco Unified Communications Manager call, they can place the ongoing CiscoUnified Communications Manager call on hold to answer the new call.
•When users are on a Cisco Unified Communications Manager call and they choose to make a Jabber toJabber call, the Cisco Unified Communications Manager call is put on hold immediately, even if theparticipant in the Jabber to Jabber call does not answer the call.
Feature Configuration for Cisco Jabber 11.8 53
Voice and VideoJabber to Jabber Hybrid Mode

•When users are on a Cisco Unified Communications Manager call and they answer an incoming Jabberto Jabber call, the Cisco Unified Communications Manager call is put on hold immediately.
• If your user’s line is configured on Cisco Unified Communications Manager to auto-answer calls andthey receive an incoming Cisco Unified Communications Manager call when they are on a Jabber toJabber call, the Jabber to Jabber call ends immediately without notification and the Cisco UnifiedCommunications Manager call is answered.
Jabber to Jabber BandwidthSpecifies the maximum bandwidth (in kilobits per second) to be used for Jabber to Jabber calls. The videoquality (resolution) of the call is lowered so that it meets the bandwidth limit. This feature is configured usingthe J2JMaxBandwidthKbps parameter.
For more information on parameters, see the Parameter Reference Guide for your release.
Mobile ConnectApplies to: All clients.
With Single Number Reach (SNR), your users' mobile phones ring whenever someone calls their work numberif:
• Cisco Jabber isn't available. After Cisco Jabber becomes available again and connects to the corporatenetwork, Cisco Unified Communications Manager goes back to sending calls to the Jabber client ratherthan using single number reach.
• Jabber mobile users selectMobile Voice Network, or they choose Autoselect and they're outside theirWi-Fi network.
Procedure
PurposeCommand or Action
EnableMobile Connect, on page 54EnableMobileConnect
Step 1
To configure the mobile device phonenumber.
Add Mobility Identity, on page 44Step 2
To configure an alternate phonenumber.
Add Remote Destination (Optional), on page 56Step 3
Enable Mobile ConnectUse the following procedure to enable single number reach for your users.
Feature Configuration for Cisco Jabber 11.854
Voice and VideoJabber to Jabber Bandwidth
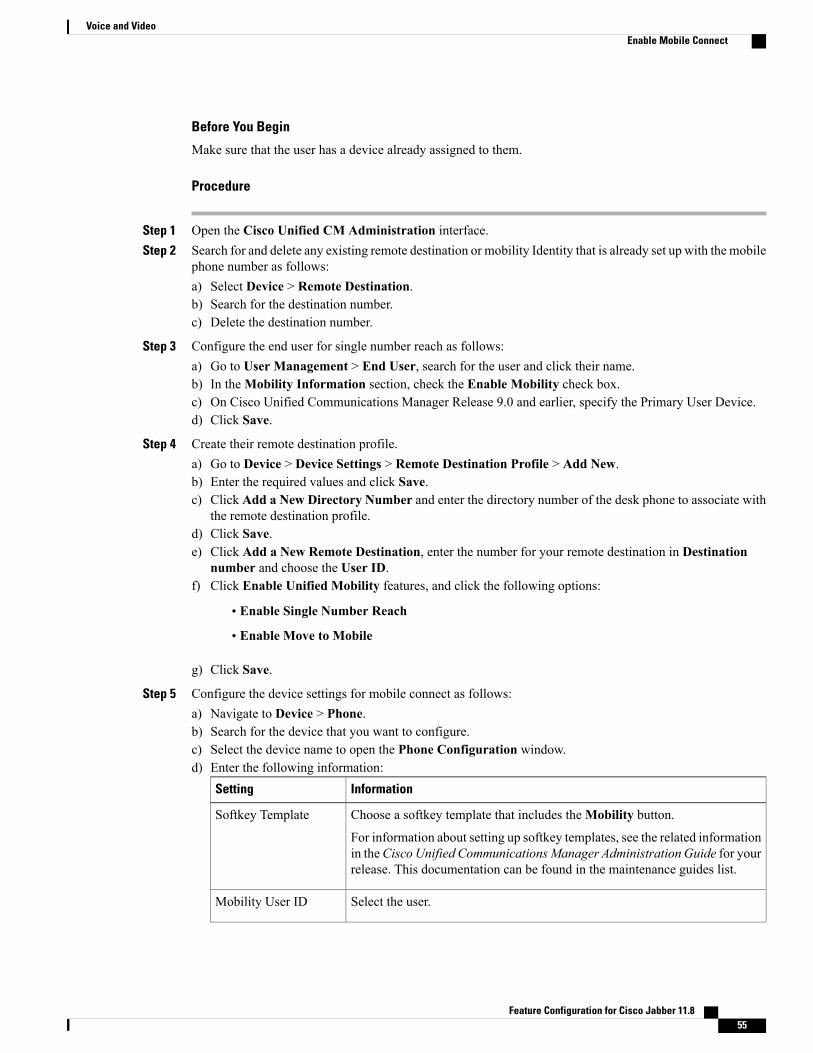
Before You Begin
Make sure that the user has a device already assigned to them.
Procedure
Step 1 Open the Cisco Unified CM Administration interface.Step 2 Search for and delete any existing remote destination or mobility Identity that is already set up with the mobile
phone number as follows:a) Select Device > Remote Destination.b) Search for the destination number.c) Delete the destination number.
Step 3 Configure the end user for single number reach as follows:a) Go to User Management > End User, search for the user and click their name.b) In theMobility Information section, check the Enable Mobility check box.c) On Cisco Unified Communications Manager Release 9.0 and earlier, specify the Primary User Device.d) Click Save.
Step 4 Create their remote destination profile.a) Go to Device > Device Settings > Remote Destination Profile > Add New.b) Enter the required values and click Save.c) Click Add a New Directory Number and enter the directory number of the desk phone to associate with
the remote destination profile.d) Click Save.e) Click Add a New Remote Destination, enter the number for your remote destination in Destination
number and choose the User ID.f) Click Enable Unified Mobility features, and click the following options:
• Enable Single Number Reach
• Enable Move to Mobile
g) Click Save.
Step 5 Configure the device settings for mobile connect as follows:a) Navigate to Device > Phone.b) Search for the device that you want to configure.c) Select the device name to open the Phone Configuration window.d) Enter the following information:
InformationSetting
Choose a softkey template that includes theMobility button.
For information about setting up softkey templates, see the related informationin theCisco Unified CommunicationsManager Administration Guide for yourrelease. This documentation can be found in the maintenance guides list.
Softkey Template
Select the user.Mobility User ID
Feature Configuration for Cisco Jabber 11.8 55
Voice and VideoEnable Mobile Connect
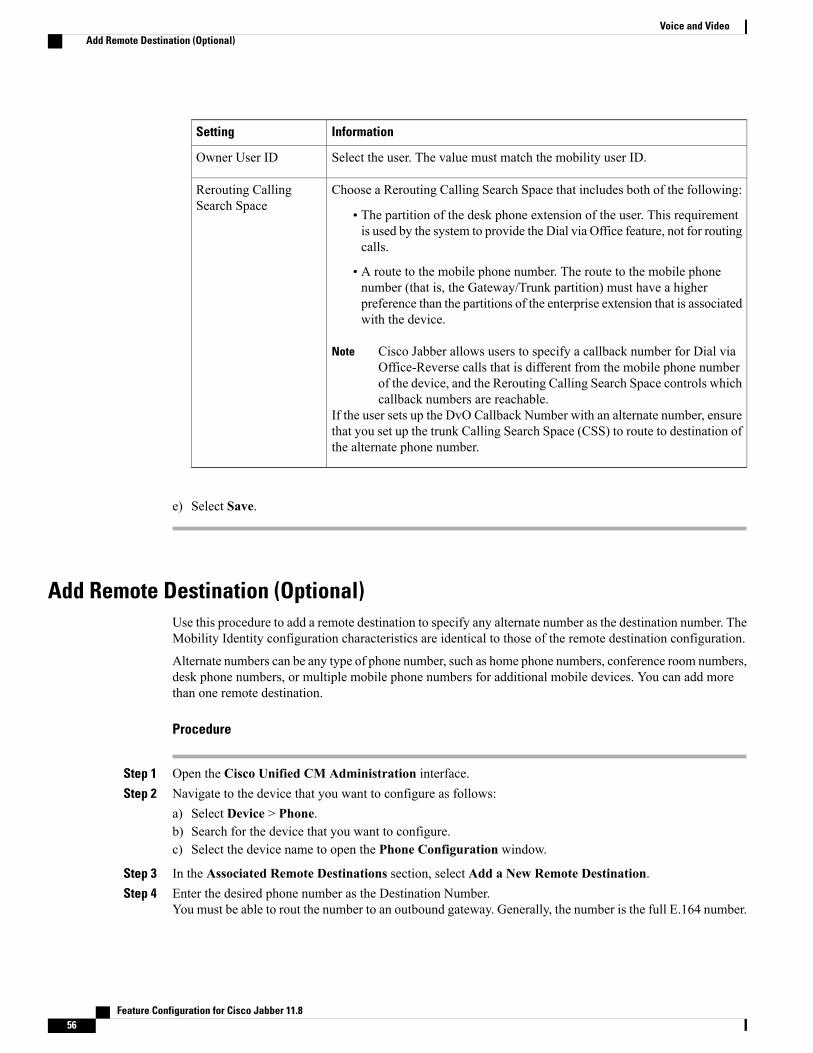
InformationSetting
Select the user. The value must match the mobility user ID.Owner User ID
Choose a Rerouting Calling Search Space that includes both of the following:
• The partition of the desk phone extension of the user. This requirementis used by the system to provide the Dial via Office feature, not for routingcalls.
• A route to the mobile phone number. The route to the mobile phonenumber (that is, the Gateway/Trunk partition) must have a higherpreference than the partitions of the enterprise extension that is associatedwith the device.
Cisco Jabber allows users to specify a callback number for Dial viaOffice-Reverse calls that is different from the mobile phone numberof the device, and the Rerouting Calling Search Space controls whichcallback numbers are reachable.
Note
If the user sets up the DvO Callback Number with an alternate number, ensurethat you set up the trunk Calling Search Space (CSS) to route to destination ofthe alternate phone number.
Rerouting CallingSearch Space
e) Select Save.
Add Remote Destination (Optional)Use this procedure to add a remote destination to specify any alternate number as the destination number. TheMobility Identity configuration characteristics are identical to those of the remote destination configuration.
Alternate numbers can be any type of phone number, such as home phone numbers, conference room numbers,desk phone numbers, or multiple mobile phone numbers for additional mobile devices. You can add morethan one remote destination.
Procedure
Step 1 Open the Cisco Unified CM Administration interface.Step 2 Navigate to the device that you want to configure as follows:
a) Select Device > Phone.b) Search for the device that you want to configure.c) Select the device name to open the Phone Configuration window.
Step 3 In the Associated Remote Destinations section, select Add a New Remote Destination.Step 4 Enter the desired phone number as the Destination Number.
You must be able to rout the number to an outbound gateway. Generally, the number is the full E.164 number.
Feature Configuration for Cisco Jabber 11.856
Voice and VideoAdd Remote Destination (Optional)
Step 5 Enter the initial values for the following call timers:a) Answer Too Soon Timer—Enter 3000b) Answer Too Late Timer— Enter 20000c) Delay Before Ringing Timer—0
This setting does not apply to DvO-R calls.
These values ensure that calls are not routed to the mobile service provider voicemail before they ring in theclient on the mobile device. For more information, see the online help in Cisco Unified CommunicationsManager.
Step 6 Do one of the following:
• If you have Cisco Unified Communications Manager Version 9 or earlier, check the Enable MobileConnect check box.
• If you have Cisco Unified Communications Manager Version 10, check the Enable Single NumberReach check box.
Step 7 Set up the schedule for routing calls to the mobile number.Step 8 Select Save.
Move to MobileApplies to: Cisco Jabber for Android, Cisco Jabber for iOS
Users can transfer an active VoIP call from Cisco Jabber to their mobile phone number on the mobile network.This feature is useful when a user on a call leaves the Wi-Fi network (for example, leaving the building towalk out to the car), or if there are voice quality issues over the Wi-Fi network.
There are two ways to enable this feature. You can also disable it.
Feature Configuration for Cisco Jabber 11.8 57
Voice and VideoMove to Mobile

InstructionsDescriptionImplementationMethod
See the Enable Handoff from VoIP toMobile Network topic.
The mobile device calls Cisco UnifiedCommunications Manager using themobile network.
This method requires a Direct Inward Dial(DID) number.
The service provider must deliver the DIDdigits exactly as configured. Alternately,for Cisco IOS gateways with H.323 or SIPcommunication to Cisco UnifiedCommunications Manager, you can useCisco IOS to manipulate the inboundcalled-party number at the gateway,presenting the digits to Cisco UnifiedCommunications Manager exactly asconfigured on the handoff DN.
This method does not work for iPod Touchdevices.
Handoff DN
See the Enable Transfer from VoIP toMobile Network topic.
Cisco Unified Communications Managercalls the phone number of the PSTNmobile service provider for the mobiledevice.
Mobility Softkey
Select Disabled for the Transfer toMobile Network option in the ProductSpecific Configuration Layout sectionof the TCT device page.
Select Disabled for the Transfer toMobile Network option in the ProductSpecific Configuration Layout sectionof the BOT device page.
Disable this feature if you do not want tomake it available to users.
None of the above
Enable Handoff from VoIP to Mobile NetworkSet up a directory number that Cisco Unified Communications Manager can use to hand off active calls fromVoIP to the mobile network. Match the user's caller ID with the Mobility Identity to ensure that Cisco UnifiedCommunicationsManager can recognize the user. Set up the TCT device and mobile device to support handofffrom VoIP to the mobile network.
Set up a directory number that Cisco Unified Communications Manager can use to hand off active calls fromVoIP to the mobile network. Match the user's caller ID with the Mobility Identity to ensure that Cisco UnifiedCommunicationsManager can recognize the user. Set up the BOT device andmobile device to support handofffrom VoIP to the mobile network.
Feature Configuration for Cisco Jabber 11.858
Voice and VideoEnable Handoff from VoIP to Mobile Network

Set Up Handoff DN
Before You Begin
Determine the required values. The values that you choose depend on the phone number that the gatewaypasses (for example, seven digits or ten digits).
Procedure
Step 1 Open the Cisco Unified CM Administration interface.Step 2 Select Call Routing >Mobility > Handoff Configuration.Step 3 Enter the Handoff Number for the Direct Inward Dial (DID) number that the device uses to hand off a VoIP
call to the mobile network.The service provider must deliver the DID digits exactly as configured. Alternately, for Cisco IOS gatewayswith H.323 or SIP communication to Cisco Unified Communications Manager, you can use Cisco IOS tomanipulate the inbound called-party number at the gateway, presenting the digits to Cisco UnifiedCommunications Manager exactly as configured on the handoff number.
You cannot use translation patterns or other similar manipulations within Cisco UnifiedCommunications Manager to match the inbound DID digits to the configured Handoff DN.
Note
Step 4 Select the Route Partition for the handoff DID.This partition should be present in the Remote Destination inbound Calling Search Space (CSS), which pointsto either the Inbound CSS of the Gateway or Trunk, or the Remote Destination CSS.
This feature does not use the remaining options on this page.
Step 5 Select Save.
Match Caller ID with Mobility IdentityTo ensure that only authorized phones can initiate outbound calls, calls must originate from a phone that isset up in the system. To do this, the system attempts to match the caller ID of the requesting phone numberwith an existing Mobility Identity. By default, when a device initiates the Handoff feature, the caller ID thatis passed from the gateway to Cisco Unified Communications Manager must exactly match the MobilityIdentity number that you entered for that device.
However, your system may be set up such that these numbers do not match exactly. For example, MobilityIdentity numbers may include a country code while caller ID does not. If so, you must set up the system torecognize a partial match.
Be sure to account for situations in which the same phone number may exist in different area codes or indifferent countries. Also, be aware that service providers can identify calls with a variable number of digits,which may affect partial matching. For example, local calls may be identified using seven digits (such as 5550123) while out-of-area calls may be identified using ten digits (such as 408 555 0199).
Before You Begin
Set up the Mobility Identity. See the Add Mobility Identity topic.
Feature Configuration for Cisco Jabber 11.8 59
Voice and VideoEnable Handoff from VoIP to Mobile Network

To determine whether you need to complete this procedure, perform the following steps. Dial in to the systemfrom the mobile device and compare the caller ID value with the Destination Number in the Mobility Identity.If the numbers do not match, you must perform this procedure. Repeat this procedure for devices that areissued in all expected locales and area codes.
Procedure
Step 1 Open the Cisco Unified CM Administration interface.Step 2 Select System > Service Parameters.Step 3 Select the active server.Step 4 Select the Cisco CallManager (Active) service.Step 5 Scroll down to the Clusterwide Parameters (System - Mobility) section.Step 6 SelectMatching Caller ID with Remote Destination and read essential information about this value.Step 7 Select Partial Match for Matching Caller ID with Remote Destination.Step 8 Select Number of Digits for Caller ID Partial Match and read the essential requirements for this value.Step 9 Enter the required number of digits to ensure partial matches.Step 10 Select Save.
Set Up User and Device Settings for Handoff
Before You Begin
• Set up the user device on the Cisco Unified Communications Manager.
• Set up the user with a Mobility Identity.
Procedure
Step 1 In theCisco Unified CMAdministration interface, go to the TCT Device page, and selectUse Handoff DNFeature for the Transfer to Mobile Network option.Do not assign this method for iPod Touch devices. Use the Mobility Softkey method instead.
Step 2 In the Cisco Unified CM Administration interface, go to the BOT Device page, and select Use HandoffDN Feature for the Transfer to Mobile Network option.
Step 3 On the iOS device, tap Settings > Phone > Show My Caller ID to verify that Caller ID is on.Step 4 On some Android device and operating system combinations, you can verify that the Caller ID is on. On the
Android device, open the Phone application and tapMenu > Call Settings > Additional settings > CallerID > Show Number.
Step 5 Test this feature.
Feature Configuration for Cisco Jabber 11.860
Voice and VideoEnable Handoff from VoIP to Mobile Network

Enable Transfer from VoIP to Mobile Network
Procedure
Step 1 Open the Cisco Unified CM Administration interface.Step 2 For system-level settings, check that the Mobility softkey appears when the phone is in the connected and
on-hook call states.a) Select Device > Device Settings > Softkey Template.b) Select the same softkey template that you selected when you configured the device for Mobile Connect.c) In the Related Links drop-down list at the upper right, select Configure Softkey Layout and select Go.d) In the call state drop-down list, select the On Hook state and verify that the Mobility key is in the list of
selected softkeys.e) In the call state drop-down list, select the Connected state and verify that the Mobility key is in the list of
selected softkeys.
Step 3 Navigate to the device that you want to configure as follows:a) Select Device > Phone.b) Search for the device that you want to configure.c) Select the device name to open the Phone Configuration window.
Step 4 For the per-user and per-device settings in Cisco Unified Communications Manager, set the specific deviceto use the Mobility softkey when the device transfers calls to the mobile voice network. Ensure that you haveset up both Mobility Identity and Mobile Connect for the mobile device. After the transfer feature is working,users can enable and disable Mobile Connect at their convenience without affecting the feature.If the device is an iPod Touch, you can configure a Mobility Identity using an alternate phone number suchas the mobile phone of the user.
a) Select the Owner User ID on the device page.b) Select theMobility User ID. The value usually matches that of the Owner User ID.c) In the Product Specific Configuration Layout section, for the Transfer to Mobile Network option, select
Use Mobility Softkey or Use HandoffDN Feature.
Step 5 In the User Locale field, choose English, United States.Step 6 Select Save.Step 7 Select Apply Config.Step 8 Instruct the user to sign out of the client and then to sign back in again to access the feature.
What to Do Next
Test your settings by transferring an active call from VoIP to the mobile network.
Personal RoomsApplies to: All clients
Feature Configuration for Cisco Jabber 11.8 61
Voice and VideoEnable Transfer from VoIP to Mobile Network
A personal room is a virtual conference room that is always available and can be used to meet with people.Cisco Jabber uses the personal room feature of Cisco WebEx Meeting Center to allow users to easily meetwith their contacts using theMeet Now option in the client.
Procedure
Step 1 Personal Rooms are enabled by default for users on Cisco WebEx Meeting Center. For more information seethe Cisco WebEx Meeting Center documentation available here: https://www.cisco.com/c/en/us/support/conferencing/webex-meeting-center/products-installation-and-configuration-guides-list.html
Step 2 Users can configure their personal rooms for all instant meetings by selecting Use Personal Room for allmy instant meetings in Cisco WebEx Meeting Center.
URI DialingThis feature is supported for on-premises deployments. URI dialing is enabled in CiscoUnified CommunicationsManager, release 9.1(2) or later.
This feature is enabled in the jabber-config.xml file using the EnableSIPURIDialling parameter.
Example: <EnableSIPURIDialling>True</EnableSIPURIDialling>
For more information on the values of the parameter, see the Parameters Reference Guide.
Applies to: All clients
The mobile clients don't support URI dialing when the Dial via Office-Reverse feature is enabled.Important
URI dialing allows users to make calls and resolve contacts with Uniform Resource Identifiers (URI). Forexample, a user named Adam McKenzie has the following SIP URI associated with his directory number:[email protected]. URI dialing enables users to call Adam with his SIP URI rather than hisdirectory number.
For detailed information on URI dialing requirements, such as valid URI formats, as well as advancedconfiguration including ILS setup, see the URI Dialing section of the System Configuration Guide for CiscoUnified Communications Manager .
Associate URIs to Directory NumbersWhen users makeURI calls, Cisco Unified CommunicationsManager routes the inbound calls to the directorynumbers associated to the URIs. For this reason, you must associate URIs with directory numbers. You caneither automatically populate directory numbers with URIs or configure directory numbers with URIs.
Automatically Populate Directory Numbers with URIsWhen you add users to Cisco Unified Communications Manager, you populate the Directory URI field witha valid SIP URI. Cisco Unified Communications Manager saves that SIP URI in the end user configuration.
Feature Configuration for Cisco Jabber 11.862
Voice and VideoURI Dialing

When you specify primary extensions for users, Cisco Unified Communications Manager populates thedirectory URI from the end user configuration to the directory number configuration. In this way, automaticallypopulates the directory URI for the user's directory number. Cisco Unified Communications Manager alsoplaces the URI in the default partition, which is Directory URI.
The following task outlines, at a high level, the steps to configure Cisco Unified Communications Managerso that directory numbers inherit URIs:
Procedure
Step 1 Add devices.Step 2 Add directory numbers to the devices.Step 3 Associate users with the devices.Step 4 Specify primary extensions for users.
What to Do Next
Verify that the directory URIs are associated with the directory numbers.
Configure Directory Numbers with URIs
You can specify URIs for directory numbers that are not associated with users. You should configure directorynumbers with URIs for testing and evaluation purposes only.
To configure directory numbers with URIs, do the following:
Procedure
Step 1 Open the Cisco Unified CM Administration interface.Step 2 Select Call Routing > Directory Number.
The Find and List Directory Numbers window opens.
Step 3 Find and select the appropriate directory number.The Directory Number Configuration window opens.
Step 4 Locate the Directory URIs section.Step 5 Specify a valid SIP URI in the URI column.Step 6 Select the appropriate partition from the Partition column.
You cannot manually add URIs to the system Directory URI partition. You should add the URI tothe same route partition as the directory number.
Note
Step 7 Add the partition to the appropriate calling search space so that users can place calls to the directory numbers.Step 8 Select Save.
Feature Configuration for Cisco Jabber 11.8 63
Voice and VideoAssociate URIs to Directory Numbers
Associate the Directory URI PartitionYou must associate the default partition into which Cisco Unified Communications Manager places URIswith a partition that contains directory numbers.
To enable URI dialing, you must associate the default directory URI partition with a partition that containsdirectory numbers.
If you do not already have a partition for directory numbers within a calling search space, you shouldcreate a partition and configure it as appropriate.
Important
Procedure
Step 1 Open the Cisco Unified CM Administration interface.Step 2 Select System > Enterprise Parameters.
The Enterprise Parameters Configuration window opens.
Step 3 Locate the End User Parameters section.Step 4 In the Directory URI Alias Partition row, select the appropriate partition from the drop-down list.Step 5 Click Save.
The default directory URI partition is associated with the partition that contains directory numbers. As a result,Cisco Unified Communications Manager can route incoming URI calls to the correct directory numbers.
You should ensure the partition is in the appropriate calling search space so that users can place calls to thedirectory numbers.
Enable FQDN in SIP Requests for Contact ResolutionTo enable contact resolution with URIs, you must ensure that Cisco Unified Communications Manager usesthe fully qualified domain name (FQDN) in SIP requests.
Procedure
Step 1 Open the Cisco Unified CM Administration interface.Step 2 Select Device > Device Settings > SIP Profile.
The Find and List SIP Profiles window opens.
Step 3 Find and select the appropriate SIP profile.You cannot edit the default SIP profile. If required, you should create a copy of the default SIPprofile that you can modify.
Remember
Step 4 Select Use Fully Qualified Domain Name in SIP Requests and then select Save.
Feature Configuration for Cisco Jabber 11.864
Voice and VideoEnable FQDN in SIP Requests for Contact Resolution
What to Do Next
Associate the SIP profile with all devices that have primary extensions to which you associate URIs.
Voicemail AvoidanceApplies to: All clients
Voicemail avoidance is a feature that prevents calls from being answered by the mobile service provider voicemail. This feature is useful if a user receives a Mobile Connect call from the enterprise on the mobile device.It is also useful when an incoming DvO-R call is placed to the mobile device.
You can set up voicemail avoidance in one of two ways:
• Timer-controlled—(Default) With this method, you set timers on the Cisco Unified CommunicationsManager to determine if the call is answered by the mobile user or mobile service provider voicemail.
• User-controlled—With this method, you set Cisco Unified Communications Manager to require that auser presses any key on the keypad of the device to generate a DTMF tone before the call can proceed.
If you deploy DvO-R, Cisco recommends that you also set user-controlled voicemail avoidance. If you setuser-controlled Voicemail Avoidance, this feature applies to both DvO-R and Mobile Connect calls.
For more information about voicemail avoidance, see the Confirmed Answer and DvO VM detection sectionin the Cisco Unified Communications Manager Features and Services Guide for your release.
Set Up Timer-Controlled Voicemail AvoidanceSet up the timer control method by setting the Answer Too Soon Timer and Answer Too Late Timer oneither the Mobility Identity or the Remote Destination. For more information, see the Add Mobility Identityor Add Remote Destination (Optional) topics.
Before You Begin
Timer-controlled voicemail avoidance is supported on Cisco Unified Communications Manager, release 6.0and later.
Set Up User-Controlled Voicemail Avoidance
User-controlled voicemail avoidance is available on Cisco Unified Communications Manager, release 9.0and later.
Important
Set up User-Controlled Voicemail Avoidance as follows:
1 Set up Cisco Unified CommunicationsManager using the Set Up Cisco Unified CommunicationsManagerto Support Voicemail Avoidance topic.
2 Set up the device using one of the following topics:
• Enable Voicemail Avoidance on Mobility Identity
Feature Configuration for Cisco Jabber 11.8 65
Voice and VideoVoicemail Avoidance
• Enable Voicemail Avoidance on Remote Destination
Cisco does not support user-controlled voicemail avoidance when using DvO-R with alternate numbersthat the end user sets up in the client. An alternate number is any phone number that the user enters in theDvO Callback Number field on the client that does not match the phone number that you set up on theuser's Mobility Identity.
If you set up this feature with alternate numbers, the Cisco Unified Communications Manager connectsthe DvO-R calls even if the callback connects to a wrong number or a voicemail system.
Important
Set Up Cisco Unified Communications Manager to Support Voicemail AvoidanceUse this procedure to set up the Cisco Unified CommunicationsManager to support user-controlled VoicemailAvoidance.
Procedure
Step 1 Open the Cisco Unified CM Administration interface.Step 2 Select System > Service Parameters.Step 3 In the Server drop-down list, select the active Cisco Unified Communications Manager.Step 4 In the Service drop-down list, select the Cisco Call Manager (Active) service.Step 5 Configure the settings in theClusterwide Parameters (System -Mobility Single Number ReachVoicemail)
section.The settings in this section are not specific to Cisco Jabber. For information about how to configurethese settings, see the Confirmed Answer and DvO VM detection section in the Cisco UnifiedCommunications Manager Administrator Guide for your release.
Note
Step 6 Click Save.
Enable Voicemail Avoidance on Mobility IdentityUse this procedure to enable user-controlled voicemail avoidance for the end user's mobility identity.
Before You Begin
• Set up the annunciator on the Cisco Unified Communications Manager. For more information, see theAnnunciator setup section in theCisco Unified CommunicationsManager Administrator Guide for yourrelease.
• If you set up a Media Resource Group on the Cisco Unified Communications Manager, set up theannunciator on the Media Resource Group. For more information, see theMedia resource group setupsection in the Cisco Unified Communications Manager Administrator Guide for your release.
Feature Configuration for Cisco Jabber 11.866
Voice and VideoSet Up User-Controlled Voicemail Avoidance
Procedure
Step 1 Open the Cisco Unified CM Administration interface.Step 2 Navigate to the device that you want to configure as follows:
a) Select Device > Phone.b) Search for the device that you want to configure.c) Select the device name to open the Phone Configuration window.
Step 3 In the Associated Mobility Identity section, click the link for the Mobility Identity.To ensure that the Voicemail Avoidance feature works correctly, the DvO Callback Number that theend user enters in the Cisco Jabber client must match the Destination Number that you enter on theMobility Identity Configuration screen.
Note
Step 4 Set the policies as follows:
• Cisco Unified Communications Manager release 9— In the Single Number Reach Voicemail Policydrop-down list, select User Control.
• Cisco Unified Communications Manager release 10 without Dial via Office— In the Single NumberReach Voicemail Policy drop-down list, select User Control.
• Cisco Unified Communications Manager release 10 with Dial via Office
◦In the Single Number Reach Voicemail Policy drop-down list, select Timer Control.
◦In the Dial-via-Office Reverse Voicemail Policy drop-down list, select User Control.
Step 5 Click Save.
Enable Voicemail Avoidance on Remote DestinationUse this procedure to enable user-controlled voicemail avoidance for the end user's remote destination.
Before You Begin
• Set up the annunciator on the Cisco Unified Communications Manager. For more information, see theAnnunciator setup section in the Cisco Unified CommunicationsManager Administrator Guide for yourrelease.
• If you set up a Media Resource Group on the Cisco Unified Communications Manager, set up theannunciator on the Media Resource Group. For more information, see theMedia resource group setupsection in the Cisco Unified Communications Manager Administrator Guide for your release.
Procedure
Step 1 Open the Cisco Unified CM Administration interface.Step 2 Navigate to the device that you want to configure as follows:
a) Select Device > Phone.
Feature Configuration for Cisco Jabber 11.8 67
Voice and VideoSet Up User-Controlled Voicemail Avoidance

b) Search for the device that you want to configure.c) Select the device name to open the Phone Configuration window.
Step 3 In the Associated Remote Destinations section, click the link for the associated remote destination.Step 4 Set the policies as follows:
• Cisco Unified Communications Manager release 9— In the Single Number Reach Voicemail Policydrop-down list, select User Control.
• Cisco Unified Communications Manager release 10 without Dial via Office— In the Single NumberReach Voicemail Policy drop-down list, select User Control.
• Cisco Unified Communications Manager release 10 with Dial via Office
◦In the Single Number Reach Voicemail Policy drop-down list, select Timer Control.
◦In the Dial-via-Office Reverse Voicemail Policy drop-down list, select User Control.
Step 5 Click Save.
Feature Configuration for Cisco Jabber 11.868
Voice and VideoSet Up User-Controlled Voicemail Avoidance

C H A P T E R 4Security and Monitoring
• Logout Inactivity Timer, page 69
• Problem Reporting, page 69
• Set Device PIN , page 71
• Silent Monitoring and Call Recording, page 72
• Telemetry, page 72
Logout Inactivity TimerApplies to: All clients
The sign out inactivity timer allows you to automatically sign users out of the client after a specified amountof time of inactivity.
Inactivity on the mobile clients includes:
• The client goes into the background.
• No user interaction on voice calls.
This feature is configured on the mobile clients using the ForceLogoutTimerMobile parameter.
Inactivity on the desktop clients includes:
• No keyboard or mouse activity.
• No user interaction on connected accessories for making and answering calls.
This feature is configured on the desktop clients using the ForceLogoutTimerDesktop parameter.
If the parameter is not set, the client will not automatically sign out.
Problem ReportingApplies to: Cisco Jabber for Windows
Feature Configuration for Cisco Jabber 11.8 69
Setting up problem reporting enables users to send a summary of issues that they encounter with the client.There are two methods for submitting problem reports as follows:
• Users submit the problem report directly through the client interface.
• Users save the problem report locally and then upload it at a later time.
The client uses an HTTP POST method to submit problem reports. Create a custom script to accept the POSTrequest and specify the URL of the script on your HTTP server as a configuration parameter. Because userscan save problem reports locally, you should also create an HTML page with a form to enable users to uploadproblem reports.
Before You Begin
Complete the following steps to prepare your environment:
1 Install and configure an HTTP server.2 Create a custom script to accept the HTTP POST request.3 Create an HTML page that enables users to upload problem reports that are saved locally. Your HTML
page should contain a form that accepts the problem report saved as a .ZIP archive and contains an actionto post the problem report using your custom script.
The following is an example form that accepts problem reports:<form name="uploadPrt" action="http://server_name.com/scripts/UploadPrt.php" method="post"enctype="multipart/form-data"><input type="file" name="zipFileName" id="zipFileName" /><br /><input type="submit" name="submitBtn" id="submitBtn" value="Upload File" /></form>
Procedure
Step 1 Host your custom script on your HTTP server.Step 2 Specify the URL of your script as the value of the PrtLogServerUrl parameter in your configuration file.
Decrypt the Problem ReportThe command line tool CiscoJabberPrtDecrypter.exe for decrypting the problem reports is only availableon Windows machines and is included in the installer. The tool has the following arguments:
• --help—Show the help message.
• --privatekey—Specify the private key file, this is a privacy enhanced mail (.pem) or a personalinformation exchange PKCS#12 (.pfx) format.
• --password—Optional, if the input private key file is password protected.
• --encryptionkey—Specify the encryption secret key file, for example file.zip.esk.
• --encryptedfile—Specify the encrypted file, for example file.zip.enc.
• --outputfile—Specify the output file, for example decryptedfile.zip.
• --mobile—Specify for the problem reports from mobile clients.
Feature Configuration for Cisco Jabber 11.870
Security and MonitoringDecrypt the Problem Report
Before You Begin
To decrypt problem reports you need the following:
• Two files from the zip file created when you generated a problem report using encryption:
• file.zip.esk—The encrypted symmetric key.
• file.zip.enc—The original data encrypted using AES256.
• Private Key for the certificate used for encrypting the data.
Procedure
Step 1 Open a command prompt in Windows.Step 2 Navigate to the C:\Program Files(x86)\Cisco Systems\Cisco Jabber\ directory.Step 3 Enter the command and your parameters.
Example for desktop clients: CiscoJabberPrtDecrypter.exe --privatekey C:\PRT\PrivateKey.pfx
--password 12345 --encryptedfile C:\PRT\file.zip.enc --encryptionkey C:\PRT\file.zip.esk
--outputfile C:\PRT\decryptedfile.zip
Example for mobile clients: CiscoJabberPrtDecrypter.exe --privatekey C:\PRT\PrivateKey.pfx
--password 12345 --encryptedfile C:\PRT\file.zip.enc --encryptionkey C:\PRT\file.zip.esk
--outputfile C:\PRT\decryptedfile.zip --mobile
If the decryption is successful the output file is created. If there is an invalid parameter the decryption failsand an error is shown on the command line.
Set Device PINApplies to:Cisco Jabber for mobile clients.
We recommend that Jabber is used only on secured devices. To check if the device is secured, configureForceDevicePin parameter with the value true.
Example:
<ForceDevicePin>true</ForceDevicePin>
If the device is not secured:
• Then Jabber displays a notification to set PIN. This is a time bound notification, if the user doesn’t tapon SET PIN within 13 seconds, then the user is signed out of Jabber.
After the user taps SET PIN option, the users must go the device settings and secure the device with aPIN or finger print authentication.
• If the user signs into Jabber, and then puts it in the background immediately, Jabber checks if the userhas secured the device or not. If the device is not secured, then the user is signed out of Jabber.
Feature Configuration for Cisco Jabber 11.8 71
Security and MonitoringSet Device PIN
Silent Monitoring and Call RecordingApplies to: All clients
Silent call monitoring is a Cisco Unified Communications Manager feature that allows a supervisor to hearboth call participants, but neither of the call participants can hear the supervisor.
Call recording is a Cisco Unified Communications Manager feature that enables a recording server to archiveagent conversations.
• Cisco Jabber does not provide any interface to begin silent monitoring or call recording. Use theappropriate software to silently monitor or record calls.
• Cisco Jabber does not currently support monitoring notification tone or recording notification tone.
• You can use silent monitoring and call recording functionality only. Cisco Jabber does not support otherfunctionality such as barging or whisper coaching.
Server Requirements:
• Silent monitoring and call recording are supported for on-premises deployment only.
• Cisco Jabber for Windows and Cisco Jabber for Mac require Cisco Unified Communications Manager9.x or later.
• Cisco Jabber for iPhone and iPad and Cisco Jabber for Android require Cisco Unified CommunicationsManager 11.0 or later.
Before you configure this feature on the server, there are releases of Cisco Unified Communications Managerthat require a device package to enable monitoring and recording capabilities. Verify that the Built In Bridgefield is available in the Phone Configuration window for the device. If the field is not available, downloadand apply the most recent device packages.
For detailed information about how to configure silent monitoring or call recording, see the FeatureConfiguration Guide for Cisco Unified Communications Manager, Release 11.0(1).
TelemetryCisco Jabber Analytics
Applies to: All clients
To improve your experience and product performance, Cisco Jabber may collect and send non-personallyidentifiable usage and performance data to Cisco. The aggregated data is used by Cisco to understand trendsin how Jabber clients are being used and how they are performing.
You must install the following root certificate to use the telemetry feature: GoDaddy Class 2Certification Authority Root Certificate. The telemetry server certificate name is"metrics-a.wbx2.com". To resolve any warnings about this certificate name, install the required GoDaddycertificate. For more information about certificates, see the Planning Guide.
By default, the telemetry data is on. You can configure the following telemetry parameters:
• Telemetry_Enabled—Specifies whether analytics data is gathered. The default value is true.
Feature Configuration for Cisco Jabber 11.872
Security and MonitoringSilent Monitoring and Call Recording
• TelemetryEnabledOverCellularData—Specifies whether analytics data is sent over cellular data andWi-Fi (true), or Wi-Fi only (false). The default value is true.
• TelemetryCustomerID—This optional parameter specifies the source of analytic information. This IDcan be a string that explicitly identifies an individual customer, or a string that identifies a commonsource without identifying the customer. We recommend using a tool that generates a Global UniqueIdentifier (GUID) to create a 36 character unique identifier, or to use a reverse domain name.
For more information about these parameters, see the Parameters Reference Guide.
Full details on what analytics data Cisco Jabber does and does not collect can be found in the Cisco JabberSupplement to Cisco’s On-Line Privacy Policy at https://www.cisco.com/web/siteassets/legal/privacy_02Jun10.html.
Feature Configuration for Cisco Jabber 11.8 73
Security and MonitoringTelemetry

Feature Configuration for Cisco Jabber 11.874
Security and MonitoringTelemetry

C H A P T E R 5Platform
• Custom Embedded Tabs, page 75
Custom Embedded TabsApplies to Cisco Jabber for desktop and mobile clients.
Custom embedded tabs display HTML content in the client interface. Learn how to create custom embeddedtab definitions for Cisco Jabber.
The Jabber embedded browser does not support cookie sharing with pop-ups from SSO enabled webpages.The content on the pop-up window may fail to load.
Note
Custom Embedded Tab DefinitionsThe custom embedded tab can only be configured using the jabber-config.xml file. The followingXML snippet shows the structure for custom tab definitions:<jabber-plugin-config><browser-plugin><page refresh="" preload=""><tooltip></tooltip><icon></icon><url></url></page></browser-plugin></jabber-plugin-config>
Cisco Jabber for Windows supports Internet Explorer version 9 or earlier. The client uses Internet Explorerin version 9 mode if a later version is on the workstation.
Cisco Jabber for Mac uses the Safari WebKit rendering engine to display the content of the embedded tab.
The following table describes the parameters for custom embedded tab definitions:DescriptionParameter
Contains all definitions for custom embedded tabs.
The value includes all custom tab definitions.
browser-plugin
Feature Configuration for Cisco Jabber 11.8 75

DescriptionParameter
Contains one custom embedded tab definition.page
Controls when the content refreshes.
• true— Content refreshes each time users select the tab.
• false (default)— Content refreshes when users restart the client or signin.
This parameter is optional and is an attribute of the page element.
refresh
Controls when the content loads.
• true— Content loads when the client starts.
• false (default)— Content loads when users select the tab.
This parameter is optional and is an attribute of the page element.
preload
Defines hover text for the custom embedded tab.
This parameter is optional. If you do not specify the hover text, the client willuse Custom tab.
The value is string of unicode characters.
tooltip
Specifies an icon for the tab. You can specify a local or hosted icon as follows:
• Local icon—Specify the URL as follows:file://file_path/icon_name
• Hosted icon—Specify theURLas follows:http://path/icon_name
You can use any icon that the client browser can render, including .JPG, .PNG,and .GIF formats.
This parameter is optional. If you do not specify an icon, the client loads thefavicon from the HTML page. If no favicon is available, the client loads thedefault icon.
icon
Specifies the URL where the content for the embedded tab resides.
The client uses the browser rendering engine to display the content of theembedded tab. For this reason, you can specify any content that the browsersupports.
For Cisco Jabber for Mac, the URL element must contain http or https.
This parameter is required.
url
Feature Configuration for Cisco Jabber 11.876
PlatformCustom Embedded Tab Definitions

User Custom TabsUsers can create their own custom embedded tabs through the client user interface.
You must enable users to create custom embedded tabs. Set true as the value for the AllowUserCustomTabsparameter in your configuration file as follows:<Options><AllowUserCustomTabs>true</AllowUserCustomTabs>
</Options>
User custom embedded tabs are set to true by default.Note
Custom IconsTo achieve optimal results, your custom icon should conform to the following guidelines:
• Dimensions: 20 x 20 pixels
• Transparent background
• PNG file format
Chats and Calls from Custom TabsYou can use protocol handlers to start chats and calls from custom embedded tabs. Make sure the customembedded tab is an HTML page.
Use the XMPP: or IM: protocol handler to start chats.Use the TEL: protocol handler to start audio and video calls.
UserID TokensYou can specify the ${UserID} token as part of the value for the url parameter. When users sign in, theclient replaces the ${UserID} token with the username of the logged in user.
You can also specify the ${UserID} token in query strings; for example,www.cisco.com/mywebapp.op?url=${UserID}.
Tip
The following is an example of how you can use the ${UserID} token:
1 You specify the following in your custom embedded tab:<url>www.cisco.com/${UserID}/profile</url>
2 Mary Smith signs in. Her username is msmith.
3 The client replaces the ${UserID} token with Mary's username as follows:<url>www.cisco.com/msmith/profile</url>
Feature Configuration for Cisco Jabber 11.8 77
PlatformUser Custom Tabs
JavaScript NotificationsYou can implement JavaScript notifications in custom embedded tabs. This topic describes the methods theclient provides for JavaScript notifications. This topic also gives you an example JavaScript form that youcan use to test notifications. It is beyond the scope of this documentation to describe how to implementJavaScript notifications for asynchronous server calls and other custom implementations. You should referto the appropriate JavaScript documentation for more information.
Notification Methods
The client includes an interface that exposes the following methods for JavaScript notifications:
• SetNotificationBadge— You call this method from the client in your JavaScript. This method takes astring value that can have any of the following values:
• Empty— An empty value removes any existing notification badge.
• A number from 1 to 999
• Two digit alphanumeric combinations, for example, A1
• onPageSelected()— The client invokes this method when users select the custom embedded tab.
• onPageDeselected()— The client invokes this method when users select another tab.
Not applicable for Jabber for iPhone and iPadNote
• onHubResized()— The client invokes this method when users resize or move the client hub window.
• onHubActivated()— The client invokes this method when the client hub windows is activated.
• onHubDeActivated()— The client invokes this method when the client hub window is deactivated.
Subscribe to Presence in Custom Tabs
You can use the following JavaScript functions to subscribe to the presence of a contact and receive presenceupdates from the client:
• SubscribePresence()— Specify a string value using the IM address of a user for this method.
• OnPresenceStateChanged— This method enables users to receive updates from the client on the presenceof a contact. You can specify one of the following values as the string:
• IM address
• Basic presence (Available, Away, Offline, Do Not Disturb)
• Rich presence (In a meeting, On a call, or a custom presence state)
Feature Configuration for Cisco Jabber 11.878
PlatformJavaScript Notifications

Note • If you subscribe to the presence of a person who is not on your contact list (also called temporarypresence subscription), the subscription expires after 68 minutes. After the subscription expires, youmust re-subscribe to the person’s presence in order to continue to receive presence updates.
• Jabber for iPad and iPhone only supports OnPresenceStateChanged.
Get Locale Information in Custom Tabs
You can use the following JavaScript functions to retrieve the current locale information of a contact fromthe client:
• GetUserLocale()— This method enables users to request locale information from the client.
• OnLocaleInfoAvailable— This method enables users to receive locale information from client. Youcan use a string value that contains the client locale information.
Jabber for iPad and iPhone only supports OnLocaleInfoAvailable.Note
Example JavaScript
The following code is an example of an HTML page that uses JavaScript to display a form into which youcan input a number from 1 to 999:<html>
<head><script type="text/javascript">
function OnPresenceStateChanged(jid, basicPresence,localizedPresence)
{var cell = document.getElementById(jid);cell.innerText = basicPresence.concat(",
",localizedPresence);}
function GetUserLocale(){
window.external.GetUserLocale();}
function SubscribePresence(){
window.external.SubscribePresence('[email protected]');}
function OnLocaleInfoAvailable(currentLocale){
var cell = document.getElementById("JabberLocale");
cell.innerText = currentLocale;}
function onHubActivated(){
var cell = document.getElementById("hubActive");cell.innerText = "TRUE";
}
Feature Configuration for Cisco Jabber 11.8 79
PlatformJavaScript Notifications
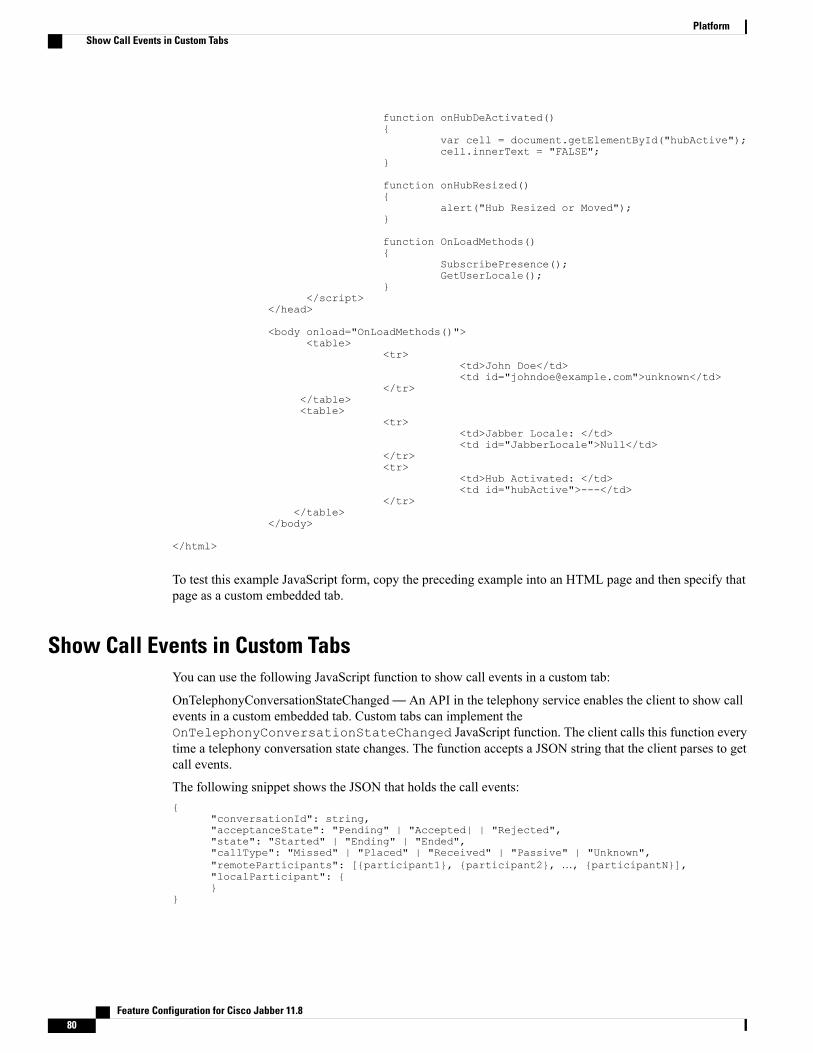
function onHubDeActivated(){
var cell = document.getElementById("hubActive");cell.innerText = "FALSE";
}
function onHubResized(){
alert("Hub Resized or Moved");}
function OnLoadMethods(){
SubscribePresence();GetUserLocale();
}</script>
</head>
<body onload="OnLoadMethods()"><table>
<tr><td>John Doe</td><td id="[email protected]">unknown</td>
</tr></table><table>
<tr><td>Jabber Locale: </td><td id="JabberLocale">Null</td>
</tr><tr>
<td>Hub Activated: </td><td id="hubActive">---</td>
</tr></table>
</body>
</html>
To test this example JavaScript form, copy the preceding example into an HTML page and then specify thatpage as a custom embedded tab.
Show Call Events in Custom TabsYou can use the following JavaScript function to show call events in a custom tab:
OnTelephonyConversationStateChanged— An API in the telephony service enables the client to show callevents in a custom embedded tab. Custom tabs can implement theOnTelephonyConversationStateChanged JavaScript function. The client calls this function everytime a telephony conversation state changes. The function accepts a JSON string that the client parses to getcall events.
The following snippet shows the JSON that holds the call events:{
"conversationId": string,"acceptanceState": "Pending" | "Accepted| | "Rejected","state": "Started" | "Ending" | "Ended","callType": "Missed" | "Placed" | "Received" | "Passive" | "Unknown","remoteParticipants": [{participant1}, {participant2}, …, {participantN}],"localParticipant": {}
}
Feature Configuration for Cisco Jabber 11.880
PlatformShow Call Events in Custom Tabs

Each participant object in the JSON can have the following properties:{
"voiceMediaDisplayName": "<displayName>","voiceMediaNumber": "<phoneNumber>","translatedNumber": "<phoneNumber>","voiceMediaPhoneType": "Business" | "Home" | "Mobile" | "Other" | "Unknown","voiceMediaState": "Active" | "Inactive" | "Pending" | "Passive" | "Unknown",
}
The following is an example implementation of this function in a custom embedded tab. This example getsthe values for the state and acceptanceState properties and shows them in the custom tab.function OnTelephonyConversationStateChanged(json) {
console.log("OnTelephonyConversationStateChanged");try {var conversation = JSON.parse(json);console.log("conversation id=" + conversation.conversationId);console.log("conversation state=" + conversation.state);console.log("conversation acceptanceState=" + conversation.acceptanceState);console.log("conversation callType=" + conversation.callType);
}catch(e) {console.log("cannot parse conversation:" + e.message);
}}
The following is an example implementation of this function with all possible fields:function OnTelephonyConversationStateChanged(json) {
console.log("OnTelephonyConversationStateChanged");try {var conversation = JSON.parse(json);console.log("conversation state=" + conversation.state);console.log("conversation acceptanceState=" + conversation.acceptanceState);console.log("conversation callType=" + conversation.callType);for (var i=0; i<conversation.remoteParticipants.length; i++) {console.log("conversation remoteParticipants[" + i + "]=");console.log("voiceMediaDisplayName=" +
conversation.remoteParticipants[i].voiceMediaDisplayName);console.log("voiceMediaNumber=" +
conversation.remoteParticipants[i].voiceMediaNumber);console.log("translatedNumber=" +
conversation.remoteParticipants[i].translatedNumber);console.log("voiceMediaPhoneType=" +
conversation.remoteParticipants[i].voiceMediaPhoneType);console.log("voiceMediaState=" +
conversation.remoteParticipants[i].voiceMediaState);}console.log("conversation localParticipant=");console.log(" voiceMediaDisplayName=" +
conversation.localParticipant.voiceMediaDisplayName);console.log(" voiceMediaNumber=" + conversation.localParticipant.voiceMediaNumber);
console.log(" translatedNumber=" + conversation.localParticipant.translatedNumber);
console.log(" voiceMediaPhoneType=" +conversation.localParticipant.voiceMediaPhoneType);
console.log(" voiceMediaState=" + conversation.localParticipant.voiceMediaState);}catch(e) {console.log("cannot parse conversation:" + e.message);
}}
Custom Embedded Tab ExampleThe following is an example of a configuration file with one embedded tab:<?xml version="1.0" encoding="utf-8"?><config version="1.0">
Feature Configuration for Cisco Jabber 11.8 81
PlatformCustom Embedded Tab Example

<Client><jabber-plugin-config><browser-plugin><page refresh ="true" preload="true"><tooltip>Cisco</tooltip><icon>https://www.cisco.com/web/fw/i/logo.gif</icon><url>https://www.cisco.com</url></page></browser-plugin></jabber-plugin-config></Client></config>
Feature Configuration for Cisco Jabber 11.882
PlatformCustom Embedded Tab Example
C H A P T E R 6Third Party Integrations
• Calendar Integration and Contact Resolution, page 83
• Chat History in Microsoft Outlook, page 85
• IBM Notes Contact Search and Calendar Integration, page 88
• Integration with Microsoft Products, page 88
• Microsoft Outlook Calendar Events, page 90
• Microsoft Outlook Presence Integration, page 90
Calendar Integration and Contact ResolutionApplies to: Cisco Jabber for Windows
You can use the following client applications for calendar integration and contact resolution:
• Microsoft Outlook 2016, 32 bit and 64 bit
• Microsoft Outlook 2013, 32 bit and 64 bit
• Microsoft Outlook 2010, 32 bit and 64 bit
• IBM Lotus Notes 9, 32 bit
• IBM Lotus Notes 8.5.3, 32 bit
• IBM Lotus Notes 8.5.2, 32 bit
• IBM Lotus Notes 8.5.1, 32 bit
• Google Calendar (calendar integration only)
Calendar integration and contact resolution are achieved with one or more of the following parameters:
• CalendarIntegrationType—Determines which calendar is integrated with the Meetings tab on the client.Users can overwrite this value with the Calendar integration type field on the Calendar tab of the Optionswindow.
• EnableLocalAddressBookSearch—Specifies if users can search for and add local Microsoft Outlook orIBM Notes contacts to their contact lists.
Feature Configuration for Cisco Jabber 11.8 83

• EnableLotusNotesContactResolution—Lets users search for and add local IBM Notes contacts to theircontact lists.
The following table shows how these parameters interact to achieve calendar integration and contact resolutionwith third party products.
Table 3: Options for Calendar Integration and Contact Resolution
CalendarIntegration
Contact ResolutionParameter Values
CalendarIntegrationType
EnableLotusNotesContactResolution
EnableLocalAddressBookSearch
NoneNone0 - nonefalsefalse
NoneMicrosoft Outlook0 - nonefalsetrue
NoneNone0 - nonetruefalse
NoneMicrosoft Outlook0 - nonetruetrue
Microsoft OutlookNone1 - MicrosoftOutlook
falsefalse
Microsoft OutlookMicrosoft Outlook1 - MicrosoftOutlook
falsetrue
Microsoft OutlookNone1 - MicrosoftOutlook
truefalse
Microsoft OutlookMicrosoft Outlook1 - MicrosoftOutlook
truetrue
IBM NotesNone2 - IBM Notesfalsefalse
IBM NotesNone2 - IBM Notesfalsetrue
IBM NotesNone2 - IBM Notestruefalse
IBM NotesIBM Notes2 - IBM Notestruetrue
GoogleNone3 - Googlefalsefalse
GoogleNone3 - Googlefalsetrue
GoogleNone3 - Googletruefalse
GoogleNone3 - Googletruetrue
Feature Configuration for Cisco Jabber 11.884
Third Party IntegrationsCalendar Integration and Contact Resolution

Chat History in Microsoft OutlookApplies to: Cisco Jabber for desktop clients.
Supported Microsoft Exchange servers: 2010, 2013, 2016, and Office 365
You can enable the client to automatically save chat histories to a Cisco Jabber Chats folder in the user'sMicrosoft Outlook application. When a user closes a chat window, the client saves the IM conversation tothe Exchange server.
To enable the feature, you must:
1 Set the SaveChatHistoryToExchangeOperationMode parameter in the jabber-config.xml file.
2 Set up a method to authenticate users to the Exchange server. If you don't specify an authentication method,then users can add their credentials in the client.
3 Specify the method for determining which server to use.
Set Parameter to Save Chat History in OutlookSet the SaveChatHistoryToExchangeOperationMode parameter to one of the following:
• DisabledByPolicy (default)—Users cannot save chat history to Microsoft Outlook. The option is notvisible in the client.
• EnabledByPolicy—Chats are saved to Microsoft Outlook. The option Save chat sessions to "CiscoJabber Chats" Folder in Microsoft Outlook is visible on the client, but users cannot access it.
With this option, you must set up authentication for the client to authenticate with the Exchange serverby synching credentials.
• DisabledByDefault—Users can save chats to Microsoft Outlook. The option Save chat sessions to"Cisco Jabber Chats" Folder in Microsoft Outlook is unchecked in the client, but users can changeit.
• EnabledByDefault—Users can save chats to Microsoft Outlook. The option Save chat sessions to"Cisco Jabber Chats" Folder in Microsoft Outlook is checked in the client, but users can change it.
Limitations for Saving Chat History to an Outlook FolderThis feature can only be enabled if users have a Cisco Unified Communications Manager account.
Limitations with Authentication Methods over Cisco Expressway for Mobile and Remote Access
If you are enabling this feature for users connecting via the Expressway for Mobile and Remote Access, thefollowing limitations apply:
• If the client detects that the user is connecting via the Expressway, then the client uses the ExternalServer option for the Exchange connection. If the external server is not set, then it uses the internalserver.
Feature Configuration for Cisco Jabber 11.8 85
Third Party IntegrationsChat History in Microsoft Outlook
• If the client detects that the user is not connecting via the Expressway, then the client uses the InternalServer option for the Exchange connection. If the internal server is not set, the client uses the externalserver.
• However, if either the internal or external server is set, but for some reason Cisco Jabber can't connectto it, the client doesn't revert to using the other server.
Authentication ModesYou must set up a method of authentication for the client to authenticate with the Exchange server. Whenauthentication is complete, the client has access to the Exchange server which allows saving chat histories toa folder in Outlook.
If you do not specify an authentication method, then users must manually input their Exchange credentials inthe Outlook tab in the Windows client and the Chats tab in the Jabber for Mac client.
Authenticate Using Single Sign On for the Operating SystemApplies to Cisco Jabber for Windows only.
The client uses the account details of the logged in user to authenticate with the Exchange server. Thisauthentication method uses the Windows NT Lan Manager (NTLM) security protocol.
Do not use this authentication method if some users share the same Windows account. The clientauthenticates with the account on the Operating System, and not with the user who is logged in to CiscoJabber. For example, User A logs onto a Windows machine and then logs into Cisco Jabber for a morningshift. When the shift is done, Jabber is reset and User B logs into the client for the afternoon shift. BecauseUser A is logged into the Windows account, then the chat messages from User B are saved in the Outlookaccount for User A.
Note
Before You Begin
Users and their computers must use domains. Authentication using single sign on does not work if users arelocal Windows users.
Procedure
In the jabber-config.xml file, set the ExchangeAuthenticateWithSystemAccount parameter to true.
Authenticate by Synching CredentialsYou can sync the Exchange credentials with another set of credentials for users, such as the Cisco UnifiedCommunications Manager IM and Presence credentials. Using this method, the client uses the credentials toauthenticate to the Exchange server.
Feature Configuration for Cisco Jabber 11.886
Third Party IntegrationsAuthentication Modes

Procedure
Step 1 In the jabber-config.xml file, configure the Exchange_UseCredentialsFrom parameter.Step 2 Define the value of the parameter as the service that you want used to sync credentials. For example,
<Exchange_UseCredentialsFrom>CUCM</Exchange_UseCredentialsFrom>.In this example, Cisco Unified CommunicationsManager is defined as the service which provides the Exchangeserver with credentials for authentication.
Specify Server AddressesAfter you enable an authentication method for the client to access the Exchange server, you must enable amethod for the client to specify the Exchange server address.
If you do not specify server addresses, then users must manually enter the internal and external Exchangeservers in the client, in the Outlook > Advanced tab of the Options menu.
Detect Server Addresses AutomaticallyApplies to Cisco Jabber for Windows only.
You can configure the client to automatically discover the Exchange servers based on users' domain. Thisdomain is defined when you set up the authentication method by using the domain that was specified for theuser's credentials.
Procedure
Step 1 In the jabber-config.xml file, configure the ExchangeAutodiscoverDomain parameter.Step 2 Define the value of the parameter as the domain to discover the Exchange server.
The client uses the domain to search for the Exchange server at one of the following Web addresses:https://<domain>/autodiscover/autodiscover.svc
https://autodiscover.<domain>/autodiscover/autodiscover.svc
Define Server AddressesYou can define the internal and external Exchange server addresses in the configuration file.
Feature Configuration for Cisco Jabber 11.8 87
Third Party IntegrationsSpecify Server Addresses
Procedure
Step 1 In the jabber-config.xml file, configure the InternalExchangeServer and ExternalExchangeServerparameters.
Step 2 Define the value of the parameters using the Exchange server addresses.
IBM Notes Contact Search and Calendar IntegrationApplies to: Cisco Jabber for Windows
Cisco Jabber for Windows supports IBM Notes calendar integration in the Meetings tab of the client. CiscoJabber also lets users search for and add local contacts from IBM Notes. To enable this integration with IBMNotes, you must set the following parameters:
• EnableLocalAddressBookSearch=true
• EnableLotusNotesContactResolution=true
• CalendarIntegrationType=2
The CalendarIntegrationType parameter can be overridden by users. To enable calendar integration and contactresolution with IBM Notes, users must ensure that the Calendar integration type on the Calendar tab of theOptions window is set to IBM Notes.
In order for users to be able to successfully add IBM Notes contacts to their contact lists, the MessagingID field in IBM Notes must contain a valid value.
Note
Cisco Jabber cannot perform contact search and calendar integration if the backup IBM notes nsf files areloaded.
Note
Contact Resolution for Incoming Calls
For incoming calls, Cisco Jabber for Windows does not search the address book in IBMNotes, therefore onlythe phone number for an IBM Notes contact shows in the call history. If Cisco Jabber users subsequentlysearch for the contact associated with the phone number, the call history changes to show the contact's nameinstead of the phone number.
Integration with Microsoft ProductsApplies to: Cisco Jabber for Windows
Cisco Jabber for Windows supports a range of Microsoft products that integrate with the application. Thissection describes the support and integrations for these products.
Feature Configuration for Cisco Jabber 11.888
Third Party IntegrationsIBM Notes Contact Search and Calendar Integration

Internet Explorer
Microsoft Internet Explorer 8 or later is required. Cisco Jabber for Windows uses the Internet Explorerrendering engine to display HTML content.
Cisco Jabber for Windows requires Internet Explorer active scripting to render IMs. See https://windows.microsoft.com/en-US/windows/help/genuine/ie-active-script for instructions on enabling activescripting.
Internet Explorer 9 users in Cloud-based deployments that use Single Sign On (SSO) get security alertswhen they sign in to Cisco Jabber for Windows. Add webexconnect.com to the list of websites in theCompatibility View Settings window of Internet Explorer 9 to stop these alerts.
Note
Office
Integration with the following versions of Office is supported:
• Microsoft Office 2016, 32 and 64 bit
• Microsoft Office 2013, 32 and 64 bit
• Microsoft Office 2010, 32 and 64 bit
Office 365
Microsoft Office 365 supports different configuration types based on the plan or subscription type. CiscoJabber for Windows has been tested with small business plan P1 of Microsoft Office 365. This plan requiresan on-premises Active Directory server.
Client-side integration with Microsoft Office 365 is supported with the following applications:
• Microsoft Office 2016, 32 bit and 64 bit
• Microsoft Office 2013, 32 bit and 64 bit
• Microsoft Office 2010, 32 bit and 64 bit
• Microsoft SharePoint 2010
SharePoint
Integration with the following versions of SharePoint is supported:
• Microsoft SharePoint 2013
• Microsoft SharePoint 2010
Availability status in Microsoft SharePoint sites is supported only if users access those sites with MicrosoftInternet Explorer. You should add theMicrosoft SharePoint site to the list of trusted sites in Microsoft InternetExplorer.
Feature Configuration for Cisco Jabber 11.8 89
Third Party IntegrationsIntegration with Microsoft Products
Microsoft Outlook Calendar EventsApplies to: Cisco Jabber for Windows
You must apply a setting in Microsoft Outlook so that calendar events display in Cisco Jabber for Windows.
Procedure
Step 1 Open the email account settings in Microsoft Outlook, as in the following example:a) Select File > Account Settings.b) Select the Email tab on the Account Settings window.
Step 2 Double-click the server name.In most cases, the server name isMicrosoft Exchange.
Step 3 Select the Use Cached Exchange Mode checkbox.Step 4 Apply the setting and then restart Microsoft Outlook.
When users create calendar events in Microsoft Outlook, those events display in theMeetings tab.
Microsoft Outlook Presence IntegrationApplies to: Cisco Jabber for Windows
To enable integration with Microsoft Outlook, you must specify SIP:user@cupdomain as the value ofthe proxyAddresses attribute inMicrosoft Active Directory. Users can then share availability inMicrosoftOutlook.
If you configure the proxyaddress attribute value without SIP, then Jabber uses user@cupdomain asan email address to resolve the presence of a contact in Microsoft Outlook.
Use one of the following methods to modify the proxyAddresses attribute:
• An Active Directory administrative tool such as Active Directory User and ComputersThe Active Directory User and Computers administrative tool allows you to edit attributes on MicrosoftWindows Server 2008 or later.
• ADSchemaWizard.exe utility
The ADSchemaWizard.exe utility is available in the Cisco Jabber administration package. This utilitygenerates an LDIF file that modifies your directory to add the proxyAddresses attribute to eachuser with the following value: SIP:user@cupdomain.
You should use the ADSchemaWizard.exe utility on servers that do not support the edit attribute featurein the Active Directory User and Computers administrative tool. You can use a tool such as ADSI Editto verify the changes that you apply with the ADSchemaWizard.exe utility.
The ADSchemaWizard.exe utility requires Microsoft .NET Framework version 3.5 or later.
• Create a script with Microsoft Windows PowerShell
Feature Configuration for Cisco Jabber 11.890
Third Party IntegrationsMicrosoft Outlook Calendar Events
Refer to the appropriate Microsoft documentation for creating a script to enable presence in MicrosoftOutlook.
Enable Presence with the Active Directory User and Computers ToolComplete the following steps to enable presence in Microsoft Outlook for individual users with the ActiveDirectory User and Computers administrative tool:
Procedure
Step 1 Start the Active Directory User and Computers administrative tool.You must have administrator permissions to run the Active Directory User and Computers administrativetool.
Step 2 Select View in the menu bar and then select the Advanced Features option from the drop-down list.Step 3 Navigate to the appropriate user in the Active Directory User and Computers administrative tool.Step 4 Double click the user to open the Properties dialog box.Step 5 Select the Attribute Editor tab.Step 6 Locate and select the proxyAddresses attribute in the Attributes list box.Step 7 Select Edit to open theMulti-valued String Editor dialog box.Step 8 In the Value to add text box, specify the following value: SIP:user@cupdomain.
For example, SIP:[email protected].
Where the user@cupdomain value is the user's instant messaging address. cupdomain corresponds tothe domain for Cisco Unified Presence or Cisco Unified Communications Manager IM and Presence Service.
Add Local Contacts from Microsoft OutlookCisco Jabber for Windows lets users search for and add local contacts in Microsoft Outlook.
All local contacts in Microsoft Outlook must have instant message addresses and phone numbers. Thesedetails allow client users to do the following:
• add local Microsoft Outlook contact to their contact lists
• see contact photos from the client
• send instant messages to local contacts
• call local contacts from the client
Administrator Tasks
To enable this integration with Microsoft Outlook, you must enable Cached ExchangeMode on the MicrosoftExchange server.
To allow users to search for local contacts in Microsoft Outlook from the client, users must have profiles setin Microsoft Outlook.
Feature Configuration for Cisco Jabber 11.8 91
Third Party IntegrationsEnable Presence with the Active Directory User and Computers Tool

User Tasks
Users must set the correct calendar preference on the client.
1 Select File > Options.
2 Select the Calendar tab.
3 SelectMicrosoft Outlook.
4 Restart Cisco Jabber to apply the change.
Feature Configuration for Cisco Jabber 11.892
Third Party IntegrationsAdd Local Contacts from Microsoft Outlook