family portal preparing for rollout - myontarioedu.info
TRANSCRIPT
Family Portal – Preparing for Rollout
November 2020 v1.0
Version History
Version Date Description
1.0 November 24, 2020 Initial version
Confidentiality
This document contains information, which is proprietary and confidential to Fujitsu Consulting (Canada) Inc. (including the information of third parties, including but not limited to, Follett of Canada Inc., submitted with their permission). In consideration of receipt of this document, the recipient agrees to treat this information as confidential and to not use or reproduce this information for any purpose other than its evaluation of this proposal or disclose this information to any other person for any purpose, without the express prior consent of Fujitsu Consulting (Canada) Inc. (and any applicable third party.)
Table of Contents
1.0 PREPARING CONTACT RECORDS FOR ROLLOUT ................................................... 5
1.1 Verifying who will receive an account ......................................................................... 5
1.2 Merging Contacts ...................................................................................................... 5
1.3 Family Portal Access ................................................................................................. 6
2.0 CREATING FAMILY PORTAL ACCESS ....................................................................... 8
2.1 Security Roles ........................................................................................................... 8
2.2 Creating User Accounts ............................................................................................. 8
2.3 Removing Portal Access .......................................................................................... 11
3.0 ADDITIONAL RESOURCES ....................................................................................... 12
3.1 School Setup ........................................................................................................... 12
3.2 Office Staff Communication...................................................................................... 12
3.3 Teacher Communication .......................................................................................... 12
3.4 Family Portal Communication................................................................................... 13
3.5 Password Recovery ................................................................................................. 13
4.0 FAMILY PORTAL WALKTHROUGH .......................................................................... 14
4.1 Pages tab................................................................................................................ 14
4.2 Family tab ............................................................................................................... 15
4.3 Academics tab ......................................................................................................... 16
4.4 Groups tab .............................................................................................................. 18
4.5 Calendar tab ........................................................................................................... 19
5.0 ROLLOUT CHECKLIST ............................................................................................. 20
6.0 APPENDIX 1 – LOGIN ID TOKENS ............................................................................ 21
Family Portal – Prep for Rollout v1.0 Copyright © FUJITSU 2020 Page 5
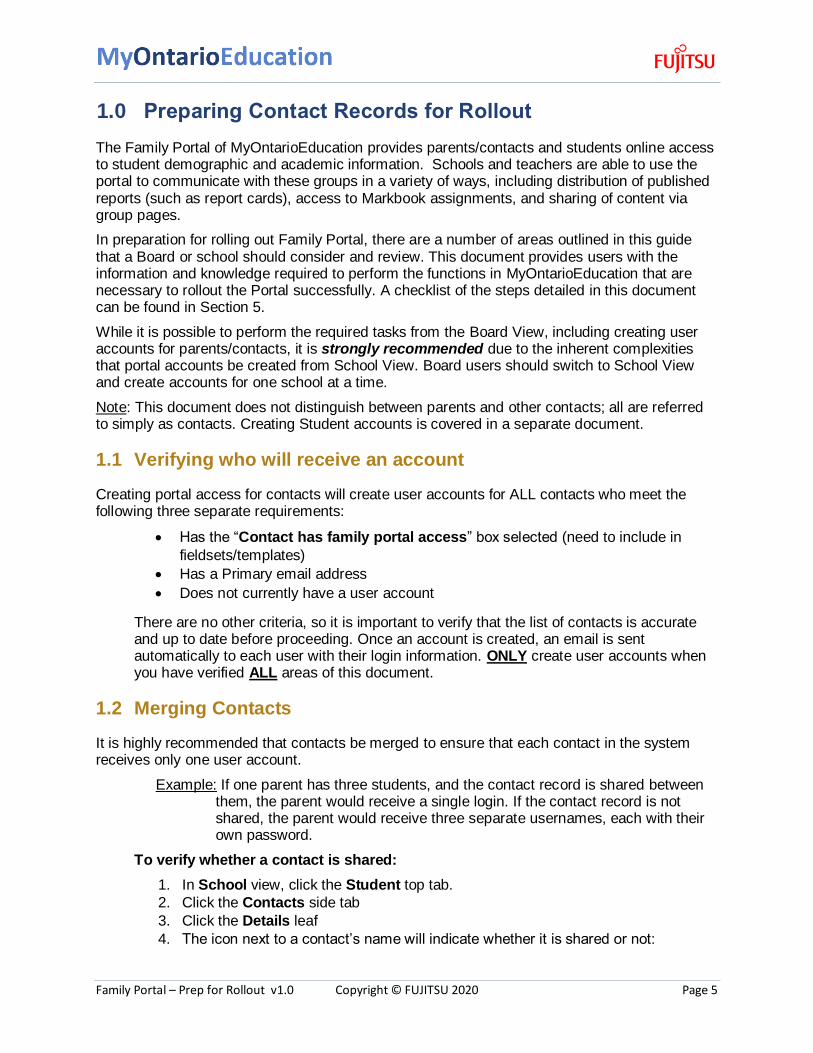
1.0 Preparing Contact Records for Rollout
The Family Portal of MyOntarioEducation provides parents/contacts and students online access to student demographic and academic information. Schools and teachers are able to use the portal to communicate with these groups in a variety of ways, including distribution of published reports (such as report cards), access to Markbook assignments, and sharing of content via group pages.
In preparation for rolling out Family Portal, there are a number of areas outlined in this guide that a Board or school should consider and review. This document provides users with the information and knowledge required to perform the functions in MyOntarioEducation that are necessary to rollout the Portal successfully. A checklist of the steps detailed in this document can be found in Section 5.
While it is possible to perform the required tasks from the Board View, including creating user accounts for parents/contacts, it is strongly recommended due to the inherent complexities that portal accounts be created from School View. Board users should switch to School View and create accounts for one school at a time.
Note: This document does not distinguish between parents and other contacts; all are referred to simply as contacts. Creating Student accounts is covered in a separate document.
1.1 Verifying who will receive an account
Creating portal access for contacts will create user accounts for ALL contacts who meet the following three separate requirements:
Has the “Contact has family portal access” box selected (need to include in
fieldsets/templates)
Has a Primary email address
Does not currently have a user account
There are no other criteria, so it is important to verify that the list of contacts is accurate and up to date before proceeding. Once an account is created, an email is sent automatically to each user with their login information. ONLY create user accounts when you have verified ALL areas of this document.
1.2 Merging Contacts
It is highly recommended that contacts be merged to ensure that each contact in the system receives only one user account.
Example: If one parent has three students, and the contact record is shared between them, the parent would receive a single login. If the contact record is not shared, the parent would receive three separate usernames, each with their own password.
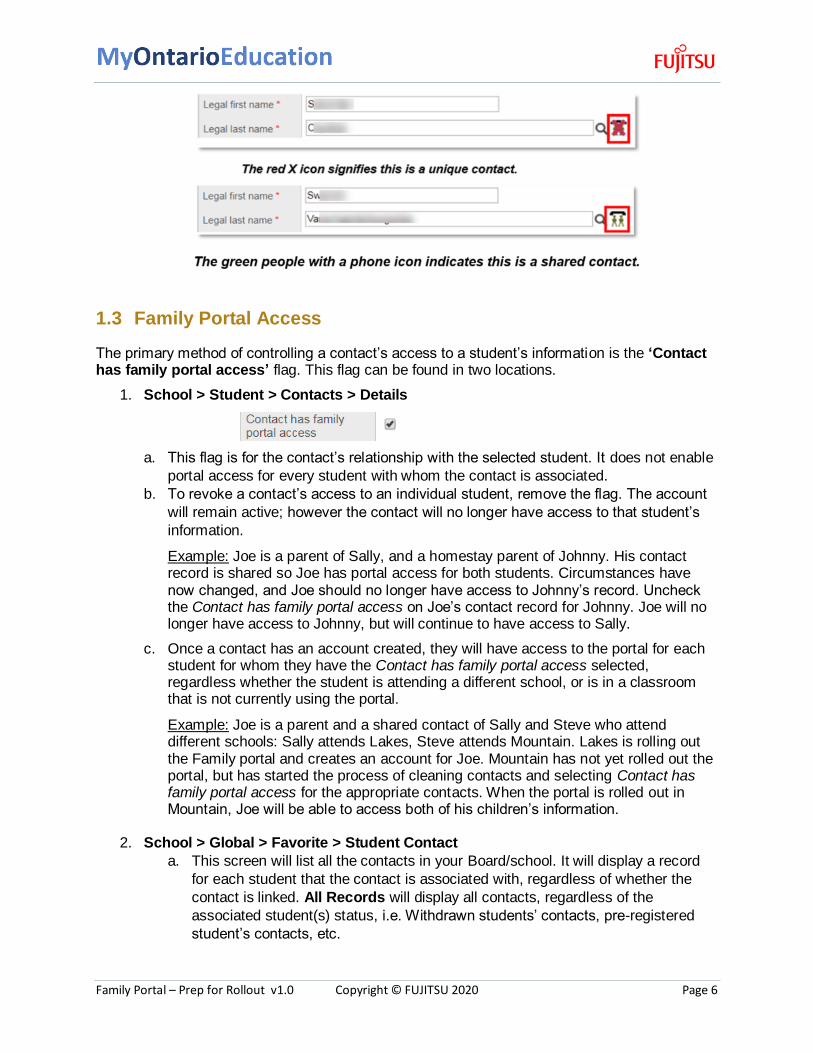
To verify whether a contact is shared:
1. In School view, click the Student top tab.
2. Click the Contacts side tab
3. Click the Details leaf
4. The icon next to a contact’s name will indicate whether it is shared or not:
Family Portal – Prep for Rollout v1.0 Copyright © FUJITSU 2020 Page 6
1.3 Family Portal Access
The primary method of controlling a contact’s access to a student’s information is the ‘Contact has family portal access’ flag. This flag can be found in two locations.
1. School > Student > Contacts > Details
a. This flag is for the contact’s relationship with the selected student. It does not enable
portal access for every student with whom the contact is associated.
b. To revoke a contact’s access to an individual student, remove the flag. The account
will remain active; however the contact will no longer have access to that student’s
information.
Example: Joe is a parent of Sally, and a homestay parent of Johnny. His contact record is shared so Joe has portal access for both students. Circumstances have now changed, and Joe should no longer have access to Johnny’s record. Uncheck the Contact has family portal access on Joe’s contact record for Johnny. Joe will no longer have access to Johnny, but will continue to have access to Sally.
c. Once a contact has an account created, they will have access to the portal for each student for whom they have the Contact has family portal access selected, regardless whether the student is attending a different school, or is in a classroom that is not currently using the portal.
Example: Joe is a parent and a shared contact of Sally and Steve who attend different schools: Sally attends Lakes, Steve attends Mountain. Lakes is rolling out the Family portal and creates an account for Joe. Mountain has not yet rolled out the portal, but has started the process of cleaning contacts and selecting Contact has family portal access for the appropriate contacts. When the portal is rolled out in Mountain, Joe will be able to access both of his children’s information.
2. School > Global > Favorite > Student Contact
a. This screen will list all the contacts in your Board/school. It will display a record
for each student that the contact is associated with, regardless of whether the
contact is linked. All Records will display all contacts, regardless of the
associated student(s) status, i.e. Withdrawn students’ contacts, pre-registered
student’s contacts, etc.

Family Portal – Prep for Rollout v1.0 Copyright © FUJITSU 2020 Page 7
Example: Using the example above, Joe would appear on the list three times, once for Sally, Steve and Johnny.
b. Create and Use the Filters to adjust the list:
Filter Name Description
Active Contacts of currently active students
Needs Email Address Contacts who have Contact has family portal access selected but no primary email address.
Parent Auth or Guardian = Y Contacts with the Parent Auth or Guardian flag set to Y.
Ready for User Account Contacts who have the Contact has family portal access
selected, have a Primary email address, and do not have a user account.
User Account Created All contacts with a user account, regardless of whether Contact has family portal access is selected.
Withdrawn, Inactive, Graduated
This will show a list of contacts of former students.
This can be used to mass update Contact has family portal access to No.
c. Portal access can be adjusted via Options > Mass Update or via Options –
Modify List
It is critical that ALL of these are reviewed prior to creating accounts to
ensure that accounts are being created only for the appropriate contacts.
Family Portal – Prep for Rollout v1.0 Copyright © FUJITSU 2020 Page 8
2.0 Creating Family Portal Access
Creating Family Portal accounts in MyOntarioEducation is a different procedure than creating Board, school or student user accounts. There are a few unique aspects that you should be aware of, such as determining which contacts will have accounts created. Ensure you understand these aspects prior to creating the accounts.
2.1 Security Roles
When Family Portal accounts are created in MyOntarioEducation users can select a role that has access to the Family view.
It is important that school users, particularly teachers, are informed of the access that the Family Portal accounts provide in their Board. This is determined by the security role that was selected when creating the accounts, either the provincial baseline or a customized security role.
2.2 Creating User Accounts
After cleaning up the contacts and creating user roles, create user accounts and passwords for families to allow them logon to Aspen.
You can create user accounts in Aspen in two ways:
Create user accounts one at a time (which may be useful for a pilot project for the
portals); or
To be more efficient when setting up the portals, you can mass create multiple
user accounts that share similar attributes. The User Account Wizard can be used
to mass create user accounts for all contacts.
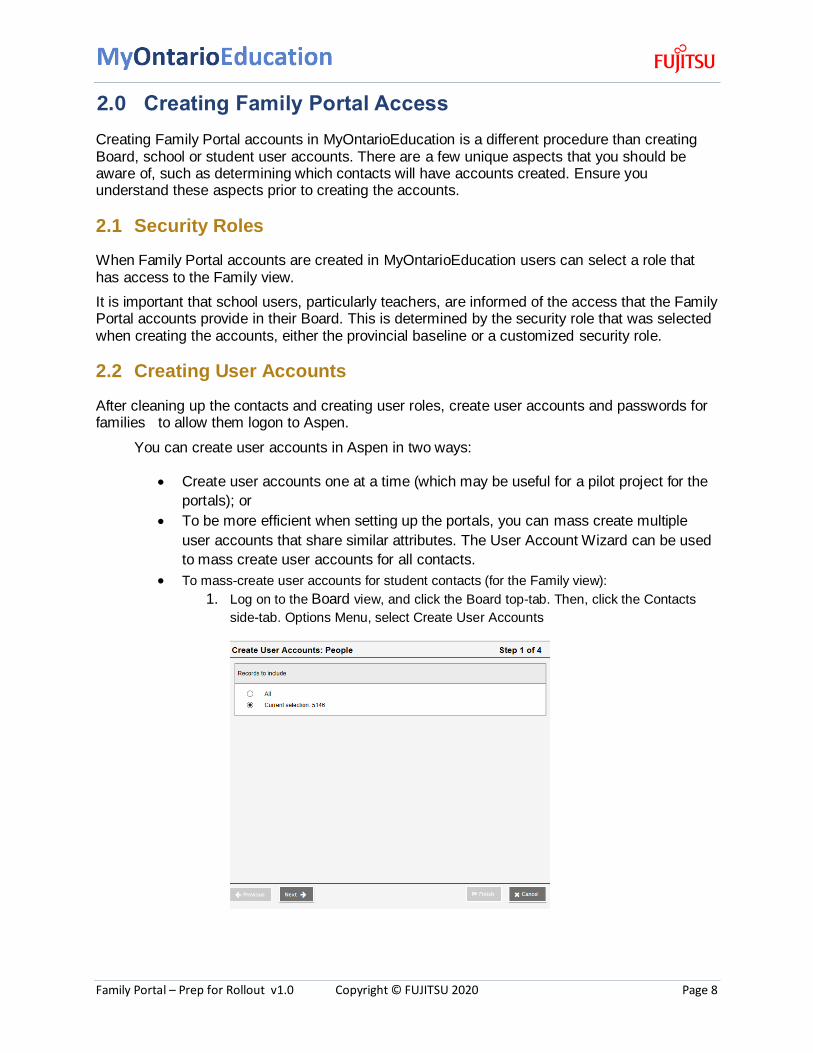
To mass-create user accounts for student contacts (for the Family view):
1. Log on to the Board view, and click the Board top-tab. Then, click the Contacts
side-tab. Options Menu, select Create User Accounts
Family Portal – Prep for Rollout v1.0 Copyright © FUJITSU 2020 Page 9
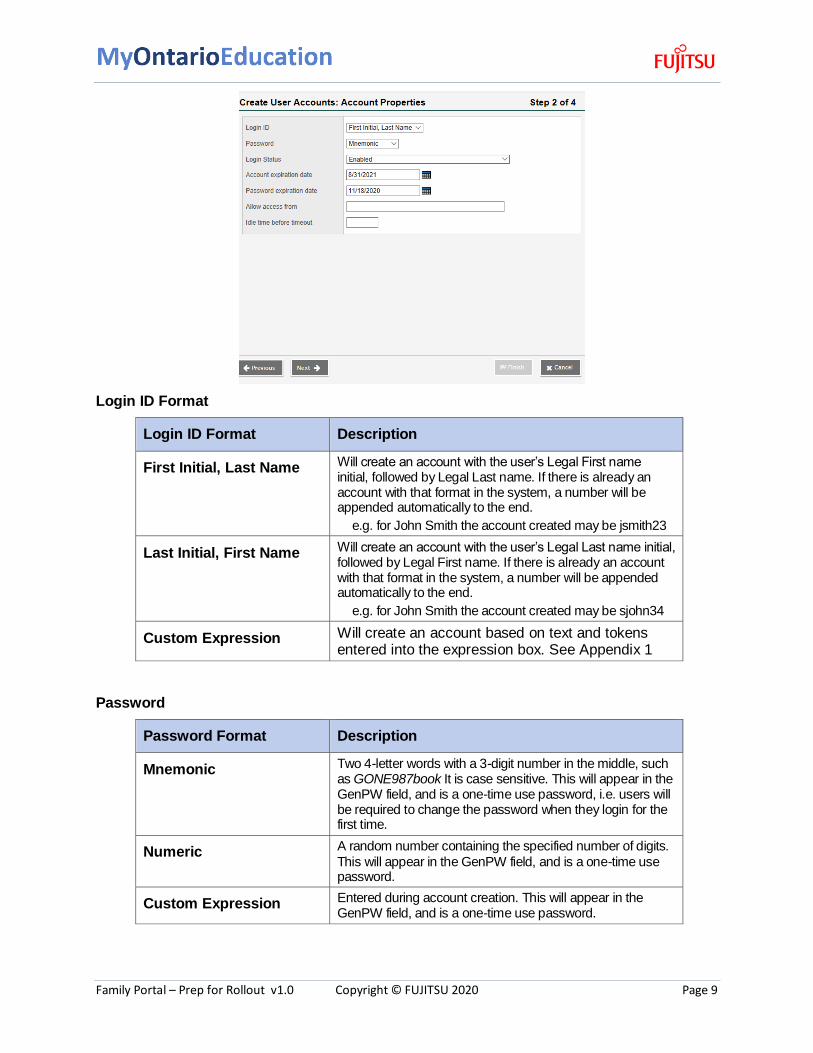
Login ID Format
Login ID Format Description
First Initial, Last Name Will create an account with the user’s Legal First name initial, followed by Legal Last name. If there is already an account with that format in the system, a number will be appended automatically to the end.
e.g. for John Smith the account created may be jsmith23
Last Initial, First Name Will create an account with the user’s Legal Last name initial, followed by Legal First name. If there is already an account with that format in the system, a number will be appended automatically to the end.
e.g. for John Smith the account created may be sjohn34
Custom Expression Will create an account based on text and tokens entered into the expression box. See Appendix 1
Password
Password Format Description
Mnemonic Two 4-letter words with a 3-digit number in the middle, such as GONE987book It is case sensitive. This will appear in the GenPW field, and is a one-time use password, i.e. users will be required to change the password when they login for the first time.
Numeric A random number containing the specified number of digits.
This will appear in the GenPW field, and is a one-time use password.
Custom Expression Entered during account creation. This will appear in the GenPW field, and is a one-time use password.
Family Portal – Prep for Rollout v1.0 Copyright © FUJITSU 2020 Page 10
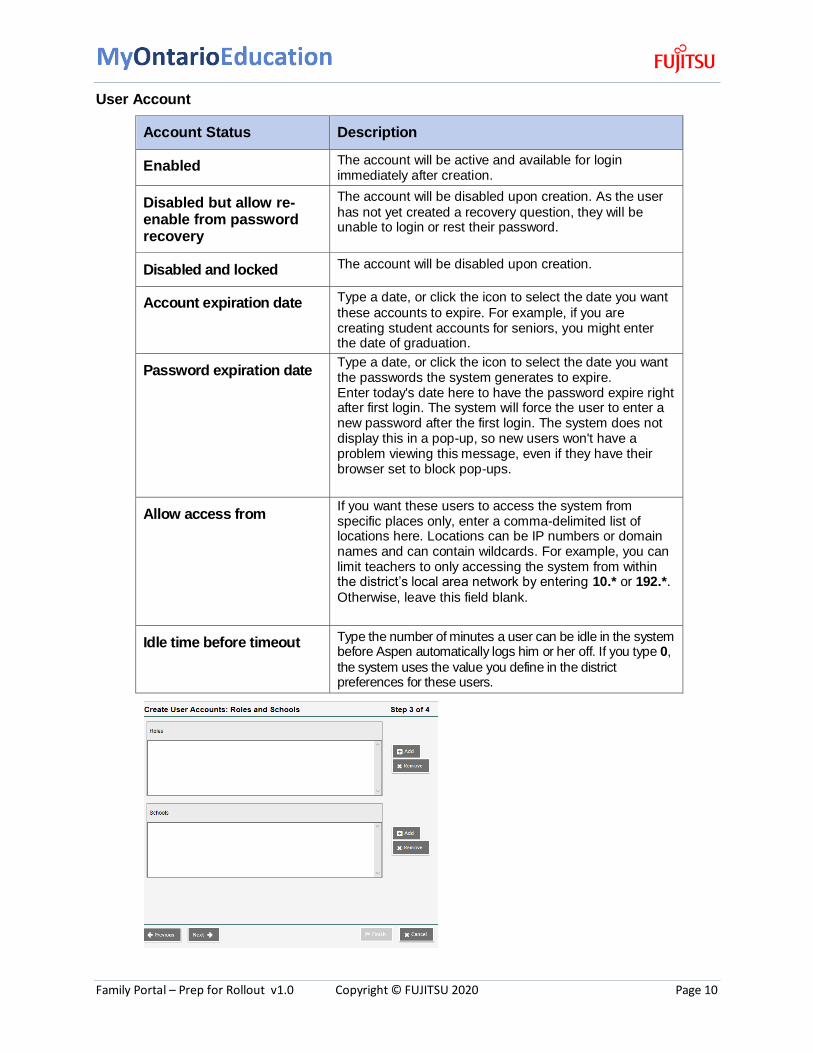
User Account
Account Status Description
Enabled The account will be active and available for login immediately after creation.
Disabled but allow re-enable from password recovery
The account will be disabled upon creation. As the user
has not yet created a recovery question, they will be unable to login or rest their password.
Disabled and locked The account will be disabled upon creation.
Account expiration date Type a date, or click the icon to select the date you want
these accounts to expire. For example, if you are creating student accounts for seniors, you might enter the date of graduation.
Password expiration date Type a date, or click the icon to select the date you want the passwords the system generates to expire. Enter today's date here to have the password expire right after first login. The system will force the user to enter a new password after the first login. The system does not display this in a pop-up, so new users won't have a problem viewing this message, even if they have their browser set to block pop-ups.
Allow access from If you want these users to access the system from specific places only, enter a comma-delimited list of locations here. Locations can be IP numbers or domain names and can contain wildcards. For example, you can limit teachers to only accessing the system from within the district’s local area network by entering 10.* or 192.*.
Otherwise, leave this field blank.
Idle time before timeout Type the number of minutes a user can be idle in the system before Aspen automatically logs him or her off. If you type 0,
the system uses the value you define in the district preferences for these users.
Family Portal – Prep for Rollout v1.0 Copyright © FUJITSU 2020 Page 11
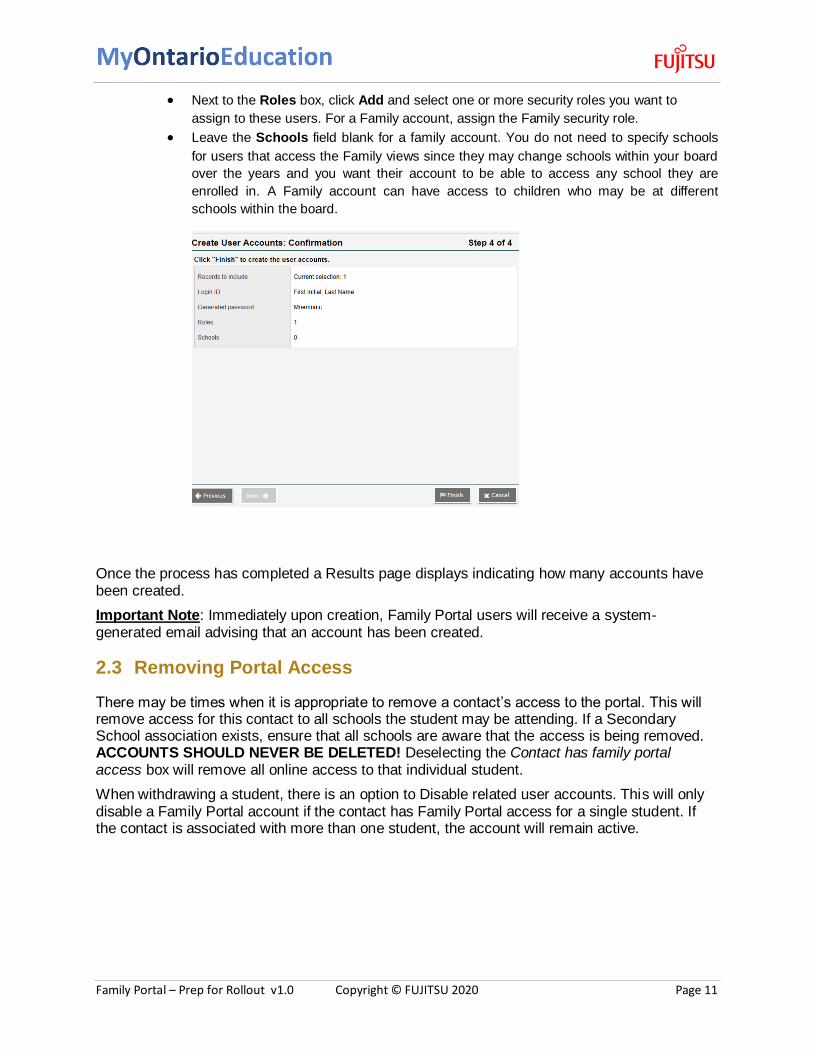
Next to the Roles box, click Add and select one or more security roles you want to
assign to these users. For a Family account, assign the Family security role.
Leave the Schools field blank for a family account. You do not need to specify schools
for users that access the Family views since they may change schools within your board
over the years and you want their account to be able to access any school they are
enrolled in. A Family account can have access to children who may be at different
schools within the board.
Once the process has completed a Results page displays indicating how many accounts have been created.
Important Note: Immediately upon creation, Family Portal users will receive a system-generated email advising that an account has been created.
2.3 Removing Portal Access
There may be times when it is appropriate to remove a contact’s access to the portal. This will remove access for this contact to all schools the student may be attending. If a Secondary School association exists, ensure that all schools are aware that the access is being removed. ACCOUNTS SHOULD NEVER BE DELETED! Deselecting the Contact has family portal access box will remove all online access to that individual student.
When withdrawing a student, there is an option to Disable related user accounts. This will only disable a Family Portal account if the contact has Family Portal access for a single student. If the contact is associated with more than one student, the account will remain active.
Family Portal – Prep for Rollout v1.0 Copyright © FUJITSU 2020 Page 12
3.0 Additional Resources
The process for a school to begin using the Family Portal is more involved than simply creating accounts. The portal is a tool to facilitate communication between the school, teachers, family members and students. Prior to account creation, communication with all user groups is essential to a successful roll out.
3.1 School Setup
There are school preferences that can be configured at School View > School > Setup > Preferences > Family/Student Portal.
3.2 Office Staff Communication
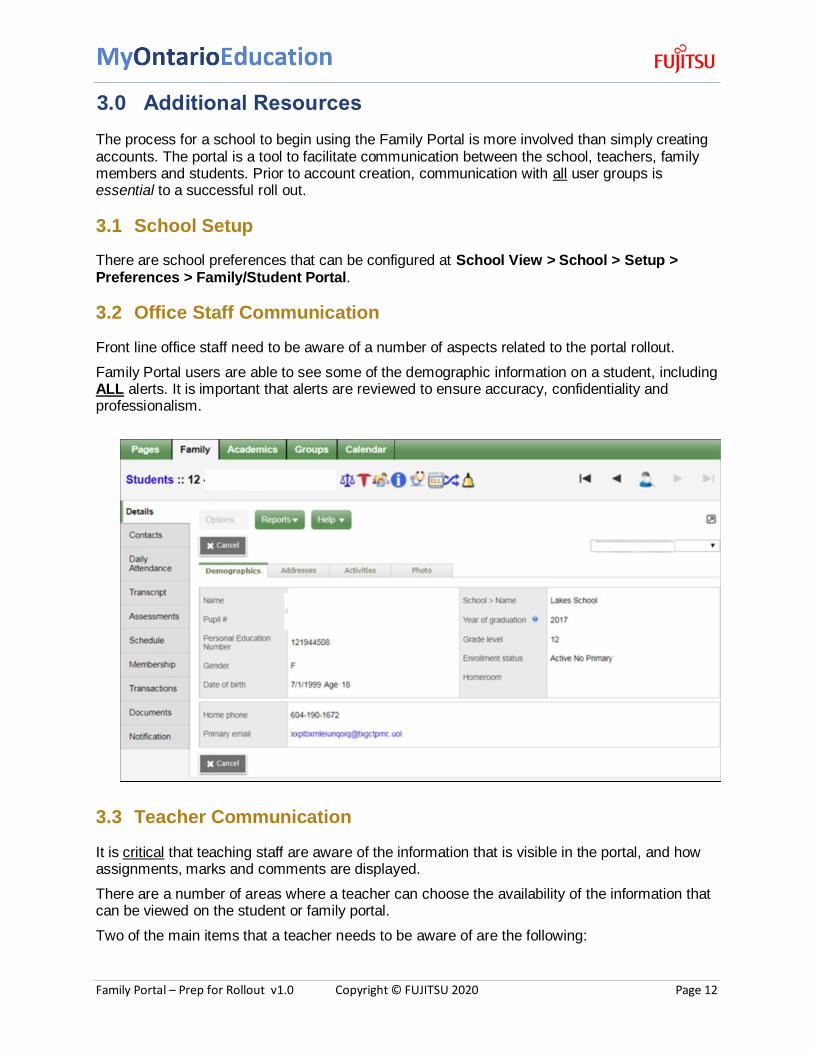
Front line office staff need to be aware of a number of aspects related to the portal rollout.
Family Portal users are able to see some of the demographic information on a student, including ALL alerts. It is important that alerts are reviewed to ensure accuracy, confidentiality and professionalism.
3.3 Teacher Communication
It is critical that teaching staff are aware of the information that is visible in the portal, and how assignments, marks and comments are displayed.
There are a number of areas where a teacher can choose the availability of the information that can be viewed on the student or family portal.
Two of the main items that a teacher needs to be aware of are the following:
Family Portal – Prep for Rollout v1.0 Copyright © FUJITSU 2020 Page 13
Assignment Visibility
This is the primary way that assignment evaluations are created; each assignment has one of 3 possible visibility settings:
Visibility type Description
Public The assignment, marks and comments will be visible and calculate in the
portal mark. Public refers to students or family members who have legitimate access to the information, not the general public. Students & family members can only see information related to the individual student.
Private The assignment will not be visible in the portal, the marks entered into this assignment will not calculate in the portal mark.
Public – No
Grades
The assignment will be visible, but no marks will display, or be included in the portal mark calculations. Assignment comments entered for an individual student will be visible.
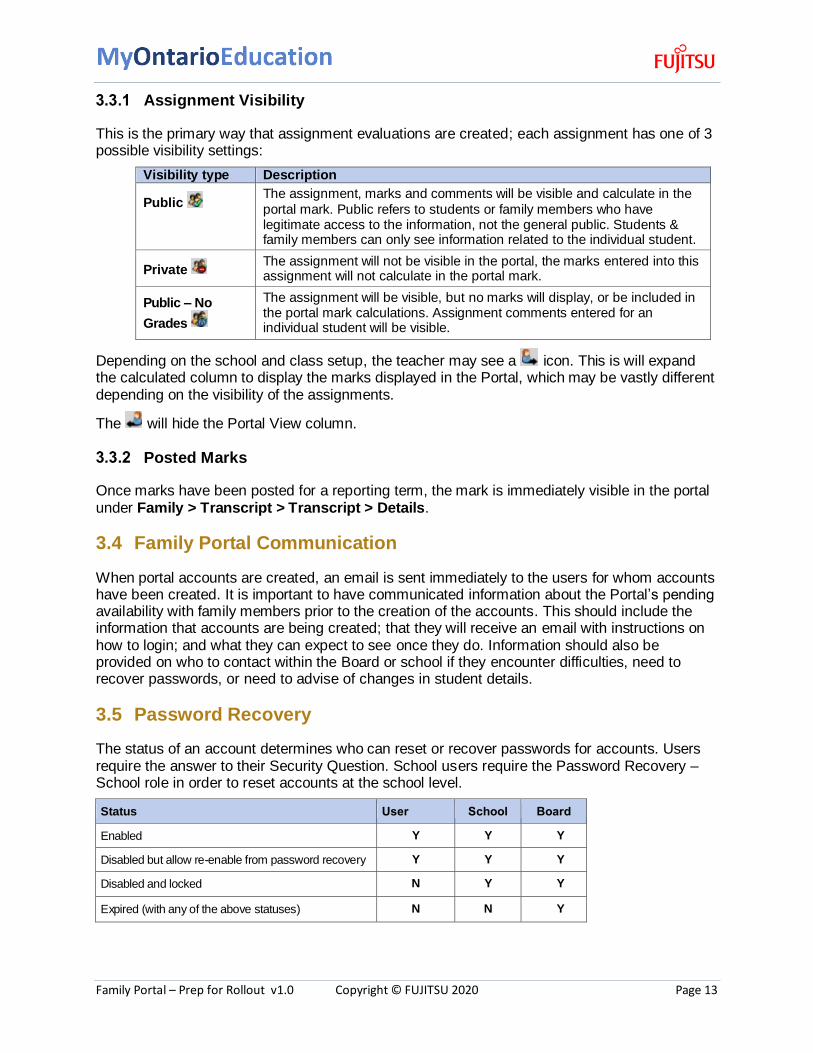
Depending on the school and class setup, the teacher may see a icon. This is will expand the calculated column to display the marks displayed in the Portal, which may be vastly different depending on the visibility of the assignments.
The will hide the Portal View column.
Posted Marks
Once marks have been posted for a reporting term, the mark is immediately visible in the portal under Family > Transcript > Transcript > Details.
3.4 Family Portal Communication
When portal accounts are created, an email is sent immediately to the users for whom accounts have been created. It is important to have communicated information about the Portal’s pending availability with family members prior to the creation of the accounts. This should include the information that accounts are being created; that they will receive an email with instructions on how to login; and what they can expect to see once they do. Information should also be provided on who to contact within the Board or school if they encounter difficulties, need to recover passwords, or need to advise of changes in student details.
3.5 Password Recovery
The status of an account determines who can reset or recover passwords for accounts. Users require the answer to their Security Question. School users require the Password Recovery – School role in order to reset accounts at the school level.
Status User School Board
Enabled Y Y Y
Disabled but allow re-enable from password recovery Y Y Y
Disabled and locked N Y Y
Expired (with any of the above statuses) N N Y
Family Portal – Prep for Rollout v1.0 Copyright © FUJITSU 2020 Page 14
4.0 Family Portal Walkthrough
This section provides screenshots of the Family Portal interface.
4.1 Pages tab
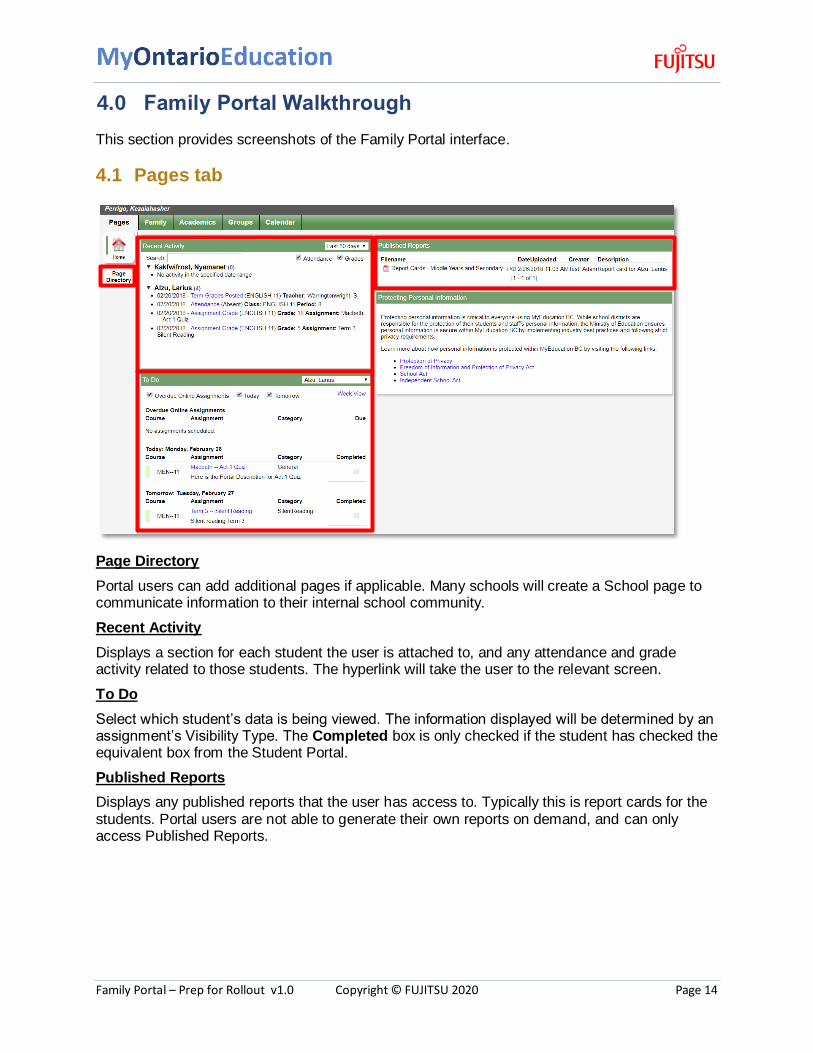
Page Directory
Portal users can add additional pages if applicable. Many schools will create a School page to communicate information to their internal school community.
Recent Activity
Displays a section for each student the user is attached to, and any attendance and grade activity related to those students. The hyperlink will take the user to the relevant screen.
To Do
Select which student’s data is being viewed. The information displayed will be determined by an assignment’s Visibility Type. The Completed box is only checked if the student has checked the equivalent box from the Student Portal.
Published Reports
Displays any published reports that the user has access to. Typically this is report cards for the students. Portal users are not able to generate their own reports on demand, and can only access Published Reports.
Family Portal – Prep for Rollout v1.0 Copyright © FUJITSU 2020 Page 15
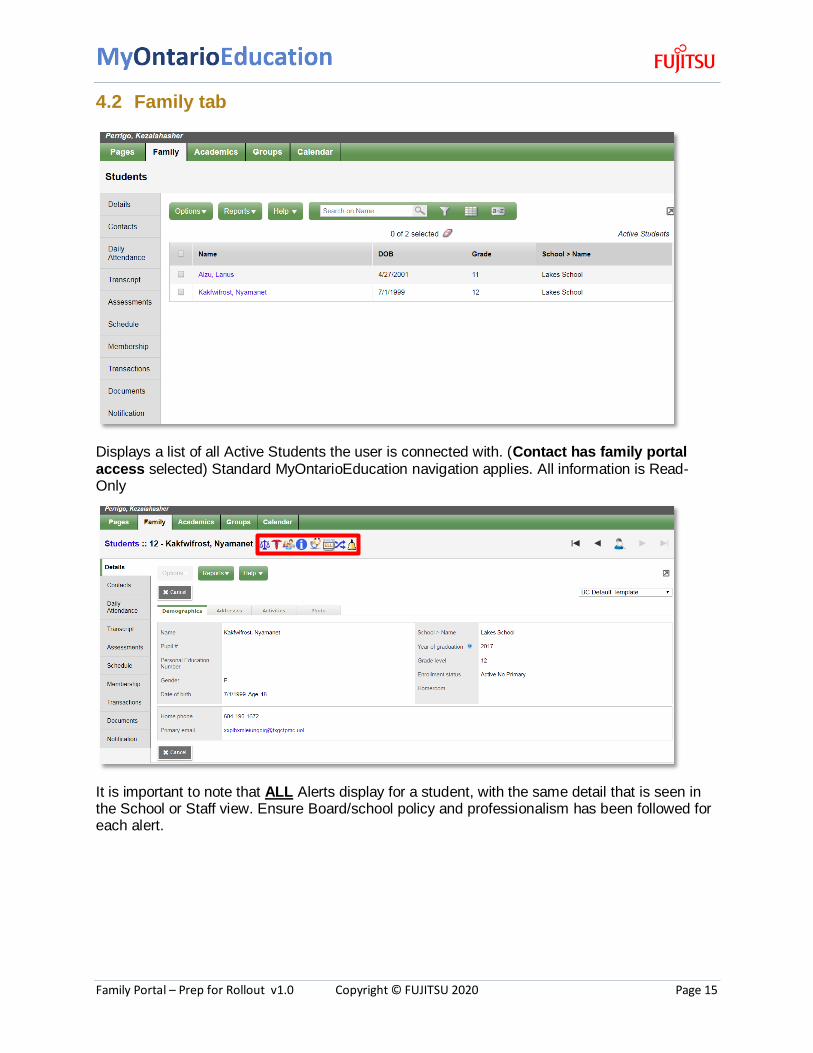
4.2 Family tab
Displays a list of all Active Students the user is connected with. (Contact has family portal access selected) Standard MyOntarioEducation navigation applies. All information is Read-Only
It is important to note that ALL Alerts display for a student, with the same detail that is seen in the School or Staff view. Ensure Board/school policy and professionalism has been followed for each alert.
Family Portal – Prep for Rollout v1.0 Copyright © FUJITSU 2020 Page 16
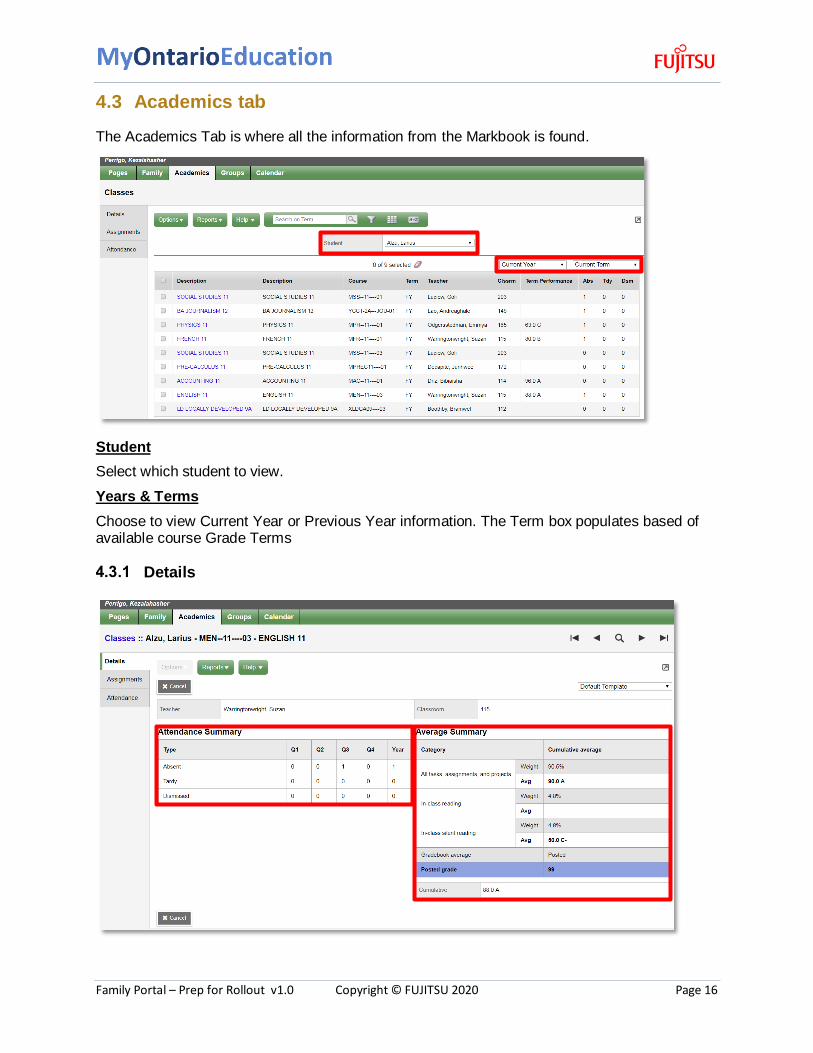
4.3 Academics tab
The Academics Tab is where all the information from the Markbook is found.
Student
Select which student to view.
Years & Terms
Choose to view Current Year or Previous Year information. The Term box populates based of available course Grade Terms
Details
Family Portal – Prep for Rollout v1.0 Copyright © FUJITSU 2020 Page 17
Shows a summary of Attendance and Mark averages. The average box can be controlled by a combination of School Setup and Teacher Markbook preferences.
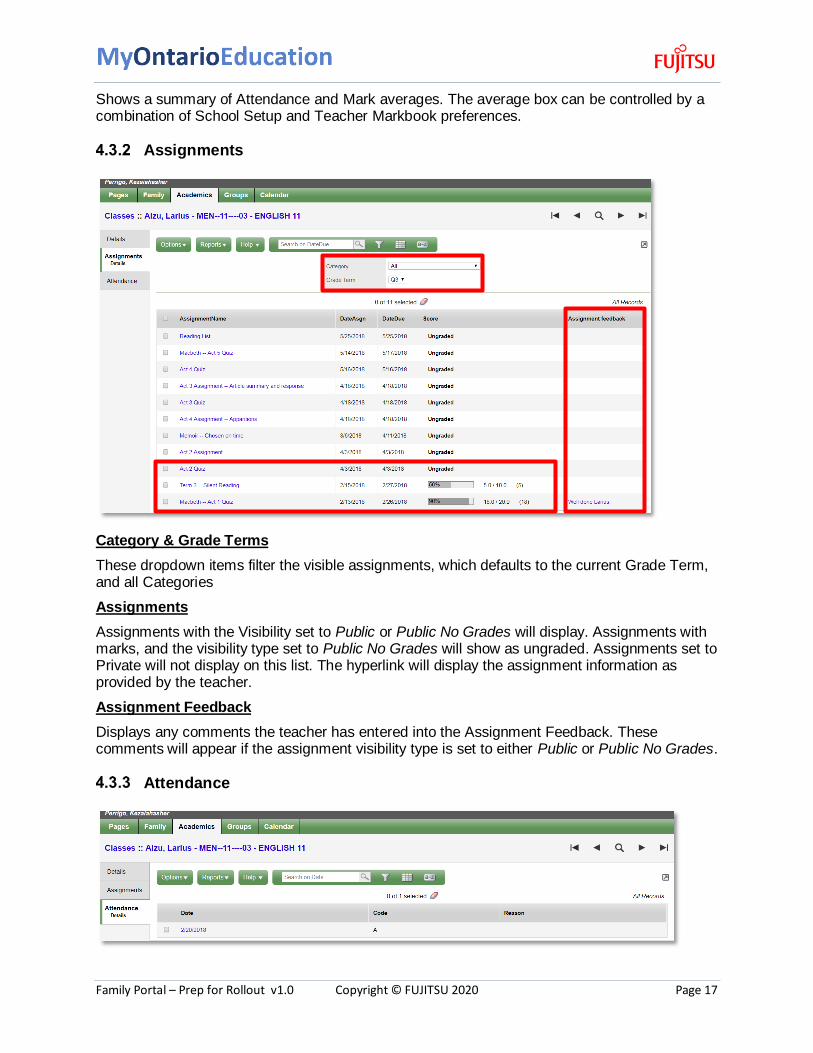
Assignments
Category & Grade Terms
These dropdown items filter the visible assignments, which defaults to the current Grade Term, and all Categories
Assignments
Assignments with the Visibility set to Public or Public No Grades will display. Assignments with marks, and the visibility type set to Public No Grades will show as ungraded. Assignments set to Private will not display on this list. The hyperlink will display the assignment information as provided by the teacher.
Assignment Feedback
Displays any comments the teacher has entered into the Assignment Feedback. These comments will appear if the assignment visibility type is set to either Public or Public No Grades.
Attendance
Family Portal – Prep for Rollout v1.0 Copyright © FUJITSU 2020 Page 18
Displays a list of class based attendance for the section.
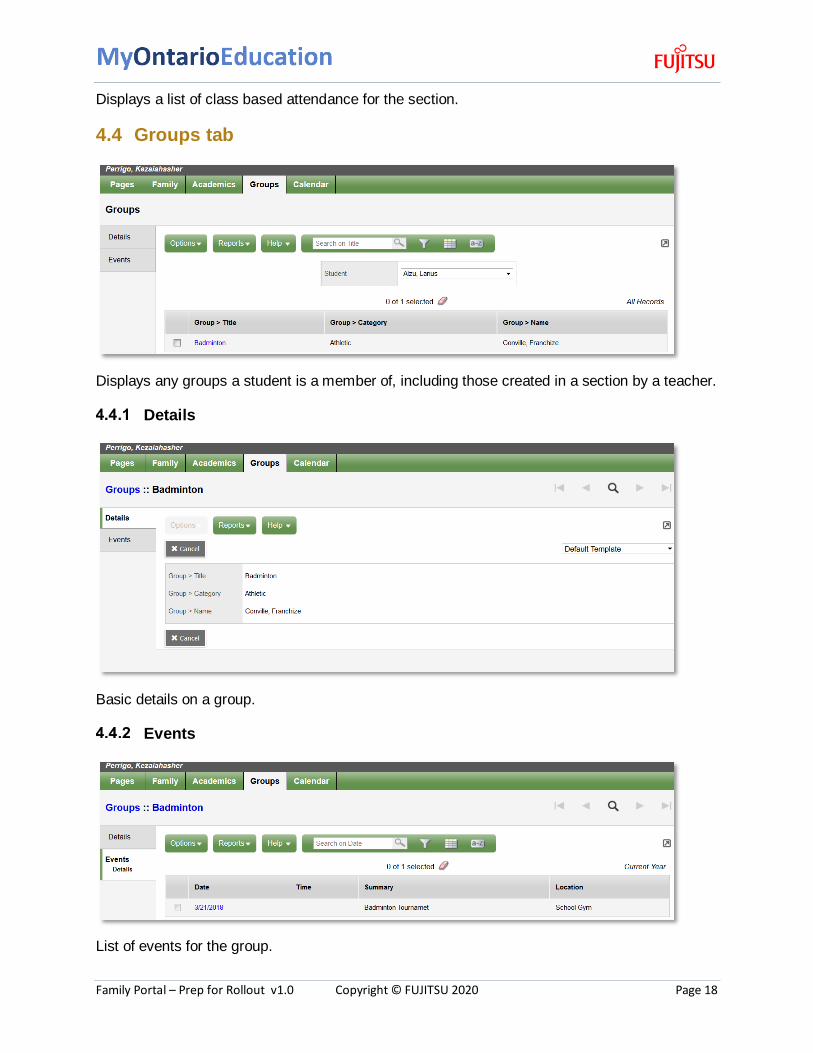
4.4 Groups tab
Displays any groups a student is a member of, including those created in a section by a teacher.
Details
Basic details on a group.
Events
List of events for the group.
Family Portal – Prep for Rollout v1.0 Copyright © FUJITSU 2020 Page 19
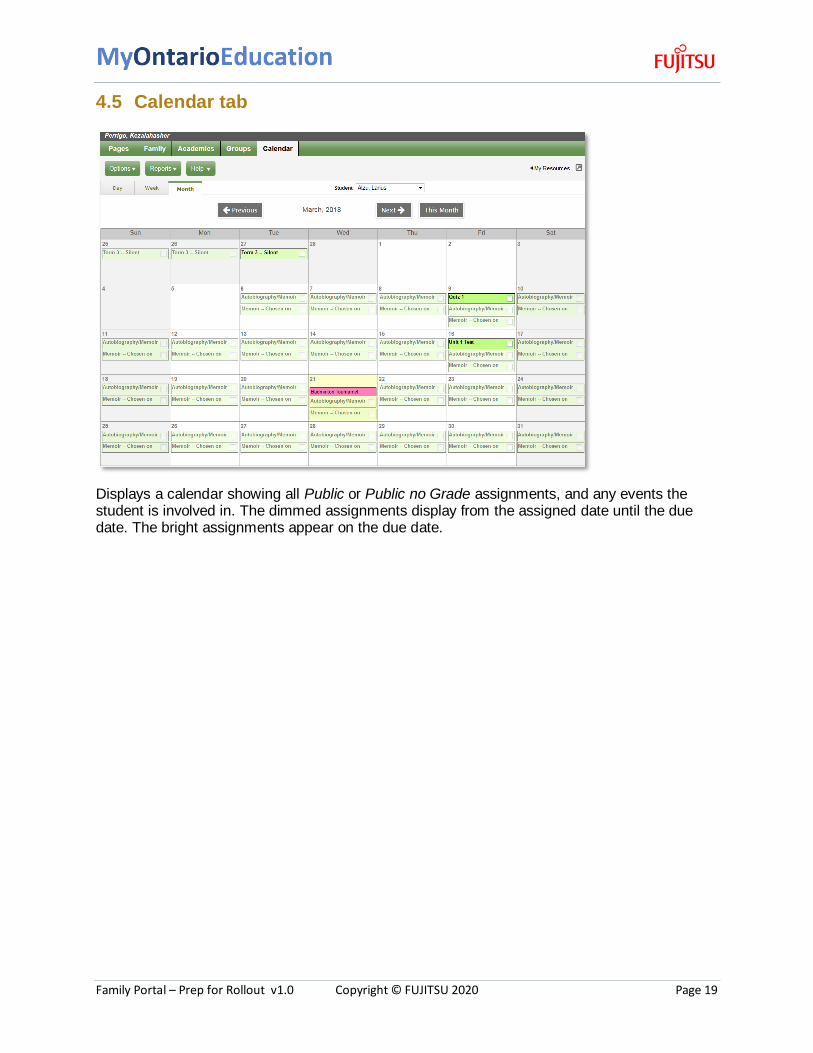
4.5 Calendar tab
Displays a calendar showing all Public or Public no Grade assignments, and any events the student is involved in. The dimmed assignments display from the assigned date until the due date. The bright assignments appear on the due date.
Family Portal – Prep for Rollout v1.0 Copyright © FUJITSU 2020 Page 20
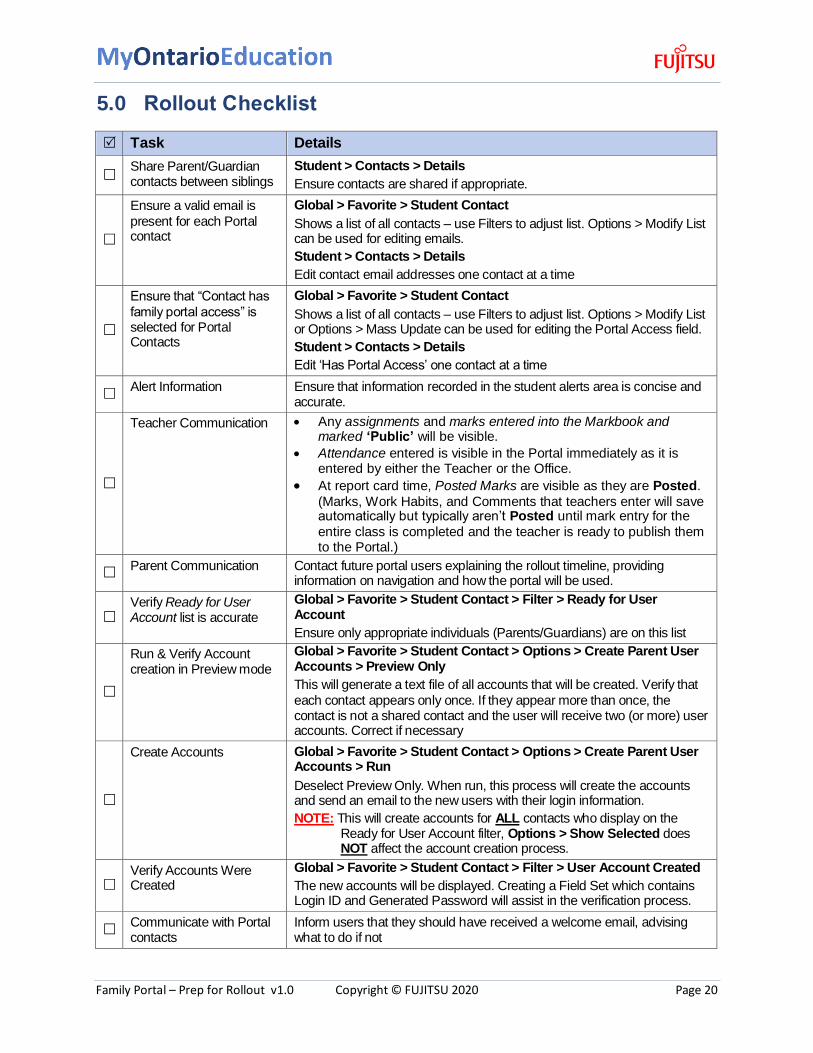
5.0 Rollout Checklist
Task Details
Share Parent/Guardian contacts between siblings
Student > Contacts > Details
Ensure contacts are shared if appropriate.
Ensure a valid email is
present for each Portal contact
Global > Favorite > Student Contact
Shows a list of all contacts – use Filters to adjust list. Options > Modify List can be used for editing emails.
Student > Contacts > Details
Edit contact email addresses one contact at a time
Ensure that “Contact has
family portal access” is selected for Portal Contacts
Global > Favorite > Student Contact
Shows a list of all contacts – use Filters to adjust list. Options > Modify List or Options > Mass Update can be used for editing the Portal Access field.
Student > Contacts > Details
Edit ‘Has Portal Access’ one contact at a time
Alert Information Ensure that information recorded in the student alerts area is concise and
accurate.
Teacher Communication Any assignments and marks entered into the Markbook and marked ‘Public’ will be visible.
Attendance entered is visible in the Portal immediately as it is entered by either the Teacher or the Office.
At report card time, Posted Marks are visible as they are Posted.
(Marks, Work Habits, and Comments that teachers enter will save automatically but typically aren’t Posted until mark entry for the
entire class is completed and the teacher is ready to publish them to the Portal.)
Parent Communication Contact future portal users explaining the rollout timeline, providing
information on navigation and how the portal will be used.
Verify Ready for User Account list is accurate
Global > Favorite > Student Contact > Filter > Ready for User Account
Ensure only appropriate individuals (Parents/Guardians) are on this list
Run & Verify Account creation in Preview mode
Global > Favorite > Student Contact > Options > Create Parent User Accounts > Preview Only
This will generate a text file of all accounts that will be created. Verify that
each contact appears only once. If they appear more than once, the contact is not a shared contact and the user will receive two (or more) user accounts. Correct if necessary
Create Accounts Global > Favorite > Student Contact > Options > Create Parent User Accounts > Run
Deselect Preview Only. When run, this process will create the accounts and send an email to the new users with their login information.
NOTE: This will create accounts for ALL contacts who display on the Ready for User Account filter, Options > Show Selected does NOT affect the account creation process.
Verify Accounts Were Created
Global > Favorite > Student Contact > Filter > User Account Created
The new accounts will be displayed. Creating a Field Set which contains Login ID and Generated Password will assist in the verification process.
Communicate with Portal contacts
Inform users that they should have received a welcome email, advising what to do if not
Family Portal – Prep for Rollout v1.0 Copyright © FUJITSU 2020 Page 21
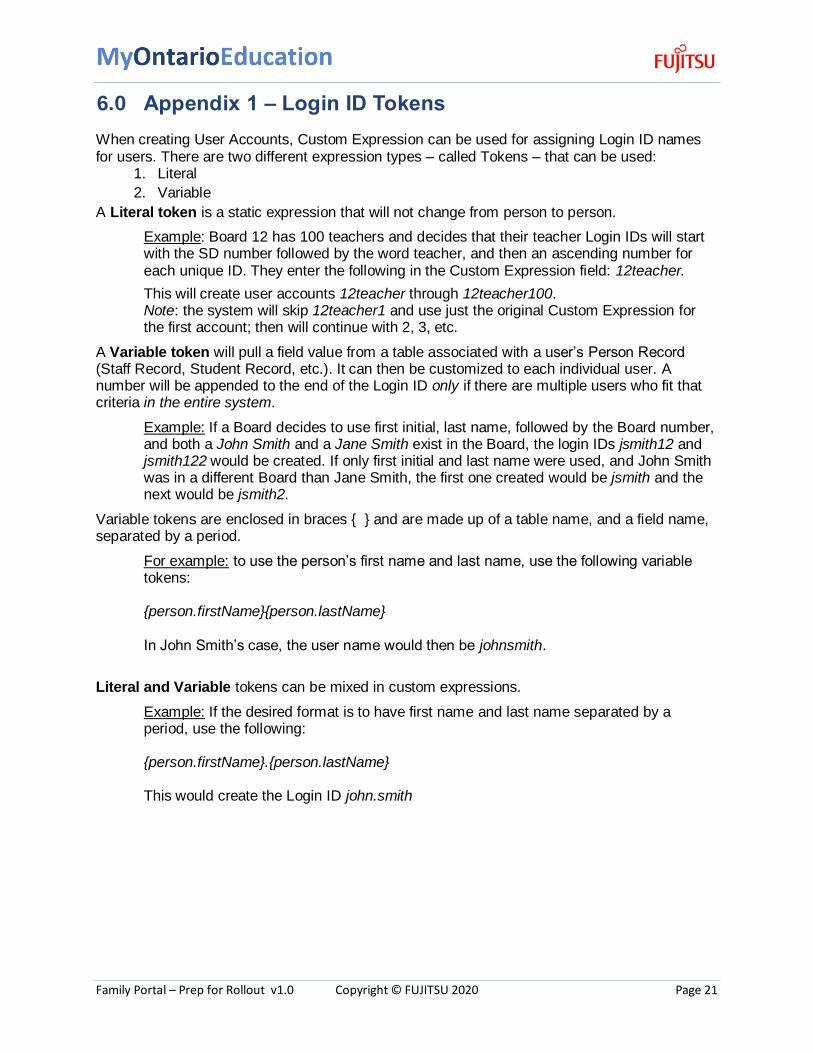
6.0 Appendix 1 – Login ID Tokens
When creating User Accounts, Custom Expression can be used for assigning Login ID names for users. There are two different expression types – called Tokens – that can be used:
1. Literal
2. Variable
A Literal token is a static expression that will not change from person to person.
Example: Board 12 has 100 teachers and decides that their teacher Login IDs will start with the SD number followed by the word teacher, and then an ascending number for each unique ID. They enter the following in the Custom Expression field: 12teacher.
This will create user accounts 12teacher through 12teacher100. Note: the system will skip 12teacher1 and use just the original Custom Expression for the first account; then will continue with 2, 3, etc.
A Variable token will pull a field value from a table associated with a user’s Person Record (Staff Record, Student Record, etc.). It can then be customized to each individual user. A number will be appended to the end of the Login ID only if there are multiple users who fit that criteria in the entire system.
Example: If a Board decides to use first initial, last name, followed by the Board number, and both a John Smith and a Jane Smith exist in the Board, the login IDs jsmith12 and jsmith122 would be created. If only first initial and last name were used, and John Smith was in a different Board than Jane Smith, the first one created would be jsmith and the next would be jsmith2.
Variable tokens are enclosed in braces { } and are made up of a table name, and a field name, separated by a period.
For example: to use the person’s first name and last name, use the following variable tokens: {person.firstName}{person.lastName} In John Smith’s case, the user name would then be johnsmith.
Literal and Variable tokens can be mixed in custom expressions.
Example: If the desired format is to have first name and last name separated by a period, use the following: {person.firstName}.{person.lastName} This would create the Login ID john.smith
Family Portal – Prep for Rollout v1.0 Copyright © FUJITSU 2020 Page 22
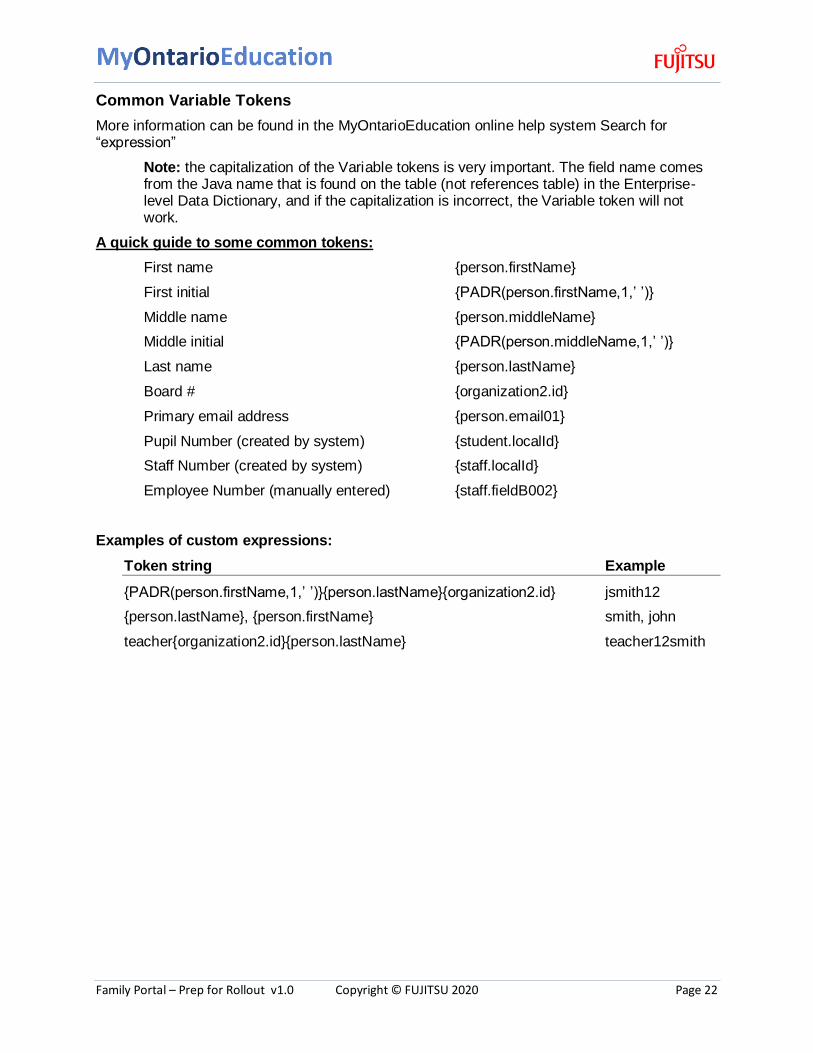
Common Variable Tokens
More information can be found in the MyOntarioEducation online help system Search for “expression”
Note: the capitalization of the Variable tokens is very important. The field name comes from the Java name that is found on the table (not references table) in the Enterprise-level Data Dictionary, and if the capitalization is incorrect, the Variable token will not work.
A quick guide to some common tokens:
First name {person.firstName}
First initial {PADR(person.firstName,1,’ ’)}
Middle name {person.middleName}
Middle initial {PADR(person.middleName,1,’ ’)}
Last name {person.lastName}
Board # {organization2.id}
Primary email address {person.email01}
Pupil Number (created by system) {student.localId}
Staff Number (created by system) {staff.localId}
Employee Number (manually entered) {staff.fieldB002}
Examples of custom expressions:
Token string Example
{PADR(person.firstName,1,’ ’)}{person.lastName}{organization2.id} jsmith12
{person.lastName}, {person.firstName} smith, john
teacher{organization2.id}{person.lastName} teacher12smith