dp2 agent - roes · roes dp2 agent 2. getting set up 2.1. connecting to the dp2 database the dp2...
TRANSCRIPT

dp2 Agent
for the
ROES Server
Kodakdp2

ROES dp2 Agent
1. Overview 12. Getting Set Up 2
2.1. Connecting to the dp2 Database 22.2. Some basic settings 22.3. Order Items 42.4. Subject Data 7
3. Setting up your Workflow 74. Advanced Capabilities 11
4.1. Path conversion Functions 114.2. Server Commands 13
5. Custom additional processing 16
�i

ROES dp2 Agent
1. Overview
The basic function of the ROES dp2 Agent is to create an order in dp2 to match an order as it exists in the ROES Server.
Like all Agents in the ROES Server the dp2 Agent draws work from a queue. When it retrieves a batch of production items for an order, it will create that order in dp2; populating its Orders, Images, OrderItems, Books, BookAttributes, Retouch and optionally SubjectInfo tables. It will also generate job files that will produce the production items in the batch being processed.
Page �1 rev: 3.0.4fc16

ROES dp2 Agent
2. Getting Set Up
2.1. Connecting to the dp2 DatabaseThe dp2 Agent needs to connect to the dp2 Database in order to perform its operations. To do that we need to define a Java Database Connectivity (JDBC) url to the dp2 database. A JDBC url defines both a driver to use and the network connection path to connect to a database. In the case of dp2 almost universally Microsoft SQL Server (or some variant of MSSQL Server) is what is used for the database server. The ROES Server has a driver to connect to MSSQLS Server built in called jTDS. So your url would look something like this:
jdbc:jtds:sqlserver://<your MSSQL Server address here>/DP2
The Username and Password fields should be set to the username and password you have setup for accessing the DP2 database (by default dp2 sets the username is set to “sa” and the password to blank but your administrator may well have set it to something different).
Once you have populated the database fields you can click on the “Test Connection” button to see if the setting are connecting properly and make adjustments as necessary.
When you’re done it might look something like:
2.2. Some basic settings
Storing the customer order id in the orders table
Like with the ROES dp2 Server, you can choose to save the customers order id value that was assigned by the ROES Client in a field in the dp2 Order table. If you select the “Store customer order id in DP2 Orders table field” checkbox then the menu with the list of the Orders table fields (those fields that are of type char) will be enabled and you can select the field you wish to use to store the customer order id.
Page �2 rev: 3.0.4fc16

ROES dp2 Agent
Handling duplicate orders
The “On Duplicate order” menu allows you to define how you want the server to behave if the order that it is about to create in dp2 already exists in dp2.
The different options are:
Delete the existing order data and replace with new order
When this option is selected all the data in dp2 about the order will be deleted including and information for this order in the Orders, Books, BookAttributes, Images, RawImages, Retouch, OrderItems, OrderItemImages and SubjectInfo tables. Any job files or job preview images for this order will also be deleted. The tables and jobs will then all be repopulated with the new data for the batch being processed.
Delete the existing order data and images and replace with new order
When this option is selected all the data in dp2 about the order will be deleted including and information for this order in the Orders, Books, BookAttributes, Images, RawImages, Retouch, OrderItems, OrderItemImages and SubjectInfo tables. Any image or raw image files belonging to this order will be deleted. Any job files or job preview images for this order will also be deleted. The tables and jobs will then all be repopulated with the new data for the batch being processed; the image files for the order itself will have to be reconstituted where they are expected to be stored.
or duplicate customer order ID, Stop processing and err
When this option is selected if the order already exists in dp2 or an order exists with the same customer order id value, then an exception will be thrown, processing will err and the batch will be placed into the agents error queue.
Stop processing and err
Page �3 rev: 3.0.4fc16

ROES dp2 Agent
When this option is selected, if the order already exists in dp2 then an exception will be thrown, processing will err and the batch will be placed into the agents error queue.
The images directory
The agent needs to know where the images will be stored, so you define that path here
The path can contain macro’s so you might have a path like:
C:\Eastman Kodak\KPro Applications\KPDP2\OrderImages\[LAB_ORDER_ID]
or more probably with a UNC path something like:
\\pc01\KPDP2\OrderImages\[LAB_ORDER_ID]
2.3. Order Items
To generate or not to generate
It is possible to use the dp2 Agent to create the order in dp2 but not create the order items. You might want this if you were just going to use DP2 for some image manipulation like color correction or something but not render in DP2. Not a likely scenario but there it is.
Page �4 rev: 3.0.4fc16

ROES dp2 Agent
Selecting the “Generate Order Items for DP2 version” checkbox will cause the dp2 Agent to not only populate the order in dp2 but also create the job files for the order items that are in the current batch as well.
What version to generate for
The Agent will create the job files slightly differently depending on what version of DP2 you are targeting.
Select the option appropriate for your dp2 version. The main difference is with 9.0 or earlier additional nodes will be created for strokes where as in 10.0 or later StrokeImageRect will define the stroke.
Unicode or UTF-8
If you select the “Generate Unicode Job Files” checkbox then the job files will be created with little endian unicode content (UTF-16LE); otherwise the job files will be generated with UTF-8 content.
Layout Location Method
This option is analogous to the same option in the ROES dp2 Server and you should set it to whatever option you were using there.
Locate by layout filename
Looks for the layout in the dp2 Products table by searching for the value of the “layoutfile” attribute (or “id” if no “layoutfile" attribute is defined) with a preceding backslash in the ProductLayoutPath field.
Locate by layout filename with extension
Page �5 rev: 3.0.4fc16
ROES dp2 Agent
Looks for the layout in the dp2 Products table by searching for the value of the “layoutfile” attribute (or “id” if no “layoutfile" attribute is defined) with a preceding backslash at the end of the ProductLayoutPath field.
Locate layout using filename as the layout ID
Looks for the layout in the dp2 Products table by searching where the value of the “layoutfile” attribute (or “id” if no “layoutfile" attribute is defined) matches the value in the ID field.
Smart DP2 Package Node ID Lookup
If the “Smart DP2 Package Node ID Lookup” checkbox is selected then when a product that is a dp2 package is created, the constituent products node will be set to what is defined in the dp2 packages table for that package (the node(s) targeted are any whose “input” attribute is set to “image”) . Otherwise the node id of the source product will be preserved.
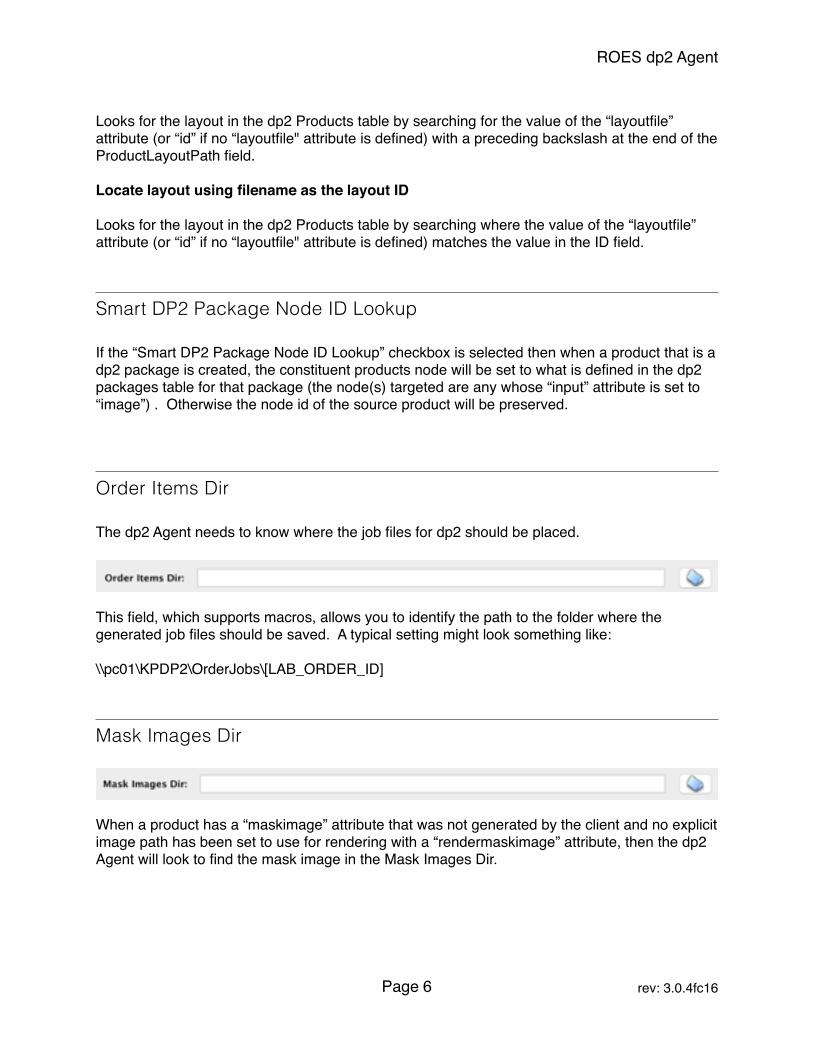
Order Items Dir
The dp2 Agent needs to know where the job files for dp2 should be placed.
This field, which supports macros, allows you to identify the path to the folder where the generated job files should be saved. A typical setting might look something like:
\\pc01\KPDP2\OrderJobs\[LAB_ORDER_ID]
Mask Images Dir
When a product has a “maskimage” attribute that was not generated by the client and no explicit image path has been set to use for rendering with a “rendermaskimage” attribute, then the dp2 Agent will look to find the mask image in the Mask Images Dir.
Page �6 rev: 3.0.4fc16

ROES dp2 Agent
Other fields in this group
The Server Command Function, Before Each Job Function and After Each Job Function will be covered in the advanced section later and are not required for basic operation of the dp2 Agent.
2.4. Subject DataSubject Data from an order can be optionally imported into the dp2 SubjectInfo tables.
Import Subject Data
If you select the “Import Subject Data into DP2 SubjectInfo tables” checkbox then if there is Subject data in the order being processed, then it will be used to populate the dp2 SubjectInfo tables.
Default SubjectInfo table
If no specific SubjectInfo table is identified in the Subject Data then the default table selected in the list of SubjectInfo tables that exist in the dp2 database will be used.
3. Setting up your WorkflowLet’s look at how you might setup a Workflow to feed order orders to your dp2 Agent.
One thing we need to consider is how we are going to make the images from an order available to dp2. There are three different approaches you could use:
1) You could set ROES Server’s Order Images directory, in the Order Directories tab, to the same directory that dp2 is using for images.
Page �7 rev: 3.0.4fc16

ROES dp2 Agent
This option has the advantage of not needing to duplicate the images. It has the disadvantage that when an order is deleted from one of the systems, the images for the order in both systems get deleted and for that reason is not recommended unless disk space is at a premium.
Your workflow in the situation could just contain your dp2 agent
Page �8 rev: 3.0.4fc16

ROES dp2 Agent
2) You could use a File Copier Agent to copy the orders images over into dp2’s image directory. This approach has the advantage of being quick and if an order is deleted in dp2 it does not affect the images for the order in the ROES Server and vis versa.
The File Copier Agent you would set the “Source Directory” field to the path where you keep the images for your orders in the ROES Server (this field supports macros). The “Destination Directory” would be set to the directory where dp2 keep it’s order images (this field also support macros). So your File Copier Agent might look something like this:
Your workflow with this situation would look something like:
Page �9 rev: 3.0.4fc16

ROES dp2 Agent
3) You could use an Order Image Job Creator Agent to create production items that produce the images in the order. These production items could then be fed into a Disk Printer which would be set to render into p2’s images directory.
This approach is useful if you are color correcting your images in the ROES Server before pushing the order into DP2. The rendered production items will incorporate any color correction settings for the image being rendered.
The Setting on the Order Image Job Creator Agent would simply be set to render the images at the same size as the order image.
In the Disk Printer you would set your “Output Directory” to the directory where the dp2 images are being kept. The DPI setting on the Disk Printer is not terribly important since the jobs created by the Order ImageJob Creator specify a size that ensures it will be rendered at the same dimensions as the original order image. In the Output File Name field, you will want to use the macro [OIJC_FILENAME_SANS_EXTENSION] macro which will evaluate to the same name as the order image used in the rendering and then set the “Output File Type” menu to “Same as source”. This will ensure that the image is saved in the same file type that as the order image used in rendering. The selections in your Disk Printer should look something like this:
Your workflow would look something like:
Page �10 rev: 3.0.4fc16

ROES dp2 Agent
4. Advanced Capabilities
4.1. Path conversion FunctionsDown near the bottom of the dp2 Agent are two fields marked “DP2 to Local Path Function” and “Local to DP2 Path Function”.
These function make it possible for you to morph a path that is defined relative to one system into a path that resolves to the same file but relative to the other system.
Page �11 rev: 3.0.4fc16

ROES dp2 Agent
When would this ever be useful? If you are running both the ROES Server and dp2 in windows then you probably wont ever need to do anything here; unless maybe you were using mounted directories and the disk were not mounted with the same ID on both systems. If you are running your ROES Server on Mac OS X and dp2 on Windows then the dp2 Agent will need to be able to transform paths from one system into paths on the other.
By default, the “DP2 to Local Path Function” just contains the macro [DP2_PATH] which evaluates to the path, relative to dp2, that you will want to change into a local, that is, ROES Server relative path. Below is an example of how I do this in my test environment.
[BEGIN_SCRIPT(BeanShell)] import com.softworks.server.scripting.*; import java.util.*; import com.softworks.server.proxy.*;
// Defined by the environment for us // Hashtable gReportMacros; // Hashtable gSystemData; // StringWriter gOutputWriter;
// Convert Windows path to OS X path String thePath = (String) gReportMacros.get( "DP2_PATH" );
if (thePath.toUpperCase(). startsWith( "\\\\Macbookpc\\KPDP2\\".toUpperCase() )) { thePath = thePath.substring( "\\\\Macbookpc\\KPDP2\\".length() ); thePath = "/Volumes/C/Eastman Kodak/KPro Applications/KPDP2/" + thePath.replace( '\\', '/' ); } else if (thePath.toUpperCase().startsWith( "C:\\".toUpperCase() )) { thePath = thePath.substring( "C:\\".length() ); thePath = "/Volumes/C/" + thePath.replace( '\\', '/' ); }
gReportMacros.put( "THE_PATH", thePath ); [END_SCRIPT][\][THE_PATH]
Basically the script is looking for either a preceding “\\Macbookpc\KPDP2\” or “C:\\” which are the two ways that a path might be defined in my dp2 environment, and replacing those with “/Volumes/C/Eastman Kodak/KPro Applications/KPDP2/“ or “/Volumes/C/“ respectively and then swapping any remaining backslashes with forward slashes.
Page �12 rev: 3.0.4fc16

ROES dp2 Agent
Similarly, the “Local to DP2 Path Function” is populated by default with just the macro [LOCAL_PATH] which will evaluate to the path to be modified as it’s defined relative to the ROES Server environment. Below is an example of how I change the path on my test system.
[BEGIN_SCRIPT(BeanShell)] import com.softworks.server.scripting.*; import java.util.*; import com.softworks.server.proxy.*;
// Defined by the environment for us // Hashtable gReportMacros; // Hashtable gSystemData; // StringWriter gOutputWriter;
// Convert OS X path to Windows path String thePath = (String) gReportMacros.get( "LOCAL_PATH" );
if (thePath.toUpperCase().startsWith( "/Volumes/C/Eastman Kodak/KPro Applications/KPDP2/".toUpperCase() )) { thePath = thePath.substring( "/Volumes/C/Eastman Kodak/KPro Applications/KPDP2/".length() ); thePath = "\\\\Macbookpc\\KPDP2\\" + thePath.replace( '/', '\\' ); } else if (thePath.toUpperCase(). startsWith( "/Volumes/C/".toUpperCase() )) { thePath = thePath.substring( "/Volumes/C/".length() ); thePath = "C:\\" + thePath.replace( '/', '\\' ); }
gReportMacros.put( "THE_PATH", thePath ); [END_SCRIPT][\][THE_PATH]
This script basically does the same thing as the prior script stripping the Mac OS X prefix and replacing it with the windows equivalent.
If you want to learn more about scripting then you should take a look at our scripting guide “Scripting for the ROES Server”.
4.2. Server CommandsIf your lab uses server commands the dp2 Agent is capable of supporting those as well. In the dp2 Agent there is a “Server Command Function” field where you can place a script that will be called each time a server command is encountered and called to be executed (Immediately
Page �13 rev: 3.0.4fc16

ROES dp2 Agent
when it is parsed, before any items are created, after the item the server command is attached to is created or after all items are created).
We can provide you our generic script that should handle most calls to server commands without any further modifications.
The Server Commands Script
The server command script works by combining the efforts of the of the ROES Server, the ROES Server Assistant (a component of the ROES DP2 Server) and the dp2 Commands importer.
When a server command is to be executed, the script will create a KPL script to be executed by the dp2 Commands Importer. Into this KPL script the Server Commands Script will write KPL code creating the various variables and data components that server commands might access that exist when those server commands are executed within the context of the ROES DP2 Server. The idea is to replicate the environment that the server command expected to be running in.
Page �14 rev: 3.0.4fc16
Kodak dp2Commands
Importer
A ServerCommand
KPL Script
ServerCommands
Script
{ }

ROES dp2 Agent
Server Commands are generally executed synchronously, that is, the Server Commands Script will wait until the current A Server Command KPL Script completes processing. When the current A Server Command KPL Script completes it will broadcast a message back to the Server Command Script via it’s ROES Server, returning any results from the Server Command.
When the Server Commands Script receives the response from A Server Command KPL Script it will then continue it’s processing.
Digging Deeper - The Server Command Function
The ROES Server dp2 Agent passes a number of values to the Server Command Function that are accessible from the gReportMacros Hashtable. These include:
Data passed to the Server Command FunctionMacro Type Description
SA_DP2_SERVER_COMMAND String The server command KPL string that is to be executed.
SA_DP2_SERVER_COMMAND_CONTEXT
String The server command context is the wrapper that was placed around the server command to indicate when it should be executed. It can be:“ROES_KPL_ExecuteImmediately”“ROES_KPL_ExecuteBeforeAnyItemsAreCreated”“ROES_KPL_ExecuteAfterItemCreated”“ROES_KPL_ExecuteAfterAllItemsAreCreated”
SA_DP2_SERVER_COMMAND_OWNER
RSXMLElement
The XML element that owns the “servercommand" attribute that this server command came from.
Macro
Page �15 rev: 3.0.4fc16
A ServerCommand
KPL Script
ServerCommands
Script
{ }

ROES dp2 Agent
The macros below are only available if SA_DP2_SERVER_COMMAND_CONTEXT equals “ROES_KPL_ExecuteAfterItemCreated”
5. Custom additional processingThe ROES Server dp2 Agent allows you to define custom processing that is to take place just before or just after each item is created in DP2. This is accomplished with the “Before Each Job Function” and the “After Each Job Function”
Before Each Job Function
A number of items that are made available to the Before Each Job Function via the gReportMacros variable. These include:
SA_DP2_IMAGE_ID_TO_ORDER_ROLL_FRAME
Hashtable<String, String>
This is a Hashtable where the keys are the “id” values for the images in the jobs in the batch and the values are the dp2 Order,Roll and Frame values where this image was added to the dp2 Images table.
Type DescriptionMacro
SA_DP2_JOB RSServerJob The job that is being processed
SA_DP2_JOB_FILE File A File object that points to the dp2 job file that was created
SA_DP2_JOB_FILE_PATH String This is the path to the job file (relative to the dp2 environment, not the local environment)
SA_DP2_JOB_SEQUENCE String The Sequence field value for this job in the dp2 OrderItems table
SA_DP2_PRODUCT_ID String The ProductID field value for this job in the dp2 OrderItems table
Data passed to Before Each Job FunctionField Type Description
SA_DP2_JOB RSServerJob The job that is being processed
SA_DP2_JOB_WILL_BE_ADDED String Tells you whether this job will be created in dp2; it will be set to “true” if it is otherwise it will be set to “false”.
Field
Page �16 rev: 3.0.4fc16

ROES dp2 Agent
After Each Job Function
A number of items that are made available to the After Each Job Function via the gReportMacros variable. These include:
The macros below are only available if SA_DP2_JOB_WAS_ADDED equals “true”
SA_DP2_IMAGE_ID_TO_ORDER_ROLL_FRAME
Hashtable<String, String>
This is a Hashtable where the keys are the “id” values for the images in the jobs in the batch and the values are the dp2 Order,Roll and Frame values where this image was added to the dp2 Images table.
Type DescriptionField
Data passed to After Each Job FunctionMacro Type Description
SA_DP2_JOB RSServerJob The job that is being processed
SA_DP2_JOB_WAS_ADDED String Tells you whether this job will be created in dp2; it will be set to “true” if it is otherwise it will be set to “false”.
SA_DP2_IMAGE_ID_TO_ORDER_ROLL_FRAME
Hashtable<String, String>
This is a Hashtable where the keys are the “id” values for the images in the jobs in the batch and the values are the dp2 Order,Roll and Frame values where this image was added to the dp2 Images table.
SA_DP2_JOB_FILE File A File object that points to the dp2 job file that was created
SA_DP2_JOB_FILE_PATH String This is the path to the job file (relative to the dp2 environment, not the local environment)
SA_DP2_JOB_SEQUENCE String The Sequence field value for this job in the dp2 OrderItems table
SA_DP2_PRODUCT_ID String The ProductID field value for this job in the dp2 OrderItems table
Page �17 rev: 3.0.4fc16