double exposure skills development
TRANSCRIPT
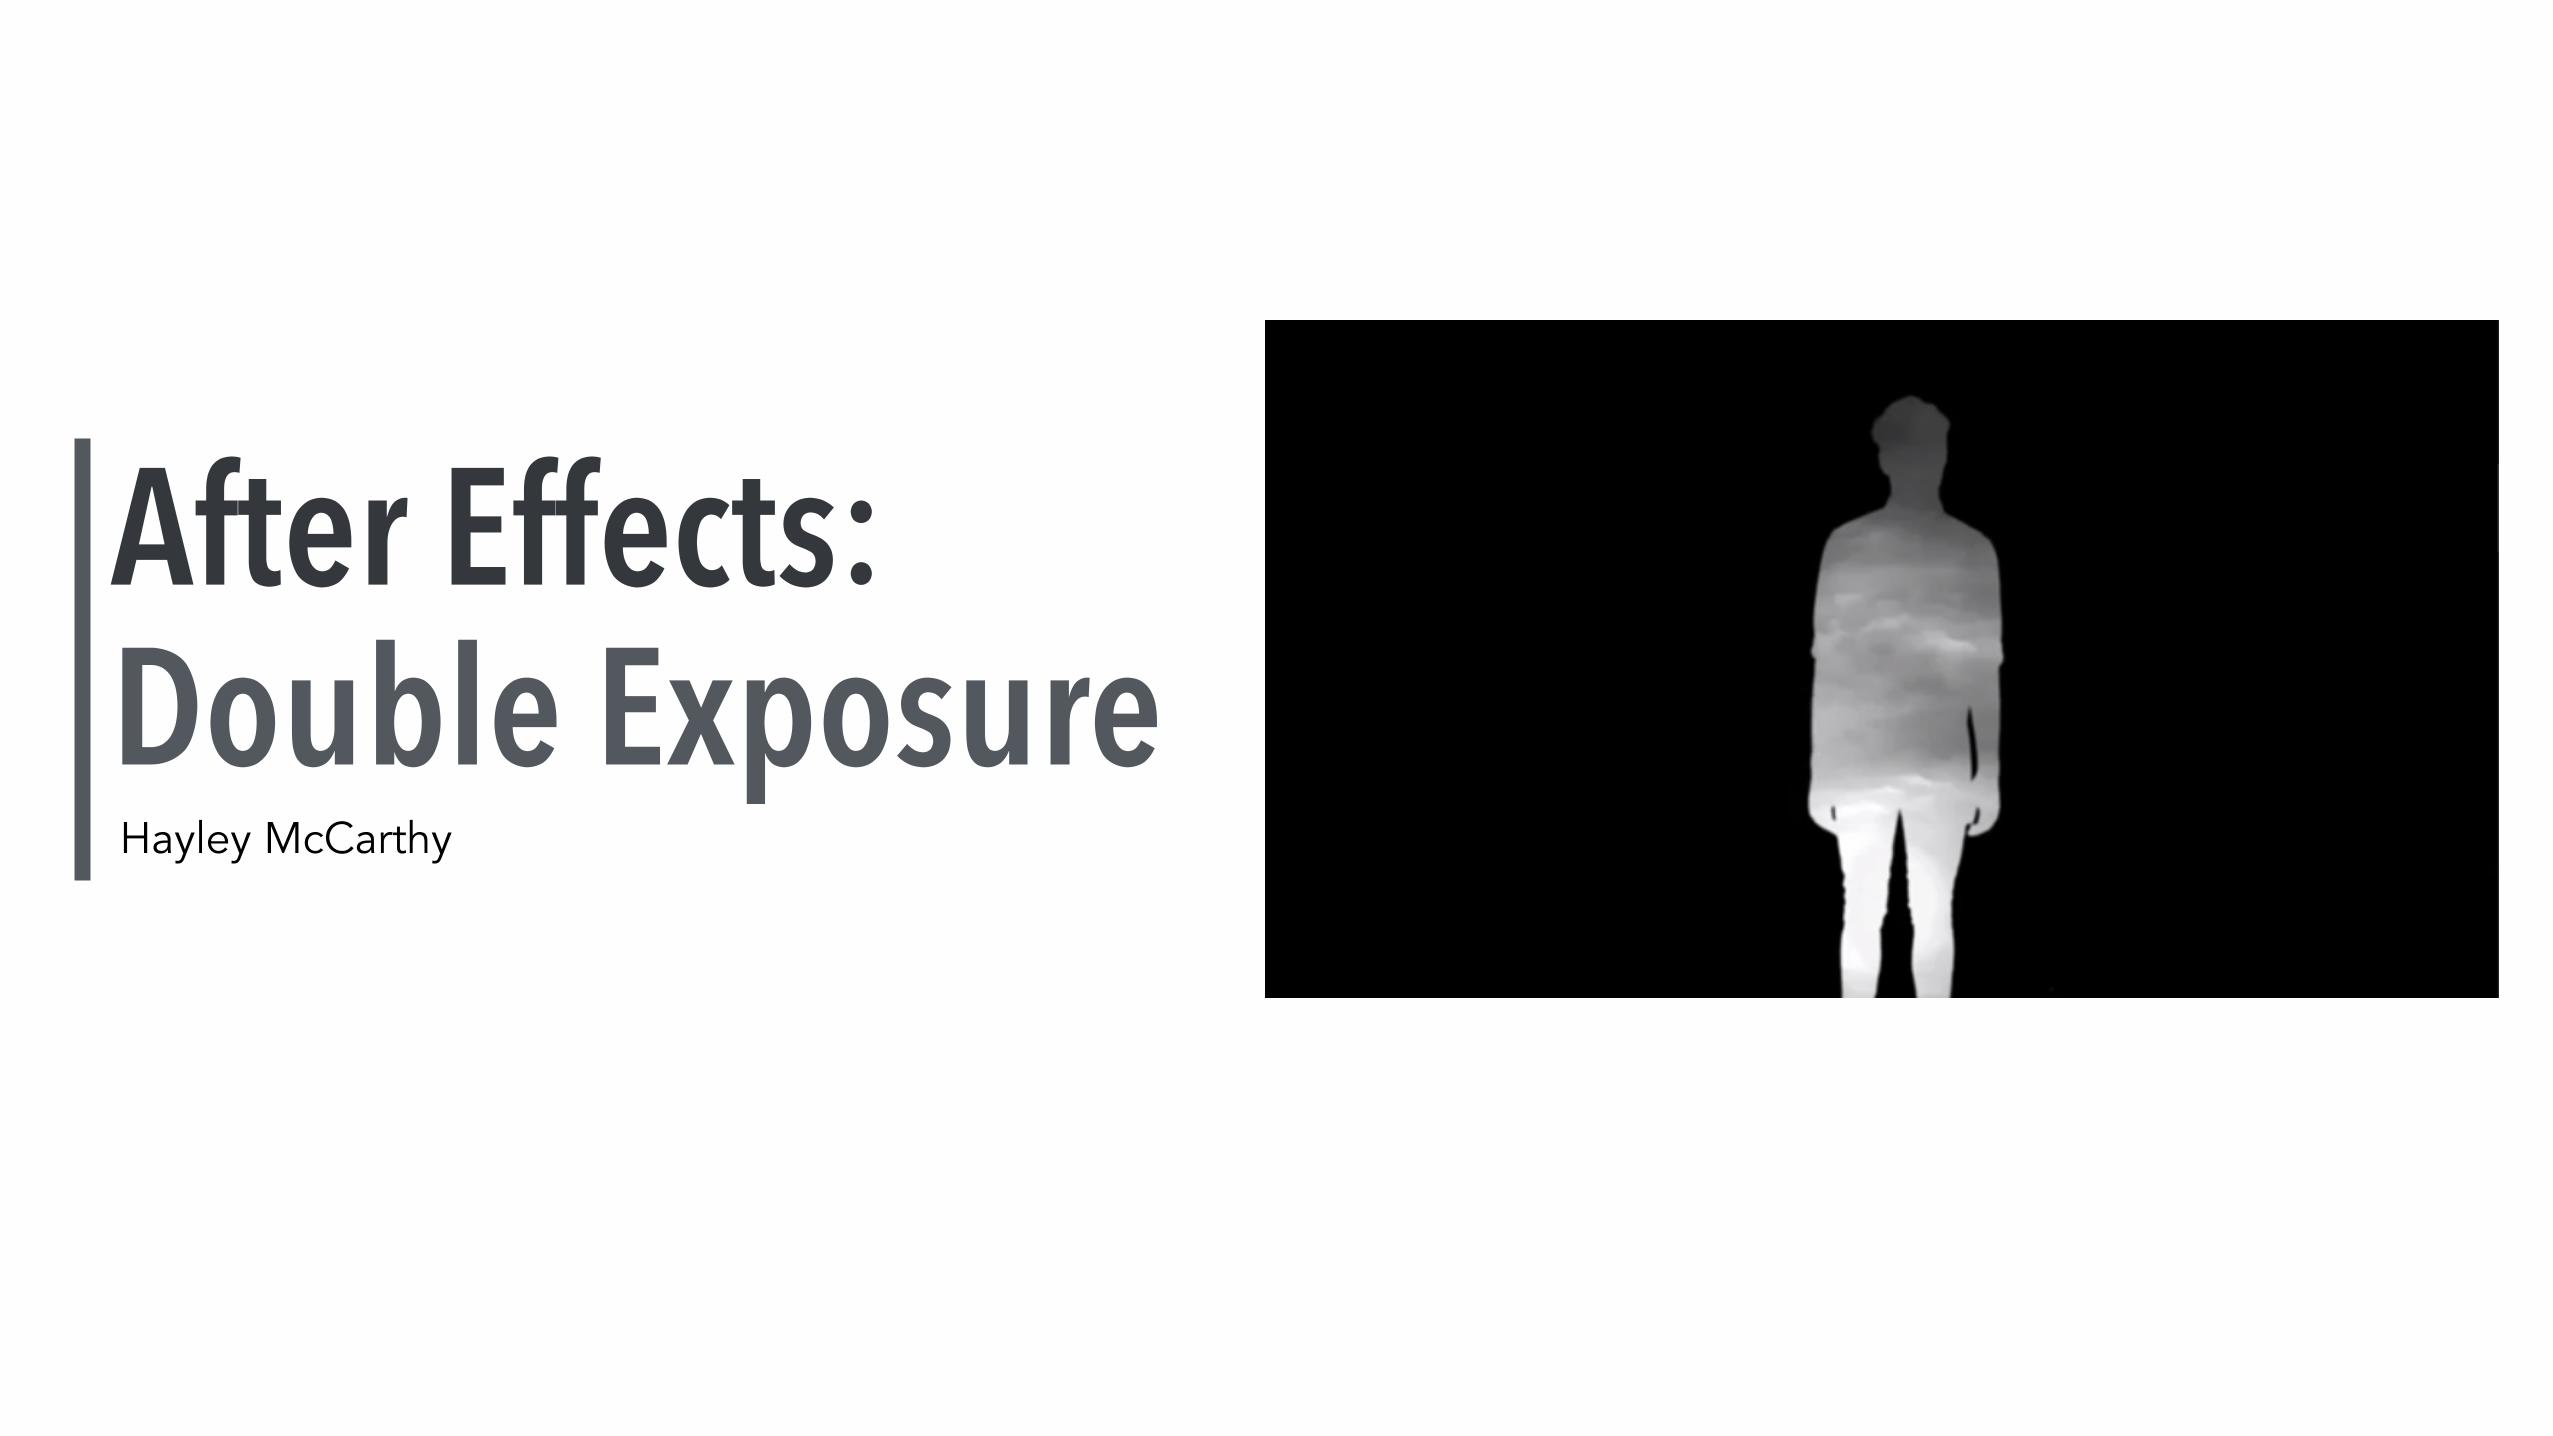
After Effects: Double ExposureHayley McCarthy
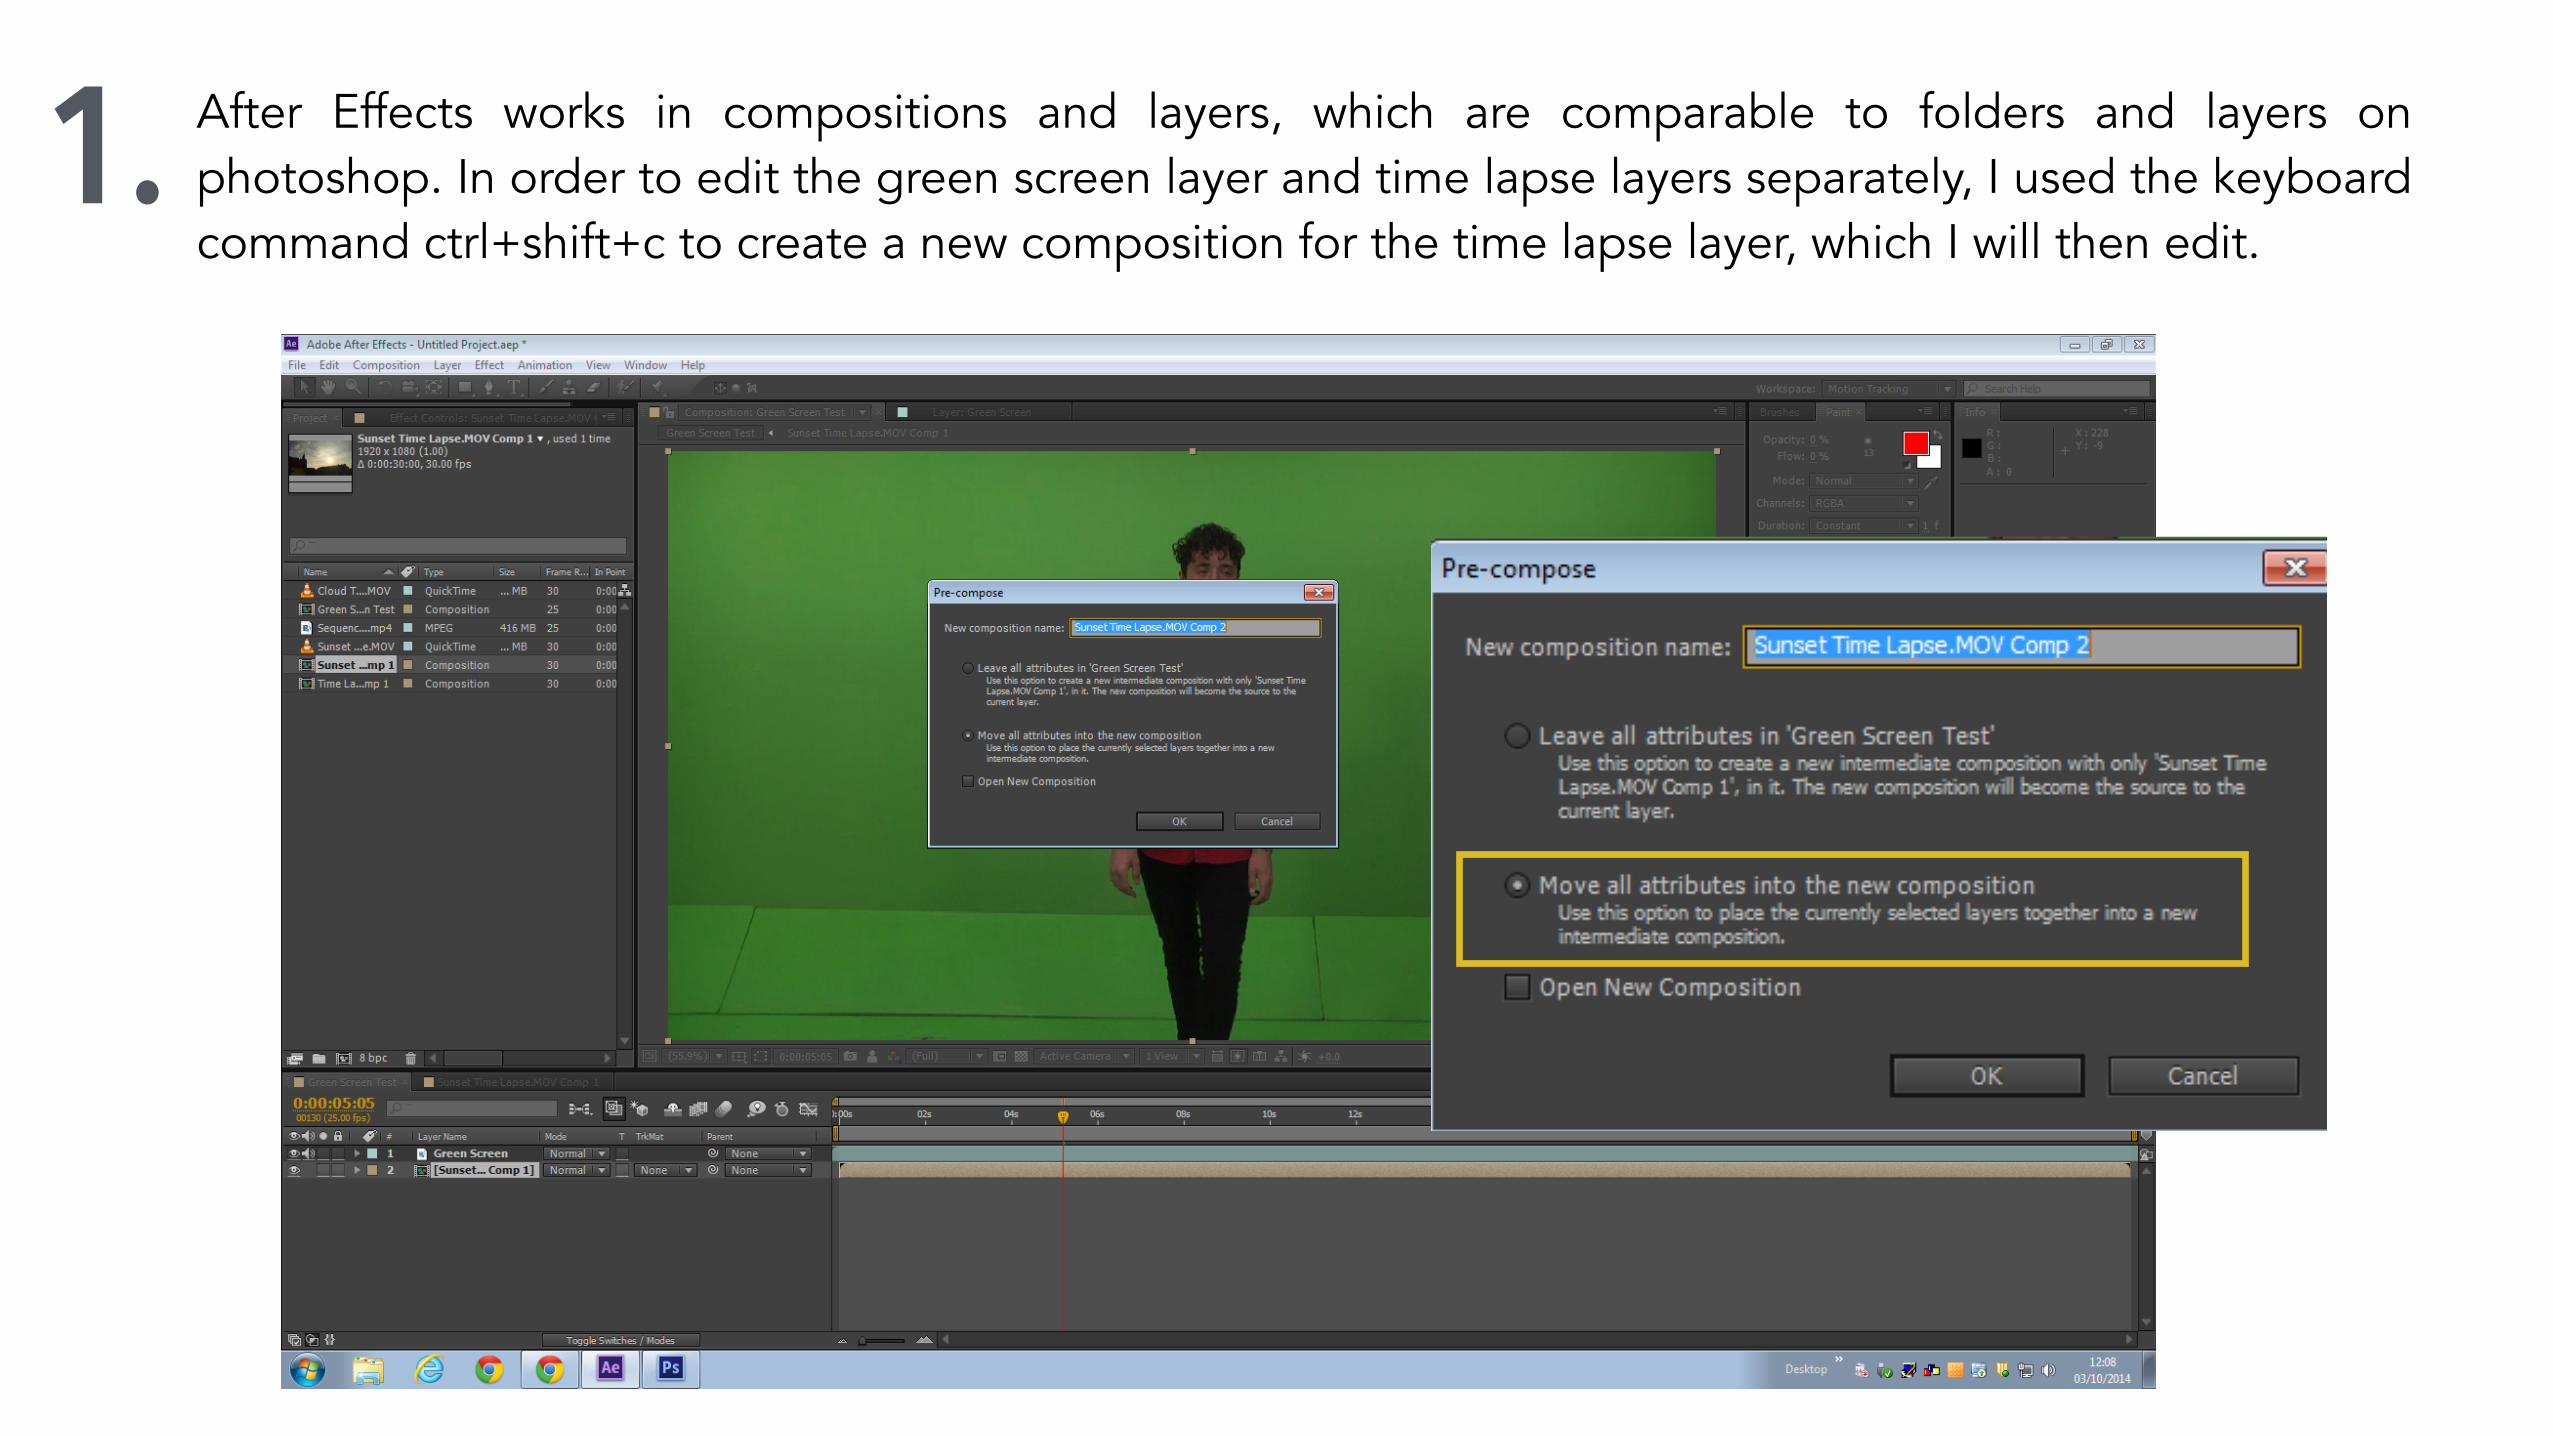
1. After Effects works in compositions and layers, which are comparable to folders and layers on photoshop. In order to edit the green screen layer and time lapse layers separately, I used the keyboard command ctrl+shift+c to create a new composition for the time lapse layer, which I will then edit.

2. Here I duplicated the time lapse layer and set the layer type to Multiply, similar to the brush options in Photoshop. Then through Curves I altered the tone of the duplicated layer to match the original layer, removing any harsh edges where the two frames meet. This allows me to slightly shift the top layer, creating a double-image which will add depth once overlaid through the double exposure.
Multiplied layer before colour correction through curves.
In the future, I could use keyframes to create a varying movement between these two layers, furthering the depth.

3. After shifting the layers through the multiply effect, I decided to place the footage in monochrome for the purpose of this task, whereby it will be easier to see the contrast created from the layering of the time lapse clips.
Evidence of two layers, one shifted and slightly transparent.

4. By shooting this footage on green screen, this created a flat background which, if lit correctly, should be easily removed by selecting the shade of green through Keylight. Similar to the colour picker tool in Photoshop, this selects and removes whatever colour I pick out, in this case the green from the background, just leaving James in the frame.

5. After selecting the green screen colour through key light, leaving a transparent background, I needed to further define the edges of the figure to create a strong silhouette to be used for the double exposure. By selecting Screen Matte, this will define the edges of the figure which I can then manipulate.
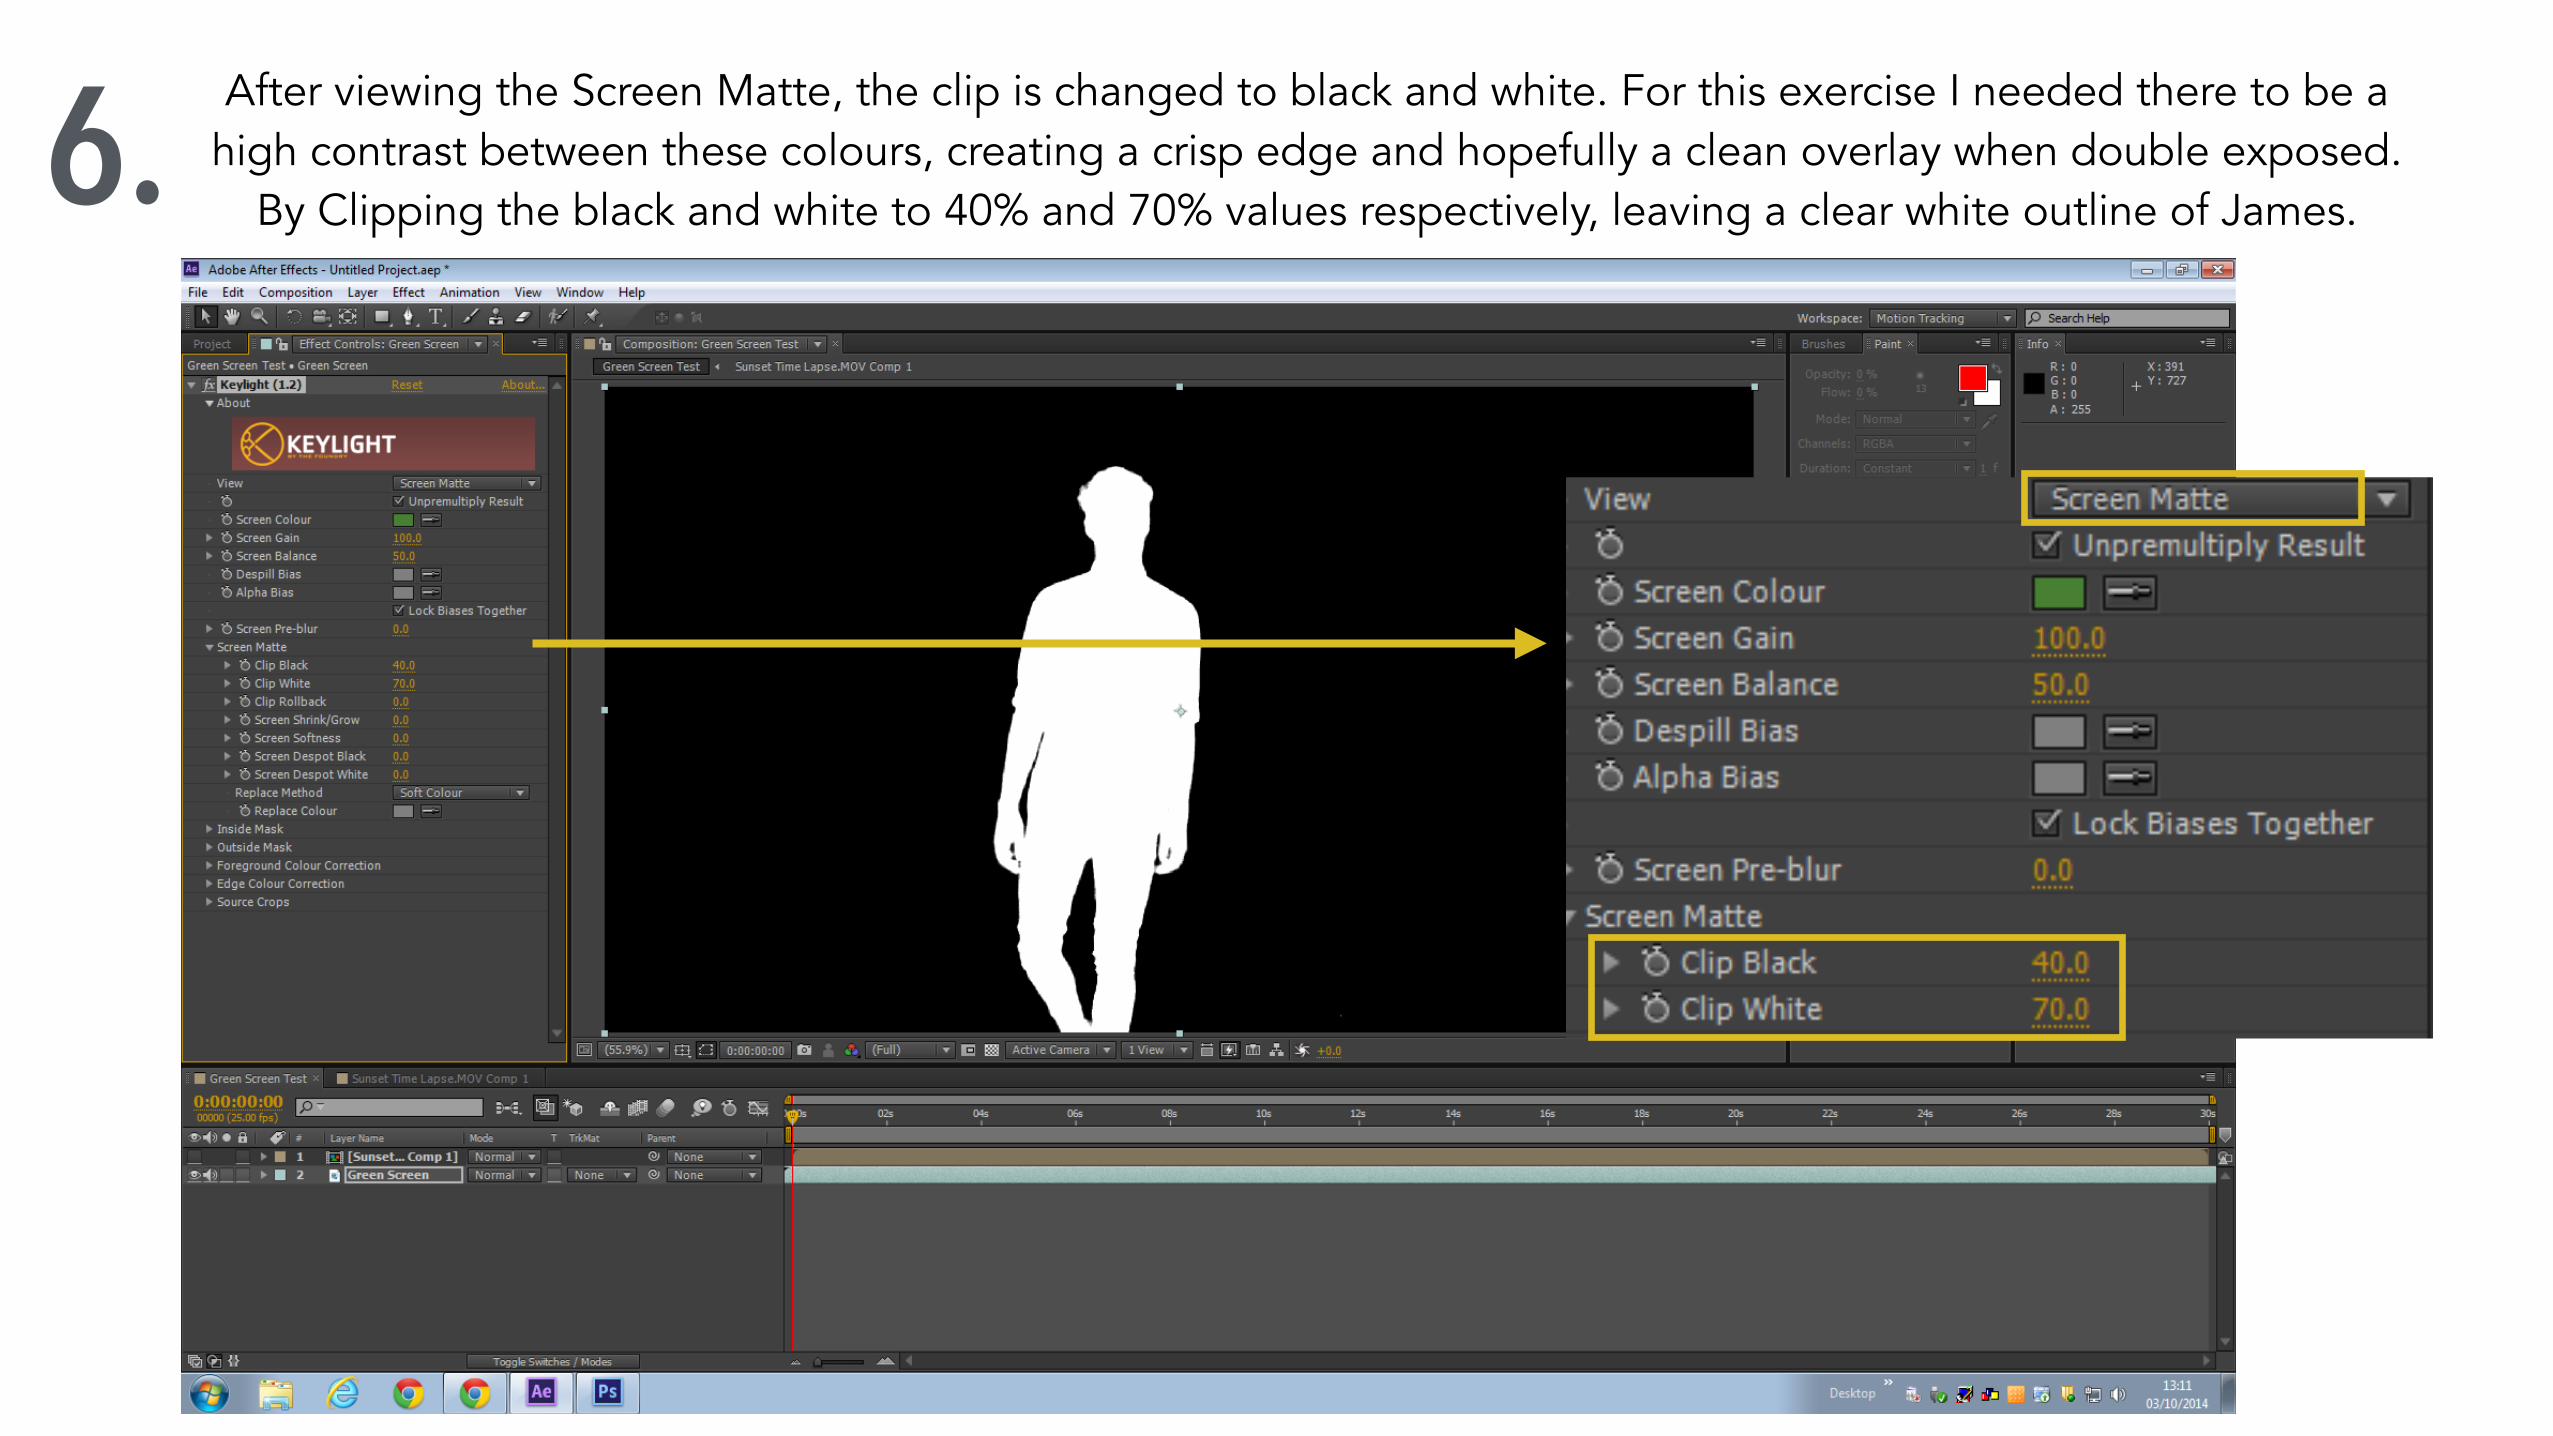
6. After viewing the Screen Matte, the clip is changed to black and white. For this exercise I needed there to be a high contrast between these colours, creating a crisp edge and hopefully a clean overlay when double exposed.
By Clipping the black and white to 40% and 70% values respectively, leaving a clear white outline of James.

7. An alpha layer is a transparent layer, which when applied to the TrakMat of the time lapse composition creates a mask similarly to that in Photoshop. This mask leaves the silhouette which I outlined from Keylighting the green screen layer, hence creating the double exposure effect.
In order to add further depth to the double exposure, I manipulated the Shadows of the green screen layer to add depth to the image.

8. A displacement map alters and transforms the pixels of the moving image through colour channels, with the potential to add a 3D effect to otherwise 2D images. However, as this particular shot was head on, the contrast created in the displacement map was not as effective as it would have been in a shot perhaps side-on, which would have harsher shadows and edges which could be enhanced.
Depth was definitely an issue for this particular test, highlighting the need for interesting angles and harsher shadows to add the impression of 3D to a 2D image.
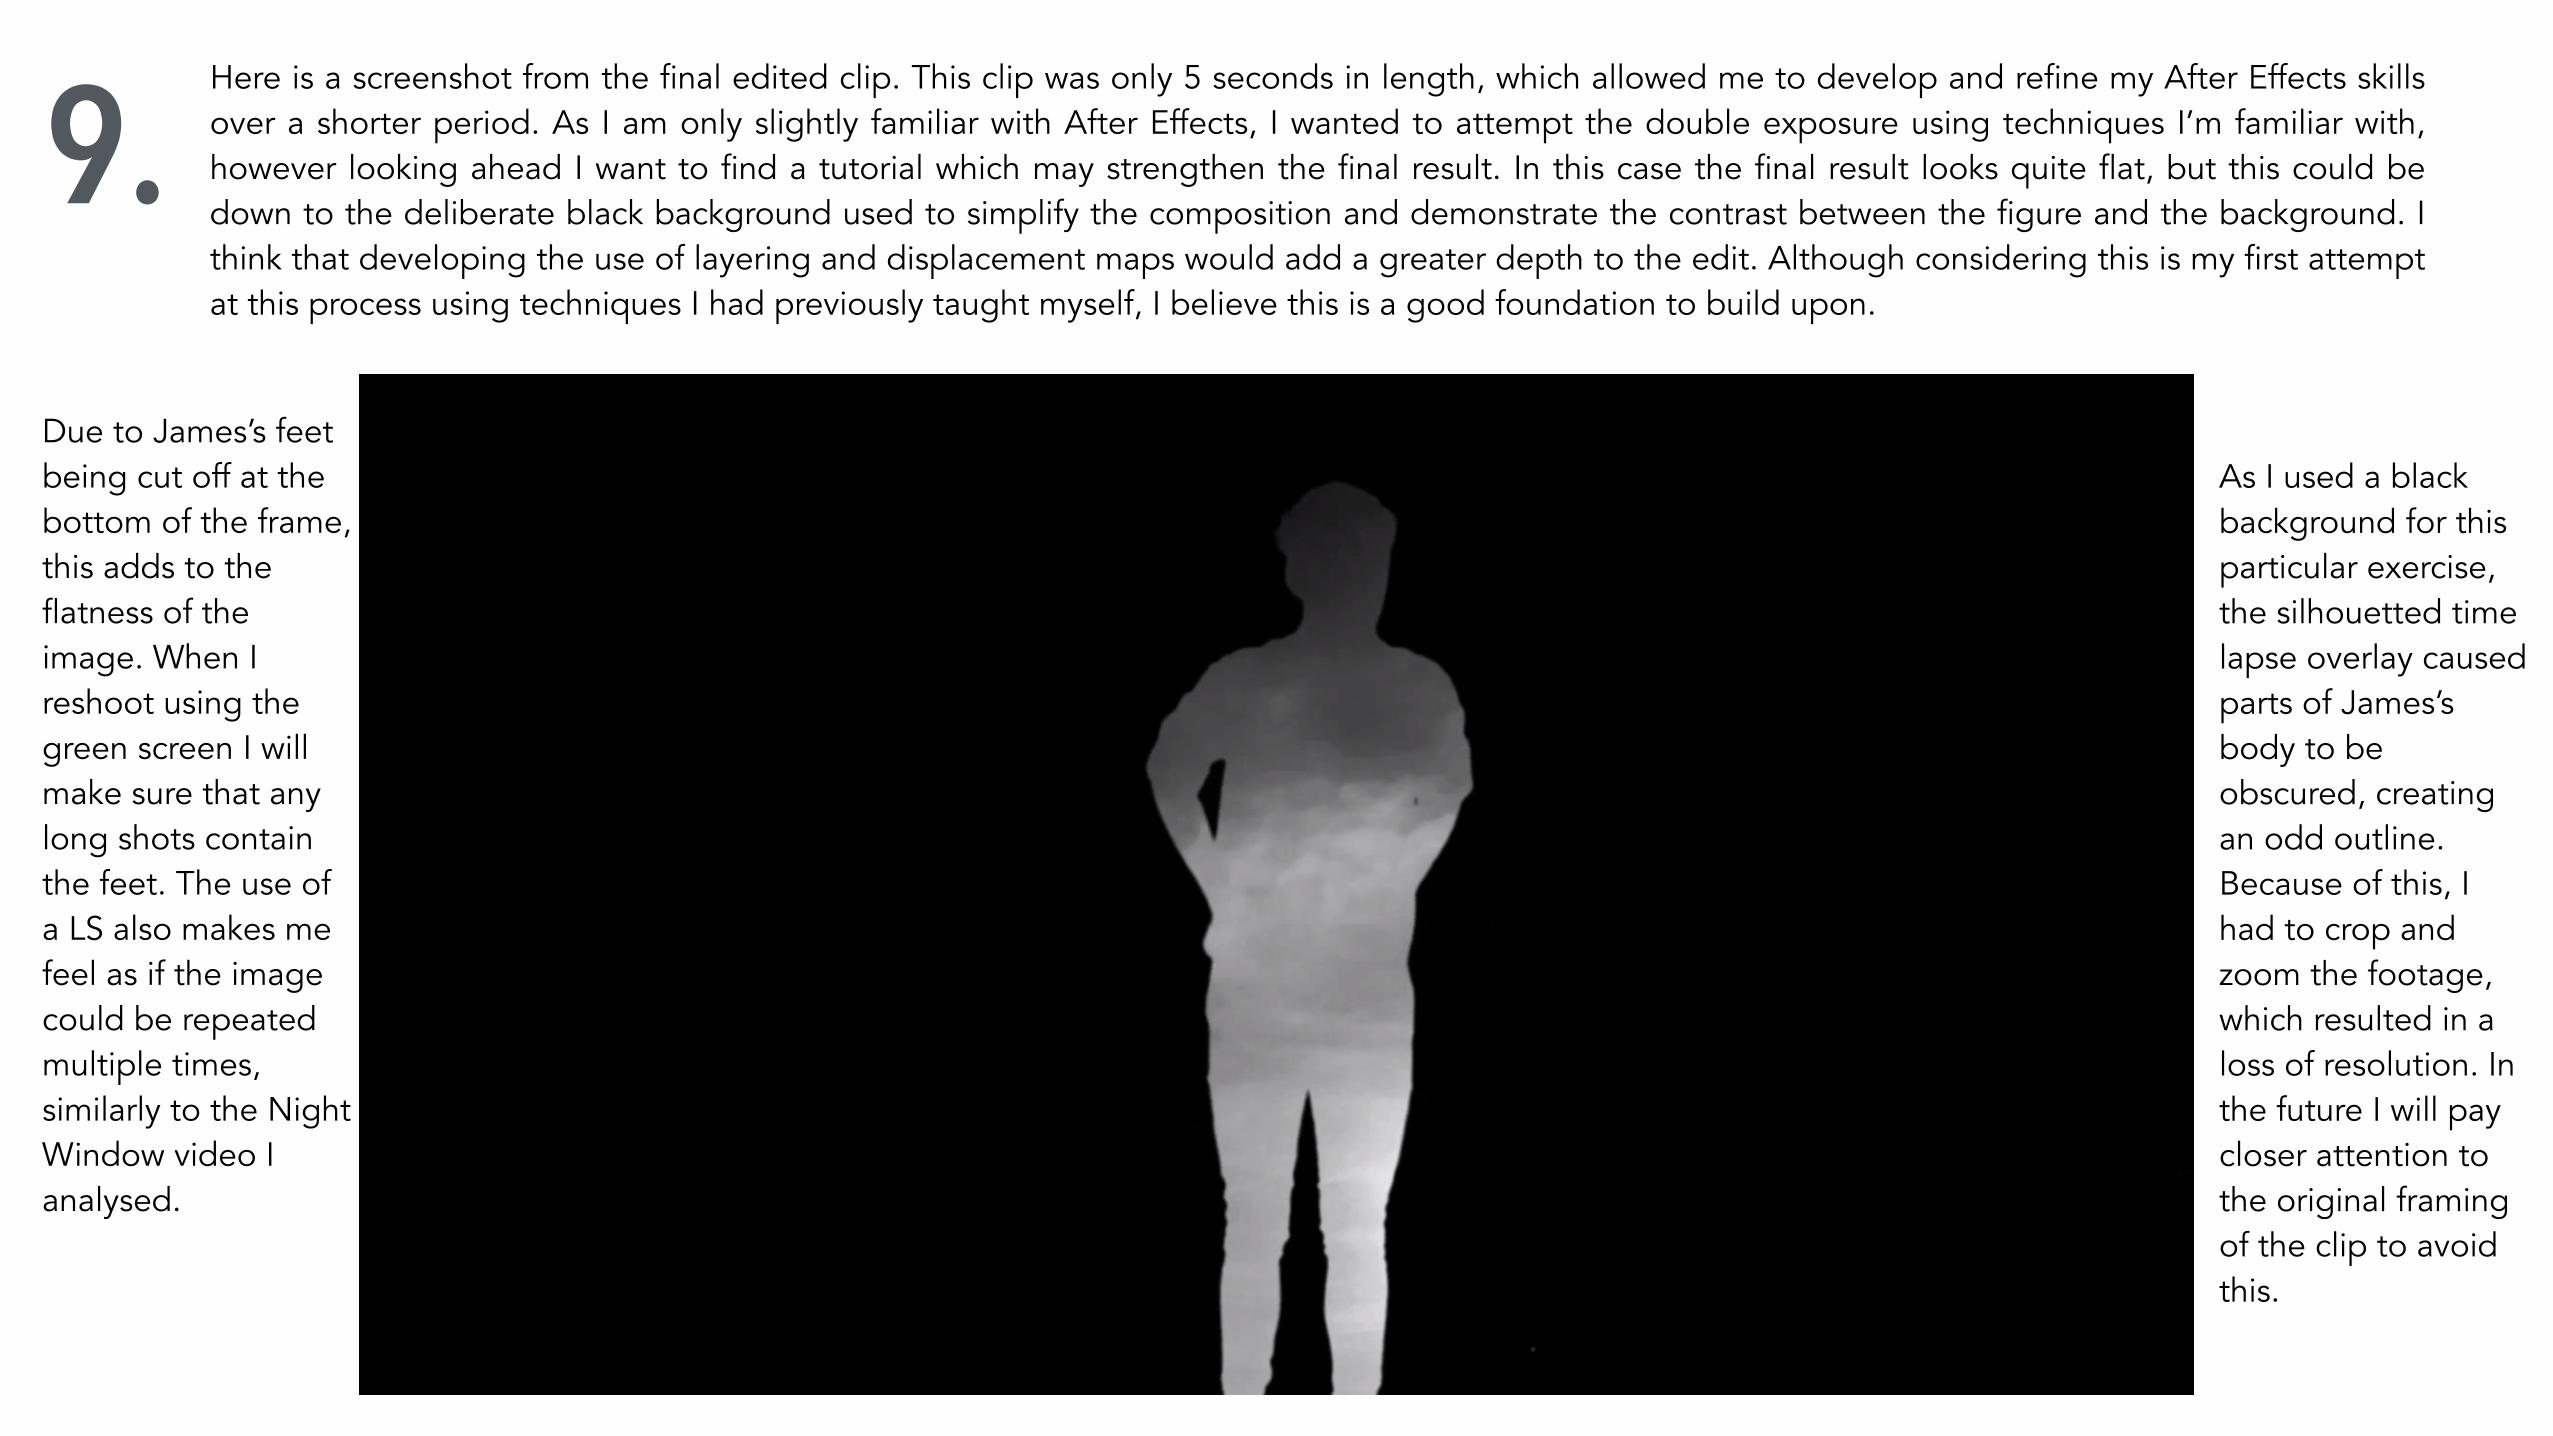
9. Here is a screenshot from the final edited clip. This clip was only 5 seconds in length, which allowed me to develop and refine my After Effects skills over a shorter period. As I am only slightly familiar with After Effects, I wanted to attempt the double exposure using techniques I’m familiar with, however looking ahead I want to find a tutorial which may strengthen the final result. In this case the final result looks quite flat, but this could be down to the deliberate black background used to simplify the composition and demonstrate the contrast between the figure and the background. I think that developing the use of layering and displacement maps would add a greater depth to the edit. Although considering this is my first attempt at this process using techniques I had previously taught myself, I believe this is a good foundation to build upon.
Due to James’s feet being cut off at the bottom of the frame, this adds to the flatness of the image. When I reshoot using the green screen I will make sure that any long shots contain the feet. The use of a LS also makes me feel as if the image could be repeated multiple times, similarly to the Night Window video I analysed.
As I used a black background for this particular exercise, the silhouetted time lapse overlay caused parts of James’s body to be obscured, creating an odd outline. Because of this, I had to crop and zoom the footage, which resulted in a loss of resolution. In the future I will pay closer attention to the original framing of the clip to avoid this.