diagnosing a failed hardware component - hph20431. · diagnostics through post (power on self...
TRANSCRIPT

© Copyright 2015 Hewlett-Packard Development Company, L.P. The information contained herein is subject to change without notice. HP Confidential – For training purposes only.
Diagnosing a Failed Hardware Component

How to Diagnose a Hardware FaultThere are various tools to diagnose possible Hardware issues with HP Desktops and Notebooks, a few are :
Beep codes/Blink codes
HP PC Hardware Diagnostics (UEFI)
HP BIOS Recovery (USB 3 in 1) key
HP Support Assistant (HPSA)
2

© Copyright 2015 Hewlett-Packard Development Company, L.P. The information contained herein is subject to change without notice. HP Confidential – For training purposes only.
Beep codes/Blink codes (Insight Diagnostics)

Diagnostics through POST(Power on Self Test)Codes
4
HP Desktops and Laptops/Notebooks’ POST issues can be diagnosed easily with built-in Beep codes or Blink codes
Note: The beep & blink codes indicate failure of one/more of the critical hardware components causing the system to not boot or display anything.
For most of the other Hardware components, HP PC Hardware diagnostics(UEFI) can be used
HP Desktops usually have a buzzer, that sounds beeps in a sequence/pattern, upon detecting failure of a certain critical Hardware component
HP Notebooks use a combination of LED’s on the keyboard (usually Caps lock & Num lock) to indicate failure of a critical Hardware component
*Users could count the no. of beeps/blinks and inform the HP Support Engineer to identify the failed Hardware Component
Beep Codes (insight diagnostics)- HP Desktops
5
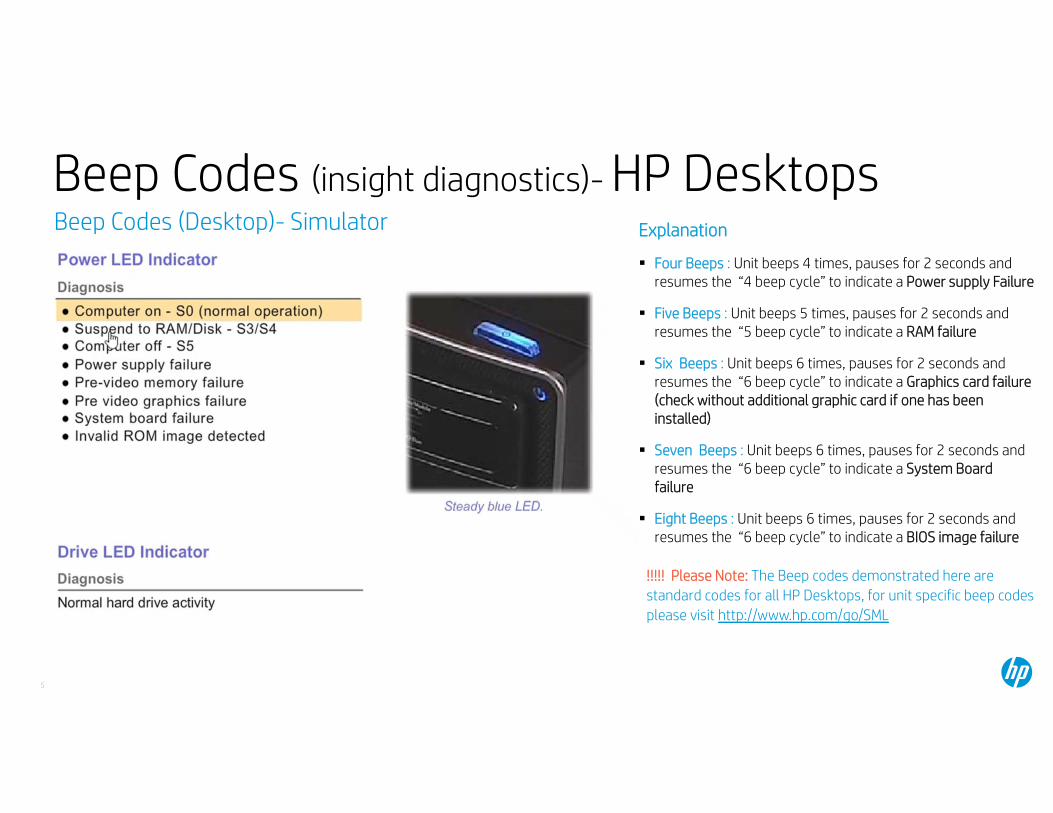
Beep Codes (Desktop)- Simulator Explanation
Four Beeps : Unit beeps 4 times, pauses for 2 seconds and resumes the “4 beep cycle” to indicate a Power supply Failure
Five Beeps : Unit beeps 5 times, pauses for 2 seconds and resumes the “5 beep cycle” to indicate a RAM failure
Six Beeps : Unit beeps 6 times, pauses for 2 seconds and resumes the “6 beep cycle” to indicate a Graphics card failure (check without additional graphic card if one has been installed)
Seven Beeps : Unit beeps 6 times, pauses for 2 seconds and resumes the “6 beep cycle” to indicate a System Board failure
Eight Beeps : Unit beeps 6 times, pauses for 2 seconds and resumes the “6 beep cycle” to indicate a BIOS image failure
!!!!! Please Note: The Beep codes demonstrated here are standard codes for all HP Desktops, for unit specific beep codes please visit http://www.hp.com/go/SML
Blink Codes (insight diagnostics)- HP Laptops
6
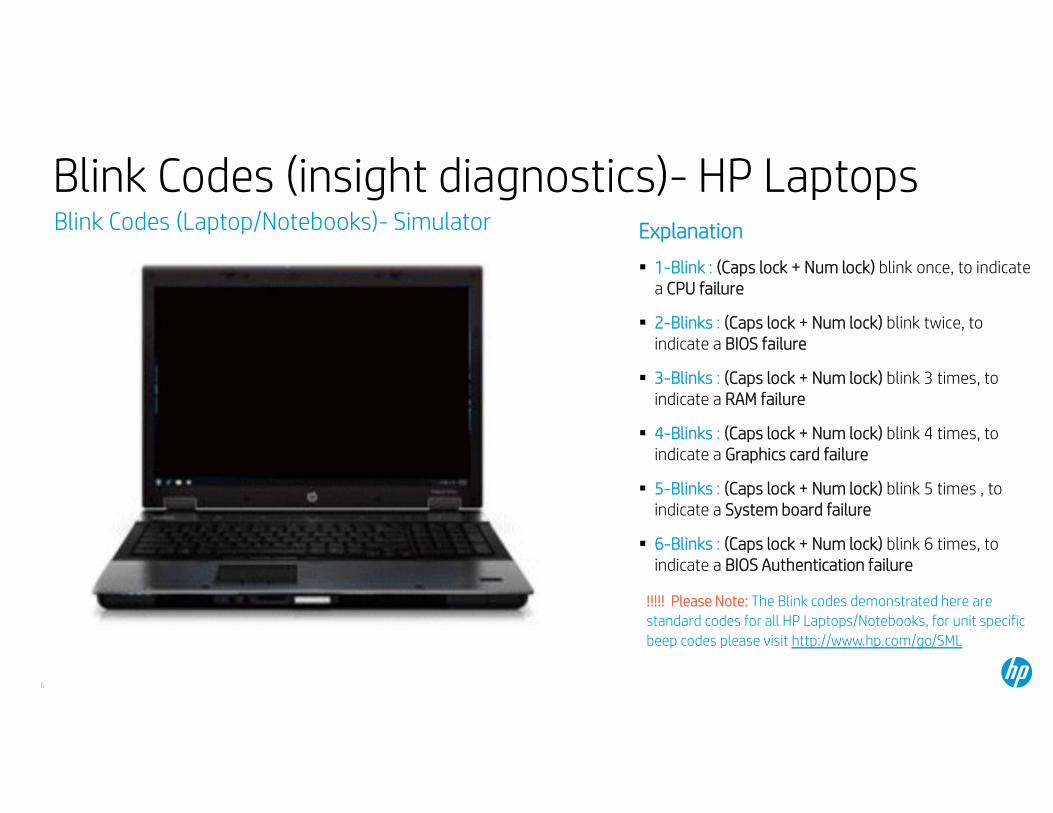
Blink Codes (Laptop/Notebooks)- Simulator Explanation
1-Blink : (Caps lock + Num lock) blink once, to indicate a CPU failure
2-Blinks : (Caps lock + Num lock) blink twice, to indicate a BIOS failure
3-Blinks : (Caps lock + Num lock) blink 3 times, to indicate a RAM failure
4-Blinks : (Caps lock + Num lock) blink 4 times, to indicate a Graphics card failure
5-Blinks : (Caps lock + Num lock) blink 5 times , to indicate a System board failure
6-Blinks : (Caps lock + Num lock) blink 6 times, to indicate a BIOS Authentication failure
!!!!! Please Note: The Blink codes demonstrated here are standard codes for all HP Laptops/Notebooks, for unit specific beep codes please visit http://www.hp.com/go/SML

© Copyright 2015 Hewlett-Packard Development Company, L.P. The information contained herein is subject to change without notice. HP Confidential – For training purposes only.
HP PC Hardware Diagnostics (UEFI)
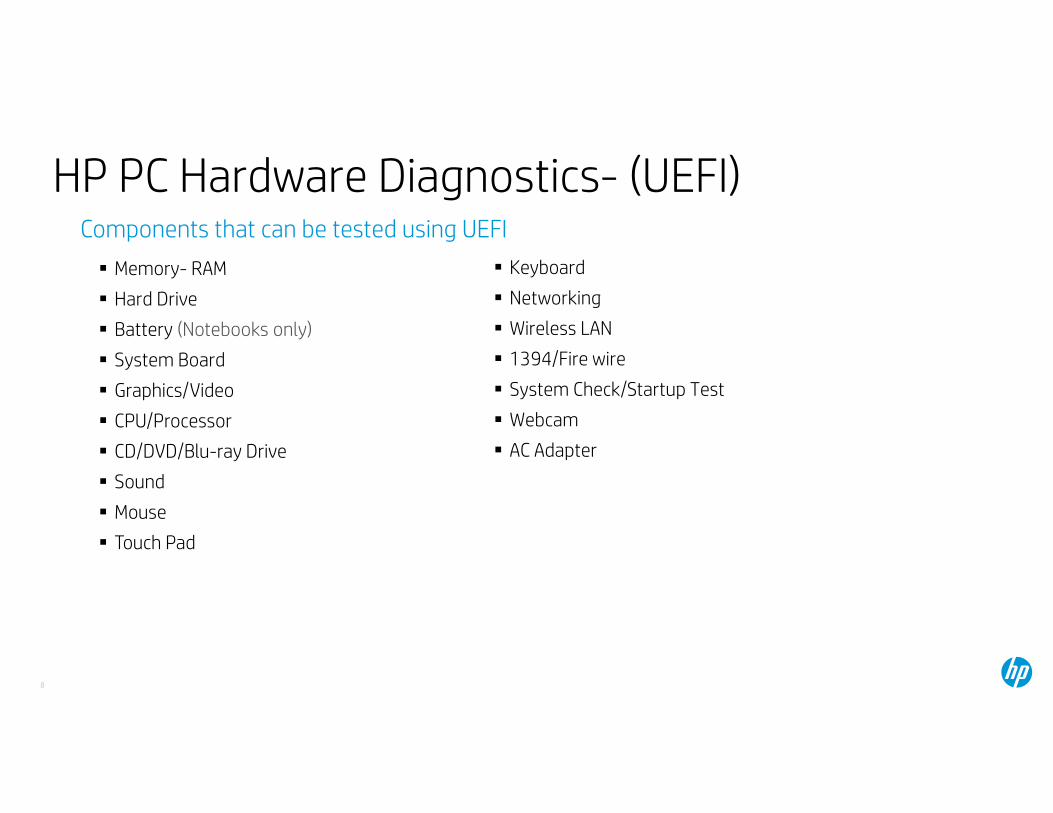
HP PC Hardware Diagnostics- (UEFI)
Memory- RAM
Hard Drive
Battery (Notebooks only)
System Board
Graphics/Video
CPU/Processor
CD/DVD/Blu-ray Drive
Sound
Mouse
Touch Pad
8
Components that can be tested using UEFI
Keyboard
Networking
Wireless LAN
1394/Fire wire
System Check/Startup Test
Webcam
AC Adapter

HP PC Hardware Diagnostics-UEFI ( Obtaining the Utility)HP PC Hardware Diagnostics comes pre-installed in all of the latest (manufactured after 2012) HP Machines (both Desktops & Laptops). However, users can also download the utility from this link
There are 3 locations where HP PC Hardware Diagnostics can run on an HP Computer: It can be run from the Hard Disk of the computer-Full functionality, (it should be installed on the Hard Disk of the computer) It can be run from a Portable USB Flash drive-Full functionality (on which the utility has been downloaded and installed)
It can be run from the Default BIOS – Limited Functionality
Users can launch the Diagnostics by pressing F2 on their computer keyboard during pre-boot. The system will intelligently choose the location to run the diagnostics from, based on device’s availability
9 HP PC Hardware Diagnostics- Full Functionality HP PC Hardware Diagnostics- Limited Functionality
In Limited functionality, only 2 components can be tested Hard Drive Memory(RAM)

Launching HP PC Hardware Diagnostics -UEFI
10
If UEFI Diagnostics is not available on the Hard Drive ( as HP_Tools partition) in My Computer/This PC, it can be downloaded from http://www8.hp.com/us/en/campaigns/hpsupportassistant/pc-diags.html and can be installed on a USB flash drive/ Pen driveNote : The USB flash drive should be formatted to FAT32 file system to install UEFI diagnostics tool
After installation from another PC, the USB media can be plugged into the required machine, restarted and F2 pressed at restart to launch the Diagnostics from USB media
Download and install UEFI on USB media

Step-1 : Downloading the HP PC Hardware Diagnostics Utility
11
Downloading and installing the Utility
Users could visit the link http://www8.hp.com/us/en/campaigns/hpsupportassistant/pc-diags.html
Select the first entry HP PC Hardware Diagnostics, if the PC has an HP UEFI BIOS or was purchased after 2009
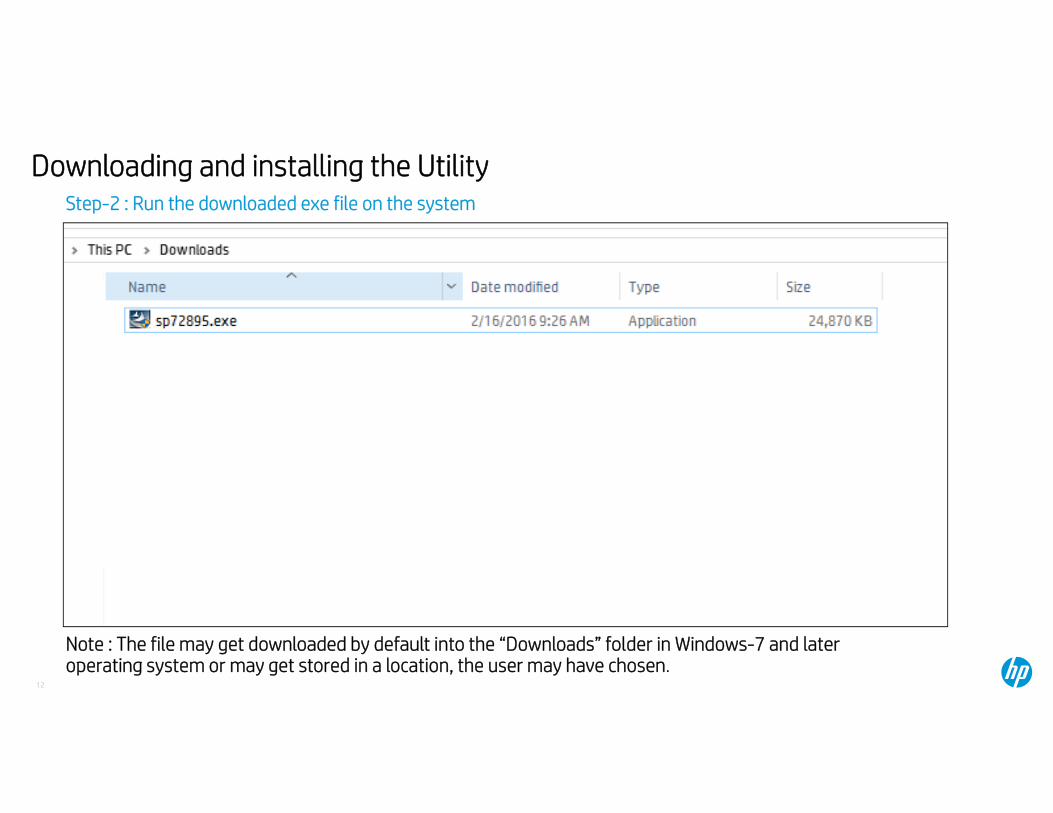
Step-2 : Run the downloaded exe file on the system
12
Note : The file may get downloaded by default into the “Downloads” folder in Windows-7 and later operating system or may get stored in a location, the user may have chosen.
Downloading and installing the Utility

Step-3 : Launching the install wizard
13
Note : Users just need to click on the “Next” button after reading the instructions
Downloading and installing the Utility
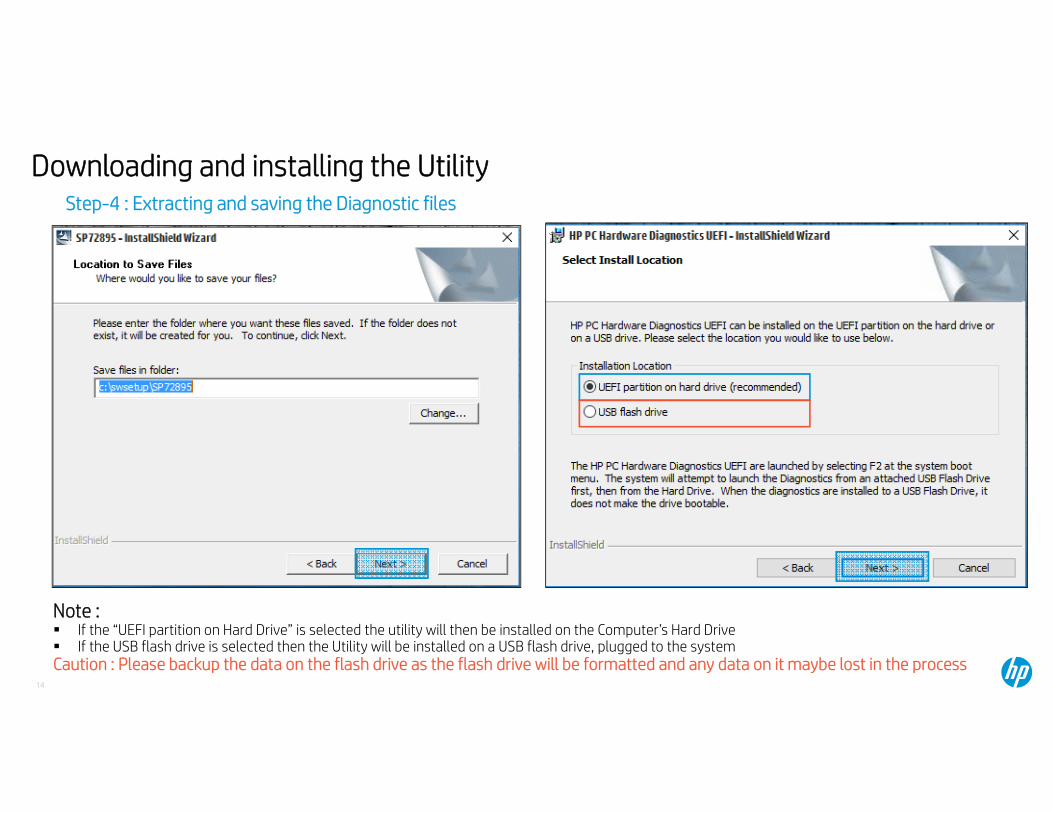
Step-4 : Extracting and saving the Diagnostic files
14
Note : If the “UEFI partition on Hard Drive” is selected the utility will then be installed on the Computer’s Hard Drive If the USB flash drive is selected then the Utility will be installed on a USB flash drive, plugged to the systemCaution : Please backup the data on the flash drive as the flash drive will be formatted and any data on it maybe lost in the process
Downloading and installing the Utility

Step-5 : The HP Tools partition prompt and Commencing installation
15
Note : If the “UEFI partition on Hard Drive” in the previous screen, the utility will create an HP_Tools partition on the Computer’s Hard Drive after user selects
“Yes” and the same would be applicable for the USB flash drive
Caution : If you wish to install the utility on a Flash drive Please backup the data on the flash drive as the flash drive will be formatted and any data on it maybe lost in the process!
Downloading and installing the Utility

Starting the Diagnostics
16
If HP PC Hardware diagnostics was installed on a USB flash drive, users should plug the USB drive into the computer, restart and press “esc” or keep tapping “F2” to launch the diagnostics from the USB
If HP PC Hardware diagnostics was installed on the Computer Hard drive, users just need to restart and press “esc” or keep tapping “F2” to launch the diagnostics from the USB
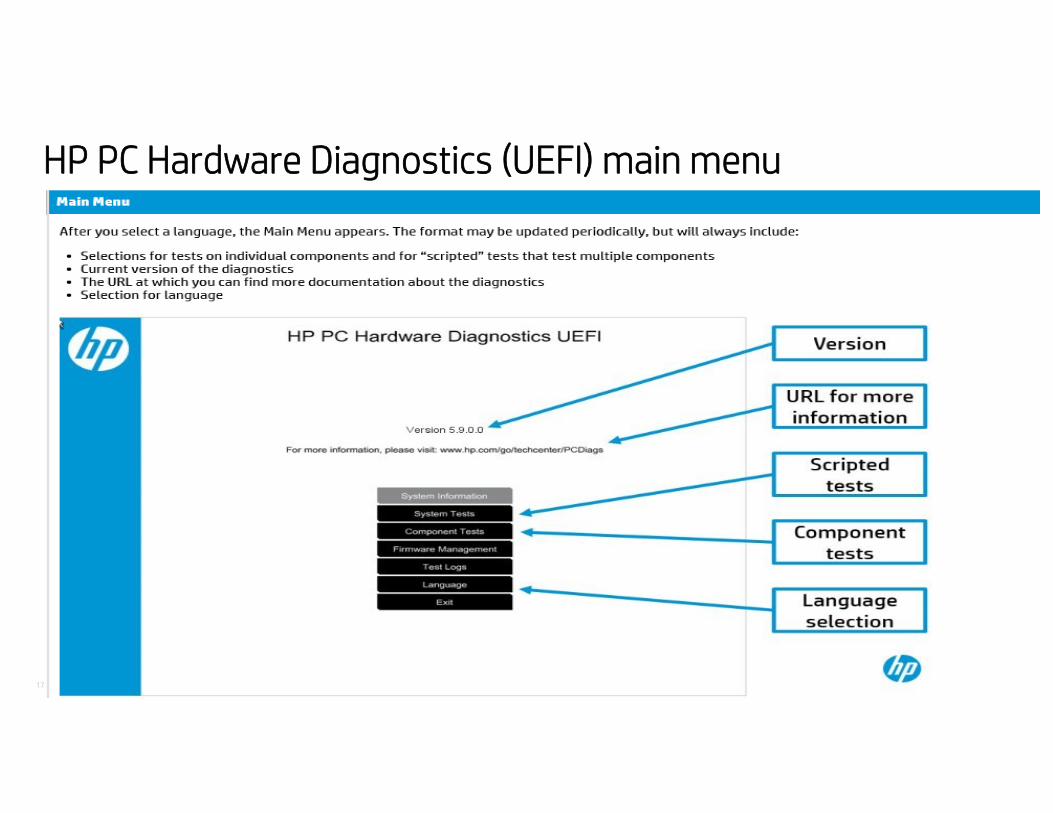
HP PC Hardware Diagnostics (UEFI) main menu
17

Launching an Individual Component Test
18

Select the Component to test from list
19
Component Test
There are various components, that can be tested using the UEFI diagnostics, individual component test screen.
After selecting the component, the on-screen instructions just need to be followed to diagnose the component.
For demo purposes, “performing an Audio test” has been selected in the
simulation here
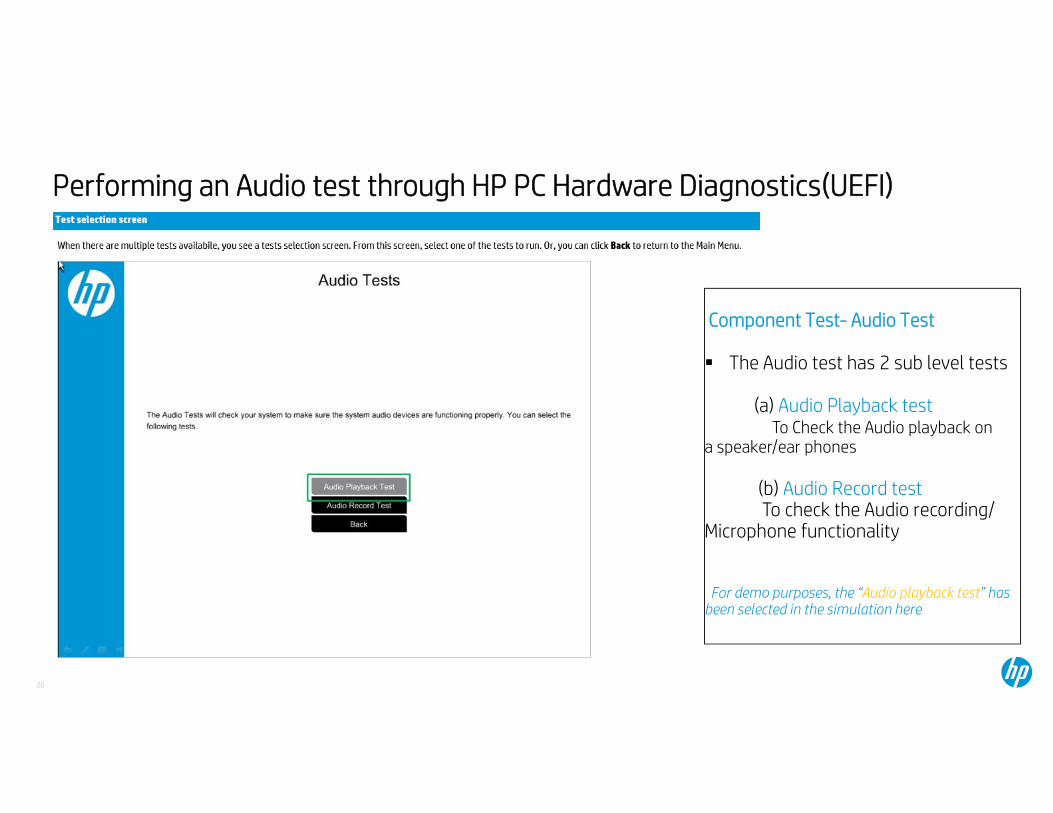
Performing an Audio test through HP PC Hardware Diagnostics(UEFI)
20
Component Test- Audio Test
The Audio test has 2 sub level tests
(a) Audio Playback test To Check the Audio playback on
a speaker/ear phones
(b) Audio Record testTo check the Audio recording/
Microphone functionality
For demo purposes, the “Audio playback test” has been selected in the simulation here
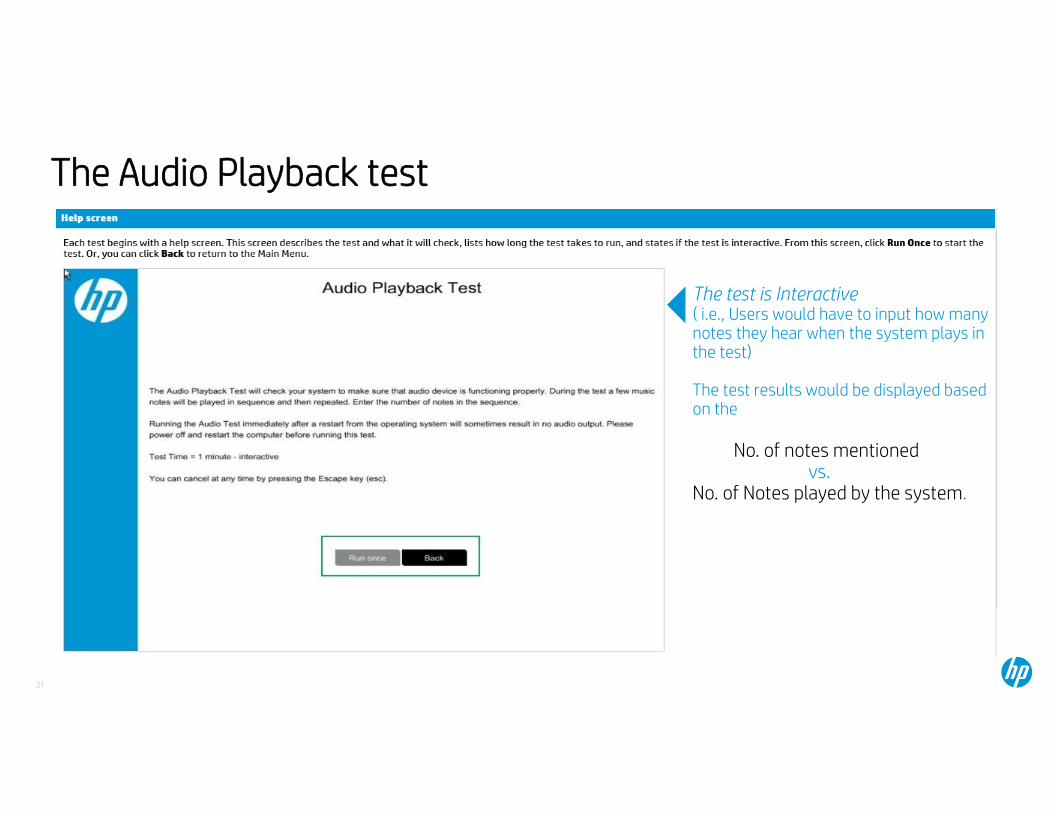
The Audio Playback test
21
The test is Interactive ( i.e., Users would have to input how many notes they hear when the system plays in the test)
The test results would be displayed based on the
No. of notes mentioned vs.
No. of Notes played by the system.

Audio Playback test Result - Pass
22
The test is Interactive ( i.e., Users would have to input how many notes they hear when the system plays in the test)
The test results would be displayed based on the
No. of notes mentioned vs.
No. of Notes played by the system.
In this case the Test result is Pass
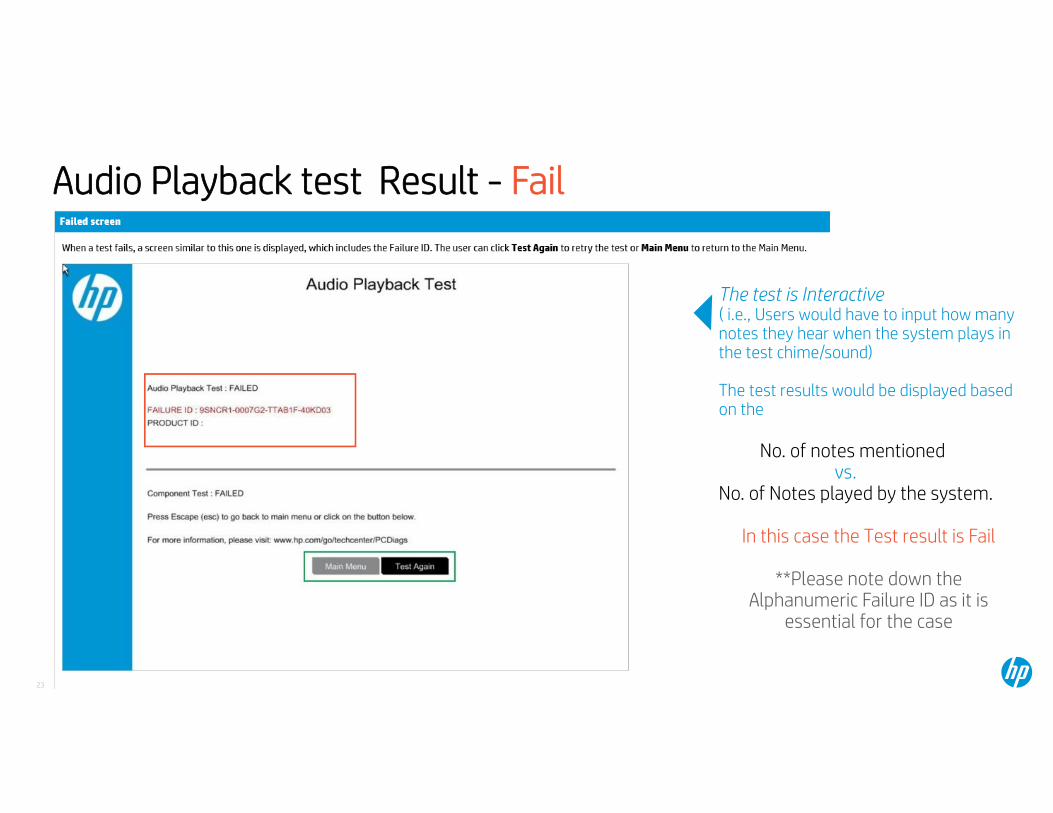
Audio Playback test Result - Fail
23
The test is Interactive ( i.e., Users would have to input how many notes they hear when the system plays in the test chime/sound)
The test results would be displayed based on the
No. of notes mentioned vs.
No. of Notes played by the system.
In this case the Test result is Fail
**Please note down the Alphanumeric Failure ID as it is
essential for the case

Important Information on Failure ID Capture & Diagnostics
24
For additional practice/Demo, users can visit HP Services media library practice on HP PC Hardware Diagnostics ( UEFI) simulators .
Please follow the steps below to log into HP Services media Library
1. Visit www.hp.com/go/SML
2. In the Product Category, select < Laptops and Hybrids> or <Desktops and Workstations>
3. Now, in the Product Family, select <Diagnostic Tools for Notebooks> or <Diagnostics Tools for Desktops>
4. In the Product Series, select <UEFI 5.x> to launch individual component test links in the Bottom.
5. Click on the Component link of choice to view its simulator
Failure messages
In case of a failure in any of the tests, the test will stop immediately and display Error code : “Failed” 24-digit failure ID , (that should be provided to HP for part identification)
Recommended actions, if any
If you see a failure code after the diagnostics, please write it down.
Otherwise, HP support engineers may want you to go through the diagnostic process again to obtain the failure ID
The HP failure ID contains 4 fields of Six alpha-numeric characters each as XXXXX-XXXXXX-XXXXXX-XXXXXX,
(where ‘X’ is an alpha-numeric character)NOTE: The Failure ID does not indicate if the system is under warranty.
HP Support Engineer can assist you with that information when you contact HP

UEFI – Frequently Asked Questions1.When "F2" is pressed during power-on, I only see 2 tests ( Hard drive & Memory). I don’t see the UEFI diagnostics mentioned here?Ans: This could be because “HP PC Hardware-UEFI diagnostics" is not installed on the computer. Please check in "My computer/This PC"
for an HP_tools partition apart from C: . If not available, then please download it from this link and install. (for instructions Refer here)
2.Which most recommended location for UEFI diagnostics tool to be installed ?
Ans: If you have only one PC, then the PC’s Hard drive is recommended. However for multiple PC’s it would be better to have UEFI installed on the USB Pen drive.
3. If I choose to install the diagnostics on a Flash drive, what is the minimum size of the pen drive required?
Ans: The minimum size of a USB Flash drive should be 4 GB or more.
NOTE : The flash drive should not have any content as it would be formatted while installing the diagnostics. (sometimes, user may have to formatted the flash drive to a FAT32 file system specifically)
4. Would I be able to perform UEFI diagnostics on a system without Hard Drive?
Ans: Yes, you could download the UEFI diagnostics into a portable USB flash drive, plug and restart the system into the diagnostics by pressing “F2” key on the keyboard
5. How could I run component level diagnostics on Older HP machines that doesn’t have an HP UEFI BIOS ?
Ans: You could download the “Vision Hardware Diagnostics” tool from this link and burn it on a CD/DVD to perform diagnostics on older HP machines.
6. My IT environment, restricts installing any applications or programs and we use our IT provided Operating system. How do I install HP PC Hardware Diagnostics?
Ans: You could download the “HP PC Hardware diagnostics” utility on a USB flash drive, from another computer and plug it to this computer
to launch the diagnostics
7. Which are the scenarios, in which I may not be able to run the HP PC Hardware Diagnostics utility?
Ans: HP PC Hardware Diagnostics can be run in most of the issue scenarios exception when there is no display/power or during a POST issue
25

© Copyright 2015 Hewlett-Packard Development Company, L.P. The information contained herein is subject to change without notice. HP Confidential – For training purposes only.
HP UEFI BIOS Recovery (USB 3 in 1)
HP UEFI BIOS Recovery
If the BIOS on an HP Notebook or Desktop, becomes corrupted, such as from a failed BIOS upgrade or damage from a virus, the computer might show any the following symptoms, which would then require a BIOS recovery
27
The computer stops at a black or blank screen and it will not even enter any of the Pre-Boot Options, such as: the BIOS Setup Utility, Hardware Diagnostic Tools, System Recovery screens, etc
The computer does not boot and the Caps Lock or Num Lock LED blinks twice or the computer emits beep codes.
The computer turns on, but doesn’t display anything (Example: The fan might spin, but there is no video on the internal display, external monitor or any additional displays, and it does not boot or display anything).
The computer displays the error message BIOS APPLICATION ERROR 501
Many HP Notebook & Desktop computers have an HP BIOS Restore tool that might be able to recover the BIOS and restore basic functionality. The Recovery happens in 2 ways
Automatic Recovery : (The system will detect an issue with BIOS and try to remediate itself before proceeding)
Manual Recovery : If the Automatic recovery fails, users could then initiate the manual recovery through a key combination and if it fails, can download a Recovery Key ( USB 3 in 1 key) from here and attempt a recovery of BIOS
HP BIOS Recovery ( Automatic & Manual)
28
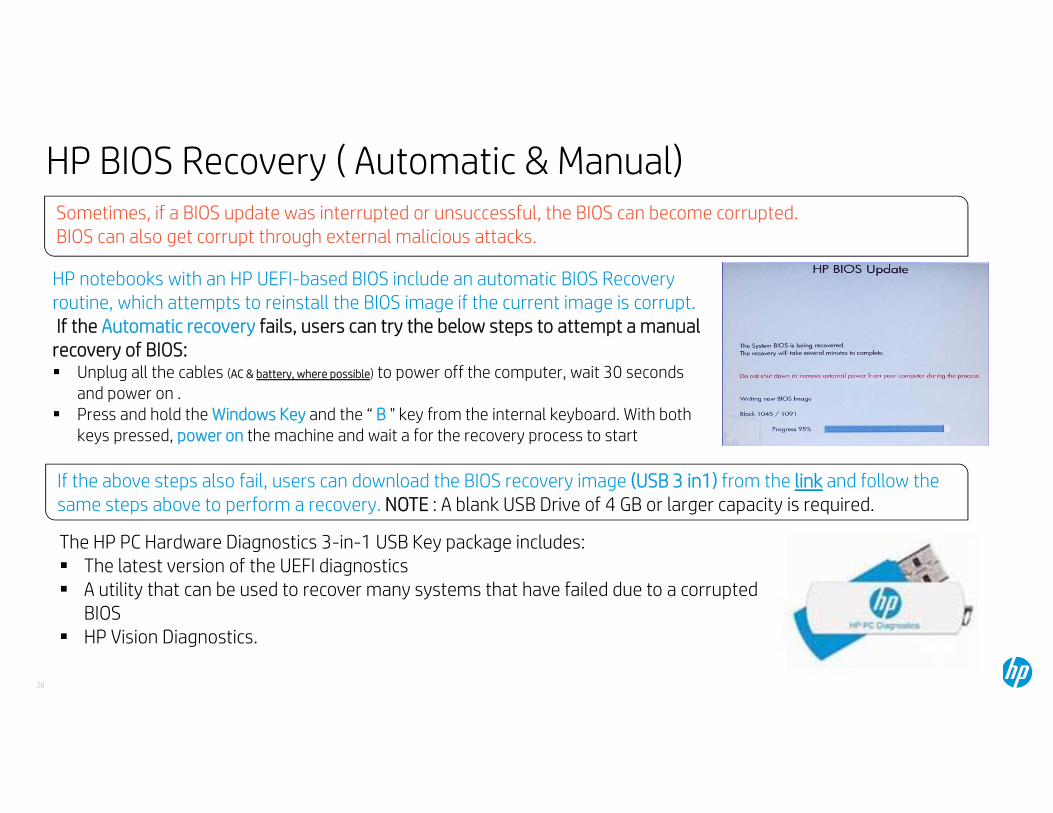
HP notebooks with an HP UEFI-based BIOS include an automatic BIOS Recovery routine, which attempts to reinstall the BIOS image if the current image is corrupt. If the Automatic recovery fails, users can try the below steps to attempt a manual recovery of BIOS: Unplug all the cables (AC & battery, where possible) to power off the computer, wait 30 seconds
and power on . Press and hold the Windows Key and the “ B " key from the internal keyboard. With both
keys pressed, power on the machine and wait a for the recovery process to start
Sometimes, if a BIOS update was interrupted or unsuccessful, the BIOS can become corrupted.BIOS can also get corrupt through external malicious attacks.
If the above steps also fail, users can download the BIOS recovery image (USB 3 in1) from the link and follow the same steps above to perform a recovery. NOTE : A blank USB Drive of 4 GB or larger capacity is required.
The HP PC Hardware Diagnostics 3-in-1 USB Key package includes: The latest version of the UEFI diagnostics A utility that can be used to recover many systems that have failed due to a corrupted
BIOS HP Vision Diagnostics.
Step-1 : Download the USB 3 in 1 Key from another Computer
29
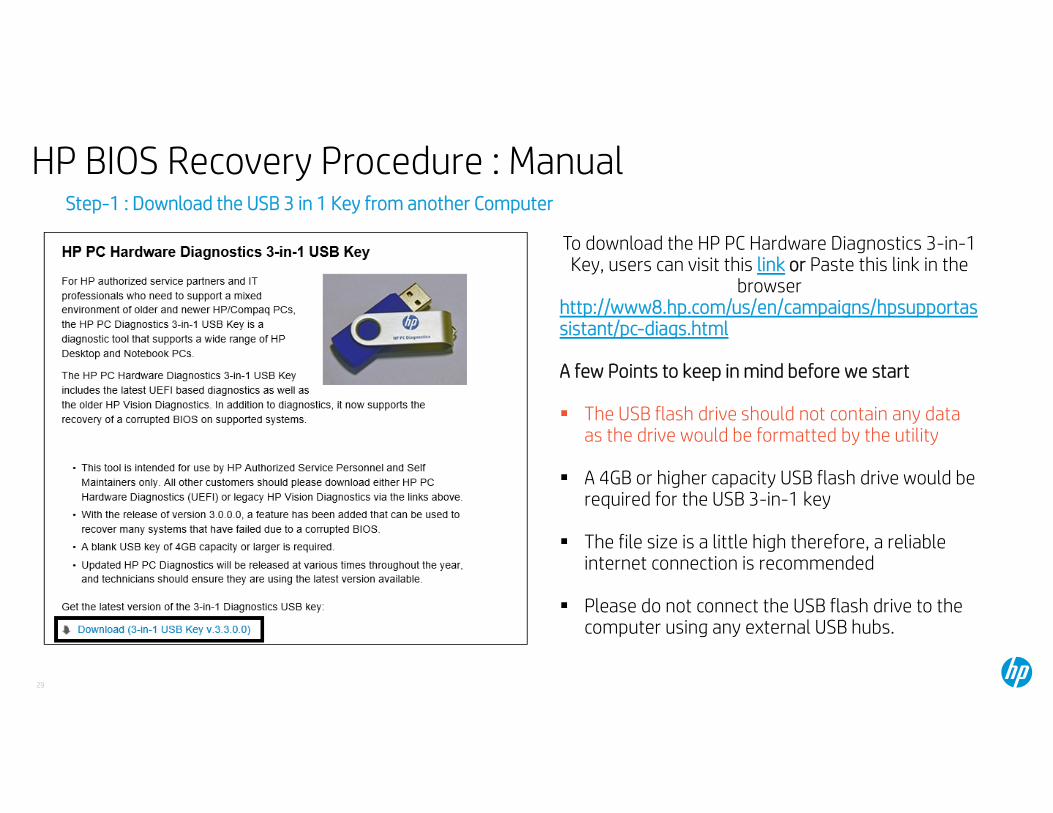
HP BIOS Recovery Procedure : Manual
To download the HP PC Hardware Diagnostics 3-in-1 Key, users can visit this link or Paste this link in the
browserhttp://www8.hp.com/us/en/campaigns/hpsupportassistant/pc-diags.html
A few Points to keep in mind before we start
The USB flash drive should not contain any data as the drive would be formatted by the utility
A 4GB or higher capacity USB flash drive would be required for the USB 3-in-1 key
The file size is a little high therefore, a reliable internet connection is recommended
Please do not connect the USB flash drive to the computer using any external USB hubs.
30
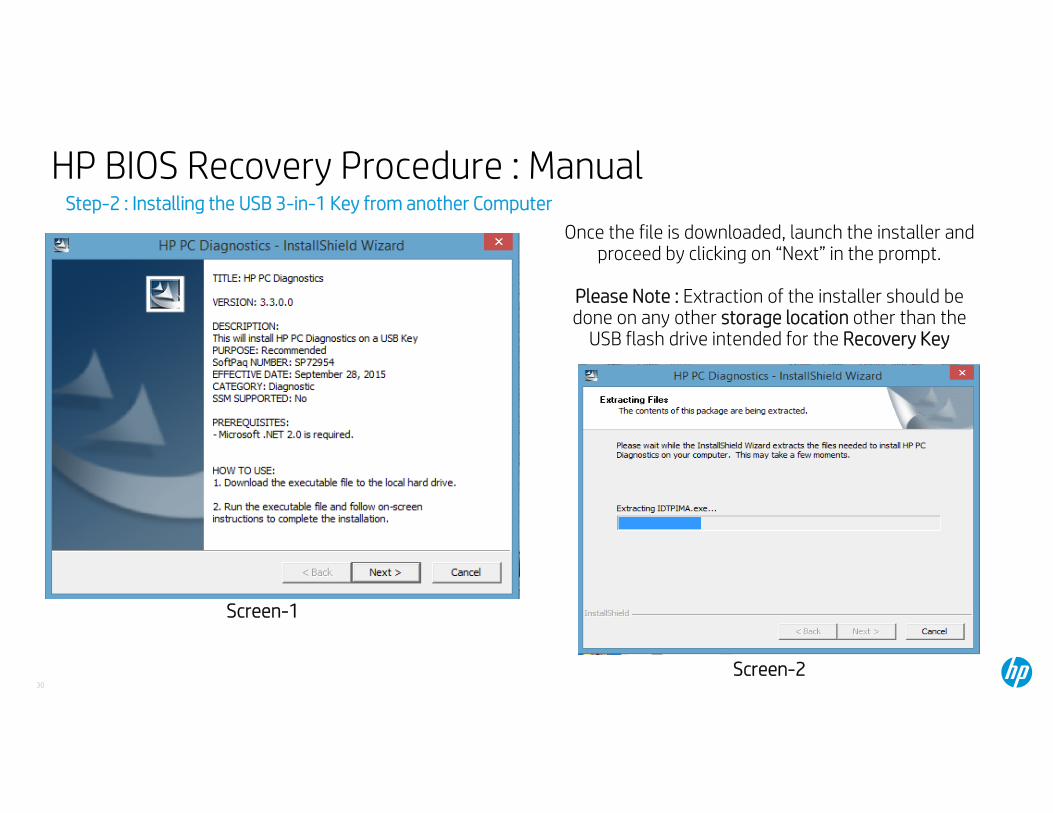
Step-2 : Installing the USB 3-in-1 Key from another Computer
HP BIOS Recovery Procedure : Manual
Once the file is downloaded, launch the installer and proceed by clicking on “Next” in the prompt.
Please Note : Extraction of the installer should be done on any other storage location other than the
USB flash drive intended for the Recovery Key
Screen-1
Screen-2

31
Step-3 : Extracting, formatting and Preparing the USB Key
HP BIOS Recovery Procedure : Manual
Various groups of files will be extracted to the root location of the storage space. These files are instrumental in formatting & preparing the USB Recovery Key. Please do not interrupt the
process

32
Step-4 : Formatting the identified USB flash drive
HP BIOS Recovery Procedure : Manual
Upon successful extraction of all the files, the user will be prompted to enter the drive letter for the USB Key to be formatted.
Users could view the drive letter in “My computer/computer/This PC” section
NOTE : Before starting the step, please remove all other USB storage devices from the computer

33
Step-5 : Insert the USB 3-in-1 Key into the Computer that needs its BIOS Recovered
HP BIOS Recovery Procedure : Manual
Stage-2
Stage-1
The system will start the recovery process
On some Notebooks and Desktop products, the system should boot to the BIOS recovery write and verification progress screens,
followed by a reboot and a message that BIOS recovery was successful (code 500 would be displayed to indicate Recovery).
On a few Business Notebooks, there may be no initial screen output; recovery operations will be indicated by blinking keyboard
LEDs ([Caps Lock] and/or [Num Lock]).
Please follow these instructions carefully to attempt a manual BIOS recovery on HP Desktops and Notebooks only
Instructions : (Let’s do this in stages to avoid confusions!!!!)
1.Power down the failed system.2. Hold down any one of the following two key combinations:
The [Windows] and [B] keys or All 4 arrow keys (up, down, right, left) together
3.While holding down one of the key combinations, power on the system.
4.Release the keys approximately three - five seconds after powering up the system.
POINTS TO KEEP IN MIND : Please plug the USB key
directly into the USB port of the computer.
Do not plug the Key into any external USB hubs connected to the PC
This USB KEY is for HP Laptops and Desktops only!
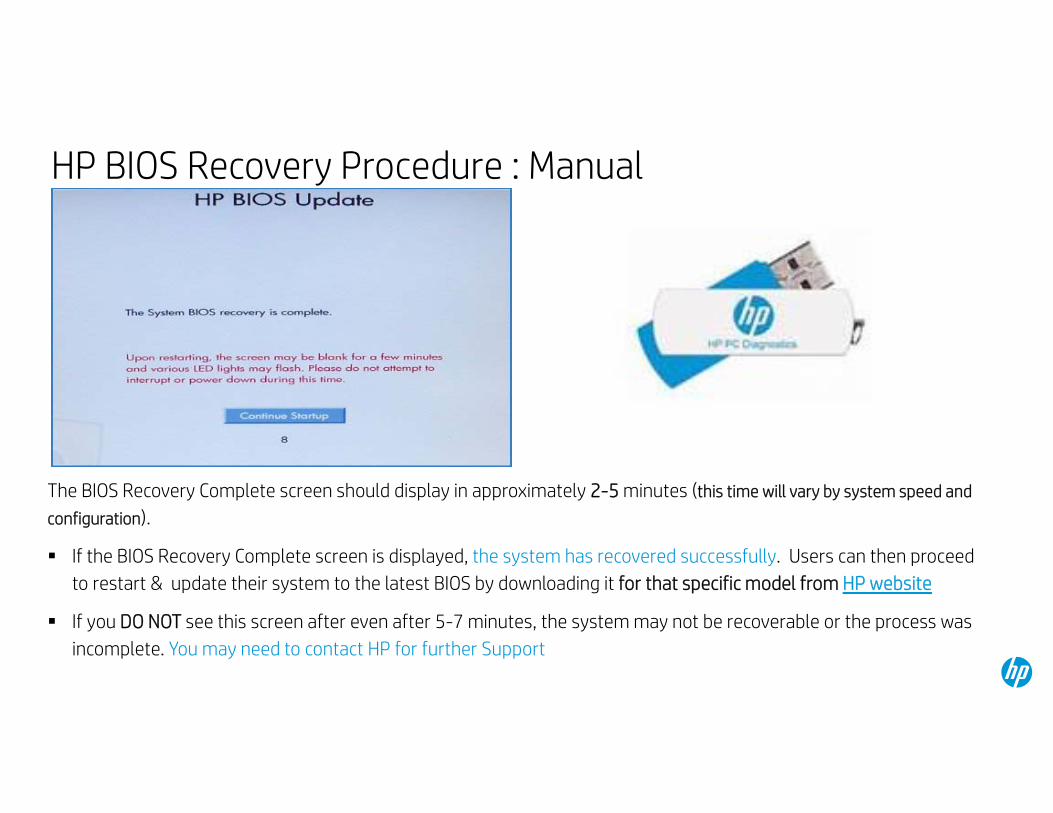
HP BIOS Recovery Procedure : Manual
The BIOS Recovery Complete screen should display in approximately 2-5 minutes (this time will vary by system speed and
configuration).
If the BIOS Recovery Complete screen is displayed, the system has recovered successfully. Users can then proceed
to restart & update their system to the latest BIOS by downloading it for that specific model from HP website
If you DO NOT see this screen after even after 5-7 minutes, the system may not be recoverable or the process was
incomplete. You may need to contact HP for further Support

© Copyright 2015 Hewlett-Packard Development Company, L.P. The information contained herein is subject to change without notice. HP Confidential – For training purposes only.
HP Support Assistant (HPSA)
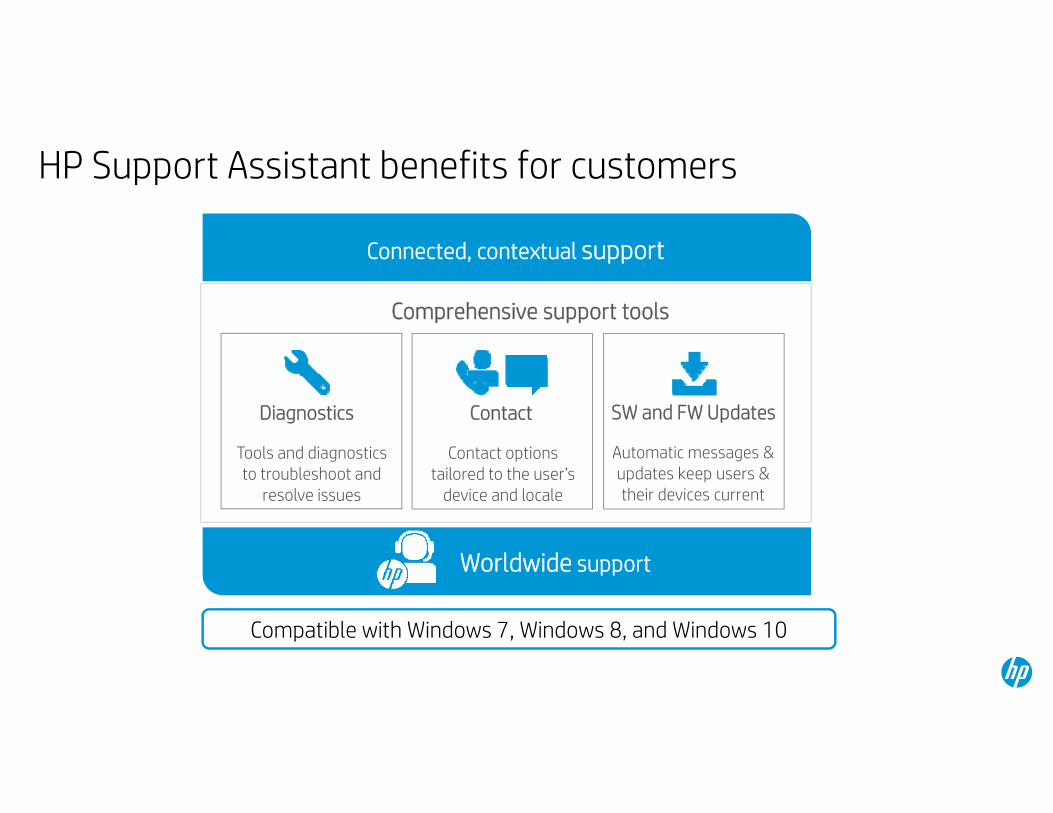
HP Support Assistant benefits for customers
Connected, contextual support
Comprehensive support tools
Worldwide support
Diagnostics Contact SW and FW Updates
Tools and diagnostics to troubleshoot and
resolve issues
Contact options tailored to the user’s
device and locale
Automatic messages & updates keep users & their devices current
Compatible with Windows 7, Windows 8, and Windows 10

Starting HPSA: Windows 8 or Windows 10

HP Support Assistant: The Welcome screen
In the welcome screen, users could configure how to install/receive software or driver updates from HP
Users can un-check the “Show a welcome screen when I open HP Support Assistant” to prevent this pop-up from appearing

The “My devices” tab
HP Support Assistant 8.0 now features a Single tab vs. Tile windows in the previous version.
The “My Devices” tab shows a summary of all the connected HP devices along with the current PC information.
The product’s serial number and product number is already listed here
Users can view the Warranty end date and the remaining warranty time on the product
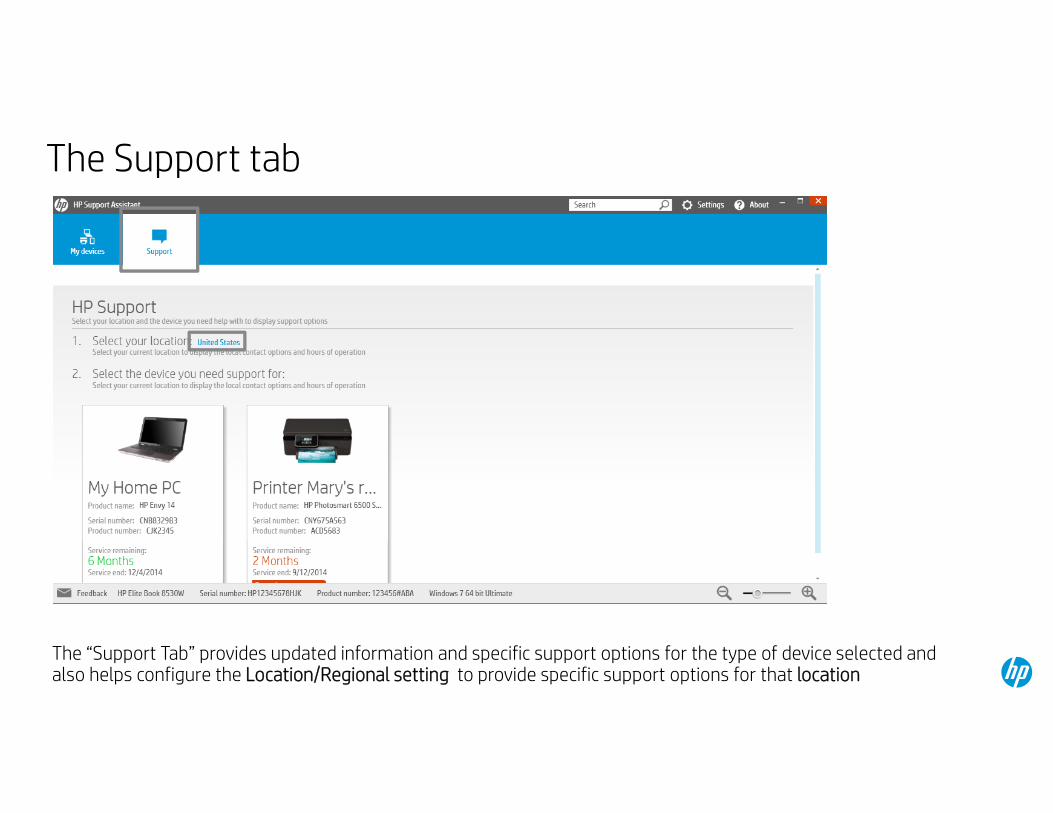
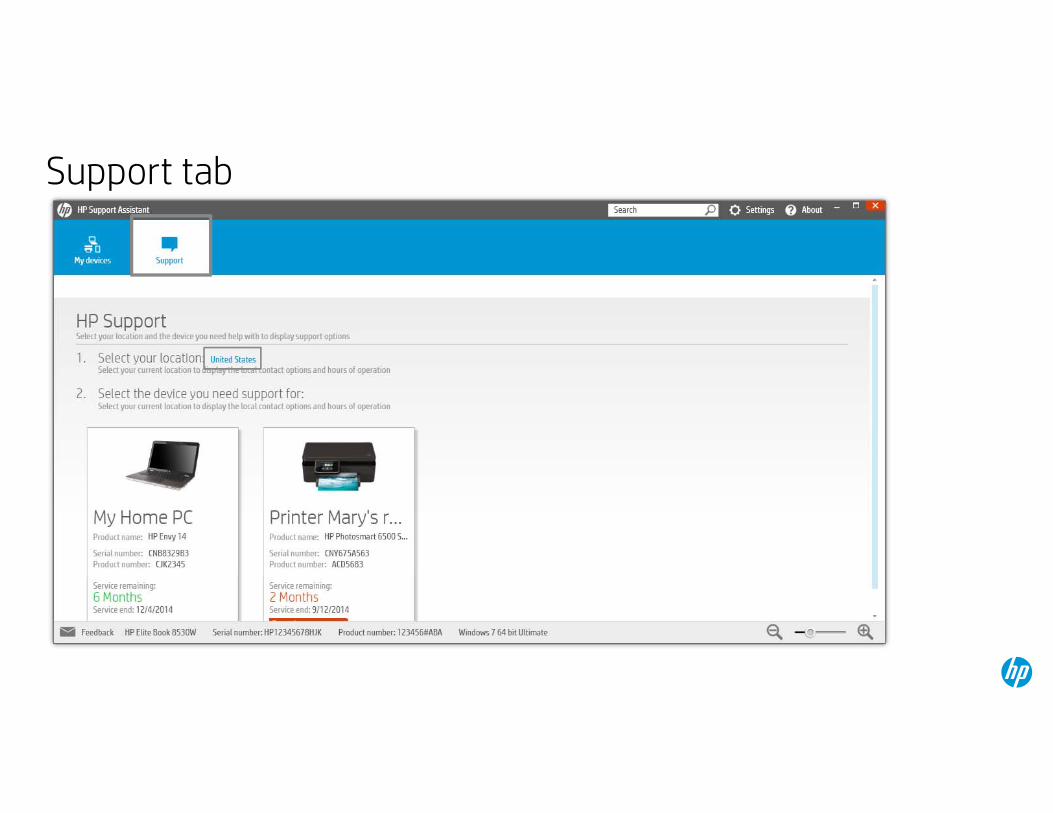
The Support tab
The “Support Tab” provides updated information and specific support options for the type of device selected and also helps configure the Location/Regional setting to provide specific support options for that location
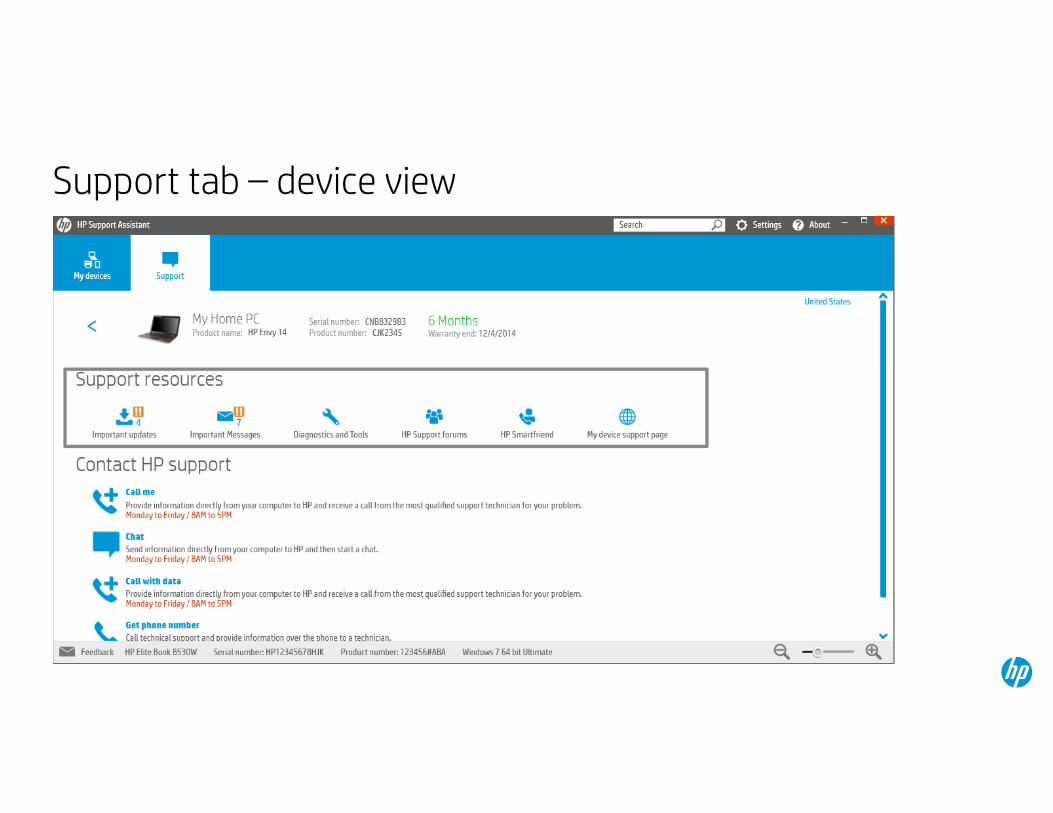
Support tab – device view

© Copyright 2015 Hewlett-Packard Development Company, L.P. The information contained herein is subject to change without notice. HP Confidential – For training purposes only.
Tab Navigations
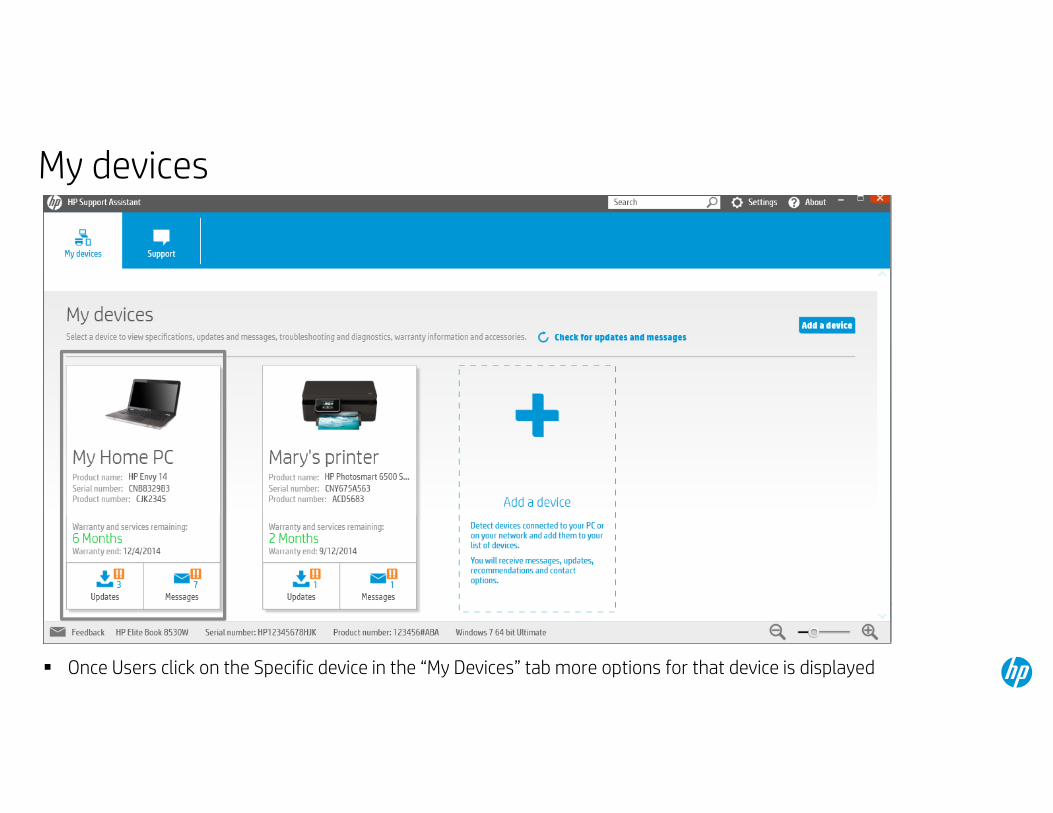
My devices
Once Users click on the Specific device in the “My Devices” tab more options for that device is displayed
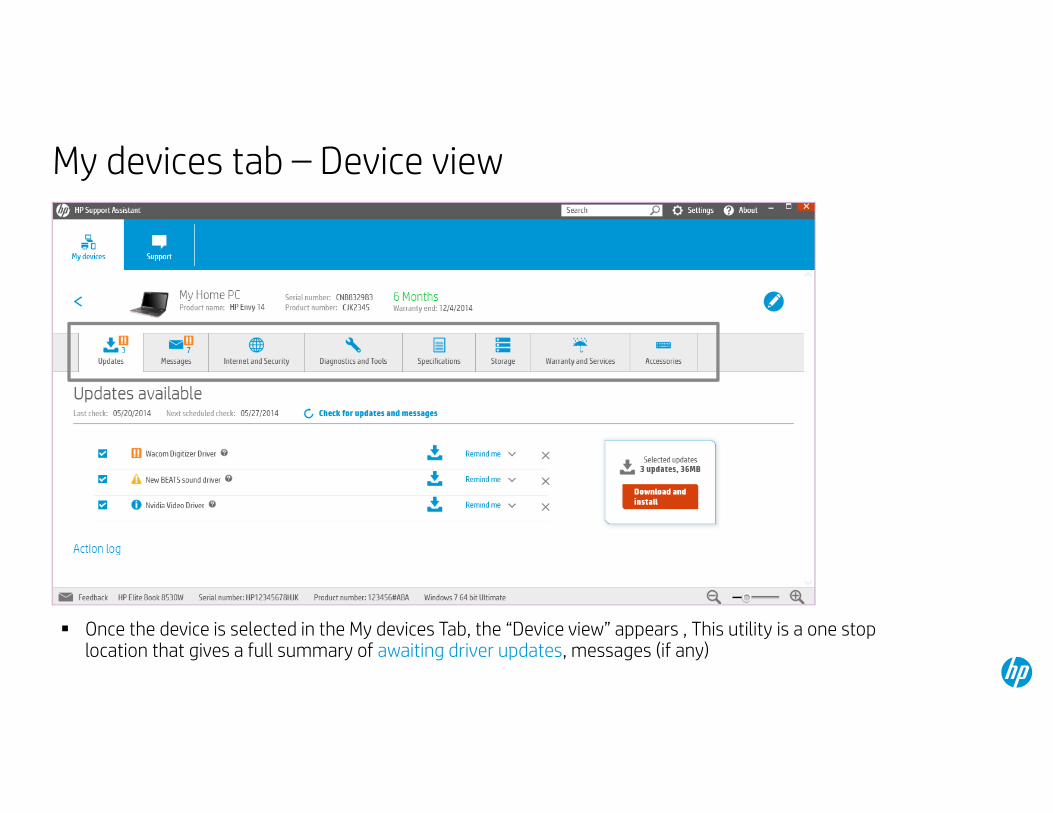
My devices tab – Device view
Once the device is selected in the My devices Tab, the “Device view” appears , This utility is a one stop location that gives a full summary of awaiting driver updates, messages (if any)
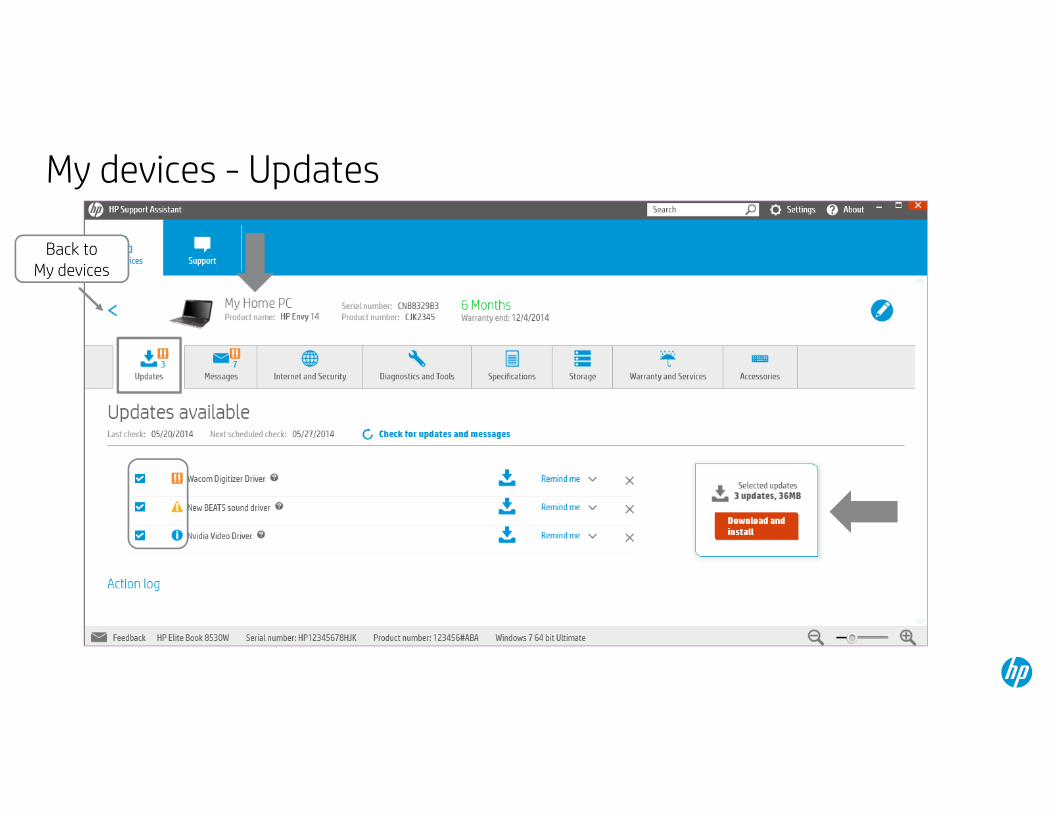
My devices - Updates
Back to My devices
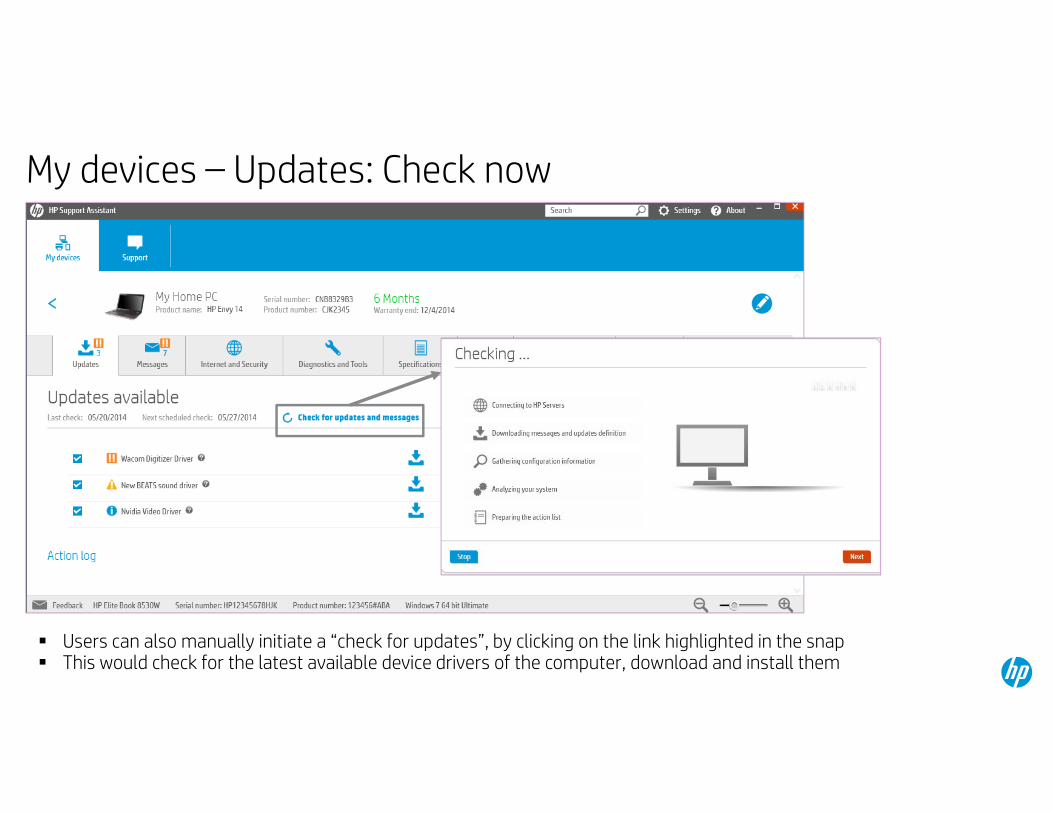
My devices – Updates: Check now
Users can also manually initiate a “check for updates”, by clicking on the link highlighted in the snap This would check for the latest available device drivers of the computer, download and install them
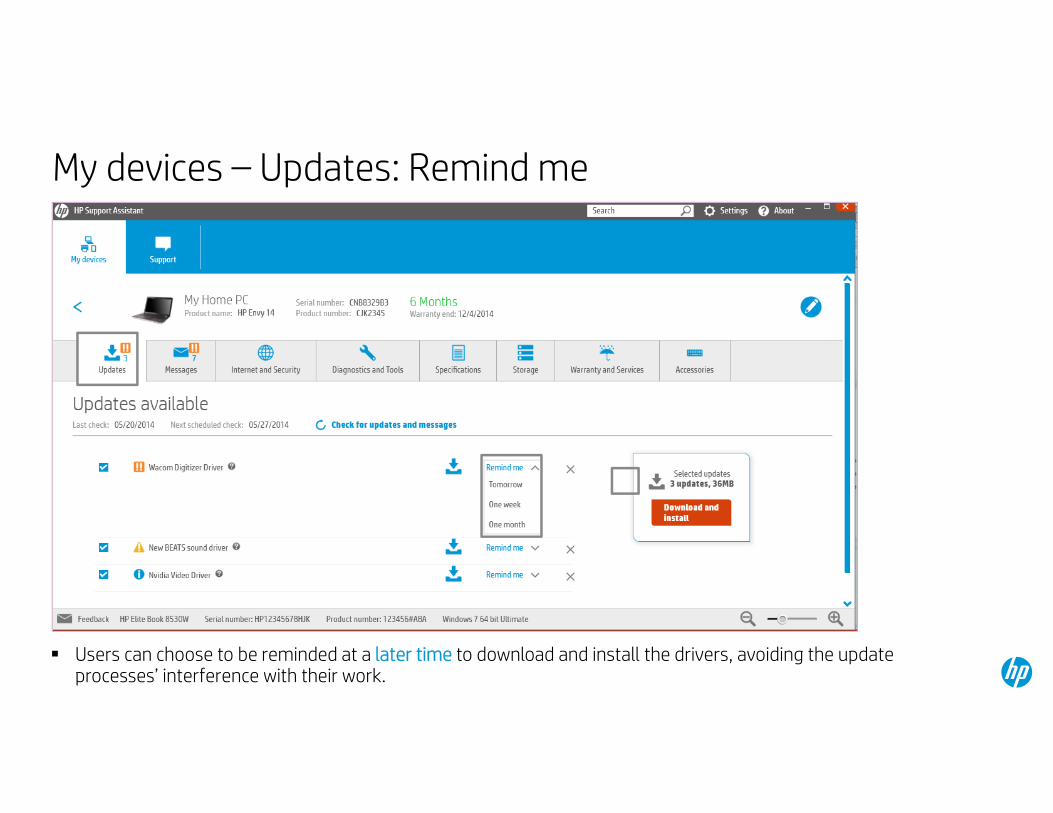
My devices – Updates: Remind me
Users can choose to be reminded at a later time to download and install the drivers, avoiding the update processes’ interference with their work.

My devices – Updates: Action log
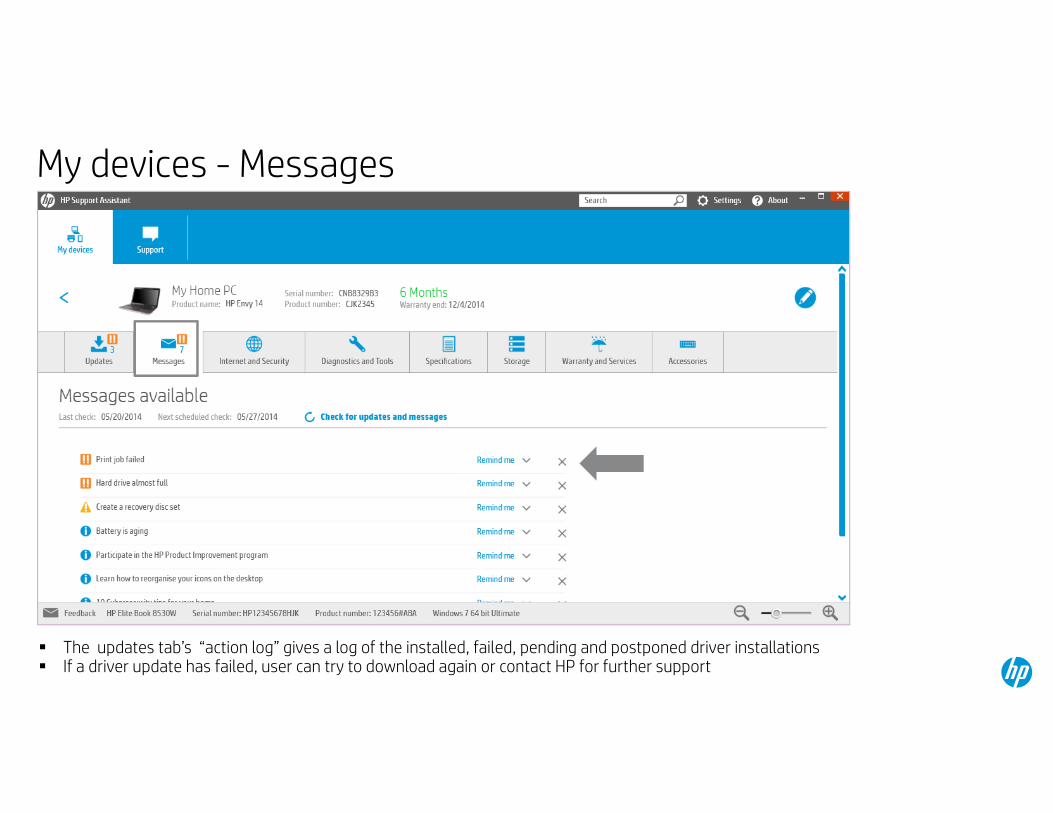
The updates tab’s “action log” gives a log of the installed, failed, pending and postponed driver installations If a driver update has failed, user can try to download again or contact HP for further support
My devices - Messages
The updates tab’s “action log” gives a log of the installed, failed, pending and postponed driver installations If a driver update has failed, user can try to download again or contact HP for further support

My devices – Messages: actions
In the Messages, users would be able to see the proactive warnings, information and remedial actions if anyFor illustration: A “ Battery is aging” and “Hard drive is almost full “ warnings have been displayed

My devices – Internet and Security
In the internet and security tab displays the security settings of the system and also provides option to easy access necessary firewall settings in one location
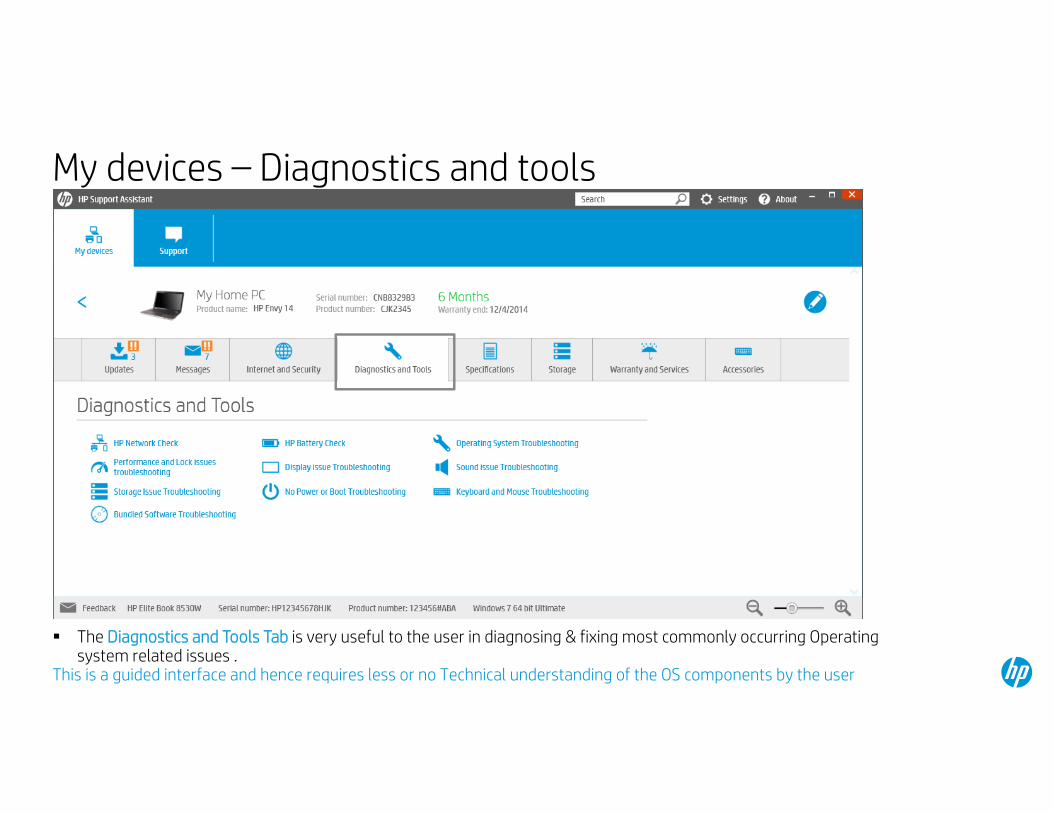
My devices – Diagnostics and tools
The Diagnostics and Tools Tab is very useful to the user in diagnosing & fixing most commonly occurring Operating system related issues .
This is a guided interface and hence requires less or no Technical understanding of the OS components by the user
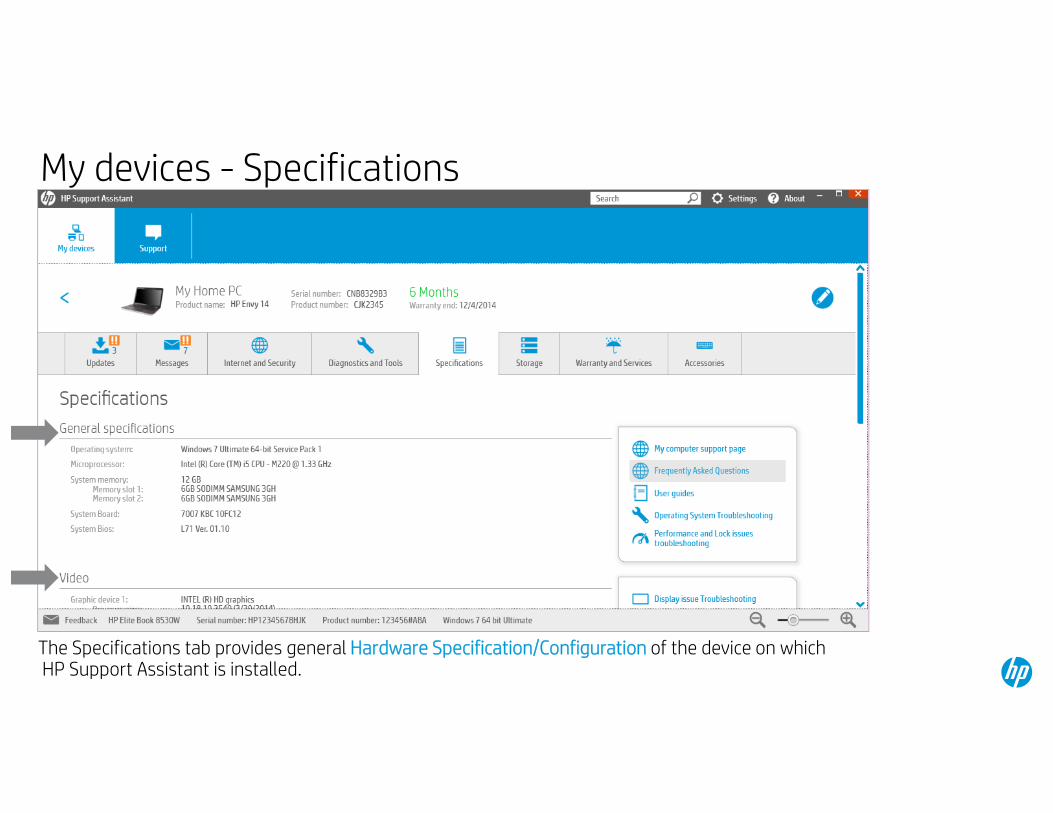
My devices - Specifications
The Specifications tab provides general Hardware Specification/Configuration of the device on whichHP Support Assistant is installed.

My devices - Storage
The Storage tab displays information about the installed Storage devices, both (Hard Drive and SSD).Importantly, this tab also shows the status of the Hard Drive health in the SMART Status, providing for an early warning
mechanism in the uneventful case of a Hard Drive failure
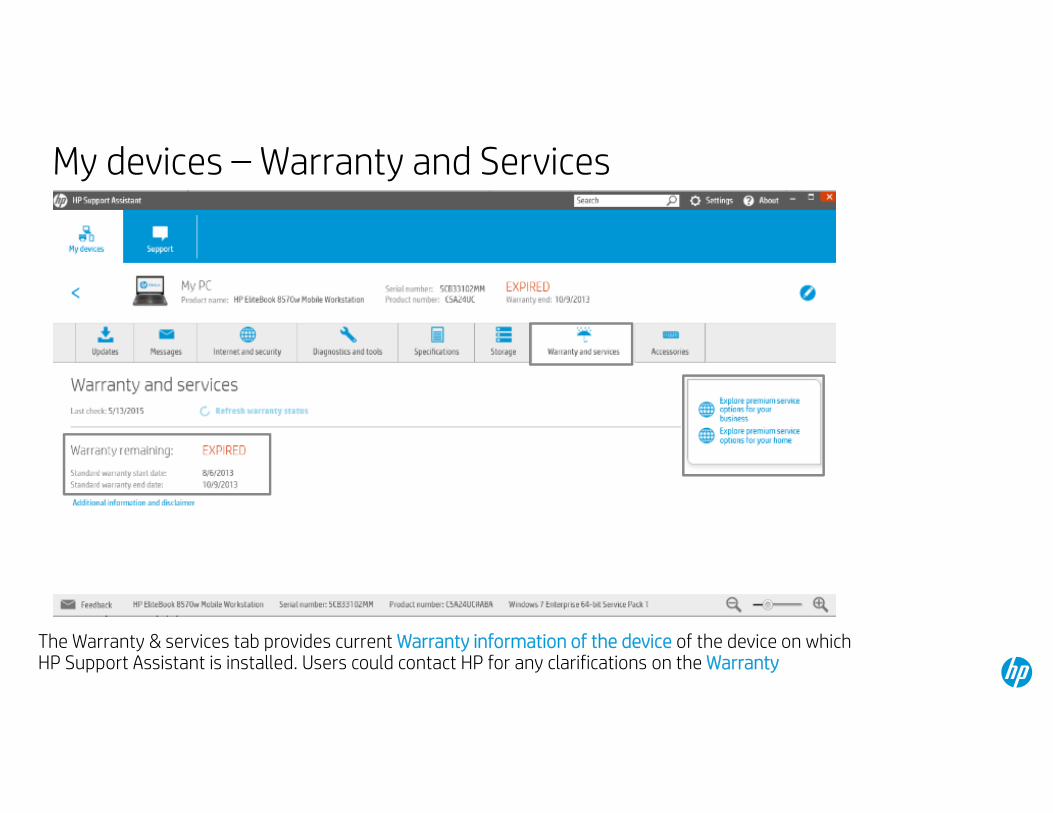
My devices – Warranty and Services
The Warranty & services tab provides current Warranty information of the device of the device on which HP Support Assistant is installed. Users could contact HP for any clarifications on the Warranty

My devices - Accessories
The Accessories tab indicates accessories connected to the device like Mouse, keyboard, etc.

My devices - printer
With HP Support Assistant 8.0 users can manage a connected HP Printer/Device without following a separate Utility as it would show up in the “My Devices” tab. If it doesn’t, users can manually “Add a device” too.

My devices: Diagnostics and tools (printer)
A quick look into the printer’s management interface, within HP Support Assistant. Using HP Support Assistant, users can perform :Printer driver updates ; View printer error messages; Manage Supplies/Cartridges; Diagnose/Troubleshoot commonly occurring issues; check for warranty status & lot more

My devices: Supplies (printer)
Using supplies tab , users can order Ink and Media without going through hassles of navigating into too many websites

© Copyright 2015 Hewlett-Packard Development Company, L.P. The information contained herein is subject to change without notice. HP Confidential – For training purposes only.
Add a device

My devices – Add a device
The Add a Device button helps users Add an HP device like a printer or scanner to the computer for easier and converged management of connected devices.

Add a Device : Detect your device
Once the “Add a Device “ button is clicked, HP Support Assistant will first automatically attempt to detect HP devices and try and add them. The user would be required to click on the “Detect my device” button to initiate this process.
However, if the Utility doesn’t detect the device, users can manually add a device too .

Add a Device: Searching for devices
Users can select from the list of devices identified and proceed to add it as shown in the snaps above!

Name your device & Scan for updates or messages
Once the user chooses a name the device, if the “Scan for updates and messages” is clicked, HP Support Assistant checks online for available latest drivers and updates the device accordingly .
Users can however, click on “Finish without scanning” and perform this activity later.
The “Add another device” link can be clicked, if user wishes to add more devices
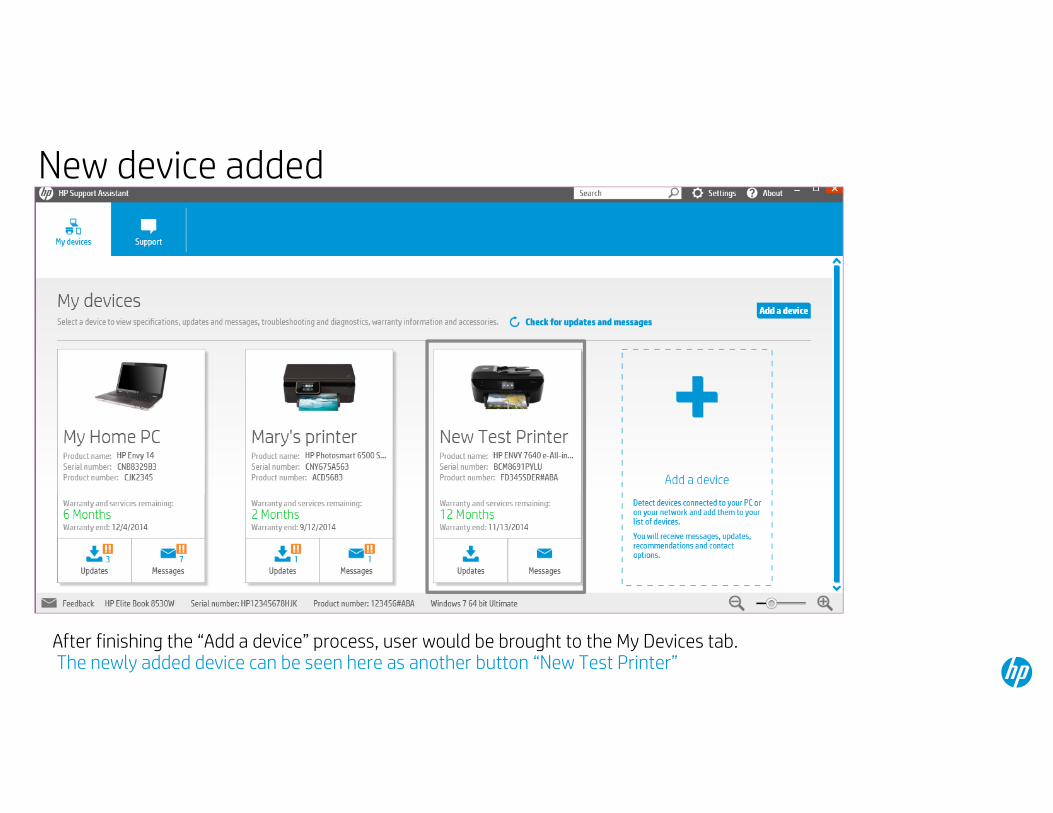
New device added
After finishing the “Add a device” process, user would be brought to the My Devices tab. The newly added device can be seen here as another button “New Test Printer”

© Copyright 2015 Hewlett-Packard Development Company, L.P. The information contained herein is subject to change without notice. HP Confidential – For training purposes only.
Support tab
Support tab
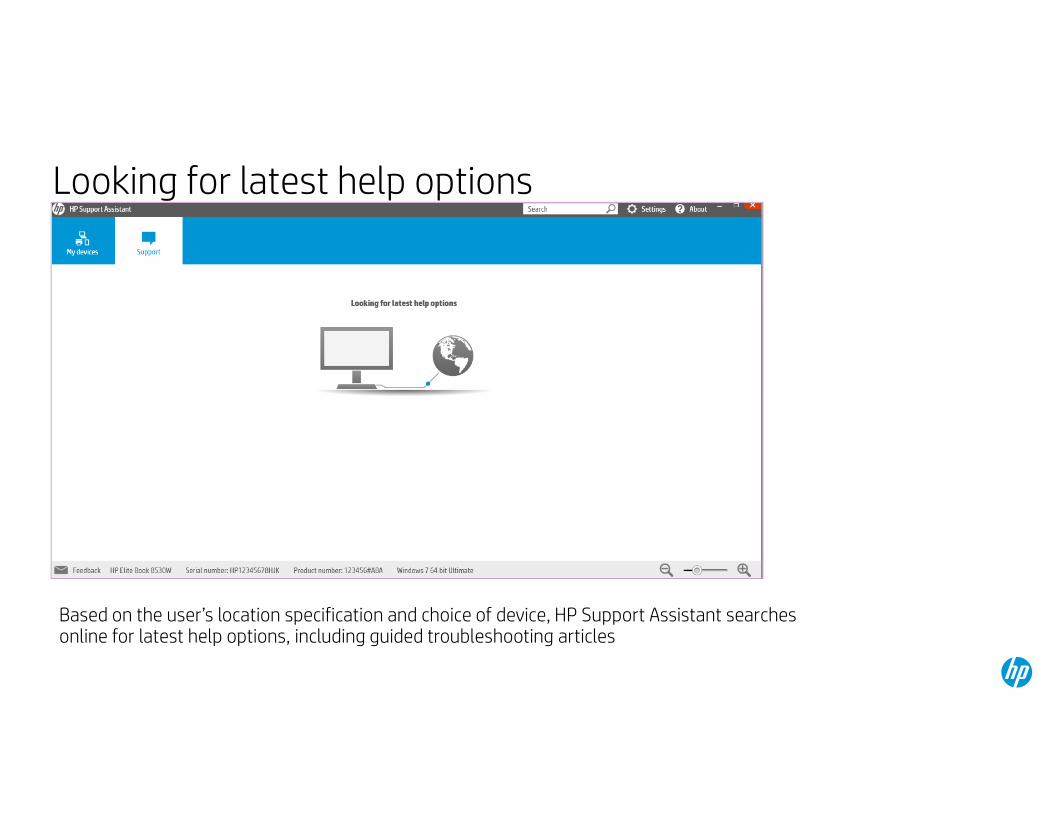
Looking for latest help options
Based on the user’s location specification and choice of device, HP Support Assistant searches online for latest help options, including guided troubleshooting articles
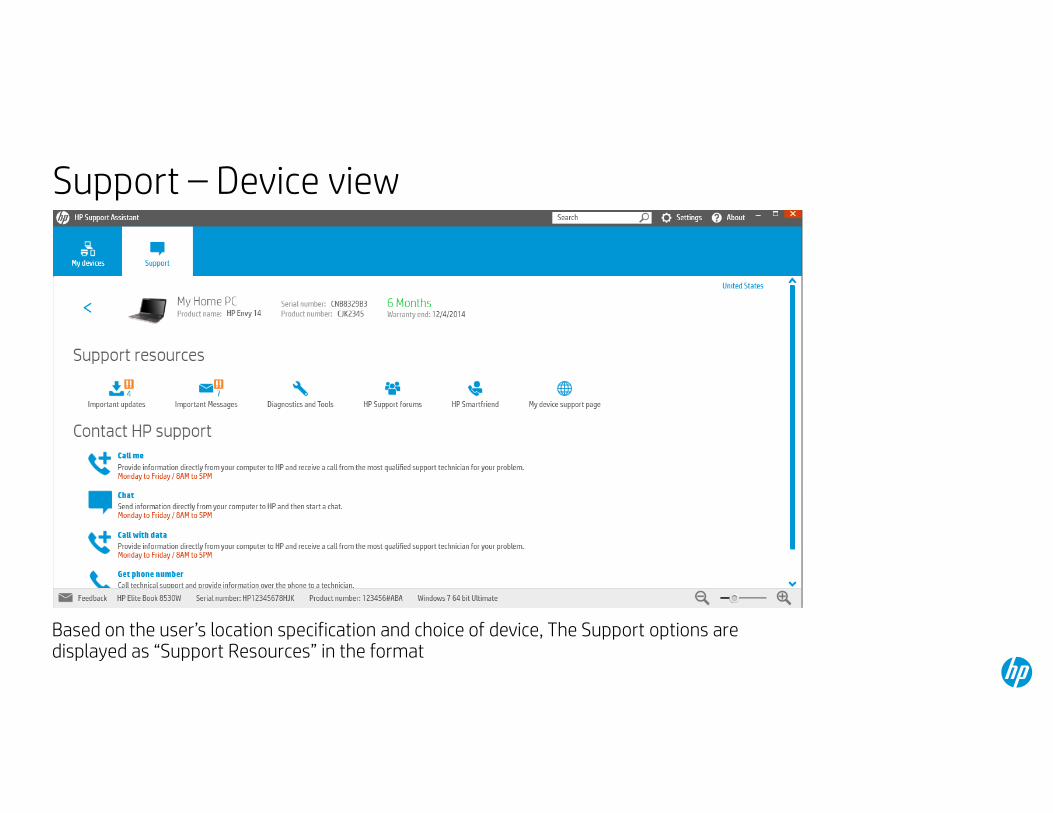
Support – Device view
Based on the user’s location specification and choice of device, The Support options are displayed as “Support Resources” in the format

© Copyright 2015 Hewlett-Packard Development Company, L.P. The information contained herein is subject to change without notice. HP Confidential – For training purposes only.
Diagnostics in HPSA

Where to find HP Diagnostics
Apart from HP PC Hardware Diagnostics, HP Support Assistant provides quick diagnostics to mitigate system restart time and check possible components in real-time, through the “Diagnostics & Tools” tab The 2 Prominent Hardware diagnostics highlighted here are “HP Network check” and “HP Battery check”

HP Network Check
Let’s start by performing “HP Network Check” either by selecting it from HP Support Assistant or from the browser Help tab. This test checks the Network Adapter and also the protocols in the line, including physical connectivity
HP Network Check can be launched from the “Diagnostics & Tool” tab from HP Support Assistant
HP Network Check can also be launched from the browser’s “Help” Tab
It is recommended to use Internet Explorer if user is
wishing to launch the utility from the browser

HP Network Check Welcome screen
• HP Network Check is an interactive Network connectivity Diagnosing and troubleshooting utility,provided by HP through HP Support Assistant
• HP Network check can be used to detect, diagnose and fix Network connectivity (both Wireless and Wired connections) on the computer in which HP Support Assistant is installed
Welcome to the HP Network Check !!
Network Diagnostics running screen
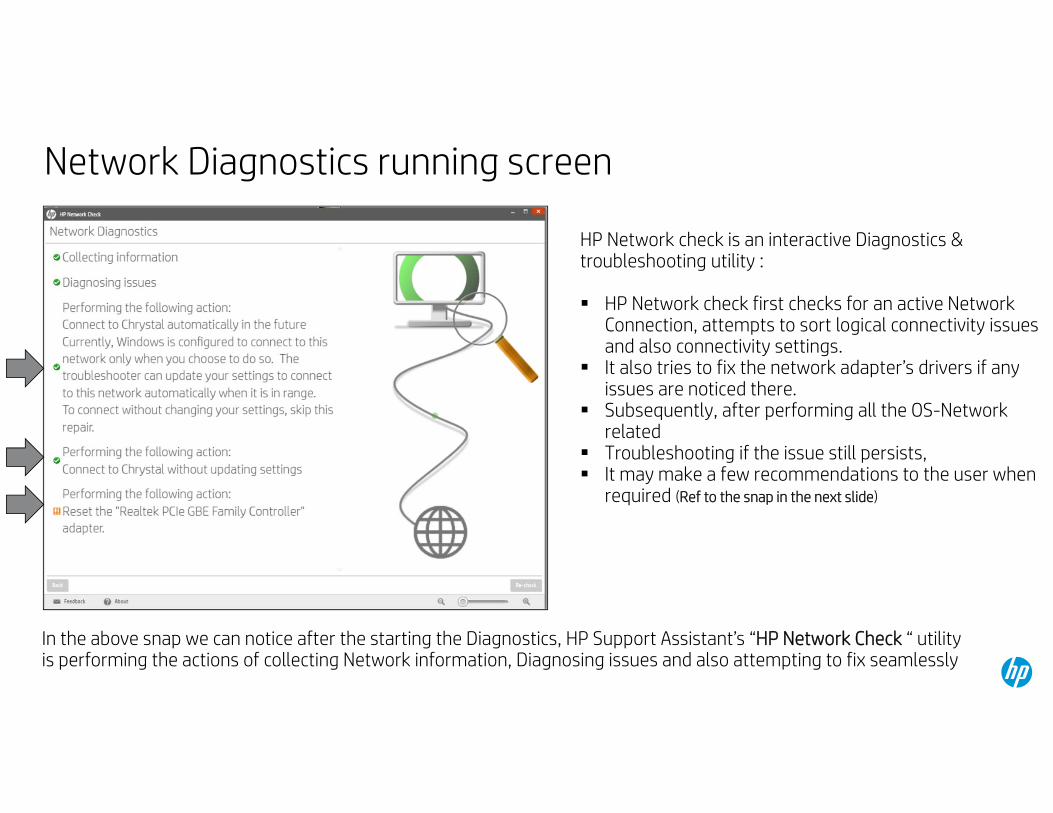
In the above snap we can notice after the starting the Diagnostics, HP Support Assistant’s “HP Network Check “ utility is performing the actions of collecting Network information, Diagnosing issues and also attempting to fix seamlessly
HP Network check is an interactive Diagnostics & troubleshooting utility :
HP Network check first checks for an active Network Connection, attempts to sort logical connectivity issues and also connectivity settings.
It also tries to fix the network adapter’s drivers if any issues are noticed there.
Subsequently, after performing all the OS-Network related
Troubleshooting if the issue still persists, It may make a few recommendations to the user when
required (Ref to the snap in the next slide)
Action screen
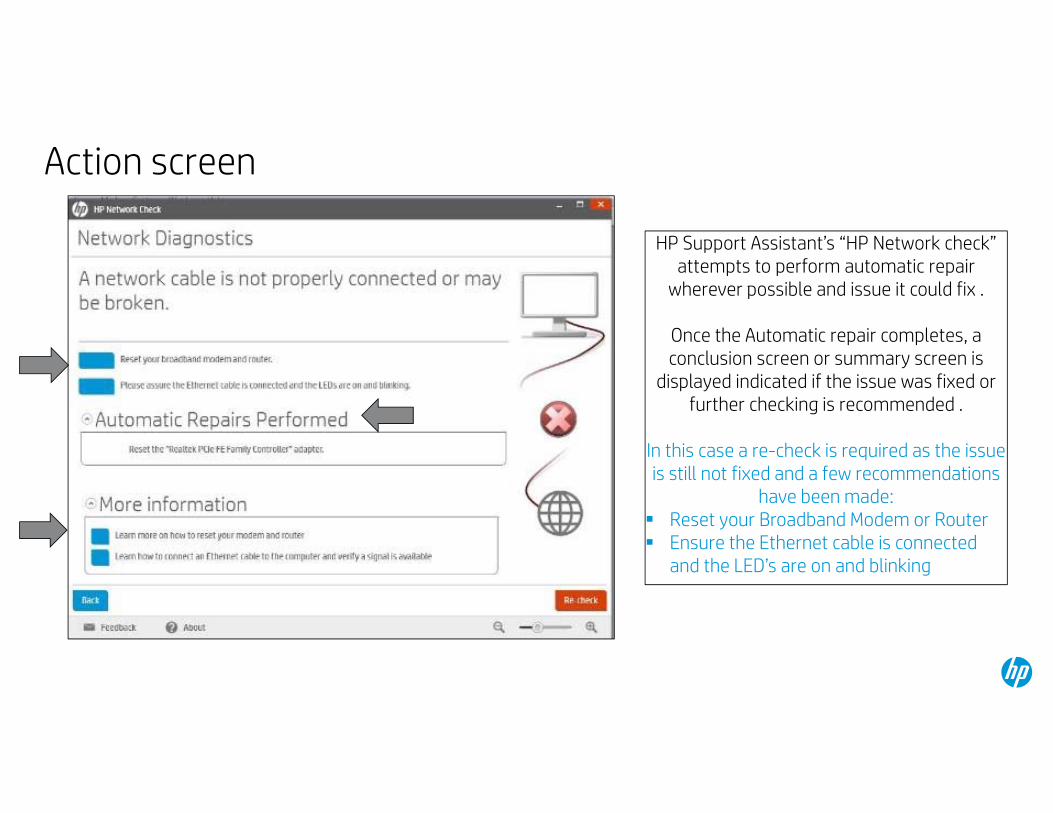
HP Support Assistant’s “HP Network check” attempts to perform automatic repair
wherever possible and issue it could fix .
Once the Automatic repair completes, a conclusion screen or summary screen is
displayed indicated if the issue was fixed or further checking is recommended .
In this case a re-check is required as the issue is still not fixed and a few recommendations
have been made: Reset your Broadband Modem or Router Ensure the Ethernet cable is connected
and the LED’s are on and blinking
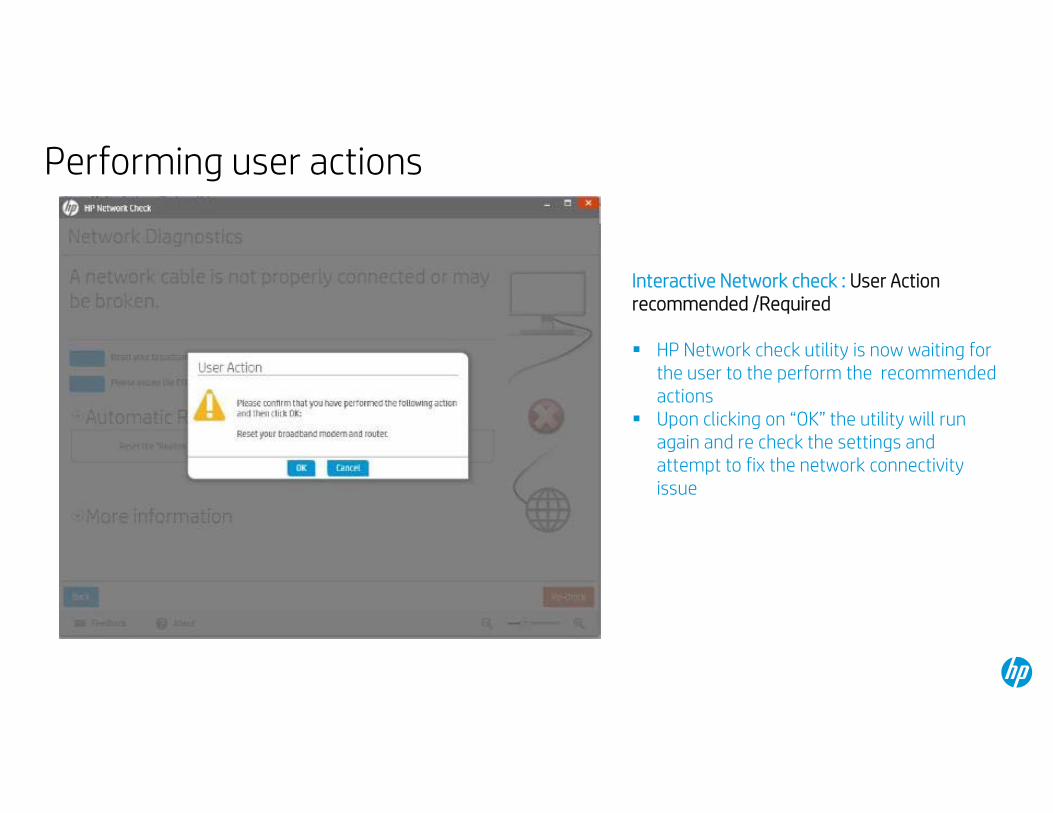
Performing user actions
Interactive Network check : User Action recommended /Required
HP Network check utility is now waiting for the user to the perform the recommended actions
Upon clicking on “OK” the utility will run again and re check the settings and attempt to fix the network connectivity issue

Connection Status screen – issue fixed
HP Network check utility has now completed the diagnostics and is displaying the possible
root causes to the issue with the Repair status.
If issue still not fixed, the Possible Root causes summary would contain information what is the next recommended action and
users can follow accordingly or contact HP for additional support
Users can also click on Network information button additionally to understand the
Network Configuration and explore additional Network support options

Network Information screen
Users can check the Network information by clicking on the “Network information”, which display the current diagnostics and Network information in a Pop-up
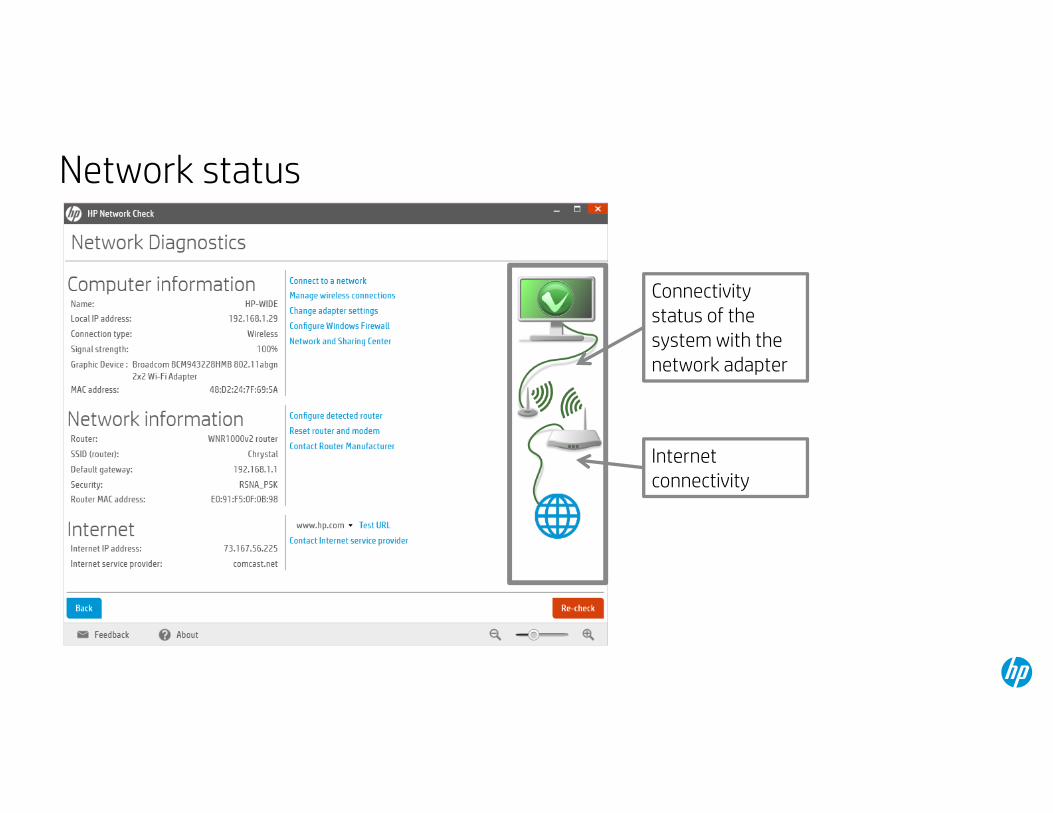
Network status
Connectivity status of the system with the network adapter
Internet connectivity

Network status possibilities
Network status graphic
Adapter type N/A Wired Wire-less Wired Wire-less Wire-less Wire-less Wire-less Wire-less
Adapter connection None Good Good Good Signal 20-40%
Signal 40-60%
Signal 60-70%
Signal 70-80%
Signal 80-100%
Internet Connection None Valid Valid Valid Valid Valid Valid Valid Valid
1 2 3 4 5 6 7 8 9Top part
Bottom part
The above table indicates the possible Network Statuses that user may see in the graphical part of the diagnostics, with a description on the “Adapter connection”, “Adapter type“ and “Internet Connectivity”

Computer information & Network information
Ranked adapter preference when multiple networks active:1. Wired2. Wireless3. Mobile/dialup4. Generic/unknown
The computer and Network information screens provide information on the Wired, Wireless
Networks and the Computer’s current network configuration

Related tools – Computer; Network & Internet
The related tools option provide additional support options in configuring the Network
Setup on the computer

© Copyright 2015 Hewlett-Packard Development Company, L.P. The information contained herein is subject to change without notice. HP Restricted.
HP Battery Check
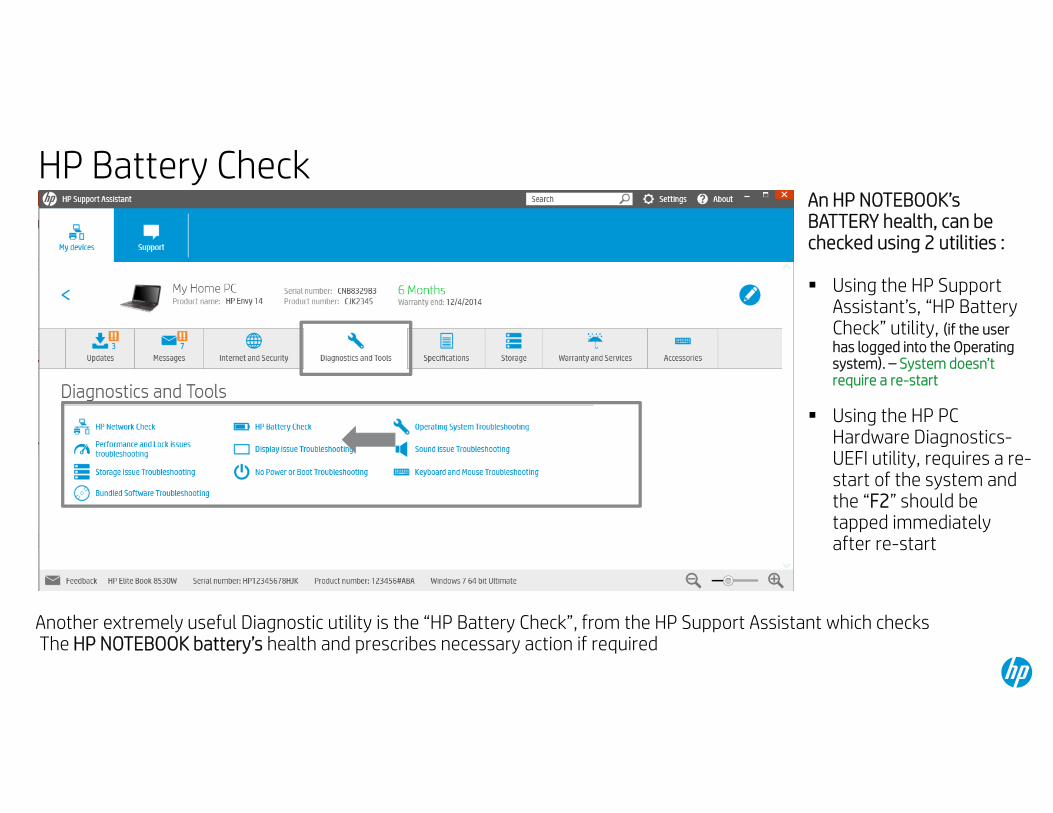
HP Battery Check
Another extremely useful Diagnostic utility is the “HP Battery Check”, from the HP Support Assistant which checks The HP NOTEBOOK battery’s health and prescribes necessary action if required
An HP NOTEBOOK’s BATTERY health, can be checked using 2 utilities :
Using the HP Support Assistant’s, “HP Battery Check” utility, (if the user has logged into the Operating system). – System doesn’t require a re-start
Using the HP PC Hardware Diagnostics-UEFI utility, requires a re-start of the system and the “F2” should be tapped immediately after re-start

Battery Check in progressNOTE : HP Battery Check is available and can only be used to check HP NOTEBOOK BATTERIES
Only the Primary and the Secondary Battery(if installed) can be checked
Upon clicking on the Battery check , the “Test in progress” screen will appear.
Users can click on the “STOP” button if they wish to stop the test immediately and can perform the test later
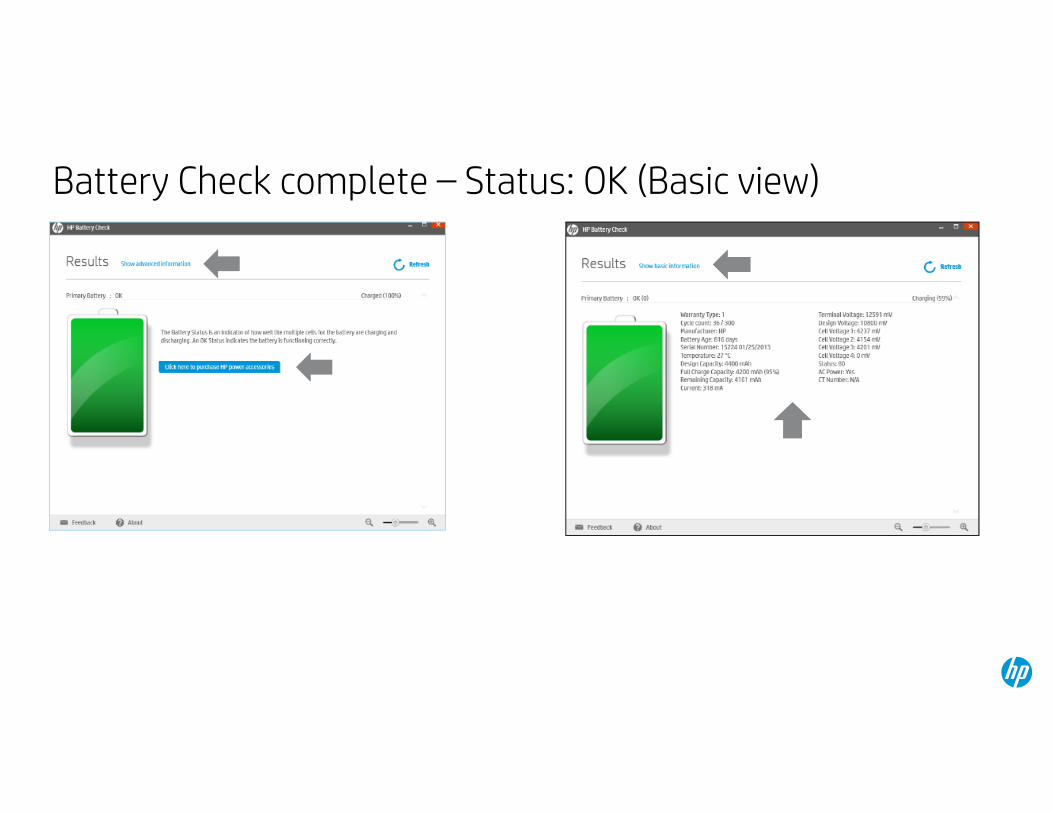
Battery Check complete – Status: OK (Basic view)
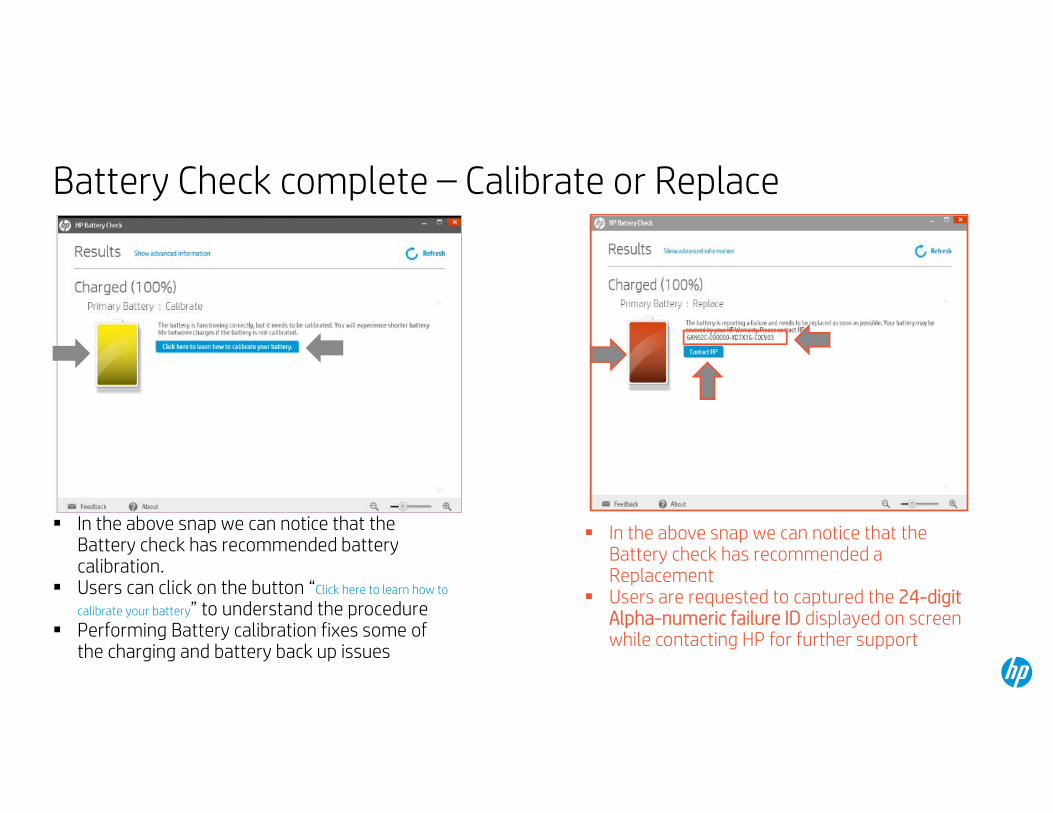
Battery Check complete – Calibrate or Replace
In the above snap we can notice that the Battery check has recommended battery calibration.
Users can click on the button “Click here to learn how to
calibrate your battery” to understand the procedure Performing Battery calibration fixes some of
the charging and battery back up issues
In the above snap we can notice that the Battery check has recommended a Replacement
Users are requested to captured the 24-digit Alpha-numeric failure ID displayed on screen while contacting HP for further support
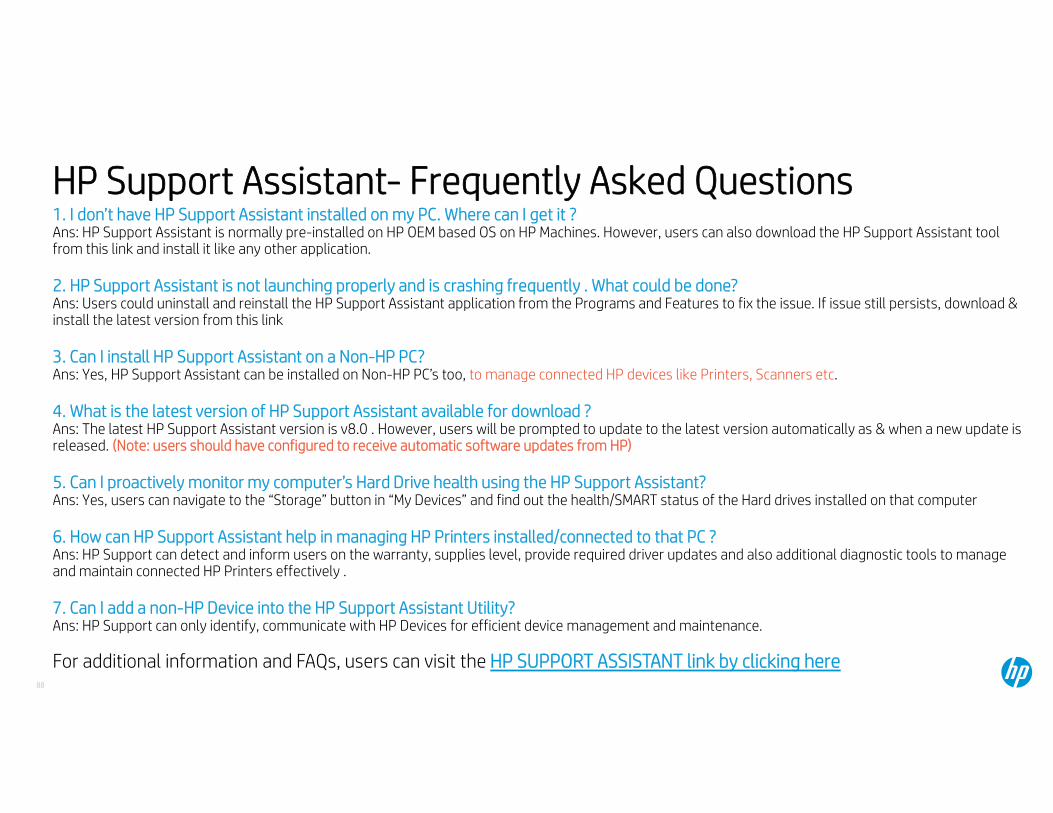
HP Support Assistant- Frequently Asked Questions
88
1. I don’t have HP Support Assistant installed on my PC. Where can I get it ?Ans: HP Support Assistant is normally pre-installed on HP OEM based OS on HP Machines. However, users can also download the HP Support Assistant tool from this link and install it like any other application.
2. HP Support Assistant is not launching properly and is crashing frequently . What could be done?Ans: Users could uninstall and reinstall the HP Support Assistant application from the Programs and Features to fix the issue. If issue still persists, download & install the latest version from this link
3. Can I install HP Support Assistant on a Non-HP PC?Ans: Yes, HP Support Assistant can be installed on Non-HP PC’s too, to manage connected HP devices like Printers, Scanners etc.
4. What is the latest version of HP Support Assistant available for download ?Ans: The latest HP Support Assistant version is v8.0 . However, users will be prompted to update to the latest version automatically as & when a new update is released. (Note: users should have configured to receive automatic software updates from HP)
5. Can I proactively monitor my computer’s Hard Drive health using the HP Support Assistant?Ans: Yes, users can navigate to the “Storage” button in “My Devices” and find out the health/SMART status of the Hard drives installed on that computer
6. How can HP Support Assistant help in managing HP Printers installed/connected to that PC ?Ans: HP Support can detect and inform users on the warranty, supplies level, provide required driver updates and also additional diagnostic tools to manage and maintain connected HP Printers effectively .
7. Can I add a non-HP Device into the HP Support Assistant Utility?Ans: HP Support can only identify, communicate with HP Devices for efficient device management and maintenance.
For additional information and FAQs, users can visit the HP SUPPORT ASSISTANT link by clicking here

© Copyright 2015 Hewlett-Packard Development Company, L.P. The information contained herein is subject to change without notice. HP Confidential – For training purposes only.
Thank you

© Copyright 2015 Hewlett-Packard Development Company, L.P. The information contained herein is subject to change without notice. HP Confidential – For training purposes only.
Diagnosing a Failed Hardware Component