copyright © 2008 corporation all rights reserved
TRANSCRIPT

Surveyor 1.0 Help Documentation
Copyright © 2008 WebAssist.com Corporation All rights reserved.
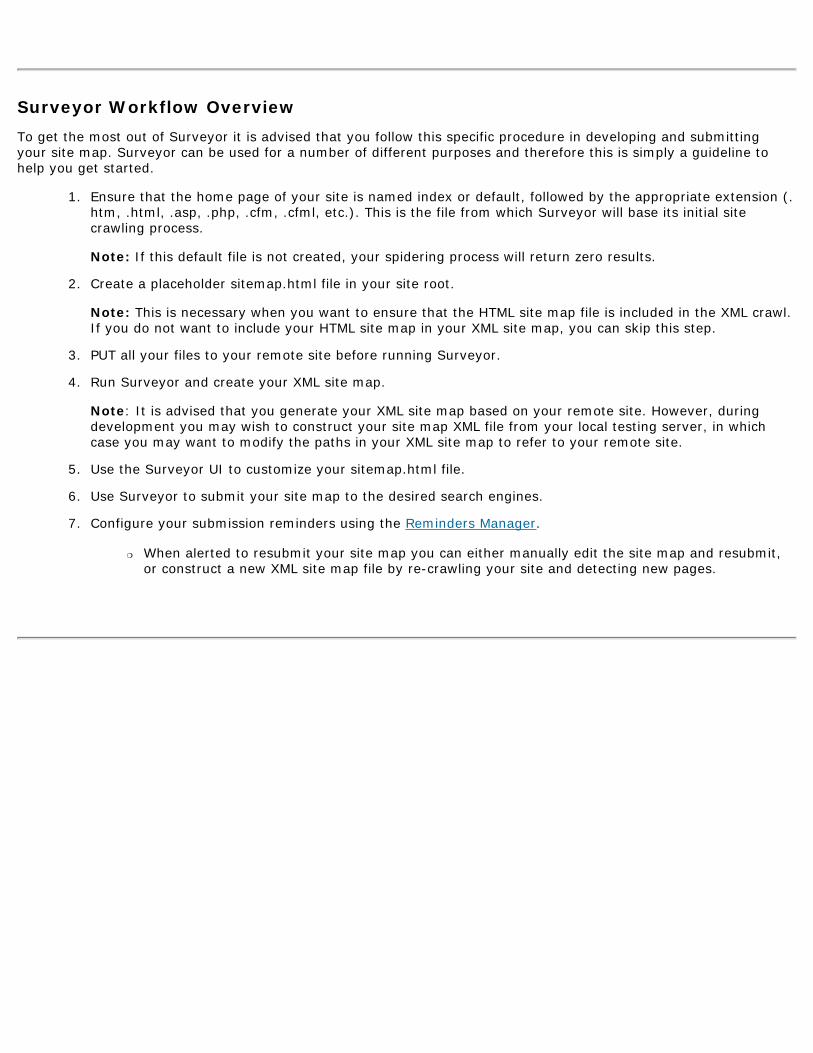
Surveyor Workflow Overview
To get the most out of Surveyor it is advised that you follow this specific procedure in developing and submitting your site map. Surveyor can be used for a number of different purposes and therefore this is simply a guideline to help you get started.
1. Ensure that the home page of your site is named index or default, followed by the appropriate extension (.htm, .html, .asp, .php, .cfm, .cfml, etc.). This is the file from which Surveyor will base its initial site crawling process. Note: If this default file is not created, your spidering process will return zero results.
2. Create a placeholder sitemap.html file in your site root. Note: This is necessary when you want to ensure that the HTML site map file is included in the XML crawl. If you do not want to include your HTML site map in your XML site map, you can skip this step.
3. PUT all your files to your remote site before running Surveyor.
4. Run Surveyor and create your XML site map. Note: It is advised that you generate your XML site map based on your remote site. However, during development you may wish to construct your site map XML file from your local testing server, in which case you may want to modify the paths in your XML site map to refer to your remote site.
5. Use the Surveyor UI to customize your sitemap.html file.
6. Use Surveyor to submit your site map to the desired search engines.
7. Configure your submission reminders using the Reminders Manager.
�❍ When alerted to resubmit your site map you can either manually edit the site map and resubmit, or construct a new XML site map file by re-crawling your site and detecting new pages.

Accessing Surveyor
Create XML Site Map
● Insert > WebAssist > Surveyor > XML Site Map
From the Insert toolbar
Create HTML Site Map
● Insert > WebAssist > Surveyor > HTML Site Map
From the Insert toolbar
Submit Site Map
● Insert > WebAssist > Surveyor > Submit Site Map
From the Insert toolbar
Submission Reminders
● Insert > WebAssist > Surveyor > Submission Reminders
From the Insert toolbar
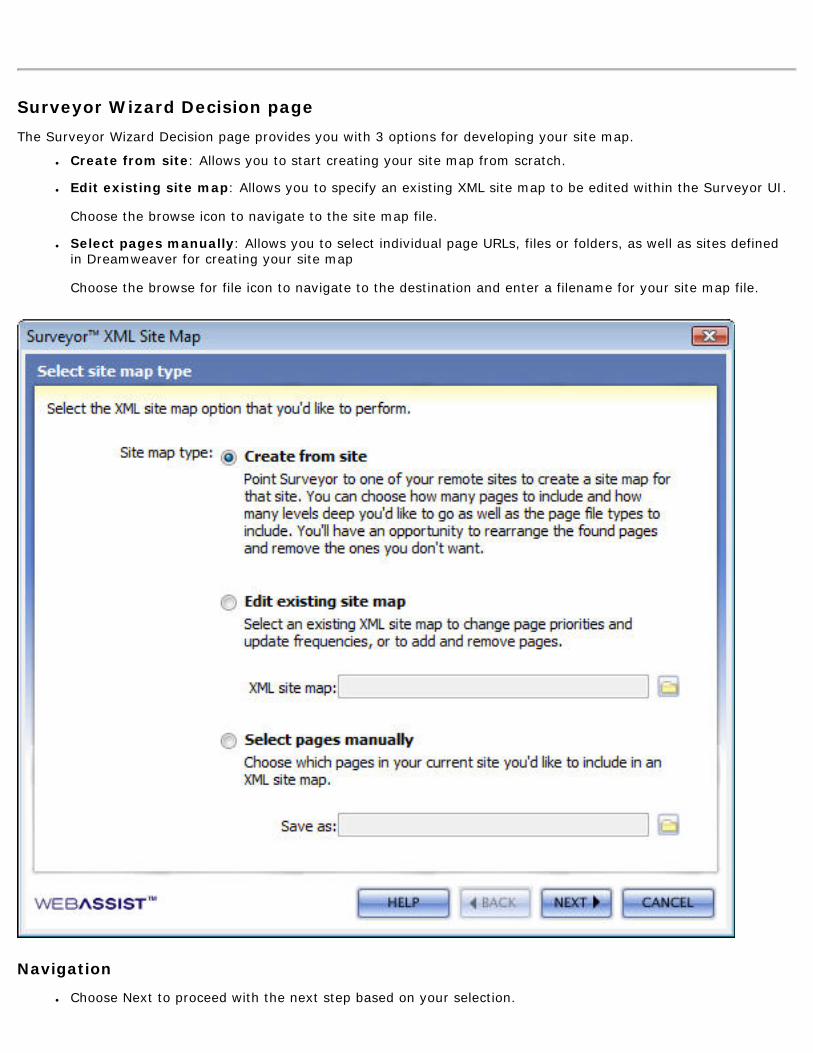
Surveyor Wizard Decision page
The Surveyor Wizard Decision page provides you with 3 options for developing your site map.
● Create from site: Allows you to start creating your site map from scratch.
● Edit existing site map: Allows you to specify an existing XML site map to be edited within the Surveyor UI. Choose the browse icon to navigate to the site map file.
● Select pages manually: Allows you to select individual page URLs, files or folders, as well as sites defined in Dreamweaver for creating your site map Choose the browse for file icon to navigate to the destination and enter a filename for your site map file.
Navigation
● Choose Next to proceed with the next step based on your selection.

● Choose Cancel to close the Surveyor Wizard.
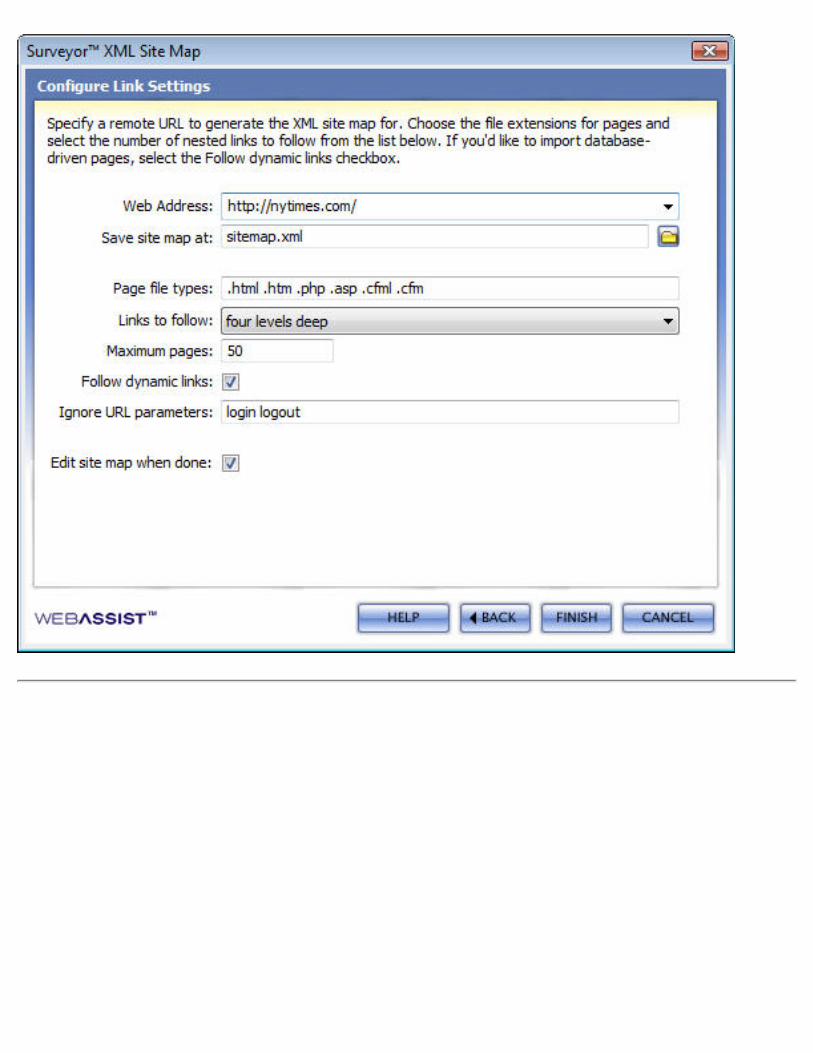
Configure Link Settings
This step of the wizard allows you to customize the settings for the site map you will be creating. Web Address: Enter the URL to the site you wish your site map to be created from.
● If you have specified an HTTP address in a defined site in Dreamweaver, you can select this site from the menu list.
Save site map at: Use the browse icon to navigate to the appropriate location and enter a name for your site map.
● The suffix, .xml will be automatically added when you choose Save.
Page file types: Enter the page files types you wish to be included in the search of your site. Links to follow: Specifies how many directory levels, based on the relative location to the root of the site that will be crawled. Options are:
● Current page only
● One, two, three, four, or five levels deep
● Entire site
Maximum pages: Sets the maximum number of pages to be crawled on your site. Follow dynamic links: When selected, includes pages that include URL parameters within the crawling process. Ignore URL parameters: When selected, excludes pages that include a specified URL parameter. Multiple entries should be separated by spaces. Edit site map when done: When selected, the Edit Site Map UI will display when complete.
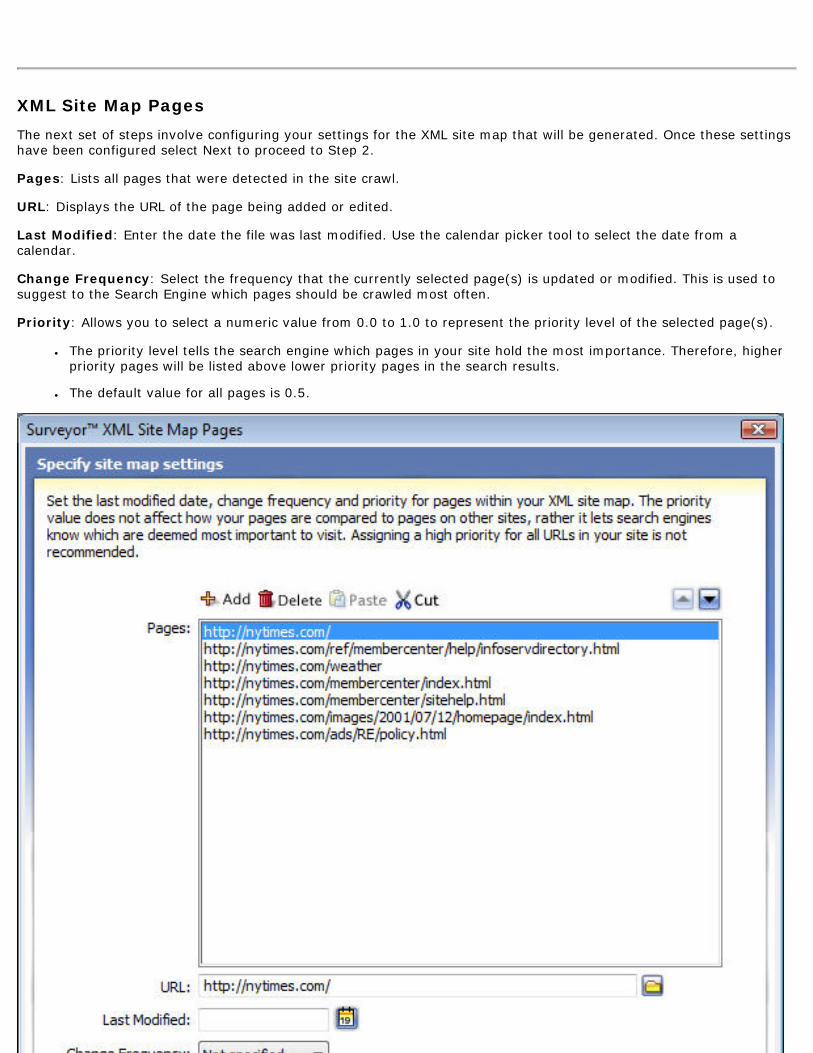
XML Site Map Pages
The next set of steps involve configuring your settings for the XML site map that will be generated. Once these settings have been configured select Next to proceed to Step 2. Pages: Lists all pages that were detected in the site crawl. URL: Displays the URL of the page being added or edited. Last Modified: Enter the date the file was last modified. Use the calendar picker tool to select the date from a calendar. Change Frequency: Select the frequency that the currently selected page(s) is updated or modified. This is used to suggest to the Search Engine which pages should be crawled most often. Priority: Allows you to select a numeric value from 0.0 to 1.0 to represent the priority level of the selected page(s).
● The priority level tells the search engine which pages in your site hold the most importance. Therefore, higher priority pages will be listed above lower priority pages in the search results.
● The default value for all pages is 0.5.
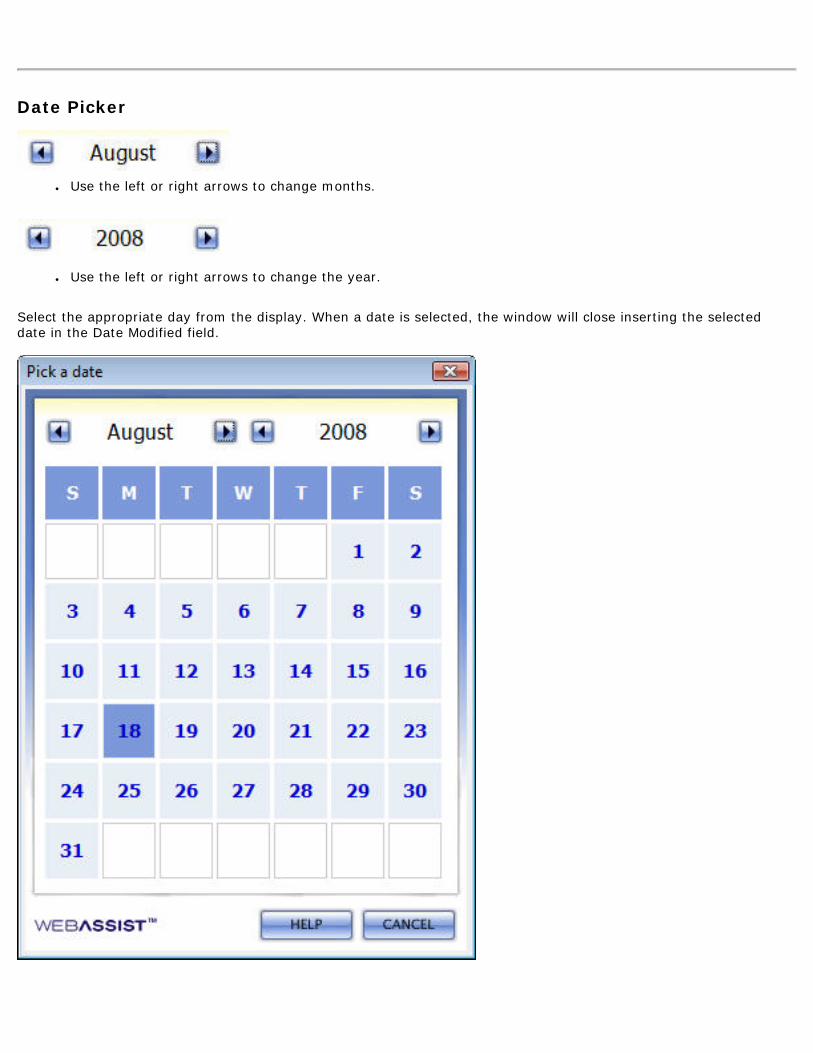
Date Picker
● Use the left or right arrows to change months.
● Use the left or right arrows to change the year.
Select the appropriate day from the display. When a date is selected, the window will close inserting the selected date in the Date Modified field.

HTML Site Map Decision
To initiate the creation of your HTML site map, first choose from one of two options. Create from XML site map: Allows you to select an already created XML site map to generate an HTML map from. Select the browse for file icon to navigate and select your .xml site map file. Select pages manually: Allows you to manually to choose the pages that you wish to include in your HTML site map.
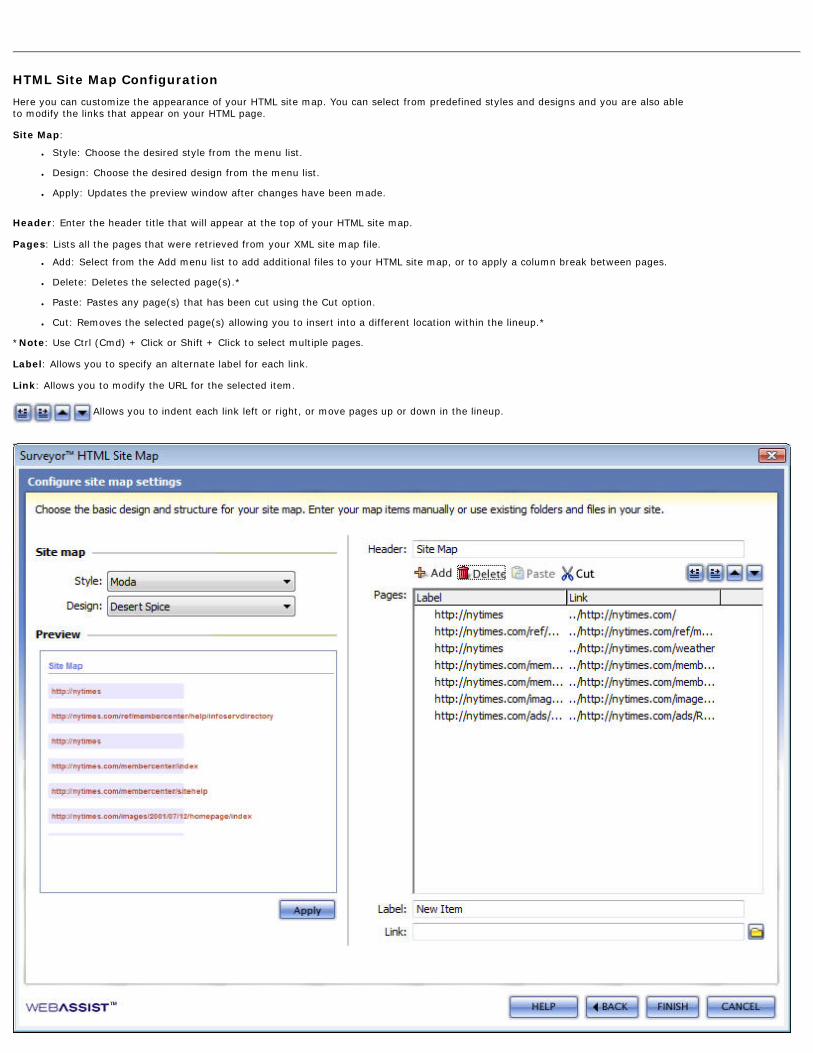
HTML Site Map Configuration
Here you can customize the appearance of your HTML site map. You can select from predefined styles and designs and you are also able to modify the links that appear on your HTML page. Site Map:
● Style: Choose the desired style from the menu list.
● Design: Choose the desired design from the menu list.
● Apply: Updates the preview window after changes have been made.
Header: Enter the header title that will appear at the top of your HTML site map. Pages: Lists all the pages that were retrieved from your XML site map file.
● Add: Select from the Add menu list to add additional files to your HTML site map, or to apply a column break between pages.
● Delete: Deletes the selected page(s).*
● Paste: Pastes any page(s) that has been cut using the Cut option.
● Cut: Removes the selected page(s) allowing you to insert into a different location within the lineup.*
*Note: Use Ctrl (Cmd) + Click or Shift + Click to select multiple pages. Label: Allows you to specify an alternate label for each link. Link: Allows you to modify the URL for the selected item.
Allows you to indent each link left or right, or move pages up or down in the lineup.
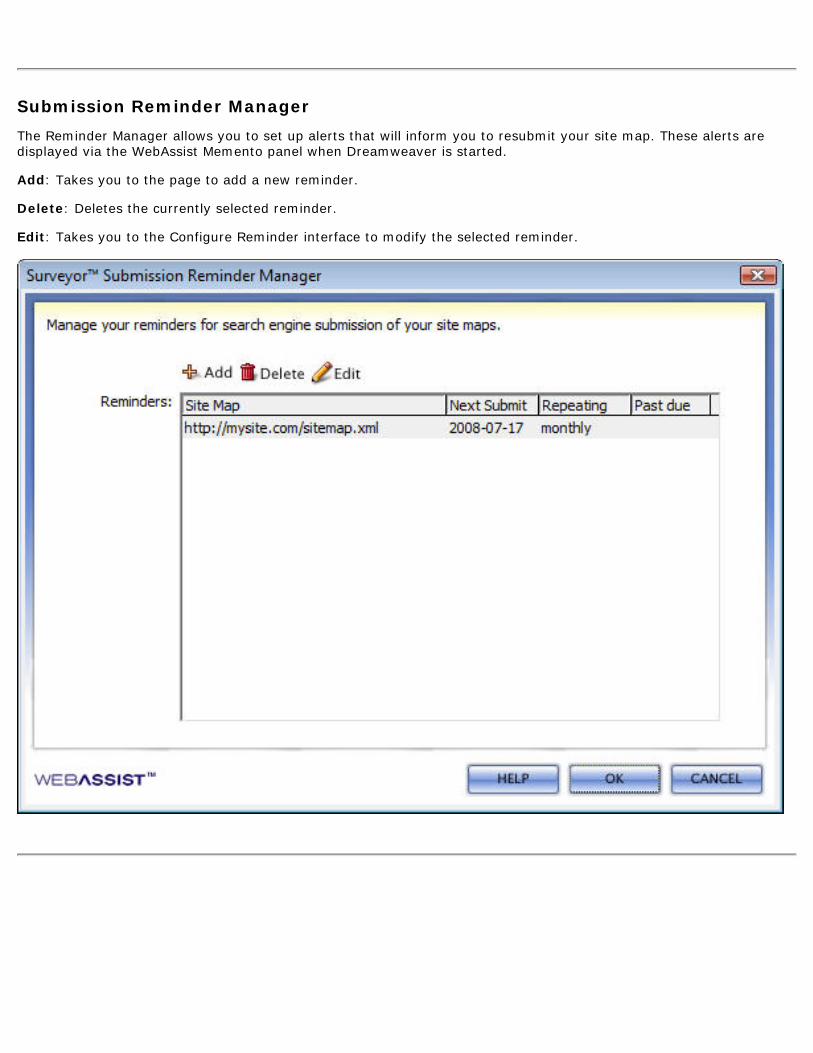
Submission Reminder Manager
The Reminder Manager allows you to set up alerts that will inform you to resubmit your site map. These alerts are displayed via the WebAssist Memento panel when Dreamweaver is started. Add: Takes you to the page to add a new reminder. Delete: Deletes the currently selected reminder. Edit: Takes you to the Configure Reminder interface to modify the selected reminder.
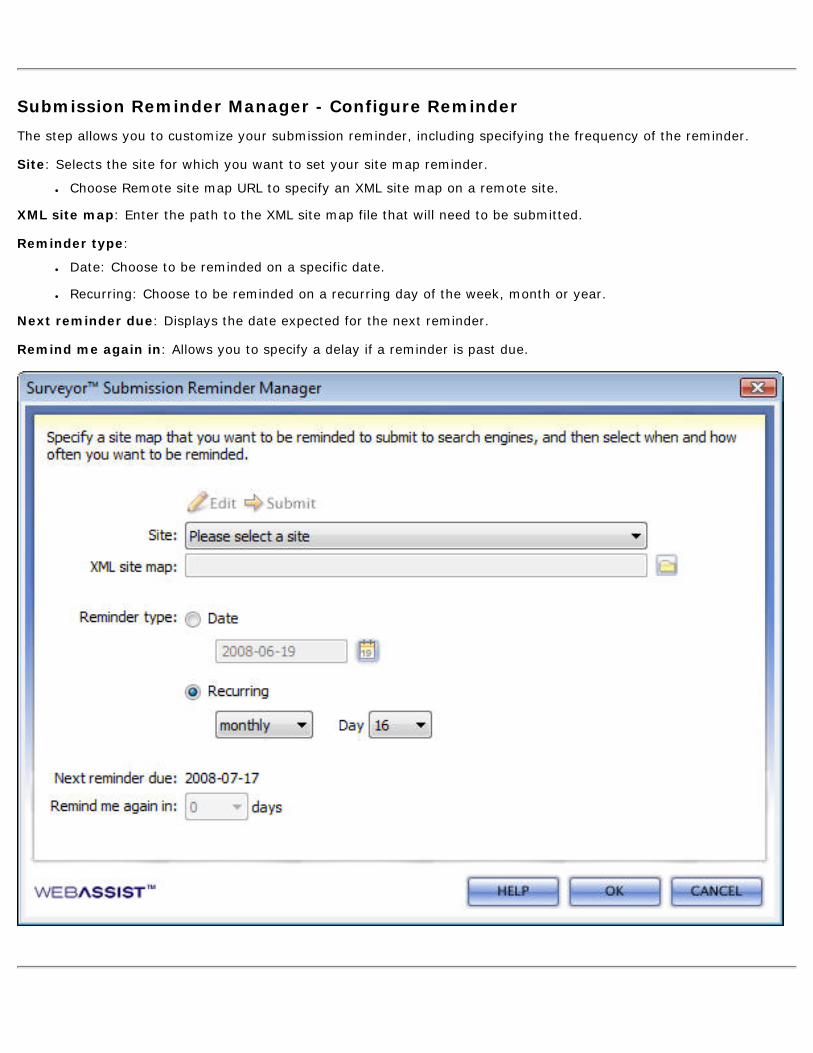
Submission Reminder Manager - Configure Reminder
The step allows you to customize your submission reminder, including specifying the frequency of the reminder. Site: Selects the site for which you want to set your site map reminder.
● Choose Remote site map URL to specify an XML site map on a remote site.
XML site map: Enter the path to the XML site map file that will need to be submitted. Reminder type:
● Date: Choose to be reminded on a specific date.
● Recurring: Choose to be reminded on a recurring day of the week, month or year.
Next reminder due: Displays the date expected for the next reminder. Remind me again in: Allows you to specify a delay if a reminder is past due.
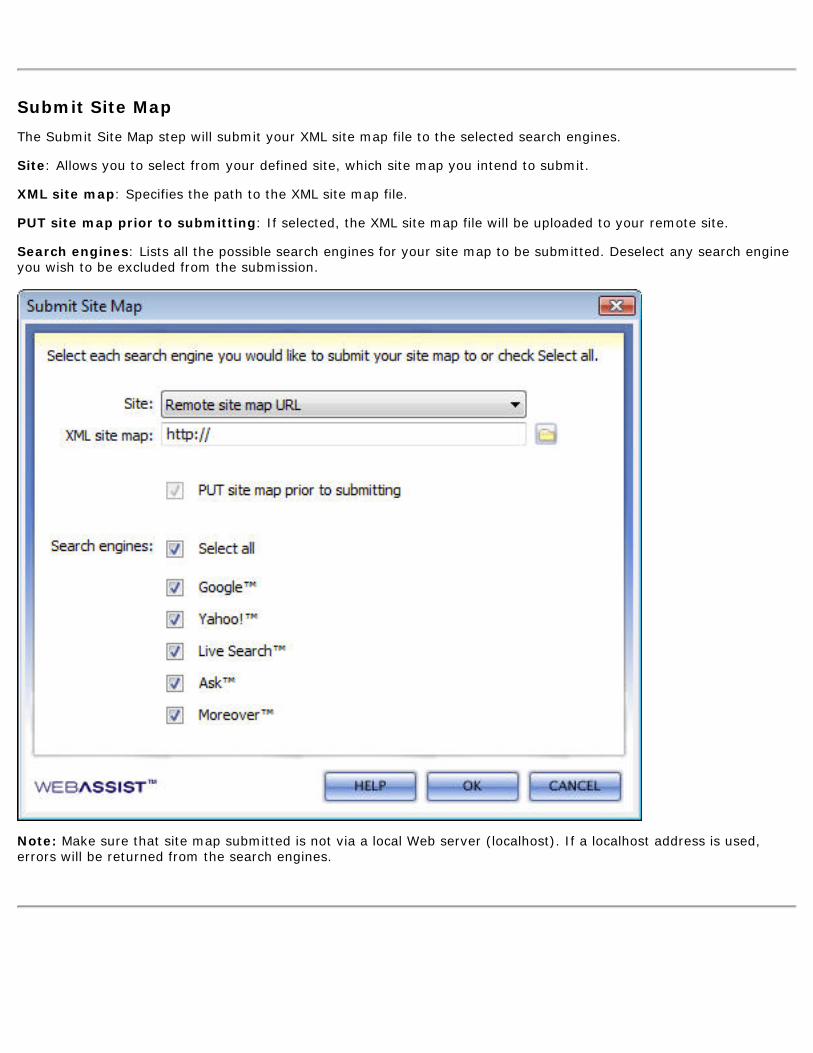
Submit Site Map
The Submit Site Map step will submit your XML site map file to the selected search engines. Site: Allows you to select from your defined site, which site map you intend to submit. XML site map: Specifies the path to the XML site map file. PUT site map prior to submitting: If selected, the XML site map file will be uploaded to your remote site. Search engines: Lists all the possible search engines for your site map to be submitted. Deselect any search engine you wish to be excluded from the submission.
Note: Make sure that site map submitted is not via a local Web server (localhost). If a localhost address is used, errors will be returned from the search engines.
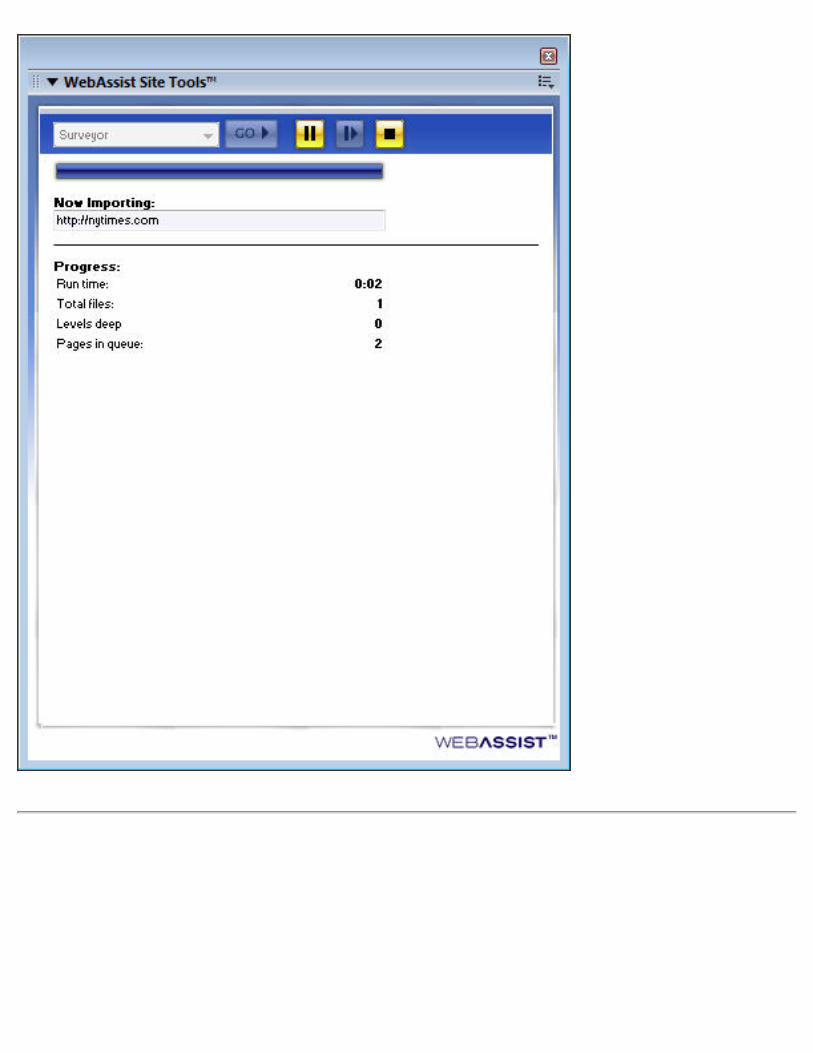
Surveyor Progress Panel
The Progress Panel displays the progress of your site crawl. When complete, you will be taken to the XML site map pages page. Now Importing: Displays the page currently being imported. Progress: Displays the overall progress of the entire site crawl procedure.
● Run time: Displays the total time since the site crawl was initialized.
● Total files: Displays the total number of files currently obtained during the site crawl.
● Levels deep: Displays the number of directory levels deep currently being crawled.
● Pages in queue: Displays the number of pages in the queue waiting to be crawled.
Pause: Pauses the current site crawl procedure. Resume: Resumes the site crawl procedure if paused. Stop: Stops the site crawl procedure. The procedure will need to be reconfigured from the beginning if stopped. Important Note: If you choose to stop the process before importing is complete, you may want to restart Dreamweaver to reduce Dreamweaver's processor usage on your system.