common area maintenance manual - … · common area maintenance manual ... state turbo sandblaster...
TRANSCRIPT

Kimberly Place Community Association
Common Area Maintenance Manual

Introduction
Kimberly Place Community Association
Welcome to your new home and to the Kimberly Place Community Association.
In order to preserve the beauty and value of your community well into the future, maintaining it right from the beginningis crucial. While each homeowner has been provided with instructions on how they should maintain their home, it is equally important that the Association maintains the common area property. This manual is designed to provide you with the knowledge and tools you need to understand how to properly maintain the components for which theAssociation has maintenance responsibility, and to track that maintenance history.
The Association's maintenance responsibilities at Kimberly Place primarily concern the building exteriors, recreation area, private streets and sidewalks, common area utilities, certain walls and fences, landscaping and the related irrigationsystem. Please refer to the Association CC&Rs for more details about the maintenance responsibilities of thehomeowners and the Association.
The Association is advised to undertake routine maintenance of various common area elements and materials. This manual is not intended to be all-inclusive, but is a minimum outline of required maintenance. If any detail in the following list or any statements made by any of our representatives conflict with the manufacturer’s recommendationsfor any products installed in the common area, the Association should follow the manufacturer’s recommendations.
In addition to the maintenance requirements and inspections laid out in this manual, the association should also ensure that Reserve Studies are done as often as is necessary toadjust the long-term replacement and repair funds as may be appropriate. This should be atleast once every three years, and the Board should review and adjust that resulting ReserveFunding plan annually as circumstances deem it to be appropriate. PLEASE BE PARTICULARLY AWARE OF THE FACT THAT IF YOU FAIL TO MAINTAIN YOURCOMPONENTS PROPERLY, THE LIVES OF THESE COMPONENTS WILL BESHORTENED AND YOU WILL NEED TO ADJUST THE RESERVE FUNDINGAPPROPRIATELY.

The Helsing Group, Inc. Copyright 2008
All Rights Reserved
Kimberly Place Community Association
Common Area Maintenance Manual
CONTENTS
Amenities
Gas Fireplace..........................................................................................................................1
Bench – Wood and Wrought Iron.................................................................................................. 2
Leather Recliners ........................................................................................................................... 3
Pool Furniture................................................................................................................................. 4
Picnic Tables .................................................................................................................................. 5
Vision Fitness Commercial Cycle – E3600HRT........................................................................... 6
Vision Fitness Commercial Elliptical – X6700HRT..................................................................... 9
Cluster Mailboxes .......................................................................................................................... 12
Doors and Windows
Exterior Doors ............................................................................................................................. 13
Garage Doors............................................................................................................................... 14
Interior Doors ........................................................................................................................................16
Skylights................................................................................................................................................17
Windows................................................................................................................................................18
Exterior Building Components Metal/Wood Carport Structure.................................................................................................... 19
Trash Enclosure Area .................................................................................................................. 20
Metal Railings ................................................................................................................................... 21
Wood Railings - Painted .............................................................................................................. 22
Light Concrete Decks .................................................................................................................... 23
Wooden Decks ............................................................................................................................... 24
Tile Siding...................................................................................................................................... 25
Wood Panel Siding and Trim......................................................................................................... 26
Stairways ..................................................................................................................................... 28
Caulking ............................................................................................................................................ 29

The Helsing Group, Inc. Copyright 2008
All Rights Reserved
Interior Finishes
Granite Countertops.................................................................................................................. 30
Carpet .......................................................................................................................................... 31
Vinyl Linoleum Flooring............................................................................................................. 33
Tile Flooring................................................................................................................................ 34
Interior Paint................................................................................................................................ 35
Kitchen Cabinets – Wood............................................................................................................ 36
Landscape
Association Landscape Maintenance.............................................................................................. 37
Landscape Drains..................................................................................................................................... 40
Storm Drainage Facilities.............................................................................................................. 41
Cement Rail Fence........................................................................................................................ 42
Arbor, Painted Wood ........................................................................................................................... 43
Wooden Fences .................................................................................................................................... 44
Wooden Trellis..................................................................................................................................... 45
Wood & Metal Gate............................................................................................................................. 46
Asphalt.........................................................................................................................................47
Streets and Drives - Painted Features............................................................................................. 49
Concrete Walkways ...................................................................................................................... 50
Decorative Concrete ..................................................................................................................... 51
Emitters......................................................................................................................................................52
Rain Bird Sprinkler Heads – Series 1800................................................................................................53
Rain Bird Valves.......................................................................................................................................56
Concrete/Masonry Retaining Wall ..........................................................................................................59
Tile Entry Monument............................................................................................................................60
Pool Signs..................................................................................................................................................61
Street Signs................................................................................................................................................62
Mechanical Systems
Fraser Johnston Air Conditioning Furnace – 125CN4 A .............................................................. 63
Roofing System
Gutters & Downspouts ................................................................................................................... 65

The Helsing Group, Inc. Copyright 2008
All Rights Reserved
CertainTeed Landmark Series Asphalt Shingles ........................................................................... 66
Utility Systems
InFocus Screenplay Projector – 7205 ........................................................................................ 68
GFCI Outlet ............................................................................................................................... 72
Zinsco Circuit Breaker............................................................................................................... 73
Square D Load Center – QO 6-12 Series L4 ............................................................................. 74
Interior and Exterior Lighting; Pole Lights................................................................................ 75
Exit Signs – LED ....................................................................................................................... 76
Intermatic T101 24 Hour Dial Time Switch .............................................................................. 77
Amerex Fire Extinguishers ........................................................................................................ 78
Standpipe Components .............................................................................................................. 79
Zurn Wilkins Backflow Preventer 950XL & 975XL................................................................. 80
Watts Potable Water Expansion Tank – PLT-5 ......................................................................... 84
Price Pfister Faucet .................................................................................................................... 86
Glacier Bay Faucet – Laundry Room ........................................................................................ 87
Stainless Steel Sink.................................................................................................................... 88
Elkay Stainless Steel Sink – Dayton.......................................................................................... 89
Rinnai Tankless Water Heater & Control .................................................................................. 91
State Turbo Sandblaster Self Cleaning Water Heater ................................................................ 95
Stormwater Pollutant Control .................................................................................................... 102
Flexflo Injector Pump – A-130-6............................................................................................... 103
Pentair/PacFab Tagelus Deluxe Sand Filter............................................................................... 107
Raypak Pool/Spa Heater – RP2100 ........................................................................................... 111
Pools........................................................................................................................................... 114
Sta-Rite Max-E-Pro Centrifugal Pump...................................................................................... 115
Preventative Maintenance & Inspection Checklists ........................................................... 118

Maintenance Manual, Warranties, and Performance Guidelines
Gas Fireplace
Kimberly Place Community AssociationAmenities
Maintenance Requirements
To keep your fireplace running efficiently, regular maintenance is mandatory. Every year, have a certified professional inspect the burner, blower operation, venting, pilot, and thermostat.
Use vinegar and water, or a non-abrasive household glass cleaner to clean the glass. If the glass accumulates a white fog (causedby dirty fuel or foreign chemicals in the unit), it may be necessary to use a specially formulated product recommended by yourdealer or manufacturer. Thoroughly rinse any cleaner from the glass before relighting the unit. Periodically vacuuming the valvecavity area (where the gas controls are) will keep the controls dust-free, which helps ensure good electrical connections.
A fireplace should be inspected before use and checked annually by a qualified professional service person.
- Control compartments, burners and circulating air passageways of the appliance must be kept clean. - Do not store combustible materials, gasoline or other flammable vapors and liquids in the vicinity of your fireplace. - Gas fireplaces with glass doors should not be operated if the glass is cracked or broken. - Do not clean your fireplace if it is operational or still hot. - Do not use abrasive cleaners, and always refer to manufacturers' instructions when cleaning glass components of your fireplace. - Any home that contains combustion appliances such as a gas fireplace should have a CSA-certified CO detector installedaccording to the manufacturer's instructions.
Required Inspection and Maintenance should be performed AnnuallyThis task should be accomplished using: No special skill for cleaning; qualified technician for annual
inspection
Page 1 of 1172008CopyrightThe Helsing Group, Inc.
All Rights Reserved

Maintenance Manual, Warranties, and Performance Guidelines
Bench - Wood and Wrought Iron
Kimberly Place Community AssociationAmenities
Maintenance Requirements
Inspect the surface periodically for dirt or stains. If approved for use on the material, commercial cleaning products containing sodium hypochlorite often remove stains caused by mold, mildew, or plant materials; and cleaning products containing phosphoric acid are often effective against rust stains and ground-in dirt. Grease and oil stains should be scrubbed with a degreasing productas soon as possible after they appear. In all cases, before selecting a cleaning product, review the manufacturer's maintenance requirements (if any) for the particular brand of artificial wood.
Wrought iron needs to be inspected annually, rusted areas de-rusted, the areas primed and painted. Ironwork may sustain major damage if left unmaintained for long periods, requiring extensive repair work. Annual inspections provide the opportunity toaddress damage in its early stages and avoid more costly repairs or replacement. An annual visual inspection should be made with particular attention placed upon: - detecting and correcting loose supports. - resetting loose nails and fasteners. - replacing any broken boards. - correcting any other damage that might cause discomfort or injury to a user.
Required Inspection and Maintenance should be performed AnnuallyThis task should be accomplished using: No special skill required for inspections and cleaning
Page 2 of 1172008CopyrightThe Helsing Group, Inc.
All Rights Reserved

Maintenance Manual, Warranties, and Performance Guidelines
Leather Recliners
Kimberly Place Community AssociationAmenities
Maintenance Requirements
Leather Maintenance
Regularly dust leather furniture using a soft untreated cloth. Apply a leather protecting cream to help keep leather from drying outand cracking. This also helps to protect against spills and dirt.Do not use detergents or chemicals to clean your leather, as these can cause severe damage.
Keep leather furniture out of direct sunlight for long periods of time and do not place furniture in front of floor heaters or heatingvents.
Avoid sitting on the edges of cushions or arms, as this may cause distortion. Remove cushions to reshape. Keep sharp objects such as pointy heels of shoes away from leather furniture.
Required Inspection and Maintenance should be performed MonthlyThis task should be accomplished using: No special skills required
Page 3 of 1172008CopyrightThe Helsing Group, Inc.
All Rights Reserved

Maintenance Manual, Warranties, and Performance Guidelines
Pool Furniture
Kimberly Place Community AssociationAmenities
Maintenance Requirements
Scattered around the pool deck area are items of furniture for the use of the residents and their guests. The pool furniture shouldbe inspected on a regular basis to determine any damage which might cause injury or discomfort to a user. Repair or replace any furniture which has become unsafe or aesthetically unacceptable. Outdoor furniture will accumulate dirt and debris and will needto be cleaned periodically.
Required Inspection and Maintenance should be performed MonthlyThis task should be accomplished using: No special skill required.
Page 4 of 1172008CopyrightThe Helsing Group, Inc.
All Rights Reserved
Maintenance Manual, Warranties, and Performance Guidelines
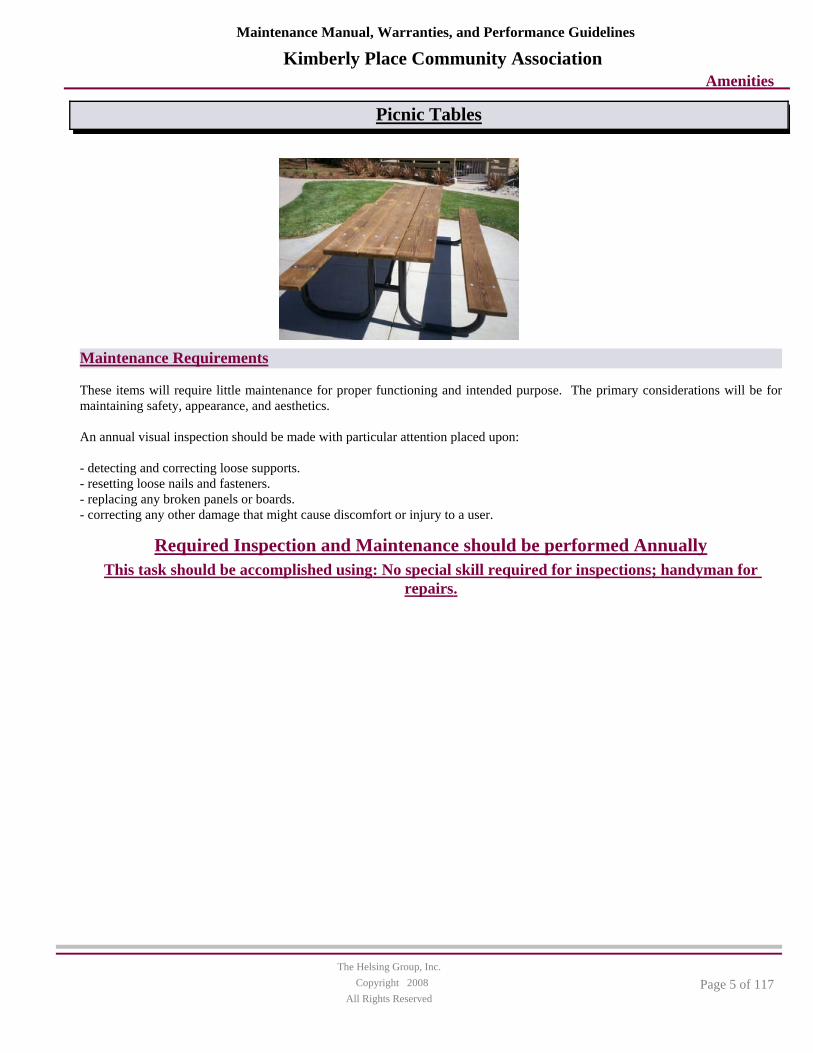
Picnic Tables
Kimberly Place Community AssociationAmenities
Maintenance Requirements
These items will require little maintenance for proper functioning and intended purpose. The primary considerations will be formaintaining safety, appearance, and aesthetics. An annual visual inspection should be made with particular attention placed upon: - detecting and correcting loose supports.- resetting loose nails and fasteners.- replacing any broken panels or boards.- correcting any other damage that might cause discomfort or injury to a user.
Required Inspection and Maintenance should be performed AnnuallyThis task should be accomplished using: No special skill required for inspections; handyman for
repairs.
Page 5 of 1172008CopyrightThe Helsing Group, Inc.
All Rights Reserved

Maintenance Manual, Warranties, and Performance Guidelines
Vision Fitness Commercial Cycle - E3600HRT
Kimberly Place Community AssociationAmenities
Vision Fitness500 South CP Avenue, PO Box 280
FRAME - LIFETIME VISION FITNESS warrants the Frame against defects in workmanship and materials for the lifetime of the originalowner, so long as the device remains in the possession of the originalowner.
CAMBRIDGE MOTOR WORKS GENERATOR SYSTEM, ELECTRONICS & PARTS - THREE YEARS VISION FITNESSwarrants the Generator System, Electronics & Parts against defects inworkmanship and materials for a period of three years from date oforiginal purchase, so long as the device remains in the possession of the original owner.
LABOR - ONE YEAR For a period of one year from the date of purchase, VISION FITNESS, through its local retailers, will provide the necessary Labor for repair and replacement of Frames, Electronics, Motors, and Parts under this warranty, so long as the device remains in the possession of the original owner.
Manufacturer's Warranty
Lake Mills WI 53551800-335-4348
Maintenance Requirements
Warning: To reduce the risk of burns, fire, electrical shock or injury to persons:1. Use this exercise product for its intended use as described in this Owner's Guide. Only use attachments recommended by the manufacturer.2. Never drop or insert any object into any opening.3. Do not remove the Bike sidecovers. Service should be performed only by an authorized VISION FITNESS retailer.4. Never operate this Bike if it is not working properly or if it has been damaged or immersed in water. Return the Bike to a retailer for examination and repair.5. Do not use outdoors.CHILDREN1. Keep children off of your Bike at all times.2. When the Bike is in use, young children and pets should be kept at least 10 feet away.
CAUTION: If you experience chest pains, nausea, dizziness or shortness of breath, stop exercising immediately and consult your physician before continuing.1. Do not wear loose clothing that might catch on any part of the Bike.2. Read this Owner's Guide before operating this Bike.3. Drink plenty of fluids during your workout.
CLEANING1. Clean only with soap and a slightly damp cloth; never use solvents.
SERVICE AND TROUBLESHOOTING PREVENTATIVE MAINTENANCE TIPS1. Locate Bike in a cool, dry pace.2. Clean the top surface of the pedals regularly.3. Make sure pedals are kept tight to crank arms.4. Keep the display console free from fingerprints and salt buildup caused by sweat.5. Use a cotton cloth with water and a mild cleaning product to clean the Bike. Other fabrics, including paper towels, may scratch the surface. Do not use ammonia or acid-based cleaners.6. Clean the housing thoroughly on a regular basis.
Page 6 of 1172008CopyrightThe Helsing Group, Inc.
All Rights Reserved

Maintenance Manual, Warranties, and Performance Guidelines
Vision Fitness Commercial Cycle - E3600HRT
Kimberly Place Community AssociationAmenities
PREVENTATIVE MAINTENANCE SCHEDULEFollow the schedules below to ensure proper operation of the product.
Cleaning Schedule:DISPLAY CONSOLE: WeeklyFRAME: WeeklySEAT FRAME: WeeklyHANDLEBARS: WeeklyPLASTIC COVERS: WeeklyPEDALS AND STRAPS: WeeklySEAT: Weekly
Inspection Schedule:DISPLAY CONSOLE: MonthlySEAT FRAME: MonthlyHANDLEBARS: MonthlyPLASTIC COVERS: MonthlyPEDALS AND STRAPS: MonthlySEAT: Bi-AnnuallyCONSOLE MOUNTING BOLTS: Bi-AnnuallyFRAME: Annually
TROUBLESHOOTINGOur Bikes are designed to be reliable and easy to use. If, however, you have a problem, these troubleshooting steps may reveal thecause.PROBLEM: The console does not light up.SOLUTION: Make sure you are pedaling the Bike.SOLUTION: Make sure the wire harness is plugged into the back of the console.
PROBLEM: The Bike is making a clicking noise.SOLUTION: Using the pedal wrench supplied with your Bike, remove both the left and right pedals, apply grease to the threaded portion and reassemble the pedals onto the Bike. Make sure the pedals are tight.SOLUTION: Make sure the pedal straps or your shoelaces are not hitting the side cover.SOLUTION: Assure seat adjustment is tight (see pages 10 and 11).
PROBLEM: The Bike makes a squeaking or creaking noise. SOLUTION: Check and tighten all hardware.
PROBLEM: The seat on your semi-recumbent Bike rocks from side to side.SOLUTION: With a 13mm wrench, loosen the Fixing Nuts on the side of the seat frame. With a 11mm wrench, pivot the Adjusting Post so the Fixing Nut is at the top of the slot. Tighten the Fixing Nut with the 13mm wrench.
TROUBLESHOOTING YOUR HEART RATE MONITOR CHEST STRAPPROBLEM: No pulse reading appears.SOLUTION: There may be a poor connection between the contact pads and skin; remoisten the electrode pads.SOLUTION: Transmitter is not properly positioned; reposition the chest strap.SOLUTION: Verify that the distance between the transmitter and receiver is not beyond the recommended range of 36 inches.
PROBLEM: There is an erratic pulse rate.
Page 7 of 1172008CopyrightThe Helsing Group, Inc.
All Rights Reserved

Maintenance Manual, Warranties, and Performance Guidelines
Vision Fitness Commercial Cycle - E3600HRT
Kimberly Place Community AssociationAmenities
SOLUTION: Chest strap is too loose; readjust according to directions.NOTE: It is possible that heart rate monitors will not function properly on some people for a variety of reasons. It may be necessary to experiment with the fit and position of the chest strap. Outside interference sources such as computers, motors, electric dog fences, home security systems, remote controls, CD players, fluorescent lights, etc., may cause problems for heart ratemonitors.
Required Inspection and Maintenance should be performed WeeklyThis task should be accomplished using: No special skill required for cleaning; Qualified Personnel for
Servicing.Please refer to Volume II of this manual for supplemental information about this component.
Page 8 of 1172008CopyrightThe Helsing Group, Inc.
All Rights Reserved

Maintenance Manual, Warranties, and Performance Guidelines
Vision Fitness Commercial Elliptical - X6700HRT
Kimberly Place Community AssociationAmenities
Vision Fitness500 South CP Avenue, PO Box 280
FRAME - LIFETIME VISION FITNESS warrants the Frame against defects in workmanship and materials for the lifetime of the originalowner, so long as the device remains in the possession of the originalowner.
CAMBRIDGE MOTOR WORKS GENERATOR SYSTEM, ELECTRONICS, & PARTS - FIVE YEARS VISION FITNESS warrants the Generator System, Electronics & Parts against defects inworkmanship and materials for a period of five years from date oforiginal purchase, so long as the device remains in the possession of the original owner.
LABOR - TWO YEARS For a period of two years from the date of purchase, VISION FITNESS, through its local retailers, will provide the necessary Labor for repair and replacement of Frames, Electronics, Motors, and Parts under this warranty, so long as the device remains in the possession of the original owner.
Manufacturer's Warranty
Lake Mills WI 53551800-335-4348
Maintenance Requirements
Warning: To reduce the risk of burns, fire, electrical shock or injury to persons:1. Use this exercise product for its intended use as described in this Owner's Guide. Only use attachments recommended by themanufacturer.2. Never drop or insert any object into any opening.3. Do not remove the Elliptical Trainer sidecovers. Service should be performed only by an authorized VISION FITNESS retailer.4. Never operate this Elliptical Trainer if it is not working properly or if it has been damaged or immersed in water. Return the Elliptical Trainer to a retailer for examination and repair.5. Do not use outdoors.
CHILDREN1. Keep children off of your Elliptical Trainer at all times.2. When the Elliptical Trainer is in use, young children and pets should be kept at least 10 feet away.
OTHER SAFETY TIPS FOR YOUR VISION FITNESS ELLIPTICAL TRAINERIf you experience chest pains, nausea, dizziness or shortness of breath, stop exercising immediately and consult your physicianbefore continuing.1. Do not wear loose clothing that might catch on any part of the Elliptical Trainer.2. Read this Owner's Guide before operating this Elliptical Trainer.
CLEANING1. Clean only with soap and a slightly damp cloth; never use solvents.
SERVICE AND TROUBLESHOOTING PREVENTATIVE MAINTENANCE TIPS1. Locate Elliptical Trainer in a cool, dry pace.2. Make sure all bolts and fasteners are kept tight.3. Keep the display console free from fingerprints and salt buildup caused by sweat.4. Use a cotton cloth with water and a mild cleaning product to clean the Elliptical Trainer. Other fabrics, including paper towels, may scratch the surface. Do not use ammonia or acid-based cleaners.
Page 9 of 1172008CopyrightThe Helsing Group, Inc.
All Rights Reserved

Maintenance Manual, Warranties, and Performance Guidelines
Vision Fitness Commercial Elliptical - X6700HRT
Kimberly Place Community AssociationAmenities
5. Clean the housing thoroughly on a regular basis.
PREVENTATIVE MAINTENANCE SCHEDULE
Cleaning Schedule:DISPLAY CONSOLE: DailyFRAME: DailyHANDLEBARS: DailyGUIDE RAILS: DailyROLLER WHEELS: DailyPLASTIC COVERS: DailyFOOTPLATES: Daily
Inspection Schedule:DISPLAY CONSOLE: MonthlyALL BOLTS AND HARDWARE: MonthlyHANDLEBARS: MonthlyROLLER WHEELS: MonthlyFRAME: Annually
TROUBLESHOOTING YOUR ELLIPTICAL TRAINEROur Elliptical Trainers are designed to be reliable and easy to use. If, however, you have a problem, these troubleshooting stepsmay indicate the cause.
PROBLEM: The console does not light up.SOLUTION: Make sure you are turning the pedals. This is a self-generating product.SOLUTION: Make sure the wire harness is plugged in to the back of the console.
PROBLEM: The Elliptical Trainer makes a squeaking or creaking noise. SOLUTION: Check and tighten all the bolts on the Elliptical Trainer. SOLUTION: Clean the track and the roller wheels with a cloth and a mild cleaning detergent.
PROBLEM: You lose power to the console when you reverse direction, or when you stop pedaling at the end of your workout. SOLUTION: Remove the battery cover on the backside of your console. Either plug in the existing battery, or replace with a new 9-volt battery.
NOTE: If the above steps do not remedy the problem, discontinue use and contact your retailer.
TROUBLESHOOTING YOUR HEART RATE MONITOR CHEST STRAP
PROBLEM: No pulse reading appears.SOLUTION: There may be a poor connection between the contact pads and skin; remoisten the electrode pads.SOLUTION: Transmitter is not properly positioned; reposition the chest strap.SOLUTION: Verify that the distance between the transmitter and receiver is not beyond the recommended range of 36 inches.
PROBLEM: There is an erratic pulse rate.SOLUTION: Chest strap is too loose; readjust according to directions.
NOTE: It is possible that heart rate monitors will not function properly on some people for a variety of reasons. It may be necessary to experiment with the fit and position of the chest strap. Outside interference sources such as computers, motors,
Page 10 of 1172008CopyrightThe Helsing Group, Inc.
All Rights Reserved

Maintenance Manual, Warranties, and Performance Guidelines
Vision Fitness Commercial Elliptical - X6700HRT
Kimberly Place Community AssociationAmenities
electric dog fences, home security systems, remote controls, CD players, fluorescent lights, etc., may cause problems for heart ratemonitors.
Required Inspection and Maintenance should be performed DailyThis task should be accomplished using: No special skill required for cleaning; Qualified Personnel for
Servicing.Please refer to Volume II of this manual for supplemental information about this component.
Page 11 of 1172008CopyrightThe Helsing Group, Inc.
All Rights Reserved

Maintenance Manual, Warranties, and Performance Guidelines
Cluster Mailboxes
Kimberly Place Community AssociationAmenities
Maintenance Requirements
Inspect mailboxes for damage to the paint, structure, or locking mechanisms. Repair and/or repaint mailboxes as needed. If thereis damage to a lock which is accessed by the Post Office (e.g., the outgoing mail box), the Post Office should be contacted immediately.
Required Inspection and Maintenance should be performed AnnuallyThis task should be accomplished using: No special skill required for inspections.
Page 12 of 1172008CopyrightThe Helsing Group, Inc.
All Rights Reserved

Maintenance Manual, Warranties, and Performance Guidelines
Exterior Doors
Kimberly Place Community AssociationDoors and Windows
Maintenance Requirements
Doors are usually refinished separately and on a paint cycle usually dissimilar to exterior paint. They are usually painted/refinished with a gloss or semi-gloss paint that will withstand daily wear, pushing open and closed, and many cleanings. Some doors are more susceptible to hard use such as the trash room doors, and some such as water heater or pool mechanical doors face constant moisture or corrosive agents and are equipped with louvers. In any case, doors need to be well-sealed, not just on their surfaces, but on louvers, vents, and edges and the bottom where the door was trimmed to clear a carpet or threshold.
Door finish should be checked annually along with other paint components. Doors exposed to the elements should be inspected closely to ensure all wood and metal is paint protected and that louvers are sealed to prevent water intrusion. Exterior door trimneeds to be inspected before each rainy season and any failed caulk joints need to be renewed. Proper maintenance includes monitoring and restoring caulking and weather stripping. Protected areas include the door and door frames. Some caulking andweather stripping may deteriorate over time. Periodically, check caulking to ensure that it has not dried and cracked or fallen out. The rate of deterioration depends on the amount of exposure to the elements. Reattach the weather stripping if it becomes loose and replace it if it becomes torn or no longer makes an effective seal.
Door shoes need to be adjusted to make good contact with the threshold. Protect exterior door assemblies from pressurized water such as from hoses or irrigation systems. Doors need to be inspected and adjusted to seal against weather as necessary tocompensate for seasonal movement of the building's frame.
Damage to doors should be reported promptly and repairs made to protect the component.
Required Inspection and Maintenance should be performed AnnuallyThis task should be accomplished using: No special skill required.
Page 13 of 1172008CopyrightThe Helsing Group, Inc.
All Rights Reserved

Maintenance Manual, Warranties, and Performance Guidelines
Garage Doors and Hardware
Kimberly Place Community AssociationDoors and Windows
The upward opening garage door is usually the largest moving piece of equipment installed or attached to any home or building. As such, its weight can approach or exceed 400 pounds depending on the size and type of construction. The manufacturer has designed and sized the components specifically for the type of door, and you can expect to have efficient and safe operation of thedoor over an extended period of time - provided it is properly maintained.
Helpful Hints
Maintenance Requirements
All mechanical devices require periodic service and/or maintenance. Garage doors are no exception. The amount and frequency of preventive maintenance required depends on many conditions within which the door operates, the frequency of operation, geographical location, and the ambient environmental conditions. Preventive maintenance should be performed at least every sixmonths, and more frequently if conditions warrant. Unless maintenance personnel are experienced in the maintenance and repair of garage doors, the maximum amount of maintenance undertaken should be the lubrication of moving parts, and the inspection of certain components for tightness.
NOTE: REPAIRING SPRINGS AND CABLES is a DANGEROUS PROCEDURE and may cause physical injury if improperlyperfomed. Such maintenance should be performed ONLY by qualified door service personnel.
DOOR TRACKS: Maintain tracks free of oil or grease to enhance operation of track rollers. Grease attracts dirt and dust whichbuild up and impede smooth operation of the door.
LUBRICATION: Lubrication in general reduces wear and friction. A 30W or other medium oil is satisfactory. If desired, anaerosol similar to WD-40 may be used to lubricate spring surfaces. Wipe off excess oil from door and track surfaces. Lightly Oil: 1. Hinge Points 2. Steel Rollers: Roller stems and inner race of assembly 3. Non-metal Rollers: Nylon or Urethane rollers are self lubricating and REQUIRE NO LUBRICATION IN THE RACE OF THE BEARING. 4. Locking Device: moving parts 5. Extension Spring Assembly: Pulley bearings 6. Torsion Spring Assembly: Bearing surfaces of headplate and torsion tube as well as spring coil surfaces. HARDWARE INSPECTION: With the door in a down, closed and locked position inspect hinges, top fixtures, locking devices, and track braces to make sure that they are securely affixed with fasteners. Re-tighten as necessary, but DO NOT over tighten. Excess torque may strip the threads and render the fastener useless.
CABLE INSPECTION: With the door in a down, closed, and locked position inspect to ensure cables are taut, and secured to
Page 14 of 1172008CopyrightThe Helsing Group, Inc.
All Rights Reserved

Maintenance Manual, Warranties, and Performance Guidelines
Garage Doors and Hardware
Kimberly Place Community AssociationDoors and Windows
bottom fixtures. Cables must be un-obstructed from bottom fixture to cable pulleys or cable drum. Inspect for frayed or broken strands.
WARNING: Replacement of the cable is a DANGEROUS procedure and should be performed only by experienced door personnel. Cables are generally attached to the bottom fixture and extreme caution should be used in tightening fastners. NEVER LOOSEN fasteners on the bottom fixtures. The cables transport the full weight of the door and must be free of breaks.
EXTENSION SPRING COUNTERBALANCE ASSEMBLY
WARNING: Replacement or adjustment of any components of the spring assemblies is a DANGEROUS procedure, and may cause physical injury if improperly performed. Forces generated in springs are generally equal to the door weight, and those forces are violently released if a spring breaks while wound or stretched. If a spring breaks, DO NOT ATTEMPT REPAIR; call a qualified door service repairman. DO NOT attempt to LOOSEN any fasteners associated with the spring or cable assemblies, as it could cause the spring to unwind or release or the door to fall if it is in the open position.
TORSION SPRING COUNTERBALANCE ASSEMBLY
WARNING: NEVER LOOSEN any fasteners on the torsion spring counter- balance assembly.
BROKEN SPRING or CABLE or SLIPPED CABLE: If a spring or cable breaks while the door is in the open position, generally the door will start to close. The door may close to the floor, or, in some instances cock or wedge into the tracks in a partiallyclosed position. DO NOT attempt any adjustments as it may free fall and cause bodily injury. Call a qualified door service repairman for repairs. If a cable slips off a torsion spring, similar conditions may result and a qualified door service man should becontacted for repairs.
Required Inspection and Maintenance should be performed Semi-AnnuallyThis task should be accomplished using: Qualified Door Service Personnel
Page 15 of 1172008CopyrightThe Helsing Group, Inc.
All Rights Reserved

Maintenance Manual, Warranties, and Performance Guidelines
Interior Doors
Kimberly Place Community AssociationDoors and Windows
Maintenance Requirements
Interior doors require minimal maintenance for proper functioning. Inspect the doors periodically to ensure that they move freelyand quietly. Noisy hinges may be treated with any commercially available lubricant that is compatible with the hinge finish. If thedoor surface becomes dirty from spills or accumulation of fingerprints, wipe with warm water and mild dish soap, or a commercial cleaner that is labeled as suitable for the door's surface material.
Required Inspection and Maintenance should be performed AnnuallyThis task should be accomplished using: No special skill for inspection or cleaning; qualified personnel
for replacement
Page 16 of 1172008CopyrightThe Helsing Group, Inc.
All Rights Reserved

Maintenance Manual, Warranties, and Performance Guidelines
Skylights
Kimberly Place Community AssociationDoors and Windows
Maintenance Requirements
Inspect skylights periodically to ensure they are in good repair and not permitting water intrusion. Check for a draft, or any waterstains on the ceiling near the skylight. Inspect the inner frame for damage and touch up paint as needed. If extensive repairs are required, they should be performed by qualified personnel.
GlassClean glass as needed, using a commercial glass cleaning product or a weak solution of household ammonia, mild soap and water;rinse well. Dry with a squeegee or chamois.
PlasticClean plastic with a mild soap or detergent and water or a weak solution of household ammonia; rinse well. Dry with a chamois to prevent spots.
For both surfaces, avoid abrasive cleaners or pads. Do not use sharp tools, such as razor blades or putty knives, to remove dirt.
Required Inspection and Maintenance should be performed Semi-AnnuallyThis task should be accomplished using: No special skill required for inspection; qualified personnel
for repairs
Page 17 of 1172008CopyrightThe Helsing Group, Inc.
All Rights Reserved

Maintenance Manual, Warranties, and Performance Guidelines
Windows
Kimberly Place Community AssociationDoors and Windows
Maintenance Requirements
Windows require periodic maintenance to ensure proper functioning. Leaks can result in dry rot and significant water damage to other components. Inspect windows for stains or other signs of water intrusion, and examine the sealing between the window jamb and the wall. Reapply sealing as needed. Keep the windowsill and interior and exterior water drainage holes (if any) clean and free from obstruction. A vacuum cleaner with a crevice attachment may help to accomplish this.
Inspect hardware components to ensure smooth operation. If needed, these may be treated with an appropriate lubricant. Do notstain or paint window hardware, vinyl frames, weatherstripping, or glass.
Keep windows clean of dust, dirt, paint, and plaster. The frame and insect screens may be cleaned with a mild detergent solutionand a soft cloth. Clean glass with a detergent solution, a mixture of ammonia and water, or a commercial glass cleaner. NEVER use abrasive cleansers, corrosive solvents, petroleum products, or caustic chemicals (such as acetone or paint thinner) to clean anypart of the window, as these can cause permanent damage.
Required Inspection and Maintenance should be performed QuarterlyThis task should be accomplished using: No special skill for inspection; qualified personnel for repairs
Page 18 of 1172008CopyrightThe Helsing Group, Inc.
All Rights Reserved

Maintenance Manual, Warranties, and Performance Guidelines
Metal/Wood Carport Structure
Kimberly Place Community AssociationExterior Building Components
Maintenance Requirements
Painted metal may sustain major damage if left unmaintained for long periods, requiring extensive repair work. Annual inspections provide the opportunity to address damage in its early stages and avoid more costly repairs or replacement.
Some wooden components may be susceptible to damage by cars and utility vehicles backing into them. Prompt repair of this damage can prevent further component deterioration and maintain aesthetics. To help preserve the integrity of the wood, always keep nearby sprinkler heads, if any, properly aligned. Water should not be allowed to spray directly on the wood for extended periods. Power washing should only be performed as necessary to removemold and spores from the surface finish. Painted wooden structures will need re-painting approximately every five years; the actual interval can be more or less depending on the product used and the environmental conditions.
Required Inspection and Maintenance should be performed AnnuallyThis task should be accomplished using: No special skill for inspections; qualified personnel for repairs
Page 19 of 1172008CopyrightThe Helsing Group, Inc.
All Rights Reserved

Maintenance Manual, Warranties, and Performance Guidelines
Trash Enclosure Area
Kimberly Place Community AssociationExterior Building Components
Maintenance Requirements
Inspect the trash enclosure area periodically to ensure that it is kept clear of debris, litter and other obstructions. Rodents and other pests are often attracted to waste disposal areas. If excessive vermin are observed on a regular basis, consult a qualified pest control contractor.
Waste should be deposited in such a manner as to prevent spilling out of the trash receptacles. Do not place toxic recyclables inthe receptacles, such as batteries, oil filters, and motor oil. Large bulky materials, such as furniture and appliances, also should notbe placed in the receptacles. For instructions on proper disposal of such items, contact the local waste disposal company.
Required Inspection and Maintenance should be performed MonthlyThis task should be accomplished using: No special skill required.
Page 20 of 1172008CopyrightThe Helsing Group, Inc.
All Rights Reserved

Maintenance Manual, Warranties, and Performance Guidelines
Metal Railings
Kimberly Place Community AssociationExterior Building Components
Maintenance Requirements
Metal railings need to be inspected annually, rusted areas de-rusted, the areas primed and painted if applicable. Railings may sustain major damage if left unmaintained for long periods, requiring extensive repair work. Annual inspections provide the opportunity to address damage in its early stages and avoid more costly repairs or replacement.
On a regularly scheduled basis, all painted metal components should be routinely weather protected by the application of a freshcoat of paint over the existing finish. Prior to painting, the surfaces need to be adequately prepared by sanding, grinding, cleaningand /or stripping.
Required Inspection and Maintenance should be performed AnnuallyThis task should be accomplished using: No special skill required.
Page 21 of 1172008CopyrightThe Helsing Group, Inc.
All Rights Reserved

Maintenance Manual, Warranties, and Performance Guidelines
Wooden Railings - Painted
Kimberly Place Community AssociationExterior Building Components
Preventative maintenance is crucial to the appearance and longevity of exterior wood. Most of the problems associated with wood, from paint damage to dry rot and termite infestation, can cause serious damage if left untreated. A regular program of inspectionsallows for early detection and easier repairs.
The most important aspect of caring for exterior wood is maintaining the paint job. The paint is intended not only to beaesthetically pleasing, but more importantly to protect the wood from weather and insects. Without the protection of good qualitypaint or stain, wood quickly sustains serious damage and requires replacement. Surface treatments typically last 3 to 5 years, depending on the quality of the paint or stain and the environmental conditions to which it is exposed.
Helpful Hints
Maintenance Requirements
Inspect railings twice annually, including an inspection prior to the start of the rainy season. Look for any boards that are split, cracked, or warped; or any holes in the wood. Boards with such defects should be repaired or replaced promptly.
Inspect the fastenings on all railings. Shake the railings vigorously to make sure they are fastened securely.
Carefully inspect the wood for any soft or decaying spots, particularly on areas near the ground. This may indicate insect damageor dry rot. Inspect the area for evidence of termites. If you suspect termites or termite damage, contact a professional inspector foran evaluation. To help preserve the integrity of the wood, always keep nearby sprinkler heads properly aligned. Water should not be allowed to spray directly on the wood.
Inspect painted surfaces carefully for splinters, rust stains, peeling or chipped paint. At the same time, examine the caulk aroundall of the joints to see if it has sustained damage or is becoming detached. Repainting should be performed at least every 5 years, or more frequently as needed. Before caulking and painting, surfaces must be correctly prepared. This may involve filling holeswith putty, sanding, and cleaning.
Required Inspection and Maintenance should be performed Semi-AnnuallyThis task should be accomplished using: No special skill required for inspections.
Page 22 of 1172008CopyrightThe Helsing Group, Inc.
All Rights Reserved

Maintenance Manual, Warranties, and Performance Guidelines
Light Concrete Decks
Kimberly Place Community AssociationExterior Building Components
Maintenance Requirements
Concrete deck surfaces should be inspected periodically to address any maintenance or safety issues that may arise. Cracks large enough to allow water penetration should be filled with a suitable concrete caulk.
If the deck is equipped with drains, inspect these and clear away any debris to ensure an unimpeded flow of water. Improper drainage can result in considerable structural damage over time.
Surfaces may be cleaned by pressure washing if needed.
Required Inspection and Maintenance should be performed Semi-AnnuallyThis task should be accomplished using: No special skill for cleaning; qualified contractor for repairs
Page 23 of 1172008CopyrightThe Helsing Group, Inc.
All Rights Reserved

Maintenance Manual, Warranties, and Performance Guidelines
Wooden Decks
Kimberly Place Community AssociationExterior Building Components
Maintenance Requirements
Wooden decks should be swept regularly to remove dirt and debris such as fallen leaves. Dirt and debris collect moisture, whichencourages the growth of mold and mildew. Excessive moisture also leads to dry rot and degradation of the wood. Be particularlycareful to remove debris that collects between boards, as dry rot frequently begins in this location.
Thoroughly inspect the deck twice annually. If any wooden components are near ground level, those should be inspected especially closely since they are the most susceptible to rot and insect damage. Examine individual boards for rotten areas, orloose nails. Use a nail set and hammer to drive popped nail heads back below the surface. A qualified contractor should performstructural repairs as necessary.
A thorough cleaning of the deck surface is required at least once a year. A number of deck cleaners are commercially available and may be applied with a scrub brush. Pressure washing is another option. When pressure washing, keep the tip of the spray gun at least 4-6 inches from the deck surface, and always keep it moving. Too much concentrated spray can damage the grain of thewood. When finished washing, towel dry any areas of overspray and allow the deck to dry for at least 12 hours.
Decks should be periodically re-sealed with a waterproof sealer or stain, every year or two as needed.
Required Inspection and Maintenance should be performed AnnuallyThis task should be accomplished using: No special skill required for cleaning; qualified contractor for
repairs
Page 24 of 1172008CopyrightThe Helsing Group, Inc.
All Rights Reserved

Maintenance Manual, Warranties, and Performance Guidelines
Tile Siding
Kimberly Place Community AssociationExterior Building Components
Maintenance Requirements
Tile siding should require minimal maintenance for proper functioning, but regular inspections are needed to ensure that small problems do not develop into major ones. Inspect the tile annually for any damage. Look for cracks or wear in the mortar. Sections of deteriorated mortar may be removed and repaired, but never attempt to use concrete to repair mortar. Sections of tilemay require replacement if surface damage is excessive. If needed, these surfaces may be cleaned with gentle pressure washing.
Required Inspection and Maintenance should be performed AnnuallyThis task should be accomplished using: No special skill required for inspection; qualified contractor
for repairs
Page 25 of 1172008CopyrightThe Helsing Group, Inc.
All Rights Reserved

Maintenance Manual, Warranties, and Performance Guidelines
Wood Panel Siding and Trim
Kimberly Place Community AssociationExterior Building Components
Preventative maintenance is crucial to the appearance and longevity of exterior wood. Most of the problems associated with wood, from paint damage to dry rot and termite infestation, can cause serious damage if left untreated. A regular program of inspectionsallows for early detection and easier repairs.
The most important aspect of caring for exterior wood is maintaining the paint job. The paint is intended not only to beaesthetically pleasing, but more importantly to protect the wood from weather and insects. Without the protection of good qualitypaint or stain, wood quickly sustains serious damage and requires replacement. Surface treatments typically last 3 to 5 years, depending on the quality of the paint or stain and the environmental conditions to which it is exposed.
Proper ventilation is needed for maintaining the integrity of exterior wood and paint. Excessive moisture may cause wood to warp or rot, and may damage paint. Pay special attention to painted areas that appear to be “blistering.” In an inadequately ventilatedwall, moisture travels through the wood and condenses right underneath the paint layer, causing the paint to detach from thesurface in a way that resembles a blister. If blistering paint is a recurring problem, additional ventilation may be needed to improve the airflow. Consult with a qualified contractor to determine the best course of action. Leaking roof components may alsocontribute to the degradation of the wood and paint beneath. If modifications to the roof or ventilation system are needed, this work should be completed before the damaged surface is prepared and repainted.
Helpful Hints
Maintenance Requirements
Wood siding and trim should be inspected twice annually, including an inspection prior to the start of the rainy season. First, examine the general appearance of the siding and trim. Look for any boards that are split, cracked, or warped; or any holes in the wood. Identify any boards that are pulling away from each other or from other surfaces. These defects should be repaired as soon as possible to prevent water intrusion into the structure. If warping of the trim is severe, consult a professional to determinewhether repair or replacement is more appropriate.
Check for any missing or protruding nails. Protruding nails should be removed and replaced with a slightly larger nail to ensure asecure fit. Drive the nail head so that it is even with the wood, but do not drive it into the wood.
Carefully inspect for any soft or decaying spots, particularly around the edges of the siding and on areas near the ground. This may indicate insect damage or dry rot. Inspect the area for evidence of termites. If you suspect termites or termite damage, contact a professional inspector for an evaluation.
Page 26 of 1172008CopyrightThe Helsing Group, Inc.
All Rights Reserved

Maintenance Manual, Warranties, and Performance Guidelines
Wood Panel Siding and Trim
Kimberly Place Community AssociationExterior Building Components
Exterior wood is particularly susceptible to damage from the sun and weather. The wood may develop cracks and raised grain as itages, which contributes to paint damage. Inspect painted surfaces carefully for splinters, rust stains, peeling or chipped paint. At the same time, examine the caulk around all of the joints to see if it has sustained damage or is becoming detached. Repainting should be performed at least every 5 years, or more frequently as needed. Before caulking and painting, surfaces must be correctly prepared. This may involve filling holes with putty, sanding, and cleaning.
The lower portions of the siding and trim should be inspected to ensure appropriate clearance between the wooden components andthe ground. Wood is especially vulnerable to moisture intrusion and insects when it is too close to the ground. Six to eight inches of clearance above the ground is typically adequate. If needed, re-grade the surrounding soil to maintain clearance. Always make sure that proper clearance is maintained whenever landscaping work is performed in the vicinity. Keep nearby sprinkler heads properly aligned; water should not be allowed to spray directly on the trim or siding.
Required Inspection and Maintenance should be performed Semi-AnnuallyThis task should be accomplished using: No special skill required for inspections.
Page 27 of 1172008CopyrightThe Helsing Group, Inc.
All Rights Reserved

Maintenance Manual, Warranties, and Performance Guidelines
Stairways
Kimberly Place Community AssociationExterior Building Components
Maintenance Requirements
For safety reasons, common area stairways should be inspected on a regular basis. Keep the stairs and landings clear of debris and obstacles. Make sure the steps appear sturdy, and free of damage or irregularities that might pose a trip hazard. Inspect the railings and fastenings also. Give the railing a firm shake to make sure that it is securely attached. Any damage should be repairedpromptly by a qualified contractor.
Required Inspection and Maintenance should be performed MonthlyThis task should be accomplished using: No special skill for inspection; qualified contractor for repairs
Page 28 of 1172008CopyrightThe Helsing Group, Inc.
All Rights Reserved

Maintenance Manual, Warranties, and Performance Guidelines
Caulking
Kimberly Place Community AssociationExterior Building Components
Maintenance Requirements
Over time and exposure to weather conditions, caulking will shrink and dry so that it no longer provides a good seal. Inspect all exterior caulking periodically and repair as necessary with a caulking compound and dispenser gun, which can be found at hardware stores.
Caulking that has shrunk, peeled or deteriorated requires routine recaulking.
Required Inspection and Maintenance should be performed AnnuallyThis task should be accomplished using: Handyman
Page 29 of 1172008CopyrightThe Helsing Group, Inc.
All Rights Reserved

Maintenance Manual, Warranties, and Performance Guidelines
Granite Countertops
Kimberly Place Community AssociationInterior Finishes
Maintenance Requirements
Clean granite surfaces regularly with a soft, clean cloth and a neutral cleanser such as mild dish soap and warm water, or a stone soap recommended by the manufacturer for use on granite. When using a new soap, always test the product on an inconspicuous area before applying the product to the entire surface. Do not use too much soap, as this may leave streaks. Rinse thoroughly anddry with a soft cloth to avoid water marks.
Avoid harsh chemicals, abrasive cloths or cleansers, and high-acid substances such as lemon juice or vinegar, which may etch the surface. Food and beverage spills should be wiped up immediately and the surface cleaned as described above. Do not allow oilyitems, such as pizza boxes, to sit out on the countertop.
To prevent staining, periodic sealing of the countertop is recommended. Countertops will normally require sealing approximatelyevery 6 months to one year. To check if the granite needs to be sealed, sprinkle a little water on the countertop. If the water is absorbed into the stone and does not bead up on the surface, it may be time to reseal. Read the label on the sealant containerbefore using, to verify that it is intended for granite countertops, and follow the sealant manufacturer’s instructions for use. Be aware that sealing the stone may result in a slight change in color.
If the countertop surface becomes scratched, contact the installer, a professional fabricator or restoration specialist to refinish thesurface.
Required Inspection and Maintenance should be performed MonthlyThis task should be accomplished using: No special skill required for sealing; qualified contractor for
repair
Page 30 of 1172008CopyrightThe Helsing Group, Inc.
All Rights Reserved

Maintenance Manual, Warranties, and Performance Guidelines
Carpet
Kimberly Place Community AssociationInterior Finishes
Carpet is a high maintenance item. It wears out because of foot traffic and dirt particles that get trampled deep into the pile beyondthe suction of a vacuum cleaner. The dirt particles wear down the fibers like sandpaper and dull the carpet. The most important step to protect carpeting is to vacuum frequently and on a regular basis.
No carpet is stain proof. Although some carpet manufacturers designate their carpets as stain-resistant, some substances may still cause permanent staining. These include, but are not limited to, hair dyes, shoe polish, paints and India ink. Some substances destroy or change the color of carpet including, but not limited to, bleaches, acne medications, drain cleaners, plant food,insecticides, and food or beverages with strongly colored natural dyes as found in some brands of mustard and herbal teas.
All carpet will slowly lose some color over time due to natural and artificial forces in the environment. This process can be slowed by frequently removing soil by vacuuming, keeping humidity and room temperatures from getting too high, and reducing sunlight exposure with window coverings.
Pilling, or small balls of fiber, can appear on your carpet, depending upon the type of carpet fiber and the type of traffic. This is anormal condition in the aging of your carpet. If this occurs, simply clip off the pills. If they cover a large area, seek professional advice.
Helpful Hints
Maintenance Requirements
Carpet should be vacuumed regularly, at least once a week. High traffic areas may require more frequent vacuuming. While you are vacuuming, inspect the carpet for spotting or wear and tear, particularly at elevation changes (stairs, etc). Proper inspection requires that deterioration and defects be noted and then assessed for cause before repairs are attempted. Some small holes or tears can be repaired with repair kits that are commercially produced. Spots and stains are aesthetic items which can detract from thevisual appreciation of the component, if not removed.
Depending on the extent of damage, repairs should be made to defects as soon as practical. Small problems quickly turn intobigger problems if left uncorrected.
It is advisable to have carpet professionally steam cleaned once each year. This practice will improve the appearance of the carpet and prolong its life.
Required Inspection and Maintenance should be performed Monthly
Page 31 of 1172008CopyrightThe Helsing Group, Inc.
All Rights Reserved

Maintenance Manual, Warranties, and Performance Guidelines
Carpet
Kimberly Place Community AssociationInterior Finishes
This task should be accomplished using: No special skill for vacuuming; qualified professional for steam cleaning
Page 32 of 1172008CopyrightThe Helsing Group, Inc.
All Rights Reserved

Maintenance Manual, Warranties, and Performance Guidelines
Vinyl Linoleum Flooring
Kimberly Place Community AssociationInterior Finishes
Maintenance Requirements
Maintenance of vinyl linoleum surfaces consists primarily of frequent sweeping and damp mopping. While wax-free linoleum finish is now the most common vinyl flooring installation, it still requires regular cleaning and grit removal to protect the clear coatfinish.
While relatively maintenance-free, an annual inspection should be made of all vinyl linoleum used on the property. Specifically, the examination should be to detect vinyl bubbling, lifting caused by water intrusion, cutting or penetrating damage in health andexercise facilities, heat or chemical damage, and adhesive failure. Timely repair of any damage found will normally enhance thiscomponent's appearance.
Since linoleum is primarily used in areas around water sources, it is especially important to periodically check the adequacy of thecaulking that prevents water intrusion behind or under the floor covering.
Vinyl linoleum is susceptible to dents, penetration, or cutting by unpadded chair legs, stepstools, and other heavy equipment or furniture. Keep this in mind when selecting furniture for these areas. Choose items with thicker legs, built-in casters, or cushioned ends.
Required Inspection and Maintenance should be performed MonthlyThis task should be accomplished using: No special skill required.
Page 33 of 1172008CopyrightThe Helsing Group, Inc.
All Rights Reserved
Maintenance Manual, Warranties, and Performance Guidelines
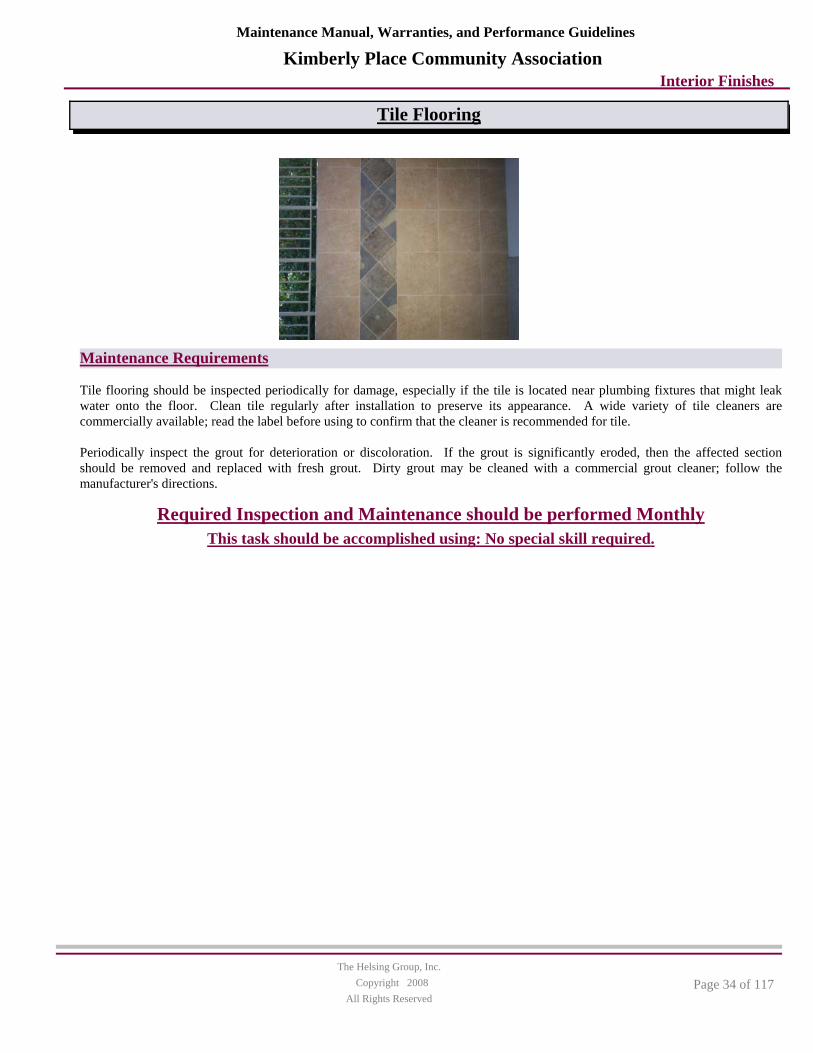
Tile Flooring
Kimberly Place Community AssociationInterior Finishes
Maintenance Requirements
Tile flooring should be inspected periodically for damage, especially if the tile is located near plumbing fixtures that might leakwater onto the floor. Clean tile regularly after installation to preserve its appearance. A wide variety of tile cleaners arecommercially available; read the label before using to confirm that the cleaner is recommended for tile.
Periodically inspect the grout for deterioration or discoloration. If the grout is significantly eroded, then the affected section should be removed and replaced with fresh grout. Dirty grout may be cleaned with a commercial grout cleaner; follow themanufacturer's directions.
Required Inspection and Maintenance should be performed MonthlyThis task should be accomplished using: No special skill required.
Page 34 of 1172008CopyrightThe Helsing Group, Inc.
All Rights Reserved
Maintenance Manual, Warranties, and Performance Guidelines
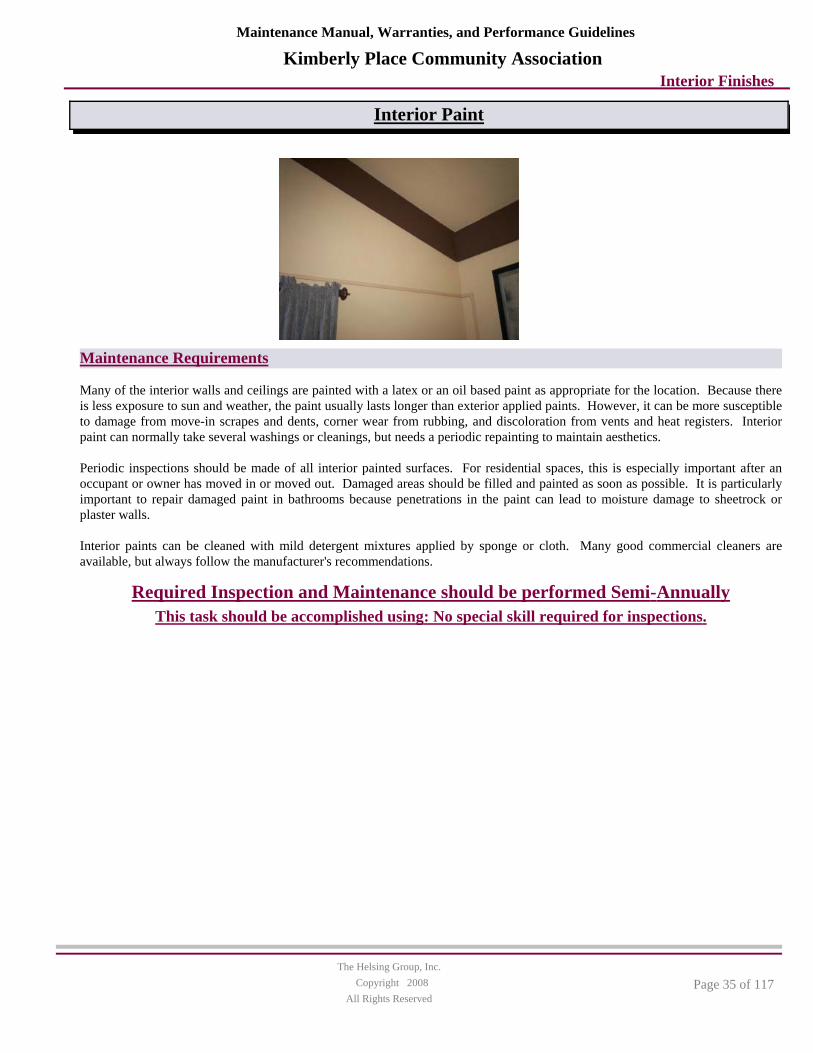
Interior Paint
Kimberly Place Community AssociationInterior Finishes
Maintenance Requirements
Many of the interior walls and ceilings are painted with a latex or an oil based paint as appropriate for the location. Because there is less exposure to sun and weather, the paint usually lasts longer than exterior applied paints. However, it can be more susceptible to damage from move-in scrapes and dents, corner wear from rubbing, and discoloration from vents and heat registers. Interior paint can normally take several washings or cleanings, but needs a periodic repainting to maintain aesthetics.
Periodic inspections should be made of all interior painted surfaces. For residential spaces, this is especially important after anoccupant or owner has moved in or moved out. Damaged areas should be filled and painted as soon as possible. It is particularlyimportant to repair damaged paint in bathrooms because penetrations in the paint can lead to moisture damage to sheetrock orplaster walls.
Interior paints can be cleaned with mild detergent mixtures applied by sponge or cloth. Many good commercial cleaners areavailable, but always follow the manufacturer's recommendations.
Required Inspection and Maintenance should be performed Semi-AnnuallyThis task should be accomplished using: No special skill required for inspections.
Page 35 of 1172008CopyrightThe Helsing Group, Inc.
All Rights Reserved
Maintenance Manual, Warranties, and Performance Guidelines
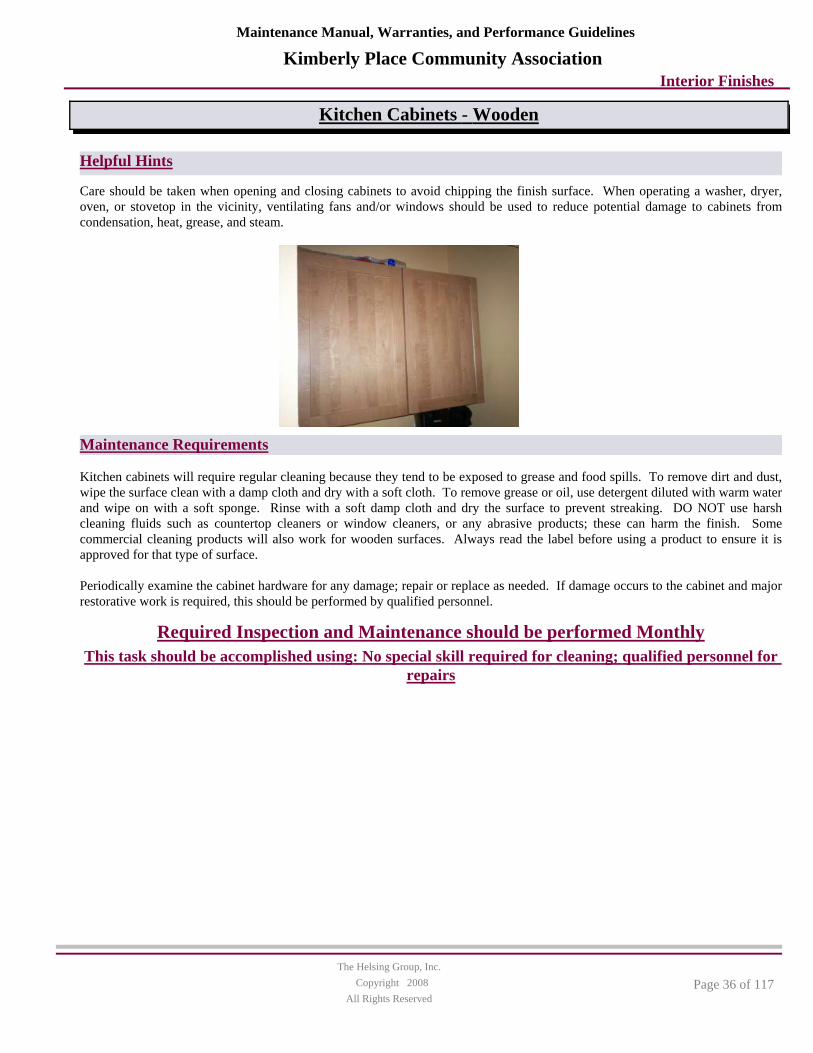
Kitchen Cabinets - Wooden
Kimberly Place Community AssociationInterior Finishes
Care should be taken when opening and closing cabinets to avoid chipping the finish surface. When operating a washer, dryer, oven, or stovetop in the vicinity, ventilating fans and/or windows should be used to reduce potential damage to cabinets fromcondensation, heat, grease, and steam.
Helpful Hints
Maintenance Requirements
Kitchen cabinets will require regular cleaning because they tend to be exposed to grease and food spills. To remove dirt and dust, wipe the surface clean with a damp cloth and dry with a soft cloth. To remove grease or oil, use detergent diluted with warm waterand wipe on with a soft sponge. Rinse with a soft damp cloth and dry the surface to prevent streaking. DO NOT use harsh cleaning fluids such as countertop cleaners or window cleaners, or any abrasive products; these can harm the finish. Some commercial cleaning products will also work for wooden surfaces. Always read the label before using a product to ensure it isapproved for that type of surface.
Periodically examine the cabinet hardware for any damage; repair or replace as needed. If damage occurs to the cabinet and major restorative work is required, this should be performed by qualified personnel.
Required Inspection and Maintenance should be performed MonthlyThis task should be accomplished using: No special skill required for cleaning; qualified personnel for
repairs
Page 36 of 1172008CopyrightThe Helsing Group, Inc.
All Rights Reserved

Maintenance Manual, Warranties, and Performance Guidelines
Association Landscape Maintenance
Kimberly Place Community AssociationLandscape
Maintenance Requirements
Irrigation
The original irrigation equipment brands shall be utilized whenever system repairs or upgrades occur.
Landscape Contractor Requirements
The association shall ensure that the landscape contractor maintains a valid C-27 license from the State of California. The contractor shall also hold appropriate Pest Control Operators and chemical application licensing/certification if they are to performthose duties. If not, then licensed and certified contractors should be used to perform those skills.
The contractor shall provide qualified on-site supervision to ensure high quality work and provide accurate reports. The Association Manager and/or Landscape Committee, as decided by the Board, shall review the contractor’s standards of performance and review. The Association Manager shall provide supervision of Contractor in relation to contracted tasks andprovide evaluation of Contractor performance to the HOA. The contractor shall provide an experienced on-site supervisor to manage the maintenance crew.
The contractor shall adhere to all state, federal and local requirements related to the safe completion of all work. Contractor safety includes the use of safety gear, traffic control and vehicle safety.
The landscape contractor shall take proper precautions when working on-site to protect any and all association structures, infrastructure and utilities. Any damages to association structures will be reported immediately to the association manager.
Pesticide Application
All chemicals shall be used in strict accordance with federal, state, county and local laws and regulations. The contractor shall be a Certified Pest Control Operator and provide verification upon bid/renewal of the maintenance contract. Contractor shall use only trained Pest Control Applicators at the site. Any use of chemicals shall be reported to the Association Manager. Insect populations on non-turf groundcovers, baiting for snails and slugs, and any other insect related issues should be treated as necessary.
Fertilizer
A soil fertility test should be performed at least twice per year. The intent is to apply fertilizer to maintain adequate nutrients forplant vigor, not beyond the plant use/needs.
Fertilizer shall be applied so as to not fall on streets and sidewalks causing run-off pollution downstream. The contractor shall take soil samples to monitor the actual soil nutrient content.
Page 37 of 1172008CopyrightThe Helsing Group, Inc.
All Rights Reserved

Maintenance Manual, Warranties, and Performance Guidelines
Association Landscape Maintenance
Kimberly Place Community AssociationLandscape
Shrub and Vine Pruning
Current year’s growth on shrubs and vines should be pruned to enhance appearance, promote health, and follow the apparent intended design. Water Management
The association should ensure proper water management is in place. Water Management includes (1) irrigation scheduling that tracks weather (ET) and changes irrigation schedules to meet the plant water need (not to exceed), (2) monitoring and repair of all irrigation system components, (3) minimization of irrigation water run-off to protect the association property and reduce risk from environmental actions.
Weed Control
The association shall ensure that all areas are kept free of weeds, particularly through the use of an organic mulching program, butmay include hand and chemical removal of weeds. Weed control is expected to be a consistent weekly activity. The association’scontractor should survey the grounds to (1) identify weeded areas weekly, and (2) implement a plan/method (i.e. hand removal,mulch and/or chemicals) for removal. After weeds are cleared from a given area, mulch shall be applied to reduce weed growth inthe future. Letting weeds go to seed produces greater numbers of weeds. Timely removal of weeds is expected along with more permanent preventative measures, i.e. mulching.
Staking and Guying
Stakes and guys on trees subject should be inspected twice per year (Spring and Fall) and adjusted or removed as required.
Edging
Groundcovers should be edged to control spreading over hardscapes, curbs, or formal borders.
Irrigation Systems
Irrigation systems should be thoroughly performance tested at least twice annually. Automatic controllers should be scheduled, to the limits of the system, for quantities and frequencies consistent with landscape seasonal requirements. Adjustments to controllersshould be made at least monthly, or even more frequently as needed during very hot or variable weather conditions. Controllers should be set to water at night or early morning, unless special conditions require a different time.
Grading
Positive drainage needs to be maintained near any structures. If the ground slopes back to the building, water will accumulate inthese low areas and may seep into foundation walls. Inspect the outside perimeter of the structure periodically and make sure thesoil is compacted and that the ground is sloped away from the structure. Soil should be filled and compacted as needed to maintain positive drainage. A general guideline is that the ground should slope at least six inches down in the first ten feet of distance awayfrom the foundation. Furthermore, no soil or mulch should be in contact with stucco or wood siding, as this will cause deterioration of the structure.
Debris Removal
Horticultural debris and litter should be removed from landscaped areas on regular days of service.
Page 38 of 1172008CopyrightThe Helsing Group, Inc.
All Rights Reserved

Maintenance Manual, Warranties, and Performance Guidelines
Association Landscape Maintenance
Kimberly Place Community AssociationLandscape
Sidewalks and Curbs
Weeds in sidewalks and curbs should be controlled with herbicides or by hand weeding. Litter should be removed from work area sidewalks, and surfaces blown clean of grass clippings on days of service. Edging should be performed as necessary to control encroachment of ground cover.
Reporting
The association should require the landscape contractor to use a variety of tracking tools, spreadsheets or word documents, to track costs, time, irrigation schedules, fertilizer applications, turf aerations, biological pest releases, etc. The specific forms/reports willbe determined in concert with the property manager, and the landscape committee. Reports may include the following and at a minimum should show the history of work performed:- Repairs/damages (location, meter #, type, date, etc.)- Retrofit location & cost (by meter, controller)- Water usage (by meter, schedule times, use compared to ET, etc.- Water use related to the site/meter water budget- Fertilizer, aeration and de-thatching schedule- Pest and/or herbicide spray schedule- Other, as needed by the association
Required Inspection and Maintenance should be performed MonthlyThis task should be accomplished using: Association's landscaper as part of contract
Page 39 of 1172008CopyrightThe Helsing Group, Inc.
All Rights Reserved

Maintenance Manual, Warranties, and Performance Guidelines
Landscape Drains
Kimberly Place Community AssociationLandscape
Maintenance Requirements
Landscape drains should be inspected periodically to ensure that the flow of water is unimpeded, including one inspection prior tothe start of the rainy season. Leaves or other debris obstructing the entry to the drain should be cleared away. If the drain fails tooperate properly and the cause of the blockage cannot be readily identified and removed, a professional plumber should beconsulted immediately.
Never dispose of salts or chemicals in the landscape drains. Nothing but water should be put into the drains.
Required Inspection and Maintenance should be performed QuarterlyThis task should be accomplished using: Association's landscaper as part of contract
Page 40 of 1172008CopyrightThe Helsing Group, Inc.
All Rights Reserved
Maintenance Manual, Warranties, and Performance Guidelines
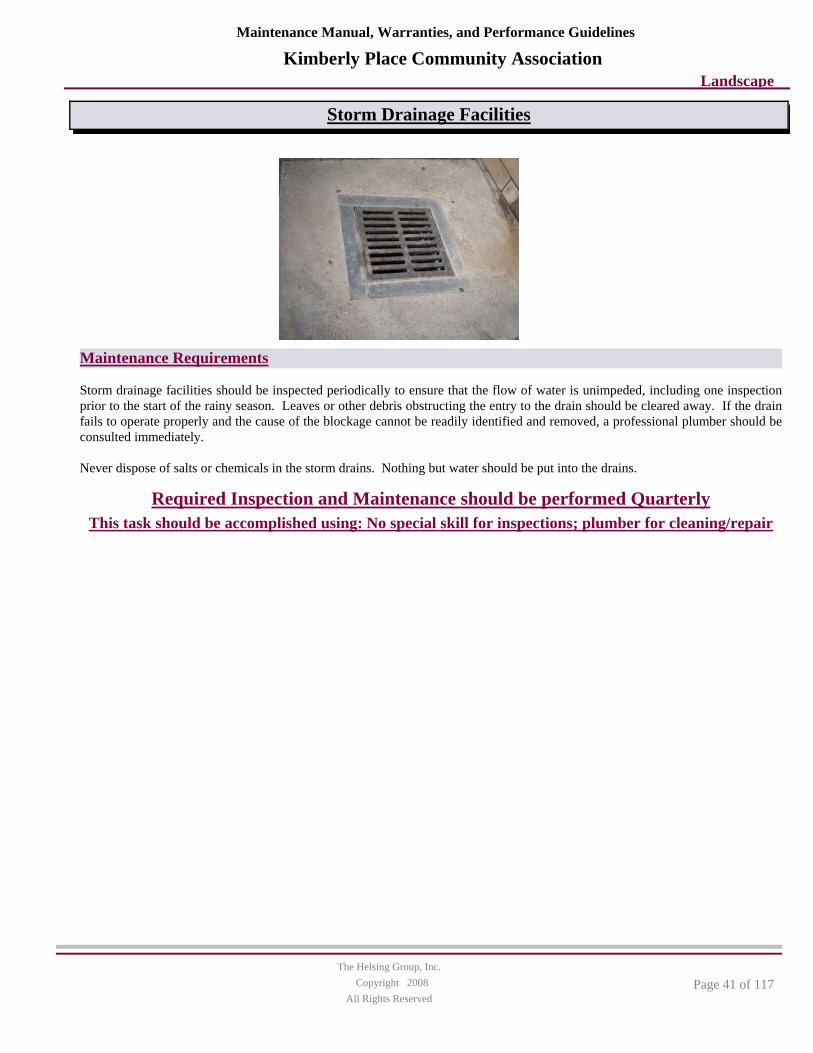
Storm Drainage Facilities
Kimberly Place Community AssociationLandscape
Maintenance Requirements
Storm drainage facilities should be inspected periodically to ensure that the flow of water is unimpeded, including one inspectionprior to the start of the rainy season. Leaves or other debris obstructing the entry to the drain should be cleared away. If the drain fails to operate properly and the cause of the blockage cannot be readily identified and removed, a professional plumber should beconsulted immediately.
Never dispose of salts or chemicals in the storm drains. Nothing but water should be put into the drains.
Required Inspection and Maintenance should be performed QuarterlyThis task should be accomplished using: No special skill for inspections; plumber for cleaning/repair
Page 41 of 1172008CopyrightThe Helsing Group, Inc.
All Rights Reserved

Maintenance Manual, Warranties, and Performance Guidelines
Cement Rail Fence
Kimberly Place Community AssociationLandscape
Maintenance Requirements
Cement rail fencing is designed to be durable and low maintenance. The color is integral to the material; therefore, the fence does not normally require painting. The fence should be periodically inspected to ensure that it remains in good condition. Structural damage is not expected to occur in the course of normal use. If such damage does occur as a result of an accident, consult with a qualified professional about repair and/or replacement options.
A cement rail fence is not designed as a retaining wall and should not be used to support dirt or debris. Ensure that the fence is kept clear of such materials.
To prevent damage to the fence, and for safety reasons, sitting or climbing on the fence is not recommended.
Required Inspection and Maintenance should be performed AnnuallyThis task should be accomplished using: No special skill required for inspections.
Page 42 of 1172008CopyrightThe Helsing Group, Inc.
All Rights Reserved

Maintenance Manual, Warranties, and Performance Guidelines
Arbor, Painted Wood
Kimberly Place Community AssociationLandscape
Maintenance Requirements
Inspect arbors annually. Look for any boards that are split, cracked, or warped. Inspect all fastenings to be sure they are secure. Defective sections of the arbor should be repaired or replaced promptly.
Carefully inspect the wood for any soft or decaying spots, particularly on areas near the ground if applicable. This may indicate insect damage or dry rot. Inspect the area for evidence of termites. If you suspect termites or termite damage, contact aprofessional inspector for an evaluation. To help preserve the integrity of the wood, always keep nearby sprinkler heads properly aligned. Water should not be allowed to spray directly on the wood.
If the surface is painted, it will need periodic repainting to maintain optimal appearance and protection from the elements. If the paint is deteriorating, the surfaces should be properly prepared and refinished.
Required Inspection and Maintenance should be performed AnnuallyThis task should be accomplished using: No special skill required for inspections.
Page 43 of 1172008CopyrightThe Helsing Group, Inc.
All Rights Reserved
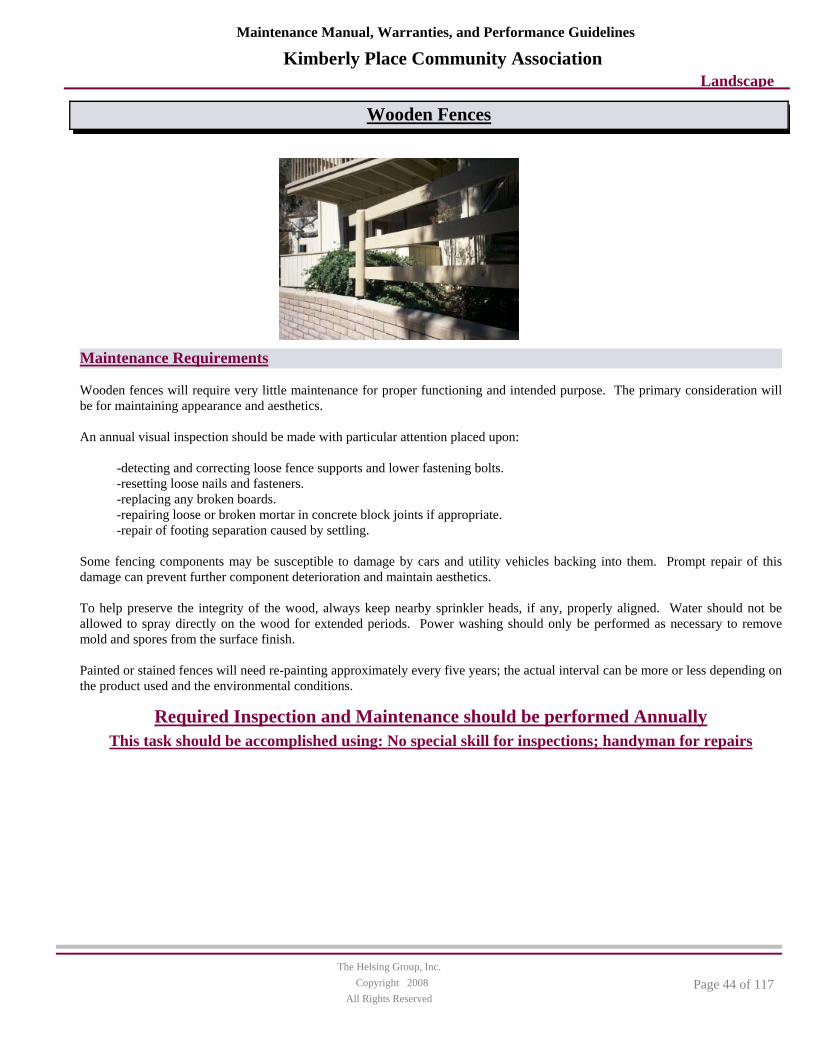
Maintenance Manual, Warranties, and Performance Guidelines
Wooden Fences
Kimberly Place Community AssociationLandscape
Maintenance Requirements
Wooden fences will require very little maintenance for proper functioning and intended purpose. The primary consideration willbe for maintaining appearance and aesthetics. An annual visual inspection should be made with particular attention placed upon: -detecting and correcting loose fence supports and lower fastening bolts. -resetting loose nails and fasteners. -replacing any broken boards. -repairing loose or broken mortar in concrete block joints if appropriate. -repair of footing separation caused by settling. Some fencing components may be susceptible to damage by cars and utility vehicles backing into them. Prompt repair of this damage can prevent further component deterioration and maintain aesthetics. To help preserve the integrity of the wood, always keep nearby sprinkler heads, if any, properly aligned. Water should not be allowed to spray directly on the wood for extended periods. Power washing should only be performed as necessary to removemold and spores from the surface finish. Painted or stained fences will need re-painting approximately every five years; the actual interval can be more or less depending on the product used and the environmental conditions.
Required Inspection and Maintenance should be performed AnnuallyThis task should be accomplished using: No special skill for inspections; handyman for repairs
Page 44 of 1172008CopyrightThe Helsing Group, Inc.
All Rights Reserved

Maintenance Manual, Warranties, and Performance Guidelines
Wooden Trellis
Kimberly Place Community AssociationLandscape
Maintenance Requirements
Inspect trellises annually. Look for any boards that are split, cracked, or warped. Inspect all fastenings to be sure they are secure.Defective sections of the trellis should be repaired or replaced promptly.
Carefully inspect the wood for any soft or decaying spots, particularly on areas near the ground if applicable. This may indicate insect damage or dry rot. Inspect the area for evidence of termites. If you suspect termites or termite damage, contact aprofessional inspector for an evaluation. To help preserve the integrity of the wood, always keep nearby sprinkler heads properly aligned. Water should not be allowed to spray directly on the wood.
Required Inspection and Maintenance should be performed AnnuallyThis task should be accomplished using: No special skill required for inspections.
Page 45 of 1172008CopyrightThe Helsing Group, Inc.
All Rights Reserved

Maintenance Manual, Warranties, and Performance Guidelines
Wood & Metal Gate
Kimberly Place Community AssociationLandscape
Maintenance Requirements
Wood and metal gates will require annual inspections. These inspections provide the opportunity to address damage in its earlystages and avoid more costly repairs or replacement. Lubricate or repair hinges as needed, reset loose nails and fasteners, andreplace any broken boards.
The metal components should be inspected for rust, de-rusted as needed, the areas primed and painted. On a regularly scheduledbasis, all metal components should be routinely weather protected by the application of a fresh coat of paint over the existingfinish. Prior to painting, the surfaces need to be adequately prepared by sanding, grinding, cleaning and/or stripping.
Ensure that water is not allowed to spray directly onto the gate, since prolonged contact with water accelerates deterioration of bothmetal and wood. Nearby sprinkler heads, if any, must be kept properly aligned.
Required Inspection and Maintenance should be performed AnnuallyThis task should be accomplished using: No special skill for inspections; handyman for repairs
Page 46 of 1172008CopyrightThe Helsing Group, Inc.
All Rights Reserved

Maintenance Manual, Warranties, and Performance Guidelines
Asphalt
Kimberly Place Community AssociationLandscape
Asphalt is a mixture of rock and sand held together by a liquid, petroleum-based cement. Asphalt surface by its intended purpose is used to bear heavy loads, and in effect begins natural deterioration soon after installation. Small cracks left uncorrected will grow into bigger cracks or potholes. These surface defects can permit water intrusion which can weaken large areas of asphalt surfaceand cause sinking. This deterioration becomes self-fueled because of the resultant water ponding. While the extent of deterioration depends on many factors such as usage, weather, and natural/artificial phenomena; routine preventive maintenanceand timely corrective action are the best defense against unnecessary serious problems.
Helpful Hints
Maintenance Requirements
1. Frequent inspection is the most important aspect of asphalt maintenance. Inspections should be performed at least twice a year, preferably after a rainfall. Inspections should be done on foot and in light adequate enough to permit close, thorough examination.
2. Proper inspection requires that deterioration and defects be noted and then assessed for cause before repairs are attempted. Cracking is probably the most common problem found. There are many kinds of cracks and asphalt surface defects. Some may simply be filled, while other defects require extensive removal and patching. While most asphalt deterioration is plain to see and relatively easy for anyone to detect, an expert should determine the cause and the fix. The key is for a knowledgeable person toassess what is causing the deterioration, especially if the damage is widespread.
3. Depending on the extent of damage, repairs should be made to defects as soon as practical. Small problems quickly turn intobigger problems if left uncorrected.
4. If vegetation begins to grow through the asphalt at concrete or different material joints, it should periodically be treated withsome Round-Up or other defoliant, and the organic matter removed as thoroughly as possible. Because of different expansionrates, it is unlikely these joints can be totally sealed.
5. Asphalt paving requires a periodic seal coat to the surface to protect the asphalt component from water and ultraviolet sundamage. Without an adequate seal coat, the asphalt surface layer and aggregate adhesion will deteriorate prematurely requiringexpensive repairs. An adequate seal coat will normally protect the asphalt for 3-5 years. Asphalt repairs should be made in conjunction with seal coating. Seal coating is not designed or intended to fix alligatored asphalt, cover over oil saturated spots, or repair large cracks. These all require a repair before the seal coat is applied. The best seal coats have fillers added to enhance the wear characteristics of the coating.
Page 47 of 1172008CopyrightThe Helsing Group, Inc.
All Rights Reserved

Maintenance Manual, Warranties, and Performance Guidelines
Asphalt
Kimberly Place Community AssociationLandscape
6. NOTE: Asphalt will need to be seal coated long before you will see any visible signs of deterioration. If you wait until you see the deterioration, you will significantly shorten the life of the asphalt. Make sure you seal coat regularly on a 3 to 5 year cycle.
7. During the association's normal reserve study cycle (at least once every three years) the association should have the asphalt inspected by a Reserve Study Company or other qualified professional and adjust the repair and seal coat cycles as appropriatebased on those inspections.
Required Inspection and Maintenance should be performed Semi-AnnuallyThis task should be accomplished using: No special skill for semiannual inspection; qualified
technician for repairs
Page 48 of 1172008CopyrightThe Helsing Group, Inc.
All Rights Reserved

Maintenance Manual, Warranties, and Performance Guidelines
Streets and Drives - Painted Features
Kimberly Place Community AssociationLandscape
Asphalt is a mixture of rock and sand held together by a liquid, petroleum-based cement. Asphalt surface by its intended purpose is used to bear heavy loads, and in effect begins natural deterioration soon after installation. Small cracks left uncorrected will grow into bigger cracks or potholes. These surface defects can permit water intrusion which can weaken large areas of asphalt surfaceand cause sinking. This deterioration becomes self-fueled because of the resultant water ponding. While the extent of deterioration depends on many factors such as usage, weather, and natural/artificial phenomena; routine preventive maintenanceand timely corrective action are the best defense against unnecessary serious problems.
Helpful Hints
Maintenance Requirements
All painted areas of streets and parking lots, such as red curbs or handicapped parking icons, will require repainting at least every3-5 years. More frequent restoration may be required depending on environmental conditions, paint quality, and level of usage. These painted features should be inspected periodically to make sure that the markings remain sufficiently visible. Check for worn or flaking paint, and for damage due to accident or vandalism. If the markings have become defaced or difficult to see, then theseareas should be re-painted immediately.
Required Inspection and Maintenance should be performed Semi-AnnuallyThis task should be accomplished using: No special skill required
Page 49 of 1172008CopyrightThe Helsing Group, Inc.
All Rights Reserved

Maintenance Manual, Warranties, and Performance Guidelines
Concrete Walkways
Kimberly Place Community AssociationLandscape
It is an old construction maxim that there are only two types of concrete – concrete that is cracked and concrete that will crack. You should not necessarily be alarmed if you see occasional thin cracks in concrete. If these cracks become significant in eitherwidth or number, you should do further inquiry.
Concrete can crack because of expansion, in spite of the fact that control or expansion joints are part of the construction. Expansive soils expand when wet and contract when dry, and these contractions can cause displacements that will cause minor, and normal, cracking. In addition, tree roots can lift sections of concrete or cause cracking as the root system matures.
Helpful Hints
Maintenance Requirements
Inspect concrete walkways regularly to ensure proper maintenance and to address safety issues as they arise. Trip and fall accidents can be both serious and costly. Cracks at control and expansion joints should be filled with a suitable concrete caulk.
Inspect the walkway to be sure that it is clear of obstacles. If plants are located nearby, pay attention to any vegetation near theedges of the walkway to ensure that potential future growth will not create a trip hazard. Walkways must be unobstructed byplanting material that might injure pedestrians; this includes low hanging tree branches.
Required Inspection and Maintenance should be performed MonthlyThis task should be accomplished using: No special skill required for inspections.
Page 50 of 1172008CopyrightThe Helsing Group, Inc.
All Rights Reserved

Maintenance Manual, Warranties, and Performance Guidelines
Decorative Concrete
Kimberly Place Community AssociationLandscape
It is an old construction maxim that there are only two types of concrete – concrete that is cracked and concrete that will crack. You should not necessarily be alarmed if you see occasional thin cracks in concrete. If these cracks become significant in eitherwidth or number, you should do further inquiry.
Concrete can crack because of expansion, in spite of the fact that control or expansion joints are part of the construction. Expansive soils expand when wet and contract when dry, and these contractions can cause displacements that will cause minor, and normal, cracking. In addition, tree roots can lift sections of concrete or cause cracking as the root system matures.
Helpful Hints
Maintenance Requirements
Concrete is a mixture of rock, sand, water, and cement mixed together to form a hard structure. Concrete surfaces are intended tobear from light to heavy loads. Decorative concrete surfaces are not only intended to take the load but to provide an aesthetic andarchitectural element into the design. The decorative concrete is sometimes patterned and colored. These surfaces can becomediscolored and debris lodged in the indentations of the pattern. Periodic pressure cleaning and sealing of the concrete willsubstantially restore the surface condition to the original appearance. INSPECTION AND MAINTENANCE: 1. Timely inspection is the most important aspect of decorative concrete maintenance. Inspections should be performed on an annual basis with particular attention given to staining and structural failure. 2. If needed, pressure wash with a maximum 1200 PSI pressure washer periodically to remove accumulated dirt and grime. 3. If there are stains or discolorations that water alone will not remove, scrub the surface with a Neutral PH detergent such as QC Neutral PH Floor cleaner or for oily stains use QC concrete degreaser with a rotary scrub brush. 4. If desired, a protective coating such as QC water seal may be used to protect the surface of the concrete and provide a semiglossfinish. This procedure may be done every 2 to 3 years after pressure washing. 5. Follow manufacturer's recommendations for all cleaners, solvents, and sealers.
Required Inspection and Maintenance should be performed Semi-AnnuallyThis task should be accomplished using: No special skill required for inspections.
Page 51 of 1172008CopyrightThe Helsing Group, Inc.
All Rights Reserved

Maintenance Manual, Warranties, and Performance Guidelines
Emitters
Kimberly Place Community AssociationLandscape
Maintenance Requirements
Emitters should be inspected periodically to ensure that they are not clogged or damaged. Checking emitters can be most easilydone by running the system once soil is dry for about one hour, then inspecting the soil around each plant for moisture. If a more thorough method is desired, each emitter can be located and inspected while the system is running.
Clogged emitters should be cleaned or replaced (if the clogging is due to hard water deposits, it is almost always easier to replacethem). If they are only clogged with dirt, simply installing them in backwards for a few seconds can sometimes clean them - or they can be cleaned with a stiff bristle brush such as an old toothbrush.
Periodically, inspect the planted area to ensure that the installed emitters are sufficient in number to accommodate the growth ofthe plants. As the plants grow, their root systems expand laterally. Additional emitters may be necessary as the roots grow beyondthe area covered. Checking moisture around the area will provide a good idea of how widely your system will water.
Required Inspection and Maintenance should be performed Semi-AnnuallyThis task should be accomplished using: Association's Landscaper as part of contract
Page 52 of 1172008CopyrightThe Helsing Group, Inc.
All Rights Reserved

Maintenance Manual, Warranties, and Performance Guidelines
Rain Bird Sprinkler Heads - Series 1800
Kimberly Place Community AssociationLandscape
Rain Bird6640 S. Bonney Ave.
Rain Bird will repair or replace at no charge any Rain Birdprofessional product that fails in normal use within the warrantyperiod stated below. You must return it to the dealer or distributor where you bought it. Product failures due to acts of God including without limitation, lightning and flooding, are not covered by thiswarranty. This commitment to repair or replace is our sole and totalwarranty. Implied warranties of merchantability and fitness, if applicable, are limited to one year from the date of sale. We will not, under any circumstances be liable for incidental or consequentialdamages, no matter how they occur.Turf Products: Falcon 6504 Series rotors, the T-Bird Series rotors, R-50 Series rotors, 7005 and 8005 rotors, 5000 Series rotors, 1800 Series popup spray heads, U-Series nozzles, brass MPR nozzles, A-8S and PA-8S-PFIS shrub adapters and 1300 and 1400 bubblers, RSD-BEx and RSO-CEx - five years. All other turf products - threeyears. All Other Products - one year. For more information, see your Rain Bird distributor or call 800-458-3005.
Manufacturer's Warranty
Tucson AZ 85706800-RAIN-BIRD
Maintenance Requirements
One of the many advantages of the 1800-series sprinkler is that it is easy to flush and clean. To remove the nozzle simply pull up the pop up part of the sprinkler (the stern) and the nozzle is on the very top. Holding tightly onto the stem with one hand, turn the nozzle counterclockwise until it separates from the stem. You do not need to turn the screw on top to remove the nozzle; it is just for adjusting how far the stream throws. As you remove the nozzle, you should see a screen inside the riser. Pull out the screen and rinse both the nozzle and screen in clean water. Never clean plastic nozzle orifices with wire or a wire brush because this candeform the interior passages and lower the quality of nozzle performance. If the nozzle is blocked and cannot be cleaned, you will have to replace the nozzle with another one of the same type. The type of nozzle is stamped into the top of the nozzle and isdesignated by numbers and some letters. A few examples of this would be "15H", "9SST", or "10VAN". Before replacing thescreen and nozzle, open the valve and flush out the head. Turn off the station, then put the screen and nozzle back into place andturn the zone back on. After this cleaning, you may need to re-adjust the direction of the sprinkler's spray. You can make these adjustments by grabbing and twisting the stem (the part that pops up) left or right until the spray of water is confined to the area that needs to be watered. The stem may be somewhat difficult to turn and will make a ratcheting noise when turned, which is normal.
Irrigation Troubleshooting
SPRAY HEADSSpray heads are relatively simple to troubleshoot. Below are the most common problems found with spray heads.
Misting - This is a result of excessive water pressure. Reducing the pressure may be done in one of two ways.1. Using the flow control on the remote control valve, or2. Installing a pressure regulator before or on the valve
Inaccurate pattern - This is usually caused by some type of blockage, either in the nozzle itself or in the screen. Only water, air, or a soft bristled object should be used to clean the nozzle and water to clean the screen.
Leaking around the stem (also known as "blow by") - This is usually caused by debris between the wiper seal and stem. A quickway to solve this problem is to step down lightly on the stem while the sprinkler is in operation. This causes water to flush quicklybetween the stem and cap, taking the debris with it. If this doesn't work, the cap is probably damaged and needs to be replaced.
Page 53 of 1172008CopyrightThe Helsing Group, Inc.
All Rights Reserved

Maintenance Manual, Warranties, and Performance Guidelines
Rain Bird Sprinkler Heads - Series 1800
Kimberly Place Community AssociationLandscape
IMPACT SPRINKLERSAll impact sprinklers work in the same basic fashion. This includes impact style rotors as well as most of the different styles orbrands available today. The following is a quick overview of how an impact sprinkler works.
OperationWater enters the bottom of the sprinkler through the bearing nipple, proceeds up through the body and exits out the nozzle. When the water hits the arm, it is propelled out away from the sprinkler. This action causes the arm to pivot away from the water stream, creating tension on the arm spring. When the spring tension is stronger than the force against it, the arm moves quickly toward thewater stream and "impacts" against the body. This "impact" causes the sprinkler to turn in a very consistent manner. This is where the term "impact" was derived from.
All Rain Bird Sprinklers share a common trait. This common trait is very important when troubleshooting impact sprinklers!
All Rain Bird Sprinklers Are Water LubricatedThe worst thing that can be done to an impact style sprinkler is to apply a foreign lubricant. This includes oil, WD-40, silicone,Teflon, pipe dope, etc. These foreign lubricants might make the sprinkler work right away, but it will actually cause the sprinkler towear out faster. Foreign lubricants attract dust and debris. When lubricants are applied to the bearing washers initially, an oil base forms on the washers. This allows the sprinkler to spin freely for a short time only! Over time, dust is attracted to the washers on the bearing stack. This causes additional friction on the washers and causes them to wear out much faster. If foreign lubricants have been applied, all of the washers and seals will need to be replaced. It is also a good idea to clean the brass at this time by aprocess called bead blasting.This ability to rebuild an impact is one of its biggest advantages. Impact sprinklers are totally serviceable in the field. If a foreign lubricant has been used, or if the sprinkler is just worn out from years of use, most parts are available and it is totally serviceable! By simply replacing worn parts (usually washers, seals, and springs) the sprinkler will be in operation for several more years of reliable service.
TroubleshootingFirst check for the obvious. Problems such as:* turf obstruction * broken arms, trips, etc.* dirt or debris in case or nozzle * foreign lubricants* excessive water pressure * inadequate water pressure
Common ProblemsThe sprinkler is stuck or won't return - The most common reason for this is water pressure that is too high or to low. Impact sprinklers can fail under either scenario. To determine what the operating pressure is, a pitot tube and a pressure gauge may be used to get a pressure reading at the head. This is done by placing the end of the pitot tube in the water stream, as close to the nozzle as possible. It is important to not place the end of the pitot tube inside of the nozzle opening. This can scratch the inner wallof the nozzle, as well as giving an inaccurate pressure reading. If the inner wall of the nozzle is scratched, the distribution pattern may be effected. Any of the previously mentioned problems can result in a non-rotating sprinkler.
The sprinkler is leaking - This is normally caused by worn washers and seals. They should be replaced at this time.
The sprinkler is not throwing as far as it should - This is usually caused by some type of blockage, either in the nozzle or the inletscreen. Cleaning the nozzle should be done with air, water or a soft bristled object (such as a pipe cleaner). Do not use wire or ascrewdriver! This can scratch the nozzle.
Required Inspection and Maintenance should be performed Monthly
Page 54 of 1172008CopyrightThe Helsing Group, Inc.
All Rights Reserved

Maintenance Manual, Warranties, and Performance Guidelines
Rain Bird Sprinkler Heads - Series 1800
Kimberly Place Community AssociationLandscape
This task should be accomplished using: Association's landscaper, as part of contract.Please refer to Volume II of this manual for supplemental information about this component.
Page 55 of 1172008CopyrightThe Helsing Group, Inc.
All Rights Reserved

Maintenance Manual, Warranties, and Performance Guidelines
Rain Bird Valves
Kimberly Place Community AssociationLandscape
Rain Bird6640 S. Bonney Ave.
Rain Bird will repair or replace at no charge any Rain Birdprofessional product that fails in normal use within the warrantyperiod stated below. You must return it to the dealer or distributor where you bought it. Product failures due to acts of God including without limitation, lightning and flooding, are not covered by thiswarranty. This commitment to repair or replace is our sole and totalwarranty. Implied warranties of merchantability and fitness, if applicable, are limited to one year from the date of sale. We will not, under any circumstances be liable for incidental or consequentialdamages, no matter how they occur.
1. Turf Products: Falcon 6504 Series rotors, the T-Bird Series rotors, R-50 Series rotors, 7005 and 8005 rotors, 5000 Series rotors, 1800 Series popup spray heads, U-Series nozzles, brass MPR nozzles, A-8S and PA-8S-PFIS shrub adapters and 1300 and 1400 bubblers, RSD-BEx and RSO-CEx - five years. All other turf products - threeyears.
2. Golf Products: Golf Rotors: TG-25, OH, DH, OS and EAGLE™series Golf rotors -three years. Additionally, any TG-25, OR, DH, OS or EAGLE™ rotor sold and Instilled in conjunction with a Rain Birdswing joint - five years. Proof of concurrent installation is required. Swing Joints - five years. Brass And Plastic Valves, EFB and PE-B Remote Control Valves, and Brass Quick Coupling Valves and Keys - three years. All other golf products - one year.
3. Agricultural Products: PC Dripline - three years, Rain Guns - three years (in agricultural applications only), Disk Filters - one year, Pressure Gauges - one year, All other agricultural products - two years.
4. All Other Products – one year. For more information, see yourRain Bird distributor or call 800-458-3005.
Manufacturer's Warranty
Tucson AZ 857061-800-RAIN-BIRD
Maintenance Requirements
Make sure that all valves activate when the controller is turned on manually. Make sure valves are accessible and not concealed by plants. Check valves periodically for leaks: observe each valve in operation, and look for unusual mounding in lawn areas and/or ponding water.
If a valve is disassembled for any reason, all parts should be cleaned with water. Any seal rings, o-rings and diaphragms should bechecked for damage. After re-assembly, test the valve to ensure that it operates correctly.
The following information is provided by the manufacturer and is specific to Rain Bird valves:
Disassembling the valve for cleaning or part replacement - Disassembly Procedure A:
To inspect the inside of the valve for cleaning or replacement of the diaphragm use the following procedure:
Page 56 of 1172008CopyrightThe Helsing Group, Inc.
All Rights Reserved

Maintenance Manual, Warranties, and Performance Guidelines
Rain Bird Valves
Kimberly Place Community AssociationLandscape
1. Shut off the water at the master shut off valve.
2. Unscrew all bonnet screws. On some models, the bleed screw and/or flow control knob will also need to be removed.
3. Remove bonnet assembly to expose the spring, diaphragm, and rubber gasket (if any) and filter (if any). Remove and inspect the spring, diaphragm, and rubber gasket for wear or damage. Inspect the diaphragm for clog or a tear in the small hole on itssurface.
4. Inspect the valve body for dirt on the diaphragm seat.
5. Inspect the bonnet for dirt clogging the small bleed port near the solenoid.
6. Rinse dirt off if necessary, or use a wire to gently dislodge dirt from the bleed port.
7. Install new diaphragm if necessary. Do not forget to replace the spring. Some new replacement diaphragms are an all-in-one design and do not have a separate rubber gasket to install. Be sure that the holes line up.
8. Press the bonnet firmly back in place. Replace the screws and tighten. Pressure test the valve to assure that all of the screws are tight enough to prevent any water leakage between the valve body and bonnet.
To replace the solenoid:
1. Unscrew the solenoid.
2. Check for debris clogging the small port where the solenoid seats.
3. Rinse off the solenoid to remove debris.
4. Check condition of solenoid O-ring.
5. Replace solenoid if necessary with part number applicable to your particular model.
Model Solenoid P/N Diaphragm P/NCP-075 or -100 208484 209391EV-100 EV-100F 407200 407303
Disassembling the valve for cleaning or part replacement - Disassembly Procedure B:
A removable actuator makes piston-type valves easy to access for maintenance. Should you need to clean the valve or replace a part, the actuator is removable following these procedures:
1. Shut off the water at the master shut off valve.
2. Using a pair of adjustable pliers clamped in the area of the valve indicated in the illustration (see manufacturer’s data in Vol. II), unscrew the actuator counterclockwise.
3. To inspect the piston seals or replace the piston, gently pull piston from the bottom to pull it out of valve.
4. To remove solenoid, hold gray flow ring and twist counter-clockwise to unscrew.
Page 57 of 1172008CopyrightThe Helsing Group, Inc.
All Rights Reserved

Maintenance Manual, Warranties, and Performance Guidelines
Rain Bird Valves
Kimberly Place Community AssociationLandscape
To reassemble the valve actuator assembly, screw it into the valve body in a clockwise direction until the actuator body contactsthe valve body. Caution: Do no over tighten as this may cause damage to the actuator. Do not use any pipe dope or tape on the actuator threads. The bleed ports (holes) just above the threads can become clogged and prevent operation.
Required Inspection and Maintenance should be performed MonthlyThis task should be accomplished using: Association's landscaper as part of contract
Please refer to Volume II of this manual for supplemental information about this component.
Page 58 of 1172008CopyrightThe Helsing Group, Inc.
All Rights Reserved

Maintenance Manual, Warranties, and Performance Guidelines
Concrete/Masonry Retaining Wall
Kimberly Place Community AssociationLandscape
Maintenance Requirements
Retaining walls should be inspected at least annually. Weeds sometimes take root between the blocks. These should be kept under control, since unattended weeds tend to multiply and become a bigger problem. Pull the weeds regularly, or spray the wall onceannually with the same weed killer used on the surrounding landscape.
Carefully inspect the soils surrounding the wall. After construction of the wall is completed, some settling of the underlying soilsoften occurs. Left unattended, areas of settling will fill with water and get bigger as the water further erodes the soil. Pondingwater can saturate the soil, increasing the weight of the soil and possibly leading to wall failure. If ponding water or any low spotsare evident, fill the area with soil in order to restore proper drainage patterns.
At the same time, inspect the landscaping adjacent to the wall and make sure that the landscape is conducive to proper drainageover and around the wall. Look for areas of erosion, bare areas, or other issues of uneven coverage that might lead to drainageproblems.
Examine the surface and structure of the wall itself. If the wall is painted, evaluate the condition of the paint and touch-up or repaint as necessary. Well-built walls normally will not undergo significant structural movement, but improper installation orexcessive settling at the base may cause unevenness, bulging, or rotation. If any of these symptoms are apparent, consult with a qualified contractor to determine the best method of repair.
Required Inspection and Maintenance should be performed AnnuallyThis task should be accomplished using: No special skill for inspections; qualified contractor for
repairs
Page 59 of 1172008CopyrightThe Helsing Group, Inc.
All Rights Reserved

Maintenance Manual, Warranties, and Performance Guidelines
Tile Entry Monument
Kimberly Place Community AssociationLandscape
Maintenance Requirements
Regular inspections are needed to ensure that small problems do not develop into major ones. Inspect the tile annually for anydamage. Look for cracks or wear in the mortar. Sections of deteriorated mortar may be removed and repaired, but never attempt to use concrete to repair mortar. Sections of tile may require replacement if surface damage is excessive. If needed, these surfaces may be cleaned with gentle pressure washing.
Required Inspection and Maintenance should be performed AnnuallyThis task should be accomplished using: No special skill required for inspection; qualified contractor
for repairs
Page 60 of 1172008CopyrightThe Helsing Group, Inc.
All Rights Reserved

Maintenance Manual, Warranties, and Performance Guidelines
Pool Signs
Kimberly Place Community AssociationLandscape
Maintenance Requirements
Signs have been mounted in the pool area in order to convey important safety information to users. These signs should be inspected on a monthly basis. Promptly replace any signs that have become unsightly or difficult to read. Any fallen or leaningsigns should be immediately straightened and fixed in place.
Required Inspection and Maintenance should be performed MonthlyThis task should be accomplished using: No special skill required.
Page 61 of 1172008CopyrightThe Helsing Group, Inc.
All Rights Reserved

Maintenance Manual, Warranties, and Performance Guidelines
Street Signs
Kimberly Place Community AssociationLandscape
Maintenance Requirements
Street signs, such as traffic signs and parking signs, should be inspected monthly. Inspect the reflective coating to ensure that signs will be visible in the dark. Check any street identification signs to ensure that they are oriented in the proper direction, and make sure they are not obscured by branches or other landscape material. Replace any signs that have become unsightly or difficult tounderstand. Any fallen or leaning signs should be immediately straightened and fixed in place.
Required Inspection and Maintenance should be performed MonthlyThis task should be accomplished using: No special skill required for inspections.
Page 62 of 1172008CopyrightThe Helsing Group, Inc.
All Rights Reserved

Maintenance Manual, Warranties, and Performance Guidelines
Fraser Johnston Air Conditioning Furnace - 125CN4 A
Kimberly Place Community AssociationMechanical Systems
To avoid damage to furnishings and potential fire risk, do not block heating vents with furniture, draperies, or other items.
Helpful Hints
Maintenance Requirements
A qualified HVAC technician should perform a thorough annual inspection of the air conditioning system, and address any needed maintenance issues. It is also very important to change the air conditioner’s filter regularly (some filters can be cleaned andreinstalled instead). Dirty filters will slow airflow, reducing the efficiency of the system, and may result in damage to the system. Filters should be cleaned or replaced according to the manufacturer’s recommendations - normally every one to six months, depending on the air conditioner and filter.
It is a good idea to turn the air conditioner on for a few minutes every two months, even during the cool season. This will help tokeep the internal parts lubricated and in proper operating condition.
If the condenser is located outdoors at ground level, be sure to maintain the manufacturer’s recommended clearance between thecondenser and any nearby plants, landscape structures or other items. Children should not play near the condenser, as it may present a safety hazard. The condensate lines should be inspected once at the beginning of the cooling season and once at the end. If the discharge of water is substantially reduced, the line may be clogged. If cold water droplets blow out of the grilles in thebuilding, this also indicates that the line is clogged. In this event, have a qualified HVAC technician service the system promptly.
Thermostats should also be inspected periodically. If the thermostat is battery-operated, check the display to see if the batteries require changing. Do not leave dead batteries in the unit, even when the system is not operating. The batteries may leak anddamage the interior of the thermostat.
Air Conditioning Tips:
- If the unit ever fails to operate, check the circuit breaker and fuses before calling for service.
- Grilles and registers should be left unblocked to allow the system to function properly and prevent possible damage.
- Depending upon seasonal conditions and your personal preferences, you may wish to adjust some registers in your home to direct more cool air to certain rooms. Because heat rises, such adjustments may be particularly useful to achieve a uniform temperaturein multi-story structures.
Page 63 of 1172008CopyrightThe Helsing Group, Inc.
All Rights Reserved

Maintenance Manual, Warranties, and Performance Guidelines
Fraser Johnston Air Conditioning Furnace - 125CN4 A
Kimberly Place Community AssociationMechanical Systems
- Air conditioning works more efficiently when it is left on all day. If the air conditioning is turned off for an extended period during hot weather, excessive heat will be absorbed within the interior room structure. When the air conditioning is finally turnedback on, the space will be more difficult to cool and more energy will ultimately be expended.
- To maximize efficiency, keep windows closed, and close drapes and shades in order to keep the room cooler.
- Do not set the thermostat lower than the desired temperature. Setting it at an excessively cool temperature will not cool the airany faster, and may cause damage to the unit.
- Because excessive moisture can damage the system, any humidifiers connected to the furnace system should be turned off whileusing air conditioning.
Required Inspection and Maintenance should be performed MonthlyThis task should be accomplished using: No special skill for filter change; qualified technician for
inspection/service
Page 64 of 1172008CopyrightThe Helsing Group, Inc.
All Rights Reserved

Maintenance Manual, Warranties, and Performance Guidelines
Gutters & Downspouts
Kimberly Place Community AssociationRoofing System
Gutters are designed to collect water and the downspouts disperse it away from the building. Fundamental to maintenance ofgutters is keeping them clear of sand and debris which may obstruct free drainage of water to the downspouts. Fundamental to maintenance of downspouts is keeping them free of blockage and ensuring that adequate drainage is available away from thebuilding. Inspection and maintenance are most effective if several good rainfalls have transpired and washed down the completedroofs. Good drainage away from buildings is necessary to prevent unnecessary foundation problems. FAILURE TO INSPECT, CLEAN, AND REPAIR GUTTERS AND DOWNSPOUTS ON A REGULAR BASIS CAN CAUSE SIGNIFICANT WATERINTRUSION DAMAGE TO THE STRUCTURE. When repairing gutters, adding strainers or other devices, ensure that like metals are used in order to prevent galvanic reactions, i.e., use copper fasteners, straps, and screening on copper components.
Helpful Hints
Maintenance Requirements
Gutters should be inspected periodically for leaking seams, loose hangers, soldered joints, and corrosion damage. Inspect the downspouts for leaking seams, unsecured strapping, and improper drainage. Downspouts can be vulnerable to damage. Inspect carefully around areas where they are likely to be dented or crushed closed (such as in a parking area). Clean the gutters as needed, first by removing any large amounts of debris with a putty knife or scraper. Then wash the gutter by directing compressed air or a forceful stream of water from a hose down the gutter to dislodge any remaining dirt. Ensure thatgutters and downspouts are unobstructed and that water run-off is directed away from the building. If a professional gutter cleaning service is contracted to perform this maintenance, they will normally use compressed air rather than water.
Required Inspection and Maintenance should be performed Semi-AnnuallyThis task should be accomplished using: Gutter Service
Page 65 of 1172008CopyrightThe Helsing Group, Inc.
All Rights Reserved

Maintenance Manual, Warranties, and Performance Guidelines
CertainTeed Landmark Series Asphalt Shingles - Kimberly Place
Kimberly Place Community AssociationRoofing System
CertainTeed CorporationPO Box 860
CertainTeed warrants to the original property owner/consumer that its asphalt roofing shingles will be free from manufacturing defects forthe length of time specified and that CertainTeed will repair orreplace, at its option, any shingles proven to be defective under the terms of this warranty.
Manufacturer's Warranty
Valley Forge PA 19482800-782-8777
Installer's Warranty
The CertainTeed Asphalt Shingle Roof was installed by:Noble Pride Roofing Company, Inc., 1016 Abbott St., Salinas, CA, 93901, (Ph) 831-751-3131
Guaranty:Noble Pride Roofing Company, Inc., guarantees that they will repair any defects in workmanship in the stated roof for a period of (5) years from the date they complete the work. This guarantee is transferable to new property owner.
Composition asphalt shingles are a common roofing material whose core material consists of either a fiberglass-based mat or organic felt. Preventative maintenance is crucial to maximizing the lifetime of a composition shingle roof. Do not wait until the roof leaks to begin inspections. By the time leaks appear, the roof has already sustained internal damage. Periodic inspections willhelp you to identify problems in the early stages and avoid more costly repairs due to leaks and premature failures later on.If you wish to inspect the roof more closely, it may be helpful to use binoculars to get a better view, but NEVER WALK ON THE ROOF. This is a safety hazard and may damage the roofing material. Only qualified personnel should walk on the roof, and then only as needed to carry out inspections or repairs. In areas where frequent foot traffic will be required, the roofers may place sheets of plywood over a layer of carpet or foam to distribute weight over the tiles and prevent slipping. If products such as antennas or solar heaters are to be installed on the roof, this installation should be performed by a licensed contractor. Any warranty on the roofing materials or installation may be voided if such work is performed by anyone other thanthe original contractor (check with the original contractor for more information). Extreme care should be taken when attaching items such as holiday decorations to the roof. In all cases, make sure to obtain the approval of your community’s ArchitecturalCommittee or Board of Directors before making any alterations or additions to the roof.
Helpful Hints
Maintenance Requirements
Maintenance:Landmark series shingles do not require maintenance when installed according to manufacturer’s application instructions.
Page 66 of 1172008CopyrightThe Helsing Group, Inc.
All Rights Reserved

Maintenance Manual, Warranties, and Performance Guidelines
CertainTeed Landmark Series Asphalt Shingles - Kimberly Place
Kimberly Place Community AssociationRoofing System
However, to protect the investment, any roof should be routinely inspected at least one a year. Older roofs should be looked atmore frequently.
Required Inspection and Maintenance should be performed AnnuallyThis task should be accomplished using: No special skill for removing debris; Qualified personnel for
inspection.Please refer to Volume II of this manual for supplemental information about this component.
Page 67 of 1172008CopyrightThe Helsing Group, Inc.
All Rights Reserved

Maintenance Manual, Warranties, and Performance Guidelines
InFocus Screenplay Projector - 7205
Kimberly Place Community AssociationUtility Systems
InFocus Corporation27700B SW Parkway Ave
Subject to the Limitations, Exclusions and Disclaimers hereof, InFocus Corporation ("InFocus") warrants that the Projector, Lampsand Accessories (hereinafter collectively or individually referred to as "Product" as appropriate) purchased from InFocus, an InFocus distributor, or an InFocus reseller will conform to InFocus' specifications and be free from defects in material or workmanshipfor the respective Limited Warranty period provided below. InFocus does not warrant that the Product will meet the specific requirementsof the end-user customer.
• Projector Product Limited Warranty Period (Excluding Lamps): Two (2) years from date of purchase.• Lamp Product Limited Warranty Periods: From the date of Projector Product purchase, the original installed lamp shall have a90-day or 500 hours usage Limited Warranty Period, whichever comes first, and replacement Lamps purchased at the time of Projector Product purchase will have a 500 hours usage Limited Warranty period.• Accessory Product Limited Warranty Period: one (1) year fromdate of purchase.
Manufacturer's Warranty
Wilsonville OR 97070503-685-8888
Maintenance Requirements
Important Operating Considerations- Place the projector in a horizontal position no greater than 15 degrees off axis. - Locate the projector in a well-ventilated area without any obstructions to intake or exhaust vents. Do not place the projector on atablecloth or other soft covering that may block the vents.- Locate the projector at least 4' (1.2 m) away from any heating or cooling vents.- Use only InFocus-approved ceiling mounts.- Use only the power cord provided. A surge-protected power strip is recommended.- Refer to this manual for proper startup and shutdown procedures.- In the unlikely event of the lamp rupturing, discard any edible items placed in the surrounding area and thoroughly clean the area along all sides of the projector. Wash hands after cleaning the area and handling the ruptured lamp. This product has a lamp whichcontains a very small amount of mercury. Dispose of it as required by local, state or federal ordinances and regulations. For more information see www.eiae.org.
Page 68 of 1172008CopyrightThe Helsing Group, Inc.
All Rights Reserved

Maintenance Manual, Warranties, and Performance Guidelines
InFocus Screenplay Projector - 7205
Kimberly Place Community AssociationUtility Systems
Follow these instructions to help ensure image quality and lamp life over the life of the projector. Failure to follow these instructions may affect the warranty.
Do not place objects in the areas along the side and in the front of the projector.
Do not place objects or people in the 2 foot (.6m) area along the front of the projector.
For ceiling mount applications, this area should be 5 feet (1.5m)
Troubleshooting your setupIf your image appears correctly on the screen, skip to the next section. If it does not, troubleshoot the setup.
The LED on top of the projector's keypad indicates the state of the projector and can help you troubleshoot.
Solid Green: The projector is plugged in, or the projector has been turned on and the software has initialized. The projector has been turned off and the fans have stopped.
Blinking Green: The Power button has been pressed and the software is initializing, or the projector is powering down and the fans are running to cool the lamp.
Blinking Red: The projector will not start up if the LED is blinking red. You must correct the problem, disconnect and reconnect the power cable, then power on the projector.
A fan (blinks 4 times) or lamp (blinks 3 times) failure has occurred. Turn off the projector and wait one minute, then turn the projector on again. Also check for a blocked vent or a stopped fan (blinks 5 times).
Solid Red: An unidentifiable error: please contact Technical Support.The following shows some potential problems. In some cases, more than one possible solution is provided. Try the solutions in the order they are presented. When the problem is solved, you can skip the additional solutions.
Problem: No startup screenSolution: Plug power cable in and remove lens cap press Power buttonResult: Correct image
Problem: Image not centered on screenSolution: Move projector, adjust zoom, adjust height or Adjust horizontal or vertical position in Picture>Keystone menuResult: Correct image
Problem: Image not squareSolution: Adjust keystone on keypad or Keystone menuResult: Square image
Problem: Image does not fit 16:9 screenSolution: Change aspect ratio to 16:9 in Picture>Aspect ratio menuResult: Correct image
Problem: Edges of image distortedSolution: Turn Overscan on in the Picture>Overscan menuResult: Correct image
Page 69 of 1172008CopyrightThe Helsing Group, Inc.
All Rights Reserved

Maintenance Manual, Warranties, and Performance Guidelines
InFocus Screenplay Projector - 7205
Kimberly Place Community AssociationUtility Systems
Problems:1. Projected colors don't match source2. Colors are washed out or too deep3. Image from component source appears greenishSolutions:1. Adjust color, tint, color temperature, brightness, or contrast in the menus.2. Pick another gamma setting3. Pick another color spaceResult: Correct image
Problem: Image upside downSolution: Turn off Ceiling in Settings>System menuResult: Correct image
Problem: Image reversed left to rightSolution: Turn off Rear in Settings>System menuResult: Correct image
Problem: Video image "torn" and fragmentedSolution: Change Video Standard in Picture>Advanced menuResult: Correct imageProblem: Lamp won't turn on, LED blinking red Solution: Make sure vents aren't blocked; allow projector to cool for one minuteResult: Unplug projector; wait one minute; plug in projector and turn it on: lamp lights
Computer-specific troubleshootingProblem: Only startup screen appearsSolution: Press the Source button and activate laptop's external port or restart laptopResult: Computer image projected
Problem: No computer image, just the words "Signal out of range"Solution: Adjust computer refresh rate in Control Panel>Display>Settings>Advanced> Adapter (location varies by operatingsystem)Result: Computer image projected
Problem: Image fuzzy or croppedSolution: Set your computer's display resolution to the native resolution of the projector (Start>Settings>Control Panel>Display>Settings tab, select 1280x720)For a laptop, disable laptop monitor or turn-on dual-display modeResult: Image clear and not cropped
Problem: The video embedded in my PowerPoint presentation does not play on the screenSolution: Turn off the internal LCD display on your laptopResult: Embedded video plays correctly
Still having problems?If you need assistance, visit our website or call us. See the inside of the back cover for support contact information.
This product is backed by a limited warranty. An extended warranty plan may be purchased from your dealer. When sending the
Page 70 of 1172008CopyrightThe Helsing Group, Inc.
All Rights Reserved
Maintenance Manual, Warranties, and Performance Guidelines
InFocus Screenplay Projector - 7205
Kimberly Place Community AssociationUtility Systems
projector in for repair, we recommend shipping the unit in its original packing material, or having a professional packagingcompany pack the unit. An optional ATA shipping case is available for purchase that provides adequate protection for shipping. Please insure your shipment for its full value.
MaintenanceCleaning the lens1. Apply a non-abrasive camera lens cleaner to a soft, dry cloth.Avoid using an excessive amount of cleaner, and don't apply the cleaner directly to the lens. Abrasive cleaners, solvents or otherharsh chemicals might scratch the lens.2. Lightly wipe the cleaning cloth over the lens in a circular motion. If you don't intend to use the projector immediately, replacethe lens cap.
Replacing the projection lampThe lamp hour timer in the About menu counts the number of hours the lamp has been in use. Twenty hours before the lamp lifeexpires, the message "Change lamp" appears on the screen at startup. If the maximum lamp time is exceeded, the lamp will notlight. In this case, after replacing the lamp you must reset the lamp hours by simultaneously pressing both Brightness buttons on the keypad and holding them for 10 seconds. You can order new lamp modules from your dealer.1. Turn off the projector and unplug the power cable.2. Wait 60 minutes to allow the projector to cool thoroughly.3. Turn the projector upside down and remove the lamp door by removing the two screws and sliding the lamp door tabs out of thethree tab bays.CAUTION: Never operate the projector with the lamp door removed. This disrupts the air flow and causes the projector tooverheat4. Loosen the captive screw on the lamp module.WARNINGS:- To avoid burns, allow the projector to cool for at least 60 minutes before you replace the lamp.- Do not drop the lamp module. The glass may shatter and cause injury.- Do not touch the glass lamp screen. Fingerprints can obscure projection sharpness.- Be extremely careful when removing the lamp module. In the unlikely event of the lamp rupturing, discard any edible itemsplaced in the surrounding area and thoroughly clean the area along all sides of the projector. Wash hands after cleaning the areaand handling the ruptured lamp. This product has a lamp which contains a very small amount of mercury. Dispose of it as required by local, state or federal ordinances and regulations. For more information see www.eiae.org.5. Carefully remove the lamp module by grasping and lifting the metal bail wire. Dispose of the lamp in an environmentally proper manner.6. Install the new lamp module, making sure that it is properly seated.7. Tighten the single screw.8. Replace the lamp door by sliding the tabs into the tab bays and tightening the two screws.9. Plug in the power cable, then press the Power button to turn the projector back on.10. Reset the lamp hour timer.
Resetting the lamp timerTo reset the lamp age, simultaneously holding down the two Brightness buttons on the projector's keypad for 10 seconds.
Required Inspection and Maintenance should be performed Semi-AnnuallyThis task should be accomplished using: No special skill required.
Please refer to Volume II of this manual for supplemental information about this component.
Page 71 of 1172008CopyrightThe Helsing Group, Inc.
All Rights Reserved

Maintenance Manual, Warranties, and Performance Guidelines
GFCI Outlet
Kimberly Place Community AssociationUtility Systems
Maintenance Requirements
Ground-fault circuit interrupter outlets, or GFCIs, are a safety feature designed to interrupt power if electrical current leaks from itsproper path (as it would if it were flowing through a person). GFCIs can stop functioning in this manner without ceasing to provide power, so they should be tested on a monthly basis. Plug a lamp, night light, or other small appliance into the outlet, and press the "Test" button. If the GFCI device is functioning properly, this will cut the power and the light will go out. Then push the reset button, and the power should be restored. If the device does not function in this way, then it is malfunctioning and should bereplaced. It is recommended that a qualified electrician perform adjustments or replacements of this component.
Required Inspection and Maintenance should be performed MonthlyThis task should be accomplished using: No special skill for testing; qualified electrician for
replacement
Page 72 of 1172008CopyrightThe Helsing Group, Inc.
All Rights Reserved

Maintenance Manual, Warranties, and Performance Guidelines
Zinsco Circuit Breaker
Kimberly Place Community AssociationUtility Systems
Maintenance Requirements
Circuit breakers should be inspected annually, or after a short circuit. Operate each switch to ensure ease of movement and to clear the contacts of any debris.
If the breakers feel hot to the touch, or frequently trip, contact a qualified electrician to perform repairs and adjustments as needed. Repair work should only be performed by an electrician familiar with the National Electrical Code, along with all other applicablecodes, laws, standards, safety practices, and protective equipment. Maintenance and repair must be performed in accordance withall applicable standards of National Electrical Manufacturers Association (NEMA).
Circuit breaker cabinets should always be kept clean of foreign matter. Follow the manufacturer’s instructions for cleaning. Dust may be removed with a vacuum cleaner or a lint-free cloth or brush. Do not blow into the circuit breakers or use compressed airfor cleaning, as this may drive dust deeper into the components and result in damage. Avoid using hydrocarbon based products unless the manufacturer approves the use of such chemicals. If the finish becomes damaged, it should be touched up with anappropriate corrosion-resistant paint or other finish.
Required Inspection and Maintenance should be performed AnnuallyThis task should be accomplished using: Qualified Personnel for Repairs
Page 73 of 1172008CopyrightThe Helsing Group, Inc.
All Rights Reserved
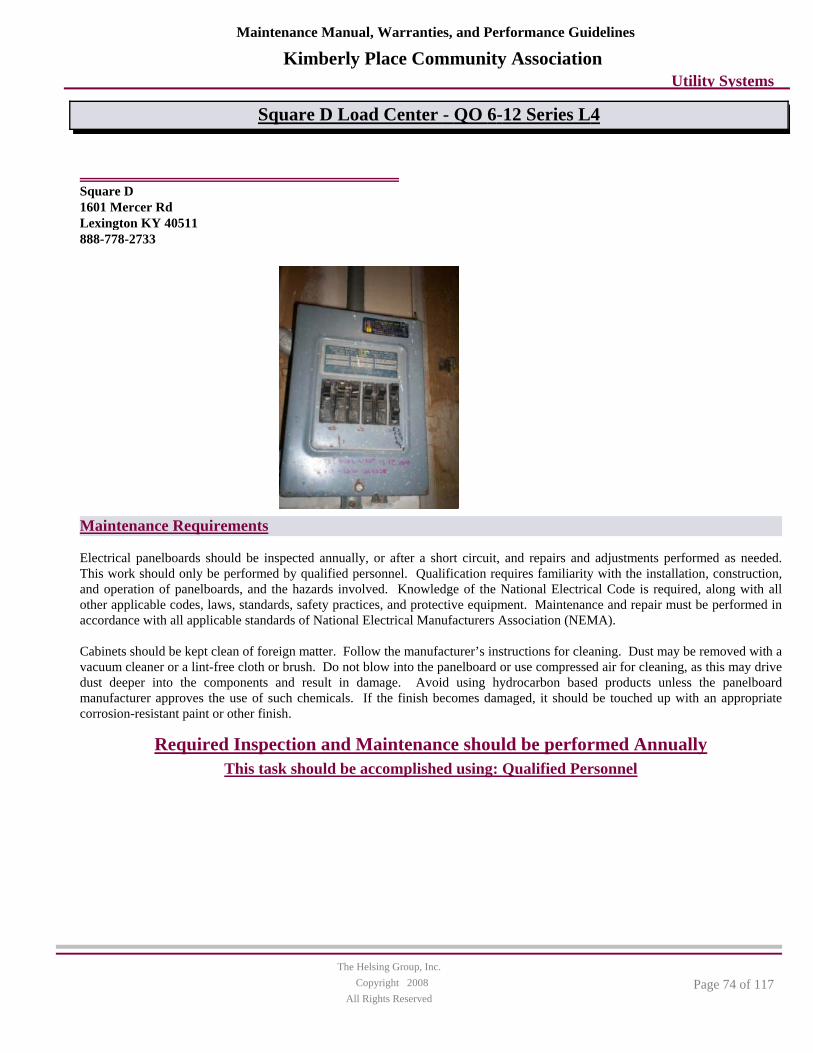
Maintenance Manual, Warranties, and Performance Guidelines
Square D Load Center - QO 6-12 Series L4
Kimberly Place Community AssociationUtility Systems
Square D1601 Mercer RdLexington KY 40511888-778-2733
Maintenance Requirements
Electrical panelboards should be inspected annually, or after a short circuit, and repairs and adjustments performed as needed. This work should only be performed by qualified personnel. Qualification requires familiarity with the installation, construction, and operation of panelboards, and the hazards involved. Knowledge of the National Electrical Code is required, along with all other applicable codes, laws, standards, safety practices, and protective equipment. Maintenance and repair must be performed in accordance with all applicable standards of National Electrical Manufacturers Association (NEMA).
Cabinets should be kept clean of foreign matter. Follow the manufacturer’s instructions for cleaning. Dust may be removed with a vacuum cleaner or a lint-free cloth or brush. Do not blow into the panelboard or use compressed air for cleaning, as this may drive dust deeper into the components and result in damage. Avoid using hydrocarbon based products unless the panelboardmanufacturer approves the use of such chemicals. If the finish becomes damaged, it should be touched up with an appropriate corrosion-resistant paint or other finish.
Required Inspection and Maintenance should be performed AnnuallyThis task should be accomplished using: Qualified Personnel
Page 74 of 1172008CopyrightThe Helsing Group, Inc.
All Rights Reserved

Maintenance Manual, Warranties, and Performance Guidelines
Interior and Exterior Lighting; Pole Lights
Kimberly Place Community AssociationUtility Systems
Maintenance Requirements
Light fixtures normally require periodic replacement rather than extensive repairs or maintenance. Of particular concern are the safety implications which may result from insufficient lighting caused by burned-out lights. Periodic inspection should be made with all lights turned on in order to detect unserviceable or burned out lights. Replace burned out bulbs as quickly as possible. Cracked, broken, or missing lenses and defective gaskets can accelerate deterioration of thesecomponents.
Light fixtures should also be inspected for satisfactory visual appearance. Rusted, broken, or otherwise decrepit fixtures should be repaired or replaced promptly. Fixtures may need to be disassembled and cleaned periodically if insects and/or other debris have accumulated inside them. Inspect light poles during the daylight hours to assess the condition of the structure and paint. Repair or repaint poles as needed.
Required Inspection and Maintenance should be performed MonthlyThis task should be accomplished using: No special skill required for inspections; qualified contractor
for pole light work
Page 75 of 1172008CopyrightThe Helsing Group, Inc.
All Rights Reserved

Maintenance Manual, Warranties, and Performance Guidelines
Exit Signs - LED
Kimberly Place Community AssociationUtility Systems
Maintenance Requirements
LED exit signs require minimal maintenance. For safety reasons, however, it is very important to inspect the signs on a regular basis to ensure that they are properly illuminated. Look for any uneven illumination that would make the sign difficult to read at a distance. Have the sign repaired or replaced if the illumination is inadequate or excessively uneven. Also, batteries may need to be replaced or recharged periodically.
Required Inspection and Maintenance should be performed QuarterlyThis task should be accomplished using: No special skill required for inspections.
Page 76 of 1172008CopyrightThe Helsing Group, Inc.
All Rights Reserved

Maintenance Manual, Warranties, and Performance Guidelines
Intermatic T101 24 Hour Dial Time Switch
Kimberly Place Community AssociationUtility Systems
Intermatic, Inc.Intermatic PlazaSpring Grove IL 60081815-675-7000
Maintenance Requirements
PROGRAMMING INSTRUCTIONS
1. To set "ON" and "OFF" times: Hold trippers against edge of CLOCK-DIAL, pointing to time (AM or PM) when ON and OFF operations are desired; tighten tripper screws firmly. For additional tripper pairs on CLOCK-DIAL, order 156T1978A.
To set TIME-OF-DAY: Pull CLOCK-DIAL outward. Turn in either direction and align the exact time-of-day on the CLOCK-DIAL (the time now, when switch is being put into operation) to the pointer. DO NOT MOVE POINTER.
OPERATING INSTRUCTIONS
To operate switch manually: Move MANUAL LEVER below CLOCK-DIAL left or right as indicated by arrows. This will not affect next operation.
In case of power failure, reset CLOCK-DIAL to proper time of day. See programming instructions.
Required Inspection and Maintenance should be performed Semi-AnnuallyThis task should be accomplished using: No special skill required.
Please refer to Volume II of this manual for supplemental information about this component.
Page 77 of 1172008CopyrightThe Helsing Group, Inc.
All Rights Reserved

Maintenance Manual, Warranties, and Performance Guidelines
Amerex Fire Extinguishers
Kimberly Place Community AssociationUtility Systems
Amerex CorporationPO Box 81Trussville AL 35173-0081205-655-3271
All components of the fire protection system should be inspected and maintained according to NFPA guidelines. The Authority Having Jurisdiction may have other requirements of fire protection devices.
Helpful Hints
Maintenance Requirements
Inspect fire extinguishers every month. Carefully examine all extinguishers for obvious physical damage, such as vandalism, corrosion, and denting. Not only may corroded or damaged extinguishers fail to work properly, they may cause injury to the user.If damage is detected, the extinguisher should be removed from service immediately and given applicable maintenance. Extinguishers located in moist environments should be properly shielded from the elements in order to reduce the likelihood ofcorrosion.
Annual recharging, testing, and maintenance of fire extinguishers should be performed by a qualified professional. Keep complete records of ALL inspections, tests, and servicing that the fire extinguishers have received.
Required Inspection and Maintenance should be performed MonthlyThis task should be accomplished using: No special skill for monthly inspection; qualified technician
for annual
Page 78 of 1172008CopyrightThe Helsing Group, Inc.
All Rights Reserved

Maintenance Manual, Warranties, and Performance Guidelines
Standpipe Components
Kimberly Place Community AssociationUtility Systems
Maintenance Requirements
The standpipe hose valves should be inspected annually to make sure they are tight and no water is leaking into the hose. Also inspect the hose itself for signs of damage. Connections, piping, pressure regulators and alarm devices (if any) should be inspected quarterly. Repair or replace defective valves or hoses.
Standpipe systems should be hydrostatically tested and flow tested approximately every 5 years. Consult with your fire safety inspection service for the appropriate method and frequency of testing for your unit.
Required Inspection and Maintenance should be performed QuarterlyThis task should be accomplished using: Qualified Inspection Service
Page 79 of 1172008CopyrightThe Helsing Group, Inc.
All Rights Reserved

Maintenance Manual, Warranties, and Performance Guidelines
Zurn Wilkins Backflow Preventer, 950XL & 975XL/U
Kimberly Place Community AssociationUtility Systems
Wilkins Operation of Zurn Plumbing Products1747 Commerce Way
Limited Warranty: All goods sold hereunder are warranted to be free from defects in material and factory workmanship for a period of oneyear from the date of purchase. We will replace at no cost goods thatprove defective provided we are notified in writing of such defect andthe goods are returned to us prepaid at Paso Robles, California, with evidence that they have been properly maintained and used inaccordance with instructions. WE SHALL NOT BE RESPONSIBLEFOR ANY LABOR CHARGES OR ANY LOSS, INJURY OR DAMAGES WHATSOEVER, INCLUDING INCIDENTAL ORCONSEQUENTIAL DAMAGES. The sole and exclusive remedyshall be limited to the replacement of the defective goods. Before installation and use, the purchaser shall determine the suitability of the product for its intended use and the purchaser assumes all risk andliability whatever in connection therewith. Where permitted by law, THE IMPLIED WARRANTY OR MERCHANTABILITY ISLIMITED TO A PERIOD OF ONEYEAR AND SHALL BE LIMITED SOLELY TO THEREPLACEMENT OF THE DEFECTIVE GOODS.
Manufacturer's Warranty
Paso Robles CA 93446805-238-7100
Maintenance Requirements
Testing Procedures
MODEL 950XL DOUBLE CHECK VALVE ASSEMBLY
Equipment Required: Differential pressure gauge test kit.
950XL TEST NO. 1
Purpose: Test #1 check valve for drip tightness against reverse flow.Requirement: The valve must dose tight against reverse flow under all pressure differentials.
Procedure:1. Close #2 and #1 shut-off valves.2. Open test cocks #2 and #3.3. Attach 'VENT' hose to test cock #1, the "LOW" hose to test cock #2 and the "HIGH" hose to test cock #3.
Page 80 of 1172008CopyrightThe Helsing Group, Inc.
All Rights Reserved

Maintenance Manual, Warranties, and Performance Guidelines
Zurn Wilkins Backflow Preventer, 950XL & 975XL/U
Kimberly Place Community AssociationUtility Systems
4. Open by-pass valves "A" and "C", then open test cock #1.5. Open test cock #4 to bleed air from valve and test kit.6. Close by-pass valve "C". Slowly open by-pass valve "B" until differential gauge reads 5 PSID. Close by-pass valve "B".7. The #1 check valve is considered tight if differential pressure is maintained.
950XL TEST NO. 2
Purpose: Test #2 check valve for tightness against reverse flow. Requirement: The valve must close tight against reverse flow under all pressure differentials.
Procedure:
1. Close test cock #1.2. Attach "HIGH" hose to test cock #4 and "LOW" hose to test cock #3.3. Open by-pass valve "C". Open test cocks #1 and #4.4. Repeat step #6 of TEST NO. 1. The #2 check valve is considered tight if differential pressure is maintained.
MODEL 975XL REDUCED PRESSURE PRINCIPLE ASSEMBLY
Equipment Required: Differential pressure gauge test kit.
975XL TEST NO. 1
Purpose: Test #2 check valve for tightness against reverse flow. Requirement: The valve must dose tight against reverse flow under all pressure differentials.
Procedure:
1. Attach the "HIGH" hose to test cock #2 and the "LOW" hose to test cock #3.2. Close #2 shut-off valve.3. Open test cocks #2 and #3.4. Open by-pass valves "C" and "A" and bleed to atmosphere until all air is expelled.5. Close by-pass valve "A". Open by-pass valve "B" and bleed to atmosphere until all air is expelled. Close by-pass valves "B"and "C".6. Attach the 'VENT' hose to test cock #4.7. Slowly open by-pass valves "A" and "C" and keep by-pass valve "B" dosed.8. Open test cock #4.9. Indicated pressure differential will drop slightly. If pressure differential does not continue to decrease, the #2 check valve isconsidered tight.
975XL TEST NO. 2
Purpose: Test #1 check valve for tightness and record pressure drop across #1 check valve.Requirement: The static pressure drop across the #1 check valve should be at least 3.0 PSID greater than the relief valve opening point (TEST NO. 3).
Procedure:
1. Close by-pass valve "A"2. Close test cock #4, and disconnect 'VENT' hose from test cock #4.
Page 81 of 1172008CopyrightThe Helsing Group, Inc.
All Rights Reserved

Maintenance Manual, Warranties, and Performance Guidelines
Zurn Wilkins Backflow Preventer, 950XL & 975XL/U
Kimberly Place Community AssociationUtility Systems
3. Open by-pass valves "B" and "C" bleeding to atmosphere, then close by-pass valve "B" restoring the system to normal staticcondition. Observe the pressure differential gauge and note this as the #1check valve psid.
975XL TEST NO. 3
Purpose: To test operation of the differential relief valve.Requirement: The pressure differential relief valve must operate to maintain the "ZONE" between the two check valves at least 2 PSID less than the supply pressure.
Procedure:
1. Close by-pass valve "C" and open by-pass valve "A".2. Open by-pass valve "B" very slowly until differential gauge needle starts to drop. Hold the valve at this position and observethe gauge reading at the moment the first discharge is noted from the reliefvalve. Record this as the opening differential pressure of the relief valve.
MAINTENANCE INSTRUCTIONS: All Model 975XL Reduced Pressure Principle and Model 950XL Double Check Valve Backflow Preventers must be inspected andmaintained by licensed personnel at least once a year or more frequently as specified by local codes. Replacement of worn or damaged parts must only be made with genuine "WILKINS" parts. The WILKINS Certificate of Limited Warranty provides thatfailure to do so "...releases WILKINS of any liability that it might otherwise have with respect to that device." Such failure could also result in an improperly functioning device.The Model 975XL Reduced Pressure Principle Assemblies should be thoroughly flushed after backflow conditions occur toprevent any type of corrosive deterioration to its components. Failure to do so could result in malfunction of the device.
GENERAL MAINTENANCE
1. Clean all parts thoroughly with water after disassembly.2. Carefully inspect rubber seal rings, diaphragms and o-rings for damage.3. Test unit after reassembly for proper operation(see "Testing Procedures").
SERVICING CHECK VALVES
1. Close inlet and outlet shut-off valves.2. Open No. 2, No. 3 and No. 4 test cocks to release pressure from valve.3. Unscrew check valve covers using appropriate size wrench (CAUTION: Cover is spring loaded). To avoid injury, hold coverdown firmly with one hand while unscrewing.4. Remove check valve cover, spring and poppet assembly.5. Inspect the rubber seal ring for cuts or embedded debris. To remove seal ring, remove screw and seal ring retainer. If the reverse side of the seal ring is unused, it is possible to invert the seal ring. This would be considered a temporary solution to fixing a fouledcheck and should be replaced with a new seal ring as soon as possible.6. Inspect valve cavity and seating area. Remove any debris.7. If installed with removable seat, unscrew seat from body and replace with new seat and lightly grease o-ring. (For seat removal assistance, consult factory.)8. Reverse the above procedures to reinstall check valve assembly. Care should be taken to make sure the heavy spring is installedin the No. 1 check valve (Model 975's series only). For the 3/4"-1" 975XLSE the No. 2 poppet has a cupped seal retainer. For the 11/4"-2" 975XLSE the No. 1 seat has a taller seat profile than the No. 2 seat.
Page 82 of 1172008CopyrightThe Helsing Group, Inc.
All Rights Reserved

Maintenance Manual, Warranties, and Performance Guidelines
Zurn Wilkins Backflow Preventer, 950XL & 975XL/U
Kimberly Place Community AssociationUtility Systems
SERVICING RELIEF VALVE
1. Remove relief valve cover bolts and cover. Gently pull on diaphragm to remove the cartridge assembly.2. Inspect seal ring for cuts and embedded debris. Turn over or replace if required.3. Disassemble cartridge by unscrewing relief valve retaining screw.4. Inspect diaphragm and o-rings for damage. Replace required parts and apply a light coat of grease to plunger o-ring.5. Carefully reassemble cartridge assembly.6. Inspect relief valve seat for wear on seating surface. If damaged, replace seat and seat o-ring. (For seat removal assistance, consult factory).7. Insert cartridge assembly into relief valve body.8. Replace relief valve cover and cover bolts.9. Place device in service and test per "TESTING PROCEDURES".
Required Inspection and Maintenance should be performed AnnuallyThis task should be accomplished using: Licensed Personnel
Please refer to Volume II of this manual for supplemental information about this component.
Page 83 of 1172008CopyrightThe Helsing Group, Inc.
All Rights Reserved

Maintenance Manual, Warranties, and Performance Guidelines
Watts Potable Water Expansion Tank - PLT-5
Kimberly Place Community AssociationUtility Systems
Watts Regulator815 Chestnut St
Limited Warranty: Watts Regulator Company warrants each product to be free from defects in material and workmanship under normalusage for a period of one year from the date of original shipment. In the event of such defects within the warranty period, the Company will, at its option, replace or recondition the product without charge. This shall constitute the sole and exclusive remedy for breach ofwarranty, and the Company shall not be responsible for any incidental, special or consequential damages, including without limitation, lost profits or the cost of repairing or replacing other property which is damaged if this product does not work properly, other costs resulting from labor charges, delays, vandalism, negligence, fouling caused by foreign material, damage from adverse water conditions, chemical, or any other circumstances over whichthe Company has no control. This warranty shall be invalidated byany abuse, misuse, misapplication or improper installation of the product. THIS WARRANTY IS IN LIEU OF ALL OTHER WARRANTIES, EXPRESS OR IMPLIED, INCLUDING ANY IMPLIED WARRANTIES OF MERCHANTABILITY OR FITNESSFOR A PARTICULAR PURPOSE. Any implied warranties that areimposed by law are limited in duration to one year.
Manufacturer's Warranty
No. Andover MA 01845978-688-1811
Maintenance Requirements
Warnings:This Expansion Tank is designed and intended for water storage at a maximum pressure of 150psi. A maximum instantaneous pressure in excess of 150psi or 200°F is UNSAFE and can cause property damage, serious bodily injury or result in death.
We recommend that all thermal expansion and safety relief products be installed with adequate drainage provisions.
Do not exceed 80psi air charge. Air charge pressures exceeding 80psi could become hazardous and will void any and allwarranties, either written or implied. Failure to follow these instructions will result in the possibility of property damage, serious bodily injury or death.
Page 84 of 1172008CopyrightThe Helsing Group, Inc.
All Rights Reserved

Maintenance Manual, Warranties, and Performance Guidelines
Watts Potable Water Expansion Tank - PLT-5
Kimberly Place Community AssociationUtility Systems
Improper installation, adjustment, alteration, service or maintenance can cause property damage, serious bodily injury or death.Read instructions completely before proceeding with installation.
Only qualified personnel may install or service this equipment in accordance with local codes and ordinances.
The manufacturer of this tank does not accept any liability or other responsibility for personal injury or property damage resultingfrom improper use, installation or operation of this tank or the system of which it is a part.
Please refer to Volume II of this manual for supplemental information about this component.
Page 85 of 1172008CopyrightThe Helsing Group, Inc.
All Rights Reserved

Maintenance Manual, Warranties, and Performance Guidelines
Price Pfister Faucet
Kimberly Place Community AssociationUtility Systems
Price Pfister Inc.19701 DaVinci
Limited Warranties: Price Pfister warrants that for as long as the original purchaser owns the home in which the Price Pfister product(the "Product") is originally installed, the Product will be free of alldefects in material and workmanship that would impair the intendedand proper use of the Product. If the Product is installed in acommercial application, the above mechanical warranty shall be limited for a period of ten (10) years from the date of purchase of theProduct.
Price Pfister warrants against deterioration of the Product's finish for as long as the original purchaser owns the home in which the Productis originally installed. If the Product is installed in a commercial application, the above finish warranty for Products that do not contain the Pforever Finish® shall be limited to a period of five (5) years from the date of purchase.
Manufacturer's Warranty
Lake Forest California 926101-800-732-8238
Maintenance Requirements
The best way to clean and care for handles and finishes is to use a soft damp cloth, which can be used to clean and shine the faucet. All Price Pfister faucets manufactured after 1997 have the Pforever Warranty®, which guarantees finish (with proper care) and function for life, so the brilliant luster and flawless performance of every faucet will never fade.
Regular use of a soft cloth rinsed in warm, soapy water will keep a finish looking clean and new. The use of polish, detergents, abrasive cleaners, organic solvents or acid to clean, shine, or polish such finishes will nullify the lifetime warranty.
Oil Rubbed Bronze: A true "living finish", Oil Rubbed Bronze will change over time to reveal highlights created by normal dailyuse. Natural oils on the hands will react with the black oxide topcoat, resulting in a warm blend of hues. Periodic maintenance isrequired of any living finish.
Required Inspection and Maintenance should be performed MonthlyThis task should be accomplished using: No special skill required.
Please refer to Volume II of this manual for supplemental information about this component.
Page 86 of 1172008CopyrightThe Helsing Group, Inc.
All Rights Reserved

Maintenance Manual, Warranties, and Performance Guidelines
Glacier Bay Faucet - Laundry Room
Kimberly Place Community AssociationUtility Systems
Glacier Bay Faucets2455 Paces Ferry Rd
All Glacier Bay products are backed by a limited lifetime warranty—your product is guaranteed for parts and finish for as long as you ownyour home.All Glacier Bay faucets comply with the strictest national standards. They are approved by IAPMO and certified for installation in new, existing or commercial applications.
Manufacturer's Warranty
Atlanta GA 30339888-328-2383
Maintenance Requirements
How should I clean my new faucet?Keep your faucet looking like new by cleaning it periodically with soap and water applied with a soft cloth or sponge. Avoid abrasive cleaners, steel wool and harsh chemicals as these will dull the finish. Use glass cleaner occasionally to help maintain the faucet's shine. To prevent water spots, wipe the faucet dry after use. Some faucets have a "living" finish of unprotected metal,usually a natural-looking copper or bronze. A living finish will change over time, acquiring a patina as it is exposed to air and water. Scrubbing a faucet with a living finish accelerates this process and may damage the base metal.
How do I clean the aerator on my faucet?A clogged or dirty aerator can reduce water flow through a faucet. It's easy to clean the aerator. Close your drain assembly to prevent small parts from falling into the drain. Unscrew the aerator assembly on the end of the spout. Take out the plastic insert that water flows through. Turn the insert upside down and run water through it. This will flush out any dirt or debris that may be lodged in the assembly. Over time, if the water pattern from the aerator begins to spray irregularly, remove the aerator, soak it invinegar overnight, rinse off the aerator screen, then replace. If the screen is really clogged, use a toothpick to clear the holes
Required Inspection and Maintenance should be performed MonthlyThis task should be accomplished using: No special skill for cleaning; handyman/plumber for major
repairsPlease refer to Volume II of this manual for supplemental information about this component.
Page 87 of 1172008CopyrightThe Helsing Group, Inc.
All Rights Reserved

Maintenance Manual, Warranties, and Performance Guidelines
Stainless Steel Sink
Kimberly Place Community AssociationUtility Systems
Maintenance Requirements
Clean stainless steel sinks regularly, particularly if your water has a high mineral content. Use a nonabrasive cloth and milddetergent. To help keep the sink looking like new, rub the sink gently in the direction of the grain, not across it. Mineral depositsmay be cleaned with a weak solution of vinegar and water. After cleaning, always rinse thoroughly with water, and wipe dry to minimize spotting.
Metal scouring pads, abrasive cleaners, and chlorine compounds should not be used, as they may damage the finish and lead to corrosion. If the drain ever requires cleaning, read the label of the drain cleaning product to be sure it is appropriate for use instainless steel sinks, and promptly rinse away any residue left behind.
Do not leave dishes, sink mats, or standing water in the sink for prolonged periods of time. Trapped food particles or corrodingmetal may cause stains. Never use the sink as a cutting board surface.
Required Inspection and Maintenance should be performed MonthlyThis task should be accomplished using: No special skill required.
Page 88 of 1172008CopyrightThe Helsing Group, Inc.
All Rights Reserved

Maintenance Manual, Warranties, and Performance Guidelines
Elkay Stainless Steel Sink - Dayton
Kimberly Place Community AssociationUtility Systems
Elkay2222 Camden Ct
Elkay warrants to the original purchaser of an Elkay stainless steelsink that Elkay will, at its option, replace or repair, without charge, such product if it fails due to a manufacturing defect for a lifetime ofnormal residential use. Product replacement does not include transportation cost or labor installation cost. This warranty covers only stainless steel self-rimming drop-in sinks installed in a conventional countertop surface and stainless steel undermount sinksinstalled in a conventional solid surface countertop and applies toresidential installations only. Elkay reserves the right to examineproduct in question and its installation prior to replacement.
Manufacturer's Warranty
Oak Brook IL 60523630-574-8484
Maintenance Requirements
Care and Cleaning of Elkay Stainless Steel Sinks
Your Elkay sink is made from the finest nickel bearing stainless steel. Its mellow satin surface harmonizes with any color scheme...Any decor. Timeless. Elegant. And, like fine silver, its beautiful finish becomes lovelier with use and age. Your Elkay sink is solid stainless steel and with Proper care and maintenance will give you a lifetime of service.
Satin FinishElkays original highlighted satin finish is produced by an abrasive grinding operation, which lends a uniform pattern of satin finish lines to the metal surface. All exposed areas then undergo a series of progressive machine and hand polishing operations. It is this careful polishing that makes an Elkay satin luster finish so beautiful...and so easy to clean and maintain.
Recommended CleansersElkay has tested general household cleansers to measure their effectiveness in cleaning stainless steel sinks. The most effectivecleansers consist of Bar Keepers Friend, Zud and Lawrence Right Work. Other cleansers, which are still effective, but lessaggressive include Comet, Shiny Sinks Plus, Luneta, Soft Scrub, Mr. Clean and Flitz. So to help maintain the beautiful finish of your stainless steel sink, use one of the cleansers that Elkay recommends.
Recommendations For Cleaning- Do...Rinse thoroughly after each use. Thorough rinsing can be done by running the water for a few minutes and rubbing thecleaned area with a sponge.- Do...Towel dry after each use to prevent mineral deposits from building up on the surface of the sink.- Do...Scour the sink once a week, being sure to rub in the direction of the satin finish lines, using an Elkay recommended cleanser.
Page 89 of 1172008CopyrightThe Helsing Group, Inc.
All Rights Reserved

Maintenance Manual, Warranties, and Performance Guidelines
Elkay Stainless Steel Sink - Dayton
Kimberly Place Community AssociationUtility Systems
- Don't...Scour the sink across the satin finish lines. Scouring across the satin finish lines can damage the original sink finish.- Don't...Allow liquid soap or other household cleansers to dry on the surface of the sink.Most brands contain chemical additives which will affect the original high luster finish.- Don't...Leave standing solutions of chlorine bleach and water in the sink for extended periods of time. Chlorides, which are found in most soaps, detergents, bleaches, and cleansers, are very aggressive to stainless steel. If left on the sink too long they can cause surface pitting.- Don't...Use a steel wool pad to clean your sink. If a more abrasive product is needed, use a Scotch Brite® pad being sure to rub in the direction of the satin finish lines. Steel wool pads have a tendency to break apart and small particles of steel can becomeembedded in the surface of the sink. The steel particles will rust and will give the appearance that the sink itself is rusting.- Don't...Use rubber mats or dishpans in the sink to protect the finish. Leaving rubber mats or dishpans in the sink can lead to surface rust or possible pitting. However, if you do use mats or dishpans please remove them after each use. Don't...Leave wet sponges, cloths, or cleaning pads on the sink. This can lead to surface rust.
Following these recommendations for the care and cleaning of your stainless steel sink will insure that it will provide you withmany years of service.
ChloridesToday, chlorides are found in most all soap, detergents, bleaches and cleansers; chlorides can be aggressive to stainless steel. However, chlorides are very water soluble. Therefore, THOROUGH RINSING of your sink after each use to remove any chlorideresidue and a weekly scouring is all that is required to keep your sink looking bright and shiny.
ScratchesLike many metallic surfaces, your stainless steel sink will scratch. These are merely usage scratches and over time will blend intothe overall finish of your sink.
KnivesYour sink is designed to serve as many things but not as a cutting board or chopping block. This type of use will lead to deepscratches in the sink finish and will dull your knives. Elkay does offer various cutting boards, which will provide an additionalwork area.
Water QualityThe quality of your water can affect your sink's appearance. If your water has a high iron content, a brown surface stain can formon the sink giving the appearance of rust. Additionally, in areas with a high concentration of minerals, or with over-softened water, a white film may develop on the sink. To combat these problems, we suggest that the sink be towel dried after use, and again, on a weekly basis, the sink should be cleaned using a recommended abrasive cleaner.
FoodsHeavy salt concentration or foods containing high levels of salt should not be allowed to dry on the sink surface. Rinse your sinkthoroughly after use.
Required Inspection and Maintenance should be performed WeeklyThis task should be accomplished using: No special skill required
Please refer to Volume II of this manual for supplemental information about this component.
Page 90 of 1172008CopyrightThe Helsing Group, Inc.
All Rights Reserved

Maintenance Manual, Warranties, and Performance Guidelines
Rinnai Tankless Water Heater & Control
Kimberly Place Community AssociationUtility Systems
Rinnai103 International Drive
Limited Warranty:This Warranty covers any defects in materials or workmanship whenthe product is installed and operated according to Rinnai writteninstallation instructions, subject to the terms within this limitedwarranty document. This Warranty applies only to products that are installed by a state qualified or licensed contractor. Improper installation may void this Warranty. Rinnai strongly suggests that youuse an installer who has attended a Rinnai product knowledge classbefore installing this water heater. This Warranty extends to theoriginal purchaser and subsequent owners, but only while the product remains at the site of the original installation. This Warranty only extends through the first installation of the product and terminates ifthe product is moved or reinstalled at a new location.
Heat Exchanger: 10 YearsAll other Parts and Components: 5 YearsReasonable Labor: 1 YearImportant: Period of coverage is 3 years from date of purchase whenused as a circulating water heater within a hot water circulation loop, when the water heater is in series with a circulation system and allcirculating water flows through the water heater.
Manufacturer's Warranty
Peachtree City GA 30269800-621-9419
Maintenance Requirements
Do not store or use gasoline or other flammable vapors and liquids in the vicinity of this or any other appliance.WHAT TO DO IF YOU SMELL GAS1. Do not try to light any appliance.2. Do not touch any electrical switch; do not use any phone in your building.3. Immediately call your gas supplier from a neighbor's phone. Follow the gas supplier's instructions.4. If you cannot reach your gas supplier, call the fire department.Installation and service must be performed by a qualified installer, service agency or the gas supplier.
Page 91 of 1172008CopyrightThe Helsing Group, Inc.
All Rights Reserved

Maintenance Manual, Warranties, and Performance Guidelines
Rinnai Tankless Water Heater & Control
Kimberly Place Community AssociationUtility Systems
This appliance must be installed in accordance with local codes, or in the absence of local codes, the National Fuel Gas Code, ANSI Z223.1/NFPA 54 and/or the CSA B149.1, Natural Gas and Propane Installation Code.1. Install this product outdoors ONLY, DO NOT install indoors.2. Do Not use this appliance if any part has been underwater. Immediately call a qualified service technician to inspect theappliance and to replace any part of the control system and any gas control which has been underwater.3. Detailed instructions on the proper installation practices to follow for the installation of your new hot water heater(s) areincluded at the back of this manual.
MAINTENANCE & SERVICE INFORMATION1. Always turn off the electrical power supply, the manual gas valve and the manual water control valve whenever servicing theunit.2. The Rinnai Water Heater should be checked by a Properly Trained Technician once a year. A Properly Trained Rinnai Technician should perform any repairs that may be necessary.
The following items should be checked each inspection:1. The area around the Rinnai unit should be free from combustible materials such as cloth, vegetation and building materials, (seepage 8)2. Check burners for presence of foreign debris, insects or bugs. These items are not covered by the unit's warranty.3. Remove and clean the inlet water filter.4. Keep the appliance area clear and free from combustible materials, gasoline, and other flammable vapors and liquids.5. Do not obstruct flow of combustion and ventilation air.
In the case of any fault or error message from the Rinnai Water Heater, first turn all hot water taps off. Wait for 5 seconds. Turn the hot water tap back on. If the error message still remains, call your Rinnai Authorized Service Representative or Rinnai at 800-621-9419.
Should overheating occur or the gas supply fail to shutoff, turn off the manual gas control valve to the appliance.
DO NOT ATTEMPT TO SERVICE YOUR Rinnai YOURSELF. Call a Rinnai Authorized Service Technician or call your installer.
MAINTENANCE SUGGESTIONSThis water heater has been designed and constructed for a long performance life when installed and operated properly undernormal conditions. Regular inspections, as outlined in this section, are strongly recommended as a means of keeping your heateroperating efficiently.
Consideration should be given to periodic maintenance of scale removal in applications where the water hardness quality iselevated and the water heater runs for extended periods such as in commercial applications or applications with circulating loops.
1. CleaningThe water heater should be cleaned annually. Keep the water heater clear of dust and debris especially in and around burner. Cleaning procedures for the Rinnai Water Heaters are as follows:A. Turn off and disconnect electrical power. Allow to cool for one hour.B. Remove the Front Panel by removing screws. See parts breakdown on panels.C. Use pressurized air to remove dust from around main burner.D. Use soft dry cloth to wipe cabinet.DO NOT DAMAGE OR DISTORT ANY PARTS OF HEATER.DO NOT USE WET CLOTH OR SPRAY CLEANERS ON BURNER.
2. Visual check of main burner flames.
Page 92 of 1172008CopyrightThe Helsing Group, Inc.
All Rights Reserved

Maintenance Manual, Warranties, and Performance Guidelines
Rinnai Tankless Water Heater & Control
Kimberly Place Community AssociationUtility Systems
The burner must flame evenly over the entire surface when operating correctly. The flame must burn with a clear, blue, stableflame. See the parts breakdown of the burner for the location of view ports. Any and all parts removed for inspection or service must be replaced before operating the unit. The flame pattern should be as shown in the following Figures.
VENT SYSTEM:Must be checked annually for blockage or deterioration. See vent installation instructions.
MAINTENANCE-ELECTRIC MOTORS: Motors are permanently lubricated and need no lubrication. Keep fan and motor free of dust and dirt, clean annually.
TROUBLESHOOTINGQ. I don't have any hot water when I open the tap!A. Make sure there is gas, water and electricity to the Rinnai Water Heater (the power is turned on and the gas is turned on)
Q. When I was using the hot water, the water got cold!A. If you adjusted the flow from the tap to lessen it, you may have gone below the minimum flow required. The Rinnai Water Heater requires a minimum flow rate to operate (see specification page for flow rate of your unit). If you mix the water with a tapand attempt to get a temperature well below the temperature being controlled by the unit, it may drop the flow below the desired minimum flow rate. Decrease the temperature supplied by the Rinnai Water Heaters at the remote control or increase your totalflow.
Q. White smoke comes out of the exhaust!A. During colder weather when the exhaust temperature is hotter than the air, the exhaust fumes condense producing white steam.
Q. When I open a hot tap. I do not immediately get hot water!A. Hot water must travel through your plumbing from the Rinnai Water Heater to the faucet. The time period for hot water to reachyour fixture is determined by the amount of water in your plumbing system between your water heater and the fixture, water pressure, flow rate of fixture in use, etc.
Q. After I turn off the hot water tap, the fan on the Rinnai Water Heaters continues to run!A. The fan is designed to be on for 65 seconds after the flow of water stops. This is to ensure constant water temperatures duringrapid starting and stopping, as well as exhausting any residual gas flue products from the unit.
CARE & LIME CONDITION WARNING:Care of Unit's Exterior:Keep the exterior cabinet clean. Use a soft cloth and warm water when cleaning the cabinet. Do Not use volatile substances such asbenzene and thinners, as they may ignite, or cause fading of the paint.
Lime Condition Warning Signal:If you notice "LC" flashing on the remote key pad, this means the unit is beginning to lime up, and MUST be flushed. Contact aqualified Rinnai service technician to flush the appliance. Failure to flush the appliance when "LC" is flashing, will cause damageto the heat exchanger. Damage caused by lime build up is not covered by the unit's warranty. To reset the LC Fault Code, turn the power off to the unit. Once power is restored, the LC code will be reset.
Water Quality:Consideration of care for your water heater should include evaluation of water quality. If the water quality exceeds the target levels provided in the table, you may want to treat or condition the water.
Required Inspection and Maintenance should be performed AnnuallyThis task should be accomplished using: Qualified Personnel
Page 93 of 1172008CopyrightThe Helsing Group, Inc.
All Rights Reserved

Maintenance Manual, Warranties, and Performance Guidelines
Rinnai Tankless Water Heater & Control
Kimberly Place Community AssociationUtility Systems
Please refer to Volume II of this manual for supplemental information about this component.
Page 94 of 1172008CopyrightThe Helsing Group, Inc.
All Rights Reserved

Maintenance Manual, Warranties, and Performance Guidelines
State Turbo Sandblaster Self Cleaning Water Heater
Kimberly Place Community AssociationUtility Systems
States Industries500 Lindhal Pkwy
3 YEAR LIMITED WARRANTY ON TANKState Industries, Inc. (State) warrants the tank in this water heater incase of a leak within three (3) years from the date of purchase or, in the absence of a Bill of Sale verifying said date, from the date indicated on the model rating plate affixed to this water heater. Should a leak occur in the tank, State will furnish a new currentmodel water heater of equal capacity and quality. No labor, installation, or freight (if any) charges are included in this warranty. You must pay these costs.
1 YEAR LIMITED WARRANTY ON PARTSState warrants the component parts of this water heater to be freefrom defects in material and workmanship for a period of one yearfrom the date of purchase or, in the absence of a Bill of Sale verifying said date, from the date indicated on the model rating plate affixed to the water heater. In case of a defect, malfunction, or failure to conform to this warranty, State will repair or replace, at its option, the part(s) of the water heater. No labor, installation, or freight (if any) charges are included in this warranty. You must pay these costs.Prior to return of the part(s) to the manufacturer for inspection, Statewill, if requested, ship all replacement part(s) C.O.D. and later provide such reimbursement as subsequent inspection indicates is dueunder these warranties.
Manufacturer's Warranty
Ashland City TN 37015800-365-8170
Maintenance Requirements
WARNING:-Do not store or use gasoline or other flammable vapors and liquids in the vicinity of this or any other appliance.-WHAT TO DO If YOU SMELL GAS• Do not try to light any appliance.• Do not touch any electrical switch; do not use any phone in your building,• Immediately call your gas supplier from a neighbor's phone. Follow the gas supplier's instructions.
Page 95 of 1172008CopyrightThe Helsing Group, Inc.
All Rights Reserved

Maintenance Manual, Warranties, and Performance Guidelines
State Turbo Sandblaster Self Cleaning Water Heater
Kimberly Place Community AssociationUtility Systems
• If you can not reach your gas supplier, call the fire department.-Installation and service must be performed by a qualified installer, service agency or the gas supplier.
WARNING:Improper installation, adjustment, alteration, service or maintenance can cause DEATH, SERIOUS BODILY INJURY, OR PROPERTY DAMAGE. Refer to this manual for assistance or consult the local gas utility for further information.
WARNINGWATER HEATERS EQUIPPED FOR ONE TYPE GAS ONLY; This water heater is equipped for one type gas only. Check the rating plate near the gas control valve for the correct gas. DO NOT USE THIS WATER HEATER WITH ANY GAS OTHERTHAN THE ONE SHOWN ON THE MODEL RATING PLATE. Failure to use the correct gas can cause problems, which canresult in DEATH, SERIOUS BODILY INJURY, OR PROPERTY DAMAGE. If you have any questions or doubts consult your gas supplier or local utility.
WARNINGA fire can start if combustible materials such as clothing, cleaning materials, or flammable liquids are placed against or next to the water heater.
WARNINGINSTALLATIONS IN AREAS WHERE FLAMMABLE LIQUIDS (VAPORS) ARE LIKELY TO BE PRESENT OR STORED (GARAGES, STORAGE, AND UTILITY AREAS, ETC): Flammable liquids (such as gasoline, solvents, propane (LP) or butane,etc,), all of which emit flammable vapors, may be improperly stored or used in such areas. The gas water healer pilot fight or main burner can ignite such vapors. The resulting flashback and fire can cause death or serious burns to anyone in the area, as well as property damage. If installation in such areas is your only option, then the installation must be accomplished in a way that the pilotflame and main burner flame are elevated from the floor at least 18 inches. While this may reduce the chances of flammable vapors from a floor spill being ignited, gasoline and other flammable substances should never be stored or used in the same room or areacontaining a gas water heater or other open flame or spark producing appliance.NOTE: Flammable vapors may be drawn by air currents from other areas of the structure to the appliance.
WARNINGThis wafer heater must not be installed directly on carpeting. Carpeting must be protected by a metal or wood panel beneath theappliance extending beyond the full width and depth of the appliance by at least 3 inches (76,2mm) in any direction, or if the appliance is installed in an alcove or closet, (he entire floor must be covered by the panel. Failure to heed this warning may result in a fire hazard.
WARNINGA gas water heater cannot operate properly without the correct amount of air for combustion. Do not install in a confined area suchas a closet, unless you provide air as shown in the "Locating The New Water Heater" section. Never obstruct the flow of ventilation air. If you have any doubts or questions at all, call your gas company. Failure to provide the proper amount of combustion air can result in a fire or explosion and can cause DEATH, SERIOUS BODILY INJURY, OR PROPERTY DAMAGE.
WARNING1. The appliance and its individual shutoff valve must be disconnected from the gas supply piping system during any pressuretesting of the gas system at lest pressures in excess of 1/2 pound per square inch (3-SkPa).2. The appliance must be isolated from the gas supply piping system by closing its individual manual shutoff valve during anypressure testing of the gas supply piping system at test pressures equal or less than 1/2 pound per square inch (3.5kPa).
WARNINGSoot build-up indicates a problem that requires correction before further use. Turn "off" gas to water healer and leave "off" until
Page 96 of 1172008CopyrightThe Helsing Group, Inc.
All Rights Reserved

Maintenance Manual, Warranties, and Performance Guidelines
State Turbo Sandblaster Self Cleaning Water Heater
Kimberly Place Community AssociationUtility Systems
repairs are made, because failure to correct the cause of the sooting can result in a fire or explosion causing death, serious bodily injury, or property damage.
WARNINGThe water heater with draft hood installed must be properly vented to a chimney, which terminates outdoors. Never operate the water healer unless it is vented to the outdoors and has adequate air supply to avoid risks of improper operation, explosion or asphyxiation.
WARNINGObstructed or deteriorated vent systems may present a serious health risk or asphyxiation.
WARNINGChemical vapor corrosion of the flue and vent system may occur if air for combustion contains certain chemical vapors. Spray canpropellants, cleaning solvents, refrigerator and air conditioner refrigerants, swimming pool chemicals, calcium and sodium chloride, waxes, bleach, and process chemicals are typical compounds, which are potentially corrosive.
WARNINGHYDROGEN GAS: Hydrogen gas can be produced in a hot water system that has not been used for a long period of time(generally two weeks or more). Hydrogen gas is extremely flammable and explosive. To prevent the possibility of injury under these conditions, we recommend the not water faucet be opened for several minutes at the kitchen sink before any electricalappliances which are connected to the hot water system arc used (such as a dishwasher or washing machine)- If hydrogen gas is present, there will probably be an unusual sound similar to air escaping through the pipe as the hot water faucet is opened. There must be no smoking or open flame near the faucet at the time it is open.
WARNINGINSULATING JACKETS: When installing an external water heater insulation jacket on a gas water heater:a. DO NOT cover the temperature-pressure relief valve,b. DO NOT put insulation over any part of the top of the gas water heater.c. DO NOT put insulation over the gas control valve or gas control valve/burner cover, or any access areas to the burner.d. DO NOT let insulation around the gas water heater to gel within 8 inches of the floor (air must get to the burner).e. DO NOT cover or remove operating instructions, and safety related warning labels and materials affixed to the water heater.Failure to heed this will result in the possibility of a fire or explosion,
WARNINGDo not use this appliance if any part of it has been under water. Immediately call a qualified service technician to inspect theappliance and to replace the gas control or any part of the burner system which has been under water,
CAUTIONWATER HEATERS EVENTUALLY LEAK: Installation of the water heater should be accomplished in such a manner that if thetank or any connections should leak, the flow of water will not cause damage to the structure. For this reason, it is not advisable toinstall the water heater in an attic or upper floor. When such locations cannot be avoided, a suitable drain pan should be installed under the water heater. Drain pans are available at your local hardware store. Such a drain pan must be not greater than 1 1/2 inches deep, have a minimum length and width of at least 2 inches greater than the water heater dimensions and must be piped toan adequate drain. The pan must not restrict combustion air flow. Under no circumstances is the manufacturer to be held liable forany water damage in connection with this water heater.
START UP CONDITIONSCONDENSATIONWhenever the water heater is filled with cold water, a certain amount of condensation will form while the burner is on. A water
Page 97 of 1172008CopyrightThe Helsing Group, Inc.
All Rights Reserved

Maintenance Manual, Warranties, and Performance Guidelines
State Turbo Sandblaster Self Cleaning Water Heater
Kimberly Place Community AssociationUtility Systems
heater may appear to be leaking when in fact the water is condensation. This usually happens:a. When a new water heater is filled with cold water for the first time,b. When gas burns and water vapor is produced in water heaters, particularly high efficiency models where flue temperatures arelower,c. When you use large amounts of hot water in a short time and the refill water is very cold.Moisture from the products of combustion condense on the cooler lank surfaces and form drops of water which may fall onto theburner or other hot surfaces to produce a "sizzling" or "frying" noise.
Excessive condensation can cause pilot outage due to water running down the flue tube onto the main burner and putting out thepilot.
Because of the suddenness and amount of water, condensation water may be diagnosed as a "tank leak" After the water in the tank warms up (about 1-2 hours), the condition should disappear.
Do not assume the water heater is leaking until there has been enough time for the water in the tank to warm up.
An undersized water heater will cause more condensation. The water healer must be sized properly to meet the family's demandsfor hot water including dishwashers, washing machines and shower heads.
Excessive condensation may be noticed during the winter and early spring months when incoming water temperatures are at theirlowest.
Good venting is essential for a gas fired water heater to operate properly as well as to carry away products of combustion andwater vapor.
SMOKE/ODORIt is not uncommon to experience a small amount of smoke and odor during the initial start-up. This is due to burning off of oilfrom metal parts, and will disappear in a short while.
THERMAL EXPANSIONWater supply systems may, because of such events as high line pressure, frequent cut-offs, the effects of water hammer among others, have installed devices such as pressure reducing valves, check valves, back flow preventers, etc. to control these types of problems. When these devices are not equipped with an internal by-pass, and no other measures are taken, the devices cause the water system to be closed. As water is heated, it expands (thermal expansion) and closed systems do not allow for the expansion ofheated water.
The water within the water heater tank expands as it is heated and increases the pressure of the water system. If the relieving point of the water heater's temperature-pressure relief valve is reached, the valve will relieve the excess pressure. Thetemperature-pressure relief valve is not intended for the constant relief of thermal expansion. This is an unacceptable condition andmust be corrected.
It is recommended that any devices installed, which could create a closed system have a by-pass and/or the system have an expansion tank to relieve the pressure build by thermal expansion in the water system. Expansion tanks are available for ordering through a local plumbing contractor. Contact the local water supplier and/or plumbing contractor for assistance in controlling these situations.STRANGE SOUNDSPossible noises due to expansion and contraction of some metal parts during periods of heat-up and cool-down do not represent harmful or dangerous conditions.
Condensation causes sizzling and popping with the burner area during heating and cooling periods and should be considered
Page 98 of 1172008CopyrightThe Helsing Group, Inc.
All Rights Reserved

Maintenance Manual, Warranties, and Performance Guidelines
State Turbo Sandblaster Self Cleaning Water Heater
Kimberly Place Community AssociationUtility Systems
normal.
Operational ConditionsSMELLY WATERIn each water heater there is installed at least one anode rod (see parts section) for corrosion protection of the tank. Certain water conditions will cause a reaction between this rod and the water. The most common complaint associated with the anode rod is oneof a "rotten egg smell". This odor is derived from hydrogen sulfide gas dissolved in the water. The smell is the result of fourfactors, which must all be present for the odor to develop:a. a concentration of sulfate in the supply water.b. little or no dissolved oxygen in the waterc. a sulfate reducing bacteria within the water heater (This harmless bacteria is non-toxic to humans.)d. an excess of active hydrogen in the tank. This is caused by the corrosion protective action of the anode.
Smelly water may be eliminated or reduced in some water heater models by replacing the anode(s) with one of less active material, and then chlorinating the water heater tank and all hot water lines Contact the local water heater supplier for further informationconcerning art Anode Replacement Kit 59000029 and this Chlorination Treatment
If the smelly water persists after the anode replacement and chlorination treatment, we can only suggest that continuous chlorination and filtering conditioning equipment be considered to eliminate the water problem.
Do not remove the anode leaving the tank unprotected. By doing so, all warranty on the water heater tank is voided.
HIGH TEMPERATURE SHUT OFF SYSTEMThis water heater is equipped with an automatic gas shut off system. This system works when high water temperatures are present.
E.C.O.The E CO. will activate if the water temperature exceeds 200°F and will not reset itself. If it is activated,1. Turn "OFF" electrical power.2. Draw off sufficient hot water to reduce the water temperature.3. Reset shutoff switch by pressing in button on thermostat.4. Repeat procedure outlined under the "Operating" instructions in this manual or located above the gas control valve on the waterheater.NOTE: The reset button cannot be reset until the water temperature in the water healer lowers to 120°F.
NOT ENOUGH OR NO HOT WATER1. Check the manual gas shut off valve to be sure it is open.2. Check the pilot flame. It may have gone out. All models have an opening behind the outer door for viewing the pilot.3. If the pilot is not lit, follow the "Operating" instructions in this manual or located above the gas control valve on the water heaterto relight the pilot. If the water was extremely hot and is now cold, the high limit safely temperature shut off may have put out theburner and pilot Refer to "High Temperature Shut Off System" in this section.4. The gas control knob must be turned to the "ON" position,5. The temperature adjustment dial may be set too low. See the Temperature Regulation" section,6. The gas company can check the gas input to see if it is correct. An underfired water heater will not heat water as quickly.7. Look for leaking or open hot water faucets. Make sure all are closed.8. The cold water inlet temperature may be colder during the winter months. It will take longer So heat the water and seem likeless hot water,9. If you cannot find what is wrong, call the local gas utility and/or plumbing contractor,
WATER IS TOO HOT1. The temperature adjustment dial may be set too high. See the Temperature Regulation" section,
Page 99 of 1172008CopyrightThe Helsing Group, Inc.
All Rights Reserved

Maintenance Manual, Warranties, and Performance Guidelines
State Turbo Sandblaster Self Cleaning Water Heater
Kimberly Place Community AssociationUtility Systems
NOTE: A period of time is necessary after an adjustment has been made for the water temperature to reach the new temperaturesetting,2. If lower temperature settings will not lower the water temperature, shut off the water heater and call the local gas utility.
PERIODIC MAINTENANCEVenting System InspectionAt least once a year a visual inspection should be made of the venting system. You should look for:1. Obstructions which could cause improper venting. The combustion and ventilation air flow must not be obstructed,2. Damage or deterioration which could cause improper venting or leakage of combustion products,3. Rusted flakes around top of water heater.
WARNINGBe sure the vent piping is properly connected lo prevent escape of dangerous flue gasses which could cause deadly asphyxiation.
WARNINGChemical vapor corrosion of the flue and vent system may occur if air for combustion contains certain chemical vapors. Spray canpropellants, cleaning solvents, refrigerator and air conditioner refrigerants, swimming pool chemicals, calcium and sodium chloride, waxes, bleach and process chemicals are typical compounds, which are potentially corrosive.
WARNINGIf after inspection of the vent system you found sooting or deterioration, something is wrong. Call the local gas utility to correct theproblem and clean or replace the flue and venting before resuming operation of the water heater.
Burner InspectionWARNINGDo not use this appliance if any part of it has been under water, immediately call a qualified service technician to inspect theappliance and to replace the gas control or any part of the burner system, which has been under water.
At least once a year a visual inspection should be made of the main burner and pilot burner. The drawing is for your reference.
You should check for sooting which is not normal and will impair proper combustion.
WARNINGSoot build-up indicates a problem that requires correction before further use. Turn "OFF" gas to water heater and leave "OFF" untilrepairs are made, because failure to correct the cause of the sooting can result in a fire causing DEATH, SERIOUS BODILY INJURY, OR PROPERTY DAMAGE,
Burner CleaningIn the event your burner needs cleaning, use the following instructions:
If inspection of the burner shows that cleaning is required, turn the gas control knob clockwise to the "OFF" position.
Loose deposits on or around the burner can be removed by carefully using the hose of a vacuum cleaner, if the burner needs to be removed for cleaning, call the local gas utility lo remove and clean the burner and correct the problem that required the burner tobe cleaned
Oiling Instructions-Model f80-725Oil motor every 12 months with 6 drops of SAE 20 motor oil
Housekeeping
Page 100 of 1172008CopyrightThe Helsing Group, Inc.
All Rights Reserved
Maintenance Manual, Warranties, and Performance Guidelines
State Turbo Sandblaster Self Cleaning Water Heater
Kimberly Place Community AssociationUtility Systems
Vacuum around base of water heater for dust, dirt, and lint on a regular basis.
Temperature-Pressure Relief Valve OperationThe temperature-pressure relief valve must be manually operated at least once a year.
WARNINGWhen checking the temperature-pressure relief valve operation, make sure that (1) no one is in front of or around the outlet of thetemperature-pressure relief valve discharge line, and (2) that the water manually discharged will not cause any property damagebecause the water may be extremely hot.
If after manually operating the valve, it fails to completely reset and continues to release water, immediately close the cold waterinlet to the water heater, follow the draining instructions, and replace the temperature-pressure relief valve with a new one.
Failure to install and maintain a new properly listed temperature-pressure relief valve will release the manufacturer from any claimwhich might result from excessive temperature or pressure.
The water heater should be drained if being shut down during freezing temperatures. Also periodic draining and cleaning of sediment from the tank may be necessary.1.Turn the gas control knob to the "OFF" position.2. CLOSE the cold-water inlet valve to the water heater.3. OPEN a nearby hot water faucet and leave open to allow for draining.4. Connect a hose to the drain valve and terminate to an adequate drain.5. OPEN the water heater drain valve to allow for tank draining.NOTE: If the water heater is going to be shut down and drained for an extended period, the drain valve should be left open withhose connected allowing water to terminate to an adequate drain.6. Close the drain valve.7. Follow instructions in the "Filling The Water Heater" section.8. Follow the lighting instructions in the "Lighting" section to restart the water heater.
Required Inspection and Maintenance should be performed MonthlyThis task should be accomplished using: No special skill required; Qualified Technician for repairs.
Please refer to Volume II of this manual for supplemental information about this component.
Page 101 of 1172008CopyrightThe Helsing Group, Inc.
All Rights Reserved

Maintenance Manual, Warranties, and Performance Guidelines
Stormwater Pollutant Control - Kimberly Place
Kimberly Place Community AssociationUtility Systems
Maintenance Requirements
According to section 2.1.10, Stormwater Pollutant Control, of the CC&R’s, the Community is subject to all federal, state and localrequirements of the National Pollutant Discharge Elimination System ("NPDES"), adopted in accordance with the Federal Clean Water Act. In 1999, the California State Water Resources Control Board ("SWRCB") enacted a new statewide General Permit for Storm Water Discharges Associated with Construction Activity (the "General Permit"). The General Permit imposes acomprehensive series of requirements on developers and builders to file a Storm Water Pollution Prevention Plan ("SWPPP") with the Regional Water Quality Control Board that sets forth Best Management Practices ("BMPS") that are intended to mitigaterunoff of silt and pollutants from the Community into storm drains. Some BMPs apply to activities undertaken by the Associationand Owners, and the Association and the Owners are required to comply with the applicable BMPS. The SWPPP includes specific maintenance schedules for post-construction operation of the BMPs that may impose long term maintenance obligationson the Association and each Owner in the Community. The BMPs are in addition to any local ordinances established by the Cityand any rules and regulations imposed by the Association concerning discharge of non-storm water into storm drains.
The Association shall ensure that (a) irrigation equipment in the Association Property shall include water sensors andprogrammable irrigation times allowing for short cycles, (b) replacement plants installed by the Association in the AssociationProperty are the same as or similar to those plants that were originally installed by Declarant, (c) water-permeable surfaces originally installed by Declarant in accordance with the approved landscape plans are maintained free of debris and in goodworking order to promote surface filtration of storm water and irrigation runoff, and (d) maintenance of native and drought-tolerant plants originally installed on permanent slopes in accordance with the approved landscaping plans. The cost of the Association's portion of such maintenance, if any, shall be treated as a Common Expense.
Page 102 of 1172008CopyrightThe Helsing Group, Inc.
All Rights Reserved

Maintenance Manual, Warranties, and Performance Guidelines
Flexflo Injector Pump - A-130-6
Kimberly Place Community AssociationUtility Systems
Flexflo5300 Business Dr
Your new pump is a quality product and is warranted to be free ofdefects as set down it this policy. All parts, including rubberizedgoods and labor are covered under warranty for 90 days from date of purchase. Used peristaltic tubes are not warranted. Parts (excluding rubberized goods and labor) are covered for a period of 12 months from date of purchase. Warranty coverage does not include damage tothe pump that results from misuse, carelessness, abuse, or alteration. Only the repair or replacement of the pump is covered. The manufacturer does not assume responsibility for any other loss ofdamage. Warranty status is determined by the pumps serial number.The serial number label must be on the pump to obtain warrantycoverage. Enclose your invoice or sales receipt, with date ofpurchase, when you return the pump for warranty repair. Warranty status will be verified by the factory or authorized service center.
Manufacturer's Warranty
Huntington Beach CA 92649714-893-8529
Maintenance Requirements
LOCATIONWEATHER AND VENTILATION:A good solid floor; such as, concrete or brick is desirable. This unit is designed for indoor installations. If used outdoors, it must be placed in a sheltered and ventilated area.The unit must be protected from ice, rain, and ultraviolet (UV) rays. Before you choose the exact spot be sure that chemicalcontainer is located near the installation. You should keep the suction line as short as possible. The unit should be offset to one sideof any removable tank lid. Keep the pump low for best control, lower than the chemical container is ideal (flooded suction).
WALL MOUNTING:It is imperative the unit is firmly attached to it's support. Wall board or plaster alone will not carry the weight and vibration. Your anchor shields shall penetrate the wall one inch. Leave the heads projecting from the wall a full 1/4". This allows the key slot holes to fit over the screw heads. Then place the unit over the screw heads and slide down.
ELECTRICAL REQUIREMENTS- Be certain you connect the unit to the proper power supply.- Using incorrect voltage will cause server damage to the motor.- The voltage requirement is printed on the serial number label.- All pump models are supplied with a junction box and cover.- To reduce the risk of electric shock, be certain that a grounding conductor is connected to the green grounding located inside the
Page 103 of 1172008CopyrightThe Helsing Group, Inc.
All Rights Reserved

Maintenance Manual, Warranties, and Performance Guidelines
Flexflo Injector Pump - A-130-6
Kimberly Place Community AssociationUtility Systems
junction box.The electrical hook up is very important to operation. The injector must never operate when treated line is shut down. The diagram above shows th injector wired within a cycle of a circulation pump or any system where chemical is used within a cycle but does ordoes not run al full system. If your system is complicated, be sure your electrician knows what is required. Remember chemicalsfed to a stopped system can ruin it.Injector
SUPPLY TANK FOR CHEMICALSPlastic containers must be designed and manufactured for this purpose. Your container must be designed for whatever chemicalyou are using. Do not place the container in direct sunlight. Ultraviolet (UV) rays attack many materials which can cause them to become brittle.
OPERATION - MAINTENANCEOnce every week inspect tubing, and accessory valves and fittings. Inspect all parts for signs of leaks, swelling, cracking, corrosion or discoloration. Also, inspect the tubing for elasticity.
Cracking, crazing, discoloration, etc., during the first week of operation are signs of severe chemical attack. If this occurs, immediately remove the fluid from the injector. Determine which parts are being attacked and replace with parts that have beenmanufactured using more suitable material.
NOTE: Sketches and Diagrams for information only. Qualified personnel, must be used when altering the electrical cord in anyway. Qualified personnel, must also be used for installation of mechanical connections.
The pump is designed to perform in a wide variety of installations. However, the service life of the pump will vary, depending on many factors such as; fluid , temperature, pressure, etc. Because of the wide variety of installations, the pump has been factory tested for pressure and performance using water only. Do not use chemicals if you are not satisfied they are compatible with thepumps construction.
The pump tube assemblies are designed for maximum service life. However, the service life can be adversely affected by thechemicals used, the amount of back pressure, the motor R.P.M., and temperature.
The pump tube assemble should be inspected frequently. Replace the tube if any cracking, leaking or loss of feed rate occurs.
THREADLESS AND THREADED INJECTORSThe most common problem is calcium and/or lime build up inside the injector, foot valve and tubing. This is basic material and can easily be removed by running a weak solution of muriatic acid through it. After flushing the pump with clear water, place the injector filling and foot valve with the tubing attached in a container of weak (1-5) solution of commercial grade muriatic, them pump it around and around. After flushing out the wetted parts with clear water again, return pump to service. CAUTION do not allow acid and chlorine products to come together. This is VERY DANGEROUS to your health!
OUTPUTADJUSTMENTSThe pause control knob adjusts the cycle timer's time on. The model A-100 standard cycle timer is set at one minute. Other cyclelengths are available. To adjust the amount of time on, turn the pause control knob to the correct setting. 1/2 equals approximately 30 seconds on. 3/4 equals approximately 45 seconds on, etc.
MEASURING THE OUTPUTThis volumetric test will take into account installation factors such as line pressure, fluid velocity, specific gravity, etc. This test isthe most accurate for measuring the injector's output in an individual installation.1. With the injector installed under normal operating conditions, place the foot valve/strainer in a large graduated container.2. Fill the container with the chemical to be injected and run the unit until all air is removed from the suction line.
Page 104 of 1172008CopyrightThe Helsing Group, Inc.
All Rights Reserved

Maintenance Manual, Warranties, and Performance Guidelines
Flexflo Injector Pump - A-130-6
Kimberly Place Community AssociationUtility Systems
3. Refill the container, if necessary, and with the foot valve in the solution, not the amount of chemical in the container.4. Run the injector for a measured amount of time and note the amount of chemical injected.
TUBE THREADING INSTRUCTIONS CAUTION: Keep fingers out of pump head!1. Hold the tube in your right hand with the fitting marked "R" facing you. Note that the fitting marked "L" is facing downward and away from you to the left. The tube is purposely twisted to allow for the difference between the inside length and the outsidelength of the tube when installed in the pump head. 2. Hold the tube with your thumbs over the "R" and the "L." The tube will naturally curve toward the rear of the pump head. The curve in the tubing is a patented feature which prevents the pump tube from running outward and against the cover. 3. Attach the plastic tube fitting (marked "R") into the right side of the pump head. Push the groove of the fitting straight into the slot. With the pump running, hold the fitting marked "L with your left hand (your thumb should be covering the "L"). 4. At the same time, use your right thumb to guide the tube into the pump head. With the tubing ridding well between the rollers, push the fitting marked "L" into the chamber lock. Be sure both fittings are pushed all the way in place.
TUBE CONNECTIONS INSTRUCTIONS1. Connect the flow indicator end of the suction tube to pump fitting marked "R." Indicator to be vertical.2. Trim the other end so strainer assembly will hang about one or two inches above bottom of solution tank (sediment space).3. Slide the ceramic weight over the end and attach the foot strainer assembly.4. Connect the discharge tube to the "L" fitting then to the injector fitting.NOTE: An injector to fit 1/4" and/or ^"threaded hole is available. Call your supplier.
Pump Tube Lubricant: Place 1 or 2 drops of silicone oil on each roller to lubricate new pump tubes or when required.
SERVICE SUGGESTIONSSuccess of this system will be the result of care. Always wear protective glasses and proper clothing when working aroundchemicals. Many disinfectant chemicals are not used in an emulsion form so we have a precipitation forming at the tank bottom. When it reaches a depth of about 1" it must be removed by washing the tank out with water. In the meantime, the strainer may become plugged and need cleaning. You can remove the strainer to clean by replacing it with your spare. First remove cover then pull up wand so you can reach the strainer assembly. While holding the strainer and the sediment fitting, unscrew the wand by turning counterclockwise. Lay the wand aside, then pull the strainer off the sediment fitting then replace the strainer with yourclean one. Reassemble the wand and push the cap back in place. Clean the dirty strainer with clear water and weak solution of muriatic acid then rinse and store until next time.
DO NOT PUT ACID IN CHLORINE TANK. NEVER STORE CHLORINE AND ACID IN THE SAME AREA.
How to clean your pump and fittingsPeriodically clean the injection fitting / check valve assembly, especially when injecting fluids that calcify such as sodiumhypochlorite.
These lime deposits and other build ups can clog the fitting, which will increase the back pressure and interfere with the pumpaccuracy. Warning: Severe cases can physically damage the injection fitting and the increase back pressure can cause increasedwear on the pump components; gears, bearings and pump tubes.
Please follow these steps when cleaning your injection fitting / check valves.1. Wash the pump, tubing and fittings out with clean water. To do this, place the "suction tubing" and "discharge tubing" (injectionfitting too) in a container full of clean water.2. Let the pump run in the clean water for a couple of minutes to remove all traces of chemical.3. Remove the lime deposits with undiluted vinegar. To do this, place the "suction tubing" and "discharge tubing" in a containerfull of undiluted vinegar.
Page 105 of 1172008CopyrightThe Helsing Group, Inc.
All Rights Reserved

Maintenance Manual, Warranties, and Performance Guidelines
Flexflo Injector Pump - A-130-6
Kimberly Place Community AssociationUtility Systems
Required Inspection and Maintenance should be performed WeeklyThis task should be accomplished using: Qualified Service Technician
Please refer to Volume II of this manual for supplemental information about this component.
Page 106 of 1172008CopyrightThe Helsing Group, Inc.
All Rights Reserved
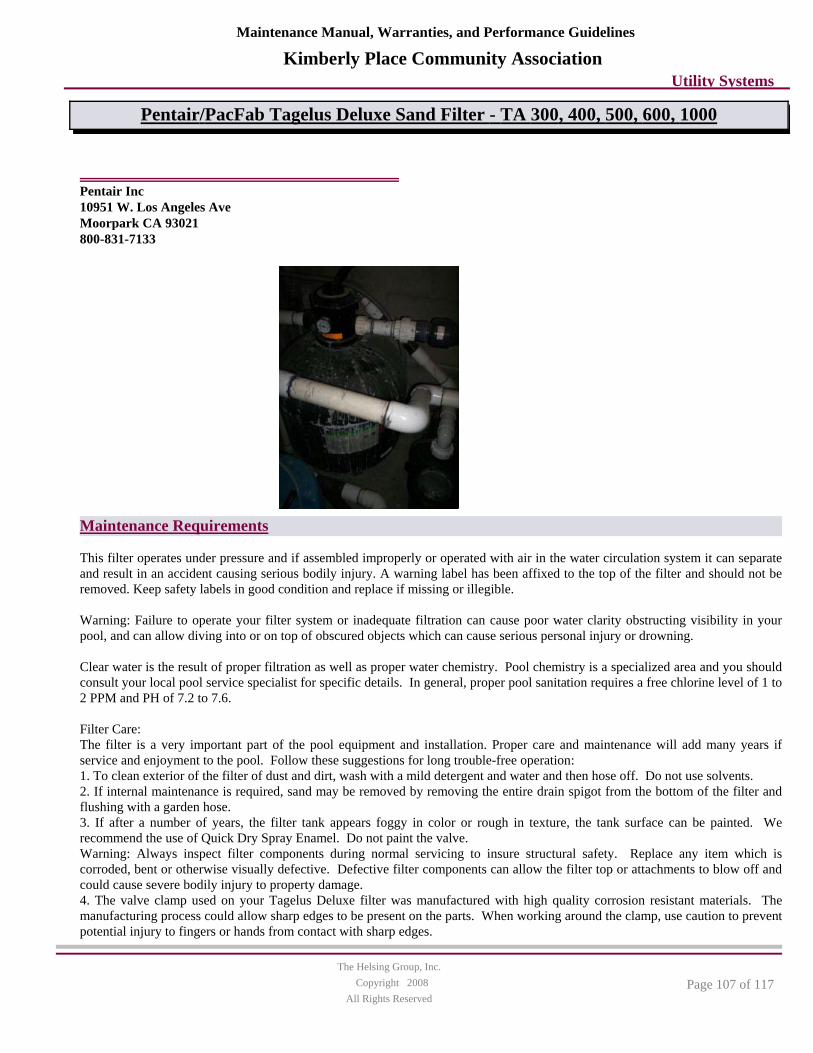
Maintenance Manual, Warranties, and Performance Guidelines
Pentair/PacFab Tagelus Deluxe Sand Filter - TA 300, 400, 500, 600, 1000
Kimberly Place Community AssociationUtility Systems
Pentair Inc10951 W. Los Angeles AveMoorpark CA 93021800-831-7133
Maintenance Requirements
This filter operates under pressure and if assembled improperly or operated with air in the water circulation system it can separateand result in an accident causing serious bodily injury. A warning label has been affixed to the top of the filter and should not beremoved. Keep safety labels in good condition and replace if missing or illegible.
Warning: Failure to operate your filter system or inadequate filtration can cause poor water clarity obstructing visibility in yourpool, and can allow diving into or on top of obscured objects which can cause serious personal injury or drowning.
Clear water is the result of proper filtration as well as proper water chemistry. Pool chemistry is a specialized area and you should consult your local pool service specialist for specific details. In general, proper pool sanitation requires a free chlorine level of 1 to 2 PPM and PH of 7.2 to 7.6.
Filter Care:The filter is a very important part of the pool equipment and installation. Proper care and maintenance will add many years if service and enjoyment to the pool. Follow these suggestions for long trouble-free operation:1. To clean exterior of the filter of dust and dirt, wash with a mild detergent and water and then hose off. Do not use solvents.2. If internal maintenance is required, sand may be removed by removing the entire drain spigot from the bottom of the filter andflushing with a garden hose. 3. If after a number of years, the filter tank appears foggy in color or rough in texture, the tank surface can be painted. Werecommend the use of Quick Dry Spray Enamel. Do not paint the valve.Warning: Always inspect filter components during normal servicing to insure structural safety. Replace any item which is corroded, bent or otherwise visually defective. Defective filter components can allow the filter top or attachments to blow off and could cause severe bodily injury to property damage.4. The valve clamp used on your Tagelus Deluxe filter was manufactured with high quality corrosion resistant materials. Themanufacturing process could allow sharp edges to be present on the parts. When working around the clamp, use caution to preventpotential injury to fingers or hands from contact with sharp edges.
Page 107 of 1172008CopyrightThe Helsing Group, Inc.
All Rights Reserved

Maintenance Manual, Warranties, and Performance Guidelines
Pentair/PacFab Tagelus Deluxe Sand Filter - TA 300, 400, 500, 600, 1000
Kimberly Place Community AssociationUtility Systems
5. Your filter is a pressure vessel and should never be serviced while under pressure. Always relieve tank pressure and open air bleeder on Tagelus Deluxe Valve before attempting to service your filter.6. When restarting your filter always open the manual air bleeder on Tagelus Deluxe Valve and stand clear of the filter.
Cleaning Frequency:1. The filter on a new pool should be back washed, and cleaned after approximately 48 hours of operation to clean out plaster dust and/or construction debris.2. There are three different ways to identify when the filter needs backwashing:a. The most accurate indicator on pool systems with a flow meter is to backwash when the flow decreases 30% from the original (clean filter) flow.b. A more subjective and less accurate indicator is to observe the amount of water flowing from the flow directions located in thewall of the pool. The filter should be back washed once it is detected that the flow has been reduced.c. The most commonly used but least accurate indicator is to backwash when the filter gauge reading increases 10 psi over the initial (clean filter) reading.3. It is important not to backwash the filter solely on a timed basis such as every three days. It is also important to note thatbackwashing too frequently actually causes poor filtration. Factors like weather conditions, heavy rains, dust or pollen, and water temperatures all affect the frequency of backwash. As you use your pool, you will become aware of these influences.4. If at any time the starting pressure after backwashing the filter indicates 4 to 6 psi higher than normal starting pressure, it is time to perform a chemical cleaning procedure.
Filter Backwash Procedure:Caution: To prevent equipment damage and possible injury, always turn off pump before changing valve positions.1. Stop pump.2. Ensure that the suction and backwash lines are open so that water is free to come from the pool and flow out the backwash line. Set control valve to back wash position.3. Stand clear of filter and start pump.4. Backwash filter for approximately 3 to 5 minutes or until backwash water is clean.5. Stop pump and set valve to rinse position.6. Stand clear of filter and start pump.7. Rinse filter for approximately 30 seconds.8. Stop pump and set valve to filter position.9. Ensure that pool return line is open so that water may flow freely from the pool back to the pool.10. Open manual air bleeder on 6 Way Valve (except TA 100D). Stand clear of filter and start pump.11. Close manual air bleeder on the 6 Way Valve (except TA 100D) when a steady stream of water emerges from the bleeder.12. The filter has now started its filtering cycle. You should insure that water is running to the pool and take note of the filterpressure.13. The filter pressure in step 12 above should not exceed the pressure originally observed o the filter when it was initially started. If after backwashing, the pressure is 4 to 6 psi above the start condition it will be necessary to chemically clean the sand bed.
Chemical Cleaning:1. It is recommended that one of the following cleaners be used:Filter-Cleanse: Great Lakes BiochemicalFilter-Free: Hydrotech Chemical CorpKleen-It: Bio Lab, IncThese cleaners will remove oils, scale and rust from the sand bed in one cleaning operation.2. Mix a solution following the manufacturers instructions on the label.3. Backwash the filter with the Multiport Valve as outline above.4. If the filter is below pool level, shut off pump and close appropriate valving to prevent draining the pool.5. Shut off pump, open filter drain and let filter drain. Place valve in backwash position.
Page 108 of 1172008CopyrightThe Helsing Group, Inc.
All Rights Reserved

Maintenance Manual, Warranties, and Performance Guidelines
Pentair/PacFab Tagelus Deluxe Sand Filter - TA 300, 400, 500, 600, 1000
Kimberly Place Community AssociationUtility Systems
6. After filter has drained, close filter drain and remove the pump strainer pot lid.7. Insure that the backwash lines are open.8. Turn the pump on and slowly pour the cleaning solution into the pump strainer with the pump running. If filter is below pool, open shut off valve slightly to allow pump to run.9. Continue adding solution until the sand bed is saturated with cleaning solution.10. Shut off the pump and leave filter in backwash position. Allow filter to stand overnight (12 hours).11. Replace the pump lid and follow backwash procedure outlined above.12. Do not allow the cleaning solution to get into the pool.
Winterizing the Filter:1. In areas that have freezing winter temperatures, protect the pool equipment by backwashing the filter.2. After backwashing, shut the pump off, open the manual air bleeder on the 6 Way Valve (Except TA 100D) and move the handle of the Multiport Valve to the Winterize position.3. Remove the wing-type plug on the bottom of the filter. The filter will drain very slowly, and therefore, it is recommended that the drain plug be left out during the shutdown season.Note: The multiport valve should be left in the Winterize position during the shutdown season so that valve diverter has notpressure on the rubber seal.4. Drain all appropriate system piping.5. We recommend covering the equipment with a tarpaulin or plastic sheet to inhibit deterioration from weather. Do not wrap pump motor with plastic.
Troubleshooting:READ AND FOLLOW ALL SAFETY INSTRUCTIONS
Problem: Pool water not sufficiently cleanCause: 1. Pool chemistry not adequate to inhibit algae growth.2. Too frequent a backwash cycle.3. Improper amount or wrong sand size.4. Inadequate turnover rateRemedy:1. Maintain pool chemistry or consult pool service technician.2. Allow pressure to build to 10 pal above clean filter condition before backwashing.3. Check sand bed depth and sand size or consult pool service technician.4. Run system for longer time or consult dealer or pool service technician.
Problem: High Filter pressure Cause:1. Insufficient backwashing.2. Sand bed plugged with mineral deposits.3. Partially closed valve or restriction in return.Remedy: 1. Backwash until effluent runs clear.2. Chemically clean filter.3. Open valve or remove obstruction in return line.
Problem: Short CyclesCause:1. Improper backwash.2. Pool chemistry not adequate to inhibit algae growth.
Page 109 of 1172008CopyrightThe Helsing Group, Inc.
All Rights Reserved

Maintenance Manual, Warranties, and Performance Guidelines
Pentair/PacFab Tagelus Deluxe Sand Filter - TA 300, 400, 500, 600, 1000
Kimberly Place Community AssociationUtility Systems
3. Plugged sand bed.4. Flow rate too high.Remedy:1. Backwash until effluent runs clear.2. Maintain pool chemistry or consult pool service technician.3. Manually remove top 1" surface of sand bed and chemically clean as required.4. Restrict flow to capacity of filter.
Problem: Return flow to pool diminished. Low filter pressure.Cause:1. Obstruction in pump hair and lint strainer.2. Obstruction in pump.3. Obstruction in suction line to pump.Remedy:1. Clean basket in strainer.2. Disassemble and clean pump.3. Clean skimmer basket. Remove obstruction in lines.4. Open valve in suction line.
Problem: Sand returning to poolCause: 1. Broken underdrain lateral.2. Backwash rate too high.3. Air strainer on Tagelus valve is damaged or missing.Remedy:1. Replace broken or damaged laterals. 2. Reduce backwash flow rate. 3. Replace damaged components.
Required Inspection and Maintenance should be performed MonthlyThis task should be accomplished using: Pool Service Specialist
Please refer to Volume II of this manual for supplemental information about this component.
Page 110 of 1172008CopyrightThe Helsing Group, Inc.
All Rights Reserved

Maintenance Manual, Warranties, and Performance Guidelines
Raypak Pool/Spa Heater - RP2100
Kimberly Place Community AssociationUtility Systems
Raypak, Inc.2151 Eastman Avenue
SCOPE OF WARRANTYRaypak, Inc.(Raypak) warrants to the original owner that the abovemodel RP2100 HEATER when installed with a pool or spa by aproperly licensed installer will be free from defects in materials andworkmanship under normal use and service for the ApplicableWarranty Period. Under this Limited Warranty, Raypak will, at itsoption, repair or furnish a replacement for any defective part of theRP2100 HEATER. The repair or replacement will be warranted foronly the unexpired portion of the original Applicable WarrantyPeriod.
EFFECTIVE DATEThe Effective Date of Warranty coverage is the date of originalinstallation if properly documented, otherwise it is the date ofmanufacture plus 30 days.
APPLICABLE WARRANTY PERIODIf the RP2100 HEATER is installed with a pool or spa, the Applicable Warranty Period is one (1) year from the Effective Date for the RP2100 HEATER and component parts.
Manufacturer's Warranty
Oxnard CA 93030805-2785300
Maintenance Requirements
MAINTENANCE AND CARE PROCEDURES
To be followed one month after start-up and then semi-annually.1. Inspect top of heater and drafthood for soot, a sticky black substance around finned tubes and "V" baffles), and open flue gaspassageways. Any visible soot should be cleaned for proper operation.CAUTION: Soot may be combustible. Wet sooted surfaces completely prior to cleaning. Do not use steel wire brush.2. Clean main burners and pilot burner of dust and lint.3. Inspect and operate all controls, gas valve and pressure relief valve.4. Make visual check of the burner and pilot flame. Flame pattern on the main burner and pilot is indicated in the previous
Page 111 of 1172008CopyrightThe Helsing Group, Inc.
All Rights Reserved

Maintenance Manual, Warranties, and Performance Guidelines
Raypak Pool/Spa Heater - RP2100
Kimberly Place Community AssociationUtility Systems
illustration. Yellow flame means restriction of the air openings. Lifting or blowing flame indicates high gas pressure. Low flame means low gas pressure. Should this occur, shut the heater off and contact your gas supplier or qualified service agency.5. On indoor heaters, clean room intake openings to assure adequate flow of combustion and ventilation air.CAUTION: Combustion air must not be contaminated by corrosive chemical fumes which can damage the heater and void thewarranty.6. Keep area around heater clear and free from combustible materials, gasoline and other flammable and corrosive vapors and liquids.
BASIC TIPS IF HEATER WILL NOT FIRE:1. If you have no electrical power; it may be your "circuit breakers" have tripped. Try re-setting them.2. If you have electrical power but the heater will not fire check the following:3. The time clock must be moved to the "ON" position.4. Your pump strainer basket may be full. If so remove debris.5. Your filter may be dirty. If so, backwash or clean filter. (To tell if your filter is dirty, look to see if the filter pressure will behigher than usual).6. The pump may have lost its prime. It may be running dry, check the pressure on the filter. If there is no pressure; then you are not moving water (or your gauge is broken). Try to get the pump to run at its normal flow rate.
POOL & SPA WATER CHEMISTRYChemical imbalance can cause severe damage to your heater and associated equipment. Maintain your water pH between 7.4 and 7.8 and total alkalinity between 100 and 150p.p.m. If the mineral content and dissolved solids in the water become too high, scale forms inside the heat exchanger tubes, reducing heater efficiency and also damaging the heater. If the pH drops below 7.2, the heater will be severely damaged. This will result in corrosion of the heat exchanger. Heat exchanger damage resulting from chemical imbalance is not covered by the warranty.
AUTOMATIC CHLORINATORS AND CHEMICAL FEEDERSAll chemicals must be introduced and completely diluted into the pool or spa water before being circulated through the heater. Do not place chlorine tablets or bromine sticks in the skimmer. High chemical concentrations will result when the pump is not running(i.e. overnight).Chlorinators must feed downstream of the heater and have an anti-siphoning device to prevent chemical backup into the heaterwhen the pump is shut off.NOTE: High chemical concentrates from feeders and Chlorinators that are out of adjustment will cause very rapid corrosion to theheat exchanger. Such damage is not covered under he warranty.
COLD WEATHER OPERATIONMODERATE CLIMATE: Heater operation can continue during short term cold spells. When temperatures are below freezing, flow (continuous pump operation) must be maintained.CAUTION: Do not use the heater to maintain water temperatures just above freezing or for freeze protection. When heater is used during freezing weather, care must be taken to avoid freeze ups. Continuous pump operation is a must. Additional protection may be required. The heater is not warranted against freeze ups.
COLD CLIMATE: Prolonged operation with water temperatures below SOT is not recommended. When starting the heater with pool temperatures below SOT operate the heater continuously until higher temperatures are reached. Operating the heater for prolonged periods with pool water below 50° F can seriously damage the heater, and is not covered by the warranty.For cold climate areas, please follow the winterizing procedures listed.
WINTERIZING THE POOL&SPA HEATERReturn HeaderWhen heaters installed outdoors in freezing climate areas are to be shut down for the winter, observe the following step-by-step procedure:
Page 112 of 1172008CopyrightThe Helsing Group, Inc.
All Rights Reserved

Maintenance Manual, Warranties, and Performance Guidelines
Raypak Pool/Spa Heater - RP2100
Kimberly Place Community AssociationUtility Systems
1. Turn off gas valve, manual gas valve, and electrical supply to the heater.2. Open drain plug located on the inlet/outlet header, (underwater pipes). Remove the heat exchanger inspection panel on the side opposite water piping to gain access to the drain plug on the return header. Open drain plug on return header. Disconnect compression fittings from the pressure switch and return header that connects to the1/4" copper tube and allow the tube to drain.
Required Inspection and Maintenance should be performed Semi-AnnuallyThis task should be accomplished using: Pool Service Specialist
Please refer to Volume II of this manual for supplemental information about this component.
Page 113 of 1172008CopyrightThe Helsing Group, Inc.
All Rights Reserved

Maintenance Manual, Warranties, and Performance Guidelines
Pools
Kimberly Place Community AssociationUtility Systems
Maintenance Requirements
These suggestions deal with the pools themselves; the mechanical support components (heaters, filters, and pumps) are coveredseparately. Swimming pools are high-maintenance components requiring much routine maintenance and care. While the majority of this care is operating maintenance routinely performed by pool technicians, comprehensive annual inspections are still required to ensure optimum component life. We recommend that these annual inspections be included in the pool maintenance and servicecontract.
Frequent chemical testing and balancing should be accomplished to ensure that water is within acceptable tolerances. Test the water PH, alkalinity, and chlorine levels at least once per week; in many circumstances it will have to be more frequently, depending on the level of usage and the requirements of local authorities. Some localities require DAILY testing. Adjust thechemical content as needed and add algaecide to the water. Incorrect chemical balance can be harmful to the surface finish andthe people who use the pool, and can result in corrosive water or calcium scale deposits. If required, the pool should be shocked (atemporary increase in the sanitizer levels in the water, to kill off persistent bacteria) or superchlorinated weekly. To avoid damage to pool equipment, make sure this procedure is approved by the manufacturers of the equipment before proceeding.
To maintain cleanliness, skim the surface of the pool and spa and brush down the sides and bottom every week. Skimmer and strainer baskets should be emptied daily or weekly as the pool service determines is necessary. The pool and spa will also need tobe vacuumed approximately once a week, unless an automatic cleaning system is installed.
Check the water level frequently. The water level should be located at the middle of the skimmer.
Inspect the deck area immediately surrounding the pool and spa to make sure it is free of trip hazards. Make sure all surrounding gates and fences are secure to prevent unauthorized entry.
Routine visual inspections of the pool and spa surface should be made for cracks, spalling, and general deterioration of the finish. Routine repair of minor defects can prevent premature deterioration of the finish.
Annual inspections of the caulking should be performed, paying special attention to the joints directly under the lip of the pool andspa tiles. Excessive leakage through these joints can cause lifting of slabs and subsequent deterioration of the decking and thepool.
Required Inspection and Maintenance should be performed MonthlyThis task should be accomplished using: Pool Technician, as part of contract
Page 114 of 1172008CopyrightThe Helsing Group, Inc.
All Rights Reserved
Maintenance Manual, Warranties, and Performance Guidelines
Sta-Rite Max-E-Pro Centrifugal Pump
Kimberly Place Community AssociationUtility Systems
Sta-Rite Pool/Spa Group293 Wright Street
Pumps, filters, skimmers, underwater lights (except bulbs), accessories and fittings manufactured by Sta-Rite are warranted to be free of defects in material and workmanship for one (1) year from date of installation. Full warranty coverage is in effect for one year after installation. The pro-rated warranty covers the tank only during the 2nd through 10th year after installation. The amount covereddecreases by 10% each year, (ie., 2nd year 90% covered, 3rd year 80% covered, etc.).
Manufacturer's Warranty
Delavan WI 53115262-728-5551
Maintenance Requirements
Carefully read and follow all safety instructions in this manual and on equipment. Keep safety labels in good condition; replace ifmissing or damaged.
Incorrectly installed or tested equipment may fail, causing severe injury or property damage.
Read and follow instructions in owner's manual when installing and operating equipment. Have a trained pool professional perform all pressure tests.
1. Do not connect system to a high pressure or city water system.2. Use equipment only in a pool or spa installation.3. Install pump with at least 2 hydraulically balanced main doors equipped with correctly installed, screw-fastened, anti-entrapment certified covers.4. Trapped air in system can cause explosion. BE SURE all air is out of system before operating or testing equipment.Before pressure testing, make the following safety checks:- Check all clamps, bolts, lids, and system accessories before testing.- Release all air in system before testing.- Water pressure for test must be less than 25 PSI (7.5 kg/cm2).- Water Temperature for test must be less than 100° F. (38° C).- Limit test to 24 hours. After test, visually check system to be sure it is ready for operation. Remove trap lid and retighten handtight only.NOTICE: These parameters apply to Sta-Rite equipment only. For non-Sta-Rite equipment, consult manufacturer. Routine MaintenanceThe only routine maintenance needed is inspection/cleaning of trap basket. Debris or trash that collects in basket will choke off water flow through the pump. Follow instructions below to clean trap:1. Stop pump, close valves in suction and discharge, and release all pressure from system before proceeding.2. Remove trap cover handle ring (turn counterclockwise). If necessary, tap handles gently with a rubber mallet.3. Remove strainer basket and clean. Be sure all holes in basket are clear, flush basket with water and replace in trap with large opening at pipe connection port (between ribs provided). If basket is replaced backwards cover will not fit on trap body.4. Clean and inspect lid O-Ring; reinstall on trap.5. Clean O-Ring groove on trap body and replace cover and handle ring. To help keep cover from sticking, tighten hand tight only.6. Prime pump (see priming instructions).
Draining Pump1. Pump down water level below all inlets to the pool.To avoid dangerous or fatal electrical shock hazard, turn OFF power to motor before draining pump.2. Remove trap cover and use low pressure air to blow accumulated water from the piping system. Lugs have been provided on thetrap lid to use a lever or pry bar for loosening.
Page 115 of 1172008CopyrightThe Helsing Group, Inc.
All Rights Reserved

Maintenance Manual, Warranties, and Performance Guidelines
Sta-Rite Max-E-Pro Centrifugal Pump
Kimberly Place Community AssociationUtility Systems
3. Cap inlet piping after draining to keep water out of the pipes.4. To prevent pump from freezing, remove trap cover and drain the tank body through the drain plugs. Clean pump and trap basketthoroughly; replace trap cover.NOTICE: Tighten trap cover by hand only (no wrenches)! Use a rubber mallet only if necessary to remove cover! If pump is not anchored, use caution not to break attached piping!5. Be sure motor is kept dry and covered.
Storage/Winterizing:WARNING - Explosion hazard. Purging the system with compressed air can cause components to explode, with risk of severe injury or death to anyone nearby. Use only a low pressure (below 5 PSI), high volume blower when air purging the pump, filter, or piping.NOTICE: Allowing pump to freeze will damage pump and void warranty! NOTICE: Do not use anti-freeze solutions (exceptpropylene glycol) in your pool/spa system. Propylene glycol is non-toxic and will not damage plastic system components; otheranti-freezes are highly toxic and may damage plastic components in the system.Drain all water from pump and piping when expecting freezing temperatures or when storing pump for a long time (see instructions below). Keep motor dry and covered during storage.
To avoid condensation/corrosion problems, do not cover pump with plastic. For outdoor/unprotected installations:1. Gravity drain system as far as possible.2. Protect areas which retain water with non-toxic propylene glycol antifreeze ("RV antifreeze").3. Enclose entire system in a weatherproof enclosure.4. To avoid condensation/corrosion damage, allow ventilation; do not wrap system in plastic.5. Use a 40% propylene glycol/60% water solution to protect pump to -50°F (-46°C). Startup For Winterized Equipment1. Remove any temporary weather protection placed around system.2. Follow filter manufacturer's instructions for reactivation of the filter.3. Inspect all electrical wiring for damage or deterioration over the shutdown period. Have a qualified serviceman repair wiring asneeded.4. Inspect and tighten all watertight connections.5. Open all valves in suction and return piping.6. Remove any winterizing plugs in piping system.7. Drain all antifreeze from system.8. Close all drain valves and replace all drain plugs in piping system.9. Prime pump according to instructions.
PUMP SERVICEPump should only be serviced by qualified personnel. For best results, use only genuine Sta-Rite factory parts. Be sure to prime pump before starting.
Before removing clamp or trap cover:1. STOP PUMP before proceeding.2. CLOSE GATE VALVES in suction and discharge pipes.3. RELEASE ALL PRESSURE from pump and piping system.4. NEVER tighten or loosen clamp while pump is operating!To avoid dangerous or fatal electrical shock hazard, turn OFF power to motor before working on pump or motor.
No lubrication or regular maintenance is needed beyond reasonable care and periodic cleaning of strainer basket.
If shaft seal is worn or damaged, repair as follows:
Page 116 of 1172008CopyrightThe Helsing Group, Inc.
All Rights Reserved

Maintenance Manual, Warranties, and Performance Guidelines
Sta-Rite Max-E-Pro Centrifugal Pump
Kimberly Place Community AssociationUtility Systems
Pump Disassembly/Removing Old Seal
Disconnect power to pump motor.Be sure gate valves on suction and return piping are closed before starting work.Release all pressure by opening all vents before starting work.
1. Drain pump by removing drain plugs on bottom of pump body and trap body.2. Be sure there is no pressure in trap body; remove cover (unscrew by turning handle ring counterclockwise).3. Remove clamp holding pump halves together. Motor and seal plate assembly can now be pulled away from pump body.4. Remove five screws and washers holding diffuser to seal plate. Remove diffuser.5. Remove motor canopy. Being careful not to touch capacitor terminals, loosen capacitor clamp and move capacitor to one side.6. Hold shaft with 7/16" open-end wrench on motor shaft flats.7. Unscrew impeller from shaft (turn counterclockwise when facing it). NOTICE: On models with impeller screw: Removeimpeller screw (left hand thread - turn clockwise) and gasket before removing impeller. Inspect gasket for damage, cracks, etc. Replace if damaged.8. Pull rotating member of seal off of impeller sleeve; clean sleeve.9. Remove four screws holding seal plate to motor.10. Place seal plate face down on flat surface and tap out ceramic seat.11. Clean seal cavity in seal plate and clean motor shaft.
Pump Reassembly/Installing New Seal1. Ceramic seat must be clean and free of dirt, grease, dust, etc. Wet outer edge of rubber cup on ceramic seat with small amount ofliquid detergent; press ceramic seat into seal plate firmly and squarely with finger pressure (Figure 5).2. If ceramic seat will not locate properly, remove it, place face up on bench and reclean cavity. Ceramic seat should now locate.3. If seat still will not locate properly, place a cardboard washer over the polished face and use a piece of 3/4" (19mm) standard pipe for pressing purposes. NOTICE: Be sure not to scratch or mar polished surface or seal will leak.4. Remount seal plate on motor. Tighten bolts to 60-80 inch-lbs. (69-92 kg/cm) torque.5. Apply a small amount of liquid detergent to inside diameter of rotating half of seal.6. Slide rotating seal member, polished face last, over impeller sleeve until rubber drive ring hits shoulder.NOTICE: Be sure not to nick or scratch polished seal face; seal will leak if face is damaged.7. Screw impeller onto shaft (clockwise); this will automatically locate seal in seal plate.NOTICE: On models with impeller screw: Install impeller gasket and lock screw (left-hand thread - turn counterclockwise). Torque lock screw to 50-55 inch-lbs. (57.6-63 kg/cm).8. Mount diffuser on seal plate; tighten screws to 10-14 inch-lbs. (11.2-16.1 kg/cm) torque.9. Assemble motor and seal plate to volute; be sure clamp is properly seated.NOTICE: Clamp knob can be located in any position around volute; if it is moved after assembly, tighten knob while tappingaround clamp to assist sealing. Do not move clamp while pump is full of water.WARNING - Hazardous pressure. Release all pressure from pump and piping system before working on pump or attempting toadjust or remove clamp. Clamp may blow off of pump if adjusted under pressure.10. Prime pump according to instructions.
Required Inspection and Maintenance should be performed WeeklyThis task should be accomplished using: No special skill for inspection; Pool professional for service
Please refer to Volume II of this manual for supplemental information about this component.
Page 117 of 1172008CopyrightThe Helsing Group, Inc.
All Rights Reserved

Preventive Maintenance and Inspection Check ListJanuary through June
Inspector or ServicePreventiveComponent Name JunMayAprMarFebJanProvider SkillMaintenance Task
Kimberly Place Community Association
Date InitialsDate InitialsDate InitialsDate InitialsInspect; Professional Service Annually
Date Initials Date InitialsNo special skill for monthly inspection; qualified technician for annual
Amerex Fire Extinguishers
XXXXXXXXXXX XXXXXXXXXXX XXXXXXXXXXX XXXXXXXXXXX XXXXXXXXXXX
Date InitialsXXXXXXXXXXX XXXXXXXXXXX XXXXXXXXXXX XXXXXXXXXXX XXXXXXXXXXX
XXXXXXXXXXX XXXXXXXXXXX XXXXXXXXXXX XXXXXXXXXXX XXXXXXXXXXX
InspectXXXXXXXXXXX XXXXXXXXXXX XXXXXXXXXXX XXXXXXXXXXX XXXXXXXXXXX
XXXXXXXXXXXXXXXXXXXXXXXXXXXXXXXXXXXXXXXXXXXXXXXXXXXXXXX
No special skill required for inspections.
Arbor, Painted Wood
XXXXXXXXXXX XXXXXXXXXXX XXXXXXXXXXX XXXXXXXXXXX XXXXXXXXXXX
XXXXXXXXXXX XXXXXXXXXXX XXXXXXXXXXX XXXXXXXXXXX XXXXXXXXXXX
Date InitialsXXXXXXXXXXX XXXXXXXXXXX XXXXXXXXXXX XXXXXXXXXXX XXXXXXXXXXX
InspectXXXXXXXXXXX XXXXXXXXXXX XXXXXXXXXXX XXXXXXXXXXX XXXXXXXXXXX
XXXXXXXXXXXXXXXXXXXXXXXXXXXXXXXXXXXXXXXXXXXXXXXXXXXXXXX
No special skill for semiannual inspection; qualified technician for repairs
Asphalt
Date InitialsDate InitialsDate InitialsDate InitialsInspect and maintain as described
Date Initials Date InitialsAssociation's landscaper as part of contract
Association Landscape Maintenance
XXXXXXXXXXX XXXXXXXXXXX XXXXXXXXXXX XXXXXXXXXXX XXXXXXXXXXX
XXXXXXXXXXX XXXXXXXXXXX XXXXXXXXXXX XXXXXXXXXXX XXXXXXXXXXX
XXXXXXXXXXX XXXXXXXXXXX XXXXXXXXXXX XXXXXXXXXXX XXXXXXXXXXX
XXXXXXXXXXX XXXXXXXXXXX XXXXXXXXXXX XXXXXXXXXXX XXXXXXXXXXX
Inspect; Clean, repair and touch up as needed
XXXXXXXXXXX XXXXXXXXXXX XXXXXXXXXXX XXXXXXXXXXX XXXXXXXXXXX
XXXXXXXXXXXXXXXXXXXXXXXXXXXXXXXXXXXXXXXXXXXXXXXXXXXXXXX
No special skill required for inspections and cleaning
Bench - Wood and Wrought Iron
Date InitialsDate InitialsDate InitialsDate InitialsInspect and Clean; Steam Clean Annually
Date Initials Date InitialsNo special skill for vacuuming; qualified professional for steam cleaning
Carpet
XXXXXXXXXXX XXXXXXXXXXX XXXXXXXXXXX XXXXXXXXXXX XXXXXXXXXXX
XXXXXXXXXXX XXXXXXXXXXX XXXXXXXXXXX XXXXXXXXXXX XXXXXXXXXXX
XXXXXXXXXXX XXXXXXXXXXX XXXXXXXXXXX XXXXXXXXXXX XXXXXXXXXXX
XXXXXXXXXXX XXXXXXXXXXX XXXXXXXXXXX XXXXXXXXXXX XXXXXXXXXXX
Inspect and repair as necessary
XXXXXXXXXXX XXXXXXXXXXX XXXXXXXXXXX XXXXXXXXXXX XXXXXXXXXXX
XXXXXXXXXXXXXXXXXXXXXXXXXXXXXXXXXXXXXXXXXXXXXXXXXXXXXXX
HandymanCaulking
XXXXXXXXXXX XXXXXXXXXXX XXXXXXXXXXX XXXXXXXXXXX XXXXXXXXXXX
XXXXXXXXXXX XXXXXXXXXXX XXXXXXXXXXX XXXXXXXXXXX XXXXXXXXXXX
XXXXXXXXXXX XXXXXXXXXXX XXXXXXXXXXX XXXXXXXXXXX XXXXXXXXXXX
XXXXXXXXXXX XXXXXXXXXXX XXXXXXXXXXX XXXXXXXXXXX XXXXXXXXXXX
InspectXXXXXXXXXXX XXXXXXXXXXX XXXXXXXXXXX XXXXXXXXXXX XXXXXXXXXXX
XXXXXXXXXXXXXXXXXXXXXXXXXXXXXXXXXXXXXXXXXXXXXXXXXXXXXXX
No special skill required for inspections.
Cement Rail Fence
1PM/Inspection Check List (Jan - Jun) - Page
Reserve Asset Management Program (RAMP)(c) 1994-2007The Helsing Group, Inc.
All Rights Reserved

Preventive Maintenance and Inspection Check ListJanuary through June
Inspector or ServicePreventiveComponent Name JunMayAprMarFebJanProvider SkillMaintenance Task
Kimberly Place Community Association
XXXXXXXXXXX XXXXXXXXXXX XXXXXXXXXXX XXXXXXXXXXX XXXXXXXXXXX
XXXXXXXXXXX XXXXXXXXXXX XXXXXXXXXXX XXXXXXXXXXX XXXXXXXXXXX
XXXXXXXXXXX XXXXXXXXXXX XXXXXXXXXXX XXXXXXXXXXX XXXXXXXXXXX
XXXXXXXXXXX XXXXXXXXXXX XXXXXXXXXXX XXXXXXXXXXX XXXXXXXXXXX
Inspect; Clear Debris as Needed
XXXXXXXXXXX XXXXXXXXXXX XXXXXXXXXXX XXXXXXXXXXX XXXXXXXXXXX
Date InitialsNo special skill for removing debris; Qualified personnel for inspection.
CertainTeed Landmark Series Asphalt Shingles - Kimberly Place
Date InitialsXXXXXXXXXXX XXXXXXXXXXX XXXXXXXXXXX XXXXXXXXXXX XXXXXXXXXXX
XXXXXXXXXXX XXXXXXXXXXX XXXXXXXXXXX XXXXXXXXXXX XXXXXXXXXXX
XXXXXXXXXXX XXXXXXXXXXX XXXXXXXXXXX XXXXXXXXXXX XXXXXXXXXXX
InspectXXXXXXXXXXX XXXXXXXXXXX XXXXXXXXXXX XXXXXXXXXXX XXXXXXXXXXX
XXXXXXXXXXXXXXXXXXXXXXXXXXXXXXXXXXXXXXXXXXXXXXXXXXXXXXX
No special skill required for inspections.
Cluster Mailboxes
Date InitialsDate InitialsDate InitialsDate InitialsInspect for cracks and safety hazards
Date Initials Date InitialsNo special skill required for inspections.
Concrete Walkways
XXXXXXXXXXX XXXXXXXXXXX XXXXXXXXXXX XXXXXXXXXXX XXXXXXXXXXX
XXXXXXXXXXX XXXXXXXXXXX XXXXXXXXXXX XXXXXXXXXXX XXXXXXXXXXX
Date InitialsXXXXXXXXXXX XXXXXXXXXXX XXXXXXXXXXX XXXXXXXXXXX XXXXXXXXXXX
InspectXXXXXXXXXXX XXXXXXXXXXX XXXXXXXXXXX XXXXXXXXXXX XXXXXXXXXXX
XXXXXXXXXXXXXXXXXXXXXXXXXXXXXXXXXXXXXXXXXXXXXXXXXXXXXXX
No special skill for inspections; qualified contractor for repairs
Concrete/Masonry Retaining Wall
XXXXXXXXXXX XXXXXXXXXXX XXXXXXXXXXX XXXXXXXXXXX XXXXXXXXXXX
XXXXXXXXXXX XXXXXXXXXXX XXXXXXXXXXX XXXXXXXXXXX XXXXXXXXXXX
Date InitialsXXXXXXXXXXX XXXXXXXXXXX XXXXXXXXXXX XXXXXXXXXXX XXXXXXXXXXX
InspectXXXXXXXXXXX XXXXXXXXXXX XXXXXXXXXXX XXXXXXXXXXX XXXXXXXXXXX
XXXXXXXXXXXXXXXXXXXXXXXXXXXXXXXXXXXXXXXXXXXXXXXXXXXXXXX
No special skill required for inspections.
Decorative Concrete
Date InitialsDate InitialsDate InitialsDate InitialsClean weekly per manufacturer guidelines
Date Initials Date InitialsNo special skill requiredElkay Stainless Steel Sink -
Dayton(WEEKLY)
XXXXXXXXXXX XXXXXXXXXXX XXXXXXXXXXX XXXXXXXXXXX XXXXXXXXXXX
XXXXXXXXXXX XXXXXXXXXXX XXXXXXXXXXX XXXXXXXXXXX XXXXXXXXXXX
Date InitialsXXXXXXXXXXX XXXXXXXXXXX XXXXXXXXXXX XXXXXXXXXXX XXXXXXXXXXX
InspectXXXXXXXXXXX XXXXXXXXXXX XXXXXXXXXXX XXXXXXXXXXX XXXXXXXXXXX
XXXXXXXXXXXXXXXXXXXXXXXXXXXXXXXXXXXXXXXXXXXXXXXXXXXXXXX
Association's Landscaper as part of contract
Emitters
XXXXXXXXXXX XXXXXXXXXXX XXXXXXXXXXX XXXXXXXXXXX XXXXXXXXXXX
XXXXXXXXXXX XXXXXXXXXXX XXXXXXXXXXX XXXXXXXXXXX XXXXXXXXXXX
Date InitialsXXXXXXXXXXX XXXXXXXXXXX XXXXXXXXXXX XXXXXXXXXXX XXXXXXXXXXX
InspectDate Initials XXXXXXXXXXX
XXXXXXXXXXXXXXXXXXXXXXXXXXXXXXXXXXXXXXXXXXXX
No special skill required for inspections.
Exit Signs - LED
2PM/Inspection Check List (Jan - Jun) - Page
Reserve Asset Management Program (RAMP)(c) 1994-2007The Helsing Group, Inc.
All Rights Reserved

Preventive Maintenance and Inspection Check ListJanuary through June
Inspector or ServicePreventiveComponent Name JunMayAprMarFebJanProvider SkillMaintenance Task
Kimberly Place Community Association
XXXXXXXXXXX XXXXXXXXXXX XXXXXXXXXXX XXXXXXXXXXX XXXXXXXXXXX
XXXXXXXXXXX XXXXXXXXXXX XXXXXXXXXXX XXXXXXXXXXX XXXXXXXXXXX
XXXXXXXXXXX XXXXXXXXXXX XXXXXXXXXXX XXXXXXXXXXX XXXXXXXXXXX
XXXXXXXXXXX XXXXXXXXXXX XXXXXXXXXXX XXXXXXXXXXX XXXXXXXXXXX
Inspect; Paint and Maintain as Needed
XXXXXXXXXXX XXXXXXXXXXX XXXXXXXXXXX XXXXXXXXXXX XXXXXXXXXXX
XXXXXXXXXXXXXXXXXXXXXXXXXXXXXXXXXXXXXXXXXXXXXXXXXXXXXXX
No special skill required.Exterior Doors
Date InitialsDate InitialsDate InitialsDate InitialsInspect Weekly; Clean/Repair as Needed
Date Initials Date InitialsQualified Service TechnicianFlexflo Injector Pump -
A-130-6(WEEKLY)
Date InitialsDate InitialsDate InitialsDate InitialsInspect/Operate/Change Filter as Required
Date Initials Date InitialsNo special skill for filter change; qualified technician for inspection/service
Fraser Johnston Air Conditioning Furnace - 125CN4 A
XXXXXXXXXXX XXXXXXXXXXX XXXXXXXXXXX XXXXXXXXXXX XXXXXXXXXXX
XXXXXXXXXXX XXXXXXXXXXX XXXXXXXXXXX XXXXXXXXXXX XXXXXXXXXXX
Date InitialsXXXXXXXXXXX XXXXXXXXXXX XXXXXXXXXXX XXXXXXXXXXX XXXXXXXXXXX
Inspect and lubricateXXXXXXXXXXX XXXXXXXXXXX XXXXXXXXXXX XXXXXXXXXXX XXXXXXXXXXX
XXXXXXXXXXXXXXXXXXXXXXXXXXXXXXXXXXXXXXXXXXXXXXXXXXXXXXX
Qualified Door Service PersonnelGarage Doors and Hardware
XXXXXXXXXXX XXXXXXXXXXX XXXXXXXXXXX XXXXXXXXXXX XXXXXXXXXXX
XXXXXXXXXXX XXXXXXXXXXX XXXXXXXXXXX XXXXXXXXXXX XXXXXXXXXXX
XXXXXXXXXXX XXXXXXXXXXX XXXXXXXXXXX XXXXXXXXXXX XXXXXXXXXXX
XXXXXXXXXXX XXXXXXXXXXX XXXXXXXXXXX XXXXXXXXXXX XXXXXXXXXXX
Inspect Annually; Clean as Needed
XXXXXXXXXXX XXXXXXXXXXX XXXXXXXXXXX XXXXXXXXXXX XXXXXXXXXXX
XXXXXXXXXXXXXXXXXXXXXXXXXXXXXXXXXXXXXXXXXXXXXXXXXXXXXXX
No special skill for cleaning; qualified technician for annual inspection
Gas Fireplace
Date InitialsDate InitialsDate InitialsDate InitialsTest Operation
Date Initials Date InitialsNo special skill for testing; qualified electrician for replacement
GFCI Outlet
Date InitialsDate InitialsDate InitialsDate InitialsClean Weekly; Inspect & Adjust
Date Initials Date InitialsNo special skill for cleaning; handyman/plumber for major repairs
Glacier Bay Faucet - Laundry Room
Date InitialsDate InitialsDate InitialsDate InitialsClean; Seal as Needed
Date Initials Date InitialsNo special skill required for sealing; qualified contractor for repair
Granite Countertops
3PM/Inspection Check List (Jan - Jun) - Page
Reserve Asset Management Program (RAMP)(c) 1994-2007The Helsing Group, Inc.
All Rights Reserved

Preventive Maintenance and Inspection Check ListJanuary through June
Inspector or ServicePreventiveComponent Name JunMayAprMarFebJanProvider SkillMaintenance Task
Kimberly Place Community Association
XXXXXXXXXXX XXXXXXXXXXX XXXXXXXXXXX XXXXXXXXXXX XXXXXXXXXXX
XXXXXXXXXXX XXXXXXXXXXX XXXXXXXXXXX XXXXXXXXXXX XXXXXXXXXXX
XXXXXXXXXXX XXXXXXXXXXX XXXXXXXXXXX XXXXXXXXXXX XXXXXXXXXXX
XXXXXXXXXXX XXXXXXXXXXX XXXXXXXXXXX XXXXXXXXXXX XXXXXXXXXXX
Clean and InspectXXXXXXXXXXX XXXXXXXXXXX XXXXXXXXXXX XXXXXXXXXXX XXXXXXXXXXX
Date InitialsGutter ServiceGutters & Downspouts
XXXXXXXXXXX XXXXXXXXXXX XXXXXXXXXXX XXXXXXXXXXX XXXXXXXXXXX
XXXXXXXXXXX XXXXXXXXXXX XXXXXXXXXXX XXXXXXXXXXX XXXXXXXXXXX
XXXXXXXXXXX XXXXXXXXXXX XXXXXXXXXXX XXXXXXXXXXX XXXXXXXXXXX
XXXXXXXXXXX XXXXXXXXXXX XXXXXXXXXXX XXXXXXXXXXX XXXXXXXXXXX
Clean Lens; Test as needed
XXXXXXXXXXX XXXXXXXXXXX XXXXXXXXXXX XXXXXXXXXXX XXXXXXXXXXX
Date InitialsNo special skill required.InFocus Screenplay Projector
- 7205
Date InitialsDate InitialsDate InitialsDate InitialsInspect
Date Initials Date InitialsNo special skill required for inspections; qualified contractor for pole light work
Interior and Exterior Lighting; Pole Lights
XXXXXXXXXXX XXXXXXXXXXX XXXXXXXXXXX XXXXXXXXXXX XXXXXXXXXXX
XXXXXXXXXXX XXXXXXXXXXX XXXXXXXXXXX XXXXXXXXXXX XXXXXXXXXXX
XXXXXXXXXXX XXXXXXXXXXX XXXXXXXXXXX XXXXXXXXXXX XXXXXXXXXXX
XXXXXXXXXXX XXXXXXXXXXX XXXXXXXXXXX XXXXXXXXXXX XXXXXXXXXXX
InspectXXXXXXXXXXX XXXXXXXXXXX XXXXXXXXXXX XXXXXXXXXXX XXXXXXXXXXX
XXXXXXXXXXXXXXXXXXXXXXXXXXXXXXXXXXXXXXXXXXXXXXXXXXXXXXX
No special skill for inspection or cleaning; qualified personnel for replacement
Interior Doors
XXXXXXXXXXX XXXXXXXXXXX XXXXXXXXXXX XXXXXXXXXXX XXXXXXXXXXX
XXXXXXXXXXX XXXXXXXXXXX XXXXXXXXXXX XXXXXXXXXXX XXXXXXXXXXX
XXXXXXXXXXX XXXXXXXXXXX XXXXXXXXXXX XXXXXXXXXXX XXXXXXXXXXX
XXXXXXXXXXX XXXXXXXXXXX XXXXXXXXXXX XXXXXXXXXXX XXXXXXXXXXX
Inspect; Clean as NeededXXXXXXXXXXX XXXXXXXXXXX XXXXXXXXXXX XXXXXXXXXXX XXXXXXXXXXX
Date InitialsNo special skill required for inspections.
Interior Paint
XXXXXXXXXXX XXXXXXXXXXX XXXXXXXXXXX XXXXXXXXXXX XXXXXXXXXXX
XXXXXXXXXXX XXXXXXXXXXX XXXXXXXXXXX XXXXXXXXXXX XXXXXXXXXXX
Date InitialsXXXXXXXXXXX XXXXXXXXXXX XXXXXXXXXXX XXXXXXXXXXX XXXXXXXXXXX
Inspect; adjust time as needed
XXXXXXXXXXX XXXXXXXXXXX XXXXXXXXXXX XXXXXXXXXXX XXXXXXXXXXX
XXXXXXXXXXXXXXXXXXXXXXXXXXXXXXXXXXXXXXXXXXXXXXXXXXXXXXX
No special skill required.Intermatic T101 24 Hour Dial Time Switch
Date InitialsDate InitialsDate InitialsDate InitialsInspect; Clean as Needed
Date Initials Date InitialsNo special skill required for cleaning; qualified personnel for repairs
Kitchen Cabinets - Wooden
XXXXXXXXXXX XXXXXXXXXXX XXXXXXXXXXX XXXXXXXXXXX XXXXXXXXXXX
XXXXXXXXXXX XXXXXXXXXXX XXXXXXXXXXX XXXXXXXXXXX XXXXXXXXXXX
Date InitialsXXXXXXXXXXX XXXXXXXXXXX XXXXXXXXXXX XXXXXXXXXXX XXXXXXXXXXX
Inspect; Clear if NeededDate Initials XXXXXXXXXXX
XXXXXXXXXXXXXXXXXXXXXXXXXXXXXXXXXXXXXXXXXXXX
Association's landscaper as part of contract
Landscape Drains
4PM/Inspection Check List (Jan - Jun) - Page
Reserve Asset Management Program (RAMP)(c) 1994-2007The Helsing Group, Inc.
All Rights Reserved

Preventive Maintenance and Inspection Check ListJanuary through June
Inspector or ServicePreventiveComponent Name JunMayAprMarFebJanProvider SkillMaintenance Task
Kimberly Place Community Association
Date InitialsDate InitialsDate InitialsDate InitialsClean and Inspect Regularly
Date Initials Date InitialsNo special skills requiredLeather Recliners
XXXXXXXXXXX XXXXXXXXXXX XXXXXXXXXXX XXXXXXXXXXX XXXXXXXXXXX
XXXXXXXXXXX XXXXXXXXXXX XXXXXXXXXXX XXXXXXXXXXX XXXXXXXXXXX
Date InitialsXXXXXXXXXXX XXXXXXXXXXX XXXXXXXXXXX XXXXXXXXXXX XXXXXXXXXXX
InspectXXXXXXXXXXX XXXXXXXXXXX XXXXXXXXXXX XXXXXXXXXXX XXXXXXXXXXX
XXXXXXXXXXXXXXXXXXXXXXXXXXXXXXXXXXXXXXXXXXXXXXXXXXXXXXX
No special skill for cleaning; qualified contractor for repairs
Light Concrete Decks
XXXXXXXXXXX XXXXXXXXXXX XXXXXXXXXXX XXXXXXXXXXX XXXXXXXXXXX
XXXXXXXXXXX XXXXXXXXXXX XXXXXXXXXXX XXXXXXXXXXX XXXXXXXXXXX
XXXXXXXXXXX XXXXXXXXXXX XXXXXXXXXXX XXXXXXXXXXX XXXXXXXXXXX
XXXXXXXXXXX XXXXXXXXXXX XXXXXXXXXXX XXXXXXXXXXX XXXXXXXXXXX
Inspect, remove rust and repaint as needed
XXXXXXXXXXX XXXXXXXXXXX XXXXXXXXXXX XXXXXXXXXXX XXXXXXXXXXX
XXXXXXXXXXXXXXXXXXXXXXXXXXXXXXXXXXXXXXXXXXXXXXXXXXXXXXX
No special skill required.Metal Railings
XXXXXXXXXXX XXXXXXXXXXX XXXXXXXXXXX XXXXXXXXXXX XXXXXXXXXXX
Date InitialsXXXXXXXXXXX XXXXXXXXXXX XXXXXXXXXXX XXXXXXXXXXX XXXXXXXXXXX
XXXXXXXXXXX XXXXXXXXXXX XXXXXXXXXXX XXXXXXXXXXX XXXXXXXXXXX
Inspect, remove rust, repair as needed
XXXXXXXXXXX XXXXXXXXXXX XXXXXXXXXXX XXXXXXXXXXX XXXXXXXXXXX
XXXXXXXXXXXXXXXXXXXXXXXXXXXXXXXXXXXXXXXXXXXXXXXXXXXXXXX
No special skill for inspections; qualified personnel for repairs
Metal/Wood Carport Structure
Date InitialsXXXXXXXXXXX XXXXXXXXXXX XXXXXXXXXXX XXXXXXXXXXX XXXXXXXXXXX
XXXXXXXXXXX XXXXXXXXXXX XXXXXXXXXXX XXXXXXXXXXX XXXXXXXXXXX
XXXXXXXXXXX XXXXXXXXXXX XXXXXXXXXXX XXXXXXXXXXX XXXXXXXXXXX
Inspect; Clean as NeededXXXXXXXXXXX XXXXXXXXXXX XXXXXXXXXXX XXXXXXXXXXX XXXXXXXXXXX
XXXXXXXXXXXXXXXXXXXXXXXXXXXXXXXXXXXXXXXXXXXXXXXXXXXXXXX
No special skill required.NuTone Ceiling Fan - Laundry Room
Date InitialsDate InitialsDate InitialsDate InitialsInspect; Clean and Repair as Needed
Date Initials Date InitialsPool Service SpecialistPentair/PacFab Tagelus
Deluxe Sand Filter - TA 300, 400, 500, 600, 1000
Date InitialsXXXXXXXXXXX XXXXXXXXXXX XXXXXXXXXXX XXXXXXXXXXX XXXXXXXXXXX
XXXXXXXXXXX XXXXXXXXXXX XXXXXXXXXXX XXXXXXXXXXX XXXXXXXXXXX
XXXXXXXXXXX XXXXXXXXXXX XXXXXXXXXXX XXXXXXXXXXX XXXXXXXXXXX
InspectXXXXXXXXXXX XXXXXXXXXXX XXXXXXXXXXX XXXXXXXXXXX XXXXXXXXXXX
XXXXXXXXXXXXXXXXXXXXXXXXXXXXXXXXXXXXXXXXXXXXXXXXXXXXXXX
No special skill required for inspections; handyman for repairs.
Picnic Tables
Date InitialsDate InitialsDate InitialsDate InitialsInspect; Clean as Needed
Date Initials Date InitialsNo special skill required.Pool Furniture
5PM/Inspection Check List (Jan - Jun) - Page
Reserve Asset Management Program (RAMP)(c) 1994-2007The Helsing Group, Inc.
All Rights Reserved

Preventive Maintenance and Inspection Check ListJanuary through June
Inspector or ServicePreventiveComponent Name JunMayAprMarFebJanProvider SkillMaintenance Task
Kimberly Place Community Association
Date InitialsDate InitialsDate InitialsDate InitialsInspect
Date Initials Date InitialsNo special skill required.Pool Signs
Date InitialsDate InitialsDate InitialsDate InitialsMaintain Daily or Weekly as Required
Date Initials Date InitialsPool Technician, as part of contractPools
Date InitialsDate InitialsDate InitialsDate InitialsClean as needed
Date Initials Date InitialsNo special skill required.Price Pfister Faucet
Date InitialsDate InitialsDate InitialsDate InitialsInspect once a month; clean as necessary.
Date Initials Date InitialsAssociation's landscaper, as part of contract.
Rain Bird Sprinkler Heads - Series 1800
Date InitialsDate InitialsDate InitialsDate InitialsInspect
Date Initials Date InitialsAssociation's landscaper as part of contract
Rain Bird Valves
XXXXXXXXXXX XXXXXXXXXXX XXXXXXXXXXX XXXXXXXXXXX XXXXXXXXXXX
XXXXXXXXXXX XXXXXXXXXXX XXXXXXXXXXX XXXXXXXXXXX XXXXXXXXXXX
Date InitialsXXXXXXXXXXX XXXXXXXXXXX XXXXXXXXXXX XXXXXXXXXXX XXXXXXXXXXX
Inspect and test.XXXXXXXXXXX XXXXXXXXXXX XXXXXXXXXXX XXXXXXXXXXX XXXXXXXXXXX
XXXXXXXXXXXXXXXXXXXXXXXXXXXXXXXXXXXXXXXXXXXXXXXXXXXXXXX
Pool Service SpecialistRaypak Pool/Spa Heater - RP2100
XXXXXXXXXXX XXXXXXXXXXX XXXXXXXXXXX XXXXXXXXXXX XXXXXXXXXXX
XXXXXXXXXXX XXXXXXXXXXX XXXXXXXXXXX XXXXXXXXXXX XXXXXXXXXXX
XXXXXXXXXXX XXXXXXXXXXX XXXXXXXXXXX XXXXXXXXXXX XXXXXXXXXXX
XXXXXXXXXXX XXXXXXXXXXX XXXXXXXXXXX XXXXXXXXXXX XXXXXXXXXXX
Inspect and CleanDate Initials XXXXXXXXXXX
XXXXXXXXXXXXXXXXXXXXXXXXXXXXXXXXXXXXXXXXXXXX
Qualified PersonnelRinnai Tankless Water Heater & Control
XXXXXXXXXXX XXXXXXXXXXX XXXXXXXXXXX XXXXXXXXXXX XXXXXXXXXXX
XXXXXXXXXXX XXXXXXXXXXX XXXXXXXXXXX XXXXXXXXXXX XXXXXXXXXXX
XXXXXXXXXXX XXXXXXXXXXX XXXXXXXXXXX XXXXXXXXXXX XXXXXXXXXXX
Date InitialsInspect; Clean as Needed
XXXXXXXXXXX XXXXXXXXXXX XXXXXXXXXXX XXXXXXXXXXX XXXXXXXXXXX
XXXXXXXXXXXXXXXXXXXXXXXXXXXXXXXXXXXXXXXXXXXXXXXXXXXXXXX
No special skill required for inspection; qualified personnel for repairs
Skylights
6PM/Inspection Check List (Jan - Jun) - Page
Reserve Asset Management Program (RAMP)(c) 1994-2007The Helsing Group, Inc.
All Rights Reserved
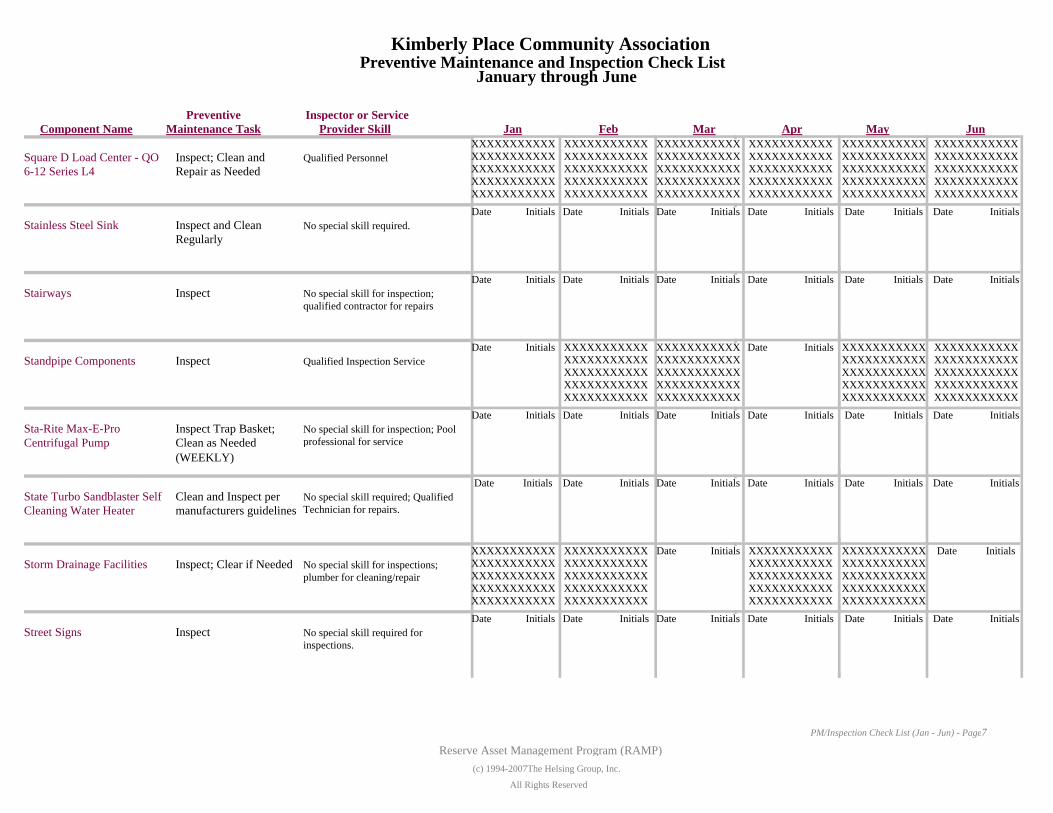
Preventive Maintenance and Inspection Check ListJanuary through June
Inspector or ServicePreventiveComponent Name JunMayAprMarFebJanProvider SkillMaintenance Task
Kimberly Place Community Association
XXXXXXXXXXX XXXXXXXXXXX XXXXXXXXXXX XXXXXXXXXXX XXXXXXXXXXX
XXXXXXXXXXX XXXXXXXXXXX XXXXXXXXXXX XXXXXXXXXXX XXXXXXXXXXX
XXXXXXXXXXX XXXXXXXXXXX XXXXXXXXXXX XXXXXXXXXXX XXXXXXXXXXX
XXXXXXXXXXX XXXXXXXXXXX XXXXXXXXXXX XXXXXXXXXXX XXXXXXXXXXX
Inspect; Clean and Repair as Needed
XXXXXXXXXXX XXXXXXXXXXX XXXXXXXXXXX XXXXXXXXXXX XXXXXXXXXXX
XXXXXXXXXXXXXXXXXXXXXXXXXXXXXXXXXXXXXXXXXXXXXXXXXXXXXXX
Qualified PersonnelSquare D Load Center - QO 6-12 Series L4
Date InitialsDate InitialsDate InitialsDate InitialsInspect and Clean Regularly
Date Initials Date InitialsNo special skill required.Stainless Steel Sink
Date InitialsDate InitialsDate InitialsDate InitialsInspect
Date Initials Date InitialsNo special skill for inspection; qualified contractor for repairs
Stairways
XXXXXXXXXXX XXXXXXXXXXX XXXXXXXXXXX XXXXXXXXXXX XXXXXXXXXXX
XXXXXXXXXXX XXXXXXXXXXX XXXXXXXXXXX XXXXXXXXXXX XXXXXXXXXXX
Date InitialsXXXXXXXXXXX XXXXXXXXXXX XXXXXXXXXXX XXXXXXXXXXX XXXXXXXXXXX
InspectDate Initials XXXXXXXXXXX
XXXXXXXXXXXXXXXXXXXXXXXXXXXXXXXXXXXXXXXXXXXX
Qualified Inspection ServiceStandpipe Components
Date InitialsDate InitialsDate InitialsDate InitialsInspect Trap Basket; Clean as Needed
Date Initials Date InitialsNo special skill for inspection; Pool professional for service
Sta-Rite Max-E-Pro Centrifugal Pump
(WEEKLY)
Date InitialsDate InitialsDate InitialsDate InitialsClean and Inspect per manufacturers guidelines
Date Initials Date InitialsNo special skill required; Qualified Technician for repairs.
State Turbo Sandblaster Self Cleaning Water Heater
Date InitialsXXXXXXXXXXX XXXXXXXXXXX XXXXXXXXXXX XXXXXXXXXXX XXXXXXXXXXX
XXXXXXXXXXX XXXXXXXXXXX XXXXXXXXXXX XXXXXXXXXXX XXXXXXXXXXX
XXXXXXXXXXX XXXXXXXXXXX XXXXXXXXXXX XXXXXXXXXXX XXXXXXXXXXX
Inspect; Clear if NeededXXXXXXXXXXX XXXXXXXXXXX XXXXXXXXXXX XXXXXXXXXXX XXXXXXXXXXX
Date InitialsNo special skill for inspections; plumber for cleaning/repair
Storm Drainage Facilities
Date InitialsDate InitialsDate InitialsDate InitialsInspect
Date Initials Date InitialsNo special skill required for inspections.
Street Signs
7PM/Inspection Check List (Jan - Jun) - Page
Reserve Asset Management Program (RAMP)(c) 1994-2007The Helsing Group, Inc.
All Rights Reserved

Preventive Maintenance and Inspection Check ListJanuary through June
Inspector or ServicePreventiveComponent Name JunMayAprMarFebJanProvider SkillMaintenance Task
Kimberly Place Community Association
XXXXXXXXXXX XXXXXXXXXXX XXXXXXXXXXX XXXXXXXXXXX XXXXXXXXXXX
XXXXXXXXXXX XXXXXXXXXXX XXXXXXXXXXX XXXXXXXXXXX XXXXXXXXXXX
Date InitialsXXXXXXXXXXX XXXXXXXXXXX XXXXXXXXXXX XXXXXXXXXXX XXXXXXXXXXX
InspectXXXXXXXXXXX XXXXXXXXXXX XXXXXXXXXXX XXXXXXXXXXX XXXXXXXXXXX
XXXXXXXXXXXXXXXXXXXXXXXXXXXXXXXXXXXXXXXXXXXXXXXXXXXXXXX
No special skill requiredStreets and Drives - Painted Features
XXXXXXXXXXX XXXXXXXXXXX XXXXXXXXXXX XXXXXXXXXXX XXXXXXXXXXX
XXXXXXXXXXX XXXXXXXXXXX XXXXXXXXXXX XXXXXXXXXXX XXXXXXXXXXX
XXXXXXXXXXX XXXXXXXXXXX XXXXXXXXXXX XXXXXXXXXXX XXXXXXXXXXX
XXXXXXXXXXX XXXXXXXXXXX XXXXXXXXXXX XXXXXXXXXXX XXXXXXXXXXX
Insepct; Repair as Needed
XXXXXXXXXXX XXXXXXXXXXX XXXXXXXXXXX XXXXXXXXXXX XXXXXXXXXXX
XXXXXXXXXXXXXXXXXXXXXXXXXXXXXXXXXXXXXXXXXXXXXXXXXXXXXXX
No special skill required for inspection; qualified contractor for repairs
Tile Entry Monument
Date InitialsDate InitialsDate InitialsDate InitialsInspect and Clean
Date Initials Date InitialsNo special skill required.Tile Flooring
XXXXXXXXXXX XXXXXXXXXXX XXXXXXXXXXX XXXXXXXXXXX XXXXXXXXXXX
XXXXXXXXXXX XXXXXXXXXXX XXXXXXXXXXX XXXXXXXXXXX XXXXXXXXXXX
XXXXXXXXXXX XXXXXXXXXXX XXXXXXXXXXX XXXXXXXXXXX XXXXXXXXXXX
XXXXXXXXXXX XXXXXXXXXXX XXXXXXXXXXX XXXXXXXXXXX XXXXXXXXXXX
Inspect; Repair as Needed
XXXXXXXXXXX XXXXXXXXXXX XXXXXXXXXXX XXXXXXXXXXX XXXXXXXXXXX
XXXXXXXXXXXXXXXXXXXXXXXXXXXXXXXXXXXXXXXXXXXXXXXXXXXXXXX
No special skill required for inspection; qualified contractor for repairs
Tile Siding
Date InitialsDate InitialsDate InitialsDate InitialsInspect
Date Initials Date InitialsNo special skill required.Trash Enclosure Area
Date InitialsDate InitialsDate InitialsDate InitialsInspect and Clean
Date Initials Date InitialsNo special skill required.Vinyl Linoleum Flooring
Date InitialsDate InitialsDate InitialsDate InitialsClean Weekly; Inspect per Service Schedule
Date Initials Date InitialsNo special skill required for cleaning; Qualified Personnel for Servicing.
Vision Fitness Commercial Cycle - E3600HRT
(WEEKLY)
Date InitialsDate InitialsDate InitialsDate InitialsClean Daily; Inspect per Service Schedule
Date Initials Date InitialsNo special skill required for cleaning; Qualified Personnel for Servicing.
Vision Fitness Commercial Elliptical - X6700HRT
(DAILY)
8PM/Inspection Check List (Jan - Jun) - Page
Reserve Asset Management Program (RAMP)(c) 1994-2007The Helsing Group, Inc.
All Rights Reserved

Preventive Maintenance and Inspection Check ListJanuary through June
Inspector or ServicePreventiveComponent Name JunMayAprMarFebJanProvider SkillMaintenance Task
Kimberly Place Community Association
XXXXXXXXXXX XXXXXXXXXXX XXXXXXXXXXX XXXXXXXXXXX XXXXXXXXXXX
XXXXXXXXXXX XXXXXXXXXXX XXXXXXXXXXX XXXXXXXXXXX XXXXXXXXXXX
Date InitialsXXXXXXXXXXX XXXXXXXXXXX XXXXXXXXXXX XXXXXXXXXXX XXXXXXXXXXX
Inspect; Clean as NeededDate Initials XXXXXXXXXXX
XXXXXXXXXXXXXXXXXXXXXXXXXXXXXXXXXXXXXXXXXXXX
No special skill for inspection; qualified personnel for repairs
Windows
Date InitialsXXXXXXXXXXX XXXXXXXXXXX XXXXXXXXXXX XXXXXXXXXXX XXXXXXXXXXX
XXXXXXXXXXX XXXXXXXXXXX XXXXXXXXXXX XXXXXXXXXXX XXXXXXXXXXX
XXXXXXXXXXX XXXXXXXXXXX XXXXXXXXXXX XXXXXXXXXXX XXXXXXXXXXX
Inspect; Repair as Needed
XXXXXXXXXXX XXXXXXXXXXX XXXXXXXXXXX XXXXXXXXXXX XXXXXXXXXXX
XXXXXXXXXXXXXXXXXXXXXXXXXXXXXXXXXXXXXXXXXXXXXXXXXXXXXXX
No special skill for inspections; handyman for repairs
Wood & Metal Gate
XXXXXXXXXXX XXXXXXXXXXX XXXXXXXXXXX XXXXXXXXXXX XXXXXXXXXXX
XXXXXXXXXXX XXXXXXXXXXX XXXXXXXXXXX XXXXXXXXXXX XXXXXXXXXXX
XXXXXXXXXXX XXXXXXXXXXX XXXXXXXXXXX XXXXXXXXXXX XXXXXXXXXXX
XXXXXXXXXXX XXXXXXXXXXX XXXXXXXXXXX XXXXXXXXXXX XXXXXXXXXXX
InspectXXXXXXXXXXX XXXXXXXXXXX XXXXXXXXXXX XXXXXXXXXXX XXXXXXXXXXX
Date InitialsNo special skill required for inspections.
Wood Panel Siding and Trim
XXXXXXXXXXX XXXXXXXXXXX XXXXXXXXXXX XXXXXXXXXXX XXXXXXXXXXX
Date InitialsXXXXXXXXXXX XXXXXXXXXXX XXXXXXXXXXX XXXXXXXXXXX XXXXXXXXXXX
XXXXXXXXXXX XXXXXXXXXXX XXXXXXXXXXX XXXXXXXXXXX XXXXXXXXXXX
Inspect and CleanXXXXXXXXXXX XXXXXXXXXXX XXXXXXXXXXX XXXXXXXXXXX XXXXXXXXXXX
XXXXXXXXXXXXXXXXXXXXXXXXXXXXXXXXXXXXXXXXXXXXXXXXXXXXXXX
No special skill required for cleaning; qualified contractor for repairs
Wooden Decks
XXXXXXXXXXX XXXXXXXXXXX XXXXXXXXXXX XXXXXXXXXXX XXXXXXXXXXX
XXXXXXXXXXX XXXXXXXXXXX XXXXXXXXXXX XXXXXXXXXXX XXXXXXXXXXX
Date InitialsXXXXXXXXXXX XXXXXXXXXXX XXXXXXXXXXX XXXXXXXXXXX XXXXXXXXXXX
InspectXXXXXXXXXXX XXXXXXXXXXX XXXXXXXXXXX XXXXXXXXXXX XXXXXXXXXXX
XXXXXXXXXXXXXXXXXXXXXXXXXXXXXXXXXXXXXXXXXXXXXXXXXXXXXXX
No special skill for inspections; handyman for repairs
Wooden Fences
XXXXXXXXXXX XXXXXXXXXXX XXXXXXXXXXX XXXXXXXXXXX XXXXXXXXXXX
XXXXXXXXXXX XXXXXXXXXXX XXXXXXXXXXX XXXXXXXXXXX XXXXXXXXXXX
XXXXXXXXXXX XXXXXXXXXXX XXXXXXXXXXX XXXXXXXXXXX XXXXXXXXXXX
XXXXXXXXXXX XXXXXXXXXXX XXXXXXXXXXX XXXXXXXXXXX XXXXXXXXXXX
InspectXXXXXXXXXXX XXXXXXXXXXX XXXXXXXXXXX XXXXXXXXXXX XXXXXXXXXXX
Date InitialsNo special skill required for inspections.
Wooden Railings - Painted
XXXXXXXXXXX XXXXXXXXXXX XXXXXXXXXXX XXXXXXXXXXX XXXXXXXXXXX
Date InitialsXXXXXXXXXXX XXXXXXXXXXX XXXXXXXXXXX XXXXXXXXXXX XXXXXXXXXXX
XXXXXXXXXXX XXXXXXXXXXX XXXXXXXXXXX XXXXXXXXXXX XXXXXXXXXXX
InspectXXXXXXXXXXX XXXXXXXXXXX XXXXXXXXXXX XXXXXXXXXXX XXXXXXXXXXX
XXXXXXXXXXXXXXXXXXXXXXXXXXXXXXXXXXXXXXXXXXXXXXXXXXXXXXX
No special skill required for inspections.
Wooden Trellis
XXXXXXXXXXX XXXXXXXXXXX XXXXXXXXXXX XXXXXXXXXXX XXXXXXXXXXX
XXXXXXXXXXX XXXXXXXXXXX XXXXXXXXXXX XXXXXXXXXXX XXXXXXXXXXX
XXXXXXXXXXX XXXXXXXXXXX XXXXXXXXXXX XXXXXXXXXXX XXXXXXXXXXX
XXXXXXXXXXX XXXXXXXXXXX XXXXXXXXXXX XXXXXXXXXXX XXXXXXXXXXX
Inspect; Clean and Repair as Needed
XXXXXXXXXXX XXXXXXXXXXX XXXXXXXXXXX XXXXXXXXXXX XXXXXXXXXXX
XXXXXXXXXXXXXXXXXXXXXXXXXXXXXXXXXXXXXXXXXXXXXXXXXXXXXXX
Qualified Personnel for RepairsZinsco Circuit Breaker
9PM/Inspection Check List (Jan - Jun) - Page
Reserve Asset Management Program (RAMP)(c) 1994-2007The Helsing Group, Inc.
All Rights Reserved

Preventive Maintenance and Inspection Check ListJanuary through June
Inspector or ServicePreventiveComponent Name JunMayAprMarFebJanProvider SkillMaintenance Task
Kimberly Place Community Association
XXXXXXXXXXX XXXXXXXXXXX XXXXXXXXXXX XXXXXXXXXXX XXXXXXXXXXX
XXXXXXXXXXX XXXXXXXXXXX XXXXXXXXXXX XXXXXXXXXXX XXXXXXXXXXX
XXXXXXXXXXX XXXXXXXXXXX XXXXXXXXXXX XXXXXXXXXXX XXXXXXXXXXX
XXXXXXXXXXX XXXXXXXXXXX XXXXXXXXXXX XXXXXXXXXXX XXXXXXXXXXX
Inspect and ServiceXXXXXXXXXXX XXXXXXXXXXX XXXXXXXXXXX XXXXXXXXXXX XXXXXXXXXXX
XXXXXXXXXXXXXXXXXXXXXXXXXXXXXXXXXXXXXXXXXXXXXXXXXXXXXXX
Licensed PersonnelZurn Wilkins Backflow Preventer, 950XL & 975XL/U
Note: This report is intended to show the scheduling for preventive maintenance and inspections suggested for this association. The months shown should be considered guidelines. Adjustments in scheduling should be made taking weather conditions, availability of personnel, and other factors into account.
10PM/Inspection Check List (Jan - Jun) - Page
Reserve Asset Management Program (RAMP)(c) 1994-2007The Helsing Group, Inc.
All Rights Reserved

Preventive Maintenance and Inspection Check ListJuly through December
Inspector or ServicePreventiveComponent Name DecNovOctSepAugJulProvider SkillMaintenance Task
Kimberly Place Community Association
Inspect; Professional Service Annually
No special skill for monthly inspection; qualified technician for annual
Date Initials Date Initials Date Initials Date Initials Date InitialsDate InitialsAmerex Fire Extinguishers
Inspect No special skill required for inspections.
XXXXXXXXXXX XXXXXXXXXXX XXXXXXXXXXX XXXXXXXXXXX XXXXXXXXXXX
XXXXXXXXXXX XXXXXXXXXXX XXXXXXXXXXX XXXXXXXXXXX XXXXXXXXXXX
XXXXXXXXXXX XXXXXXXXXXX XXXXXXXXXXX XXXXXXXXXXX XXXXXXXXXXX
XXXXXXXXXXX XXXXXXXXXXX XXXXXXXXXXX XXXXXXXXXXX XXXXXXXXXXX
XXXXXXXXXXX XXXXXXXXXXX XXXXXXXXXXX XXXXXXXXXXX XXXXXXXXXXX
XXXXXXXXXXX XXXXXXXXXXX XXXXXXXXXXX XXXXXXXXXXX XXXXXXXXXXX
Arbor, Painted Wood
Inspect No special skill for semiannual inspection; qualified technician for repairs
XXXXXXXXXXX XXXXXXXXXXX XXXXXXXXXXX XXXXXXXXXXX XXXXXXXXXXX
XXXXXXXXXXX XXXXXXXXXXX XXXXXXXXXXX XXXXXXXXXXX XXXXXXXXXXX
Date Initials XXXXXXXXXXX XXXXXXXXXXX XXXXXXXXXXX XXXXXXXXXXX XXXXXXXXXXX
XXXXXXXXXXX XXXXXXXXXXX XXXXXXXXXXX XXXXXXXXXXX XXXXXXXXXXX
XXXXXXXXXXX XXXXXXXXXXX XXXXXXXXXXX XXXXXXXXXXX XXXXXXXXXXX
Asphalt
Inspect and maintain as described
Association's landscaper as part of contract
Date Initials Date Initials Date Initials Date Initials Date InitialsDate InitialsAssociation Landscape Maintenance
Inspect; Clean, repair and touch up as needed
No special skill required for inspections and cleaning
XXXXXXXXXXX XXXXXXXXXXX XXXXXXXXXXX XXXXXXXXXXX XXXXXXXXXXX
Date Initials XXXXXXXXXXX XXXXXXXXXXX XXXXXXXXXXX XXXXXXXXXXX XXXXXXXXXXX
XXXXXXXXXXX XXXXXXXXXXX XXXXXXXXXXX XXXXXXXXXXX XXXXXXXXXXX
XXXXXXXXXXX XXXXXXXXXXX XXXXXXXXXXX XXXXXXXXXXX XXXXXXXXXXX
XXXXXXXXXXX XXXXXXXXXXX XXXXXXXXXXX XXXXXXXXXXX XXXXXXXXXXX
Bench - Wood and Wrought Iron
Inspect and Clean; Steam Clean Annually
No special skill for vacuuming; qualified professional for steam cleaning
Date Initials Date Initials Date Initials Date Initials Date InitialsDate InitialsCarpet
Inspect and repair as necessary
HandymanXXXXXXXXXXX XXXXXXXXXXX XXXXXXXXXXX XXXXXXXXXXX XXXXXXXXXXX
XXXXXXXXXXX XXXXXXXXXXX XXXXXXXXXXX XXXXXXXXXXX XXXXXXXXXXX
XXXXXXXXXXX XXXXXXXXXXX XXXXXXXXXXX XXXXXXXXXXX XXXXXXXXXXX
XXXXXXXXXXX XXXXXXXXXXX XXXXXXXXXXX XXXXXXXXXXX XXXXXXXXXXX
XXXXXXXXXXX XXXXXXXXXXX XXXXXXXXXXX XXXXXXXXXXX XXXXXXXXXXX
Date InitialsCaulking
Inspect No special skill required for inspections.
XXXXXXXXXXX XXXXXXXXXXX XXXXXXXXXXX XXXXXXXXXXX XXXXXXXXXXX
XXXXXXXXXXX XXXXXXXXXXX XXXXXXXXXXX XXXXXXXXXXX XXXXXXXXXXX
XXXXXXXXXXX XXXXXXXXXXX XXXXXXXXXXX XXXXXXXXXXX XXXXXXXXXXX
XXXXXXXXXXX XXXXXXXXXXX XXXXXXXXXXX XXXXXXXXXXX XXXXXXXXXXX
XXXXXXXXXXX XXXXXXXXXXX XXXXXXXXXXX XXXXXXXXXXX XXXXXXXXXXX
Date InitialsCement Rail Fence
1PM/Inspection Check List (Jul - Dec) - Page
Reserve Asset Management Program (RAMP)(c) 1994-2007 The Helsing Group, Inc.
All Rights Reserved

Preventive Maintenance and Inspection Check ListJuly through December
Inspector or ServicePreventiveComponent Name DecNovOctSepAugJulProvider SkillMaintenance Task
Kimberly Place Community Association
Inspect; Clear Debris as Needed
No special skill for removing debris; Qualified personnel for inspection.
XXXXXXXXXXX XXXXXXXXXXX XXXXXXXXXXX XXXXXXXXXXX XXXXXXXXXXX
XXXXXXXXXXX XXXXXXXXXXX XXXXXXXXXXX XXXXXXXXXXX XXXXXXXXXXX
XXXXXXXXXXX XXXXXXXXXXX XXXXXXXXXXX XXXXXXXXXXX XXXXXXXXXXX
XXXXXXXXXXX XXXXXXXXXXX XXXXXXXXXXX XXXXXXXXXXX XXXXXXXXXXX
XXXXXXXXXXX XXXXXXXXXXX XXXXXXXXXXX XXXXXXXXXXX XXXXXXXXXXX
XXXXXXXXXXX XXXXXXXXXXX XXXXXXXXXXX XXXXXXXXXXX XXXXXXXXXXX
CertainTeed Landmark Series Asphalt Shingles - Kimberly Place
Inspect No special skill required for inspections.
XXXXXXXXXXX XXXXXXXXXXX XXXXXXXXXXX XXXXXXXXXXX XXXXXXXXXXX
XXXXXXXXXXX XXXXXXXXXXX XXXXXXXXXXX XXXXXXXXXXX XXXXXXXXXXX
XXXXXXXXXXX XXXXXXXXXXX XXXXXXXXXXX XXXXXXXXXXX XXXXXXXXXXX
XXXXXXXXXXX XXXXXXXXXXX XXXXXXXXXXX XXXXXXXXXXX XXXXXXXXXXX
XXXXXXXXXXX XXXXXXXXXXX XXXXXXXXXXX XXXXXXXXXXX XXXXXXXXXXX
XXXXXXXXXXX XXXXXXXXXXX XXXXXXXXXXX XXXXXXXXXXX XXXXXXXXXXX
Cluster Mailboxes
Inspect for cracks and safety hazards
No special skill required for inspections.
Date Initials Date Initials Date Initials Date Initials Date InitialsDate InitialsConcrete Walkways
Inspect No special skill for inspections; qualified contractor for repairs
XXXXXXXXXXX XXXXXXXXXXX XXXXXXXXXXX XXXXXXXXXXX XXXXXXXXXXX
XXXXXXXXXXX XXXXXXXXXXX XXXXXXXXXXX XXXXXXXXXXX XXXXXXXXXXX
XXXXXXXXXXX XXXXXXXXXXX XXXXXXXXXXX XXXXXXXXXXX XXXXXXXXXXX
XXXXXXXXXXX XXXXXXXXXXX XXXXXXXXXXX XXXXXXXXXXX XXXXXXXXXXX
XXXXXXXXXXX XXXXXXXXXXX XXXXXXXXXXX XXXXXXXXXXX XXXXXXXXXXX
XXXXXXXXXXX XXXXXXXXXXX XXXXXXXXXXX XXXXXXXXXXX XXXXXXXXXXX
Concrete/Masonry Retaining Wall
Inspect No special skill required for inspections.
XXXXXXXXXXX XXXXXXXXXXX XXXXXXXXXXX XXXXXXXXXXX XXXXXXXXXXX
XXXXXXXXXXX XXXXXXXXXXX XXXXXXXXXXX XXXXXXXXXXX XXXXXXXXXXX
Date Initials XXXXXXXXXXX XXXXXXXXXXX XXXXXXXXXXX XXXXXXXXXXX XXXXXXXXXXX
XXXXXXXXXXX XXXXXXXXXXX XXXXXXXXXXX XXXXXXXXXXX XXXXXXXXXXX
XXXXXXXXXXX XXXXXXXXXXX XXXXXXXXXXX XXXXXXXXXXX XXXXXXXXXXX
Decorative Concrete
Clean weekly per manufacturer guidelines
No special skill requiredDate Initials Date Initials Date Initials Date Initials Date InitialsDate Initials
Elkay Stainless Steel Sink - Dayton
(WEEKLY)
Inspect Association's Landscaper as part of contract
XXXXXXXXXXX XXXXXXXXXXX XXXXXXXXXXX XXXXXXXXXXX XXXXXXXXXXX
XXXXXXXXXXX XXXXXXXXXXX XXXXXXXXXXX XXXXXXXXXXX XXXXXXXXXXX
Date Initials XXXXXXXXXXX XXXXXXXXXXX XXXXXXXXXXX XXXXXXXXXXX XXXXXXXXXXX
XXXXXXXXXXX XXXXXXXXXXX XXXXXXXXXXX XXXXXXXXXXX XXXXXXXXXXX
XXXXXXXXXXX XXXXXXXXXXX XXXXXXXXXXX XXXXXXXXXXX XXXXXXXXXXX
Emitters
Inspect No special skill required for inspections.
XXXXXXXXXXX XXXXXXXXXXX XXXXXXXXXXX XXXXXXXXXXX XXXXXXXXXXX
XXXXXXXXXXX XXXXXXXXXXX XXXXXXXXXXX XXXXXXXXXXX XXXXXXXXXXX
Date Initials XXXXXXXXXXX XXXXXXXXXXX XXXXXXXXXXX XXXXXXXXXXX XXXXXXXXXXX
XXXXXXXXXXX XXXXXXXXXXX XXXXXXXXXXX XXXXXXXXXXX XXXXXXXXXXX
Date InitialsExit Signs - LED
2PM/Inspection Check List (Jul - Dec) - Page
Reserve Asset Management Program (RAMP)(c) 1994-2007 The Helsing Group, Inc.
All Rights Reserved

Preventive Maintenance and Inspection Check ListJuly through December
Inspector or ServicePreventiveComponent Name DecNovOctSepAugJulProvider SkillMaintenance Task
Kimberly Place Community Association
Inspect; Paint and Maintain as Needed
No special skill required.Date Initials XXXXXXXXXXX
XXXXXXXXXXX XXXXXXXXXXX XXXXXXXXXXX XXXXXXXXXXX
XXXXXXXXXXX XXXXXXXXXXX XXXXXXXXXXX XXXXXXXXXXX XXXXXXXXXXX
XXXXXXXXXXX XXXXXXXXXXX XXXXXXXXXXX XXXXXXXXXXX XXXXXXXXXXX
XXXXXXXXXXX XXXXXXXXXXX XXXXXXXXXXX XXXXXXXXXXX XXXXXXXXXXX
XXXXXXXXXXX XXXXXXXXXXX XXXXXXXXXXX XXXXXXXXXXX XXXXXXXXXXX
Exterior Doors
Inspect Weekly; Clean/Repair as Needed
Qualified Service TechnicianDate Initials Date Initials Date Initials Date Initials Date InitialsDate Initials
Flexflo Injector Pump - A-130-6
(WEEKLY)
Inspect/Operate/Change Filter as Required
No special skill for filter change; qualified technician for inspection/service
Date Initials Date Initials Date Initials Date Initials Date InitialsDate InitialsFraser Johnston Air Conditioning Furnace - 125CN4 A
Inspect and lubricate Qualified Door Service Personnel
XXXXXXXXXXX XXXXXXXXXXX XXXXXXXXXXX XXXXXXXXXXX XXXXXXXXXXX
XXXXXXXXXXX XXXXXXXXXXX XXXXXXXXXXX XXXXXXXXXXX XXXXXXXXXXX
Date Initials XXXXXXXXXXX XXXXXXXXXXX XXXXXXXXXXX XXXXXXXXXXX XXXXXXXXXXX
XXXXXXXXXXX XXXXXXXXXXX XXXXXXXXXXX XXXXXXXXXXX XXXXXXXXXXX
XXXXXXXXXXX XXXXXXXXXXX XXXXXXXXXXX XXXXXXXXXXX XXXXXXXXXXX
Garage Doors and Hardware
Inspect Annually; Clean as Needed
No special skill for cleaning; qualified technician for annual inspection
Date Initials XXXXXXXXXXX XXXXXXXXXXX XXXXXXXXXXX XXXXXXXXXXX XXXXXXXXXXX
XXXXXXXXXXX XXXXXXXXXXX XXXXXXXXXXX XXXXXXXXXXX XXXXXXXXXXX
XXXXXXXXXXX XXXXXXXXXXX XXXXXXXXXXX XXXXXXXXXXX XXXXXXXXXXX
XXXXXXXXXXX XXXXXXXXXXX XXXXXXXXXXX XXXXXXXXXXX XXXXXXXXXXX
XXXXXXXXXXX XXXXXXXXXXX XXXXXXXXXXX XXXXXXXXXXX XXXXXXXXXXX
Gas Fireplace
Test Operation No special skill for testing; qualified electrician for replacement
Date Initials Date Initials Date Initials Date Initials Date InitialsDate InitialsGFCI Outlet
Clean Weekly; Inspect & Adjust
No special skill for cleaning; handyman/plumber for major repairs
Date Initials Date Initials Date Initials Date Initials Date InitialsDate InitialsGlacier Bay Faucet - Laundry Room
Clean; Seal as Needed No special skill required for sealing; qualified contractor for repair
Date Initials Date Initials Date Initials Date Initials Date InitialsDate InitialsGranite Countertops
3PM/Inspection Check List (Jul - Dec) - Page
Reserve Asset Management Program (RAMP)(c) 1994-2007 The Helsing Group, Inc.
All Rights Reserved

Preventive Maintenance and Inspection Check ListJuly through December
Inspector or ServicePreventiveComponent Name DecNovOctSepAugJulProvider SkillMaintenance Task
Kimberly Place Community Association
Clean and Inspect Gutter ServiceXXXXXXXXXXX XXXXXXXXXXX XXXXXXXXXXX XXXXXXXXXXX XXXXXXXXXXX
Date Initials XXXXXXXXXXX XXXXXXXXXXX XXXXXXXXXXX XXXXXXXXXXX XXXXXXXXXXX
XXXXXXXXXXX XXXXXXXXXXX XXXXXXXXXXX XXXXXXXXXXX XXXXXXXXXXX
XXXXXXXXXXX XXXXXXXXXXX XXXXXXXXXXX XXXXXXXXXXX XXXXXXXXXXX
XXXXXXXXXXX XXXXXXXXXXX XXXXXXXXXXX XXXXXXXXXXX XXXXXXXXXXX
Gutters & Downspouts
Clean Lens; Test as needed
No special skill required.XXXXXXXXXXX XXXXXXXXXXX XXXXXXXXXXX XXXXXXXXXXX XXXXXXXXXXX
Date Initials XXXXXXXXXXX XXXXXXXXXXX XXXXXXXXXXX XXXXXXXXXXX XXXXXXXXXXX
XXXXXXXXXXX XXXXXXXXXXX XXXXXXXXXXX XXXXXXXXXXX XXXXXXXXXXX
XXXXXXXXXXX XXXXXXXXXXX XXXXXXXXXXX XXXXXXXXXXX XXXXXXXXXXX
XXXXXXXXXXX XXXXXXXXXXX XXXXXXXXXXX XXXXXXXXXXX XXXXXXXXXXX
InFocus Screenplay Projector - 7205
Inspect No special skill required for inspections; qualified contractor for pole light work
Date Initials Date Initials Date Initials Date Initials Date InitialsDate InitialsInterior and Exterior Lighting; Pole Lights
Inspect No special skill for inspection or cleaning; qualified personnel for replacement
Date Initials XXXXXXXXXXX XXXXXXXXXXX XXXXXXXXXXX XXXXXXXXXXX XXXXXXXXXXX
XXXXXXXXXXX XXXXXXXXXXX XXXXXXXXXXX XXXXXXXXXXX XXXXXXXXXXX
XXXXXXXXXXX XXXXXXXXXXX XXXXXXXXXXX XXXXXXXXXXX XXXXXXXXXXX
XXXXXXXXXXX XXXXXXXXXXX XXXXXXXXXXX XXXXXXXXXXX XXXXXXXXXXX
XXXXXXXXXXX XXXXXXXXXXX XXXXXXXXXXX XXXXXXXXXXX XXXXXXXXXXX
Interior Doors
Inspect; Clean as Needed No special skill required for inspections.
XXXXXXXXXXX XXXXXXXXXXX XXXXXXXXXXX XXXXXXXXXXX XXXXXXXXXXX
Date Initials XXXXXXXXXXX XXXXXXXXXXX XXXXXXXXXXX XXXXXXXXXXX XXXXXXXXXXX
XXXXXXXXXXX XXXXXXXXXXX XXXXXXXXXXX XXXXXXXXXXX XXXXXXXXXXX
XXXXXXXXXXX XXXXXXXXXXX XXXXXXXXXXX XXXXXXXXXXX XXXXXXXXXXX
XXXXXXXXXXX XXXXXXXXXXX XXXXXXXXXXX XXXXXXXXXXX XXXXXXXXXXX
Interior Paint
Inspect; adjust time as needed
No special skill required.XXXXXXXXXXX XXXXXXXXXXX XXXXXXXXXXX XXXXXXXXXXX XXXXXXXXXXX
XXXXXXXXXXX XXXXXXXXXXX XXXXXXXXXXX XXXXXXXXXXX XXXXXXXXXXX
Date Initials XXXXXXXXXXX XXXXXXXXXXX XXXXXXXXXXX XXXXXXXXXXX XXXXXXXXXXX
XXXXXXXXXXX XXXXXXXXXXX XXXXXXXXXXX XXXXXXXXXXX XXXXXXXXXXX
XXXXXXXXXXX XXXXXXXXXXX XXXXXXXXXXX XXXXXXXXXXX XXXXXXXXXXX
Intermatic T101 24 Hour Dial Time Switch
Inspect; Clean as Needed No special skill required for cleaning; qualified personnel for repairs
Date Initials Date Initials Date Initials Date Initials Date InitialsDate InitialsKitchen Cabinets - Wooden
Inspect; Clear if Needed Association's landscaper as part of contract
XXXXXXXXXXX XXXXXXXXXXX XXXXXXXXXXX XXXXXXXXXXX XXXXXXXXXXX
XXXXXXXXXXX XXXXXXXXXXX XXXXXXXXXXX XXXXXXXXXXX XXXXXXXXXXX
Date Initials XXXXXXXXXXX XXXXXXXXXXX XXXXXXXXXXX XXXXXXXXXXX XXXXXXXXXXX
XXXXXXXXXXX XXXXXXXXXXX XXXXXXXXXXX XXXXXXXXXXX XXXXXXXXXXX
Date InitialsLandscape Drains
4PM/Inspection Check List (Jul - Dec) - Page
Reserve Asset Management Program (RAMP)(c) 1994-2007 The Helsing Group, Inc.
All Rights Reserved

Preventive Maintenance and Inspection Check ListJuly through December
Inspector or ServicePreventiveComponent Name DecNovOctSepAugJulProvider SkillMaintenance Task
Kimberly Place Community Association
Clean and Inspect Regularly
No special skills requiredDate Initials Date Initials Date Initials Date Initials Date InitialsDate Initials
Leather Recliners
Inspect No special skill for cleaning; qualified contractor for repairs
XXXXXXXXXXX XXXXXXXXXXX XXXXXXXXXXX XXXXXXXXXXX XXXXXXXXXXX
XXXXXXXXXXX XXXXXXXXXXX XXXXXXXXXXX XXXXXXXXXXX XXXXXXXXXXX
Date Initials XXXXXXXXXXX XXXXXXXXXXX XXXXXXXXXXX XXXXXXXXXXX XXXXXXXXXXX
XXXXXXXXXXX XXXXXXXXXXX XXXXXXXXXXX XXXXXXXXXXX XXXXXXXXXXX
XXXXXXXXXXX XXXXXXXXXXX XXXXXXXXXXX XXXXXXXXXXX XXXXXXXXXXX
Light Concrete Decks
Inspect, remove rust and repaint as needed
No special skill required.XXXXXXXXXXX XXXXXXXXXXX XXXXXXXXXXX XXXXXXXXXXX XXXXXXXXXXX
XXXXXXXXXXX XXXXXXXXXXX XXXXXXXXXXX XXXXXXXXXXX XXXXXXXXXXX
XXXXXXXXXXX XXXXXXXXXXX XXXXXXXXXXX XXXXXXXXXXX XXXXXXXXXXX
XXXXXXXXXXX XXXXXXXXXXX XXXXXXXXXXX XXXXXXXXXXX XXXXXXXXXXX
XXXXXXXXXXX XXXXXXXXXXX XXXXXXXXXXX XXXXXXXXXXX XXXXXXXXXXX
Date InitialsMetal Railings
Inspect, remove rust, repair as needed
No special skill for inspections; qualified personnel for repairs
XXXXXXXXXXX XXXXXXXXXXX XXXXXXXXXXX XXXXXXXXXXX XXXXXXXXXXX
XXXXXXXXXXX XXXXXXXXXXX XXXXXXXXXXX XXXXXXXXXXX XXXXXXXXXXX
XXXXXXXXXXX XXXXXXXXXXX XXXXXXXXXXX XXXXXXXXXXX XXXXXXXXXXX
XXXXXXXXXXX XXXXXXXXXXX XXXXXXXXXXX XXXXXXXXXXX XXXXXXXXXXX
XXXXXXXXXXX XXXXXXXXXXX XXXXXXXXXXX XXXXXXXXXXX XXXXXXXXXXX
XXXXXXXXXXX XXXXXXXXXXX XXXXXXXXXXX XXXXXXXXXXX XXXXXXXXXXX
Metal/Wood Carport Structure
Inspect; Clean as Needed No special skill required.XXXXXXXXXXX XXXXXXXXXXX XXXXXXXXXXX XXXXXXXXXXX XXXXXXXXXXX
XXXXXXXXXXX XXXXXXXXXXX XXXXXXXXXXX XXXXXXXXXXX XXXXXXXXXXX
XXXXXXXXXXX XXXXXXXXXXX XXXXXXXXXXX XXXXXXXXXXX XXXXXXXXXXX
XXXXXXXXXXX XXXXXXXXXXX XXXXXXXXXXX XXXXXXXXXXX XXXXXXXXXXX
Date InitialsXXXXXXXXXXX XXXXXXXXXXX XXXXXXXXXXX XXXXXXXXXXX XXXXXXXXXXX
NuTone Ceiling Fan - Laundry Room
Inspect; Clean and Repair as Needed
Pool Service SpecialistDate Initials Date Initials Date Initials Date Initials Date InitialsDate Initials
Pentair/PacFab Tagelus Deluxe Sand Filter - TA 300, 400, 500, 600, 1000
Inspect No special skill required for inspections; handyman for repairs.
XXXXXXXXXXX XXXXXXXXXXX XXXXXXXXXXX XXXXXXXXXXX XXXXXXXXXXX
XXXXXXXXXXX XXXXXXXXXXX XXXXXXXXXXX XXXXXXXXXXX XXXXXXXXXXX
XXXXXXXXXXX XXXXXXXXXXX XXXXXXXXXXX XXXXXXXXXXX XXXXXXXXXXX
XXXXXXXXXXX XXXXXXXXXXX XXXXXXXXXXX XXXXXXXXXXX XXXXXXXXXXX
XXXXXXXXXXX XXXXXXXXXXX XXXXXXXXXXX XXXXXXXXXXX XXXXXXXXXXX
XXXXXXXXXXX XXXXXXXXXXX XXXXXXXXXXX XXXXXXXXXXX XXXXXXXXXXX
Picnic Tables
Inspect; Clean as Needed No special skill required.Date Initials Date Initials Date Initials Date Initials Date InitialsDate Initials
Pool Furniture
5PM/Inspection Check List (Jul - Dec) - Page
Reserve Asset Management Program (RAMP)(c) 1994-2007 The Helsing Group, Inc.
All Rights Reserved

Preventive Maintenance and Inspection Check ListJuly through December
Inspector or ServicePreventiveComponent Name DecNovOctSepAugJulProvider SkillMaintenance Task
Kimberly Place Community Association
Inspect No special skill required.Date Initials Date Initials Date Initials Date Initials Date InitialsDate Initials
Pool Signs
Maintain Daily or Weekly as Required
Pool Technician, as part of contract
Date Initials Date Initials Date Initials Date Initials Date InitialsDate InitialsPools
Clean as needed No special skill required.Date Initials Date Initials Date Initials Date Initials Date InitialsDate Initials
Price Pfister Faucet
Inspect once a month; clean as necessary.
Association's landscaper, as part of contract.
Date Initials Date Initials Date Initials Date Initials Date InitialsDate InitialsRain Bird Sprinkler Heads - Series 1800
Inspect Association's landscaper as part of contract
Date Initials Date Initials Date Initials Date Initials Date InitialsDate InitialsRain Bird Valves
Inspect and test. Pool Service SpecialistXXXXXXXXXXX XXXXXXXXXXX XXXXXXXXXXX XXXXXXXXXXX XXXXXXXXXXX
XXXXXXXXXXX XXXXXXXXXXX XXXXXXXXXXX XXXXXXXXXXX XXXXXXXXXXX
Date Initials XXXXXXXXXXX XXXXXXXXXXX XXXXXXXXXXX XXXXXXXXXXX XXXXXXXXXXX
XXXXXXXXXXX XXXXXXXXXXX XXXXXXXXXXX XXXXXXXXXXX XXXXXXXXXXX
XXXXXXXXXXX XXXXXXXXXXX XXXXXXXXXXX XXXXXXXXXXX XXXXXXXXXXX
Raypak Pool/Spa Heater - RP2100
Inspect and Clean Qualified PersonnelXXXXXXXXXXX XXXXXXXXXXX XXXXXXXXXXX XXXXXXXXXXX XXXXXXXXXXX
XXXXXXXXXXX XXXXXXXXXXX XXXXXXXXXXX XXXXXXXXXXX XXXXXXXXXXX
XXXXXXXXXXX XXXXXXXXXXX XXXXXXXXXXX XXXXXXXXXXX XXXXXXXXXXX
XXXXXXXXXXX XXXXXXXXXXX XXXXXXXXXXX XXXXXXXXXXX XXXXXXXXXXX
XXXXXXXXXXX XXXXXXXXXXX XXXXXXXXXXX XXXXXXXXXXX XXXXXXXXXXX
XXXXXXXXXXX XXXXXXXXXXX XXXXXXXXXXX XXXXXXXXXXX XXXXXXXXXXX
Rinnai Tankless Water Heater & Control
6PM/Inspection Check List (Jul - Dec) - Page
Reserve Asset Management Program (RAMP)(c) 1994-2007 The Helsing Group, Inc.
All Rights Reserved

Preventive Maintenance and Inspection Check ListJuly through December
Inspector or ServicePreventiveComponent Name DecNovOctSepAugJulProvider SkillMaintenance Task
Kimberly Place Community Association
Inspect; Clean as Needed No special skill required for inspection; qualified personnel for repairs
Date Initials XXXXXXXXXXX XXXXXXXXXXX XXXXXXXXXXX XXXXXXXXXXX XXXXXXXXXXX
XXXXXXXXXXX XXXXXXXXXXX XXXXXXXXXXX XXXXXXXXXXX XXXXXXXXXXX
XXXXXXXXXXX XXXXXXXXXXX XXXXXXXXXXX XXXXXXXXXXX XXXXXXXXXXX
XXXXXXXXXXX XXXXXXXXXXX XXXXXXXXXXX XXXXXXXXXXX XXXXXXXXXXX
XXXXXXXXXXX XXXXXXXXXXX XXXXXXXXXXX XXXXXXXXXXX XXXXXXXXXXX
Skylights
Inspect; Clean and Repair as Needed
Qualified PersonnelXXXXXXXXXXX XXXXXXXXXXX XXXXXXXXXXX XXXXXXXXXXX XXXXXXXXXXX
Date Initials XXXXXXXXXXX XXXXXXXXXXX XXXXXXXXXXX XXXXXXXXXXX XXXXXXXXXXX
XXXXXXXXXXX XXXXXXXXXXX XXXXXXXXXXX XXXXXXXXXXX XXXXXXXXXXX
XXXXXXXXXXX XXXXXXXXXXX XXXXXXXXXXX XXXXXXXXXXX XXXXXXXXXXX
XXXXXXXXXXX XXXXXXXXXXX XXXXXXXXXXX XXXXXXXXXXX XXXXXXXXXXX
Square D Load Center - QO 6-12 Series L4
Inspect and Clean Regularly
No special skill required.Date Initials Date Initials Date Initials Date Initials Date InitialsDate Initials
Stainless Steel Sink
Inspect No special skill for inspection; qualified contractor for repairs
Date Initials Date Initials Date Initials Date Initials Date InitialsDate InitialsStairways
Inspect Qualified Inspection ServiceXXXXXXXXXXX XXXXXXXXXXX XXXXXXXXXXX XXXXXXXXXXX XXXXXXXXXXX
XXXXXXXXXXX XXXXXXXXXXX XXXXXXXXXXX XXXXXXXXXXX XXXXXXXXXXX
Date Initials XXXXXXXXXXX XXXXXXXXXXX XXXXXXXXXXX XXXXXXXXXXX XXXXXXXXXXX
XXXXXXXXXXX XXXXXXXXXXX XXXXXXXXXXX XXXXXXXXXXX XXXXXXXXXXX
Date InitialsStandpipe Components
Inspect Trap Basket; Clean as Needed
No special skill for inspection; Pool professional for service
Date Initials Date Initials Date Initials Date Initials Date InitialsDate InitialsSta-Rite Max-E-Pro Centrifugal Pump
(WEEKLY)
Clean and Inspect per manufacturers guidelines
No special skill required; Qualified Technician for repairs.
Date Initials Date Initials Date Initials Date Initials Date InitialsDate InitialsState Turbo Sandblaster Self Cleaning Water Heater
Inspect; Clear if Needed No special skill for inspections; plumber for cleaning/repair
XXXXXXXXXXX XXXXXXXXXXX XXXXXXXXXXX XXXXXXXXXXX XXXXXXXXXXX
Date Initials XXXXXXXXXXX XXXXXXXXXXX XXXXXXXXXXX XXXXXXXXXXX XXXXXXXXXXX
XXXXXXXXXXX XXXXXXXXXXX XXXXXXXXXXX XXXXXXXXXXX XXXXXXXXXXX
Date InitialsXXXXXXXXXXX XXXXXXXXXXX XXXXXXXXXXX XXXXXXXXXXX XXXXXXXXXXX
Storm Drainage Facilities
7PM/Inspection Check List (Jul - Dec) - Page
Reserve Asset Management Program (RAMP)(c) 1994-2007 The Helsing Group, Inc.
All Rights Reserved

Preventive Maintenance and Inspection Check ListJuly through December
Inspector or ServicePreventiveComponent Name DecNovOctSepAugJulProvider SkillMaintenance Task
Kimberly Place Community Association
Inspect No special skill required for inspections.
Date Initials Date Initials Date Initials Date Initials Date InitialsDate InitialsStreet Signs
Inspect No special skill requiredXXXXXXXXXXX XXXXXXXXXXX XXXXXXXXXXX XXXXXXXXXXX XXXXXXXXXXX
XXXXXXXXXXX XXXXXXXXXXX XXXXXXXXXXX XXXXXXXXXXX XXXXXXXXXXX
Date Initials XXXXXXXXXXX XXXXXXXXXXX XXXXXXXXXXX XXXXXXXXXXX XXXXXXXXXXX
XXXXXXXXXXX XXXXXXXXXXX XXXXXXXXXXX XXXXXXXXXXX XXXXXXXXXXX
XXXXXXXXXXX XXXXXXXXXXX XXXXXXXXXXX XXXXXXXXXXX XXXXXXXXXXX
Streets and Drives - Painted Features
Insepct; Repair as Needed
No special skill required for inspection; qualified contractor for repairs
XXXXXXXXXXX XXXXXXXXXXX XXXXXXXXXXX XXXXXXXXXXX XXXXXXXXXXX
Date Initials XXXXXXXXXXX XXXXXXXXXXX XXXXXXXXXXX XXXXXXXXXXX XXXXXXXXXXX
XXXXXXXXXXX XXXXXXXXXXX XXXXXXXXXXX XXXXXXXXXXX XXXXXXXXXXX
XXXXXXXXXXX XXXXXXXXXXX XXXXXXXXXXX XXXXXXXXXXX XXXXXXXXXXX
XXXXXXXXXXX XXXXXXXXXXX XXXXXXXXXXX XXXXXXXXXXX XXXXXXXXXXX
Tile Entry Monument
Inspect and Clean No special skill required.Date Initials Date Initials Date Initials Date Initials Date InitialsDate Initials
Tile Flooring
Inspect; Repair as Needed
No special skill required for inspection; qualified contractor for repairs
XXXXXXXXXXX XXXXXXXXXXX XXXXXXXXXXX XXXXXXXXXXX XXXXXXXXXXX
Date Initials XXXXXXXXXXX XXXXXXXXXXX XXXXXXXXXXX XXXXXXXXXXX XXXXXXXXXXX
XXXXXXXXXXX XXXXXXXXXXX XXXXXXXXXXX XXXXXXXXXXX XXXXXXXXXXX
XXXXXXXXXXX XXXXXXXXXXX XXXXXXXXXXX XXXXXXXXXXX XXXXXXXXXXX
XXXXXXXXXXX XXXXXXXXXXX XXXXXXXXXXX XXXXXXXXXXX XXXXXXXXXXX
Tile Siding
Inspect No special skill required.Date Initials Date Initials Date Initials Date Initials Date InitialsDate Initials
Trash Enclosure Area
Inspect and Clean No special skill required.Date Initials Date Initials Date Initials Date Initials Date InitialsDate Initials
Vinyl Linoleum Flooring
Clean Weekly; Inspect per Service Schedule
No special skill required for cleaning; Qualified Personnel for Servicing.
Date Initials Date Initials Date Initials Date Initials Date InitialsDate InitialsVision Fitness Commercial Cycle - E3600HRT
(WEEKLY)
8PM/Inspection Check List (Jul - Dec) - Page
Reserve Asset Management Program (RAMP)(c) 1994-2007 The Helsing Group, Inc.
All Rights Reserved

Preventive Maintenance and Inspection Check ListJuly through December
Inspector or ServicePreventiveComponent Name DecNovOctSepAugJulProvider SkillMaintenance Task
Kimberly Place Community Association
Clean Daily; Inspect per Service Schedule
No special skill required for cleaning; Qualified Personnel for Servicing.
Date Initials Date Initials Date Initials Date Initials Date InitialsDate InitialsVision Fitness Commercial Elliptical - X6700HRT
(DAILY)
Inspect; Clean as Needed No special skill for inspection; qualified personnel for repairs
XXXXXXXXXXX XXXXXXXXXXX XXXXXXXXXXX XXXXXXXXXXX XXXXXXXXXXX
XXXXXXXXXXX XXXXXXXXXXX XXXXXXXXXXX XXXXXXXXXXX XXXXXXXXXXX
Date Initials XXXXXXXXXXX XXXXXXXXXXX XXXXXXXXXXX XXXXXXXXXXX XXXXXXXXXXX
XXXXXXXXXXX XXXXXXXXXXX XXXXXXXXXXX XXXXXXXXXXX XXXXXXXXXXX
Date InitialsWindows
Inspect; Repair as Needed
No special skill for inspections; handyman for repairs
XXXXXXXXXXX XXXXXXXXXXX XXXXXXXXXXX XXXXXXXXXXX XXXXXXXXXXX
XXXXXXXXXXX XXXXXXXXXXX XXXXXXXXXXX XXXXXXXXXXX XXXXXXXXXXX
XXXXXXXXXXX XXXXXXXXXXX XXXXXXXXXXX XXXXXXXXXXX XXXXXXXXXXX
XXXXXXXXXXX XXXXXXXXXXX XXXXXXXXXXX XXXXXXXXXXX XXXXXXXXXXX
XXXXXXXXXXX XXXXXXXXXXX XXXXXXXXXXX XXXXXXXXXXX XXXXXXXXXXX
XXXXXXXXXXX XXXXXXXXXXX XXXXXXXXXXX XXXXXXXXXXX XXXXXXXXXXX
Wood & Metal Gate
Inspect No special skill required for inspections.
XXXXXXXXXXX XXXXXXXXXXX XXXXXXXXXXX XXXXXXXXXXX XXXXXXXXXXX
Date Initials XXXXXXXXXXX XXXXXXXXXXX XXXXXXXXXXX XXXXXXXXXXX XXXXXXXXXXX
XXXXXXXXXXX XXXXXXXXXXX XXXXXXXXXXX XXXXXXXXXXX XXXXXXXXXXX
XXXXXXXXXXX XXXXXXXXXXX XXXXXXXXXXX XXXXXXXXXXX XXXXXXXXXXX
XXXXXXXXXXX XXXXXXXXXXX XXXXXXXXXXX XXXXXXXXXXX XXXXXXXXXXX
Wood Panel Siding and Trim
Inspect and Clean No special skill required for cleaning; qualified contractor for repairs
XXXXXXXXXXX XXXXXXXXXXX XXXXXXXXXXX XXXXXXXXXXX XXXXXXXXXXX
XXXXXXXXXXX XXXXXXXXXXX XXXXXXXXXXX XXXXXXXXXXX XXXXXXXXXXX
XXXXXXXXXXX XXXXXXXXXXX XXXXXXXXXXX XXXXXXXXXXX XXXXXXXXXXX
XXXXXXXXXXX XXXXXXXXXXX XXXXXXXXXXX XXXXXXXXXXX XXXXXXXXXXX
XXXXXXXXXXX XXXXXXXXXXX XXXXXXXXXXX XXXXXXXXXXX XXXXXXXXXXX
XXXXXXXXXXX XXXXXXXXXXX XXXXXXXXXXX XXXXXXXXXXX XXXXXXXXXXX
Wooden Decks
Inspect No special skill for inspections; handyman for repairs
XXXXXXXXXXX XXXXXXXXXXX XXXXXXXXXXX XXXXXXXXXXX XXXXXXXXXXX
XXXXXXXXXXX XXXXXXXXXXX XXXXXXXXXXX XXXXXXXXXXX XXXXXXXXXXX
XXXXXXXXXXX XXXXXXXXXXX XXXXXXXXXXX XXXXXXXXXXX XXXXXXXXXXX
XXXXXXXXXXX XXXXXXXXXXX XXXXXXXXXXX XXXXXXXXXXX XXXXXXXXXXX
XXXXXXXXXXX XXXXXXXXXXX XXXXXXXXXXX XXXXXXXXXXX XXXXXXXXXXX
XXXXXXXXXXX XXXXXXXXXXX XXXXXXXXXXX XXXXXXXXXXX XXXXXXXXXXX
Wooden Fences
Inspect No special skill required for inspections.
XXXXXXXXXXX XXXXXXXXXXX XXXXXXXXXXX XXXXXXXXXXX XXXXXXXXXXX
Date Initials XXXXXXXXXXX XXXXXXXXXXX XXXXXXXXXXX XXXXXXXXXXX XXXXXXXXXXX
XXXXXXXXXXX XXXXXXXXXXX XXXXXXXXXXX XXXXXXXXXXX XXXXXXXXXXX
XXXXXXXXXXX XXXXXXXXXXX XXXXXXXXXXX XXXXXXXXXXX XXXXXXXXXXX
XXXXXXXXXXX XXXXXXXXXXX XXXXXXXXXXX XXXXXXXXXXX XXXXXXXXXXX
Wooden Railings - Painted
Inspect No special skill required for inspections.
XXXXXXXXXXX XXXXXXXXXXX XXXXXXXXXXX XXXXXXXXXXX XXXXXXXXXXX
XXXXXXXXXXX XXXXXXXXXXX XXXXXXXXXXX XXXXXXXXXXX XXXXXXXXXXX
XXXXXXXXXXX XXXXXXXXXXX XXXXXXXXXXX XXXXXXXXXXX XXXXXXXXXXX
XXXXXXXXXXX XXXXXXXXXXX XXXXXXXXXXX XXXXXXXXXXX XXXXXXXXXXX
XXXXXXXXXXX XXXXXXXXXXX XXXXXXXXXXX XXXXXXXXXXX XXXXXXXXXXX
XXXXXXXXXXX XXXXXXXXXXX XXXXXXXXXXX XXXXXXXXXXX XXXXXXXXXXX
Wooden Trellis
9PM/Inspection Check List (Jul - Dec) - Page
Reserve Asset Management Program (RAMP)(c) 1994-2007 The Helsing Group, Inc.
All Rights Reserved

Preventive Maintenance and Inspection Check ListJuly through December
Inspector or ServicePreventiveComponent Name DecNovOctSepAugJulProvider SkillMaintenance Task
Kimberly Place Community Association
Inspect; Clean and Repair as Needed
Qualified Personnel for RepairsXXXXXXXXXXX XXXXXXXXXXX XXXXXXXXXXX XXXXXXXXXXX XXXXXXXXXXX
Date Initials XXXXXXXXXXX XXXXXXXXXXX XXXXXXXXXXX XXXXXXXXXXX XXXXXXXXXXX
XXXXXXXXXXX XXXXXXXXXXX XXXXXXXXXXX XXXXXXXXXXX XXXXXXXXXXX
XXXXXXXXXXX XXXXXXXXXXX XXXXXXXXXXX XXXXXXXXXXX XXXXXXXXXXX
XXXXXXXXXXX XXXXXXXXXXX XXXXXXXXXXX XXXXXXXXXXX XXXXXXXXXXX
Zinsco Circuit Breaker
Inspect and Service Licensed PersonnelDate Initials XXXXXXXXXXX
XXXXXXXXXXX XXXXXXXXXXX XXXXXXXXXXX XXXXXXXXXXX
XXXXXXXXXXX XXXXXXXXXXX XXXXXXXXXXX XXXXXXXXXXX XXXXXXXXXXX
XXXXXXXXXXX XXXXXXXXXXX XXXXXXXXXXX XXXXXXXXXXX XXXXXXXXXXX
XXXXXXXXXXX XXXXXXXXXXX XXXXXXXXXXX XXXXXXXXXXX XXXXXXXXXXX
XXXXXXXXXXX XXXXXXXXXXX XXXXXXXXXXX XXXXXXXXXXX XXXXXXXXXXX
Zurn Wilkins Backflow Preventer, 950XL & 975XL/U
Note: This report is intended to show the scheduling for preventive maintenance and inspections suggested for this association. The months shown should be considered guidelines. Adjustments in scheduling should be made taking weather conditions, availability of personnel, and other factors into account.
10PM/Inspection Check List (Jul - Dec) - Page
Reserve Asset Management Program (RAMP)(c) 1994-2007 The Helsing Group, Inc.
All Rights Reserved