co-creating welfare
TRANSCRIPT

0
Co-creating Welfare Training course material preparing professionals to co-create welfare solutions with citizens
Authors : The Co-Creating Welfare Project partners
Date : August 2019 Place : Europe (Denmark, United Kingdom, France and Portugal
Copyright: © 2019, Universidade do Minho. Instituto de Educação. Centro de Investigação em Estudos da Criança
Braga, Portugal, September 2019 ISBN 978-972-8952-61-7 (eBook)

1
The Co-Creating Welfare Project Partners are (in alphabetical order)
Dr. Zelia Anastacio
Dr. Sandie Bernard
Pr. Graça Carvalho
Frants Christensen
Dr. Emily Darlington
Henriette Hansen
Dr. Julien Masson
Paul Magee
Dr. Gemma Pearce
Dr. Teresa Vilaça
This work is licensed under the Creative Commons Attribution-NonCommercial-ShareAlike 4.0
International License.
To view a copy of this license, visit http://creativecommons.org/licenses/by-nc-sa/4.0/.
Attribution — You must give appropriate credit, provide a link to the license, and indicate if changes
were made. You may do so in any reasonable manner, but not in any way that suggests the licensor
endorses you or your use.
NonCommercial — You may not use the material for commercial purposes.
ShareAlike — If you remix, transform, or build upon the material, you must distribute your
contributions under the same license as the original.

2
Table of Content
Introduction to the Co-Creating Welfare Training Course.............................................................................. 7
1. Introduction ............................................................................................................................................. 8
1.1 Learning objectives and trainer competences ............................................................................... 9
1.2 Teaching theories ........................................................................................................................... 9
1.3 Design of the training modules .................................................................................................... 11
Introducing the training to the participants ................................................................................................. 13
2. Preparing the Course ............................................................................................................................. 14
2.1 Preparing the Participants ............................................................................................................ 14
Video presentation ................................................................................................................................... 14
Purpose ................................................................................................................................................ 14
Content ................................................................................................................................................ 14
Duration ............................................................................................................................................... 14
Welcoming letter (or e-mail) .................................................................................................................... 15
Programmes ............................................................................................................................................. 15
Content ................................................................................................................................................ 15
List of participants .................................................................................................................................... 15
The Charter ............................................................................................................................................... 15
2.1 Worksheet to prepare the participants ....................................................................................... 15
The Individual Charter ......................................................................................................................... 16
Preparation Form ................................................................................................................................. 17
Training Theme 1: Creating a common understanding of co-creation ........................................................ 19
3. Learning objective and trainer competences for training theme 1 ....................................................... 20
3.1 Preparation and follow up for training theme 1 .......................................................................... 20
Preparation needed before the first training day:............................................................................... 20
List of materials needed for trainers: .................................................................................................. 21
What should trainers ask attendees to do before coming to day 1? .................................................. 21
On the training day, trainers will need to: ........................................................................................... 22
After the training day, trainers will need to: ....................................................................................... 22

3
3.2 Proposal for timetable for training theme 1 ................................................................................ 22
3.3 Worksheets for proposed activities ..................................................................................................... 6
Cue Card Worksheet .............................................................................................................................. 7
Activity introduction .............................................................................................................................. 7
Preparation for the activity.................................................................................................................... 7
The activity ............................................................................................................................................. 7
CUbe Activity Worksheet ....................................................................................................................... 8
Purpose .................................................................................................................................................. 8
Time ....................................................................................................................................................... 8
Process ................................................................................................................................................... 8
Morning Session question to be discussed via the Cube: ...................................................................... 9
Afternoon Session question to be discussed via the Cube: ................................................................... 9
Remarks: ................................................................................................................................................ 9
Ladder Activity Handout ...................................................................................................................... 10
Photograph Activity Worksheet........................................................................................................... 11
Bridging Activity ................................................................................................................................... 12
Training Theme 2: Initiating the co-creation process through collaborative problem formulation............. 15
4. Learning objectives and trainer competences for training theme 2 ........................................................ 16
4.1 Preparation and follow up for training theme 2 .......................................................................... 16
Preparation needed before the second training day: ......................................................................... 16
List of materials needed for trainers: .................................................................................................. 17
What should trainers ask attendees to do before coming to day 2? .................................................. 17
On the training day, trainers will need to: ........................................................................................... 17
After the training day, trainers will need to: ....................................................................................... 18
4.2. Proposal for timetable for training theme 2 ................................................................................ 18
4.3. Worksheets for proposed activities ............................................................................................. 21
Collaborative Problem Formulation and the Roles of Facilitators worksheet ..................................... 22
Objectives ............................................................................................................................................ 22
Duration ............................................................................................................................................... 22
Material ............................................................................................................................................... 22
Process ................................................................................................................................................. 22
Collaborative Problem Formulation and the Roles of Facilitators handout ........................................ 23

4
From Expert To Facilitator ................................................................................................................... 23
Open Dialogue worksheet ................................................................................................................... 26
Objectives ............................................................................................................................................ 26
Duration ............................................................................................................................................... 26
Material ............................................................................................................................................... 26
Process ................................................................................................................................................. 26
Open Dialogue Handout ...................................................................................................................... 27
Fishbowl worksheet (version 1) ........................................................................................................... 28
Objectives ............................................................................................................................................ 28
Duration ............................................................................................................................................... 28
Material ............................................................................................................................................... 28
Process ................................................................................................................................................. 28
Fishbowl worksheet for facilitator (version 2) ..................................................................................... 28
Process ................................................................................................................................................. 29
Alternative ways of delivering this fish bowl technique: ..................................................................... 31
Jigsaw worksheet - Required Skills To Promote Open Dialogue .......................................................... 32
Objectives ............................................................................................................................................ 32
Duration ............................................................................................................................................... 32
Process ................................................................................................................................................. 32
Jigsaw Teamwork Handout ............................................................................................................... 33
Part I – Forum Theatre ......................................................................................................................... 33
Part II – Role-play ................................................................................................................................. 33
Part III – Required Skills To Promote Open Dialogue........................................................................... 34
The Forum Theatre Worksheet ......................................................................................................... 37
Role-Play Worksheet on Process Management and Co-Creation Tools .............................................. 38
Objectives ............................................................................................................................................ 38
Duration ............................................................................................................................................... 38
Process ................................................................................................................................................. 38
Observation and discussion ................................................................................................................. 42
Poster Activity Worksheet (Alternative activity instead of Role Play) ................................................. 45
Process: ................................................................................................................................................ 45
Bridging Activity ................................................................................................................................... 46

5
Training Theme 3: Managing the co-creation process ................................................................................. 49
5.1 Learning objective and trainer competences for training theme 3 ............................................. 50
5.2 Preparation and follow up for training theme 3 .......................................................................... 50
Preparation needed before the third training day: ............................................................................. 50
List of materials needed for trainers: .................................................................................................. 51
What should trainers ask attendees to do before coming to day 3? .................................................. 51
On the training day, trainers will need to: ........................................................................................... 51
After the training day, trainers will need to: ....................................................................................... 52
5.3 Proposal for timetable for training theme 3 ................................................................................ 52
5.4 Worksheets for proposed activities ............................................................................................. 56
Q-Sort activity worksheet .................................................................................................................... 57
OBJECTIVES .......................................................................................................................................... 57
Q-Sort presentation guidelines: ideas to introduce in your presentation ........................................... 61
Sticky Notes activity worksheet ........................................................................................................... 62
OBJECTIVES .......................................................................................................................................... 62
Mediation competences worksheet .................................................................................................... 64
LEGO ACTIVITY worksheet @Agnes_Crepet ........................................................................................ 65
STEP 1: Promoting empathy, and defining needs – 20 Minutes in total ............................................. 65
PERSONA WORKSHEET ........................................................................................................................ 66
STEP 2: PROTOTYPING – 20 minutes ................................................................................................... 67
STEP 3: ITERATION PROCESS – 15 minutes .......................................................................................... 67
STEP 4: PROTOTYPING – 15 minutes ................................................................................................... 67
STEP 5: ITERATION PROCESS – 15 minutes .......................................................................................... 67
STEP 6: PROTOTYPING – 15 minutes ................................................................................................... 67
Try out an activity worksheet .............................................................................................................. 68
Bridging Activity ................................................................................................................................... 69
Training Theme 4: Dissemination and Communication of the co-creation process and its results ............. 72
6.1 Learning objectives and trainer competences for training theme 4 ...................................................... 73
6.1 Preparation for training theme 4 ................................................................................................. 74
Preparation needed before the first training day:............................................................................... 74
List of materials needed for trainers: .................................................................................................. 74
What should trainers ask attendees to do before coming to day 4? .................................................. 75

6
On the training day, trainers will need to: ........................................................................................... 75
After the training day, trainers will need to: ....................................................................................... 75
6.2 Proposal for timetable for training theme 4 ................................................................................ 76
6.3 Worksheets for proposed activities ............................................................................................. 79
Story Cubes Worksheet ....................................................................................................................... 80
Goals of the activity: ............................................................................................................................ 80
How to do the activity: ........................................................................................................................ 80
Pecha Kucha Worksheet ...................................................................................................................... 81
Reflection Activity ................................................................................................................................ 83
- Annexes .................................................................................................................................................. 85
- Cube Template ................................................................................................................................. 85
- Inspirational slides for an introductory presentation about co-creation ........................................ 85

7
Introduction to the Co-Creating Welfare Training Course
8
1. Introduction The Co-creation Welfare training course has been developed within the European ERASMUS+ Project called
“Co-creating Welfare”.
The motivation for the development of the training course is a broadly political acknowledged need for re-
organisation within the welfare sector in order to obtain a more sustainable and cost effectiveness sector.
Organisations that offer welfare services to citizens are often struggling with budget cut-downs, mainly due
to consequences of the hardly ended worldwide financial crisis, which has pushed forward the need for
looking at new ways of organizing the European welfare offers.
As a response to the need for re-organisation, co-creation has started to become an acknowledged concept
to create a more sustainable set-up and organisation of the welfare sector. Co-creation is a new way of
thinking about public services which has the potential to deliver a major shift in the way we provide health,
education, policing and other services, in ways that make them much more effective, more efficient, and
so more sustainable, but professional practitioners need skills and knowledge to work with co-creation.
The CCW training course material will provide these skills and knowledge.
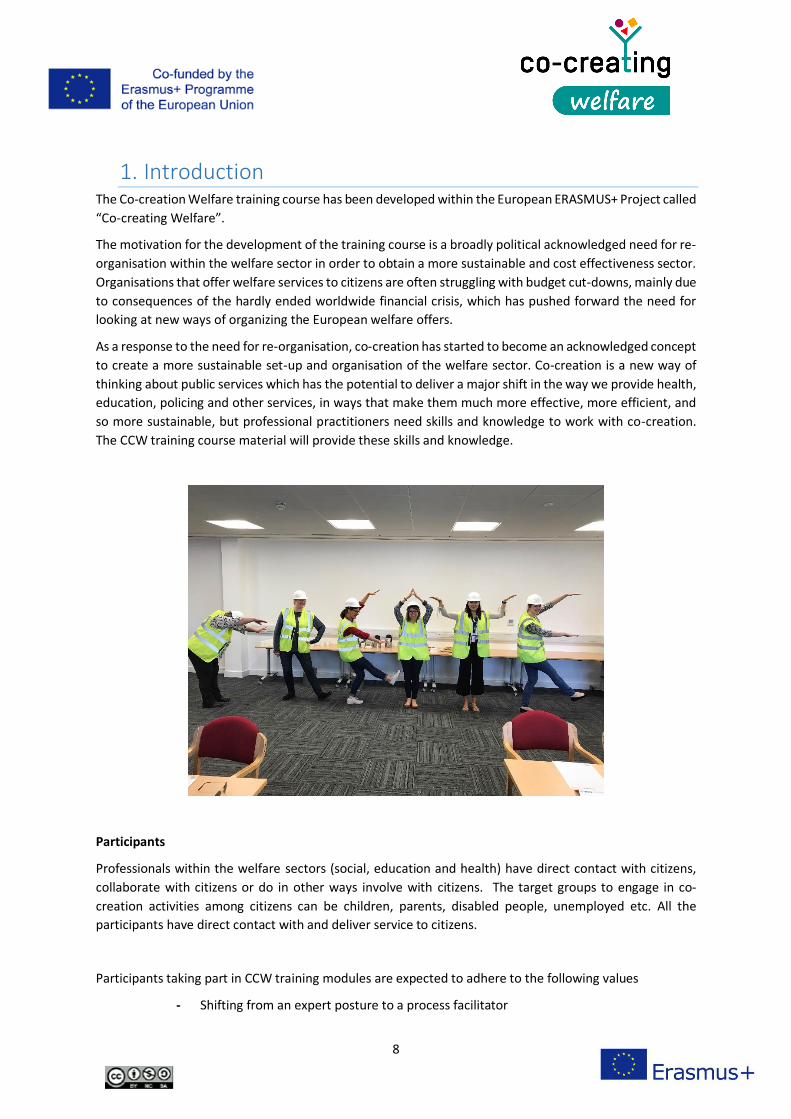
Participants
Professionals within the welfare sectors (social, education and health) have direct contact with citizens,
collaborate with citizens or do in other ways involve with citizens. The target groups to engage in co-
creation activities among citizens can be children, parents, disabled people, unemployed etc. All the
participants have direct contact with and deliver service to citizens.
Participants taking part in CCW training modules are expected to adhere to the following values
- Shifting from an expert posture to a process facilitator

9
- Being humble, curious
- Welcoming “out-of-the-box-thinking”
1.1 Learning objectives and trainer competences The overall learning objective of the CCW training course is to make professional practitioners within the
health and social welfare sector, capable of creating, implementing and evaluating co-creating processes
with the citizens benefitting from the welfare services of their organization.
In order to obtain these specific learning objectives, it is important that the trainers have the following
general competences
- Knowledge of theory underpinning co-creation.
- Experience of carrying out co-creation in the welfare sector.
- Capacity to work with the training group using co-creation methods and practice (e.g., encouraging
ideas and debate, active listening, facilitation without imparting own opinions, development of
creativity to bring together shared conclusions across a group).
- Experience of carrying out training, including group facilitation and organization.
For each specific training theme, specific competences for the trainer are mentioned within the material.
1.2 Teaching theories The course is rooted in the social constructionism/social constructivism. It allows participants in
collaboration with facilitators to discover and explore different perspectives and perceptions of practice.
And to identify the strength in working actively with these perspectives and perceptions in developing
welfare solutions in collaboration with citizens and local stakeholders.
Several tools and methods are applied during the course in order to bring this approach into a practice and
present use: narratives through cases from participants’ own practice, the teaching in communication with
the use of participatory tools for sharing stories, the Cube as a way of identifying perspectives etc.
A case is a form of narrative. The narrative method is a fixed point in the methodology and is used to
document and develop practice reflectively and subjectively. From the point of view of social
constructivism, narrative documentation aims to capture the levels of meaning in the narrator's social
construction of reality. The reason for working with a practical case is to promote reflection and assure
relevant and practise oriented learning. When working with activities such as cases, the narratives
constitute the training in the possibilities of the language and communication. Within the understanding
of constructionism, language is considered the most important and active tool. For this reason, the course
includes training in communication through exercises and dialogue.

10
The close relation to and integration of participants’ own practise is further supported by applying the
principles of action learning. Participants are given methods and tools they can work with in their own
practice or when carrying out suggested tasks between modules. In this way there is a close link between
the learning processes set in motion when participants are attending the course and the processes initiated
by the participants themselves in their collaboration with and delivering of services to citizens. Learning is
hereby applied as contextual: it takes place in a concrete social setting, of which practical implementation
is an important element. Throughout the course, exercises and implementation take place not only in the
teaching space.
The relational aspect of learning, whether organizational or individual, is considered important when co-
creating processes are successful. The SECI model by to Nonaka and Takeuchi is often referred to in theories
of organizational learning. The aspects in the model are integrated in the course material for the purpose
of generating more sustainable and collaborative changes moving from an individual aspect of and
responsibility of learning to a focus on social learning. The co-creating approach hereby offering a
significant way of participants to appreciative communication and learning.
The co-creating Welfare training course is highly including the learning theory by Bateson who distinguishes
between four levels of learning that allow us to establish new understandings in the process of obtaining
knowledge and developing new practices.
The four levels of learning:
Applying Bateson’s learning theory allows us to look at the professionals’ challenges in a different way.
Bateson argues that exceeding established understandings and conceptions can be existentially dangerous.
• learning something within a specific professional framework. Level 1: to
learn
• Practice learning that develops through concrete learning situations –the ability to be flexible in structuring of practical processes in different situations. Denoted as practical narrative competence.
Level 2: learning to
learn
•The third level is challenging. This level signifies the process of going beyond one’s conceptions and main narratives. As a professional this can result in the experience of putting one’s professional identity on the line. The narratives add up and new narratives occur.
Level 3: Learning to
challenge own behaviour
•Collaborators develop their new co-created realities and new knowledge and solutions occur. The setting must establish a learning environment with specific temporal and spacial structures and concepts to make the shared narratives occur. (Supported by innovative processes). Emergence characterizes this level as new practices develop active interaction. (Expansive learning)
Level 4: Learning to
create change

11
Following this line of thought, it is essential to consider whether citizens share the same experience in
exceeding their understandings and conceptions.
In this learning theory narratives are essential in order to establish coherence.
1.3 Design of the training modules The CCW training course material is constructed with four overall training themes, which will take the
attendee through the entire process of initiating, facilitating and evaluating an entire co-creating
process. The four training themes and modules will be linked together through concrete actions and
bridging activities between the course days, where the learning subjects will be applied in practice
within the attendees’ organisations, and brought back within the following training day, to be
discussed among the attendees.
The four training themes / course days are the following; 1) Creating a common understanding of co-
creation, 2) Initiating the co-creation process through collaborative problem formulation and evaluation,
3) Managing the co-creation process and 4) Dissemination and communication of the co-creation process
and it’s results. It is important that the attendees participate in all four training modules as they are linked
together and provide the attendees with a complete understanding of - and skills to carry out - the entire
co-creation process.
After each training course day, a “bridging activity” will be introduced to the attendees, with the objective
for them to apply and make their own experiences with the training in the concrete, local context. By using
the principles from action learning, the idea is that the attendees will bring back what they have learned
and work together with their colleagues and users of the organisation’s services. Before returning to the
following training course day, the trainer will ask the attendees to consider 4 – 5 questions, which will be
discussed in the group, in order to create common learning among the attendees.

12
For each training course day, an evaluation activity is included. This activity is important to provide the
trainer with an insight of the attendees’ expectations and outcome of the training. For each training course
day, an agenda is proposed within the training course material, but the evaluation activity can be used to
adjust the activities of the training course if e.g. the attendees ask for more time to discuss and do group
work.
The following overall evaluation questions are relevant for each training course day
1) How did you experience the prior information about the Co-creating Welfare
training day?
2) What were your best experiences today?
3) When did you learn most today?
4) How did the level of the presentations suit you?
5) How was the link between the presentations and group work?
6) How did you experience the group work (content and communication)
7) How was the link between module’s theme and the presentations and group work?
8) Do you feel ready to use what you have learned today in your everyday work?
Please explain your answer
9) How did you experience the practical organization of the training course day?
10) What would you like to do/have more of?
11) What would you like to do/have less of?
12) Do you have any other comments?

13
Introducing the training to the participants

14
2. Preparing the Course Participants come from a wide range of welfare organizations and welfare areas and have a highly
differentiated professional background and the training is planned and carried out differentially (variations
in numbers of participants, range of organizations and length of the days etc.). Therefore, the way of
introducing the training for participants will vary locally.
Each module comprises guidelines of how to prepare the training. In addition to these preparatory tasks,
a few tools can support a coherent course and facilitate a mutual balancing of expectations.
2.1 Preparing the Participants
Video presentation In line with the narrative approach and a short video presentation of each course day, the trainers and the
concept of the whole training (for day one) can help participants to be prepared and feel confident. The
videos can be up-loaded and available e.g. at Youtube. A link for the videos can be send to the participants
a week before each course day.
Also the video can be used as part of the overall dissemination (locally and nationally).
You can simply use your camera in a Smartphone or if available to you a video camera.
Purpose a) To outline the purpose of today’s training (and for the first video: a brief view of how the training will
support developing co-creating skills and competences)
b) Making participants feel comfortable with the course
c) Initiating the creation of relations (by introducing and telling who we are and why we are here as
teachers/facilitators; what we “bring to the table”)
d) Dissemination – the videos can be part of newsletters, be presented at subsites in our organizations,
used as part of the train-the-trainer material etc.
Content a) Short introduction of today’s theme (illustrating in what way the theme, the exercises and the
theoretical presentations will be helpful to develop co-creating skills and competences. In other words:
why is it important)
b) Who will the teachers/facilitators be (name and professional background)
c) What are they in particular looking forward to (in this way exemplifying what to expect from the
facilitators)
d) What to do between the one course day and the next
Duration 2½-3 minutes

15
Welcoming letter (or e-mail) A welcoming letter or e-mail should be sent to the participants. The welcoming letter is a personal greeting
from you and signals the style of communication you will carry out during the course.
In the letter or e-mail you can enclose the link to the video. We suggest the welcoming letter being as short
as possible. The letter or e-mail shall be sent to participants no later than a week before course start.
Programmes By sending a program to the participants they will have a short, written introduction with the most
important information of what the single course days are about. The programs for participants can be used
in order to frame the course. And as a simple reminder of the course, where to go, and when.
Content a) Practical information: the address of the training, parking, public transportation etc.
b) Names of teachers/facilitators and contact information in case of sending apologies
c) Information of meals etc. (is it included e.g.)
d) In short, the themes of the day providing an overview with intended hours including the breaks
for coffee and lunch
List of participants Before the first course day also a list of participants can be provided with names, organization, function,
and municipality. If agreed upon also e-mails. The list gives participants a concrete overview of who they
will meet at the course. The list is of course most relevant and valuable if the course days are arranged with
participation form different organizations.
The Charter The Charter is a learning map for the participants to be developed and used throughout the course (please
see separate file with graphic illustration and further description). It is a personal tool for developing a
toolbox and a frame for exemplifying the progress in learning.
It can be sent by e-mail to the participants before the course in order to make them aware of the personal
learning potential of the course. By introducing the Charter beforehand, you initiate the learning process
as well.
2.1 Worksheet to prepare the participants

16
The Individual Charter
Note: The word Charter means a treaty that contains a statement of something that you want to
accomplish. This charter is an individual charter. In this you write down the questions, intentions and
considerations you have in order to develop and implement co-creation in your workplace and daily
practice.
During these course days you will be presented to concepts, theories, methods and each other's
experiences and considerations etc. The elements that you collect during this course will help you develop
and implement co-creation in your own practice. You can use the charter to keep track of your learnings
and how you want to apply it into your daily work.
The Charter has three parts.
1. Reflection
You regularly record what is interesting for your practice, e.g.:
• Topics and issues that you recognize from your own practice.
• Subjects and focus areas that can inspire and motivate new initiatives in your practice.
• Follow-up questions for discussions during the course or at your workplace.
2. Between course days
You follow up on the work you have done during the course.
Focus on the narrative: What is the good story since last?
3. Implementation
You must describe:
• As accurately as possible, the considerations you have for implementing your new
knowledge for developing collaborative and co-creative processes (e.g. with whom can you
share the good stories and how? Who do you engage with when planning “next step”?)
• A concrete description of the actions, perspectives, and ideas that you will take with you
- perhaps in cooperation with your colleagues from the course

17
Preparation Form
To prepare for the course, please fill out this form. The form will help clarifying your expectations and
experience in working with co-creation. The form should help you qualify your own role in the teaching
and your role as professional in working with citizens and other actors in co-creating processes.
Questions
Please write your answers below
If you need more space, please use
the back
Which experiences do you have in working
with co-creation? Please specify the areas you
have the experience (the context) and the results
if possible. Who were involved, e.g. citizens
being children, parents or elderly, or an
organization
Which of these experiences will you
particularly bring to this course?
What are you particularly looking forward
to in the CCW course?
Is there anything in particular you are
looking forward to in working with co-
creation in your practice?

18
Is there anything in particular you are
worried about in with co-creation in your
practice?
How do you imagine that working (more)
with co-creation in your practice can
qualify or enrich your professional work?

19
Training Theme 1: Creating a common understanding of co-creation

20
3. Learning objective and trainer competences for training theme 1
The learning objectives for training theme 1 is to create a common understanding of co-creation and
furthermore theme 1 is aiming to achieve a shift in the training groups thinking using co-creation.
Conclusive the participants should be able to:
- Describe their understanding of co-creation;
- State reasons for using co-creation;
- Describe barriers and facilitators to co-creation;
- Apply co-creation to a range of relevant contexts;
- Provide examples of different methods of applying co-creation and where they might be useful.
The following competences will be useful for the trainer to have:
- Knowledge of theory underpinning co-creation.
- Experience of carrying out co-creation in the welfare sector.
- Capacity to work with the training group using co-creation methods and practice (e.g., encouraging
ideas and debate, active listening, facilitation without imparting own opinions, development of
creativity to bring together shared conclusions across a group).
- Experience of carrying out training, including group facilitation and organization.
3.1 Preparation and follow up for training theme 1 Within this section an overview is given of how the trainer should prepare the first training day, both in
relation to practical issues but especially how to prepare the attendees for the training.
Preparation needed before the first training day: - Organize venue and any catering/refreshments (check if anyone has any special requirements,
e.g., catering, access.)
- Finalize the format of the day (choose which options you wish to use), presentation slides (see
guidance) and materials for the day (including post-it notes for the word cloud and colour
pencils/pens for creative activities).
- Create a film to send out to attendees prior to the training day (optional – see course introduction).
- Send out programme, map, link to project website (for access to training information and tools),
pre-reading materials (and film if you have created one).

21
- If you are using the cue card activity in training day 1, then also complete the pre-training activity
for it (see worksheet).
- CUbes need to be created (one per group) before training day 1 (see worksheet and template).
Use an A2 sheet of card or similar material.
List of materials needed for trainers: - Course introduction
- Presentation guidance
- Cue card activity worksheet
- Photograph activity worksheet
- CUbe activity worksheet
- CUbe template
- Ladder activity worksheet
- Poster activity worksheet
- Case study worksheet and template
- Feedback survey form
What should trainers ask attendees to do before coming to day 1? To send back to trainers before day 1 (for cue card activity):
- Write down how you would describe co-creation (these answers should be sent back to the
trainers in advance of day 1 so that they have time to make the cue cards).

22
- Trainees do not need to spend very long doing this and it does not need to be perfect – just ask
them to write down a brief idea without thinking about it for too long – just something to do
quickly in 5 minutes.
For trainees to have a think about before coming on the course (e.g., 10 minutes):
- Consider how you and your organization currently involve people in decision making, change and
service development (take into consideration that people on the course may or may not know
what ‘co-creation’ means at this stage so it can be useful to suggest examples of ‘currently
involving people’ or collaborating with people’ here and at the beginning of the first training day.
- Come along to the course with an example from your practice that you would like to develop
through using co-creation.
On the training day, trainers will need to: - Facilitate introduction and rapport building among participants.
- Facilitate discussion and collaborative problem-solving.
- Present information and provide materials for activities.
- Facilitators can write on a white board or similar throughout the day to help summarize and show
development of attendees understanding of co-creation. This will support the facilitator to reflect
with attendees on their learning.
- Summarize the day and how this will lead into the next training day.
- Set activities to do between training day 1 and 2.
- Hand out and collect feedback forms.
After the training day, trainers will need to: - Share presentation slides.
- Send round any materials/information of interest that arose during the training course (e.g., based
on a conversation, a question might be asked and people want further reading on a topic, and this
can be sent round afterwards as a follow up from the day).
- Share artefacts created in day one – e.g., scan them in and email them round to the group.
- Send round information for next session and timetable for when any activities should be
completed/submitted prior to training day 2.
3.2 Proposal for timetable for training theme 1

Time Activity Notes to trainer
9.00-9.15 Registration, drinks and informal chat
Word cloud
This gives people a chance to informally
socialise and familiarise themselves with the
setting.
Give each attendee 3 post it notes each
when they arrive and ask them to write a
word on each one to express how they
initially feel about co-creation. Ask them to
put all their post it notes up on the wall.
Leave them there for people to see and then
take a photo of them and collect them up in
the break (these can then be recorded and a
word cloud made from the words). This will
then form a word cloud that you can send
round to attendees after day 1. An idea is to
repeat this activity again on training day 4
and then you can compare, if the trainees
perception of co-creation has changed.
Word clouds can be created for free using
websites such as www.wordclouds.com or
http://www.wordle.net/
9.15-9.30 Introduction to everyone
Share who you are and share either a) or b):
a) the current use of co-creation within
your organisation;
b) an example of what you consider to be
good co-creation practice.
How this is achieved is optional. It is aimed
as an ice breaker and introduction to
everyone on the course. We suggest this is
done with the whole room of attendees
sharing with everyone in the room. If you
want to, you can provide the option that
attendees can tell everyone something
about themselves that’s not about work,
e.g., what they are doing at the weekend or
a hobby.
This can help the trainer to gauge who the
more and less reserved members of the
group are to aid their facilitation.
9.30-10 Cue cards activity
See worksheet

1
This is an ice breaker activity to be carried
out in groups, to encourage attendees to
think about what co-creation means to
them.
This continues the sense of sharing ideas and
stops people keeping them to themselves or
worrying about improving the idea before
sharing it.
An alternative option here is to use the
photograph activity if you are not using this
alongside the CUbe activity (revise question
2 in case study template to reflect this
change).
10.-10.15 Case study example See template
Ask trainees to write in their case study
templates
a) What example they are working
on/thinking through today from
their practice?
b) What their preferred description is
on co-creation from the cue cards
activity.
10.15-
10.45
Co-creation ladder activity
See worksheet
Ask trainees to write in their case study
templates
c) Where does your case study
example sit on the ladder? How can
you improve this?

2
10.45-11 Break / drinks You may want to order the refreshment to
arrive towards the end of the previous
activity so that they are ready.
11-11.30 CUbe activity and photograph activity 1
See worksheets (and CUbe template to the
CUbes and power point presentation to
support facilitators with timings)
For training sessions with 8 or more
attendees, you can run both activities at the
same time. Split the room in half so half are
doing the CUbe activity (30 minutes) and the
other half are doing the photograph activity
(they will swap around and try the other
activity in the afternoon session).
If you have fewer than 8 attendees in the
training day, only run the CUbe activity (and
you have the option of doing the photograph
activity instead of the cue card activity if you
would prefer).
This CUbe activity focuses on reasons to use
co-creation.
The photograph activity focuses on finding
pictures that trainees think represent co-
creation.
11.30-12 Feedback from photographs
(10 mins)
Feedback from CUbe
(10 mins)
Show the group the photographs that
people took and ask them to explain why
they took it and how it represents co-
creation to them.
Ask the people who took part in the CUbe to
summarise to the other half of the trainees
what they think the incentives are to using
co-creation – and ask if anyone who didn’t

3
Write in case study example
(10 mins)
take part in the CUbe has anything else to
add.
Ask trainees to write in their case study
templates
d) What are the specific reasons to use
co-creation in relation to your case
study example?
12-12.30 Presentation from trainers introducing co-
creation
See presentation guidance
Link this in with the morning’s group
activities.
12.30-1.15 Lunch
1.15-1.30 Walk and talk Short walk round the block.
Ask trainees to discuss with each how what
they have learnt this morning fits into their
case study examples.
1.30-2 CUbe activity and photograph activity 2
See worksheets (and CUbe template to the
CUbes and power point presentation to
support facilitators with timings)
Same format as the morning version of this
activity, but the groups will swap around so
that those that did not do the CUbe will have
a go at the photograph activity and vice
versa.
This CUbe activity focuses on barriers to
using co-creation.
The photograph activity focuses on finding
pictures that trainees think represent

4
barriers and incentives to using co-creation
in their workplace.
2-2.30 Feedback from photographs
(10 mins)
Feedback from CUbe (10 mins)
Write in case study example
(10 mins)
Show the group the photographs that
people took and ask them to explain why
they took it and how it represents co-
creation to them.
Ask the people who took part in the CUbe to
summarise to the other half of the trainees
what they think the barriers are to using co-
creation within their organisation – and ask
if anyone who didn’t take part in the CUbe
has anything else to add.
Ask trainees to write in their case study
templates
e) What are the specific barriers to
using co-creation in relation to your
case study example?
2.30-3 Presentation by trainers See presentation guidance
Use examples from your own experience.
3-3.20 Working as partners to develop your case
studies
Work in pairs
Ask trainees to pitch their co-creation ideas
from their case study example to a partner
and then allow the partner to ask question,
give feedback and ideas for further
development. Then they swap over. (5
minutes a pitch and 5 minutes for feedback
each)
Trainees can make note of in the case study
template:
f) Any further ideas from pitching your
case study to your partner?

5
3.20-3.40 Reflection
Share thoughts on:
a) key learning you have got from
today.
b) how you think this might help you
to explore future scenarios and
generate new opportunities.
c) Any activities you did or did not like
and what kinds of activities you
could use in your co-creation.
Complete evaluation and feedback by using
the list of questions from page 12.
Everyone together.
Trainers to summarise methods used and
review the artefacts created over the day.
Place emphasis on the fact that the methods
used encourage co-creation.
Hand out feedback surveys and ask
attendees to complete these now and hand
them to you before they leave.
3.40-3.55 Activity to do between training day 1 and
day 2
1. Choose one of the co-creation
activities that you have used today
that you will try using in your
organisation.
2. Come up with a plan about how
you will do this and who you will do
it with.
Ask trainees to write in their case study
templates:
g) What co-creation activity will you
try using in your organisation? How
you will do this and who you will do
it with?
The aim of this is for attendees to go away
and try a co-creation activity themselves in
their own welfare settings. They will then
feedback at the beginning of training day 2
how it went, what problems they had and
then work together to think about how
these could be overcome.
As an option, you can ask participants to
write down their plans to that you can email
them or post their plans to them in between
day 1 and day 2 to prompt them to carry out
this activity before coming back to day 2
training.

6
3.55-4 Close
- Summary of what will happen in
next session and anything that
needs to be done before it.
- Hand completed feedback forms
to trainer.
Collect up all feedback forms (if completed
as paper copies).
3.3 Worksheets for proposed activities

7
Cue Card Worksheet
Activity introduction The aim of this activity is to act as an ice breaker and to introduce the topic. The cue cards themselves act
as prompts for discussion. This is a useful co-creation activity because it allows trainees to put together
what their ideas of co-creation are, and then combine them together to discuss and develop. For the
purpose of day 1 this activity allows people to explore where there are similarities and differences of
opinion and why this might be (e.g., different experiences and contexts). This is a useful activity to do
before the trainer introduces their presentation on co-creation, as the aim is for the trainees to develop
and discuss their own ideas first in the spirit of co-creation itself.
Preparation for the activity - Ask people who will be attending the training course (e.g., by email) to answer the following
question with one sentence: “What is co-creation to you?” (The question asked can be changed if
a different one is more relevant to the training group’s needs).
- Ask to receive replies to this question in advance of the training course so that they can be turned
into cue cards for the first training day.
- To make cue cards, create documents with the sentences written on them in a fairly large/bold
print (these can be done in word and then printed off). It is preferable if the cards are anonymous
and they can be printed on different colour paper but not necessary. Each sentence can then be
cut out (and laminated as an additional option for a nicer finish).
- We suggest that you also ask the trainers to have a go at this as well or get a few definitions from
the literature and add these descriptions into the mix (it is useful if each group at the training
course has a ‘good’ explanation of co-creation to discuss).
An alternative option is that you can ask people at the time of the training activity (instead of beforehand)
to write down their answers on a bit of paper and then these can be discussed within that group or mixed
up and handed out to different groups to discuss.
The activity Split the room up into groups and share the cue cards out among the groups (sitting round a table with cue
cards spread out on the tables). Ask the groups to have a look at the cue cards and think about the following
questions:
- Discuss what each member of the group thinks of these statements about co-creation and how it
relates to their own ideas of co-creation. .
- Were your opinions different or similar?
- What might be the reasons for this (e.g., ideas of co-creation might be different/ similar in different
welfare fields/contexts)?
- As an extra option, attendees can also be asked to discuss which definitions are the best and
why, and to rank the cards from favourite to least favourite.

8
CUbe Activity Worksheet
Purpose • The Coventry University Cube (CUbe) is an easily handled box (no more than 30cm3), passed around a
group.
• The CUbe is a tool to capture ideas from everyone in an idea generation session even those who might
not normally be able to project their thoughts.
• The surface of the CUbe is intended for writing and sketching.
• Every participant has the opportunity to write/draw on the CUbe surface. As the CUbe is passed
around, fast ideas can be generated through upbeat discussion and then these can be written down as
they are generated in order to keep a record on the cube. Connections can be made from one idea
written on the CUbe to another idea regardless of which side of the CUbe they exist upon (e.g. people
can draw arrows between two written notes on the CUbe).
• Once the artefact is opened out flat, it can be scanned to produce a graphic that can be easily emailed
to people who took part in the activity.
• It is preferable if this activity is carried out in a different environment to what participants are used to,
for example: If participants usually sit down round a table to discuss things, then we recommend they
stand up to make it a driven, active experience.
• You may want to choose a different part of the room to stand or leave the room and find a different
space (e.g., in a less formal room or outside).
Time • 30 minutes is the maximum recommended time for the CUbe activity. The session intends to be a
short, punchy experience to encourage rapid, out loud idea generation rather than dwelling on
thoughts.
• A short explanation of the question to explore should be proposed to the group before the activity
starts (maximum 2 minutes).
Process Split the larger group into smaller teams. Teams of 6 are preferable but this can be done with teams of 4
to 8 people if needed. Be aware that teams of 4 people require more facilitation to ensure an even spread
of involvement during the session. More than 8 requires more control from facilitators and may not yield
an even spread of contribution across the participating team within the allotted 30 minutes.
How to facilitate the CUbe:
• Before starting the activity, explain that the session will take 30 minutes. After this time the CUbe will
be removed from the team by the facilitator.
• Introduce the question (maximum 2 minutes)
• Provide 1 CUbe per team. Provide a pen (team may also use their own if preferred)
• Start the provided CUbe Power Point presentation. This example presentation has pre-set timing
intervals that will indicate time elapsed. An audio file may be recorded by the trainer on each slide to
announce the timing interval, otherwise there is a graphic indication. The trainer may wish to adjust
the timing interval to indicate time remaining instead of time elapsed. Some trainers may wish to

9
facilitate without the additional support of the presentation. In this case, the trainer will need to
announce timing intervals to the group.
• Begin the 30-minute session.
• Let the team know when they have 10 minutes, 5 minutes and 2 minutes left.
• At 30 minutes announce that the session is complete. Remove the CUbe from the team.
• End the Powerpoint presentation.
• Open the CUbe up from the 3D cube shape to its 2D cross shape. Scan or take photo to share with
team.
• Ask the participants if they would like to share this co-created image on the CCW website. This is not
obligatory.
Morning Session question to be discussed via the Cube: What are the incentives and benefits of using co-creation in an organisation?
Or
Why would you use co-creation in your workplace?
Afternoon Session question to be discussed via the Cube: Collaborative problem formulation - What are the problems and barriers to using co-creation in an
organisation?
Remarks: Often a Cube process will run through the following phases:
1
•10 min.
•Confusing phase
2
•10 Min. Collaboration phase
3
•10 Min. Realization phase

10
Ladder Activity Handout
1. Using your case study example, where do you currently fit on the ladder with regards to involving
stakeholders?
2. Discuss in groups and try to problem-solve together:
- What do you think each level means?
- Does this fit with where you thought you were?
- Where would you like to be and why would this be helpful?
- How do you think you might get there?
Write your reflections in your case study example handout.

11
Photograph Activity Worksheet
- Split the people taking part in this activity into groups.
- Ask the groups to go out of the training room and have a look around the building and outside to
find a picture that they think as a group best represents co-creation (if you are repeating this task
again in the afternoon, a second question can be provided to ask attendees to take pictures of
what they think represents barriers and incentives to using co-creation in their workplace).
- Once they have their picture they can email it back to the trainer, and they can upload them on to
a powerpoint.
- At the end of the session, the trainer shows the different pictures that were taken and each group
explains to the room why they took their photos.
- Give participants the option to include their photographs on the website with a short explanation
about what the photos represent (some may not choose this).

12
Bridging Activity
1. What example from your welfare practice/organization are you hoping to improve co-
creation processes in?
2. What is your preferred description on co-creation from the cue cards activity?
3. Where does your case study example sit on the ladder? How can you improve this?

13
4. What are the specific reasons to use co-creation in relation to your case study example?
5. What are the specific barriers to using co-creation in relation to your case study example?
6. How can the barriers to using co-creation for your specific case study example be
overcome?

14
7. Any further ideas from pitching your case study to your partner?
8. What co-creation activity will you try using in your organization? How you will do this and
who you will do it with?

15
Training Theme 2: Initiating the co-creation process through collaborative problem formulation

16
4. Learning objectives and trainer competences for training theme 2
The learning objectives for training theme 2 is to initiate the co-creation process through collaborative
problem formulation and furthermore aiming to cover main underlying principles of co-creation, such as
active listening, open dialogue, design empathy competences and welfare definitions. Conclusive the
participants should be able to:
- Facilitate a process of collaborative problem formulation
- Use and promote collaborative problem-solving activities
- Engage all relevant stakeholders
- Designate roles to all relevant stakeholders in order to create engagement and empowerment in
a group of citizens and other relevant stakeholders.
The following specific competences will be useful for the trainer to have:
- Knowledge about collaborative problem formulation and solving.
- Knowledge about empowerment principles.
- Knowledge about brainstorming methods.
- Knowledge about design methods.
- Capacity to facilitate an open dialogue.
- Capacity to facilitate a “fishbowl”
4.1 Preparation and follow up for training theme 2
Preparation needed before the second training day: - Organise venue and any catering/refreshments (check if anyone has any special requirements,
e.g., food allergies, access.)
- Finalize the format of the day (choose which options you wish to use), presentation slides (see
guidance) and materials for the day (including post-it notes for the word cloud and coloured
pencils/pens for creative activities).
- Create a film to send out to attendees prior to the training day (optional – see course introduction).
- Send out programme, map, link to project website (to access training information and tools), pre-
reading of materials (and film if you have created one).
- Material for case study on behavioral problems and commitment needs to be prepared (one per
group) before training day 2.
- Role-play activities need to be created before training day 2 (see worksheet).

17
- “Day-2 pre-training questionnaire” (online, if possible) needs to be created before training day 2
(see worksheet).
- “Day-2 post-training activity” needs to be created before training day 2 (see worksheet).
List of materials needed for trainers: - Course introduction
- Cardboard
- Colored markers
- Role play activity cards and template
- Collaborative Problem Formulation and the Roles of Facilitators worksheet and handout
- From Expert To Facilitator worksheet
- Open Dialogue worksheet and handout
- Fishbowl worksheet (there are two different versions of this activity that the facilitator can choose)
- Jigsaw - Required Skills To Promote Open Dialogue worksheet and handout
- Part II – Role-play worksheet
- The Forum Theatre Worksheet
- Role-Play Worksheet on Process Management And Co-Creation Tools
- Role Play Worksheet
- Post-training activity
What should trainers ask attendees to do before coming to day 2? - Send the questionnaire to the attendees, collect and reflect on the bridging activity that they have
been working on between training day 1 and 2. Questions to the attendees could be;
o Which activity did you work with and what did you do?
o Was the training from training day 1 relevant and helpful for you to work with the activity?
o What did you find difficult in the process? Why
o What did you find easy? Why?
o Which concrete experience would you like to bring into the discussion on training day 2?
- Ask the attendees to return their answers one week before the training day so that you can
prepare the day based on their concrete experiences.
- Select and read one of the case studies available.
- Read and prepare the implementation of the Role-play activities.
On the training day, trainers will need to: - Facilitate participants’ sharing about their experiences, motivations and expectations.

18
- Trainers’ presentation of data obtained from the questionnaires.
- Present information and provide materials for the case study and the role-play activities.
- Summarize the day and how this will lead into the next training day.
- Set activities to do between day 2 and 3.
After the training day, trainers will need to: - Share presentation slides.
- Send any materials/information of interest that arose during the training course (e.g., based on a
conversation, a question might be asked and people want further reading on a topic, and this can
be sent afterwards as a follow up from the day).
- Share artifacts created on day two – e.g., photograph them and email them to the group.
- Send information for the next session and timetable for when any activities should be
completed/submitted prior to training day 3.
- Deliver the “Day-2 post-training activity” to be filled in by attendees between training day 2 and
3.
4.2. Proposal for timetable for training theme 2
Time Activity Notes to trainer
08:45 –
9:00
Registration, refreshments and informal
chat
This gives people a chance to informally
socialize and familiarize themselves with the
setting.
09:00 –
10.00
Bridging Activity
Based on the answers that the attendees
have returned, you prepare a poster where
you cluster the difficulties and the success
that the attendees have experienced.
Based on this clustering, you discuss the 4
most common experiences allowing app. 15
minutes for each discussion.
10:00 –
10:45
What is Collaborative Problem
Formulation?
Presentation from the trainer about subjects
such as;
What collaborative problem formulation is,
from expert to facilitator; how to engage
individuals from the very beginning of the
process (see Collaborative Problem
Formulation and the Role of Facilitator
Handout) and what the principles of open

19
dialogue are (see Open Dialogue Handout).
(app. 45 minutes)
10:45 –
11:00
Break
11:00 –
11.30
Introduction to activities to support
Collaborative Problem formulation
Short introduction to activities (see Jigsaw
Worksheet)
a) Forum Theatre
b) Fishbowl
11:30 –
12:00
Exercise: Applying the principles from
Open Dialogue (1)
THE FORUM THEATRE INTEGRATING ONE
OF THE FOUR CHALLENGES/PROBLEMS
Start with the presentation of the cases to
participants (The Forum Theatre Worksheet).
Ask participants to form small groups and
prepare one case to dramatize, using the
principles of Open Dialogue.
12:00 –
12:30
Lunch
12:30 –
13:00
Summing up in plenum from exercise:
Applying the principles from Open
Dialogue
13:00 –
14:00
Exercise: Applying the principles from
Open Dialogue (2)
Fishbowl: PROCESS MANAGEMENT AND CO-
CREATION TOOLS
Start with the presentation of the Fishbowl
tool (see Fishbowl Worksheet).
Ask participants to organize themselves into
groups of 3-4 persons of the same institution.
Explain that what is intended with the activity
is that participants of the same institution
share with others how they will trigger the
process of collaborative problem formulation
regarding welfare in their own
institution/context.
14.00 –
14.15
Break / refreshments and discussion

20
14:15 –
15:15
THEORETICAL PRESENTATION
Theory on evaluation in a participatory
approach, part 1.
Reflections on added value in the case
presented in the Forum Theatre and the
Role Play activity
Ask participants to share in the large group,
the difficulties encountered in the
accomplishment of the simulations by the
group, and the ways used to overcome them.
Discussion in small groups, to further think
about using co-creation, discussing and
answering the following questions:
▪ How do you engage people and work WITH them?
▪ How do you work with everyone’s opinions and show value in everyone’s contributions?
▪ How will you know if co-creation is happening / working?
▪ How do you overcome other barriers that were written down on the cubes?
15:15 –
16:00
Activity to do between training day 2 and
day 3
a) Choose one of the collaborative
problem formulation activities
that you have used today that you
will try using in your organisation.
b) Come up with a plan about how
you will do this and who you will
do it with.
Ask trainees to write in their case study
templates:
h) What collaborative problem
formulation activity will you try using
in your organisation? How you will
do this and who you will do it with.
The aim of this is for attendees to try out a co-
creation activity themselves in their own
welfare settings. They will then provide
feedback at the beginning of training day 3
discussing how it went, what problems and
successes they had and then work together to
think about how these could be overcome.
As an option, you can ask participants to write
down their plans so that you can email or post
their plans to them in between day 2 and day
3, in order to encourage participants to carry
out this activity before returning to the day 3
training session.

21
16:00 –
16:30
Close
- Check out activity – what did I
learn today….
- Summary what will happen in the
next session and anything that
needs to be done beforehand.
- Hand out completed feedback
forms to trainer.
Collect all feedback forms (if completed as
paper copies).
4.3. Worksheets for proposed activities

22
Collaborative Problem Formulation and the Roles of Facilitators worksheet
Objectives a) To deepen previous learning about the framework for value co-creation and the co-creation
collaborative process.
b) To understand how to carry out the collaborative problem formulation process;
c) To self-evaluate their own competencies as facilitator;
d) To analyse how to engage individuals from the very beginning of the collaborative problem
formulation process.
Duration 15 minutes
Material - PowerPoint presentation
- Handout
Process Use a PowerPoint presentation, which can be elaborated on the basis of the handout, to question the
participants about: the framework for value co-creation and the co-creation collaborative process; how to
carry out the collaborative problem formulation process; what competencies each of them as future
facilitators of welfare co-creation processes in their institutions need to develop more; and how to engage
individuals from the very beginning of the collaborative problem formulation process.

23
Collaborative Problem Formulation and the Roles of Facilitators handout
The framework for value co-creation consists of a collaborative dialogical problem solving process that
serves as a managerial tool to determine critical resources and the roles of participants facilitating joint
activities and optimizing resource utilization. The co-creation collaborative process is made up of activities
such as:
• Diagnosing needs
• Collaborative problem formulation
• Creating solutions
• Identifying resources
• Co-designing actions to implement solutions
• Managing value conflicts
• Implementing and evaluating the planned actions.
In collaborative problem formulation, co-creation begins with an identification of needs and the goals for
the exchange of ideas. After diagnosing the needs, the parties undertake a negotiation process to specify
the problem. Typically, the facilitator uses his/her specialist knowledge and experience to help participants
to identify in the diagnosis phase, their problems and needs in depth.
From Expert To Facilitator In the context of the co-creation, facilitation is a process to “make easier” the flow of discussions and
dialogues encouraging all participants to participate in some way and stay on the task, increasing the
collective value of the entire team to guide it through a collaborative process that produces a problem
solving. Therefore, several aspects of the role of facilitator are presented below.
Roles of facilitators
1. Preparing and planning the meeting agenda in advance
Prepare the work in advance taking into account the "who”, “what”, “why” and “where", to decide
"how" to carry out the meeting. Be careful, because it is easy to over-schedule activities and not
incorporate enough downtime for the participants. Distribute the meeting agenda in advance. It
helps both facilitators and participants know what to expect and how to prepare themselves for the
meeting.
2. Clarifying the objectives of each activity and section of the training, as well as the expected time
that will be spent on each activity
Participants will be better prepared to contribute and help to achieve the goals of the meeting if they
know what they are, and understand how the activities will be carried out in order to achieve them.
24
3. Co-creating community rules to establish appropriate ways to interact with each other during
the meeting. These rules may include sentences of the following type:
Participants:
• Contribute to the co-creation community through their experiences, skills and time;
• Distribute leadership responsibilities and collectively share co-creation community
management;
• Engage in insightful and non-threatening discussions of ideas and experiences;
• Be respectful and use appropriate language in team discussions;
• Listen and respond to each other with open and constructive minds;
• Be willing to share challenges, lessons learned, constraints / barriers faced and
successes;
• Not be afraid to respectfully challenge each other by asking questions;
• Will refrain from personal attacks;
• Be committed to build on each member's strengths;
• Be committed to help others to improve areas that need further development;
• Use short, clear sentences and avoid using obscure expressions without an explanation;
• Be committed to search for opportunities for consensus or compromise, and for creative
solutions;
• Be willing to contribute to an atmosphere of problem solving;
• Promote their personal and professional goals through participation in the co-creation
community.
(Centres for Disease Control and Prevention, 2016)
4. Keeping the discussion moving
You should be aware of the discussion and learning that is taking place, looking around the room at
all participants, listening and encouraging all participants to contribute to the team. The
methodology you choose may vary, but the methods you use should include all members in
the discussion to prevent someone from feeling excluded from the dialogue.
5. Monitoring the time of activities
The co-creation team may include people who are very involved with the problem and the
community and very knowledgeable about the contexts and scope of the problem.
Therefore, it is easy to deviate to accessory topics to the problem that is being solved. In
these cases, you should refocus the group back onto the specific agenda item that is being

25
worked on and help the group stay focused on the topic being developed. It is important to
try to close the accessory topic or decide with the team to develop it later.
6. Close the meeting and renew the action items for the future.
Make a final synthesis with participants to ensure that all points of the meeting were
accurately dealt with, and that action items were noted and will be followed by other actions
in the future as a follow-up to someone.
Key-references:
• Center for Community Health and Development at the University of Kansas (2017). Community tool box.
Kansas: KU Center for Community Health and Development. Retrieved from:
https://ctb.ku.edu/en/table-of-contents
• Centres for Disease Control and Prevention (2016). Public Health Information Network Communities of
Practice. Resource Kit. Atlanta: CDC. Retrieved from:
https://www.cdc.gov/phcommunities/resourcekit/index.html
• Luckin, R., Baines, E., Cukurova, M., & Holmes, W., Mann, M. (2017). Solved! Making the case for
collaborative problem-solving. England and Wales: Nesta.
• Vianna, M., Vianna Y., Lucena, B., & Russo, B. (2012). Design thinking: Business innovation. Rio de Janeiro:
MJV Press.

26
Open Dialogue worksheet
Objectives a) To understand what the principles of Open Dialogue are.
b) To analyse the potentials of Open Dialogue to engage individuals from the very beginning of the
collaborative problem formulation process.
Duration 60 minutes
Material - PowerPoint presentation
- Handouts
Process Use a PowerPoint presentation, which can be elaborated on the basis of the Open Dialogue Handout, to
question the participants about: what Open Dialogue is; what the principles of Open Dialogue are and how
it is possible for participants to apply them in collaborative problem formulation in the Welfare co-creating
process in their institutions; and how Open Dialogue engages individuals from the very beginning of the
collaborative problem formulation process.

27
Open Dialogue Handout
A crucial challenge in the collaborative problem formulation phase is the parties’ ability to communicate
and be active. In this phase, the parties may lack a mutual understanding of the goal to attain, and the
diverse benefits and sacrifices attached to different solutions. Therefore, dialogue is needed to choose the
path that prefigures the best possible balance between the value to be achieved and the sacrifices needed
for it. Open Dialogue, is a dialogic practice and a community-based integrated work system, which
engages individuals, families, professionals and institutions from the beginning of the problem solving
stage. The principles of Open Dialogue are the following:
• Immediate response. Respond promptly to people when they make contact. Everyone participates since
the first meetings. The team manages to create an emphatic atmosphere by responding quickly and
listening attentively to all topics the participants bring up.
• Social network perspective. Social networks can be seen as relevant in helping to define the problem. Key
people can be involved by asking the participants already involved: Who is concerned about the
situation? Who could be of help to solve the problem? Are they able to participate in these meetings?
Who would be the best participants to invite?
• Flexibility and mobility. This is achieved when the solution of the problem is a response to the specific
needs of each community, their specific language and their way of living
• Psychological continuity. The co-creation team takes responsibility for the process of problem solving for
as long as needed.
• Responsibility. A good rule is to follow the principle that the professional who is contacted takes
responsibility for organizing the first meeting and inviting the team. Typically, two Open Dialogue
practitioners are involved in a network meeting, with more practitioners involved if there are higher
levels of concern.
• Tolerance of uncertainty. Open-dialogue practitioners make great efforts to support networks
experiencing the problem to initiate the dialogue with uncertainty, when no one yet knows the reasons
for the problem or the solutions for it, rather than react prematurely to contain the problem, trusting
that the network's wisdom to solve it will emerge through dialogue. This allows more time to understand
the problem.
• Dialogicity. In the meetings, the members who have taken the initiative for organizing them take charge
of promoting dialogue and only secondarily on promoting changes to solve the problem. Dialogue is seen
as the forum through which stakeholders are able to acquire more feeling of agency in their own lives
through discussing the problem.
Key-reference: Center for Community Health and Development at the University of Kansas (2017).
Community tool box. Kansas: KU Center for Community Health and Development. Retrieved from:
https://ctb.ku.edu/en/table-of-contents

28
Fishbowl worksheet (version 1)
Objectives a) To discuss how to apply the process of a collaborative problem formulation in their community
b) To apply principles about how to carry out the collaborative problem formulation process;
c) To analyse how to engage individuals of their community from the very beginning of the
collaborative problem formulation process.
Duration 60 minutes
Material • Before the training, place the tables in such a way that participants can carry out work in small groups
and so that the groups form a circle.
• Inside the circle, place the tables for a small group. The number of chairs should be equal to the number
of members of the first group plus an empty chair.
Process • Ask participants to organize themselves into groups of 3-4 persons of the same institution.
• Explain that what is intended with the activity is that participants of the same institution share with others
how they will trigger the process of collaborative problem formulation regarding welfare in their own
institution / context.
• Ask participants to discuss in their small groups what they intend to do at their own institution/context
(app. 10 minutes).
• After 10 minutes, invite the members of the first group to sit in the centre of a discussion group.
• Explain to the participants that during the sharing of ideas of the group that is in the centre of the circle,
other participants should ask questions to better understand what is being explained or to help them
better reflect on the process they are thinking of implementing in the future. Emphasize that if someone
in the outer circle has good ideas to help the group inside the circle to improve their action plan or to
answer the questions participants are asked, he/she should sit in the free chair in the group inside the
circle. Once he/she has given his/her collaboration, he/she must return to his/her place of origin.
• When the group inside the circle finishes, the centre will be occupied by the second group and the
methodology will be repeated
Fishbowl worksheet for facilitator (version 2)

29
The fishbowl technique was developed largely in clinical psychology practice as a new co-
creative think tank helping people to get from insight, to ideas, to evaluation of those ideas
in just a single session.
In the traditional Goldfish Bowl a small group of people discuss a scenario or case study
whilst being observed by an outer ring of people, who reflect on the discussion individually
from their own perspectives. The groups then swap over, with the outer group coming into
the middle and sharing their thoughts on what they saw, heard and felt during the
discussion. Finally, the whole group discusses the issue, capturing key learnings and
conclusions.
The fishbowl is a technique to enable simultaneous internal and external observation. By
switching observational points of view, the range of perspectives can be increased.
Gathering the perspectives together at the conclusion of the fishbowl, provides a rich data
set and greater insight.
There are many different versions of doing the fishbowl activity, and this worksheet is one
of the ways to do it. This method was chosen because it involves all in the room together in
one activity and allows everybody the opportunity to speak, listen and make decisions. It
encourages reflection and promotes understanding of individual perspectives.
Process The room needs to be set up with chairs in two circles (or whatever shape fits in your room) with the
same amount of chairs in the inner and outer circle. Ask all attendees to sit on the chairs all facing
inwards (e.g., a group of 40 people should have 20 in each circle). Ask participants to have their notepads
and pens with them.

30
Phase 1 (10 mins)
- Group A (inner circle) discusses
question 1 together: “What are the
difficulties of working with your co-
creators?”
- Group B (outer circle) listens and
makes notes
Phase 2 (10 mins)
- Group A and B swap places
- Group B (inner circle) discusses
question 2 together (in light of group
A’s discussion): “What competencies
are needed to support and mediate
communication with co-creators?”
- Group A (outer circle) listens and
makes notes

31
Phase 3 (10 mins)
- Group B turns their chairs to face
group A
- Group A and B discusses the final
task together (in light of group A and
B’s discussions): “Decide on the top 5
competencies you think is needed to
support and mediate communication
with co-creators”.
The facilitators can then turn these top 5 competencies into a word cloud if they wish.
Alternative ways of delivering this fish bowl technique: 1. This fishbowl technique has also been used so that group A are one type of co-creator
(e.g., patients or students) and group B are a different type of co-creator (e.g., staff). In this
scenario, usually group A and B are asked to discuss the same question in phase 1 and 2
(this often helps to emphasise people’s needs and constraints as separate groups), and then
come together in phase 3 to agree on solutions together (taking into consideration the
needs and constraints discussed).
2. If you are tight for space you can try splitting the room up and arranging smaller groups (for example
around the already existing tables).

32
Jigsaw worksheet - Required Skills To Promote Open Dialogue
Objectives a) To understand why the forum theatre and role-play activities enhance co-creation.
b) To analyse the potentials of these activities to develop skills to promote Open Dialogue.
Duration 30 minutes
Process • Divide participants into groups of three.
• Explain that the general topic is divided into three smaller interrelated pieces.
• Assign to each member of a team a puzzle piece to read (e.g., Part I or Part II, and so on) and
become an expert on a different piece.
• After each person has become an expert on their piece of the puzzle, they teach the other team
members about that particular puzzle piece.
• After each person has finished teaching, the puzzle is reassembled and everyone in the team
knows something important about every piece of the puzzle.
• Ask each group to share what they learnt with others.

33
Jigsaw Teamwork Handout
Part I – Forum Theatre The technique of the forum theatre was originally developed as part of the Theatre of the Oppressed by
Boal (Koreň, 2014), as a political tool for change. It consists of a performance of a short play or sketch,
usually indicating some kind of oppression, which initiates with the dramatization of real situations faced
by the participants and that ends with the protagonist(s) being oppressed. Then, the performance is
repeated and any member of the audience (‘spect-actor’) is allowed to shout “Freeze”, and take the place
of one of the oppressed characters, showing how they could change the situation to enable a different
outcome. One of the first things that spect-actors realize is that, as in life, if they don’t intervene, nothing
will change. Several alternatives may be explored by different spect-actors. The other actors remain in
character, improvising their responses. A facilitator (Joker) is necessary to enable communication between
the players and the audience. After an intervention, the Joker may ask, “What were the objectives of this
activity?”, “Was it realistic?”, “Can you do this in real life in your co-creation project?”. Therefore, the
Forum theatre becomes a laboratory to simulate the exercise of democracy, in which anyone can speak or
act, experimenting different courses of action, as happen in society, with similar situations happening in
different contexts or/and with different people. The forum theatre is not a theatre of advice, which means
its aim is not to show what other people should do, but to discover collaboratively what we can do.
Key-reference: Koreň, L.de H. D. (2014). Art for art’s sake: an introduction to the use and value of forum
theatre. Lund, Sweden: Trans Europe Halles Resource.
Part II – Role-play Role-play is a quick activity to test an experience or to collect ideas to solve a problem. The objective is for
participants to get into the character of people involved, developing their empathy regarding the character
they are role-playing. Role-play is a type of prototype that is pretty easy to build and helps participants to
get an idea or experience in front of all team members on the efficiency of the co-creation process. The
main goal of prototyping is that participants present an idea perceptible enough on the situation portrayed
in order to elicit a collaborative problem formulation and problem solving. In structuring a role-play activity,
the “choice of scenarios”, the “choice of roles” the “implementation of the role-play activity” and the
“concluding discussion” have specific characteristics to promote the use of the required skills to promote
Open Dialogue in an inspiring, democratic, collaborative and creative atmosphere. The scenarios might be
common daily life scenes or task-oriented, such as solving a specific problem. The roles, that can range
from very closed (e.g., including ideas to be defended and all the personal and social characteristics of the
character) to more open (providing just some background information) must be defined. The roles give
actors a framework within which they build their characters and so, they need some time to prepare them.
The facilitator can assume the role of “facilitator”, for example to encourage open dialogue, creativity and
sharing of ideas; “actor”, because sometimes getting involved and taking part assuming a critical role is
adequate; or “spectator” since watching the role-play he/she can present data collected during the practice
to help the team reflect on the role-play and propose improvement strategies to introduce in real situations
similar to the one simulated. It is also crucial to keep the role play activity real and relevant by bringing
situations of life and roles to play as real as possible, which could include using some descriptions about
the local culture or social networks involved. Role-play needs to be followed by a debriefing for the
participants to share what they have learnt and to reinforce this learning. For example, as participants

34
practise the role-play activities, they might find that they have difficulty in promoting open dialogue. The
process of finding the new type of questioning and/or ways of interaction should offer more participants
autonomy, so after the practice stage you could ask participants to reflect on strategies to develop their
Open Dialogue skills. It is also possible to record the role-play activities so that participants can have the
opportunity to listen to the dialogue again and reflect on their skills.
Key-reference: Bowman, S.L. (2010). The functions of role-playing games: how participants create
community, solve problems and explore indentity. New York: Shutterstock Ed.
Part III – Required Skills To Promote Open Dialogue
Value stakeholders and their ideas
Promoting mutual respect among the team members
Using questions:
• A closed question (e.g., Do you feel ready to use what you have learned today in your everyday work?)
is answered with a factual knowledge or a single word. A misplaced closed question can lead to silence,
therefore is best to be avoided when a conversation is in full flow. However, a closed question is
adequate:
• to make a decision (e.g., Do we all agree that the second activity is the best activity to do
between training day 2 and day 3?)
• to test your understanding (e.g., When you say it will be good to involve a sexual health
professional, do you refer to a doctor? or If I understand well...)
• to summarise the other person's ideas or to serve as a mirror (e.g., it seems to me that in your
opinion... Is that what you said?)
• to know specific facts (e.g., What factors influence people's wellbeing in your context?)
• An open question (e.g., What happened at the meeting?) asks the participants for their knowledge,
feelings and opinions and implies longer answers. They usually begin with “What is the meaning
of...?”, “What is ...?”, “Why ...?”. An open questions is adequate to:
• To develop an open conversation (e.g., How did the problem arise?)
• To find out the other person's opinion or concerns (e.g., What do you think about the role play
carried out?)
• To ask for more detail to ensure you have the whole story and that you understand it
thoroughly (e.g., As a facilitator, you might be dealing with inattentive participants who are
engaging in side-bar conversations. What you can do is to use gentle and appropriate humour

35
to redirect them to the focus of the meeting; When you say ..., you refer to ...? Can you explain
it better?)
• To help to find solutions to problems (e.g., what can we do? How can we solve this problem?
What strategies seem most appropriate?
• To negotiate (e.g., What will happen if we take this attitude? ... What are the advantages of
this strategy? And the disadvantages? ... Which solution will be better?)
Encouraging participant to continue talking
Use expressions such as “go, go...”, “Continue...”, “And then? ...” , “So? ... “Great!”
Responding to stakeholders’ utterances:
The skill of responding is a three-part process: stakeholder’s initial utterance; the facilitator’s
response to that utterance; and the response to the response given.
Never impose a solution to the team
Be an active listener to improve communication and address controversial and difficult issues:
• Active Listening is not just listening, but showing our attention with our eyes and bodies and in the
ways we react to each other. By using this technique we become more involved with the person
who is speaking, we are valuing what they are saying and we are showing that we value the person
and his/her ideas.
• Strategy for Active Listening:
• Do not interrupt but wait for participants to say what they need to say.
• Be critical regarding what your body language and posture are saying to
participants.
• Summarise the content and feelings regarding what participants are expressing to
make sure you understood them and to help the participants to organize their
narrative.
• Ask participants to say more about their experiences or feelings in a way that shows
you are interested in what they are sharing.
• Help participants reflect on their emotions and the content of these emotions (e.g.,
”You are happy”, ”You are happy because your co-creating process is being carried
out”).

36
Elicit multiple viewpoints and value opposite opinions to consider options.
Open Dialogue values the collaborative exchange among multiple and equally valid points of view,
that weaves new and more shared understandings to which everyone contributes.
Being transparent and reflecting
This is the ability to engage in an open, participatory, transparent, and jargon-free conversation with
the co-creation team in meetings, clarifying issues, bringing out viewpoints and synthesizing
differences.

37
The Forum Theatre Worksheet
Integrates one of the four challenges/problems in the cases below
Case 1.
Behavioural problems
and commitment
Case 2.
Kindergarten exposed to
repetitive vandalism by
local youth
Case 3
Nursing home seeking
solutions to help
prevents isolation among
the residents
Case 4
The local school is met
with severe budget cuts
and the headmaster is
particular worried about
the maintenance of
sports

38
Role-Play Worksheet on Process Management and Co-Creation Tools
Objectives a) To understand how role-play activities enhances co-creation.
b) To self-evaluate and co-evaluate the competencies of actors to promote Open Dialogue.
c) To analyse the potentials of this activities to develop skills to promote Open Dialogue.
Duration 90 minutes
Process • Organize the room to carry out the role-play: in the centre of the room place a table with material (pen,
sheets size A3) and a computer. Put a flipchart and a multimedia projector in the room.
• Divide participants into seven groups if you decide to use the three families, which means seven different
characters. If the number of participants is small, it is suggested to use only one family in the Role-play,
which means five different characters.
• Start with the presentation of the case to participants (see case in the Role-play Worksheet).
• Distribute one role to each group in order for them to decide who will play it, and prepare the role in
order to use the principals of Open Dialogue during about 20 minutes (see roles in the Role-play
Worksheet). Emphasize that the information contained in the role assigned to the group is just a starting
point to inspire the preparation of the character's action.
• Explain that the other participants will observe the actors and collect data to discuss the potentials of the
activity at the end of the theater. Distribute the “Observation and discussion” part of the Worksheet (see
observation and discussion in the Role-play Worksheet).
• Start the simulated situation by group, which should take about 20 minutes, encouraging them to use the
principles of Open Dialogue.
• At the end of the simulation invite actors to self-evaluate their roles (app. 10 minutes), using questions
of the following type:
- What did you like most about playing your role?
- What did you like least? Why?
- In your opinion, what principles of the Open Dialogue did you apply?
- What were the two skills to Promote Open Dialogue that you evidenced more while playing your
role? Why do you have this perception?
• Ask the groups, for about 20 minutes, analyzing the data collected individually.
• In the last 20 minutes of the activity, ask each group to share with all their conclusions. To facilitate this
sharing you can use the “Observation and Discussion Worksheet”.
Characters

39
The community leader: Joana School principal: Maria
The doctor: Frederic Social worker: John
Representative of the 1st family: Rita
Representative of the 2nd family: Alberto
Representative of the 3rd family: Ricardo
Case
The community leader where you live invited you to a meeting to help her to resolve a troublesome
situation that is happening in the community. Some time ago, she became aware that there were three
families in the community who, despite social security aid, live with many serious economic needs.
The first family has three members. The second family is constituted by Alberto, married to Fernando who
have two children. The third family consists of an elderly couple with age-related illnesses and their 60-
year-old son who is a barber.
The community leader explains that after talking to some families she has managed to have ten of them
give a percentage of their monthly salary for a year to help these needy families. The goal is to give them
time to try to improve their living conditions. The total monthly amount available is 1800 Euros.
Families who are sponsoring the three most deprived want to remain anonymous, but they demanded to
be informed during those twelve months about how the money was being distributed by the three families,
and what was being done to improve their living conditions so that they can return to a balanced economic
situation.
The community leader explains that she invited you, because you have different professions and / or skills,
which can contribute to a more effective joint collaborative work. She asks that if you agree to be part of
this co-creation group to promote the well-being of these disadvantaged families, you will discuss together
with others to achieve the following main objectives: (i) to develop a plan of action to help these families
to minimize their problems; ii) to plan a strategy to monitor the action plan.
Now the community leader suggests that after you think about the role you can play in this group, you will
come back to the meeting to solve together with the families their problems.
Roles
The community leader
You are the facilitator of the meeting. You have the job of taking stock of the knowledge and concerns
shared by the team. You write on the list “What we know” all the facts that the team is sharing about
these families. During this discussion, you highlight the information that is missing and you can write it
down on the list of “the facts you need to know”. You write on this list, for example: who the family
members are; their ages, genders, clothes sizes; what they most need; What are the academic
qualifications of the family members; and what their professional experience is. From this list you could
encourage the group to list the “things to investigate” in order to move forward with problem
resolution, for example: understanding the money the families spend on medicine and if there are
cheaper alternatives; understanding how to buy consumer goods at a discount; understanding the
amount of money they spend on food; new employment opportunities; how to enable families to (re)

40
shape their lives, etc. etc. Remind the team that in order to carry out their research, they should co-
create a “plan of action” in which they list the steps to take to get the new information.
Medical Doctor
You say that in your medical consultations you have already received an elderly couple from one of
these families and you have consulted a baby of three months from another of these families. You are
concerned about the families' lack of money for the medication the elderly people you consulted
should take. You are also concerned about the emotional wellbeing of the people who are part of these
families, especially with the possibility of their social isolation or the diminishing of their optimism,
perseverance and commitment to seek solutions to improve their living conditions.
School principal
You know that two of the families have school-aged children and teenagers. You are afraid that their
economic situation will have a negative effect on their academic achievement. You point out several
reasons why this might happen and you suggest strategies to support these students.
When you consider adequate, you could remind the team that you are now in a position to list the
"possible solutions" to solve this problem. Write these possible solutions in a list. You could explain to
the team that this list may require the development of a "new list of additional information" that has
to be put together to consider whether or not it is possible to implement the possible solutions that
had been co-created previously. List the realistic "defensible solutions" and ask your colleagues to co-
create the "plan of action". List in the plan of action the steps to implement the solutions that you
advocate, and the ways to evaluate whether these actions have resulted in the desired changes in the
lifestyles and living conditions of the family members.
Social worker
You are worried. You remind the staff that this year there will be low temperatures and children may
probably not have clothes because they are growing. Also, you are worried about money for heating
the home of the elderly. You ask the team how the money will be distributed: Will it be the same for
the three families or will the families with the largest family receive more? You present your opinion in
detail.
Rita
You are 25 years old and you have training to teach biology. You are currently unemployed. Ricardo is your
husband. He is 30 years old and is a freelance journalist. Although he tries to work hard, his jobs are not
well paid. You have a daughter, Margarida who is six months old and has fragile health that causes her to
seek medical attention several times.
You went to the meeting to share your problems and try to find a solution for them. You believe that the
people who are at the meeting will keep information about your family’s situation secret.

41
Alberto
You are married to Fernando. You are 45 years old and you are a nurse. However, you are currently
unemployed. Fernanda a carpenter is 55 years old, and although her work is well paid, in recent years she
has barely worked because she is very ill. Your daughter, Marta is 15 and is a 10th grade student. She has
always been a good student and has not had any health problems. Paulo, your son, is 18 years old and is in
the 2nd year of the university in the course of Mechanical Engineering. He is a good student, practices a lot
of sport and is very healthy.
You went to the meeting to share your problems and try to find a solution for them. You believe that the
people who are at the meeting will keep information about your family situation a secret.
Ricardo
You are 60 years old and you are barber. Your salary is not enough to pay for your parents' medication and
the caregiver's salary. Your father, Pedro, is 76 years old. He has no source of income, has Alzeimer's
disease and is increasingly dependent on the family. Your mother, Carmo, is 85 years old, is retired and
receives 600 Euros monthly. Her health has age-related weaknesses.
You went to the meeting to share your problems and try to find a solution for them. You believe that the
people who are at the meeting will keep information about your family situation a secret.

42
Observation and discussion
1. Recall part IV of the Jigsaw Teamwork Handout “Required Skills To Promote Open Dialogue", and record
in column 2 of the table below the evidence that shows the use of the skills listed in the column 1, and in
column 3 the actor who shows this skill (CM= The community leader; MD= Medical Doctor; SP=School
principal; SW=Social worker; R= Rita; A=Alberto; R=Ricardo).
Skill Evidences Actor
Values
stakeholders
and their ideas
Promotes
mutual respect
among the
team members
Uses closed
questions
Uses open
questions
Encourages
participants to
continue talking

43
Responds to
actors’
utterances
Never imposes
a solution to the
team.
Makes active
listening
Elicits multiple
view points
Values opposite
opinions to
consider
options
Is transparent in
his/her
reflections
2. Were there any details that emerged in the role-play activities that surprised you?
2.1.If yes, what were they?

44
2.2.In your opinion, would these details have arisen if it were not a simulated situation? Why?
3. In your opinion what are the potentials of the role-play activity to develop skills to promote Open
Dialogue?
4. To what extent do you consider that the role-play activities enable actors to develop their creativity?
5. In your opinion, is role-play useful for testing a co-created solution to solve a problem? Why?

45
Poster Activity Worksheet (Alternative activity instead of Role Play)
This activity will encourage participants to create an artefact that illustrates the participants
understanding of Co-Creation and the way in which they can use the process to solve the issue of
barriers in their workplace.
The poster activity at the end of the day celebrates the learned experience, it is not highlighting the
shortfalls within an organization but rather expressing a personal experience of it.
A poster, in essence, is a visual piece of art that is shown. Ultimately, co-creation requires an external
perspective. The chance to share the poster is in keeping with the open collaborative and non-
judgmental process that is co-creation. Sharing the poster at trainee’s own workplace would be useful
to try out the new skills. Showing the poster during the training day and receiving feedback will help
to galvanize its meaning and enable the participant it to better explain to other colleagues.
The trainer will need to encourage an environment where people do not have to worry about polished
artefacts, but to care more about what the posters represent and the learning they get from creating
them.
It is recommended that drinks are available during this activity to promote a free environment where
participants can walk about.
Process:
• Split the group into pairs.
• Provide arts-based materials (e.g., paint, crayons, magazines and glue for collage).
• Provide poster paper (A3 minimum, A1 maximum).
• Explain the topic to be explored (e.g., in groups, pick a problem that you discussed during the
CUbe activity and create a poster that shows how to solve that problem).
• At the end, ask participants to explain the thinking behind their poster.
• Ask participants to display their poster afterwards.
• Give participants the option to include their poster on the website (some may not choose this).
Also ask participants to write a short description to support the poster on the CCW website.

46
Bridging Activity
1. Who are the co-creators that you will be co-created with?
2. What are the rules of co-creation that you have used in the past? What rules to you think are important to use in the future? How will you co-create these?
3. What are the difficulties of working with your co-creators?

47
4. What competencies are needed to support and mediate communication with the co-creators in your case studies?
5. What are the potential risks in your co-creation case study and how might you deal with them if they arise?
6. What are some solutions to some of your co-creation barriers?

48
7. What activity will you try using in your organisation? How you will do this and who you
will do it with?

49
Training Theme 3: Managing the co-creation process

50
5.1 Learning objective and trainer competences for training theme 3
The learning objectives for training theme 3 is to manage the co-creation process all way through and
additionally aim shift thinking to organisational level and embedding what has been learned in context.
This is actually a good opportunity to reflect on the beginning of the course and evolve training based on
outcomes of bridging activity. Conclusively the participants should be able to:
- Understand the different types of collaborations and relating stakes, challenges and
opportunities
- Know of the different stages of project management
- Be able to select and use co-creation activities
- The participants are able to shift and apply cocreation in their contexts
- Know of the specificities of co-creation project management
- Be able to anticipate potential process facilitators
- Support the design of co-created programme evaluation which includes impact evaluation of the
new solution when it is implemented
- Support collaborative project development
- Promote a shared creation of tools
The following specific competences will be useful for the trainer to have;
- Capacity to show empathy, listening skills with no judgement
- Capacity to show interest in what a person can bring and think, promote exchange and
communication
- Capacity provide positive and constructive feedback, develop motivation
- Capacity to debate, without manipulating
- Capacity to develop critical thinking, and skills to synthesize different opinions
- Capacity to develop constructive dialog, constructive confrontation of ideas and debate
- Capacity to embrace the emotions which may emerge from collaborative situations
- Capacity to stimulate people’s enthusiasm to find new solutions, develop creativity
- Capacity to create and share a vision, federate and promote coherence in efforts
5.2 Preparation and follow up for training theme 3
Preparation needed before the third training day: - Organise venue and any catering/refreshments (check if anyone has any special requirements,
e.g., catering, access.)

51
- Finalise the format of the day (choose which options you wish to use), presentation slides (see
guidance) and materials for the day (including post-it notes for the word cloud and colour
pencils/pens for creative activities).
- Create a film to send out to attendees prior to the training day (optional – see course introduction).
- Send out programme, map, link to project website (for access to training information and tools),
pre-reading materials (and film if you have created one).
- Design a Q-Sort worksheet with a list of statements, and prepare the Q-sort activity (See worksheet
1)
- Prepare the Metaplan and brainstorming activities (see worksheets 2)
- Prepare a presentation about mediation competences (See worksheet 3). Find examples of how
to develop them, and critical issues to initiate discussions from.
- Send out 4 – 5 questions about the activity that the attendees have been working with between
training day 2 and 3 – See “Try out an activity worksheet”
List of materials needed for trainers: - sticky notes and pens
- Lego for the Lego activity
- paper board and white board
- videoprojector and screen
- paper table cloth for the discussion tables activity
- Q-Sort sheet with a list of statements to be printed for each participant
- “Try out an activity” worksheet to be printed for each participant
- 1x Sticky Notes activity worksheet
- 1x Mediation competences worksheet
- Lego activity persona worksheet
What should trainers ask attendees to do before coming to day 3? - Ask participants to send between 3 and 5 ppt slides.
- On each slide, write one expectation / need for this training session.
- Emphasize the fact that only ONE idea should be written on a slide
- Ask participants to bring the case study they have been working with in days 1 an 2.
On the training day, trainers will need to: • show empathy, listening skills with no judgement
• show interest in what a person can bring and think, promote exchange and communication

52
• provide positive and constructive feedback, develop motivation
• debate, without manipulating
• develop critical thinking, and skills to synthesize different opinions
• develop constructive dialog, constructive confrontation of ideas and debate
• embrace the emotions which may emerge from collaborative situations
• facilitate discussions
After the training day, trainers will need to: - Share presentation slides.
- Send round any materials/information of interest that arose during the training course (e.g., based
on a conversation, a question might be asked and people want further reading on a topic, and this
can be sent round afterwards as a follow up from the day).
- Share artefacts created in day one – e.g., scan them in and email them round to the group.
- Send round information for next session and timetable for when any activities should be
completed/submitted prior to training day 2.
- Something about the concrete activity between training day 3 and 4 I don’t understand what is
expected here. The trainees will be doing the follow-up activity. They will get the info at the end
of the training. I don’t think the trainer will have anything to do about that before the next day.
5.3 Proposal for timetable for training theme 3
Time Activity Notes to trainer
08:45 – 9:00 Registration, drinks and informal chat
This gives people a chance to
informally socialize and familiarize
themselves with the setting.
09:00 – 9.30 Bridging Activity
Based on the answers that the
attendees have returned, you
prepare a poster where you cluster
the difficulties and the success that
the attendees have experienced.
Based on this clustering you discuss
the 4 most common experiences and
give app. 5 minutes for each
9.30 -10.30 Q-SORT activity: experiencing co-creation:
process / barrier / facilitators
The Q-Sort is a simulation activity.
Participants are put into a group

53
Presentation of the potential issues to take
into consideration (Feedback session)
activity during which they will
experience the barriers and levers to
co-creation. Co-creation is forced
through consensus. See worksheet 1
on how to organize and moderate a
Q-Sort Session
See “Q-SORT Presentation
guidelines”
10.30 –
10.45
BREAK
10.45 –
11.00
Introducing “Mediation competences” Introduce and discuss the following
ideas:
➢ Based on the barriers and
facilitators identified in day 1 and
this morning, what role do we
have in the process?
introduce training and
mediation
Refer to the case study in day 1
➢ What kind of competences do we
need to facilitate co-creation
processes?
Make a presentation based
on the “mediation
competences” worksheet
➢ What type of tools/activities can
we use to act as mediators?
List activities on a paperboard
sheet
11.00 –
11.45
Sticky notes ACTIVITY: setting the grounds
for project management and identifying
the specificities of co-created projects
See “Sticky notes activity” worksheet
This worksheet details how to
organize and moderate the Sticky

54
notes session. This activity will focus
on the project management process
11.45 –
12.30
Evaluating achievements
Split participants into 2 discussion
tables. If working with a large group,
you can have 3 or 4 tables.
Put a paper tablecloth on each table.
Ask two participants to act as
moderators on each table.
Focus for table 1 can be the
following: What are the stakes and
issues relating to project evaluation
in general?
Focus for table 2 can be the
following: What are the stakes and
issues relating to the evaluation of
co-created projects?
Round 1 - 10 minutes
During the discussions, participants
write down their ideas on the
tablecloth.
Then participants swap tables for
round 2.
Round 2 - 10 minutes
Ask table moderators to sum up
discussions in round 1. Participants
are then asked to follow up on
discussion starting from what what
said in round 1.
At the end of round 2, each
moderator synthesizes discussions (5
minutes to prepare, 5 minutes to
present)

55
Spend the last ten minutes
continuing discussions on how this
could be used in a future project.
12.30 – 13:30 Lunch
13.30 –
14.45
LEGO ACTIVITY: Defining a problem
together and creating a solution
STEPS 1 TO 4
Introduction: 5 minutes
The following activity aims to
cocreating a solution. The focus for
this activity will be:
“how can we evaluate a cocreated
project? How can we evaluate the
benefits of cocreation?”
Ask participants to draw on situations
they have worked with in their case
study. In what situation would they
be using cocreation? What would
they be using it for?
See Lego activity Worksheet
STEPS 1 TO 4
14.45 –
15.00
Break
15.00-15.45 LEGO ACTIVITY: Co-creating an evaluation
activity/tool using design thinking
Steps 4 to 6
See Lego Worksheet – Steps 4 to 6
15.45-16.00 Debrief of Lego activity Ask participants’ impressions on the
Lego activity
16.00 –
16.15
Activity to do between training day 3 and
day 4
a) Choose one of the process and
negotiation activities that you have
Give participants the “Try out an
activity worksheet”
The aim of this is for attendees to go
away and try a process and

56
used today that you will try using in
your organisation.
b) Come up with a plan about how you
will do this and who you will do it
with.
negotiation activity themselves in
their own welfare settings. They will
then feedback at the beginning of
training day 4 how it went, what
problems they had and then work
together to think about how these
could be overcome.
As an option, you can ask participants
to write down their plans to that you
can email them or post their plans to
them in between day 3 and day 4 to
prompt them to carry out this activity
before coming back to day 2 training.
16.15-16:45 Close
- Checking out activity – what did I
learn today?
- Any remaining questions to be
answered
- Summary of what will happen in
next session and anything that
needs to be done before it.
- Hand completed feedback forms to
trainer.
- Thanks yous
Collect up all feedback forms (if
completed as paper copies).
5.4 Worksheets for proposed activities

57
Q-Sort activity worksheet
OBJECTIVES Experimentation of collaborative work, negotiation and collective problem-solving. People are presented
with several statements about collaboration. All statements are in the form of “collaboration is…”.
Statements are designed to be open for discussion. One of the aims of the activity is to put forward the
importance of sharing a common language and identifying the fact that citizens with different backgrounds
may not spontaneously share a common understanding of what collaboration is. Also, this activity
underlines the fact that even though people may seem to disagree on the definitions at first, the issue is in
fact to clarify how participants understand words.
TARGETED SKILLS (examples)
☐ CAPACITY TO SHOW INTEREST IN WHAT A PERSON CAN
BRING AND THINK, PROMOTE EXCHANGE AND
COMMUNICATION
☐ CAPACITY TO DEBATE, WITHOUT MANIPULATING
☐ CAPACITY TO DEVELOP CONSTRUCTIVE DIALOG,
CONSTRUCTIVE CONFRONTATION OF IDEAS AND DEBATE
HOW TO ORGANIZE THE SESSION
Recommended duration: 1 hour
Recommended number of people: 20
Material, props: printed Q-sets of 30 statements to create (e.g. to collaborate is to have shared
objectives; when you collaborate the role of each partner must be clearly defined; to collaborate is
to be engaged in a common production…)
HOW TO CARRY OUT THE ACTIVITY
STEP 1: Individual work: 5-10 minutes
The Q-set is given to people in the form of a pack of randomly numbered cards, each card containing
one of the statements. If you want to make your own set of statements, you need to remember
that each statement MUST be subject to interpretation (to identify barriers in collaboration). In the
presented Q-SORT activity, all statements are about collaboration.
Individually, people are invited to select 3 statements with which they ‘completely agree’ and 3
with which they ‘completely disagree’ with.
A RULE TO EMPHASIZE: each participant MUST work individually. Step 2 should not be presented
before step 1 is completed.

58
STEP 2: Work in small groups: 20 minutes
The group must assign the following roles to participants: a) A master of time ; b) A presenter who
will present the statements selection at the end of the activity; c) A secretary who takes notes ; d)
A moderator who ensures that communication is equal, non-aggressive and that everyone can put
their point of view across ; e) An observer who presents the process in each group (how did you
reach a consensus). Each group decides how the different roles are assigned. They will account for
this during the feedback.
When this is done, give the group the following assignment:
The group must find a CONSENSUS on 3 statements they all completely agree with, and 3
statements they totally disagree with.
Each group will have to justify the choice of statements and also explain the processes that took
place during this task.
DO NOT TELL THE GROUPS THAT THEY WILL HAVE TO NEGOCIATE, as they will have to come to this
conclusion themselves.
STEP 3: Feedback with the whole group: 30 minutes
In turn, the rapporteur in each group presents the selection of statements (statements are noted
on the board). Observations are made on the different statements: do all groups agree with each
other? Did some groups put the same statement in opposite categories? How can we explain this?
Identify differences in representation, language, meaning of words, professional identity
etc.
In turn, the observer presents the process for each group; Difficulties and levers are noted on the
board.
Identify that a negotiation process took place that stakes may have differed between
participants, objectives may have differed to, and that negotiation is a solution to reach a
common solution.
Alternative version: Add constraints cards to emphasize the points you consider most relevant eg
the difference between stakes and goals, language an vocabulary barriers etc…)
STRONG POINTS POTENTIEL DIFFICULTIES, LIMITATIONS
➢ It is basically a systematic study of
participants of viewpoints
➢ Negotiation process that emerges
➢ The trainer must resume the definition of
consensus and introduce the notion of
mandatory negotiation
Sources :

59
1. Job van Exel (2005). Q methodology: A sneak preview.
https://www.researchgate.net/publication/228574836_Q_Methodology_A_Sneak_Previe
w
2. Mérini, C. (1999) Le partenariat en formation: de la modélisation à une application. Harmattan.
223p.

60
3 11
Cocreation is real when it’s on a voluntary
basis Cocreation’s first step is meeting people
19 27
Cocreation requires people to talk about
their opinions
Cocreation contributes to people’s
trademark
6 14
Real cocreation requires financial means Cocreation is real when you experience
numerous arguments
22 30
Cocreation requires people to confront
their ideas
Cocreation requires a very rigorous
organization
8 16
In order to cocreate, people need to know
exactly what their role is
Cocreation aims to changing people’s
vision
24 32
Cocreation is networking Cocreation contributes to informing
decision-makers
2 26
Cocreation allows people to swap roles, of
even be replaced by someone else
Cocreation enables people to have
specialized practices
4 12
Cocreation requires to be evaluated
regularly
Sustainable cocreation requires
institutionalization of the partnership
20 28
Cocreation means implementing a joint
intervention Cocreation promotes information
1 9
Cocreation is an opportunity for
innovation Cocreation opens new perspectives
17 25
Cocreation creates space for creativity Cocreation transforms decision-makers
23 7
Cocreations is a means to articulate social
practices with people cultural background Cocreation means ‘to have common goals’
15 31
Cocreation can have unexpected effects Cocreation can lead to exclusion
5 13
Cocreation is mainly joint action Cocreation means that the stakes are the
same for everyone
21 29
Cocreation brings a new vision Cocreation is a means to change the
political system
18 10
Cocreation requires training Cocreation means that people engage in a
common deliverable
Inspired from Mérini, C. (1999) Le partenariat en formation : de la modélisation à
une application. Harmattan. 223p.

61
Q-Sort presentation guidelines: ideas to introduce in your presentation
- High level collaboration / cocreation means that people share something that brings them
together. It is a specific mode of interaction, which brings various people together to solve a
common issue or address a common aspiration.
- It is about building common grounds based on people’s differences.
o Differences in competences
o Differences in hierarchical status, social status and so on
o Differences in decision power
o Differences in the stakes involved
- Often, such differences are barriers to overcome
- Everyone needs to have an interest in the collaboration, there needs to be a shared problem,
issue, question to address. This shared issue needs to be acknowledged by all, as this will
promote motivation.
- Common objectives need to be pinpointed, even though the stakes will be different for each
institution / participant. This is where the negociation process takes place, to be able to agree on
common goals, and accept other peoples’ reasons to be part of the project. Negotiation is key to
take differences into consideration.
Ref: Mérini, C. – P35-47. CHAPITRE 2. Les dynamiques collectives dans le travail enseignant : du mythe à
l’analyse d’une réalité (2007) livres : Coordonner, collaborer, coopérer. De Boeck. 208p.

62
Sticky Notes activity worksheet
OBJECTIVES Group animation technique that enables the trainer to structure group discussions, quickly and easily
gathering all the ideas of a group. This technique enables the trainer to synthesize the information collected
and consolidate it in a consensual form leading the group to visualize the richness and complementarity of
their opinions or to consider all aspects of an issue.
TARGETED SKILLS (examples)
☐ CAPACITY TO SHOW INTEREST IN WHAT A PERSON CAN
BRING AND THINK, PROMOTE EXCHANGE AND
COMMUNICATION
☐ CAPACITY TO PROVIDE POSITIVE AND CONSTRUCTIVE
FEEDBACK, DEVELOP MOTIVATION
☐ CAPACITY TO DEVELOP CONSTRUCTIVE DIALOG,
CONSTRUCTIVE CONFRONTATION OF IDEAS AND DEBATE
HOW TO ORGANIZE THE SESSION
Recommended duration: 1 hour
Recommended number of people: 20
Material, props: post’it of different colors, marker pens, stickers
HOW TO CARRY OUT THE ACTIVITY
1. Preparation: write “what do you know about project management?” on the board. Give out
the Sticky notes and markers.
2. Participants are invited to write ONE IDEA ONLY on each sticky note, using simple and short
statements, drawings, or words (explicit, which do not require comments).
3. Answers are collected and placed on the board or table. Sticky notes are then categorized
in groups (answers which relate to the same idea). The categories are then named.
4. If the group is trying to answer a question (vs outline a subject) an extra step can consist of
weighting the different ideas: participants are invited to get up and place two stickers on
the groups that seem to better answer to question (prioritization).
This Sticky notes activity will be carried out in 6 different rounds on the following themes:
1st round: What do you know about project management?
Try and sort ideas, and make any required additions. You want to be able to have the following
categories for next rounds:
- Setting up a team
- Needs analysis

63
- Strategic planning
- Evaluation
- Communication / sustainability
For each additionnal round, either focus on one of the steps, or on a category of ideas, e.g. ”write
down ideas on how to set up a project team”, or ”write down any tools you know”. Then categorize
the ideas and take a picture for future reference.
STRONG POINTS POTENTIEL DIFFICULTIES, LIMITATIONS
➢ Create a dynamic that forces everyone to
participate
➢ Generate a lot of ideas
➢ Create a consensus around the
interpretation of an issue
➢ One idea per post-it (make short sentences)

64
Mediation competences worksheet
Mediation competences require to understand the stakes relating to the different sectors involved,
individually, but also grasp the potential stakes, challenges and opportunities relating to inter-sectoral
collaboration.
Using mediation competences requires to adhere to the following values
• Shifting from an expert posture to a process facilitator
• Being humble, curious
• Welcoming “out-of-the-box-thinking”
Examples of mediation competences are found below
• Capacity to show empathy, listening skills with no judgement
• Capacity to show interest in what a person can bring and think, promote exchange and
communication
• Capacity provide positive and constructive feedback, develop motivation
• Capacity to debate, without manipulating
• Capacity to develop critical thinking, and skills to synthesize different opinions
• Capacity to develop constructive dialog, constructive confrontation of ideas and debate
• Capacity to embrace the emotions which may emerge from collaborative situations
• Capacity to stimulate people’s enthusiasm to find new solutions, develop creativity
• Capacity to create and share a vision, federate and promote coherence in efforts

65
LEGO ACTIVITY worksheet @Agnes_Crepet
If working with a large group, split in groups of 10-12.
STEP 1: Promoting empathy, and defining needs – 20 Minutes in total
Aim of this step: enabling participants to put themselves in users/patients/citizens place
Each participant is asked to create 2 personas, who represent the users / citizens they work with. (See
Persona Worksheet for inspiration). – 10 minutes
Use Legos to represent the persona, and sticky notes to provide a short description of the person.
When all the personas are created, ask everyone to introduce their personas. The facilitator writes the
main issues/ problems/ stakes on the board at the same time. At the end of this phase, participants
should have a good idea of what type of problem they are dealing with, what issue they are trying to
address-10 minutes

66
PERSONA WORKSHEET

67
STEP 2: PROTOTYPING – 20 minutes
Each team of 10-12 splits into groups of 3-4 people. They then generate ideas to find a solution to the
problem identified in step 1 and prototype it. -15-20 minutes max
STEP 3: ITERATION PROCESS – 15 minutes
Each group of 3-4 pitches their idea to the group of 10 people in 3 minutes.
Then each participant puts forward the strong points, ideas they liked, as well as the weaker points or
changes to be made. This is done very quickly (1 minute per person)
STEP 4: PROTOTYPING – 15 minutes
Each group of 3-4 people works on their prototype again taking comments into consideration.
They then generate new ideas and a new prototype. -15 minutes max
STEP 5: ITERATION PROCESS – 15 minutes
Each group of 3-4 pitches their idea to the group of 10 people in 3 minutes.
Then each participant puts forward the strong points, ideas they liked, as well as the weaker points or
changes to be made. This is done very quickly (1 minute per person)
STEP 6: PROTOTYPING – 15 minutes
The whole group then prototype a new solution together.

68
Try out an activity worksheet
CHART THAT COULD BE USED FOR FEEDBACK IF THE PARTICIPANT USED AN ACTIVITY
NAME OF ACTIVITY USED
SHORT DESCRIPTION OF HOW YOU USED IT?
HOW DID IT GO?
WERE THERE ANY DIFFICULTIES?
WERE THERE ANY FACILITATORS?
HOW SUCCESSFUL WAS IT?
HOW DID YOU ASSESS THE SUCCESS OF THIS
ACTIVITY?
DID YOU MAKE ANY ADAPTATIONS?
DO YOU HAVE ANY RECOMMANDATIONS TO
MAKE?
CHART THAT COULD BE USED FOR FEEDBACK IF THE PARTICIPANT COULD NOT USE AN ACTIVITY
NAME OF ACTIVITY YOU COULD USE
SHORT DESCRIPTION OF HOW YOU COULD USE
IT?
WHAT DIFFICULTIES WOULD YOU EXPECT?
WHAT FACILITATORS COULD YOU USE?
HOW WOULD YOU ASSESS THE SUCCESS OF THIS
ACTIVITY?
WHAT ADAPTATIONS WOULD YOU MAKE?
DO YOU HAVE ANY RECOMMANDATIONS TO
MAKE?
“Try out one of the activities we did today, and prepare feedback on it”
69
Bridging Activity
1. What assumptions and agendas may need to be made explicit and negotiated in your local context?
2. What project management tools can you use with your case study and co-creation in general from the different methods presented?
3. Who might you need to present the case for co-creation to and what can you include in your case?

70
4. How will you generally evaluate your project and how will you evaluate the success of the co-creation?
5. How does the solution you developed in the Lego activity relate to your co-creation case study?

71
6. What further reflections do you have from the day overall that relates to your co-creation case study?
7. What activity will you try using in your organisation? How you will do this and who you will
do it with?

72
Training Theme 4: Dissemination and Communication of the co-creation process and its results

73
6.1 Learning objectives and trainer competences for training theme 4 The learning aims for training theme 4 is that the participants is able to create storybased dissemination
to encourage sustainability and to inspire co-creation as something that can be achieved in reality (and
co-create confidence to achieve!). Furthermore it is an objective to complete a common reflection on
bringing all learning together and what it means in practice, consequently that the participants can be
trainers too! Conclusively the participants should be able to:
- apply a narrative- and practice-oriented approach as a method for communicating with
collaborators and stakeholders.
- identify, communicate, and engage with different stakeholders – political and practical with the
narrative approach. Identifying and presenting the good story to stakeholders, citizens, colleges.
Participants will obtain theoretical knowledge about and be able to use in practice:
- the narrative approach in communication.
- practice narratives in working with citizens and collaborators.
- citizens’ and collaborators’ conception of practice, visualizing different perspectives.
- practice narratives as documentation and the good story – a collaboration between stakeholders
and participants.
- knowledge sharing (“Capacity building”).
The result is a road-map and dissemination plan for each participant (or group of participants if they
belong to the same organization and are working with the same daily tasks), hereby supporting a
sustainable implementation of concrete co-creation actions in the local practice.
The following specific competences will be useful for the trainer to have:
- Experience in teaching communication.
- Experience in cooperating with civil society actors.
- Experience in facilitating innovation with co-creation as an approach.
- Experience in and competences to work with/support cross-sectorial implementation of
innovation.
74
6.1 Preparation for training theme 4
Preparation needed before the first training day:
- Organize venue and any catering/refreshments (check if anyone has any special requirements re
catering, access, etc.)
- Finalize the format of the day (choose which options you wish to use), presentation slides and
materials for the day.
- Create a film to send out to attendees prior to the training day (optional – see course
introduction).
- Send out program, map, link to project website (for access to training information and tools),
pre-reading materials (and film if you have created one).
- Prepare the Padlet platform
- Make sure you have the Story Cubes.
- Make sure attendees can have access to wifi for the up-load at Padlet.
- Send out a link to an example of a Pecha Kucha presentation, e.g. from Youtube.
- Send out 4 – 5 questions about the activity that the attendees have been working with between
training day 3 and 4. See “Try out an activity worksheet” from training day 3.
List of materials needed for trainers: - Sticky notes and pens
- Paper board and white board
- Video projector and screen
- Story cubes for the story cubes activity
- An example of the pecha kucha presentation

75
What should trainers ask attendees to do before coming to day 4? Participants should bring along their Charter which they have completed as far as possible.
Besides this, each participant should write down their own narrative of a/the co-creation project/process
they are working with in their own practice. Each narrative must not exceed 1000 characters. We suggest
the narratives being presented are shared with the other participants before the module on the Padlet.
On the training day, trainers will need to: - Hand out evaluation forms with the following questions;
- How will this course affect your future meetings with collaborators facilitating co-creation?
- Do you feel prepared to apply the narrative approach in your practice at work?
- Do you feel insecure about anything?
- If so – how will you deal with this?
NOTE: the evaluation should preferable connect closely to the preparation form which the
participants receive before the course day.
After the training day, trainers will need to: - Share presentation slides.
- Send round any materials/information of interest that arose during the training course (e.g.,
based on a conversation, a question might be asked and people want further reading on a topic,
and this can be sent round afterwards as a follow up from the day).
- Share artefects created in day one – e.g., scan them in and email them round to the group.

76
6.2 Proposal for timetable for training theme 4
Time Activity Notes to trainer
8:30 AM Welcome, introduction of today’s program
and learning objectives by facilitators
8:45
AM
Theoretical frame and presentation of
today’s theme:
A narrative approach to communication
Themes: narrative approach, conceptions
of learning, practice narratives.
Break
9:15
AM
9:30 AM Group activity: Create a shared narrative.
Story Cubes are used in order to establish
a common narrative of the co-creation
process and outcome. Yet, on the course
day, the focus of the exercise will be a
common narrative of the CCW project.
The cubes support sharing the good story
not only by words but also by the use of
pictograms. The cubes enable us to create
a narrative with the use of a creative and
innovative approach.
Reflections often come while telling the
story and reveal new perspectives for the
narrator. By categorizing the different
perspectives of the group members into
overall themes, the group has created the
basis of a shared narrative that they can
communicate to the surrounding world.
See Story Cubes worksheet.

77
10:10
AM
Theoretical presentation and discussion:
Challenges and possibilities in developing a
shared narrative. The concept of BA, bringing
tacit knowledge as a resource to the table,
creating a space for sharing knowledge.
Break
10:40
AM
Group discussions: Identify and discuss
challenges in prepared practice narratives –
in pairs. The Story Cubes can be used again.
10:55
AM
Theoretical presentation and discussion:
Dissemination, shared ownership and
anchorage of shared narrative
How to move from an individual
perspective to a common, shared
narrative and understanding (within the
local authority, community, organization,
institution…). How to work strategically
with narratives becomes an organizational
opportunity and responsibility.
Tacit knowledge versus explicit knowledge
– the potential of sharing knowledge and
making the tacit knowledge visible,
concrete and present.
The Padlet is used as an example of a
platform as the participants have
uploaded their own stories here.
Preferably also the facilitators have
uploaded a story which can inspire the
participants. The Padlet is helpful for
visualizing how tacit knowledge can be –
more – visible.
11:30
AM
Lunch
12:15
PM
Group discussions and activity: The good
story about a solution developed in co-
creation. From individual experience to an
organizational narrative.
The facilitator gives a short presentation
of the Pecha Kucha tool, 10 minutes and
shows an example. Examples can be found
at http://www.pechakucha.org/watch
The participants create a pecha kucha
presentation of their experience with the
CCW project based on the shared
narrative that they have previously laid

78
the foundation of through the story cubes
activity.
Each pecha kucha are presented to the
other participants.
14:15
PM
Preparing the action to be trained in
participant’s own practice.
Identification of who can help and
support, who will you contact and how?
Relational approach to the action. The
overall question being: how can co-
creation be integrated and further
qualified as well as integrated in my
organization?
The Charter is a central tool helping to
clarify what have been important
experiences and learning during the
course. At this very last day of the course
the Charter is helping the participants to
summarize and focus on methods, tools
and ways of anchoring the new
competences in the daily practice. The
Charter is hereby also a personal tool box.
Network based approach. Each participant
(or groups of participants depending on
how they are organized and perhaps are
working together) make their own plan of
engaging and bringing co-creation in to
their practice by answering:
a) What to do?
b) Why is it important to co-create and not
use the usual approach? In which way will
the result differ from what I know of
(identifying the added value).
c) Who will I engage with?
d) How will I do so?
e) When?!
If possible, the management team in each
organization is invited to this final part of
the course day. They will be listening and
perhaps sharing their ideas and reflections
as well.

79
15.00
PM
Evaluation
15:30
PM
Goodbye
6.3 Worksheets for proposed activities

80
Story Cubes Worksheet
40 minutes
Goals of the activity: To create a shared narrative about what you have gained from participating in the CCW project (if the
group has participated in the same co-creation project, then the shared narrative can be on that project
instead of) through an exploration of one’s own and the other participants’ perspectives.
How to do the activity: Make groups of 5-6 participants
Choose one facilitator who will note down the perspectives shared and lead the process of agreeing on
themes (the person should also be given the opportunity to throw the cubes and share his or her
perspective).
Choose one person to keep track of the time.
The question to be answered: What have you gained from participating in this project?
- Take turn throwing the cubes.
- When it’s your turn, choose 5 of the images and use them to share your perspectives re the
question above with your group members.
- The group facilitator will write down your perspectives in headwords on sticky notes, one
perspective on each note. 20 minutes in total.
- When all group members have had their turn, agree on a way to divide all the perspectives on
the sticky notes into 4-5 overall themes and place them on a poster. This part is led by the group
facilitator. 15 minutes in total.
- The themes agreed upon will be the basis of your shared narrative of the co-creation process (or
in this case, the experience of participating in the CCW project). The next step is to agree on a
way to present your shared narrative e.g. by making a Pehca Kucha presentation.

81
Pecha Kucha Worksheet
2 hours.
The word Pecha Kucha is Japanese and means chit chat. It is also a presentation style in which 20 slides
are shown for 20 seconds each – this means that your presentation takes in total 6 minutes and 40
seconds. This format keeps presentations concise and fast-paced, but it also encourages you to think
more creatively about how to get your message across to your audience.
The Pecha Kucha method is effective when you need to present an idea very shortly. The exercise focuses
on how the personal enthusiasm can be transformed and made visible for a larger group/organization.
The presentation in Pecha Kucha can help in a very concrete way to engage other people, share
knowledge, get new perspectives etc.
10 minutes: Short presentation by facilitator, what is the purpose, how to and perhaps one example.
When making a Pecha Kucha presentation for the first time, it’s common to become frustrated by the
tight format and to struggle getting the timing between speech and slides right. This information could be
shared with participants to make them prepared to become frustrated.
50 minutes: Each group that created the shared narrative in the Story Cubes activity prepares one
presentation. Due to the time limit they might have to shorten their presentation to less than 20 slides.
In order to make a Pecha Kucha presentation, you should:
• Start by finding out what your message is. You might have many messages that you would like to share
with the audience, but due to the tight format you will have to choose a few.
• Then build up your story. You might want to make a template like the one below. For each slide you
have time for what corresponds to approximately 2 or 3 sentences written in the word computer
program. You can choose to spend more than one slide on a specific point or topic – that’s up to you.
• When making a Pecha Kucha, you can put images, pictures, cartoons, headwords etc. on your slides.
Avoid too many words on the slides as the audience won’t have time to read it. Remember: Images speak
louder than words.

82
• Then create your slides. In order to keep to the tight format you are encouraged to set the slideshow to
automatically change slides every 20 seconds. Now it’s time to practice your presentation. And it does
take practice, you might feel stressed about the format to begin with, but do not despair. It will get easier
along the way and you will make some great presentation that your audience will love to listen to and
look at and not the least - presentations and messages that they will remember.
• You can find some great pecha kucha presentations on Youtube in order to get some inspiration of how
to do it. Good luck working on your new, creative, and effective presentation style.
60 minutes. Each group hereafter presents their narrative for the whole group of attendees. Feedback
from attendees and facilitator focuses on how the presentation is conceived and what the presentation
could perhaps comprise at the next step in practice.

83
Reflection Activity
1. How can you incorporate the ‘us’ and ‘now’ into your story?
2. What other stories can you create?
3. How might you use story cubes to co-create a story in your local context?

84
4. What circumstances can you use the pecha kucha method of communication?
5. Who are you going to stay in touch with and how?
6. How will you continue your co-creation habit?

85
- Annexes
- Cube Template
- Inspirational slides for an introductory presentation about co-creation
Co-Creation definition:
“collective creativity, i.e. creativity that is shared by two or more people”
Sanders and Stappers (2008)

86
Key-points of Co-Creation
• end-users; seek and value their experience
• mutual development of solutions / identification of problems
• based on Participatory Action Research (PAR) methods
• appears to be messy but is a process
(Sanders, E. and Stappers, P. 2008 Co-creation and the New Landscapes of Design
CoDesign 4(1):5-18 . DOI 10.1080/15710880701875068)
• central to solution development
• applicable to product, service, organisation, urban design… etc
Aims of Co-Creation
• gather people with a shared goal
• share different approaches product development and services
• explore new ways of working within existing constraints
• user-centred; seen through the user’s eyes
• all end-users are involved in creative activities
• create physical artefacts to represent ideas
• a process, not a snap-shot of user experience
87
Advantages of participating in Co-Creation
• experience makes users, the ‘expert’
• inclusive – all users participate and have their say
• empowering
• relaxed, informal environment with playful atmosphere
• better understanding of other’s problems and solutions (as well as one’s own)
• efficient process
Outcomes of Co-Creation
• better understanding of user needs, leads to successful result and:
• development of a product/service that users truly want
• empathy for user relationship with products, services
• persuasive – data gives powerful words and pictures
• allows innovation in the right direction
• avoids taking too many wrong turns
Summary of Co-Creation introduction
• efficient
• effective
• empowering

88
This document has been developed as part of the ERASMUS + Project
Co-Creating Welfare
For more information please look at
www.ccw-project.eu
The content of this documents does not reflect the official opinion of the European Union.
Responsibility for the information and views expressed in the document lies
entirely with the author(s).
Reproduction is authorised provided the source is acknowledged.
Partners in the Co-Creating Welfare Project are:
This work is licensed under the Creative Commons Attribution-NonCommercial-ShareAlike 4.0 International
License. To view a copy of this license, visit http://creativecommons.org/licenses/by-nc-sa/4.0/.