camp tv episodes in week 2
TRANSCRIPT

CAMP TV Episodes in Week 2
CAMP TV 206 Independence Day Celebrate with a stars and stripe handprint, toss balls into Uncle Sam’s hat!
Celebrate Independence Day with head counselor Zach and make a stars and stripes handprint! Meet meerkats & mandrills, make shadow art and pendulums. Content partners include America’s Test Kitchen Kids, Children’s Museum of South Dakota, Exploratorium, Impossible Science, Memphis Zoo, One Voice Children’s Choir, Playworks, San Diego Zoo, S’more Ideas, Story Pirates, The Metropolitan Museum of Art. CAMP TV 207 Celebrate Your Name Day Make a name sign, read The Name Jar, learn what’s in a name! Join head counselor Zach to make a name sign, read The Name Jar, learn what’s in a name! Meet
macaws, play “Match My Height,” use vegetables to design a t-shirt, go on a simple machines scavenger
hunt, do yoga dance. Content partners include Appalachian Center for Crafts, Memphis Zoo, National
Dance Institute, OK Go, Story Pirates.
CAMP TV 208 Sports Day Play mini-golf, mini-football, and mini-bowling! Join head counselor Zach to play mini-golf, mini-football, and mini-bowling! Make a racer from cups, learn to steal a base, meet kangaroos and rhinos. Content partners include America’s Test Kitchen Kids, Children’s Museum of the Arts, Memphis Zoo, OK Go, One Voice Children’s Choir, San Diego Zoo, S’More Ideas, Story Pirates. CAMP TV 209 Royalty Day Read Crown, make a crown and a coat of arms, meet the king of the jungle! Join head counselor Zach to read Crown, make a crown and a coat of arms, meet the king of the jungle! Learn hip hop moves, turn lemons into lemonade, create tessellations and an animal craft. Content partners include America’s Test Kitchen Kids, Children's Museum of Acadiana, Minnesota Zoo, NJ DOE, NY Philharmonic, NY Public Library, San Diego Zoo, They Might Be Giants, 1520 Arts. CAMP TV 210 Travel Day Try foods from different countries, play “Land, Sea, Air,” make a compass! Join head counselor Zach and try food from different countries, play “Land, Sea, Air,” make a compass. Meet giraffes and cowboy kids, go on a sensory hike, read Suki’s Kimono, do a pattern dance! Content partners include Buffalo Bill Center of the West, Carnegie Hall, Liberty Science Center, Memphis Zoo, OK Go, Playworks, Seneca Park Zoo.

© The WNET Group https://www.camptv.org
Activity Guide
Snazzy Jump Rope Moves ……….……..……….1-2 Guacamole ….………..………….……..…..……… 3-4 Stars and Stripes Flag Handprint Painting .… 5-6 Make a Potato Print ……..……….….…….......… 7-9 Pendulums ……………….……….……..….….... 10-11 Shadow Art ……….……………..……...........… 12-13 Festive Fruit Drink ……….…………...…………….. 14 Telekinesis: Opposites Attract …………………… 15
Camp TV is a production of The WNET Group.
Major funding for Camp TV is provided by the Corporation for Public Broadcasting. Additional funding is provided by The Peter G. Peterson and Joan Ganz Cooney Fund and the Pine Tree Foundation of New York.
Can you think of a time when you did something on your own for the first time? Draw a picture of you doing something independently and get ready to celebrate “Independence Day” on Camp TV!
PARTICIPATE!
Celebrate Independence Day with head counselor Zach and make a stars and stripes handprint! Meet meerkats & mandrills, make shadow art & pendulums. Content partners include America’s Test Kitchen Kids, Children’s Museum of South Dakota, Exploratorium, Impossible Science, Memphis Zoo, One Voice Children’s Choir, Playworks, San Diego Zoo, S’more Ideas, Story Pirates, The Metropolitan Museum of Art.
Season 2, Episode 6: Independence Day

https://www.camptv.org
Snazzy Jump Rope Moves
Skier
1. Jump side to side with your feet together.
Bell Hop
2. Jump front to back with your feet together.
Straddle Cross
1. Start with your feet together.
2. Jump with your feet out into a straddle.
3. Crisscross one foot in front of the other.
4. Jump back out.
5. Crisscross the other foot.
6.Repeat as you jump rope!

https://www.camptv.org
Crisscross
1. Jump normally with your feet together.
2. Swing the rope over your head with a normal swing and jump.
3. Then, cross your arms while you swing the rope and jump.
4. Alternate between one normal swing and one crisscross swing as you jump rope.
Activity courtesy of S’more Ideas
https://www.camptv.org
Guacamole Materials List:
• Cutting board
• Butter knife
• Soup spoon
• Medium bowl
• Rasp grater (or box grater)
• ¼-teaspoon measuring spoon
• Chef's knife
• Whisk
• Rubber spatula
Ingredients:
• 3 ripe avocados
• 1 lime
• ½ tsp salt
• 1 plum tomato, chopped
• 2 tbsp chopped fresh cilantro
• 1 scallion, sliced thin
*This activity should be done with the help of a trusted adult* Instructions:
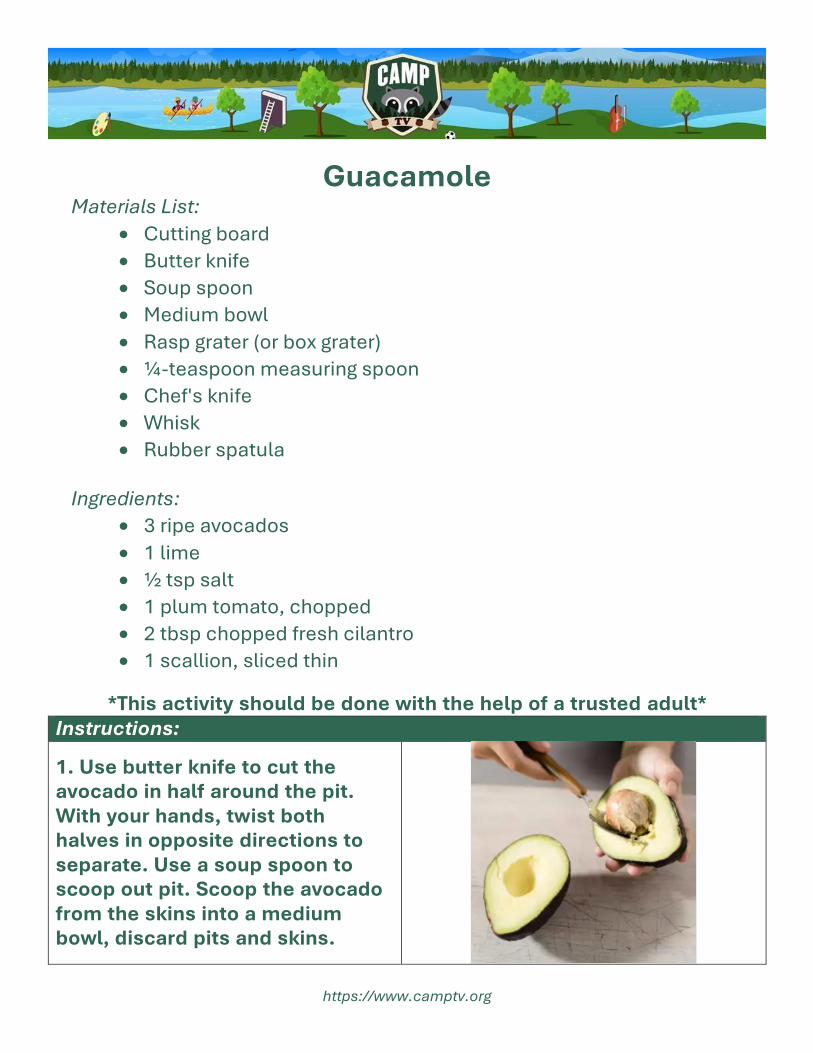
1. Use butter knife to cut the avocado in half around the pit. With your hands, twist both halves in opposite directions to separate. Use a soup spoon to scoop out pit. Scoop the avocado from the skins into a medium bowl, discard pits and skins.

https://www.camptv.org
2. Use rasp grater or fine holes on box grater to remove ¼ teaspoon zest (the colored skin) from lime. Add zest to bowl with avocados.
3. Use a chef’s knife to cut the lime in half and squeeze the juice into the bowl with the avocados. Add salt to the bowl.
4. Use a sturdy whisk to break the avocado into large pieces. Gently stir mixture to combine, leaving some large chunks of avocado. Gently tap the whisk on the rim of the bowl to remove any stuck avocado pieces and remove whisk from bowl.
5. Add tomato, cilantro, and scallion to the avocado mixture and use a rubber spatula to gently stir together. Serve and enjoy!
Activity courtesy of America’s Test Kitchen Kids

https://www.camptv.org
Stars and Stripes Flag Handprint Painting Materials List:
• washable non-toxic red, white, and blue craft paint
• paint brushes
• light-colored piece of paper
• piece of colored paper
• white paint marker
• glue
Instructions:
1. Start by painting a blue square on the palm of your hand.
2. Paint red and white alternating stripes down your fingers
3. Press your hand down onto the light piece of paper and hold it steady. After a few seconds, carefully lift your hand up.

https://www.camptv.org
4. After you’ve washed your hands and your painting has dried add a star to the blue area using a white paint marker (if you don’t have a white paint marker, you can use regular white paint).
5. Put some glue onto the back of your handprint and mount your artwork onto the colored paper, creating a frame.
6. Don’t forget to sign your name!

https://www.camptv.org
Make a Potato Print
Materials List:
• paper
• slices of potato
• pencil
• paintbrush
• acrylic paint
• paperclip
Design Your Print
Instructions:
1. Ask an adult to cut a potato into thick slices.
2. On a piece of paper, sketch a design for your potato stamp.
3. Center the design on the paper over the flesh of the cut potato.
4. To transfer the design, use the end of an unbent paperclip to poke holes along the design lines.
https://www.camptv.org
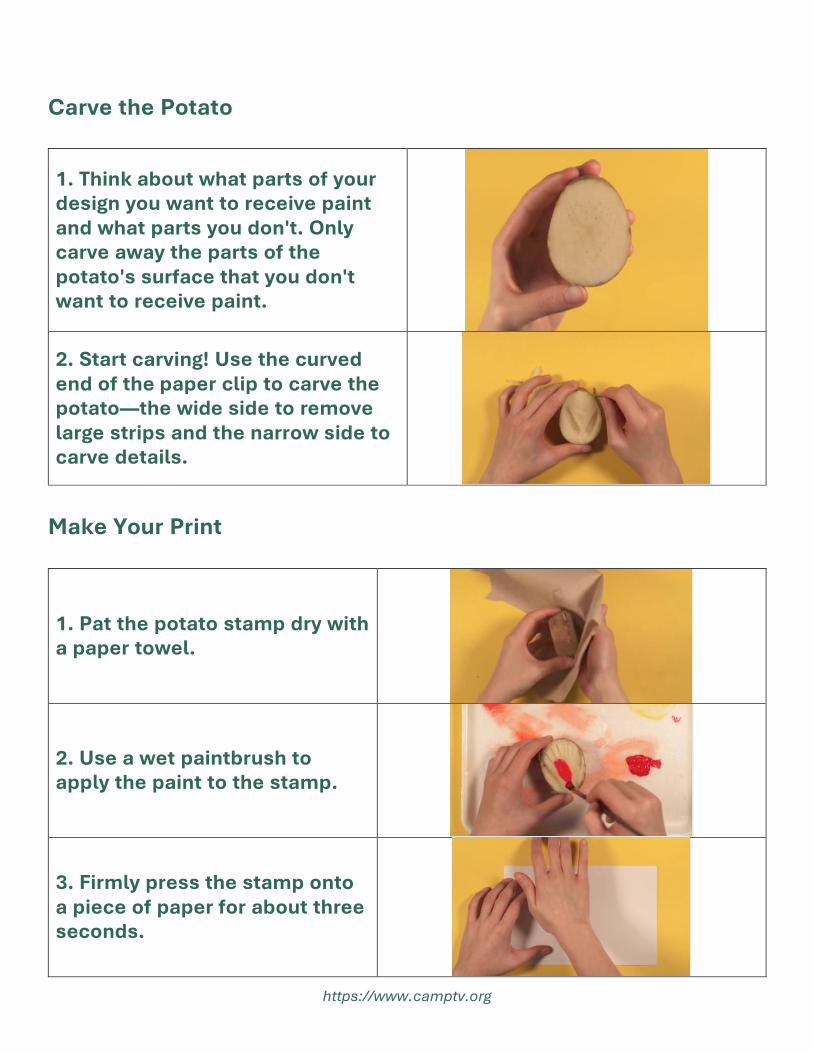
Carve the Potato
1. Think about what parts of your design you want to receive paint and what parts you don't. Only carve away the parts of the potato's surface that you don't want to receive paint.
2. Start carving! Use the curved end of the paper clip to carve the potato—the wide side to remove large strips and the narrow side to carve details.
Make Your Print
1. Pat the potato stamp dry with a paper towel.
2. Use a wet paintbrush to apply the paint to the stamp.
3. Firmly press the stamp onto a piece of paper for about three seconds.

https://www.camptv.org
4. Slowly lift the potato from the paper.
5. Repeat to make a pattern.
6. Check out your awesome print!
Activity courtesy of The Metropolitan Museum of Art - #MetKids
https://www.metmuseum.org/art/online-features/metkids/videos/MetKids-Make-a-Potato-Print

https://www.camptv.org
Pendulums Materials List:
• weighted object - coin, jar lid, button, key, or washer
• something to secure the object – tape, paperclip, or rubber band
• something the pendulum can hang from - yarn, twine, or old shoelace
• long flat object – ruler or cooking spoon
Instructions:
1. Secure your weighted object onto the string. Be sure to secure the string to the middle of the weighted object
2. Lift the weighted end of the pendulum and let it swing. Experiment with different materials to see what works, and what doesn’t work.

https://www.camptv.org
3. Tape a long flat object to a table so that an inch or two is sticking out over the edge of the table.
4. Take the sting of the pendulum so that it is in line with the object. Use extra pieces of tape to secure your pendulum in place.
5. Observe your pendulum.
6. Experiment with different set ups or try comparing different kinds of pendulums.
Activity courtesy of The Exploratorium

https://www.camptv.org
Shadow Art Materials List:
• colorful construction paper
• black and white construction paper
• glue stick
• eraser
• pencil
• safety scissors
• flashlight or other light source
Instructions:
1. With a pencil, draw your shadow on a piece of black construction paper.
2. Cut out your shadow using safety scissors.
3. When your shadow is cut out, glue it onto a piece of white construction paper.

https://www.camptv.org
4. Flip over the paper. Cut out shapes from the colored paper to begin creating a scene that your shadow can live in. Glue down the shapes, be careful not to cover up too much of your shadow.
5. When you are done, reveal your artwork to your friends and family!
Activity courtesy of The Children’s Museum of South Dakota

https://www.camptv.org
Festive Fruit Drink Materials List:
• pitcher
• large spoon Ingredients:
• 1 cup mixed berries – fresh or frozen
• 3 tablespoons of orange juice
• 2 tablespoons of lemon juice
• bubbly water
• 2 tablespoons of sugar - optional
1. Start by washing your hands. Then, stir together the berries, orange juice, lemon juice and sugar until the sugar has dissolved and some of the berries have broken down.
2. Let stand for about 10 minutes.
3. Pour in some fizzy water and serve over ice. Cheers!

https://www.camptv.org
Telekinesis: Opposites Attract Materials List:
• Straws
• Object with curved edge, like a saltshaker
Instructions:
1. Choose an object with a curved edge. Anything so that the straw is not resting directly across.
2. Charge the straw by dragging it against the paper wrapper as you remove it, or rub with a paper napkin.
3. The straw is now negatively charged. When it gets close to your fingers, it’s attracted to the positive charge in your hands. Place hands on different sides of the straw to make the straw move.
Activity courtesy of Impossible Science

© The WNET Group https://www.camptv.org
Activity Guide
Camp TV Name Tag …………………………………..1 Design Your Own T-Shirt …………….……..……….2-3 Make a Name Sign ……………………………………. 4-5 Match My Height ………………………………………. 6-7
Camp TV is a production of The WNET Group.
Major funding for Camp TV is provided by the Corporation for Public Broadcasting. Additional funding is provided by The Peter G. Peterson and Joan Ganz Cooney Fund and the Pine Tree Foundation of New York.
Use the template on the following page to make your own name tag to wear while you watch “Celebrate Your Name Day” on Camp TV!
PARTICIPATE!
Join head counselor Zach to make a name sign, read THE NAME JAR, learn what’s in a name! Meet macaws, play “Match My Height,” use vegetables to design a t-shirt, go on a simple machines scavenger hunt, do yoga dance. Content partners include Appalachian Center for Crafts, Memphis Zoo, National Dance Institute, OK Go, Story Pirates.
Season 2, Episode 7: Celebrate Your Name Day

https://www.camptv.org
Camp TV Name Tag 1. Print out the template.2. Write your name and decorate your name tag.3. Cut out your name tag using safety scissors and wear it while you watch“Celebrate Your Name Day” on Camp TV!
MY NAME IS:

https://www.camptv.org
Design Your Own T-Shirt Materials List:
• non-washable acrylic paints
• sliced veggies
• 100% cotton T-shirt (prewashed)
• cardboard
• masking tape (optional)
• Iron (optional)
*This activity should be done with the help of a trusted adult* Instructions:
1. Lay the shirt flat and place a piece cardboard inside of the shirt to prevent the print from transferring to the back.
2. Prepare your paints. You can mix paints to create your own unique colors.
3. Decide how you want to lay out your pattern.
4. Tap the edge of your sliced veggies into the paint.

https://www.camptv.org
5. Stamp the veggies onto your shirt to create a print. Press hard and apply even pressure.
5. Continue to add more prints. Try using other veggies and colors to make different designs!
6. You can try using masking tape to add a break in your design. Stamp over the tape, then remove the tape to reveal!
7. After the paint has dried, you will need to set the paint with heat. You can use a hot iron for 5 minutes (use a piece of cloth between the iron and the freshly painted t-shirt) or throw it in the dryer for 30 minutes. Once it has set you can wear your new shirt!
Activity courtesy of WCTE – Appalachian Center for Crafts

https://www.camptv.org
Make a Name Sign Materials List:
• pipe cleaners
• glue
• cardstock
• hole punch
• pencil
• safety scissors
Instructions:
1. Write your name on a piece of cardstock using a pencil.
2. Then, bend some pipe cleaners into the shape of the letters that make your name.
3. Trace the letters on the cardstock with glue and put your letters on top.

https://www.camptv.org
4. Punch two holes at the top of your sign.
5. Cut an assortment of multi-color pipe cleaners, about 6 inches in length, and wrap those pieces tightly around another pipe cleaner to form fuzzy beads.
6. Fold it in half to create a hanger. Twist each end of the hanger into the holes and fold to secure. Hang your sign on a wall, your bedroom door, or anywhere you’d like!

https://www.camptv.org
Match My Height Materials List:
• tape measurer
• different household objects
• tape Instructions: 1. Use a measuring tape to find your height in inches. It may be helpful to have someone assist you.
2. Collect different objects from around your house. List these objects in the chart.
3. Use the chart to make predictions about how many times you need to line up the object to match your height.
4. Lay a tape measurer on the ground. Mark your height on the tape measurer with a piece of tape.
5. Line up your object at zero. Use your finger to mark the length of the object and see how many times you need to line it up to match your height. Record the number in the chart and see how accurate your predictions were!

https://www.camptv.org
Match My Height
My Height: _____________ inches
OBJECT GUESS MATCH

© The WNET Group https://www.camptv.org
Activity Guide
Sports Day Pennant ……………………………… 1 Cup Racer ………………………….………….…... 2-4 Light Portrait ………………………..……………... 5 Bowl for the Goal ……………………..………….. 6-7 Itty-Bitty Goal Game …..………………….…….. 8-9
Camp TV is a production of The WNET Group.
Major funding for Camp TV is provided by the Corporation for Public Broadcasting. Additional funding is provided by The Peter G. Peterson and Joan Ganz Cooney Fund and the Pine Tree Foundation of New York.
We’ve got spirit, yes we do! We’ve got spirit, how about you? Use the pennant template on the next page to cheer for “Sports Day” on Camp TV!
PARTICIPATE!
Join head counselor Zach to play mini-golf, mini-football, and mini-bowling! Make a racer from cups, learn to steal a base, meet kangaroos and rhinos. Content partners include America’s Test Kitchen Kids, Children’s Museum of the Arts, Memphis Zoo, OK Go, One Voice Children’s Choir, San Diego Zoo, S’More Ideas, Story Pirates.
Season 2, Episode 8: Sports Day

https://www.camptv.org
Sports Day Pennant
1. Print the pennant template. 2. Decorate your pennant. 3. Cut out the pennant using safety scissors. 4. Wrap the shaded section around a pencil or wooden dowel. 5. Secure with glue or tape. 6. Cheer while you watch “Sports Day” on Camp TV!

https://www.camptv.org
Cup Racer Materials List:
• cups with lids
• scissors
• rubber bands
• paperclips
• push pin
• 2 small squares of cardboard (1in. x 1in.)
• hex nut
• bead
• tape
• marker
• pencil
• straw
*This activity should be done with the help of a trusted adult*
Instructions:
1. Mark the center on the bottom of both cups with a marker. Then, use a push pin to create a small hole in the center of the cups.
2. Use the pushpin to create small holes in the center of 2 small pieces of cardboard. Then, use a pencil to make the holes in the cardboard bigger.

https://www.camptv.org
3. Try using a pencil to make the holes in the cups bigger. If the pencil doesn’t work, ask an adult to help you make bigger holes in the cups using scissors. The holes should be big enough for rubber bands to fit through.
4. Stack the cups end to end, making sure that the holes line up. Use a long piece of tape to secure the cups together.
5. Take 2 rubber bands. Lay one underneath the other, fold it through itself, and pull it back out, creating a chain.
6. String the rubber band through a cup lid, the hole in a piece of cardboard, and a paperclip. Pull tight.

https://www.camptv.org
7. Use a pencil to push the loose end of the rubber band through the hole between the cups. Grab the end of the rubber band from the other side.
8. Push the rubber band through the second lid and the other piece of the cardboard. Then, string the rubber band through the hex nut and a bead so that the straw will sit past the lip of the cup.
9. Finally, string the straw through the loop of the rubber band.
10. Spin the straw to twist the rubber band. Set your car down on a flat surface and let it go!
Activity courtesy of Think TV / Mr. C

Activity courtesy of Children’s Museum of the Arts - https://www.camptv.org
Light Portraits Materials List:
• colored paper
• pencils
• drawing materials – markers, colored pencils, etc.
• safety scissors
• glue
Instructions:
1. Begin with a self-portrait. You can draw, cut out pictures from magazines, or use a photograph of yourself. Be sure to make your image is small so it can fit on the page with lots of extra space.
2. Once your self-portrait is complete, add your “light.” Use strips of colored paper to create a burst. Glue the strips to the paper. Cut the off the extra that falls off the page.
4. Cut out your self-portrait and glue it on top of the colored lines. Display your light portrait for everyone to see!
https://www.camptv.org
Bowl for the Goal Materials List:
• 10 empty cans or bottles – make sure they are empty and clean
• tape
• pen
• ball
• something to keep track of your score – paper and pencil
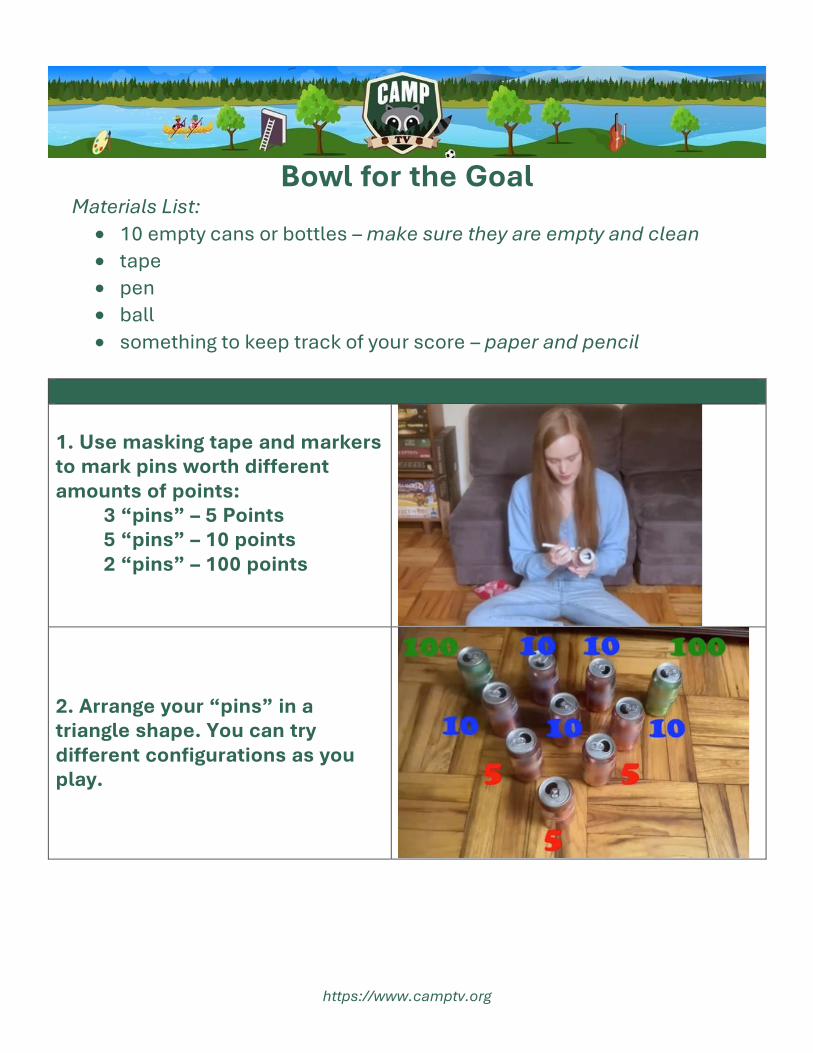
1. Use masking tape and markers to mark pins worth different amounts of points: 3 “pins” – 5 Points 5 “pins” – 10 points 2 “pins” – 100 points
2. Arrange your “pins” in a triangle shape. You can try different configurations as you play.

https://www.camptv.org
3. Use piece of tape to mark a line you must stay behind when your throw the ball. Roll the ball along the floor to try and knock down as many “pins” as you can.
4. Count your points for every “pin” that you knock down. Add up all your points to find your total score!

https://www.camptv.org
Itty-Bitty Goal Game Materials List:
• green and brown construction paper
• chalk
• ruler
• craft sticks
• mini clothes pins
• gray paint
• paint brush
• glue
1. Paint 3 craft sticks and 1 clothes pin gray. Once they are dry, glue them together to create the top of the goal post and clip to the clothes pin.
2. Next, using a ruler and chalk draw 10-yard lines from 10 - 40 on the green construction paper.

https://www.camptv.org
3. Set up the goal post in the end zone. The clothes pin should be able to stand on its own, but a small piece of clay can be used for reinforcement, if needed.
4. Crumple a small piece of brown construction paper for a ball. Have fun trying to flick it through the goal post for a field goal.

© The WNET Group https://www.camptv.org
Activity Guide Royalty Day Crown ………………………….…………….. 1 Back-Up Crown …………………………...……………….. 2-3 Lemonade ……………………..……….……………………. 4 Density Tower ………………………….……………………. 5 Macrame Wall Hanging …………………………………… 6-7 Tessellations ………………………………………….……… 8-9 Wings ………………………………………………………….. 10-11 Coat of Arms ………………………………………………… 12 Porcupine Craft …………………………………………….. 13-14
Camp TV is a production of The WNET Group.
Major funding for Camp TV is provided by the Corporation for Public Broadcasting. Additional funding is provided by The Peter G. Peterson and Joan Ganz Cooney Fund and the Pine Tree Foundation of New York.
Dress up for “Royalty Day” on Camp TV by making your own crown! Use the template and the instructions on the next page.
PARTICIPATE!
Join head counselor Zach to read CROWN, make a crown and a coat of arms, meet the king of the jungle! Learn hip hop moves, turn lemons into lemonade, create tessellations and an animal craft. Content partners include America’s Test Kitchen Kids, Children's Museum of Acadiana, Minnesota Zoo, NJ DOE, NY Philharmonic, NY Public Library, New York State Museum, S’more Ideas, San Diego Zoo, They Might Be Giants, and 1520 Arts.
Season 2, Episode 9: Royalty Day
https://www.camptv.org
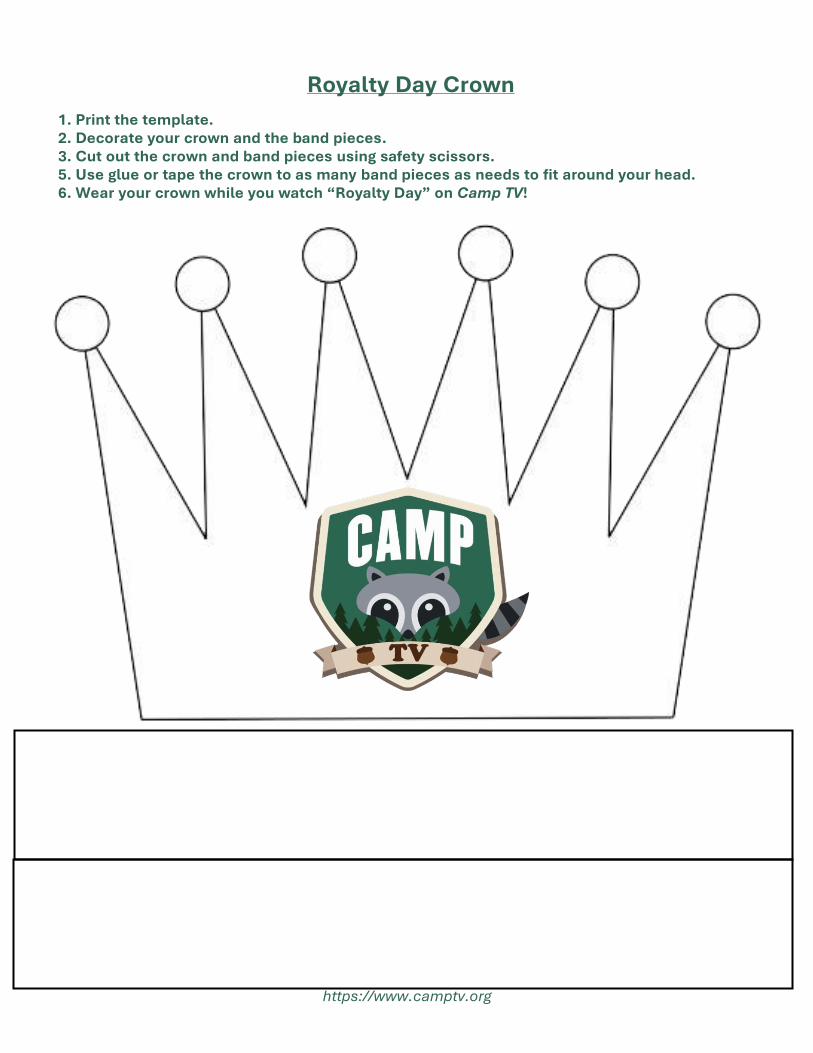
Royalty Day Crown
1. Print the template. 2. Decorate your crown and the band pieces. 3. Cut out the crown and band pieces using safety scissors. 5. Use glue or tape the crown to as many band pieces as needs to fit around your head. 6. Wear your crown while you watch “Royalty Day” on Camp TV!
https://www.camptv.org
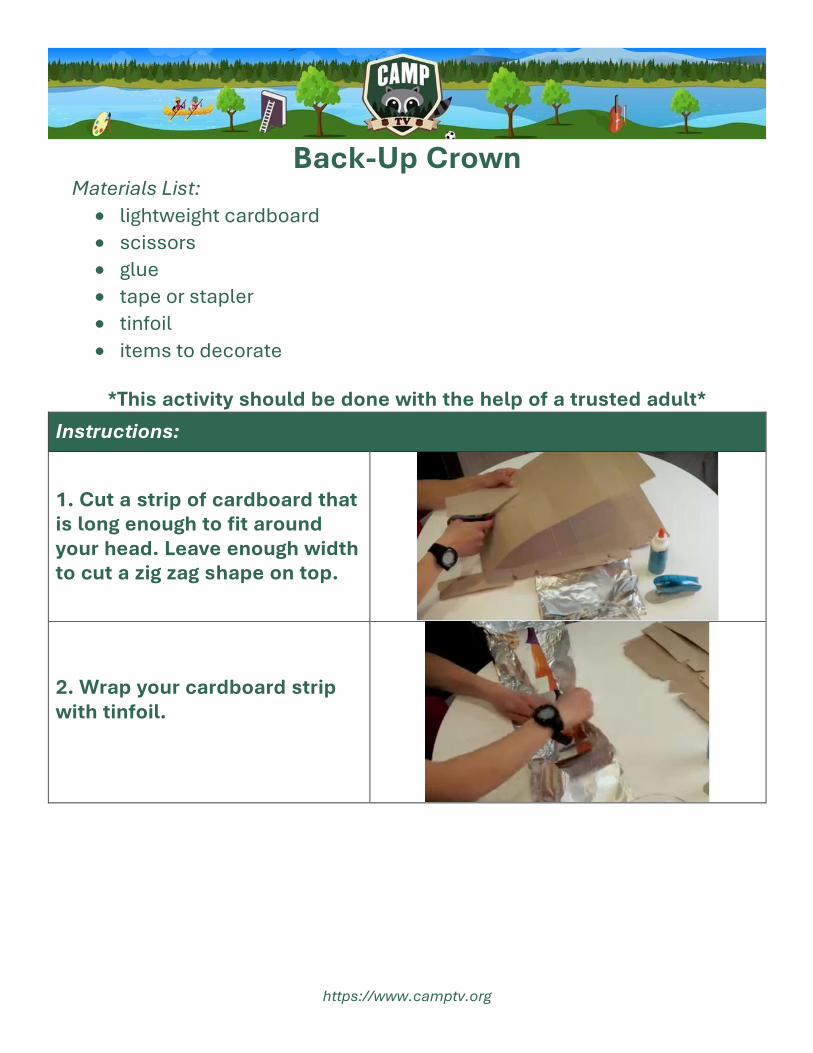
Back-Up Crown Materials List:
• lightweight cardboard
• scissors
• glue
• tape or stapler
• tinfoil
• items to decorate
*This activity should be done with the help of a trusted adult*
Instructions:
1. Cut a strip of cardboard that is long enough to fit around your head. Leave enough width to cut a zig zag shape on top.
2. Wrap your cardboard strip with tinfoil.

https://www.camptv.org
3. Cut a zig zag shape along the top of the crown.
4. Decorate your crown with whatever you please.
5. Tape or staple your crown from the inside and wear your crown like royalty!
- https://www.camptv.org
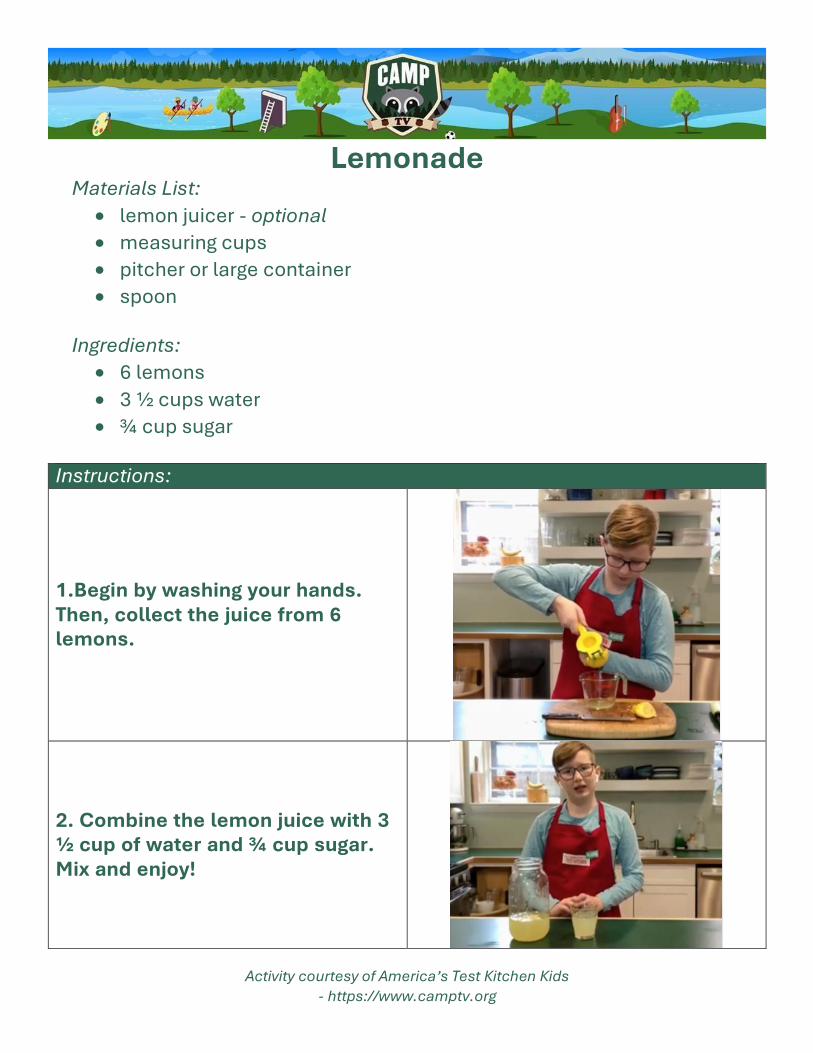
Lemonade Materials List:
• lemon juicer - optional
• measuring cups
• pitcher or large container
• spoon
Ingredients:
• 6 lemons
• 3 ½ cups water
• ¾ cup sugar
Instructions:
1.Begin by washing your hands. Then, collect the juice from 6 lemons.
2. Combine the lemon juice with 3 ½ cup of water and ¾ cup sugar. Mix and enjoy!
Activity courtesy of America’s Test Kitchen Kids

- https://www.camptv.org
Density Tower Materials List:
• liquids of different densities from around your home - vegetable oil, syrup, dish soap, colored water
• glass
• small items
Instructions:
1. Start with the liquid that is most dense. Pick up each liquid and try to figure out which one is heaviest.
2. Create layers from most dense to least dense using different liquids.
3. Drop items into the glass to test if they will sink, float, or get stuck in your density tower.
Activity courtesy of Children’s Museum of Acadiana

https://www.camptv.org
Macrame Wall Hanging Materials List:
• stick
• white string
• ruler
• flavored drink mix
• safety scissors
• 2 cups warm water
1. Measure and cut 9 pieces of string that are each 24 inches long
2. Secure each piece of string to the stick by making a small loop on top of the stick and pulling the ends through.
3. Cut one more 24-inch piece of string and tie it to the ends of the stick so that it can hang.

- https://www.camptv.org
4. Cut the ends of the sting into a diagonal with the longest pieces in the middle and the shortest pieces on the side.
5. Mix the flavored drink mix with warm water. Then, dip your wall hanging into the mixture. Let sit for 5-10 minutes.
6. Squeeze the excess into the cup and discard the liquid.
7.Let dry and hang your new macrame wall hanging!
Activity courtesy of S’more Ideas

- https://www.camptv.org
Tessellations Materials List:
• paper
• safety scissors
• tape
• pencil Instructions:
1. Fold your paper twice in both directions to make a bunch of rectangles.
2. Cut out one rectangle and draw a crazy line from top to bottom. Then cut it out
3. Move the piece that you cut to the other side and tape it on.

- https://www.camptv.org
4. If you’d like, draw another line from side to side and cut it out.
5. Move the new piece to the other side of your shape and tape together.
6. Trace your shape several times on a piece of paper and watch how perfectly it connects every time!
Activity courtesy of Lauren Proda

- https://www.camptv.org
Wings Materials List:
• 2 poster boards
• paper
• elastic bands
• glue gun
• scissors
• glue or tape
• pencil
*This activity should be done with the help of a trusted adult* Instructions:
1. Draw the shape of a wing that is the length of your arm on a poster board and cut it out. Use the cut out to trace a second wing on your second posterboard and cut it out.
2. Measure and cut 4 elastic bands that will fit around your forearm. Glue the elastic bands onto the wings using a glue gun.
3. Set aside the wing and start making the feathers. Using your paper, cut out an oval shape with a slight point on one end. Repeat until you have a good amount of feathers.

- https://www.camptv.org
4. Take a few feathers at a time and fold them length wise. Cut skinny triangles along the edges to give the feathers more dimension.
5. Lay your feathers on your wings and secure with glue or tape. Enjoy your new bird wings!
Activity courtesy of TPT / Minnesota Zoo

- https://www.camptv.org
Coat of Arms Materials List:
• construction paper
• markers
Instructions:
1. Start by drawing a giant “U”, then draw a line across the top. Divide inside of the shape into 4 quarters.
2. Draw symbols in each section that represent who you are and what’s important to you.

- https://www.camptv.org
Porcupine Craft Materials List:
• construction paper
• glue
• googly eyes
• pencil • black marker
• safety scissors
Instructions:
1. Trace your hand on a piece of construction paper and cut out the shape. Cut out 7 or more handprints on different colors.
2. Arrange the handprints so you can see as many fingers as possible then glue the layers together.

- https://www.camptv.org
3. Create the porcupine’s face using the corner of a piece scrap paper. Attach to the other pieces using glue.
4. Glue on googly eyes and draw a nose and mouth.
5. Now you have your own prickly porcupine!
Activity courtesy of New York State Museum

© The WNET Group https://www.camptv.org
Activity Guide
Pattern Dance …………………..….…….……..……….1 Cube Illusion ……………………………………………… 2-4 Tiny Treker You Bookmark …………..…………….…. 5-6 Homemade Compass …………………………………. 7-8
Camp TV is a production of The WNET Group.
Major funding for Camp TV is provided by the Corporation for Public Broadcasting. Additional funding is provided by The Peter G. Peterson and Joan Ganz Cooney Fund and the Pine Tree Foundation of New York.
Write a postcard to Zach! Draw a picture of your favorite travel destination and write a message telling him about your favorite things to do there.
PARTICIPATE!
Join head counselor Zach and try food from different countries, play “Land, Sea, Air,” make a compass. Meet giraffes and cowboy kids, go on a sensory hike, read SUKI’s KIMONO, do a pattern dance! Content partners include Buffalo Bill Center of the West, Carnegie Hall, Liberty Science Center, Memphis Zoo, OK Go, Playworks, Seneca Park Zoo.
Season 2, Episode 10: Travel Day

https://www.camptv.org
Pattern Dance
Instructions:
1. Choose a dance move and a number. For instance, if you choose “kick” and the number 3, then the first part of the dance pattern would be 3 kicks.
2. Next, have your partner choose another dance move and another number. Take turns going back and forth at least two more times to add more moves to your pattern.
3. It’s time to put the whole thing to the test! Turn on some music and do your entire dance from the beginning. Once you’ve finished your pattern one time, repeat it as many times as it takes to get through the entire song.

https://www.camptv.org
Cube Illusion Materials List:
• ruler
• paper
• pencils
• fishing line
• scissors or a craft blade
• clear tape
• pipe clearers
• thumbtack
• shoebox *This activity should be done with the help of a trusted adult*
Instructions:
1. Cut a square hole in the middle of the bottom of the box. Cover with tape on both sides.
2. On a sheet of paper, draw a cube that fits inside the box. Tape the picture on the back wall of the box so that you can see it through the window you made.

https://www.camptv.org
3. Use a push pin to poke holes through the corners of the cube.
4. Staying very still, look through the window and use the push pin to poke holes through the window that line up with the 8 holes you made in the back of the box.
5. Remove the picture of the cube. String fishing line from one hole in the back of the box to the matching hole on the other side. Pull tight and secure with tape.

https://www.camptv.org
6. Connect 2 of the fishing line stings with a pipe cleaner to create a line. By eye, continue to use pipe cleaners to draw the lines of the cube. Use pipe cleaners of different lengths so they are spread out through the whole box.
7. After you add all the lines of the cube with pipe cleaners, check out your cube through the window of your box.
Activity courtesy of OK GO!

https://www.camptv.org
Tiny Treker You Bookmark Materials List:
• a fun photo of yourself
• scissors
• hole punch
• ribbon or a tassel
• clear packing tape
Instructions:
1. Take a photo of yourself posing like you are holding a rope or floating away. Make sure your arms are above your head and your hands form a fist. Print out the photo.
2. Lay a long piece of tape on the table. It should be long enough to fold over the picture and cover it entirely. Place your photo in the middle of the tape and carefully fold the tape over your photo. Slowly walk your fingers over the tape to smooth it down.

https://www.camptv.org
3. Carefully cut yourself out.
4. Use a hole punch to make a hole at your hands. String ribbon or a tassel through the hole. Now you have a tiny trekker you!

https://www.camptv.org
Make Your Own Compass Materials List:
• magnet
• paperclip
• bowl filled with water
• Styrofoam cup
• scissors
• tape
• permanent marker
Instructions:
1. Carefully cut off the bottom of your Styrofoam cup. Place the bottom aside.
2. With the help of an adult, carefully unfold and straighten your paper clip.

https://www.camptv.org
3. Rub your magnet against one side of the straightened paper clip Make sure that you are always rubbing in the same direction, never back and forth. Do this for about 30 seconds, or 50 strokes.
4. Tape your paperclip needle to the bottom of the Styrofoam cup bottom.
5. Float your homemade compass in a bowl of water. Watch it rotate. When it starts to settle and finally stops, you’ll know that your compass has found north!
Activity courtesy of Liberty Science Center