a microscope is an optical instrument that allows you to see objects magnified. some microscopes are...
TRANSCRIPT

MICROSCOPES

What is a MicroscopeA microscope is an optical instrument that allows you to see objects magnified. Some microscopes are so strong that you can see things that the human eye can't see alone.

TYPES OF MICROSCOPESLight Microscope - the models found in most schools, use compound lenses and light to magnify objects. The lenses bend or refract the light, which makes the object beneath them appear closer.

TYPES OF MICROSCOPESStereoscope - this microscope allows for binocular viewing of larger specimens.
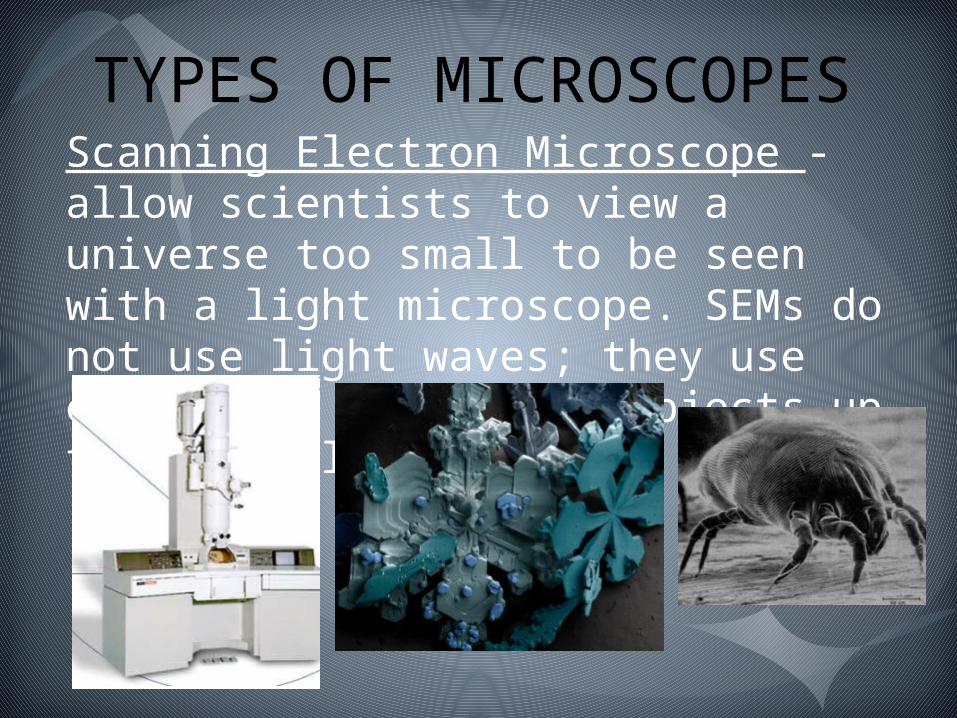
TYPES OF MICROSCOPESScanning Electron Microscope - allow scientists to view a universe too small to be seen with a light microscope. SEMs do not use light waves; they use electrons to magnify objects up to two million times.

TYPES OF MICROSCOPESTransmission Electron Microscope - also uses electrons, but instead of scanning the surface (as with SEM's) electrons are passed through very thin specimens.
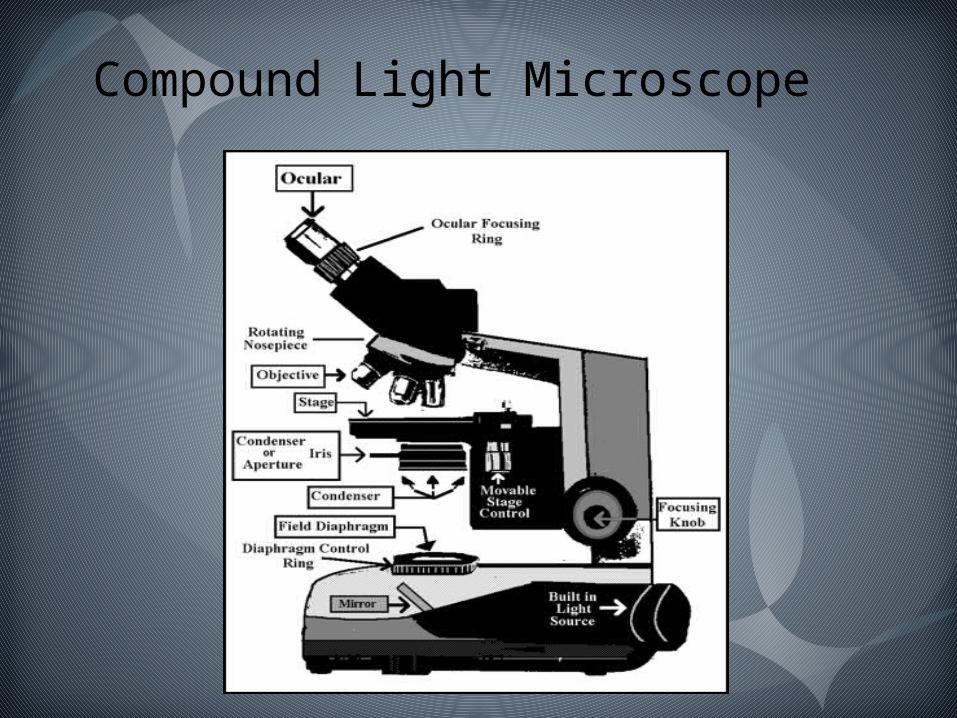
Compound Light Microscope
Parts of a Compound Microscope1) Eyepiece:The Eyepiece is the top part of the microscope; it is the lens you look through to see your specimen. 2) Arm:The Arm: It’s the large metal band attaching the base to the lens and eyepiece. When you carry a microscope, use one hand to hold the Arm, and the place the other under the base 3) Fine Adjustment Knob:The Fine Adjustment Knob: It’s the smaller round knob on the side of the microscope used to fine-tune the focus of your specimen after using the coarse adjustment knob. 4) Coarse Adjustment Knob:The Coarse Adjustment Knob: Of the two knobs on the side of a microscope, it is the largest. It is used to focus on the specimen; it may move either the stage or the upper part of the microscope (in a relative up and down motion). Always focus with the coarse knob first.

Parts of a Compound Microscope5) Objective LensesObjective lenses: Most microscopes have 2, 3, or more lenses that magnify at different powers. Always start with the lowest power and work your way up to the strongest when examining a specimen. The shortest lens is usually the lowest power. 6) Stage:The Stage: It’s where the sample or specimen is placed for examination. 7) Iris Diaphragm:The Iris Diaphragm: It’s what allows you to control the amount of light on the specimen that comes through the stage. (Through the Aperture) 8) Light Source:The Light Source: It can be a bulb or a mirror, and is usually found near the base of the microscope shining up through the stage. 9 Aperture:The Aperture: It’s the hole in the stage that allows light through for better viewing of the specimen.

Light Path
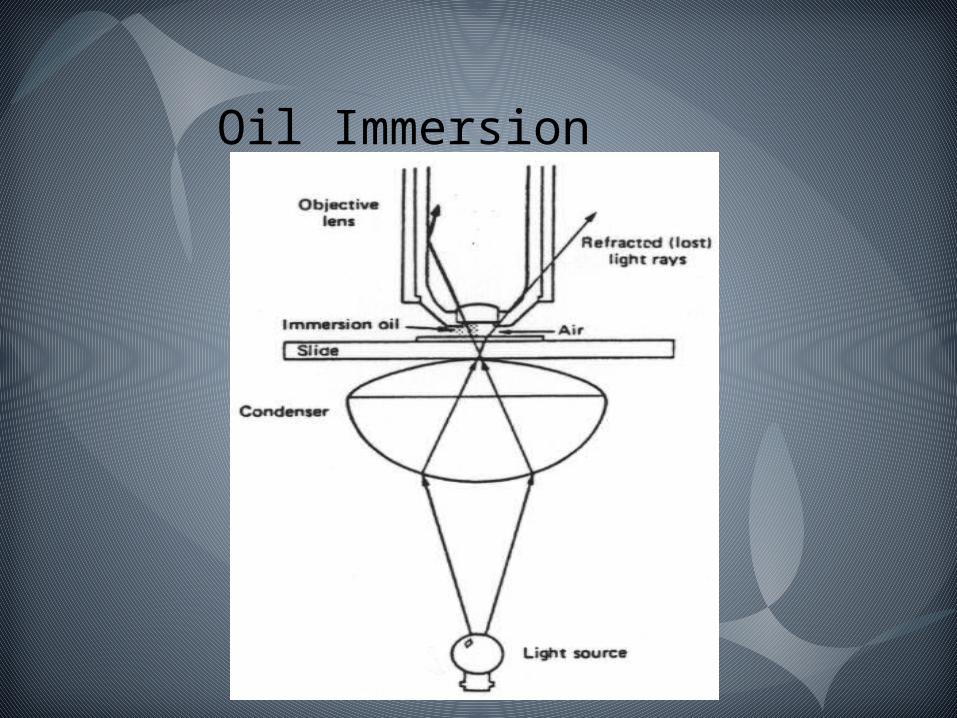
Oil Immersion
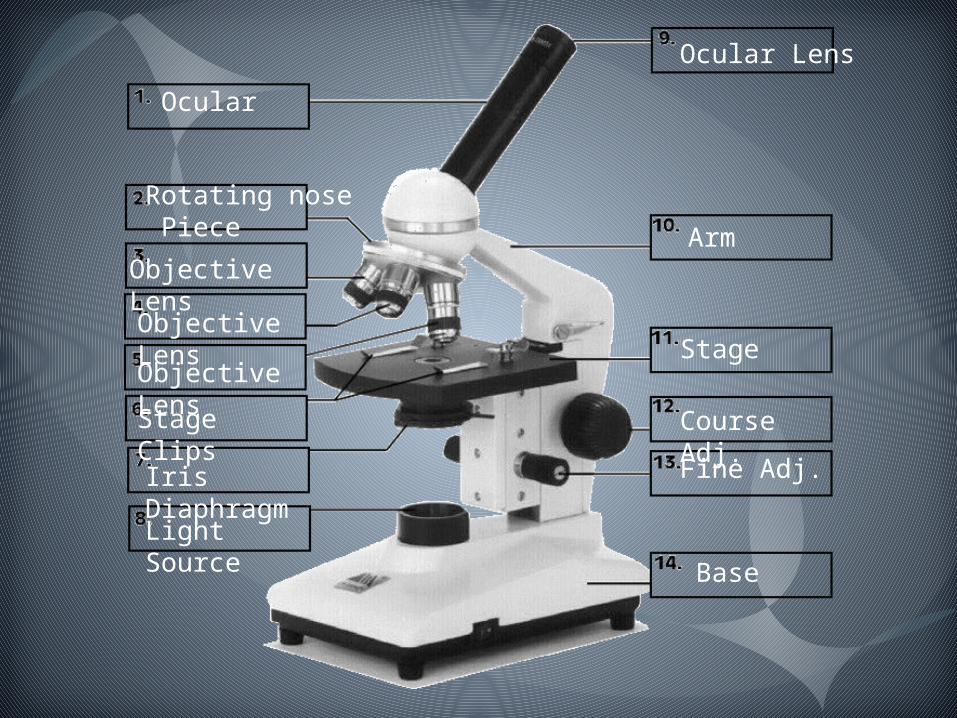
Ocular
Rotating nose Piece
Ocular Lens
ArmObjective LensObjective LensObjective LensStage Clips
Iris DiaphragmLight Source
Stage
Course Adj.
Fine Adj.
Base
The Stereo Microscope Lab

STEREO MICROSCOPE

INSTRUCTIONS1 - Plug in your microscope and set it on a flat surface where it will not move around. Make sure the space you have available is large enough to work on.2 - Turn on the lighting source for your microscope. Anything on a slide should be lit from underneath, while solid or opaque objects should be lit from above.3 - Place your specimen on the stage plate. Use the clips if it is flat or if you can fold the edges down to fit under the clip.

INSTRUCTIONS4 - Turn the eyepieces slowly while looking into them in order to focus them. You will know they are focused correctly for you when you can look through them without straining your eyes.5 - Set the magnification level (5X, 10X, 40X, etc.) you want by turning the objective turret. Make sure the magnification level mark on the outside of this faces the front of the microscope.6 - Turn the focus knob until the object you are looking at comes in clearly. The focus knob takes into consideration magnification, while the eyepieces only are turned to adjust to your eyes.