20 tips in 20 minutes
DESCRIPTION
20 Tips in 20 Minutes. David, Enrick, Luc PTC/User Montreal RUG. Tip 01. Assembly Manipulation Techniques. Prior to creating a drawing. Create the Simplified Reps you need for the drawing. - PowerPoint PPT PresentationTRANSCRIPT


20 Tips in 20 Minutes20 Tips in 20 Minutes
David, Enrick, LucPTC/User Montreal RUGDavid, Enrick, LucPTC/User Montreal RUG

Assembly Manipulation TechniquesAssembly Manipulation Techniques
Create the Simplified Reps you need for the drawing.
Use Simplified Representations to prevent Pro/ENGINEER from retrieving unnecessary models into memory.
Use as few assembly features as possible because intersecting components creates hidden copies of the model and this uses additional memory. When sketching assembly features, use closed sections and manually select the components to be intersected. This will prevent Pro/ENGINEER from intersecting extraneous components and will speed up drawing performance.
Prior to creating a drawingPrior to creating a drawing
Tip 01
Tip 01
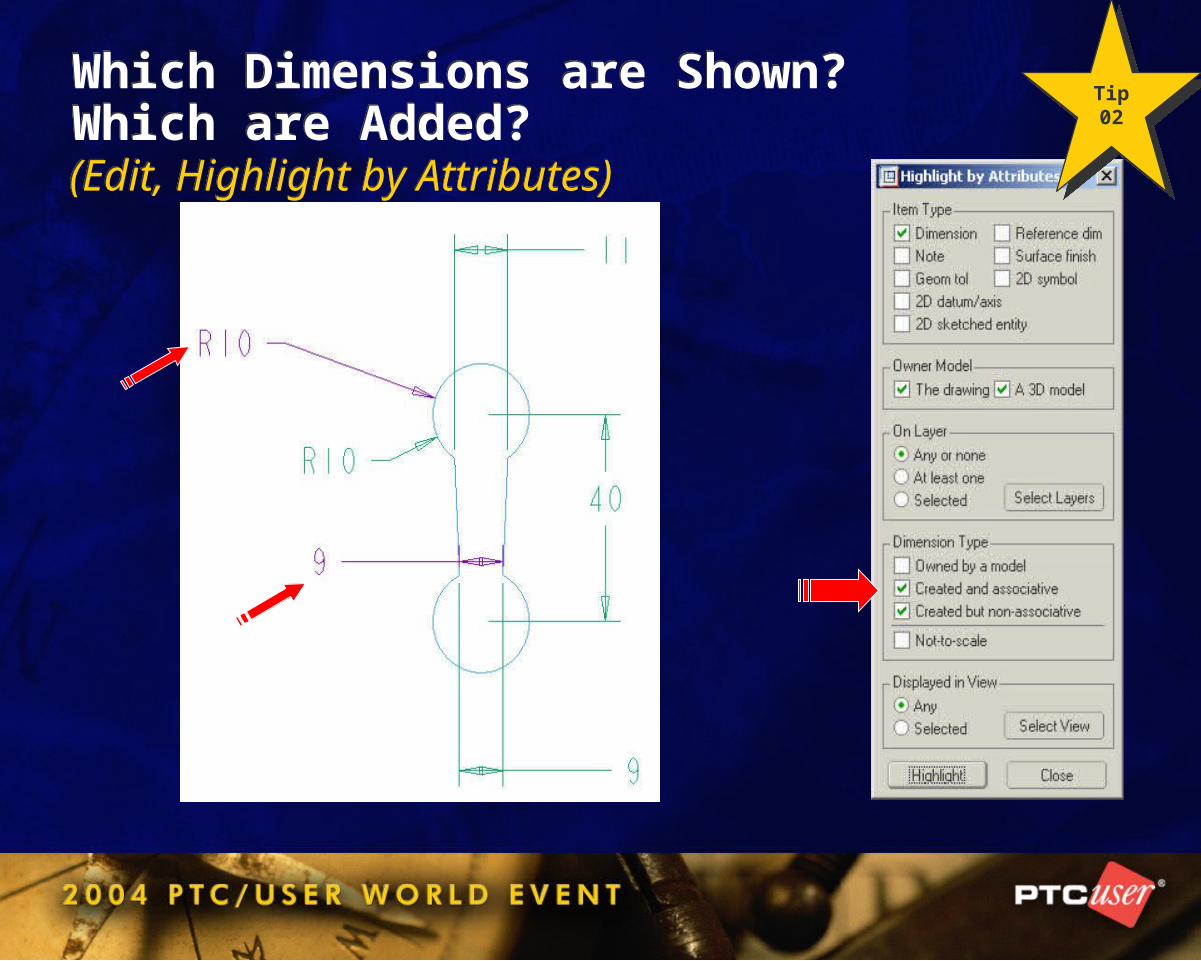
Which Dimensions are Shown?Which are Added?Which Dimensions are Shown?Which are Added?(Edit, Highlight by Attributes)(Edit, Highlight by Attributes)
Tip 02
Tip 02

Relations TipsRelations Tips
Add Comments to remind yourself and others what your relations are controlling
Modify your dimensions with Logical names
– Length instead of d20, etc.
Relations are evaluated from top to bottom. Relations towards the bottom have more precedence than those higher up.
Parameters must exist before they can be used in relations.
Maximum Line length is 80 Characters use \ to continue on a second line. Recommended Maximum of 5 lines total.
Tip 03
Tip 03

Existing Parts and SectionsExisting Parts and SectionsTip 04
Tip 04

Including a drawing into Word documentIncluding a drawing into Word documentTip 05
Tip 05

How to cut a part using datum planeHow to cut a part using datum planeTip 06
Tip 06

Pro/INTRALINK Table DisplayFit Table Column WidthPro/INTRALINK Table DisplayFit Table Column Width
Right clicking on a column header will fit the column
width
<SHIFT> + Right clicking on a column header will fit all the columns width
Tip 07
Tip 07

Pro/INTRALINK Table Display Saved Table Display Column WidthPro/INTRALINK Table Display Saved Table Display Column Width
Table display columns are now saved with a width!
Commonspace Status
Compare Status
Workspace Status
New in Pro/I 3.3
Only!
New in Pro/I 3.3
Only!
Tip 07
(cont’d)
Tip 07
(cont’d)

Pro/INTRALINK Table DisplayKeeping Columns Visible While ScrollingPro/INTRALINK Table DisplayKeeping Columns Visible While Scrolling
Click and Drag the this small vertical bar to freeze the
display of the column on the left
Use the horizontal scroll bar to see the column on the right
These columns will remain visible during
the scrolling
Tip 08
Tip 08
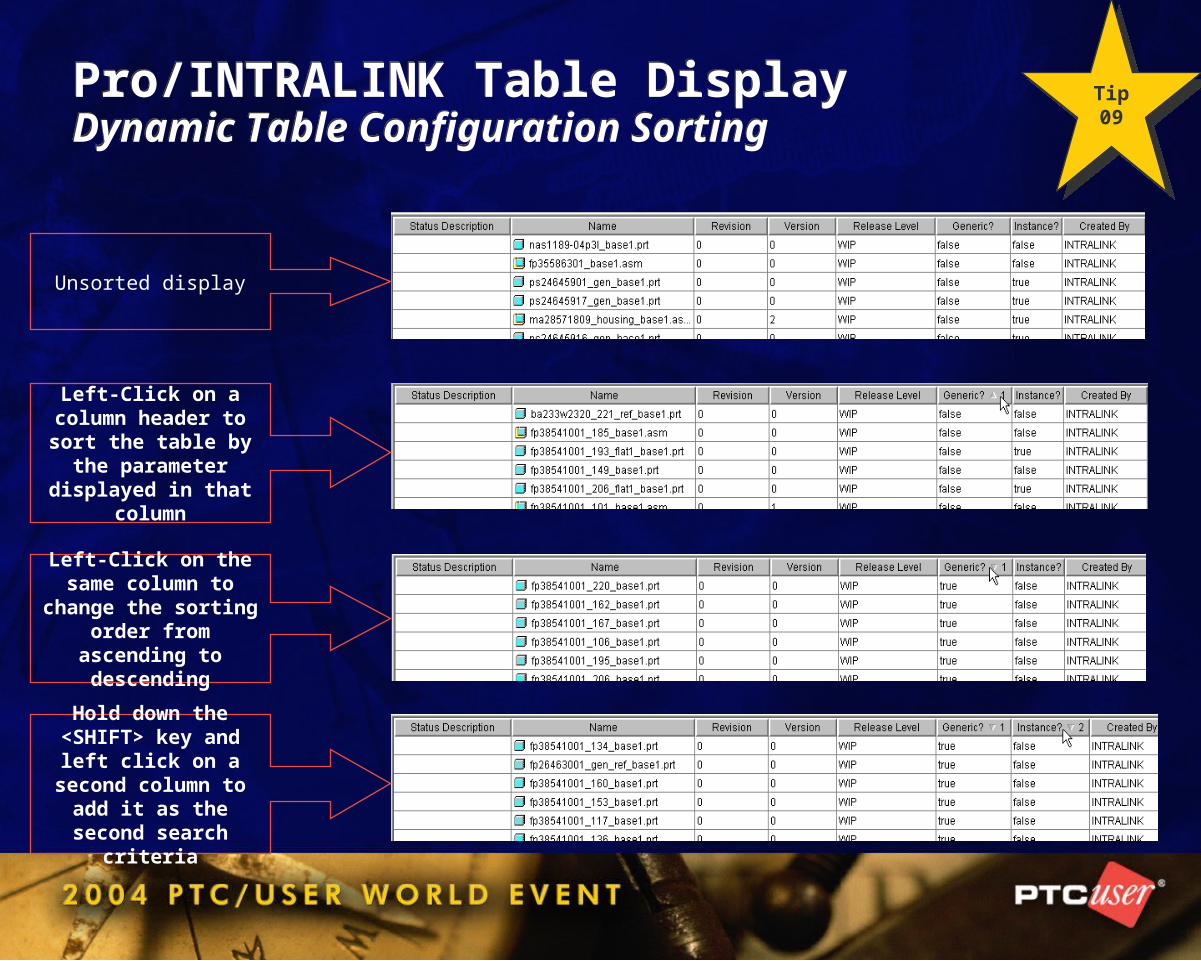
Pro/INTRALINK Table Display Dynamic Table Configuration SortingPro/INTRALINK Table Display Dynamic Table Configuration Sorting
Unsorted display
Left-Click on a column header to sort the
table by the parameter displayed in that
column
Left-Click on the same column to change the
sorting order from ascending to descending
Hold down the <SHIFT> key and left
click on a second column to add it as the second search
criteria
Tip 09
Tip 09

Pro/INTRALINK Table Display Workspace Dynamic Table Configuration SortingPro/INTRALINK Table Display Workspace Dynamic Table Configuration Sorting
Dynamic sorting done locally
+500% faster
Column width is lost Manual resize
is required
No benefits whenApplying a saved
Table display
New in Pro/I 3.3
Only!
New in Pro/I 3.3
Only!
Tip 09
(cont’d)
Tip 09
(cont’d)

Easy Pro/INTRALINK Table ExportBOM ReportEasy Pro/INTRALINK Table ExportBOM Report
1
Generate in Pro/INTRALINK
the Commonspace BOM report for
the desired assembly.
2
Generate in Pro/INTRALINK
the Commonspace BOM report for
the desired assembly.
To quickly import BOM data into
Microsoft Excel for further processing, follow these steps:
To quickly import BOM data into
Microsoft Excel for further processing, follow these steps:
Tip 10
Tip 10

Easy Pro/INTRALINK Table ExportBOM ReportEasy Pro/INTRALINK Table ExportBOM Report
3
When the HTML browser is open,
copy the file location from the
Address.
4
Paste the file location in the file open dialog box
of MS Excel.
Tip 10
(cont’d)
Tip 10
(cont’d)

Easy Pro/INTRALINK Table ExportBOM ReportEasy Pro/INTRALINK Table ExportBOM Report
Voilà!
This printing technique is also applicable to most Pro/INTRALINK
windows!
Tip 10
(cont’d)
Tip 10
(cont’d)
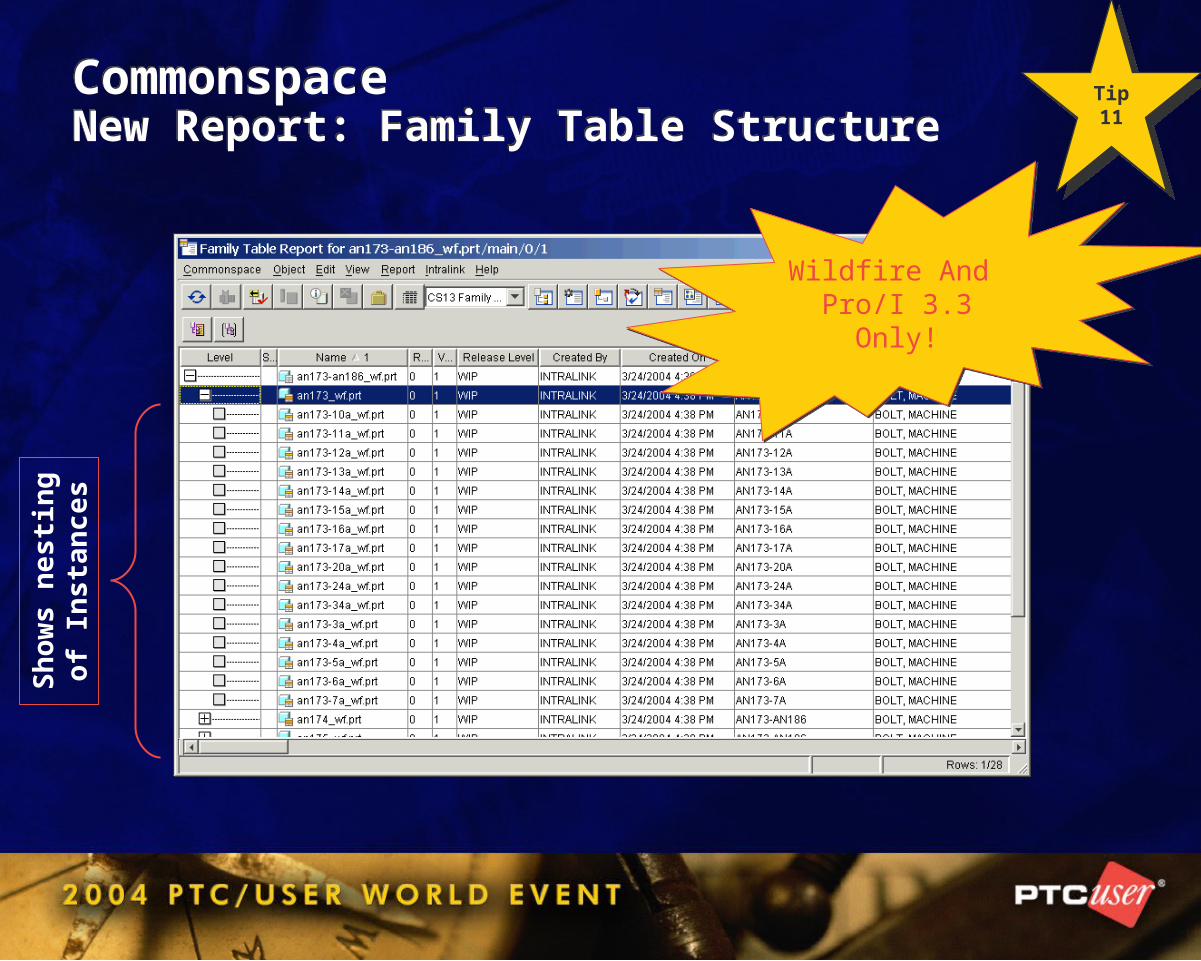
CommonspaceNew Report: Family Table StructureCommonspaceNew Report: Family Table Structure
Sh
ow
s n
esti
ng
o
f In
stan
ces
Wildfire And Pro/I 3.3
Only!
Wildfire And Pro/I 3.3
Only!
Tip 11
Tip 11

CommonspaceNew Report: Model StructureCommonspaceNew Report: Model Structure
Mim
ics
Pro
/E
Mo
del
Tre
e
Wildfire And Pro/I 3.3
Only!
Wildfire And Pro/I 3.3
Only!
Tip 12
Tip 12

CommonspaceNew Report: External SimpRepCommonspaceNew Report: External SimpRep
Wildfire And Pro/I 3.3
Only!
Wildfire And Pro/I 3.3
Only!
A great tool to reduce Workspace size for Large Assemblies!
Tip 13
Tip 13
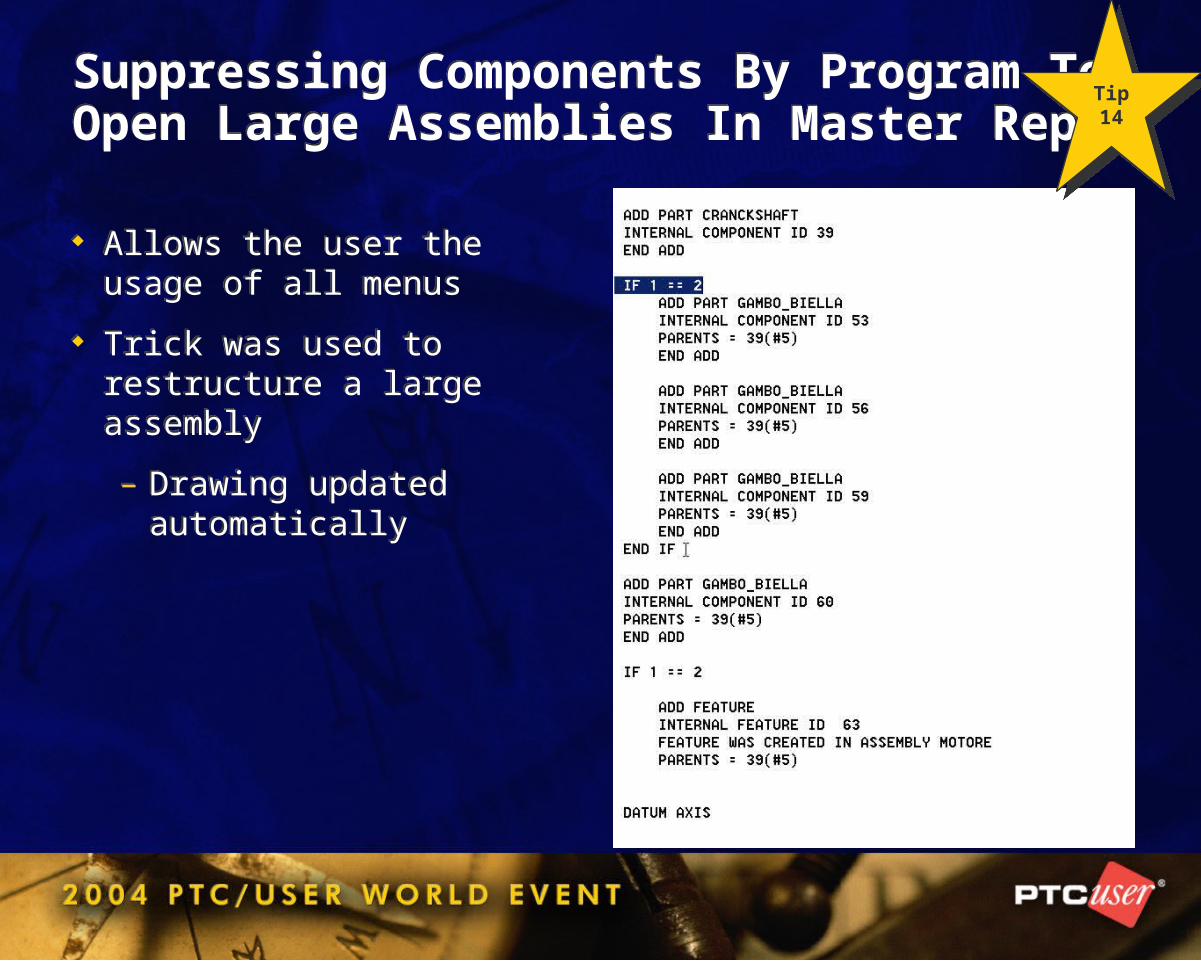
Suppressing Components By Program To Open Large Assemblies In Master RepSuppressing Components By Program To Open Large Assemblies In Master Rep
Allows the user the usage of all menus
Trick was used to restructure a large assembly
– Drawing updated automatically
Allows the user the usage of all menus
Trick was used to restructure a large assembly
– Drawing updated automatically
Tip 14
Tip 14

Redefining ModelsRedefining Models
When making major changes
– Redifine features from the bottom will eliminate the need for regeneration, thus saving time
– Works for Parts and Assemblies
When making major changes
– Redifine features from the bottom will eliminate the need for regeneration, thus saving time
– Works for Parts and Assemblies
Tip 15
Tip 15

Copying ViewsCopying Views
Create a detail view of the desired view
Edit the view and change it to General
Edit the view and change it to full View
Usage
– Creates an exact duplicate of the original view
– Keeps all member, edge and process Display
Create a detail view of the desired view
Edit the view and change it to General
Edit the view and change it to full View
Usage
– Creates an exact duplicate of the original view
– Keeps all member, edge and process Display
Tip 16
Tip 16
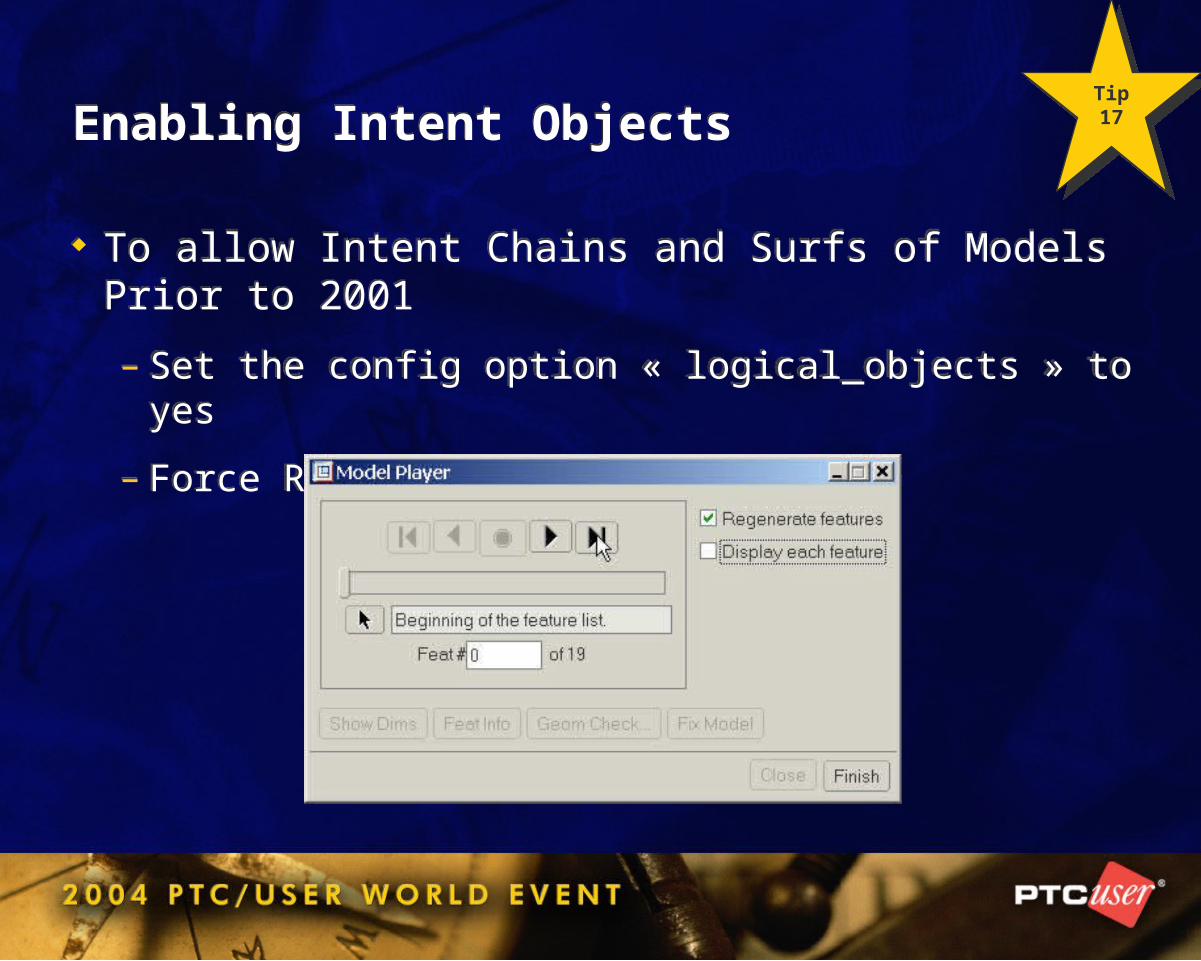
Enabling Intent ObjectsEnabling Intent Objects
To allow Intent Chains and Surfs of Models Prior to 2001
– Set the config option « logical_objects » to yes
– Force Regen with Model Player
To allow Intent Chains and Surfs of Models Prior to 2001
– Set the config option « logical_objects » to yes
– Force Regen with Model Player
Tip 17
Tip 17
Using The Model PlayerUsing The Model Player
Excellent tool to identify issues
– Force Regeneration
– Use Session Info, Message Log
– Repair the model if necessary
Will identify the following:
– Line Errors in Relations
– Geometry Checks
– All Warnings (model missing, assembly cut outside the model, …)
Excellent tool to identify issues
– Force Regeneration
– Use Session Info, Message Log
– Repair the model if necessary
Will identify the following:
– Line Errors in Relations
– Geometry Checks
– All Warnings (model missing, assembly cut outside the model, …)
Tip 18
Tip 18

Playing With AccuracyPlaying With Accuracy
Lowering Accuracy
– Faster Regen
– Eliminates Geometry Checks of « Tiny Edges »
– Bigger Files
May cause part to fail (in the case of complex rounds for example), so use with caution
Lowering Accuracy
– Faster Regen
– Eliminates Geometry Checks of « Tiny Edges »
– Bigger Files
May cause part to fail (in the case of complex rounds for example), so use with caution
Tip 19
Tip 19
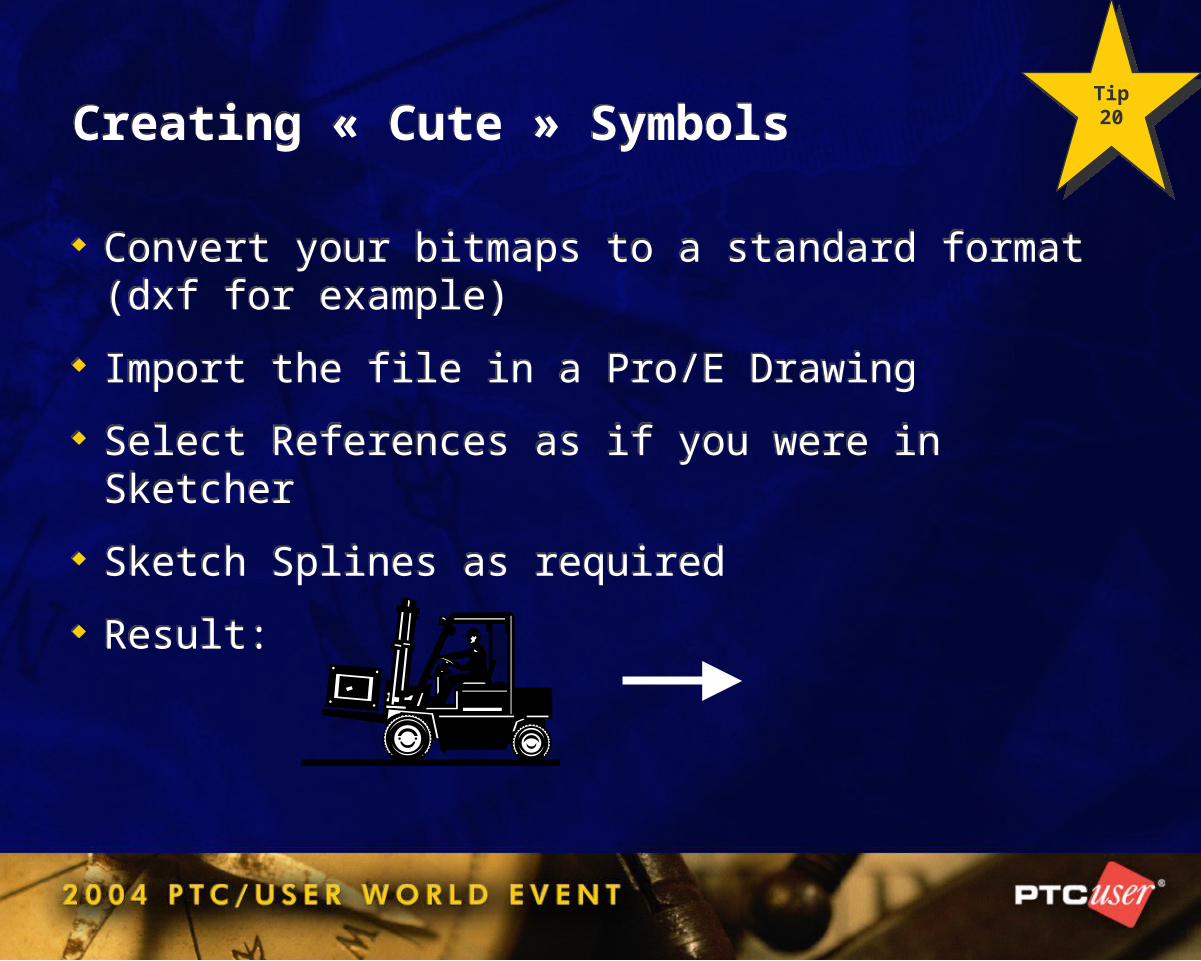
Creating « Cute » SymbolsCreating « Cute » Symbols
Convert your bitmaps to a standard format (dxf for example)
Import the file in a Pro/E Drawing
Select References as if you were in Sketcher
Sketch Splines as required
Result:
Convert your bitmaps to a standard format (dxf for example)
Import the file in a Pro/E Drawing
Select References as if you were in Sketcher
Sketch Splines as required
Result:
Tip 20
Tip 20
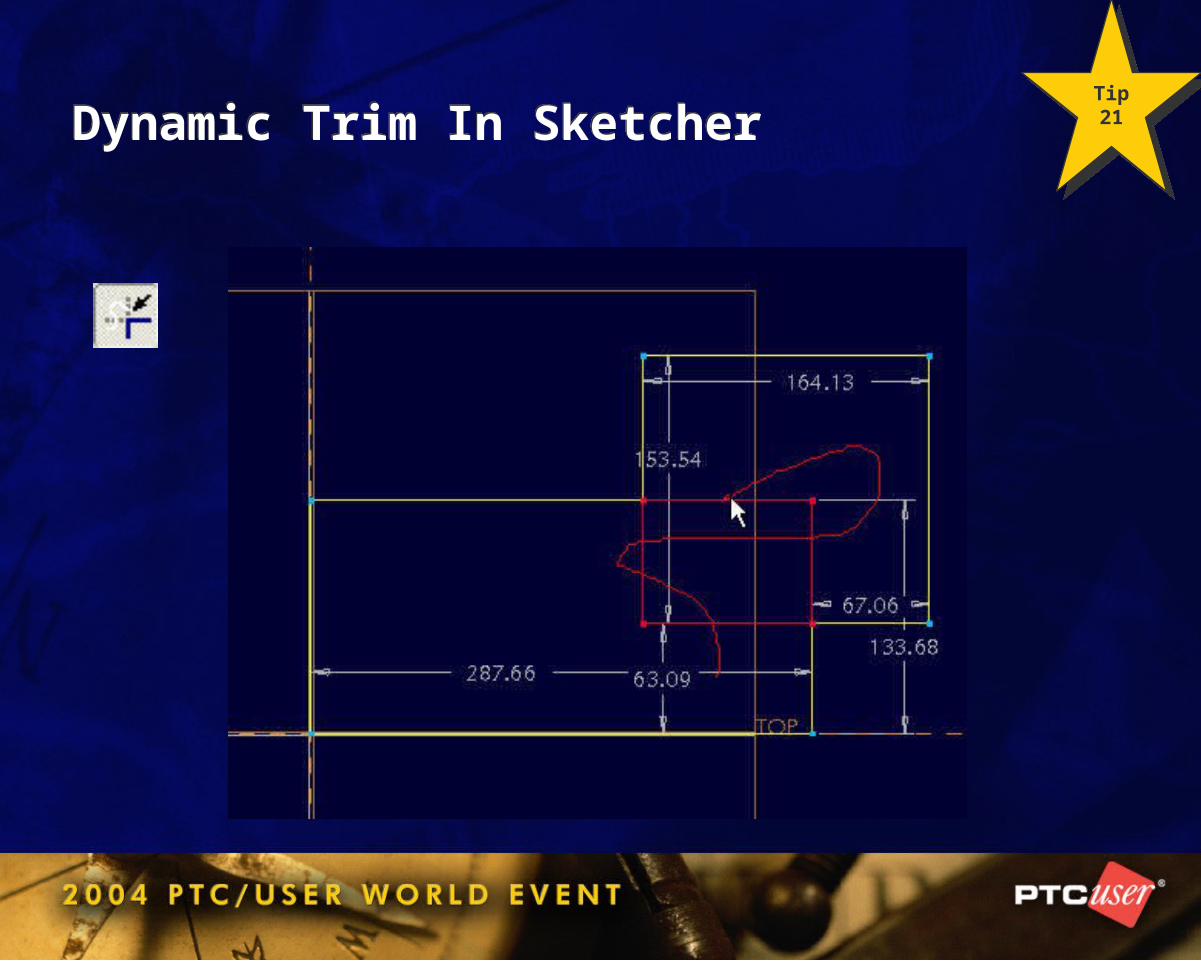
Dynamic Trim In SketcherDynamic Trim In SketcherTip 21
Tip 21
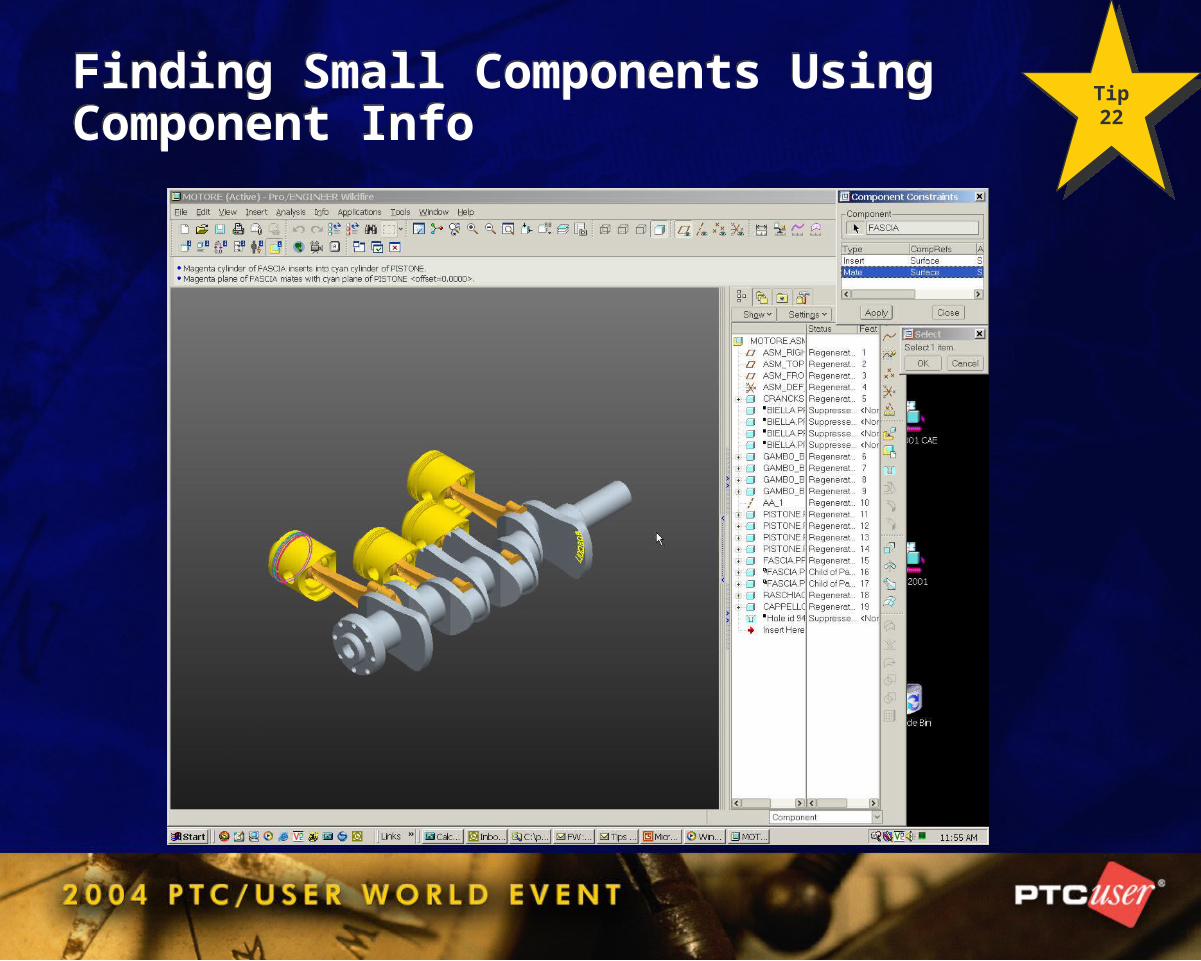
Finding Small Components UsingComponent InfoFinding Small Components UsingComponent Info
Tip 22
Tip 22
Checking Out Only Required AssembliesChecking Out Only Required Assemblies
When working with Large Assemblies
Check-out Top Level Assembly with Relationships set to none
Open the Assembly in a simplified rep Excluding all Components
Redefine the targeted simplified rep
Check-out the marked assemblies in the simplified rep
You can also retrieve the top level assembly directly and use the Quick Fix, Find Component as you go.
Tip 23
Tip 23