xactimate 25 demo request - amcat adjusting services · after reading the xactware license...
TRANSCRIPT

©2008 Xactware Solutions, Inc. All Rights Reserved. 1426 East 750 North | Orem, Utah 84097 | 800-932-XACT (9228) | fax 801-224-5218 | www.xactware.com
1
Xactimate 25 Demo Request PREFACE:
This document has been created with the intent to teach an adjuster how to request a demo from Xactware in preparation of Amcat training. This is a prerequisite that must be done prior to the training.
Demo Request
1. Enter www.xactware.com .
2.
3.
©2008 Xactware Solutions, Inc. All Rights Reserved. 1426 East 750 North | Orem, Utah 84097 | 800-932-XACT (9228) | fax 801-224-5218 | www.xactware.com
2
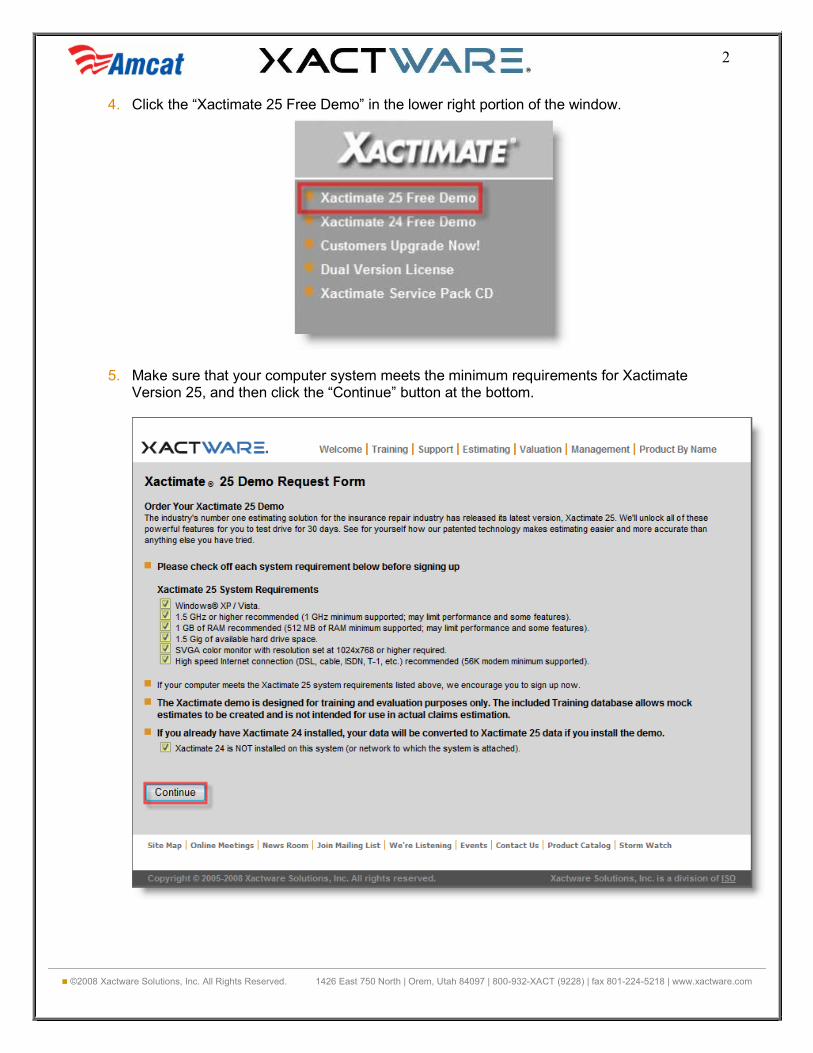
4.
5. Make sure that your computer system meets the minimum requirements for Xactimate
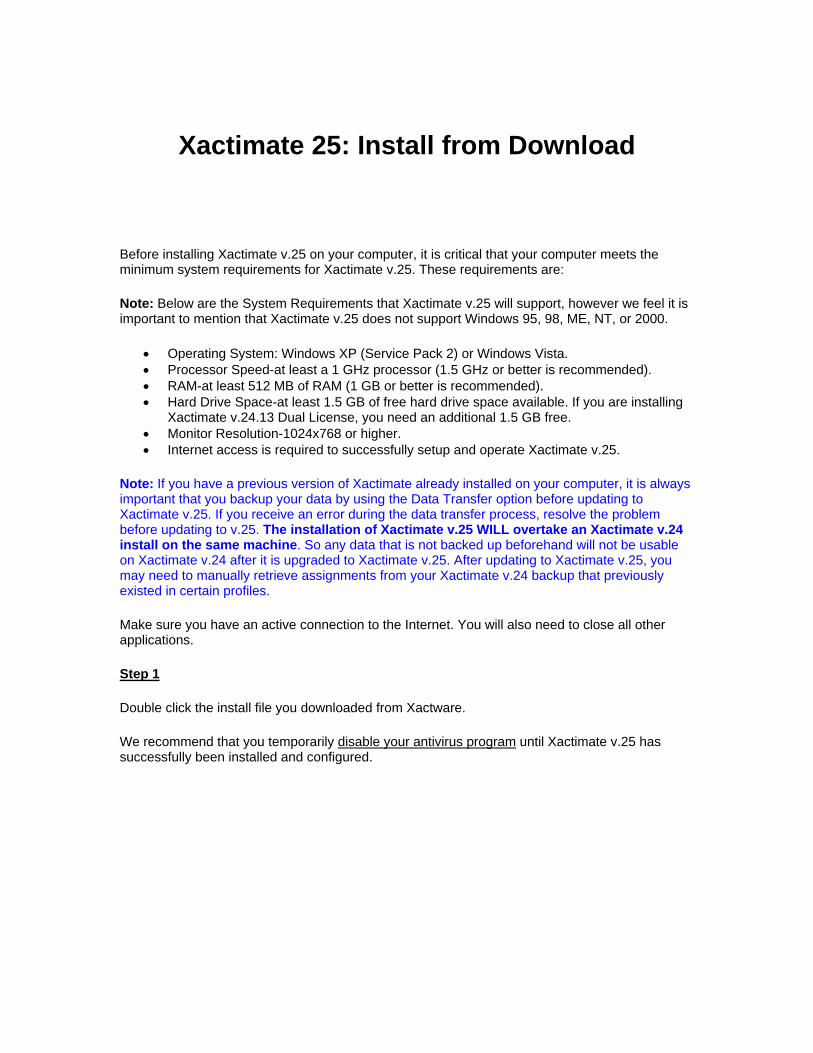
Xactimate 25: Install from Download
Before installing Xactimate v.25 on your computer, it is critical that your computer meets the minimum system requirements for Xactimate v.25. These requirements are:
Note: Below are the System Requirements that Xactimate v.25 will support, however we feel it is important to mention that Xactimate v.25 does not support Windows 95, 98, ME, NT, or 2000.
• Operating System: Windows XP (Service Pack 2) or Windows Vista. • Processor Speed-at least a 1 GHz processor (1.5 GHz or better is recommended). • RAM-at least 512 MB of RAM (1 GB or better is recommended). • Hard Drive Space-at least 1.5 GB of free hard drive space available. If you are installing
Xactimate v.24.13 Dual License, you need an additional 1.5 GB free. • Monitor Resolution-1024x768 or higher. • Internet access is required to successfully setup and operate Xactimate v.25.
Note: If you have a previous version of Xactimate already installed on your computer, it is always important that you backup your data by using the Data Transfer option before updating to Xactimate v.25. If you receive an error during the data transfer process, resolve the problem before updating to v.25. The installation of Xactimate v.25 WILL overtake an Xactimate v.24 install on the same machine. So any data that is not backed up beforehand will not be usable on Xactimate v.24 after it is upgraded to Xactimate v.25. After updating to Xactimate v.25, you may need to manually retrieve assignments from your Xactimate v.24 backup that previously existed in certain profiles.
Make sure you have an active connection to the Internet. You will also need to close all other applications.
Step 1
Double click the install file you downloaded from Xactware.
We recommend that you temporarily disable your antivirus program until Xactimate v.25 has successfully been installed and configured.

Step 2
The installation procedure should begin automatically.
Step 3
The installation setup procedure should now begin.
From the Choose Setup Language window, click the drop-down-button to select the language you want to install with, then click OK.
Step 4
The next window informs you that Xactimate v.25 requires both Microsoft.NET and SQL Server Express to run correctly. Note: These are Microsoft programs that are required to run Xactimate. Even if one or more are already installed on your computer, this window appears so Xactimate can validate the existence of the correct versions of the programs and then install any required programs that are needed.
Click the Install button to begin this process. Clicking on the Cancel button will abort the Xactimate v.25 install.
Once the required programs have been validated and installed on your computer, you may be prompted to reboot your computer. If you are prompted, select Yes to reboot.

Step 5
The InstallShield Wizard begins the install process.
Step 6
The next window you see will be the License Agreement window. Please read the text contained in this window before proceeding to the next step.
After reading the Xactware License Agreement and accepting the terms, click the I accept the terms in the license agreement radio button, then click Next.

Note: From this point on, you can click the Back button at anytime to return to the previous window, click Next to accept the current selections and continue, or click Cancel to stop the install process.
Step 7
We recommend that you accept the defaults in this window as they appear.
Click Next to accept the default path and to keep the desktop shortcut and all users options checked.

Step 8
The installation process begins. You will see a progress bar that shows you the progress of the install. This will take several minutes.
Step 9
When the installation is finished, the following screen will appear.
Click Finish. This portion of the setup is complete.

Step 10
By default the Xactimate 25 shortcut icon will now appear on your desktop, double-click on this icon to begin the data configuration.
Note: If you chose not to place the Xactimate 25 icon on your desktop, follow the steps below to begin the configuration process.
Step 11
The first window to appear is the Data Configuration window. You will have the following options:
Local Data is used for stand-alone systems where Xactimate v.25 never connects to a network.
Step 12
The next window to appear will ask if you have data from a previous version of Xactimate.
Click No, unless you've already uninstalled Xactimate v. If you do have data from a failed uninstall of Xactimate v.24 (or v.24i),
If you click Yes. The Specify Directory window opens.
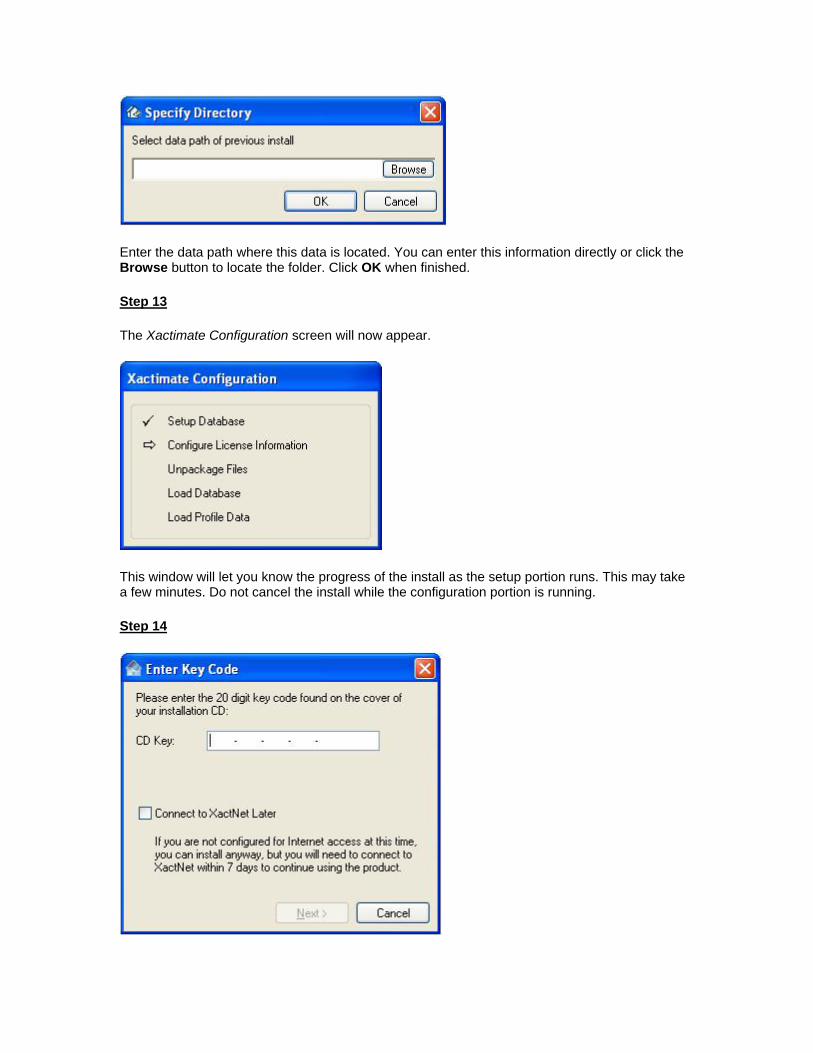
Enter the data path where this data is located. You can enter this information directly or click the Browse button to locate the folder. Click OK when finished.
Step 13
The Xactimate Configuration screen will now appear.
This window will let you know the progress of the install as the setup portion runs. This may take a few minutes. Do not cancel the install while the configuration portion is running.
Step 14
Next, enter the code “DEMO-XM8” and Select “Connect to XactNet Later”
After you have entered in your CD Key, click on the Next button.
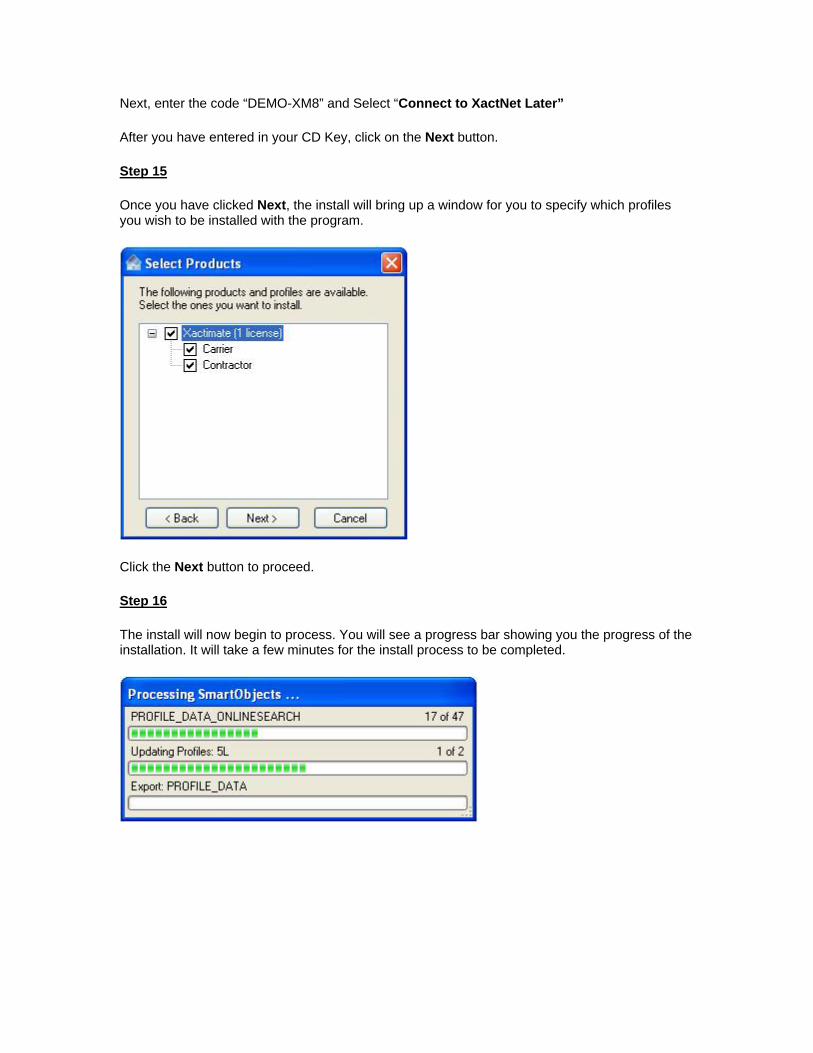
Step 15
Once you have clicked Next, the install will bring up a window for you to specify which profiles you wish to be installed with the program.
Click the Next button to proceed.
Step 16
The install will now begin to process. You will see a progress bar showing you the progress of the installation. It will take a few minutes for the install process to be completed.
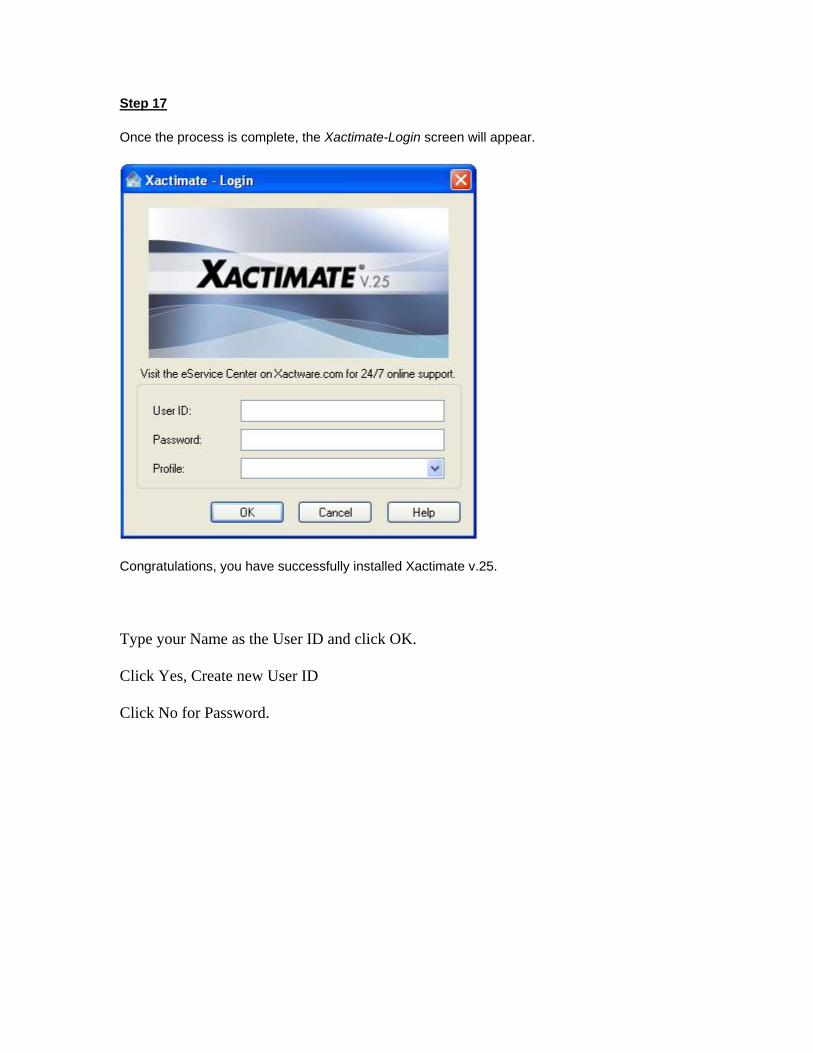
Step 17
Once the process is complete, the Xactimate-Login screen will appear.
Congratulations, you have successfully installed Xactimate v.25.
Type your Name as the User ID and click OK.
Click Yes, Create new User ID
Click No for Password.