workbench - amazon s3process.pdfmortise & tenons and bridle joints the king of joints and a fun...
TRANSCRIPT
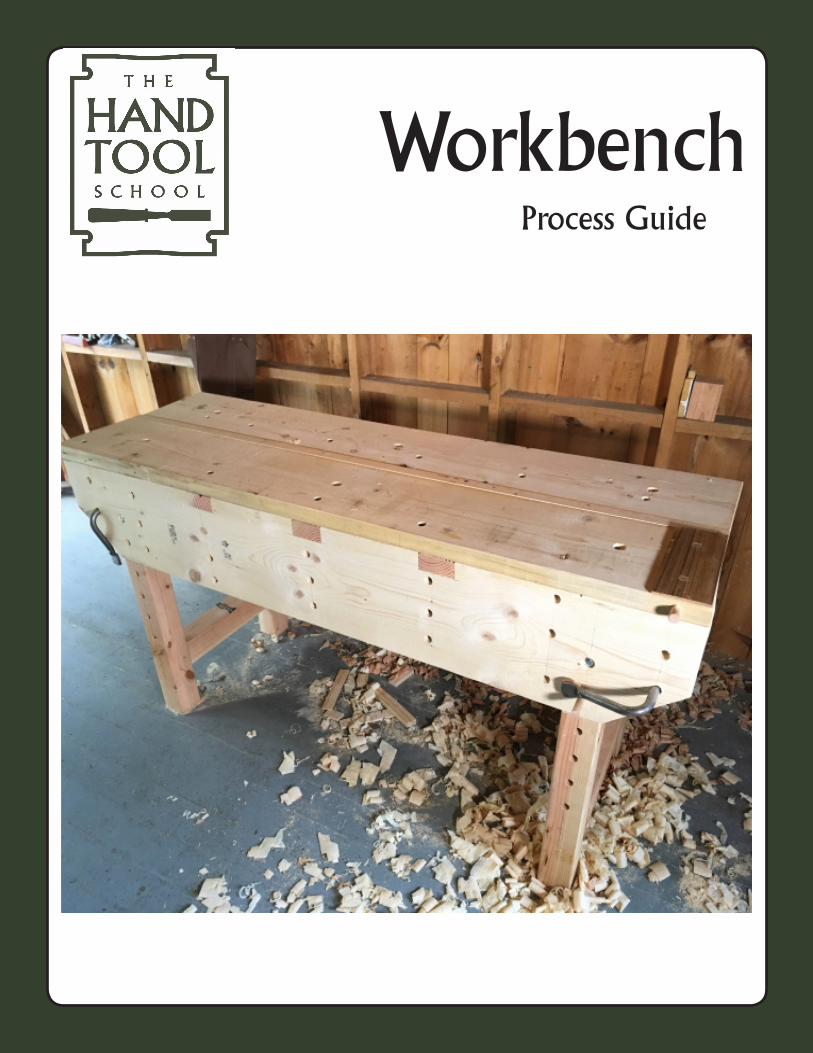
WorkbenchProcess Guide
Design, Lumber, Tools & Nails
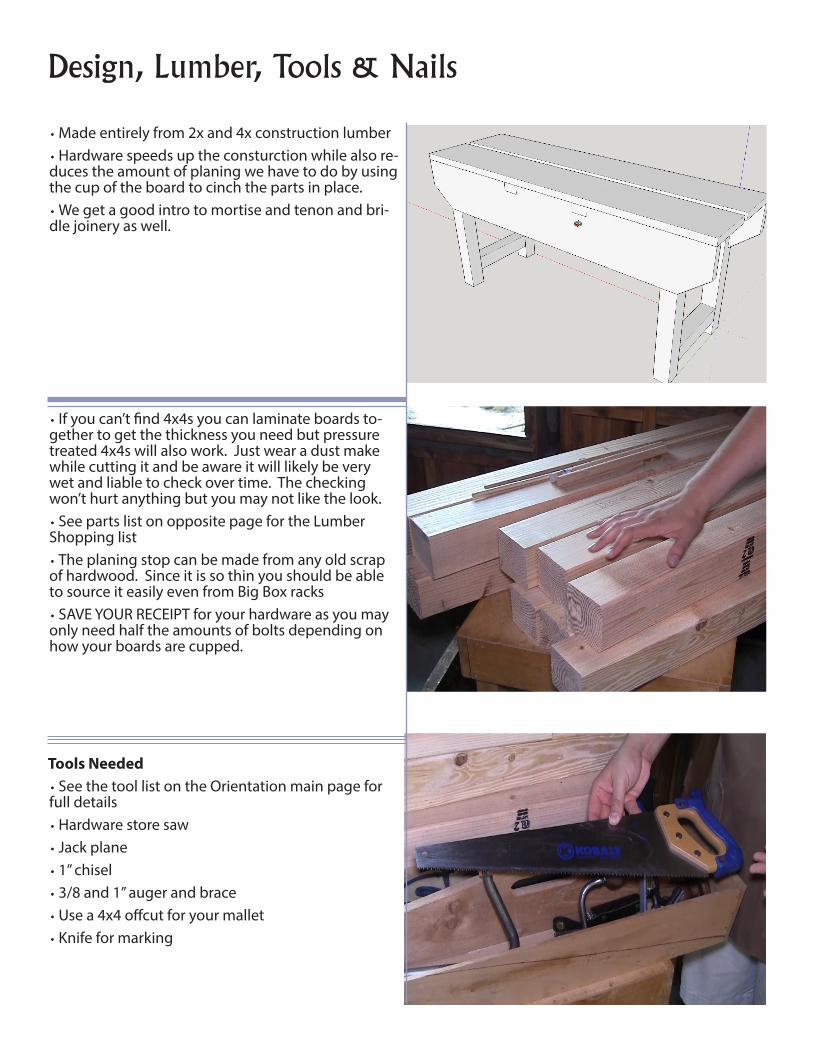
• Made entirely from 2x and 4x construction lumber• Hardware speeds up the consturction while also re-duces the amount of planing we have to do by using the cup of the board to cinch the parts in place.• We get a good intro to mortise and tenon and bri-dle joinery as well.
• If you can’t find 4x4s you can laminate boards to-gether to get the thickness you need but pressure treated 4x4s will also work. Just wear a dust make while cutting it and be aware it will likely be very wet and liable to check over time. The checking won’t hurt anything but you may not like the look.• See parts list on opposite page for the Lumber Shopping list• The planing stop can be made from any old scrap of hardwood. Since it is so thin you should be able to source it easily even from Big Box racks• SAVE YOUR RECEIPT for your hardware as you may only need half the amounts of bolts depending on how your boards are cupped.
Tools Needed• See the tool list on the Orientation main page for full details• Hardware store saw• Jack plane• 1” chisel• 3/8 and 1” auger and brace• Use a 4x4 offcut for your mallet• Knife for marking
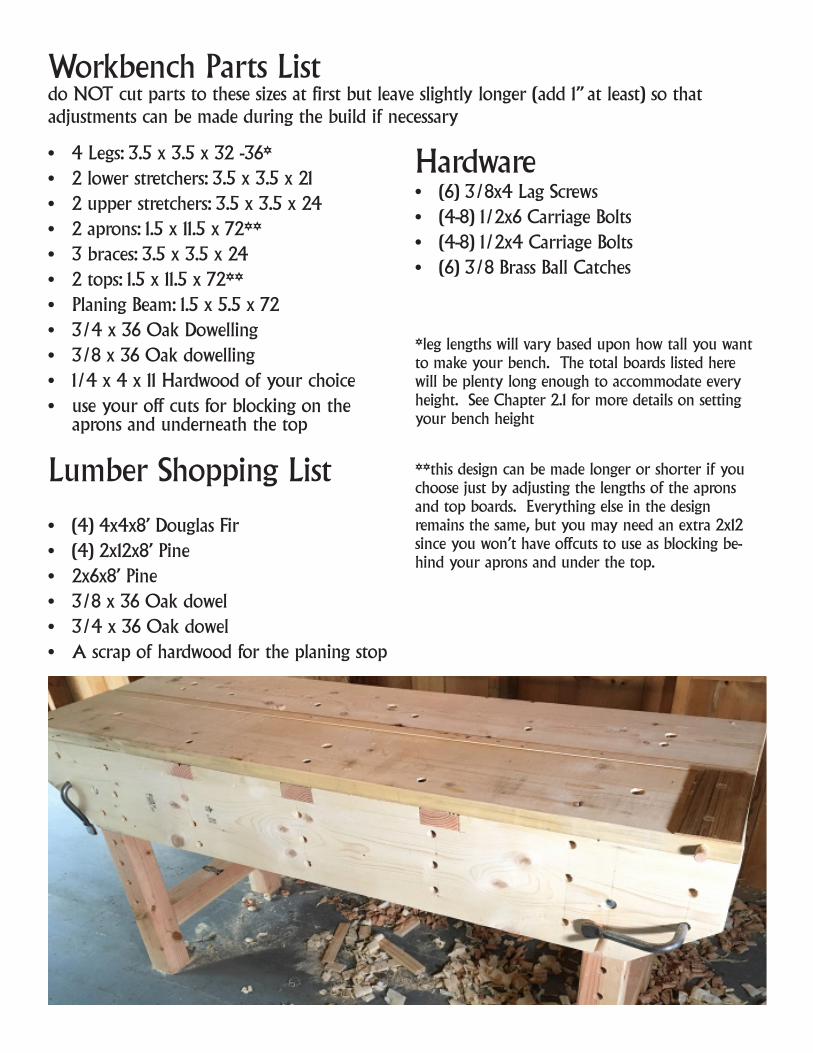
Workbench Parts Listdo NOT cut parts to these sizes at first but leave slightly longer (add 1” at least) so that adjustments can be made during the build if necessary
• 4 Legs: 3.5 x 3.5 x 32 -36* • 2 lower stretchers: 3.5 x 3.5 x 21• 2 upper stretchers: 3.5 x 3.5 x 24• 2 aprons: 1.5 x 11.5 x 72**• 3 braces: 3.5 x 3.5 x 24• 2 tops: 1.5 x 11.5 x 72**• Planing Beam: 1.5 x 5.5 x 72• 3/4 x 36 Oak Dowelling• 3/8 x 36 Oak dowelling• 1/4 x 4 x 11 Hardwood of your choice• use your off cuts for blocking on the
aprons and underneath the top
Lumber Shopping List
• (4) 4x4x8’ Douglas Fir• (4) 2x12x8’ Pine• 2x6x8’ Pine• 3/8 x 36 Oak dowel• 3/4 x 36 Oak dowel• A scrap of hardwood for the planing stop
Hardware• (6) 3/8x4 Lag Screws• (4-8) 1/2x6 Carriage Bolts• (4-8) 1/2x4 Carriage Bolts• (6) 3/8 Brass Ball Catches
*leg lengths will vary based upon how tall you want to make your bench. The total boards listed here will be plenty long enough to accommodate every height. See Chapter 2.1 for more details on setting your bench height
**this design can be made longer or shorter if you choose just by adjusting the lengths of the aprons and top boards. Everything else in the design remains the same, but you may need an extra 2x12 since you won’t have offcuts to use as blocking be-hind your aprons and under the top.
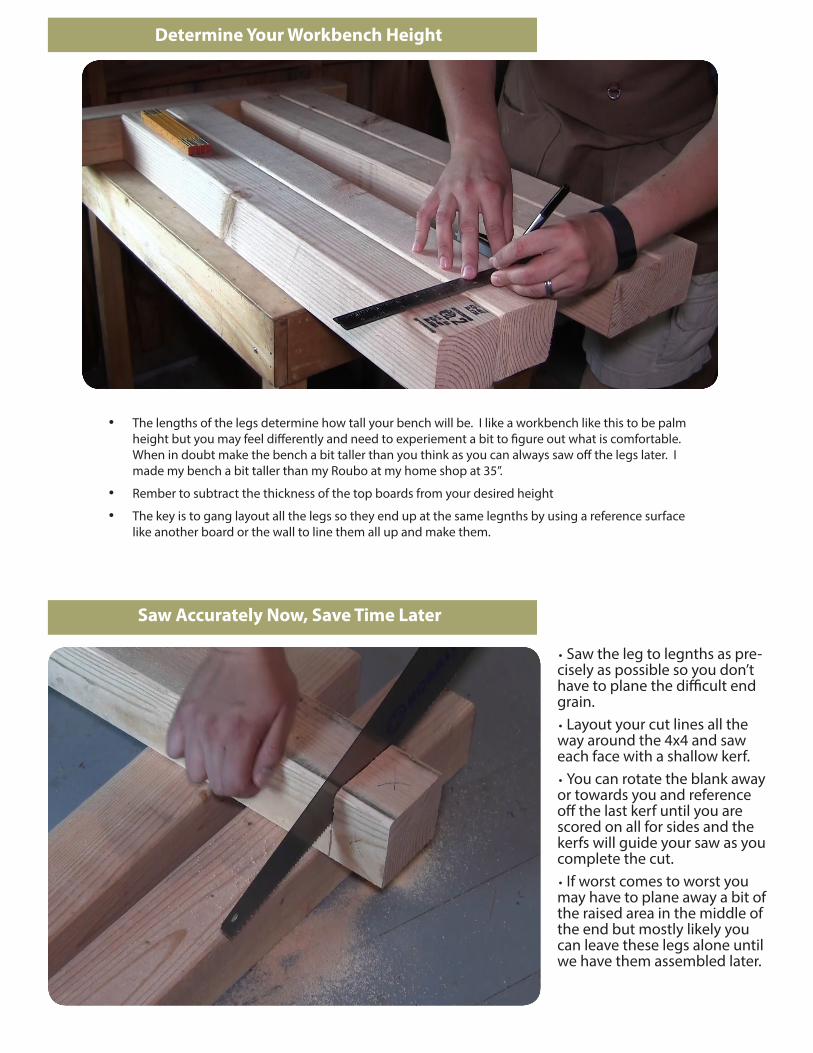
Determine Your Workbench Height
• The lengths of the legs determine how tall your bench will be. I like a workbench like this to be palm height but you may feel differently and need to experiement a bit to figure out what is comfortable. When in doubt make the bench a bit taller than you think as you can always saw off the legs later. I made my bench a bit taller than my Roubo at my home shop at 35”.
• Rember to subtract the thickness of the top boards from your desired height
• The key is to gang layout all the legs so they end up at the same legnths by using a reference surface like another board or the wall to line them all up and make them.
• Saw the leg to legnths as pre-cisely as possible so you don’t have to plane the difficult end grain. • Layout your cut lines all the way around the 4x4 and saw each face with a shallow kerf.• You can rotate the blank away or towards you and reference off the last kerf until you are scored on all for sides and the kerfs will guide your saw as you complete the cut.• If worst comes to worst you may have to plane away a bit of the raised area in the middle of the end but mostly likely you can leave these legs alone until we have them assembled later.
Saw Accurately Now, Save Time Later

The stretchers should be laid out from the shoulders, spacing them 17” apart and at least 2” of length for the tenons. With the first stretcher laid out, transfer your lines to the other stretcher.
Layout a mortise 6” from the bottom of the leg and knife in the extents. Then knife in a center line.
Bore 4 1” holes on the centerline.
Layout the top stretcher the same as the lower but with longer, 3.5” tenons. Assemble and clamp using a windlass or clamps and lay out the mortise.
Layout a 1” wide tenon cen-tered on the stretcher and 2” long.Saw the shoulders then saw the tenon cheeks.You can also split out the cheeks
Pare the cheeks back to the lines and chop back on the end grain.
Use a scrap block as a mallet.
Saw the cheeks of the bridle then bore out the root of the bridle with a 1” auger bit to gree the waste.
Chop and pare back to the layout line.
Use your 1” chisel to pare across the grain to fit the tenon.
Fit the tenon to the mortise. If necessary pare the tenon cheeks to fit rather than paring the mor-tise walls.
Fit the bridle joints to complete the leg assemblies. Don’ t stress over the look of the bridles as we will be sawing them later for the notches for the aprons.
Mortise & Tenons and Bridle JointsThe king of joints and a fun variation
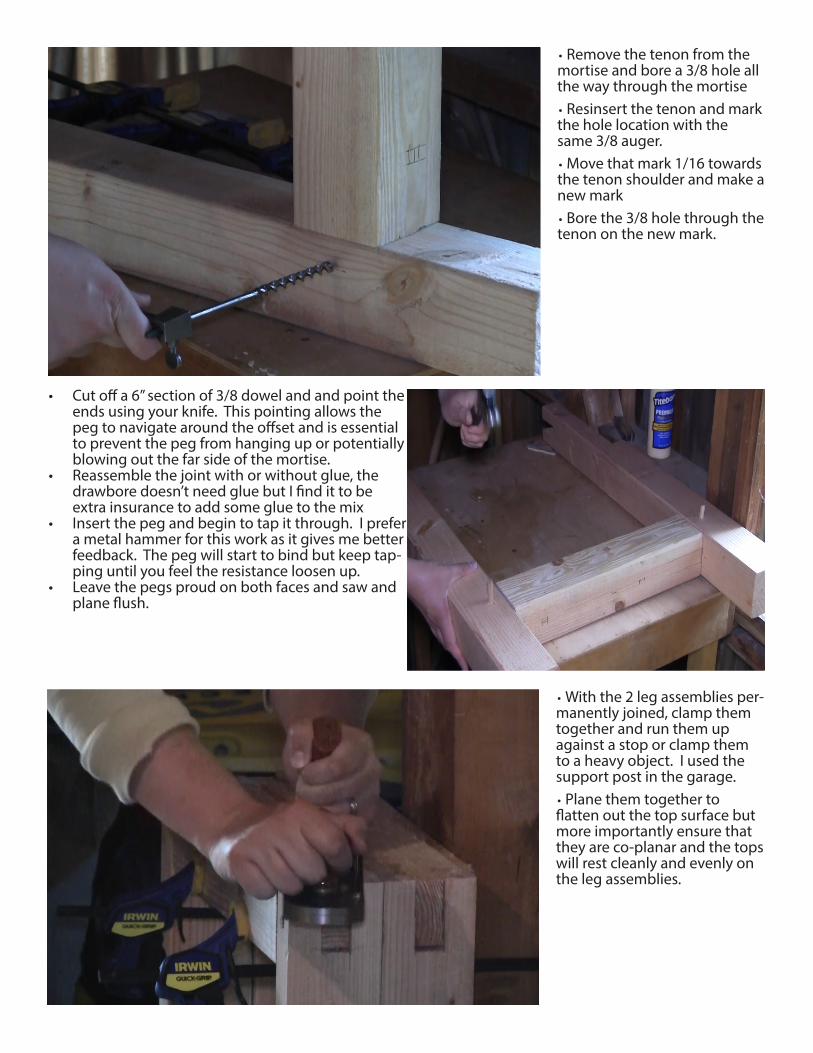
• Cut off a 6” section of 3/8 dowel and and point the ends using your knife. This pointing allows the peg to navigate around the offset and is essential to prevent the peg from hanging up or potentially blowing out the far side of the mortise.
• Reassemble the joint with or without glue, the drawbore doesn’t need glue but I find it to be extra insurance to add some glue to the mix
• Insert the peg and begin to tap it through. I prefer a metal hammer for this work as it gives me better feedback. The peg will start to bind but keep tap-ping until you feel the resistance loosen up.
• Leave the pegs proud on both faces and saw and plane flush.
• Remove the tenon from the mortise and bore a 3/8 hole all the way through the mortise• Resinsert the tenon and mark the hole location with the same 3/8 auger.• Move that mark 1/16 towards the tenon shoulder and make a new mark• Bore the 3/8 hole through the tenon on the new mark.
• With the 2 leg assemblies per-manently joined, clamp them together and run them up against a stop or clamp them to a heavy object. I used the support post in the garage.• Plane them together to flatten out the top surface but more importantly ensure that they are co-planar and the tops will rest cleanly and evenly on the leg assemblies.
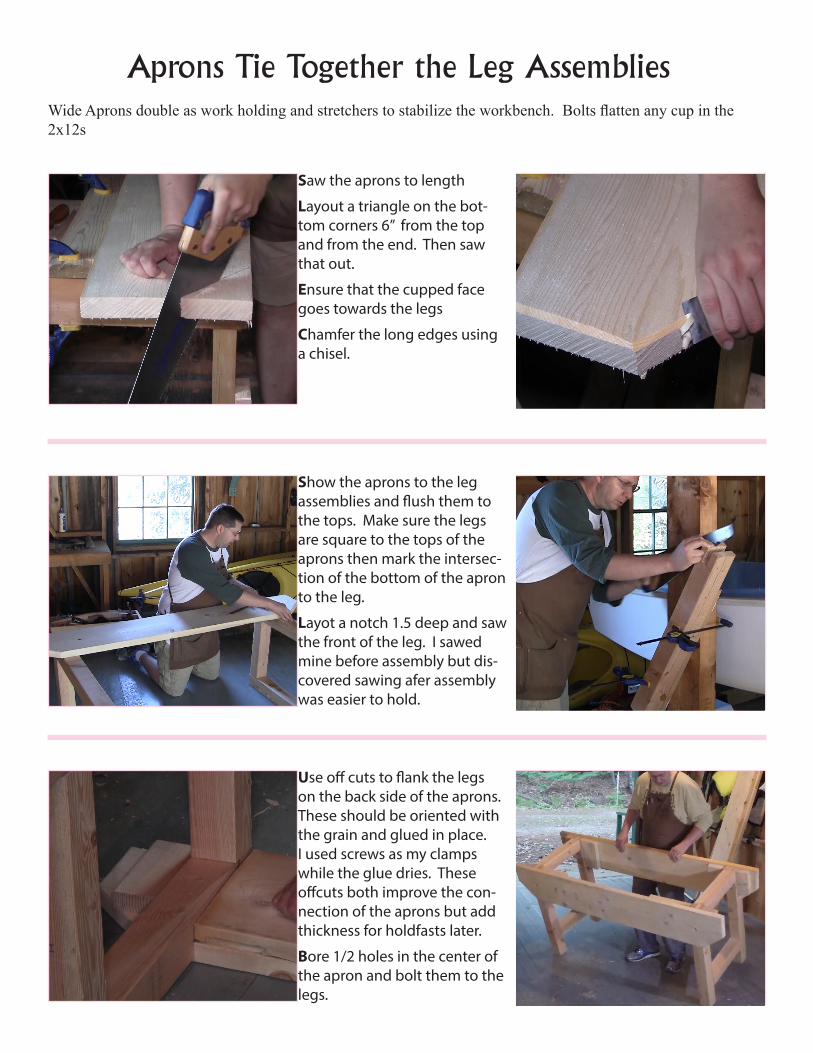
Saw the aprons to length
Layout a triangle on the bot-tom corners 6” from the top and from the end. Then saw that out.
Ensure that the cupped face goes towards the legs
Chamfer the long edges using a chisel.
Use off cuts to flank the legs on the back side of the aprons. These should be oriented with the grain and glued in place. I used screws as my clamps while the glue dries. These offcuts both improve the con-nection of the aprons but add thickness for holdfasts later.
Bore 1/2 holes in the center of the apron and bolt them to the legs.
Show the aprons to the leg assemblies and flush them to the tops. Make sure the legs are square to the tops of the aprons then mark the intersec-tion of the bottom of the apron to the leg.
Layot a notch 1.5 deep and saw the front of the leg. I sawed mine before assembly but dis-covered sawing afer assembly was easier to hold.
Aprons Tie Together the Leg AssembliesWide Aprons double as work holding and stretchers to stabilize the workbench. Bolts flatten any cup in the 2x12s
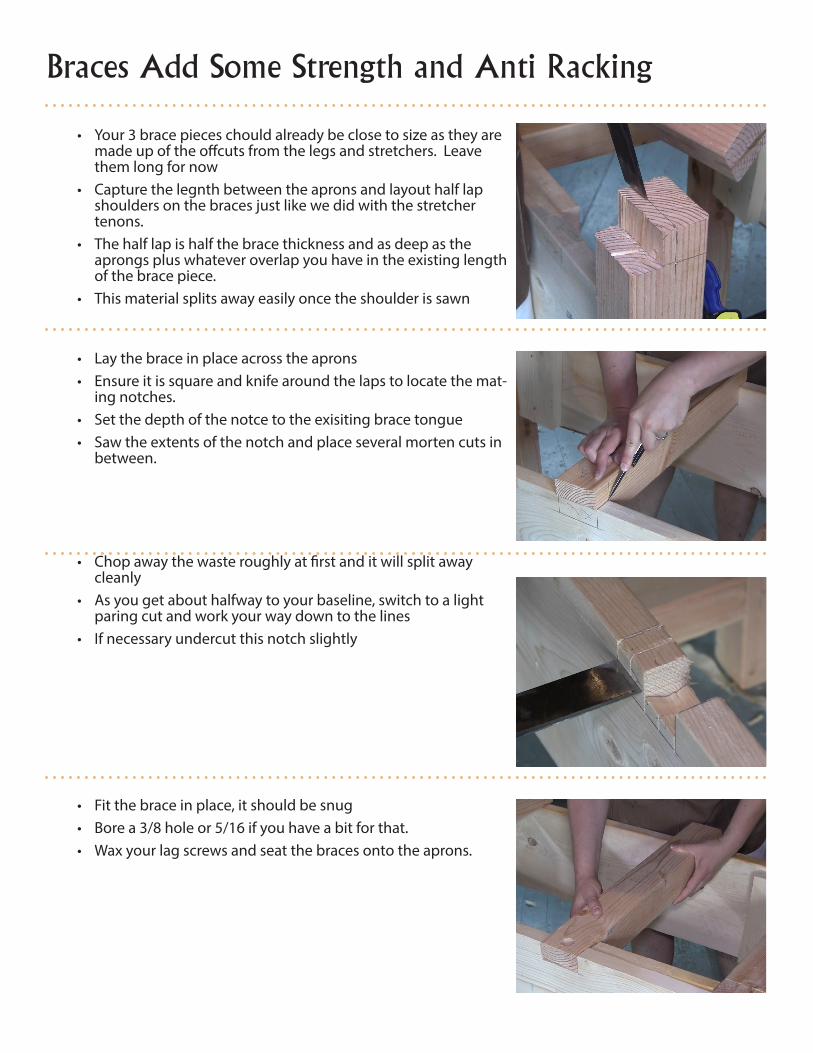
• Your 3 brace pieces chould already be close to size as they are made up of the offcuts from the legs and stretchers. Leave them long for now
• Capture the legnth between the aprons and layout half lap shoulders on the braces just like we did with the stretcher tenons.
• The half lap is half the brace thickness and as deep as the aprongs plus whatever overlap you have in the existing length of the brace piece.
• This material splits away easily once the shoulder is sawn
• Lay the brace in place across the aprons• Ensure it is square and knife around the laps to locate the mat-
ing notches.• Set the depth of the notce to the exisiting brace tongue• Saw the extents of the notch and place several morten cuts in
between.
• Chop away the waste roughly at first and it will split away cleanly
• As you get about halfway to your baseline, switch to a light paring cut and work your way down to the lines
• If necessary undercut this notch slightly
• Fit the brace in place, it should be snug• Bore a 3/8 hole or 5/16 if you have a bit for that.• Wax your lag screws and seat the braces onto the aprons.
Braces Add Some Strength and Anti Racking
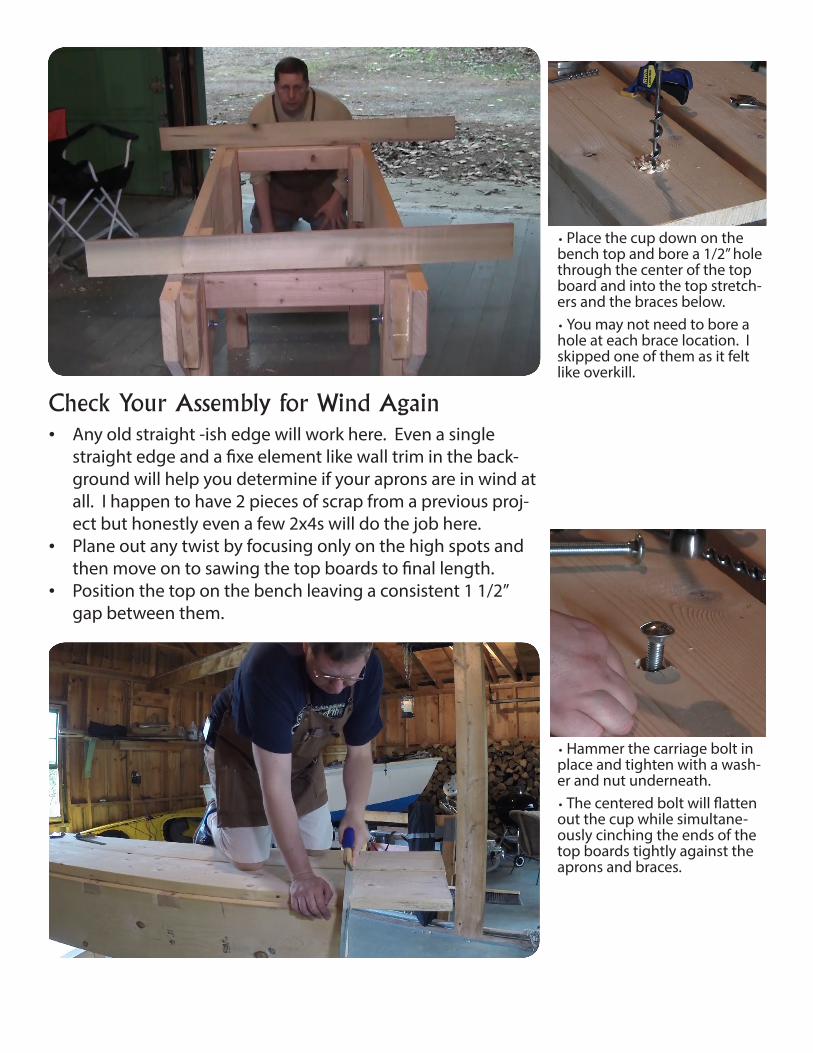
Check Your Assembly for Wind Again• Any old straight -ish edge will work here. Even a single
straight edge and a fixe element like wall trim in the back-ground will help you determine if your aprons are in wind at all. I happen to have 2 pieces of scrap from a previous proj-ect but honestly even a few 2x4s will do the job here.
• Plane out any twist by focusing only on the high spots and then move on to sawing the top boards to final length.
• Position the top on the bench leaving a consistent 1 1/2” gap between them.
• Place the cup down on the bench top and bore a 1/2” hole through the center of the top board and into the top stretch-ers and the braces below. • You may not need to bore a hole at each brace location. I skipped one of them as it felt like overkill.
• Hammer the carriage bolt in place and tighten with a wash-er and nut underneath.• The centered bolt will flatten out the cup while simultane-ously cinching the ends of the top boards tightly against the aprons and braces.

• Plane the 2x6 face until it fits snugly in the top gap but not so snugly that it can’t be moved easily.
• Mark the location of each brace and layout a notch that allows the planing beam to sit flush with the top
• Layout a notch to the right 1/2” shallower and one to the left 2” shallower.
• Saw and chop out the notches• Set the beam to match the thickness of the stock to be planed to
allow for across the grain planing.
• Bore dog holes with the 3/4” auger bit. Place your head on the pad of the brace to help you create square holes
• Locate dog holes along the back bench so the holdfasts reach across the planing beam and are spaced the diameter of the hold-fast reach.
• Bore a line of holes 2” in from the front edge and spaced again the diameter of the holdfast reach.
• Bore holes 3” on center down the legs and 12” apart down the apron.
• Cut 6” lengths of 3/4” dowel• Make a crosscut 1/8” deep 2” from one end of the dowel• Chop away the waste and pare the face flat• Bore a 3/8” hole 1/2” below the notch• Press a ball catch into the hole to complete the bench dog
• Cut 2 7” long pieces from the Oak dowel• Plane a scrap of hardwood to 1/4 x 4 x 11• Bore 3/4 dog holes 2” from the end of the bench• Clamp the stop in place and mark the hole locations with the au-
ger bit from beneath the bench.• Bore 3/4 holes through the stop• Saw a kerf on one end of each dowel• Pare a few wedges from scrap and drive them into the dowel to
lock the pegs into place and complete the planing stop.
Work holding on the Viseless Workbench
