wink
TRANSCRIPT

Technological University of the PhilippnesCollege of Industrial Education
Master in Technology of Education
Daniel M. Sta.Maria MTE

Wink-is a software tool to make presentations and tutorials about using software programs.
It allows you to capture screenshots of the actions you take on the desktop, wrap them into an animation and export as beautiful, classy Flash, PDF or even executable packages.
Furthermore, you can also place navigation buttons,
decorations and comments to your presentation slides, adding depth and style to
your work. Wink is an ideal solution for creating small-
size, high-quality presentation

Add Preset Shape
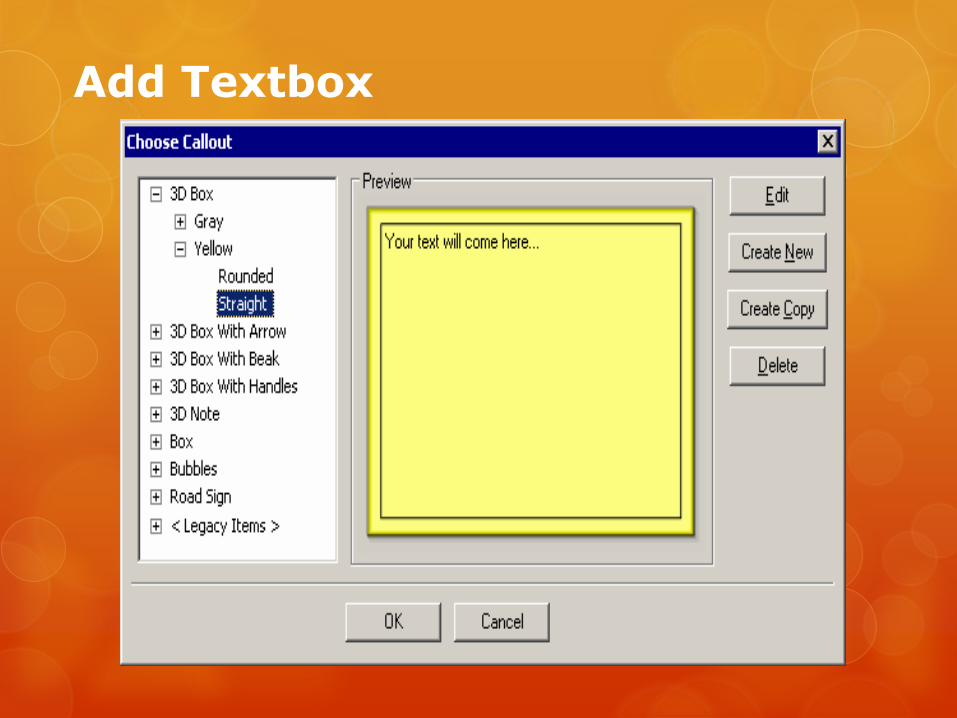
Add Textbox

EXAMPLE:
a tutor for MS-Word/Excel
tutor in Application

Using Wink you can capture screenshots, add explanations boxes, buttons, titles etc and generate a highly effective tutorial for your users.

There are many purposes for these kinds of presentations
· Advertising of software.
· Tutorials of software for classes.
· Documentation of software to supplement written documentation.
· Answer questions about the use of programs visually.

The basic output format of Wink is Flash. Flash is viewed in a web browser using thefree Macromedia Flash Player which is already installed on most computers or caneasily be installed the first the time the end user tries to watch a flash file.

New features in version 2.0
· Translated to more languages
· Undo/Redo
· Unlimited textboxes
· Unlimited buttons
· URL Buttons to open a webpage when clicked
· Image objects

· Shape objects, create and use shapes just like callouts with no text
· Audio (can record while capturing, as well as add/edit later)
· Improved and simpler properties panel
· Improved flow of control in output swffile so no more flickering of title/callouts when no buttons are used
· Ability to disable frames in a project so they won’t appear in output

Interface


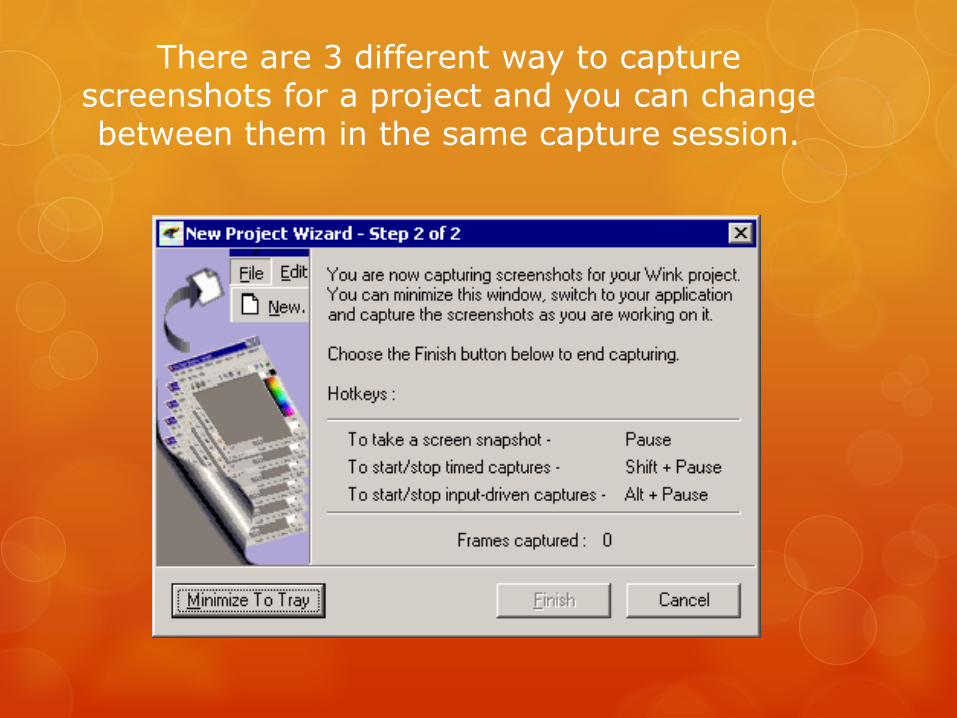
There are 3 different way to capture screenshots for a project and you can changebetween them in the same capture session.

– Each time you press the hotkey (default: Pause) the current content of the screen is captured to a frame in the project. The Wink icon in the system tray will blink momentarily to indicate this. If you want to use this mode exclusively you have to take screenshots after all actions done with the mouse and keyboard and furthermore also each time the mouse cursor has moved from one position to another.
Manual screen snapshots

Timed capture
– When activated with the hotkey (default: Shift + Pause) Wink will continuously capture screenshots with a certain capture rate that is specified in the previous step until you stop it again with the same hotkey. The Wink icon will be replaced by an animation that updates with the speed of the capture rate. For tutorials it is not very efficient to only use this mode because it will quite certain record many unnecessary frames but it can be effective for small parts of a project showing for instance how to draw in a program. This mode is also useful for tracking the behaviour of programs/installations that runs for a long time. In this case you could set the capture rate in the previous step to only record a given number of frames per minute or hour instead of frames per second.

Input-driven capture
Using input-driven capture Wink will automatically try to capture all the relevant frames while you do the actions that should be recorded. It can record all mouse clicks and/or all key presses (with the exception of some default and user-defined key combinations) based on the choice in the first step of the wizard. This mode is started and stopped through a third hotkey (default: Alt + Pause) and the icon in the system tray will change to show when it is activated. Like with manual screen snapshots the icon will blink each time Wink captures a screenshot but in this case not all the screenshots are actually converted into frames in the project since Wink will only save a screenshot if it is different from the last one.

The project window is divided into two parts:
1
2currently chosen frame in normal size
thumbnails of all the frames


Editing frames in a project

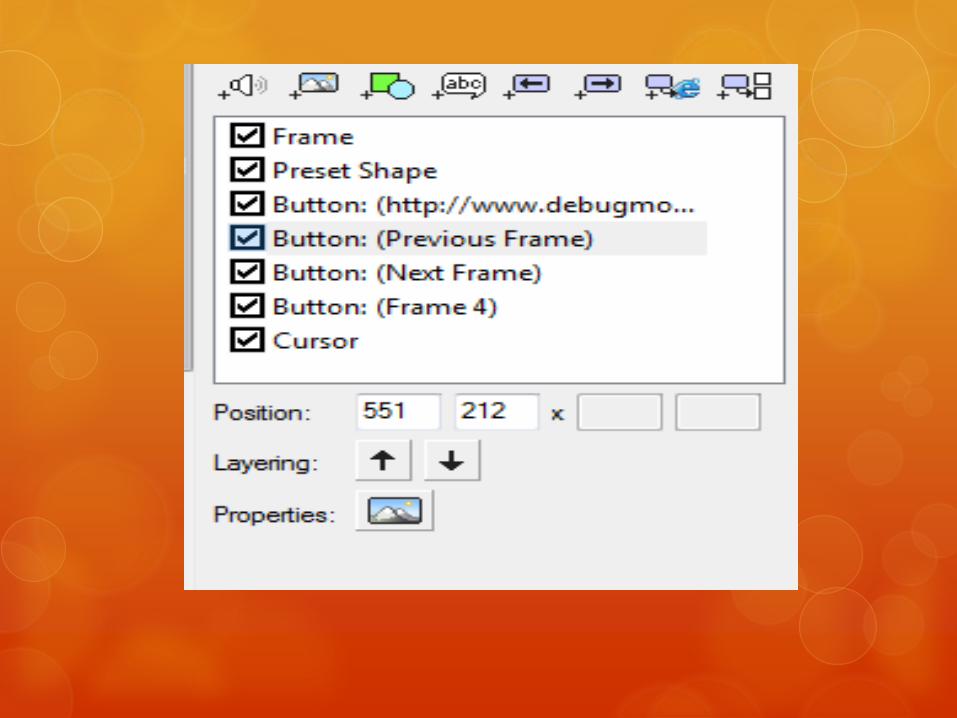
Properties Bar Properties of each element in the framecan be viewed/modified by selecting theitem in the list. You can also modify theposition/properties of elements, layerobjects of the same kind, enable/disableobjects and entire frames across multipleframes in a single step.
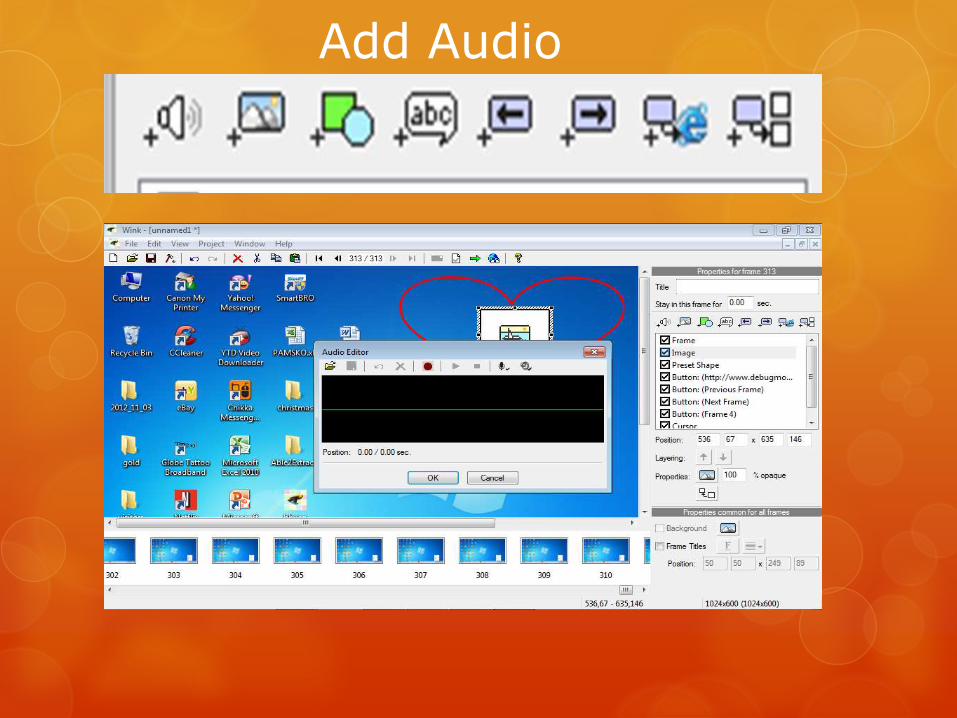
Add Audio

Add Image

Add Preset Shape

Add Textbox

Add Previous Button
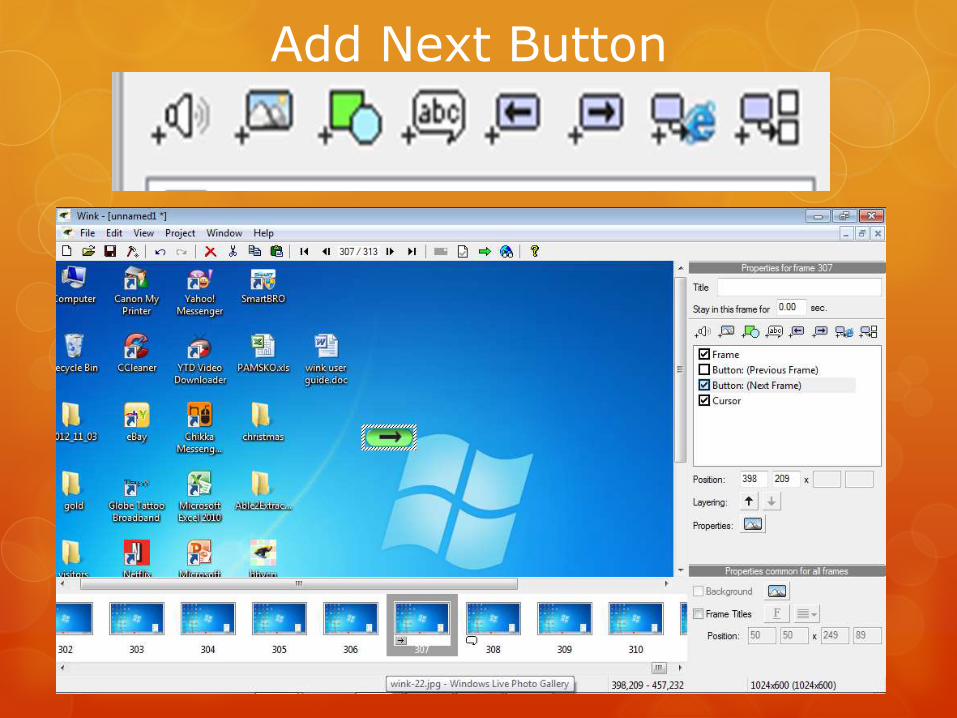
Add Next Button

Add Go to URL Button

Add Go to Frame Button


Rendering

THANK YOU