what and how to plantdownloads.plantingseason.co.za/...and_how_to_plant.pdf · if you wish to plant...
TRANSCRIPT
PLANTING SEASON 2009
What and how to plant
Hello, class ….
Well, I believe you’re all here, like me, because you want to be ….Today we’re preparing for
Planting Season 2009 on Spring Equinox Day, 22nd September, by choosing what to plant,
and how to plant it. If you are not paying attention, please leave the class and go count the soil
microbes outside in my EcoGrowing system, using a magnifying glass and writing down the
results with a blunt pencil!!
Choosing what to plant.
Those of you who’ve lived in different parts of our country will know that different regions have
different climates – even within a region, there are different micro-climates within a few
hundred metres of each other that can differ from each other … but that’s something that you’ll
learn about in greater depth when you attend one of my “permaculture” and Sustainable
EcoGrowing Systems Courses that I hold in different places around the country, as part of the
Sustainable Community Living degree for graduates of the series of courses.
By the way, “perma-culture” really means “sustainable living”, and I promote this holistic view
to include everyone around us, as well as all of the environment, in every part of our daily
lives …. in effect, giving respect to the whole of the Universe.
But back to climate: the bottom line is this – what you grow in Gauteng will face different
factors than if you grow it in Northern Zululand, or the Western Cape, or in Lesotho, for
example.
To make matters very simple, I have divided the country into four broad regions. These
regions are:
• Sub-Tropical areas – where the climate is warmer & most things grow easily and faster;
• Mild areas – where there is medium to heavy winter frosts, but warm days;
• Highveld areas – this covers most of northern & western parts of Southern Africa above
the extended Drakensberg escarpment; and
• Winter Rainfall area – the Western Cape region falls into this category.
I do have another region, which is the Montaine area above 3,000 metres in altitude, in which
we’re researching the development of practical High-Altitude EcoGrowing Systems for above-
snow-line growing. However, this is such a small area that has pretty low population densities,
so we can ignore this area for our purposes here today. Anything lower than the 3,000 metres
altitude line will fall into the Highveld areas.

So, what grows well in these different areas around the country?
Because of South Africa’s climate, most types of vegetables, herbs, and fruit trees that have
come originally from Europe or North America do very well wherever you plant them in
Southern Africa.
To make things even more simple, I have developed a special programme that makes the
choice of what to plant very easy. I work a lot with very rural Emergent and Small-Scale
Farmer Development, and so my teams have always found that simple is more sustainable.
The only variables in planting these veges are:
1. What to Plant, and the best time to plant the seeds and transplant seedlings;
2. The best places to plant the seeds and plant-out seedlings; and
3. Giving the plant some regular attention – at least on a daily basis, if you can.
I teach the method of Sustainable EcoGrowing, that produces chemical and pesticide-free
crops (“organic” produce). With this method, we plant mature (advanced) seedlings that we
have grown from seed ourselves, on site. This means we have a small nursery operation that
grows the best, strongest, happiest seedlings for transplanting into our growing area.
With this in mind, let’s look at each of these variables, briefly.
1. The best time to plant seeds:
As a rough guide, most seeds take between 6 weeks and 12 weeks to germinate,
depending on the type of seed, the season, and where you are in our sub-continent. Seed
A rural community with an Emergent Farmer Development
programme.
Happy community members at a Community Meeting to launch
their project.
Their available Growing Area …. Jealous? You bet!!
Mature seedlings in a seed tray, ready to be planted-out.
Seedlings in pots in the nursery.

packages and local organic nurseries can help you more specifically for your particular
region.
If you want to plant-out your own home-grown mature seedlings, as I do with my
sustainable agriculture systems – as these are the best plants for the local conditions, then
you’d need to plant the seeds in seed trays before the actual time of planting. Otherwise,
buy trays of good, strong, healthy vegetable and herb seedlings from your nearest organic
nursery, about a week before the 22nd when Planting Season officially begins.
Planting seedlings is far easier for the busy person, as it can be done in the evening, and
also maintained in the early morning and in the evening. And it’s a simple selection of
plants, which are the same anywhere in the country for that time of year ….
Planting seeds can be done at any time of the day, however, planting-out seedlings should
be done in the evening, when they can recover from the trauma of the transplanting
procedure by not having the heat of the sun draw more water from their leaves than they’re
able to take up through their roots. They can recover overnight if you plant in the evening,
& become stronger, bearing usable produce sooner.
I also like to teach the Lunar Phase Planting method.
I once used to call this “Planting-By-The-Moon”, until, one day, a student on my course
said, “Oh yes, I remember my grandmother always planted by the Moon – she used to
plant her vegetable gardens at night, in the moonlight – and she always had really good
veges!”
Well, this was only partly linked to the Lunar Phase Planting method – probably more by
casual association to folklore than by sticking to the “rule-of-thumb” for planting according
to the phases of the Moon, and when I explained the differences, we all had a good laugh!!
Lunar Phase Planting has been researched by Metaphysics (“Beyond-Physics”) scientists
in different parts of the world. It’s a very deep subject, and so we won’t go into it here. But
the main thing to know is that vegetables and other food crops do grow better, stronger,
healthier, and faster than others planted in nearby test sites that were not planted during
the appropriate Moon Phase.
The simple guide is this:
Between New Moon and First Quarter Moon, plant seeds or transplant mature
seedlings that give a leafy produce.
Planting out mature herb seedlings in the evening into a compost mulch in a special vegetarian restaurant garden for Luna Lounge, Bothas Hill (KZN).

Between First Quarter Moon and Full Moon, plant seeds or transplant mature
seedlings that give a fruit as produce.
Between Full Moon and Last Quarter Moon, plant seeds or transplant mature
seedlings that have a root product.
Complicated? Well, here’s an easy way to remember this. Please say after me,
Leafy, fruity, rooty ….. leafy, fruity, rooty ….. leafy, fruity, rooty!!
Bingo, I think you’ve got it!!!
With Planting Season Day 2009 falling on Tuesday 22nd September, we happen to be,
according to the Moon Phase Calendar, in the week of a “waxing” (or growing) Moon. The
New Moon will have taken place the previous Friday, the 18th September, at 20:44 (8:44
pm) South African Standard Time (SAST). With this in mind, the best plants for this time of
year, to either plant as seeds or transplant as mature seedlings, are leafy veges, and all
leafy herbs.
Here’s the simple table that shows the best organic plants to plant-out as mature
seedlings on Planting Season Day 2009:
Vegetable Comments
Basil Plant next to where you want to plant tomatoes between First Quarter Moon & Full Moon.
Cabbage All types, including salad cabbages
Celery
Leek
Lettuce There are many varieties, all of them suitable for this period.
Parsley
Swiss Chard
All leafy Herbs
For those of you who wish to plant seeds, the table for the appropriate seeds for this day is
exactly the same as for the mature seedlings above. However, you may plant the leafy
Herbs as seedlings amongst your vegetables seeds for best results. This is called
Companion Planting, and I’ll talk briefly about it once we’ve talked about the what the best
vegetables and herbs are to plant.
Remember, though, that variety is important, so I’m encouraging you all to follow up this
first planting of leafies – no, not liefies, skatabol – leafies, on Planting Season Day 2009
with the fruities. You can do this after 6:50 am (SAST) on Saturday, 26th September, to fit
in with the Moon Phases.
The fruity veges that are good to plant after this time are: beans, broccoli, chickpeas,
eggplant (brinjal or aubergine), green peppers (capsicum), peas, tomatoes, baby marrows
(zucchini), cucumbers, squash, sunflowers, maize (mielies & sweetcorn), pumpkins, and
melons.
And then, to bring more variety to your garden patch, after 8:10 am (SAST) on Sunday 4th
October, you should plant the rooties. The suitable ones for this time are: beetroots,
carrots, onions, potatoes, radishes, and shallots.
If you are in any doubt, please feel free to visit your local organic vegetable nursery and
ask them for advice … most nurserymen (male or female) are passionate about their
plants, and will be only too happy to give you the best advice for your local area.
Alright, class, that ends the section on What to plant, and the best time to plant.
I bet you’re saying, “Well if that’s being brief, I don’t want to be around when he goes into
greater depth!” ….. that’s fine by me …. I’m here to pass on some good tips on being a
successful “organic” gardener. But if you didn’t think that, and want to learn more, I run in-
depth courses that qualify you as a supported “permaculture” designer and developer, with
an international University diploma accreditation at its end. It’s both theoretical and
practical – mostly practical, because I believe that learning is only permanent through the
hands DO-Ing.
The next variable to discuss is:
2. The best places to plant the seeds or plant-out seedlings:
I like to set up a seedling nursery at every project I do, which can be as simple as having
tiered levels of planks on blocks under the eaves of a north-east facing wall of your house,
or any other building. This is a protected area that has good winter sunshine, and is also
out of the cold south-westerly winds that come through as cold fronts.
So planting seeds, for me, is invariably done in my small nurseries.
I normally use my own germination mix to plant the seeds into. Until they are sprouted
and have their first true pair of leaves, seedlings don’t need feeding. The germination mix
is just a suitable home for the seed to have enough (but not too much) moisture to
germinate. However, once they’ve produced their first leaf-pair, they need to be
transplanted into a seedling mix, which has nutrient for the growth of the seedling. This is
called a “growing medium”. If you wish to plant seedlings to transplant into your growing
area, you can get these two mixes from your local organic nursery. Other commercial
nurseries do sell bags of growing mediums, but I tend to avoid these as many times they
have chemicals in them, and that destroys the intention I have to grow and eat pure
“organic” vegetables.
I like to plant-out the mature seedlings straight into a mulch in pre-determined positions.
The mulch is mostly mature compost, which is just like rich soil, but very friable, or loose,
and full of soil microbes, and earthworms.
So that person I asked to leave the class earlier doesn’t really have a difficult job, because
the soil microbes are quite close to the surface, and easy to find, even with the magnifying
glass they’re using …… although finding an earthworm with a magnifying glass can
sometimes be scary, when you’re not expecting it …..
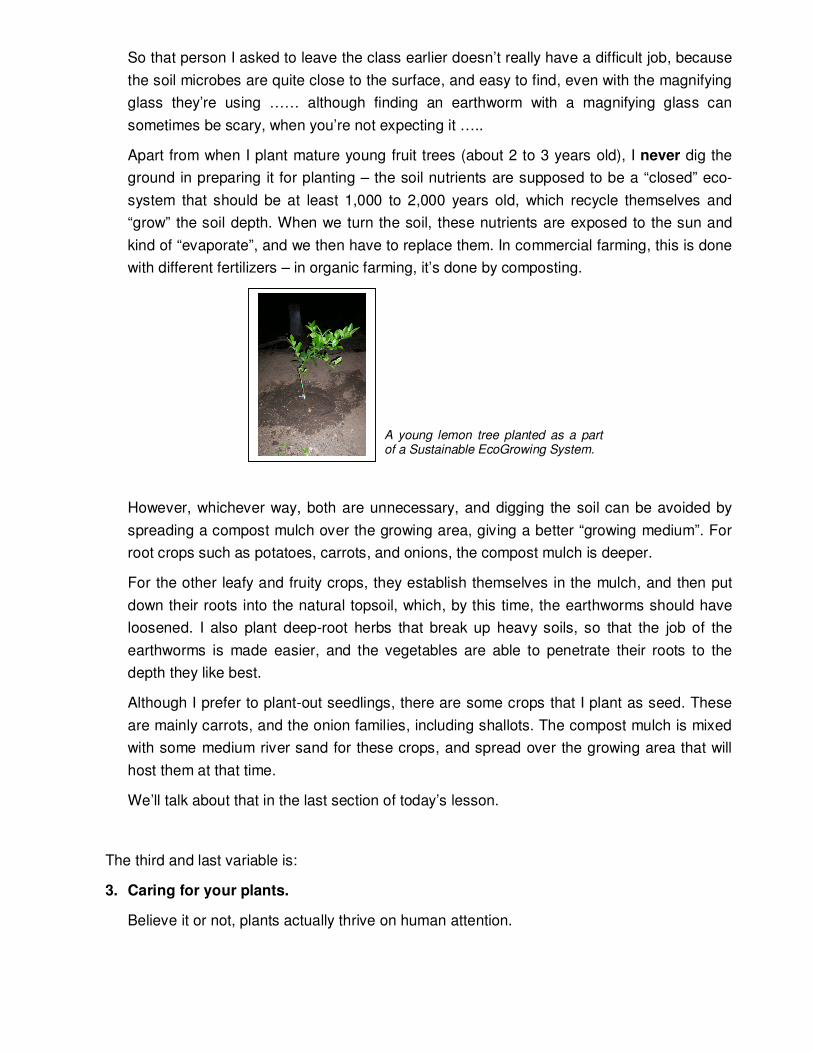
Apart from when I plant mature young fruit trees (about 2 to 3 years old), I never dig the
ground in preparing it for planting – the soil nutrients are supposed to be a “closed” eco-
system that should be at least 1,000 to 2,000 years old, which recycle themselves and
“grow” the soil depth. When we turn the soil, these nutrients are exposed to the sun and
kind of “evaporate”, and we then have to replace them. In commercial farming, this is done
with different fertilizers – in organic farming, it’s done by composting.
However, whichever way, both are unnecessary, and digging the soil can be avoided by
spreading a compost mulch over the growing area, giving a better “growing medium”. For
root crops such as potatoes, carrots, and onions, the compost mulch is deeper.
For the other leafy and fruity crops, they establish themselves in the mulch, and then put
down their roots into the natural topsoil, which, by this time, the earthworms should have
loosened. I also plant deep-root herbs that break up heavy soils, so that the job of the
earthworms is made easier, and the vegetables are able to penetrate their roots to the
depth they like best.
Although I prefer to plant-out seedlings, there are some crops that I plant as seed. These
are mainly carrots, and the onion families, including shallots. The compost mulch is mixed
with some medium river sand for these crops, and spread over the growing area that will
host them at that time.
We’ll talk about that in the last section of today’s lesson.
The third and last variable is:
3. Caring for your plants.
Believe it or not, plants actually thrive on human attention.
A young lemon tree planted as a part of a Sustainable EcoGrowing System.
That’s why I go into the nursery every morning and every afternoon, to water the plants
with a fine-rosed watering can, or with a spray bottle for the finer seeds and smaller
seedlings.
While I water the plants, I may take out fallen detritus (dead vegetation) that the wind may
have blown onto the seed trays, sometimes a foreign plant (some people call these
“weeds”, but I have a use for everything that grows, so none of them is a pest that I can
call a “weed”).
If you happened to be with me in the nursery or in the growing areas, you may think I’m off
my rocker ….. and I’d be pleased to hear so, because I really enjoy living a “different”
lifestyle to the manipulative hustle of what other people call a “normal” life.
You’d probably form this opinion of me, because ……. I TALK to the seeds, seedlings, and
plants!! Yeah, totally crazy, mad professor, weird …. And I AM!! Fortunately. Because this
is an important factor in raising healthy and productive plants.
Some years ago, a lie-detector expert in USA named Cleve Backster was working late &
decided his office pot plant looked as though it needed water. Having an investigating
mind, he decided to connect his lie-detector machine (which reads very small electrical
impulses) to the plant before he watered it. When he gave it water, the electrograph on the
lie-detector gave a definite reading, and one that related to the human emotions of
gratitude and joy. Subsequently, Mr Backster gave up the lie-detector career and started
studying plant responses to human intentions.
So, the bottom line of his findings (and those of other researchers in this field in other parts
of the world) is that plants respond to human thoughts and intentions.
When we talk and think positively to and about our plants, they respond positively and
happily. When we’re negative, they tend to become unhealthy and take longer to mature.
So that’s why I talk to all my plants …. And, you know what, it makes ME feel good at the
same time!
If you remember to try it, you may find that it helps both you and the plants in the same
way …..
Well, that’s the end of the Choosing What To Plant section of today’s lesson.
Before class is dismissed, however, we need to first talk about why things grow better when
other types of plants grow near them … and vise versa …. as well as how to plant seeds, and
plant-out seedlings.
First, let’s talk about planting groups of plants together for better growing, which I shall call

A Rough Guide to Companion Planting.
No we’re not going to be rough on our plants … they do much better when we’re good to
them. What did we learn in the last session about Mr Backster’s discoveries?
Companion planting is the method of growing different plants next to each other with mutual
benefits to both.
The benefits include:
• making maximum use of a growing area without a single-species crop saturating the area
with demands for food and nutrient resources;
• good companion plants don’t compete for root space and light, nor for the necessary
nutrients;
• pest management is simpler, because pests normally attack only one species of plant, and
when others are planted around the target plant, the pests find it harder to wipe out your
entire crop. This is important in “organic’ growing, as we try our best to avoid using any
artificial chemical substance, even for pest control. And also, sharing our ecosystem with
all the natural organisms builds a harmonious balance which is beneficial to us all;
• herbs are very good companion plants that disguise the target plant from pests with aroma,
shape, and sometimes a better taste;
• companion plants can be used to “nursemaid”, or protect, more vulnerable plants,
especially immature ones;
• some companion plants are beneficial through releasing substances through their root
systems that actually increase the well-being of other plants – this is a process I call
“reverse-allopathy”.
Allopathy is a well-researched scientific subject that has identified that certain plants release
harmful substances through their root systems that inhibit or prevent the growth of other plants
that compete with them. Grasses are one such type of allopathic plant, however, they seem to
concentrate on preventing another species of grass from invading their space.
“Reverse-allopathy” is the beneficial symbiotic (or companion) relationship between certain
plants.
I try, whenever possible, to avoid planting two of the same species of plant right next to each,
particularly when it comes to lettuce, cabbage, and other leafy crops that attract pest species.
Around and between them I plant herbs and other crops. Typically, a growing area will consist
of one of each plant, as follows:
Row 1 – broccoli, swiss chard, basil, broccoli, parsley, celery, broccoli, swiss chard,
parsley, broccoli, basil, celery, swiss chard, broccoli, parsley, celery, swiss chard,
broccoli, basil, celery, broccoli;
Row 2 – tomato, pepper (capsicum), eggplant (brinjal), tomato, pepper (capsicum),
eggplant (brinjal), tomato;
Row 3 – dwarf beans, lettuce, carrot, beetroot, cabbage, dwarf beans, lettuce, carrot,
beetroot, cabbage, dwarf beans, lettuce, carrot, beetroot, cabbage, dwarf beans;

Between rows 1, 2, & 3, and to fill in spaces between the larger plants, are scattered carrots
and beetroots;
Row 4 – leeks;
Row 5 – potatoes;
Row 6 – chick peas.
My Sustained EcoGrowing System design is based on maximising plant energies by planting
in circles, with a key-hole design that helps us humans with plant management. The design
incorporates having the species of crops that we can harvest repeatedly over a period of time
closer to the pathways, so that we don’t walk on the soil every day, which compacts it and
makes more work for our “eco-operative” helpers, the earthworms and other soil insects.
Veges that are only reaped once – like lettuce, cabbage, potatoes – are furthest from the
pathways.
With combinations of groups of companion plants in different circles, this graphic gives an idea
of what a complete Sustained EcoGrowing System should look like:
An example of a Sustained EcoGrowing System Companion Planting layout.

Probably the best example of companion plants are carrots and onions. When planted
interspersed, either in rows (one row of carrots, one of onions, one of carrots, etc) or as
alternate plants in rows, they compliment each other without competing for root or foliage
space, they help supply nutrients to each other, and each protects the other from pests.
However, herbs in and around your garden have special benefits, and are not only there to
look pretty, give wonderful scents to the air, and to brighten the garden with their flowers, but
are also very useful as flavouring for foods, and for many different kinds of primary &
preventative health care products that you can make easily in your home.
Herbs and vegetables planted together in a Companion Planting System in an organic garden.
Planting alternate rows of carrots and onions to get maximum benefit from Companion Planting, in a Sustained EcoGrowing System.
Simple herbal medicines made at home.

As a rule, most combinations of similar-season crops will make good companions with little ill-
effect on each other in a healthy growing ecosystem. There’d be no harm in experimenting
with different plant species combinations.
But as a guide, here are lists of suitable companion plants:
LIST OF USEFUL COMPANION PLANTS
PLANT COMPANION PLANT/S
Balm (Lemon Balm) Most vegetables
Basil Tomato
Beetroot Cabbage, carrot, lettuce, lovage, parsley, tomato
Beans Eggplant, potato, summer savoury, winter savoury
Borage Strawberries, tomatoes
Cabbage Beetroot, camomile, carrot, dill, lettuce, nasturtiums, parsley, peppermint, sage, thyme, tomato
Camomile Cabbage, onions, peppermint, wheat
Carrot Beetroot, cabbage, lettuce, lovage, onion, onion chives, parsley, rosemary, spring onion, tomato
Chervil Coriander, radish
Chives (Onion) Apple trees, carrots, lovage
Comfrey Strawberries
Common Stinging Nettle Angelica, marjoram, peppermint
Coriander Anise, chervil
Cucumber Dill, nasturtiums
Dill Cabbage, cucumber, lettuce, maize
Eggplant Beans, peas
Garlic Fruit trees, lovage, raspberries, roses
Horseradish Fruit trees, lovage, potatoes
Lavender Thyme, most vegetables
Lettuce Beetroot, cabbage, carrot, dill, parsley, thyme, tomato
Lovage Potatoes, Swedes and root vegetables
Maize Dill, melon, pumpkin, squash, watermelon
Marigolds Most vegetables
Marjoram Most vegetables, common stinging nettle
Melon Maize, sweet corn
Mint Salad burnet
Nasturtiums Cabbage, cucumber, pumpkins, radish, squash
Onions Carrot, camomile, lovage, summer savoury
Oregano Most vegetables, French sorrel
Parsley Beetroot, cabbage, carrot, lettuce, tomato
Peas Eggplant
Peppermint Cabbage, camomile, common stinging nettle
Potato Beans, horseradish, lovage
Pumpkin Maize, nasturtiums, sweet corn
Radish Chervil, Lovage, nasturtiums
Raspberries Garlic
Rosemary Carrots and most vegetables, sage
Roses Garlic
Sage Cabbage, rosemary

PLANT COMPANION PLANT/S
Salad Burnet Mint, thyme
Savoury (Summer) Beans, onions,
Savoury (Winter) Beans
Sorrel (French) Oregano
Spring Onion Carrot, lovage
Strawberries Borage
Squash Maize, nasturtiums, sweet corn
Swedes Lovage
Sweet Corn Maize, melon, pumpkin, squash, watermelon
Thyme Cabbage, lavender, lettuce, all brassicas, salad burnet
Tomato Basil, beetroot, borage, cabbage, carrot, lettuce, parsley
Watermelon Maize, sweet corn
However, as in all good things in nature, there just happens to be some balancing factor, and
there are some plants that just don’t work together. The following table lists some of these:
LIST OF PLANTS TO AVOID PLANTING TOGETHER
PLANT NON-COMPATIBLE PLANT/S
Basil Rue
Beans Chives, fennel, garlic, onion, spring onion
Caraway Fennel
Carrot Dill
Chives Beans, peas
Coriander Fennel
Dill Carrots
Dwarf Beans Chives, fennel, garlic, onion, spring onion
Fennel Caraway, coriander, dwarf beans, kohlrabi, tomatoes, wormwood
Garlic Beans, peas
Kohlrabi Fennel
Onion Beans, peas
Peas Chives, garlic, onion, spring onion
Rue Basil
Spring Onion Beans, peas
Summer Savoury seeds ALL SEEDS (savoury seeds inhibit germination of other seeds)
Tomatoes Fennel
Winter Savoury seeds ALL SEEDS (savoury seeds inhibit germination of other seeds)
Wormwood Fennel
Well, I think that our guide to companion planting has been rough enough, so let’s get onto the
next topic of today’s lesson.

The last, and most practical part of today’s lesson is about ways to get your plants into the
ground and growing. Let’s call this section:
Planting for Planting Season 2009.
Here’s the real nitty-gritty, the real deal, so to speak …. it’s what gets our organic vegetable
garden and growing system to give us healthy food to put on our tables.
Let’s first talk about planting seed.
As I discussed in the first section of today’s lesson, seed can be planted either in a nursery to
produce mature (advanced) seedlings to plant-out into your growing area, or can be planted
directly into your growing area.
I haven’t mentioned indoor growing, hanging gardens, patio or balcony gardens, or even
rooftop gardens, but all of these can also have seed planted directly into your containers or
growing mediums, and the principles are the same.
But what are the principles of planting seeds?
Firstly, your growing medium needs to have good drainage, which you can achieve through
adding river sand with compost (one part of each), which balances moisture retention and
drainage.
Secondly, planting is best done using small tools – a nursery set, and a small watering can
with a fine nozzle, and a spray bottle.
Thirdly, the seeds should be planted no deeper than twice their diameter.
So then, how do we plant seeds?
• Get your seedbed levelled with your growing medium at a uniform depth.
Some examples of growing in containers in patios, balconies, indoors, and in hanging systems made from recycled materials.

• With your small trowel, hollow out a small hole or furrow, no deeper than twice the
diameter of your seed. You may prefer to use a toothpick or a piece of small plastic to do
the same job, for smaller seeds.
• Place your seeds at the correct spacing in the hole or furrow.
• Sift fine soil mixed with mature compost over the holes or furrows, to a depth of no more
than twice the size of the diameter of the seed. A household basket sieve will do the trick, if
you don’t have a fine garden sieve.
• After planting all the seeds in that area, spray the surface of the planted area with a fine
mist spray until it is moist.
• Each day, check that the soil is still moist, and spray it if necessary.
• Then wait for the seedling to emerge.
• When it does, and shows its first pair of true leaves, add a tonic of earthworm castings or
another organic liquid manure to your water once or twice a week, until it gives its produce.
Well, that’s as simple as seed planting should be. Don’t try to make it complicated ….. and
remember, talk to your seeds to help them germinate, while you’re watering them every day!!!
And keep talking to them as they grow ……
For those of us that like the convenience of planting-out mature seedlings, here’s some
pointers:
• I prefer planting into a mulch material, such as I spoke about in the first section of today’s
lesson, so I spread it evenly to a depth that is a little more than the depth of the seedling
pot that I’m using to plant-out from.
• I normally leave the seedlings, in their trays or pots, right next to the planting area for a few
days before planting, so that they acclimatise to that specific spot.
Mature (advanced) seedlings in a seedling tray, acclimatizing before being planted-out.
Planting seeds into seed trays, and covering them with a sifted mixture of soil and mature compost.
• Also, I normally align the seedlings pointing in the same direction as they grew in my
nursery, or in the nursery where I got them. This allows them to orientate themselves with
less stress.
• Take a dibber or small trowel and make hollows in the mulch that allows the seedling to fit
in at the same height as the soil of the tray or pot it grew in.
• Remember, space your seedlings – most vegetables need at least 30 cm circles for their
roots and foliage to get the best take-up of nutrients and for foliage growth, without being
“crowded”.
• If the seedling is in a tray, “prick-out” the seedling with the soil around it’s roots. Remember
to not turn the seedling upside down , and to align it in the same direction it was facing in
the tray.
• If the seedling is in a nursery bag, or a pot, the procedure is the same. With a bag, I cut
away the plastic, without turning the seedling upside down. Doing that causes it to
traumatise, and it will invariably not do very well. Place the seedling, with its root soil, into
the hollow you made, aligning it in the same direction as it was in it’s container.
• Take the mulch that came out of your planting hollow, and fill in around the planted
seedling, gently tamping it down so it is not loose enough to be blown away by the wind.
• Water the seedlings with a watering can with a fine rose (nozzle), until the soil is moist
around them.
• Check your seedlings every day, keeping the soil moist, and talk to them ….
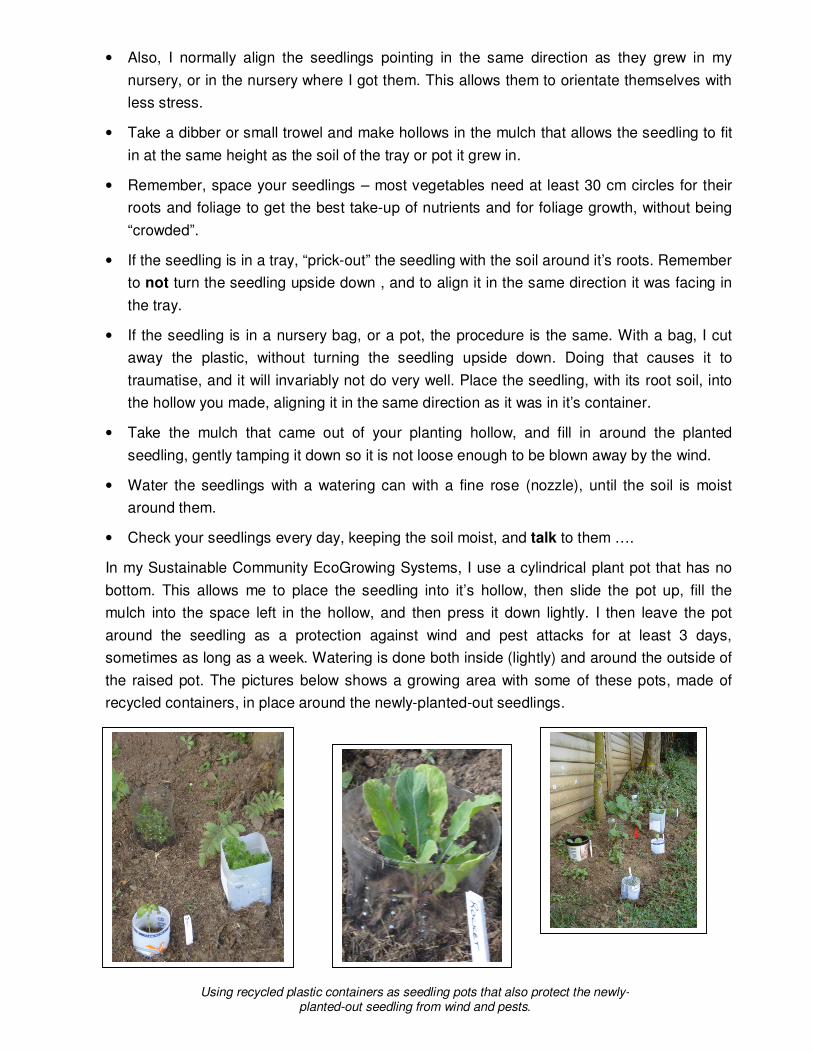
In my Sustainable Community EcoGrowing Systems, I use a cylindrical plant pot that has no
bottom. This allows me to place the seedling into it’s hollow, then slide the pot up, fill the
mulch into the space left in the hollow, and then press it down lightly. I then leave the pot
around the seedling as a protection against wind and pest attacks for at least 3 days,
sometimes as long as a week. Watering is done both inside (lightly) and around the outside of
the raised pot. The pictures below shows a growing area with some of these pots, made of
recycled containers, in place around the newly-planted-out seedlings.
Using recycled plastic containers as seedling pots that also protect the newly-planted-out seedling from wind and pests.
Well, that concludes my subjects for today’s lesson, class.
We learned all about what to plant for Planting Season 2009, and to supplement that with
herbs, as well as other veges in the 2 weeks following.
We also learned about companion planting, as well as how to plant both seeds and plant-out
mature seedlings.
Now, if you really want to learn how to grow your own “organic” food, in any space, that gives
you food for your family for three varied meals a day, every day of the whole year, you can
sign up for one of my Sustainable Community Living Courses – EcoGrowing Systems, which
I’ll hold in any part of Southern Africa, if there’s enough people to attend.
This Course, and its related Courses (Sustainable Community Living – Alternative Essential
Services, and Advanced Sustainable Community Living – Design & Development) will teach
you how to become completely self-sustaining in your chosen “community” environment,
which may be as small as you individually, or may progressively include extended family and
neighbours as well.
If you want to, you may also use the International University qualifications awarded to
graduates of the Courses to follow a professional career-path choice, as a consultant in the
fields covered by the Courses. The University-level qualifications are Diplomas for the
individual courses, and a Batchelor Degree for the graduates that successfully complete all
three individual courses.
Alright, class is over, but remember, people …… make a jungle out there …….
Happy planting on Planting Season Day 2009!!!
Dr. Wayne Ingwe: [email protected]