welcome to mastering unreal technology: the art of level design
TRANSCRIPT

Welcome to MASTERING UNREAL TECHNOLOGY:
The Art of Level Design
Unreal CH 3 Excerpt 8/20/04 12:56 PM Page 1
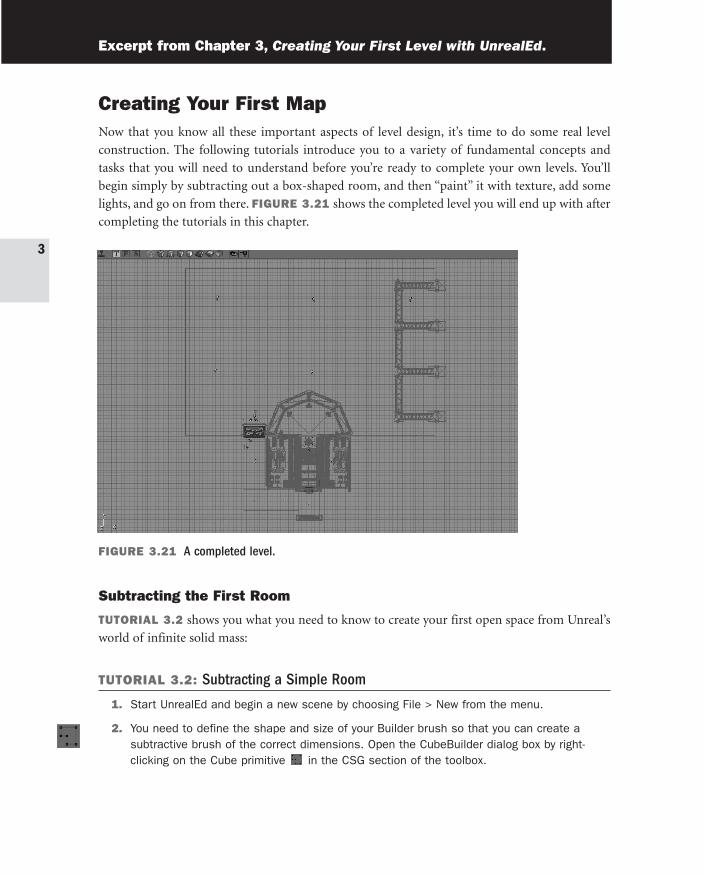
Creating Your First MapNow that you know all these important aspects of level design, it’s time to do some real level
construction. The following tutorials introduce you to a variety of fundamental concepts and
tasks that you will need to understand before you’re ready to complete your own levels. You’ll
begin simply by subtracting out a box-shaped room, and then “paint” it with texture, add some
lights, and go on from there. FIGURE 3.21 shows the completed level you will end up with after
completing the tutorials in this chapter.
Excerpt from Chapter 3, Creating Your First Level with UnrealEd.
FIGURE 3.21 A completed level.
Subtracting the First Room
TUTORIAL 3.2 shows you what you need to know to create your first open space from Unreal’s
world of infinite solid mass:
TUTORIAL 3.2: Subtracting a Simple Room
1. Start UnrealEd and begin a new scene by choosing File > New from the menu.
2. You need to define the shape and size of your Builder brush so that you can create a subtractive brush of the correct dimensions. Open the CubeBuilder dialog box by right-clicking on the Cube primitive in the CSG section of the toolbox.
3
Unreal CH 3 Excerpt 8/20/04 12:56 PM Page 96
CHAPTER 3 CREATING YOUR FIRST LEVEL WITH UNREALED 97
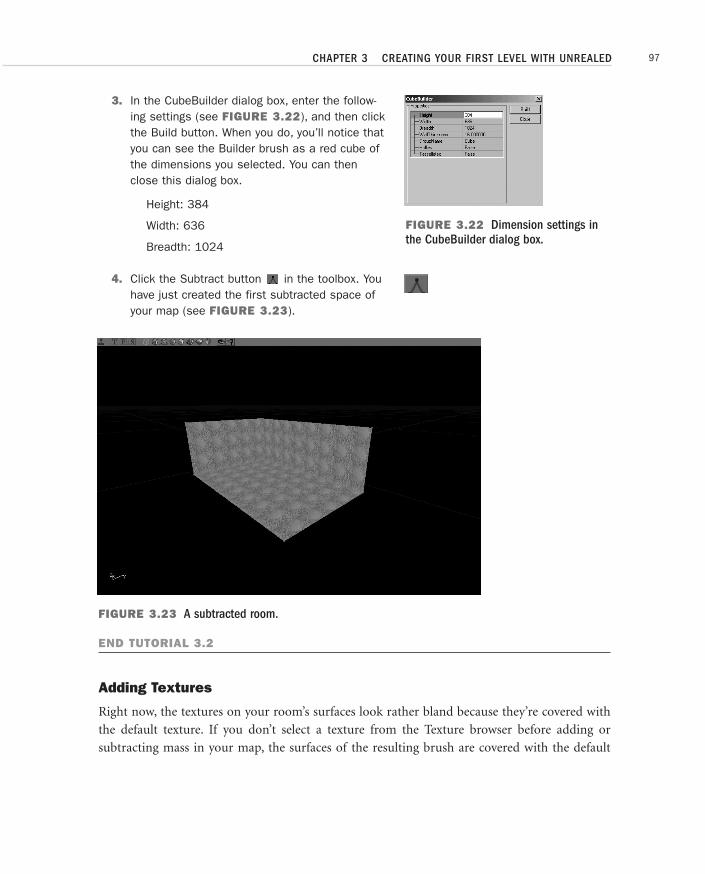
FIGURE 3.23 A subtracted room.
END TUTORIAL 3.2
Adding Textures
Right now, the textures on your room’s surfaces look rather bland because they’re covered with
the default texture. If you don’t select a texture from the Texture browser before adding or
subtracting mass in your map, the surfaces of the resulting brush are covered with the default
3. In the CubeBuilder dialog box, enter the follow-ing settings (see FIGURE 3.22), and then clickthe Build button. When you do, you’ll notice thatyou can see the Builder brush as a red cube ofthe dimensions you selected. You can thenclose this dialog box.
Height: 384
Width: 636
Breadth: 1024
4. Click the Subtract button in the toolbox. Youhave just created the first subtracted space ofyour map (see FIGURE 3.23).
FIGURE 3.22 Dimension settings inthe CubeBuilder dialog box.
Unreal CH 3 Excerpt 8/20/04 12:56 PM Page 97
texture—a greenish bubbly surface. Selecting a texture from the Texture browser before adding or
subtracting is a good idea. If you forget to do this, you can still change those textures by using the
Texture browser.
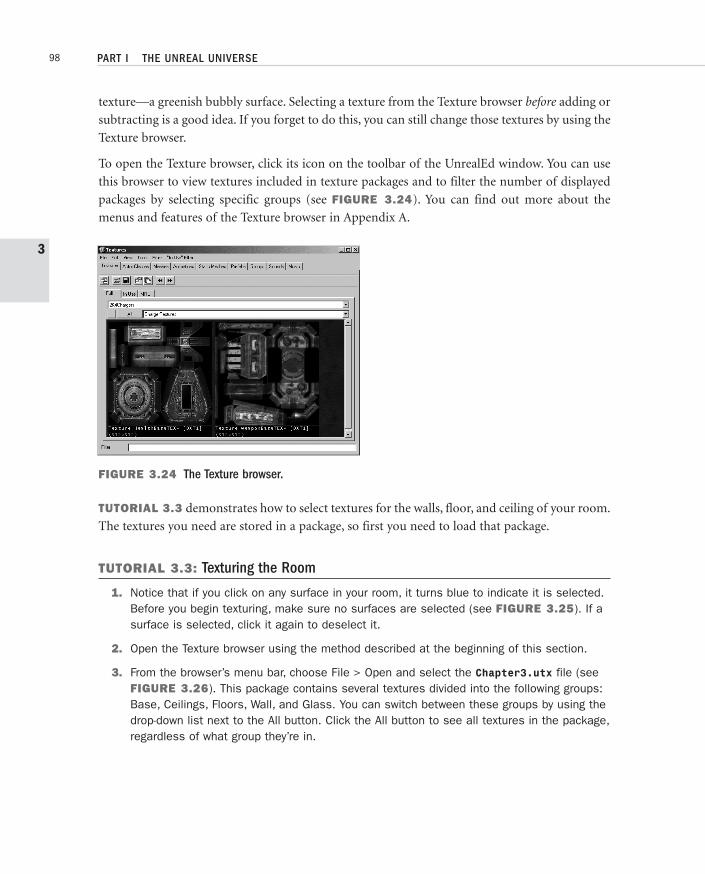
To open the Texture browser, click its icon on the toolbar of the UnrealEd window. You can use
this browser to view textures included in texture packages and to filter the number of displayed
packages by selecting specific groups (see FIGURE 3.24). You can find out more about the
menus and features of the Texture browser in Appendix A.
FIGURE 3.24 The Texture browser.
TUTORIAL 3.3 demonstrates how to select textures for the walls, floor, and ceiling of your room.
The textures you need are stored in a package, so first you need to load that package.
TUTORIAL 3.3: Texturing the Room
1. Notice that if you click on any surface in your room, it turns blue to indicate it is selected.Before you begin texturing, make sure no surfaces are selected (see FIGURE 3.25). If asurface is selected, click it again to deselect it.
2. Open the Texture browser using the method described at the beginning of this section.
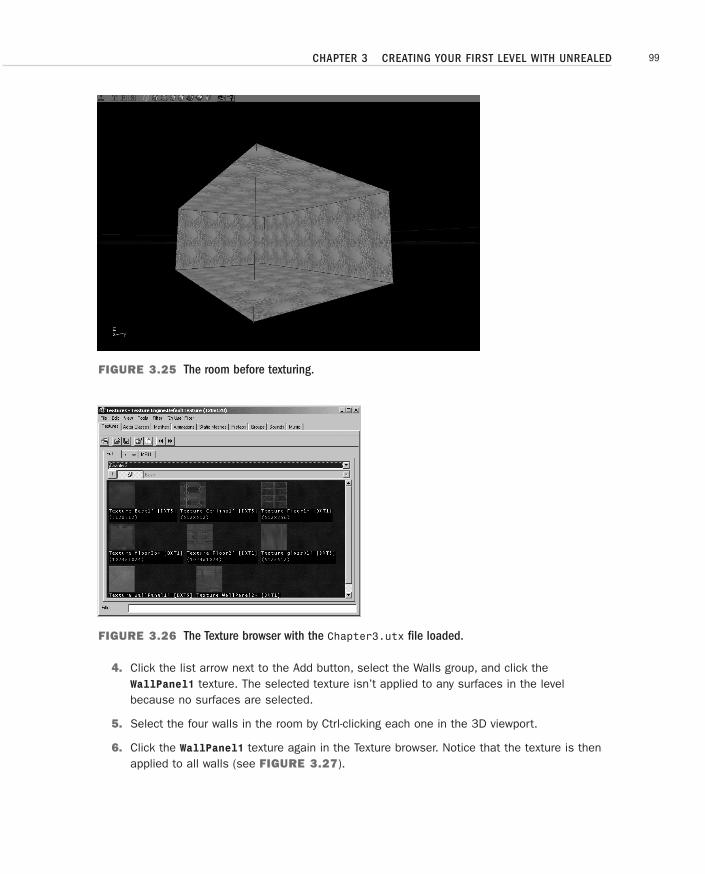
3. From the browser’s menu bar, choose File > Open and select the Chapter3.utx file (seeFIGURE 3.26). This package contains several textures divided into the following groups:Base, Ceilings, Floors, Wall, and Glass. You can switch between these groups by using thedrop-down list next to the All button. Click the All button to see all textures in the package,regardless of what group they’re in.
PART I THE UNREAL UNIVERSE98
3
Unreal CH 3 Excerpt 8/20/04 12:56 PM Page 98
CHAPTER 3 CREATING YOUR FIRST LEVEL WITH UNREALED 99
FIGURE 3.25 The room before texturing.
FIGURE 3.26 The Texture browser with the Chapter3.utx file loaded.
4. Click the list arrow next to the Add button, select the Walls group, and click theWallPanel1 texture. The selected texture isn’t applied to any surfaces in the levelbecause no surfaces are selected.
5. Select the four walls in the room by Ctrl-clicking each one in the 3D viewport.
6. Click the WallPanel1 texture again in the Texture browser. Notice that the texture is thenapplied to all walls (see FIGURE 3.27).
Unreal CH 3 Excerpt 8/20/04 12:56 PM Page 99
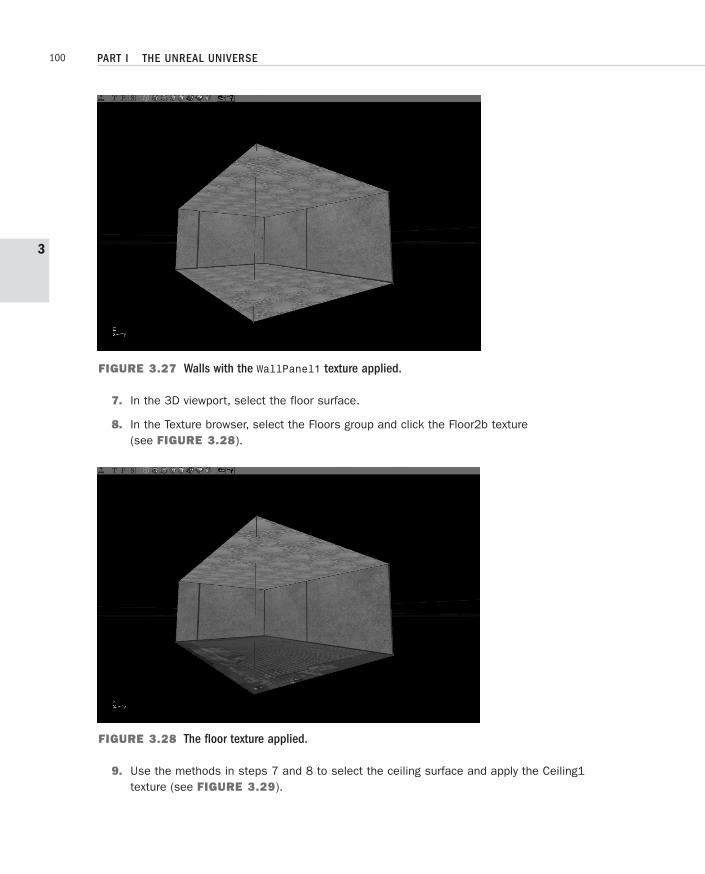
FIGURE 3.27 Walls with the WallPanel1 texture applied.
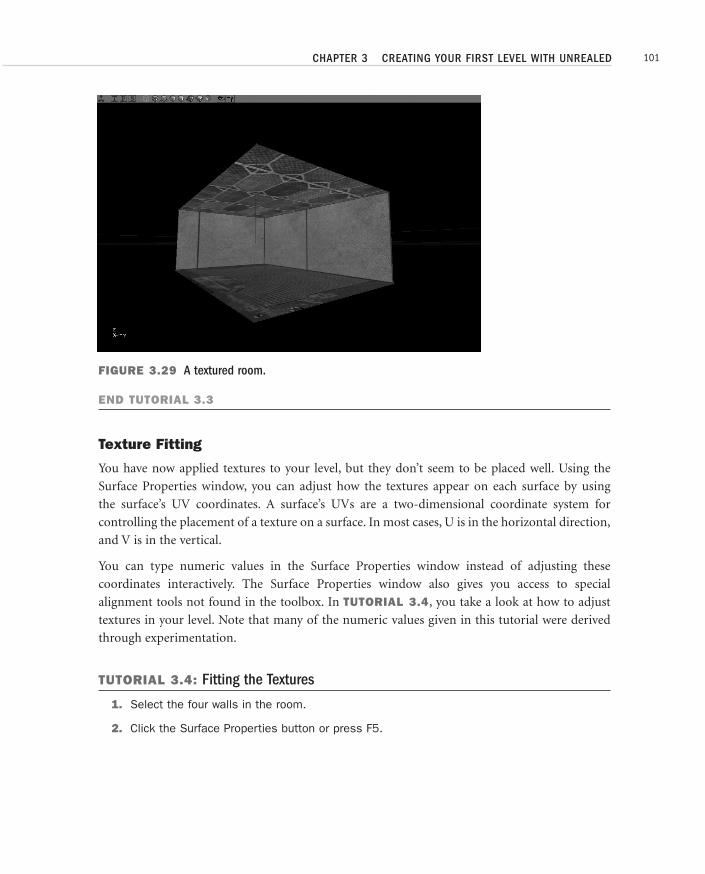
7. In the 3D viewport, select the floor surface.
8. In the Texture browser, select the Floors group and click the Floor2b texture (see FIGURE 3.28).
FIGURE 3.28 The floor texture applied.
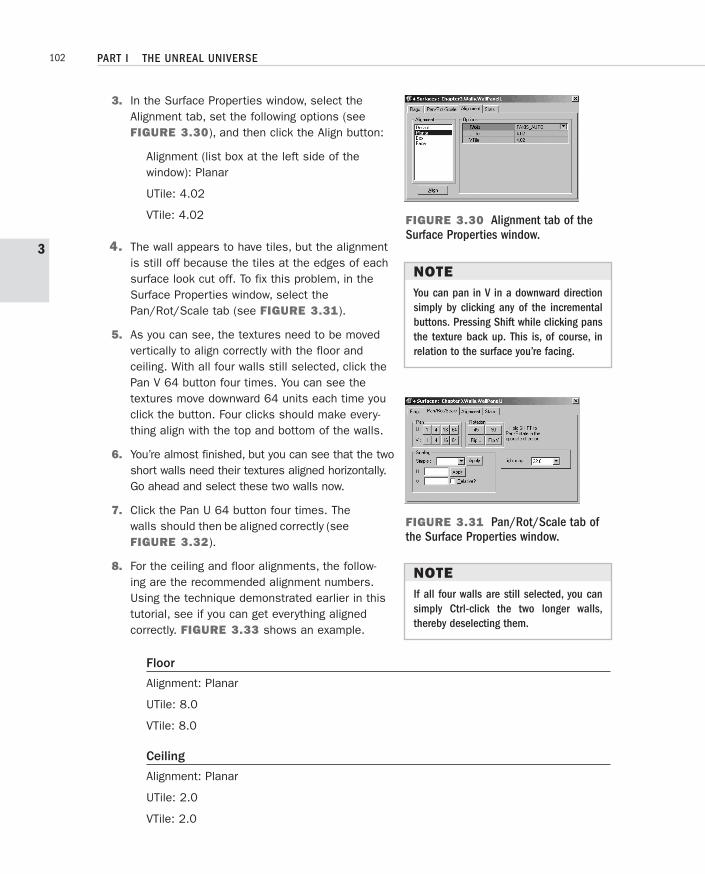
9. Use the methods in steps 7 and 8 to select the ceiling surface and apply the Ceiling1 texture (see FIGURE 3.29).
PART I THE UNREAL UNIVERSE100
3
Unreal CH 3 Excerpt 8/20/04 12:56 PM Page 100
CHAPTER 3 CREATING YOUR FIRST LEVEL WITH UNREALED 101
FIGURE 3.29 A textured room.
END TUTORIAL 3.3
Texture Fitting
You have now applied textures to your level, but they don’t seem to be placed well. Using the
Surface Properties window, you can adjust how the textures appear on each surface by using
the surface’s UV coordinates. A surface’s UVs are a two-dimensional coordinate system for
controlling the placement of a texture on a surface. In most cases, U is in the horizontal direction,
and V is in the vertical.
You can type numeric values in the Surface Properties window instead of adjusting these
coordinates interactively. The Surface Properties window also gives you access to special
alignment tools not found in the toolbox. In TUTORIAL 3.4, you take a look at how to adjust
textures in your level. Note that many of the numeric values given in this tutorial were derived
through experimentation.
TUTORIAL 3.4: Fitting the Textures
1. Select the four walls in the room.
2. Click the Surface Properties button or press F5.
Unreal CH 3 Excerpt 8/20/04 12:56 PM Page 101
3. In the Surface Properties window, select theAlignment tab, set the following options (seeFIGURE 3.30), and then click the Align button:
Alignment (list box at the left side of the window): Planar
UTile: 4.02
VTile: 4.02
4. The wall appears to have tiles, but the alignmentis still off because the tiles at the edges of eachsurface look cut off. To fix this problem, in theSurface Properties window, select thePan/Rot/Scale tab (see FIGURE 3.31).
5. As you can see, the textures need to be movedvertically to align correctly with the floor and ceiling. With all four walls still selected, click thePan V 64 button four times. You can see the textures move downward 64 units each time youclick the button. Four clicks should make every-thing align with the top and bottom of the walls.
6. You’re almost finished, but you can see that the twoshort walls need their textures aligned horizontally.Go ahead and select these two walls now.
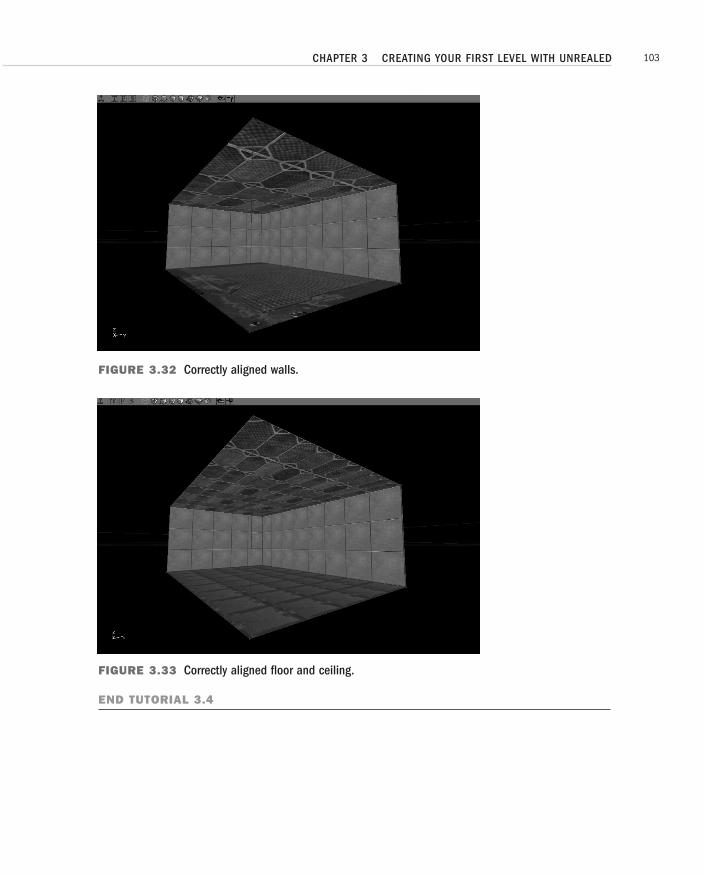
7. Click the Pan U 64 button four times. The walls should then be aligned correctly (seeFIGURE 3.32).
8. For the ceiling and floor alignments, the follow-ing are the recommended alignment numbers.Using the technique demonstrated earlier in thistutorial, see if you can get everything alignedcorrectly. FIGURE 3.33 shows an example.
Floor
Alignment: Planar
UTile: 8.0
VTile: 8.0
Ceiling
Alignment: Planar
UTile: 2.0
VTile: 2.0
PART I THE UNREAL UNIVERSE102
3
FIGURE 3.30 Alignment tab of theSurface Properties window.
FIGURE 3.31 Pan/Rot/Scale tab ofthe Surface Properties window.
NOTEYou can pan in V in a downward directionsimply by clicking any of the incrementalbuttons. Pressing Shift while clicking pansthe texture back up. This is, of course, inrelation to the surface you’re facing.
NOTEIf all four walls are still selected, you cansimply Ctrl-click the two longer walls,thereby deselecting them.
Unreal CH 3 Excerpt 8/20/04 12:56 PM Page 102
CHAPTER 3 CREATING YOUR FIRST LEVEL WITH UNREALED 103
FIGURE 3.32 Correctly aligned walls.
FIGURE 3.33 Correctly aligned floor and ceiling.
END TUTORIAL 3.4
Unreal CH 3 Excerpt 8/20/04 12:56 PM Page 103

Making the Level Functional
Lights, as you might imagine, are essential to your levels. Lightless game levels look much like a
room with the lights turned off. Obviously, playing a lightless game would be quite difficult.
Lights are used not only to allow players to see your level, but also to create mood, add color, and
control the dramatic “feel” of each area of the map. In the following tutorial, you make your level
playable by learning how to place lights and rebuild the level to generate light maps for creating
areas of light and shadow.
Before you can jump in and actually run around this map in the game, you need to add a few
missing items. The first item, as mentioned, is a light source of some kind. The second is a Player
Start Actor, which gives your map a point of entry for any characters that want to play it. Finally,
you must rebuild the level to calculate its world geometry and generate the light maps that make
surfaces seem to be illuminated.
TUTORIAL 3.5: Making the Level Functional
1. First, add a light. Right-click on the center of the ceiling surface in the 3D viewport, andchoose Add Light Here from the context menu. A light bulb icon is displayed to representthe light’s position (see FIGURE 3.34).
FIGURE 3.34 Newly created light.
PART I THE UNREAL UNIVERSE104
3
Unreal CH 3 Excerpt 8/20/04 12:56 PM Page 104
CHAPTER 3 CREATING YOUR FIRST LEVEL WITH UNREALED 105
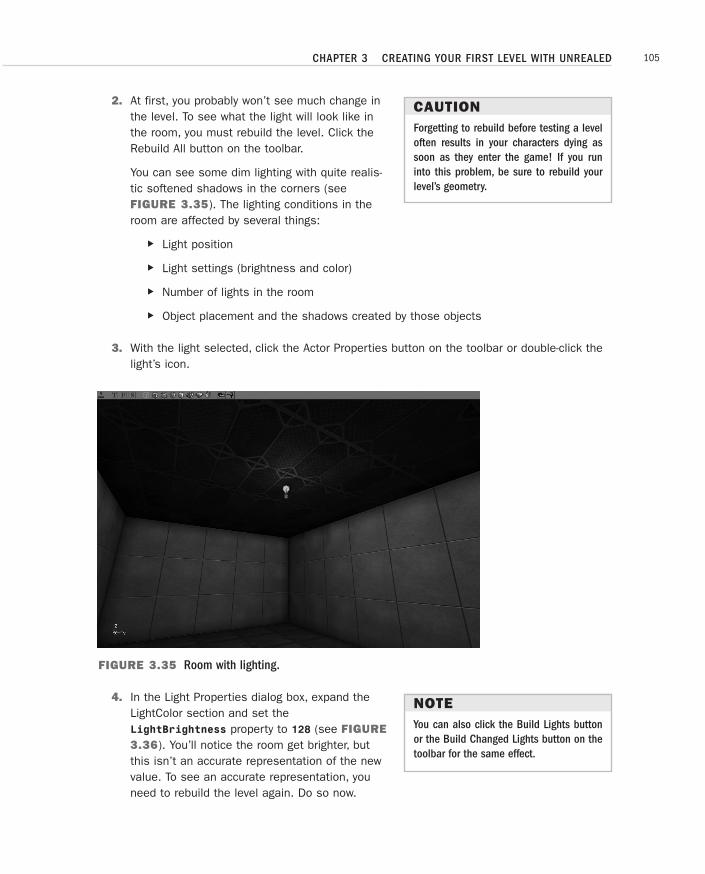
2. At first, you probably won’t see much change inthe level. To see what the light will look like inthe room, you must rebuild the level. Click theRebuild All button on the toolbar.
You can see some dim lighting with quite realis-tic softened shadows in the corners (seeFIGURE 3.35). The lighting conditions in theroom are affected by several things:
. Light position
. Light settings (brightness and color)
. Number of lights in the room
. Object placement and the shadows created by those objects
3. With the light selected, click the Actor Properties button on the toolbar or double-click thelight’s icon.
FIGURE 3.35 Room with lighting.
4. In the Light Properties dialog box, expand theLightColor section and set theLightBrightness property to 128 (see FIGURE3.36). You’ll notice the room get brighter, butthis isn’t an accurate representation of the newvalue. To see an accurate representation, youneed to rebuild the level again. Do so now.
CAUTIONForgetting to rebuild before testing a leveloften results in your characters dying assoon as they enter the game! If you runinto this problem, be sure to rebuild yourlevel’s geometry.
NOTEYou can also click the Build Lights buttonor the Build Changed Lights button on thetoolbar for the same effect.
Unreal CH 3 Excerpt 8/20/04 12:56 PM Page 105
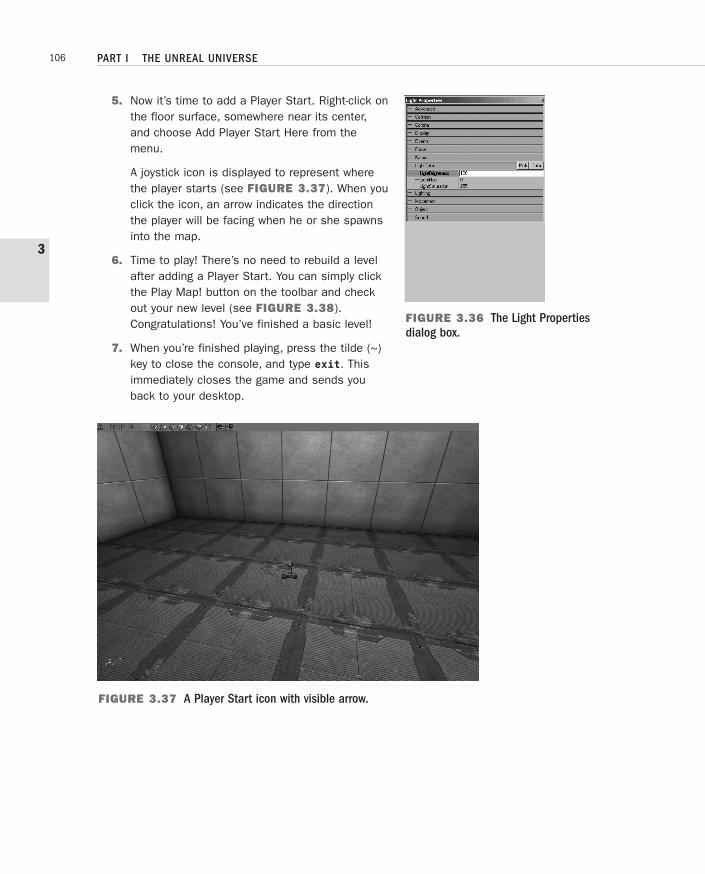
FIGURE 3.37 A Player Start icon with visible arrow.
5. Now it’s time to add a Player Start. Right-click onthe floor surface, somewhere near its center,and choose Add Player Start Here from themenu.
A joystick icon is displayed to represent wherethe player starts (see FIGURE 3.37). When youclick the icon, an arrow indicates the directionthe player will be facing when he or she spawnsinto the map.
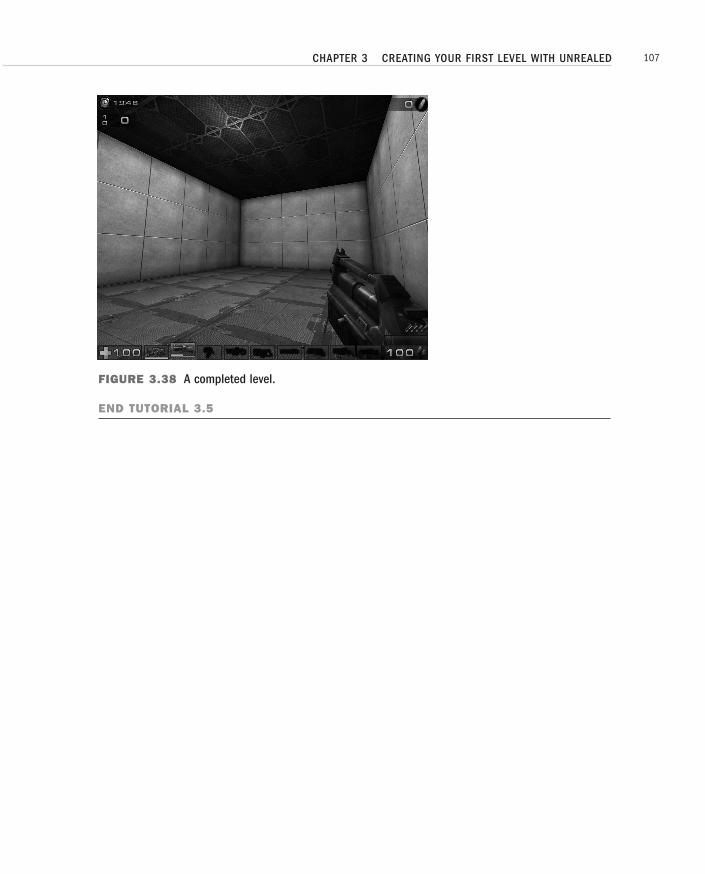
6. Time to play! There’s no need to rebuild a levelafter adding a Player Start. You can simply clickthe Play Map! button on the toolbar and checkout your new level (see FIGURE 3.38).Congratulations! You’ve finished a basic level!
7. When you’re finished playing, press the tilde (~)key to close the console, and type exit. Thisimmediately closes the game and sends youback to your desktop.
PART I THE UNREAL UNIVERSE106
3
FIGURE 3.36 The Light Propertiesdialog box.
Unreal CH 3 Excerpt 8/20/04 12:56 PM Page 106
CHAPTER 3 CREATING YOUR FIRST LEVEL WITH UNREALED 107
FIGURE 3.38 A completed level.
END TUTORIAL 3.5
Unreal CH 3 Excerpt 8/20/04 12:56 PM Page 107