week 6 sketchup 8
DESCRIPTION
How to insert an image into our model.TRANSCRIPT

Ana Silvia Hernandez Balcazar 4/03/13
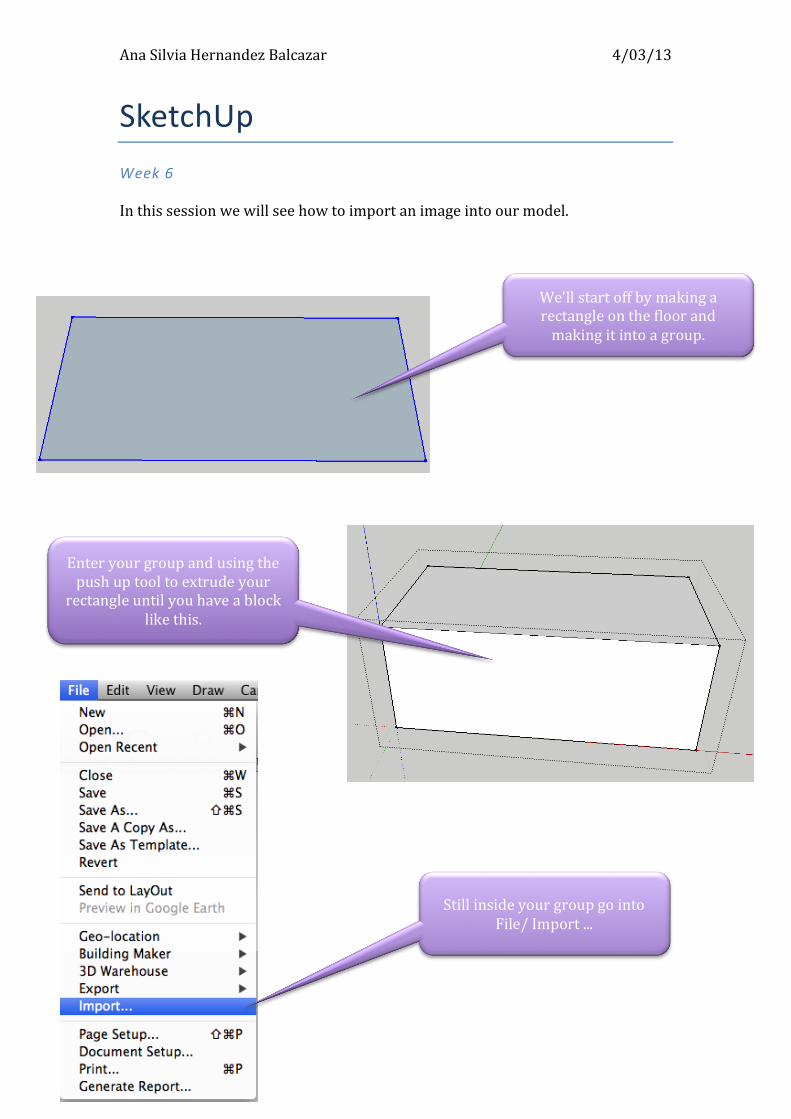
We’ll start off by making a rectangle on the floor and making it into a group.
Enter your group and using the push up tool to extrude your
rectangle until you have a block like this.
Still inside your group go into File/ Import ...
SketchUp Week 6 In this session we will see how to import an image into our model.
Ana Silvia Hernandez Balcazar 4/03/13
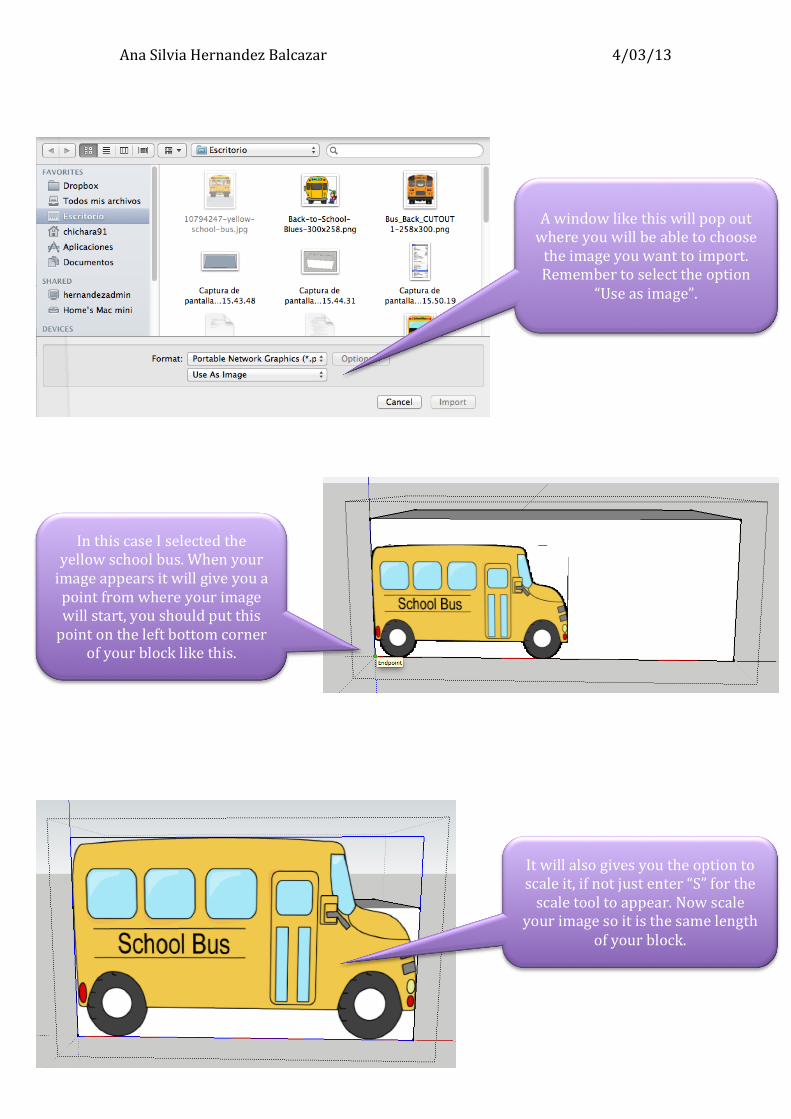
A window like this will pop out where you will be able to choose the image you want to import. Remember to select the option
“Use as image”.
In this case I selected the yellow school bus. When your image appears it will give you a point from where your image will start, you should put this point on the left bottom corner
of your block like this.
It will also gives you the option to scale it, if not just enter “S” for the scale tool to appear. Now scale
your image so it is the same length of your block.

Ana Silvia Hernandez Balcazar 4/03/13
We will get rid of the white parts, so we need to be facing our figure straight so we can draw on it, and the lines can
stay on the same axis.
Use the push up tool to get rid of the white part.
Use the push up tool to make even your block regarding the
height.
Ana Silvia Hernandez Balcazar 4/03/13
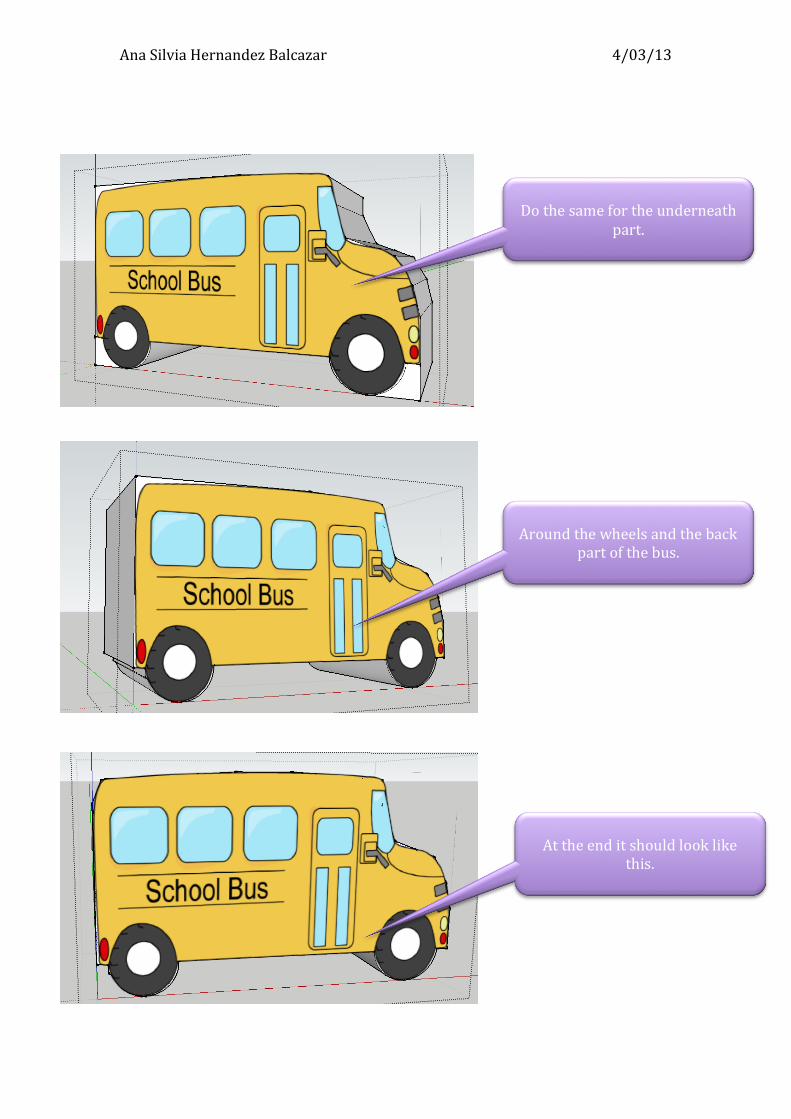
Do the same for the underneath part.
Around the wheels and the back part of the bus.
At the end it should look like this.
Ana Silvia Hernandez Balcazar 4/03/13
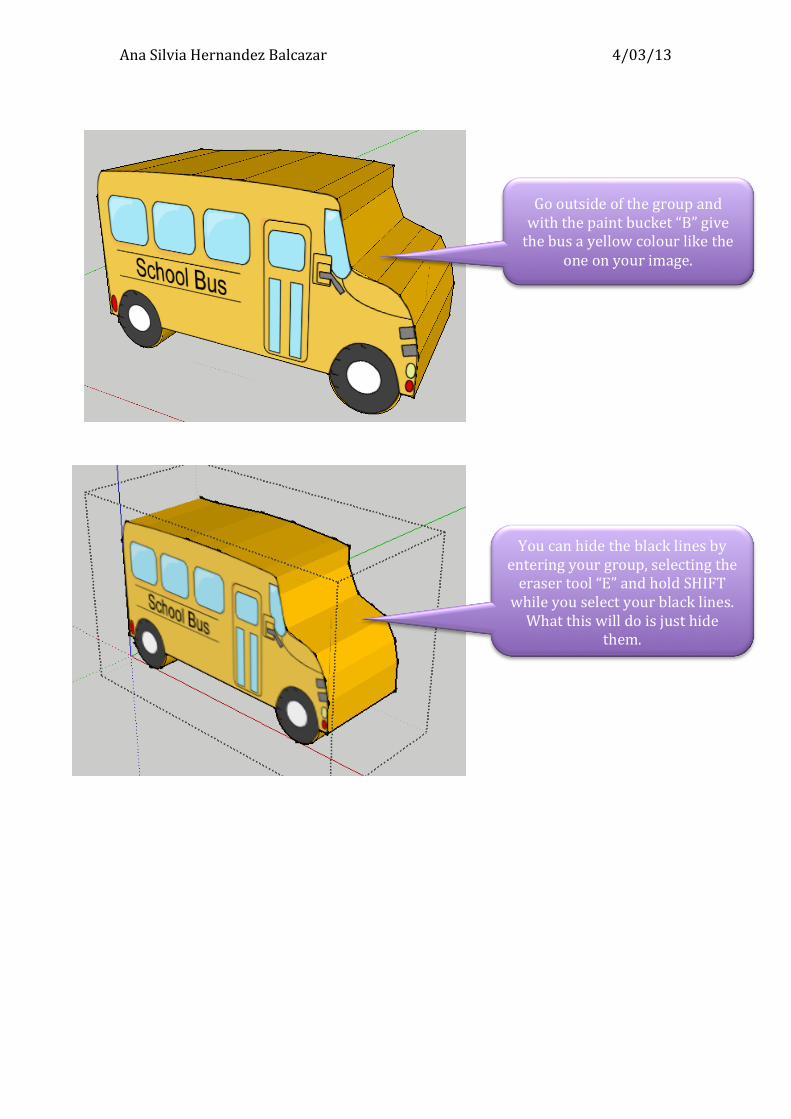
Go outside of the group and with the paint bucket “B” give the bus a yellow colour like the
one on your image.
You can hide the black lines by entering your group, selecting the eraser tool “E” and hold SHIFT while you select your black lines. What this will do is just hide
them.