using the background eraser tool in corel® paint · pdf fileusing the background eraser...
TRANSCRIPT
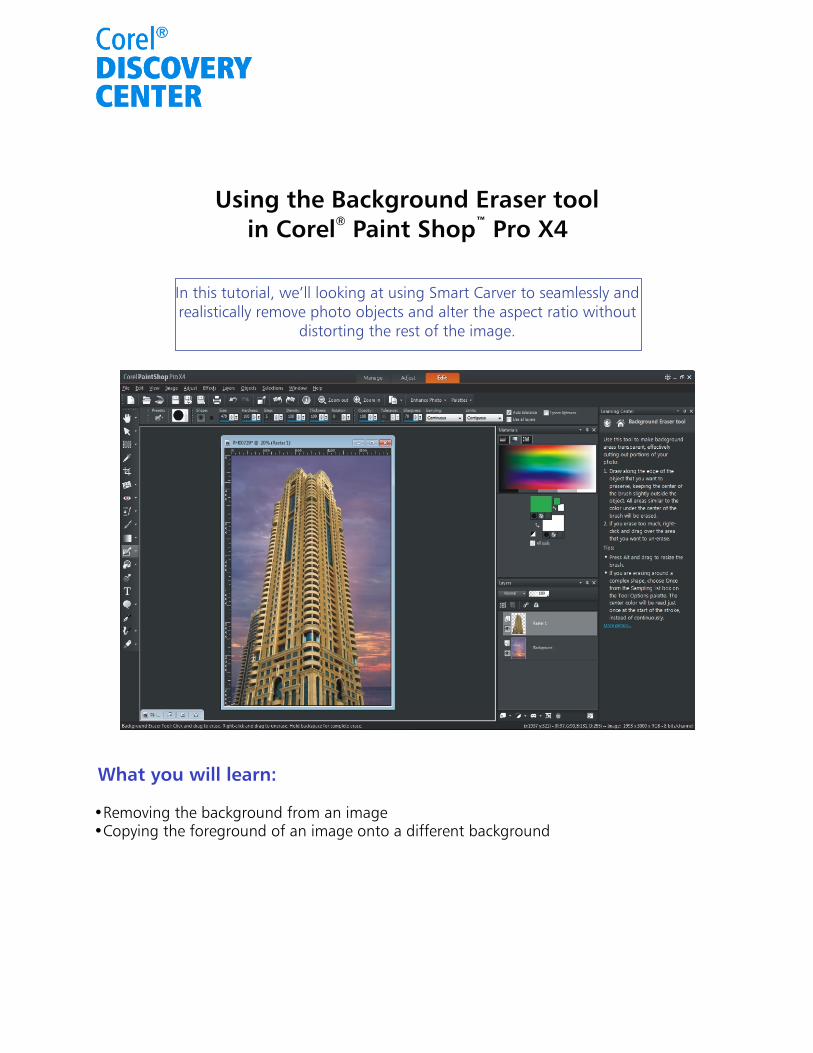
Using the Background Eraser tool in ® ™ Corel Paint Shop Pro X4
In this tutorial, we’ll looking at using Smart Carver to seamlessly and realistically remove photo objects and alter the aspect ratio without
distorting the rest of the image.
What you will learn:
•Removing the background from an image •Copying the foreground of an image onto a different background
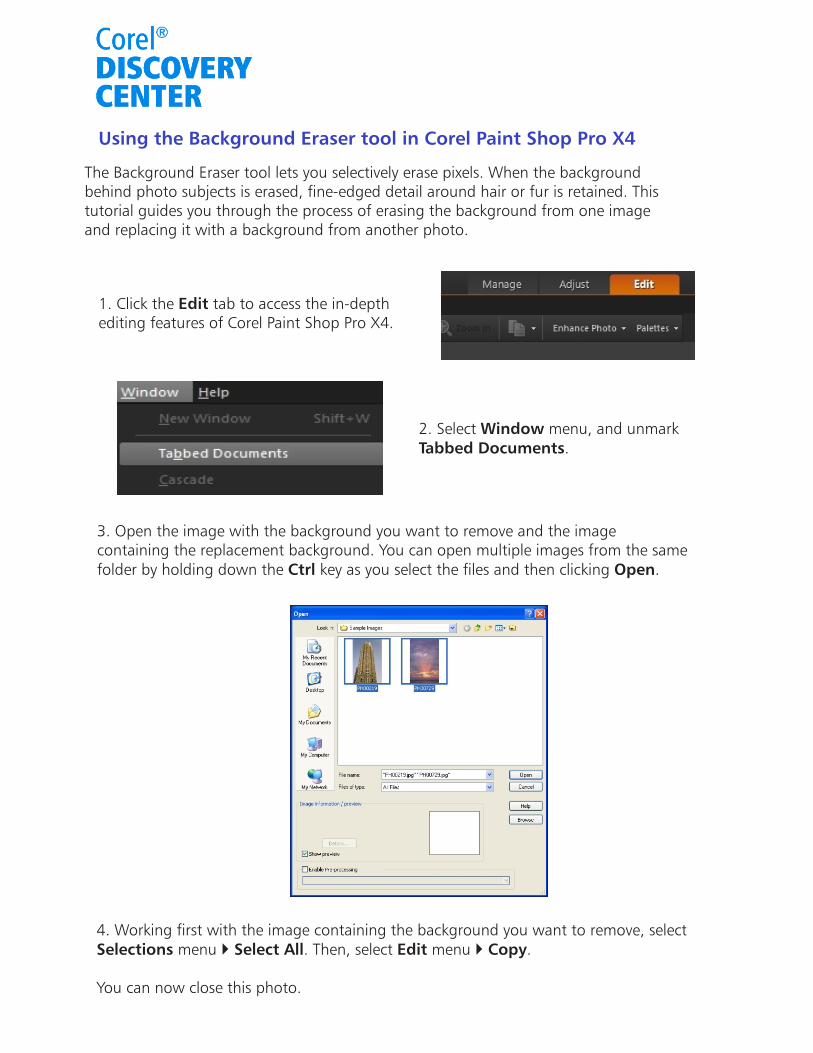
Using the Background Eraser tool in Corel Paint Shop Pro X4
The Background Eraser tool lets you selectively erase pixels. When the background behind photo subjects is erased, fine-edged detail around hair or fur is retained. This tutorial guides you through the process of erasing the background from one image and replacing it with a background from another photo.
1. Click the Edit tab to access the in-depth editing features of Corel Paint Shop Pro X4.
2. Select Window menu, and unmark Tabbed Documents.
3. Open the image with the background you want to remove and the image containing the replacement background. You can open multiple images from the same folder by holding down the Ctrl key as you select the files and then clicking Open.
4. Working first with the image containing the background you want to remove, select Selections menu Select All. Then, select Edit menu Copy.
You can now close this photo.
} }
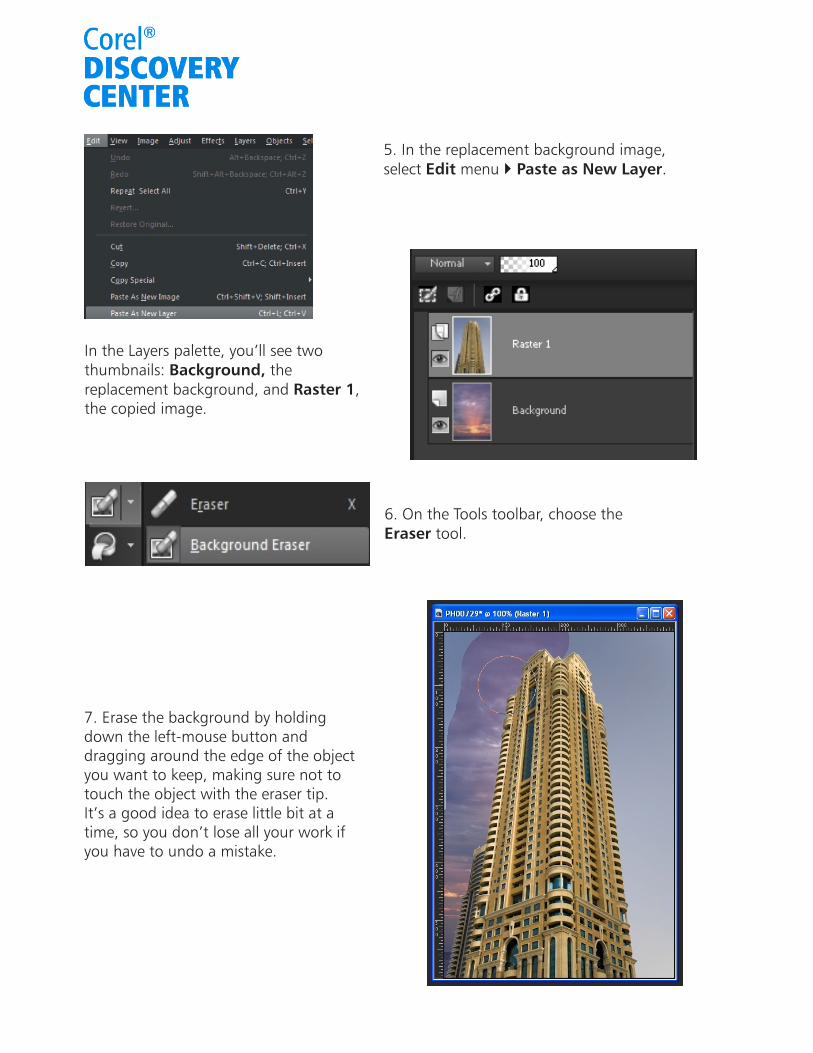
5. In the replacement background image, select Edit menu Paste as New Layer.}
In the Layers palette, you’ll see two thumbnails: Background, the replacement background, and Raster 1, the copied image.
6. On the Tools toolbar, choose the Eraser tool.
7. Erase the background by holding down the left-mouse button and dragging around the edge of the object you want to keep, making sure not to touch the object with the eraser tip. It’s a good idea to erase little bit at a time, so you don’t lose all your work if you have to undo a mistake.
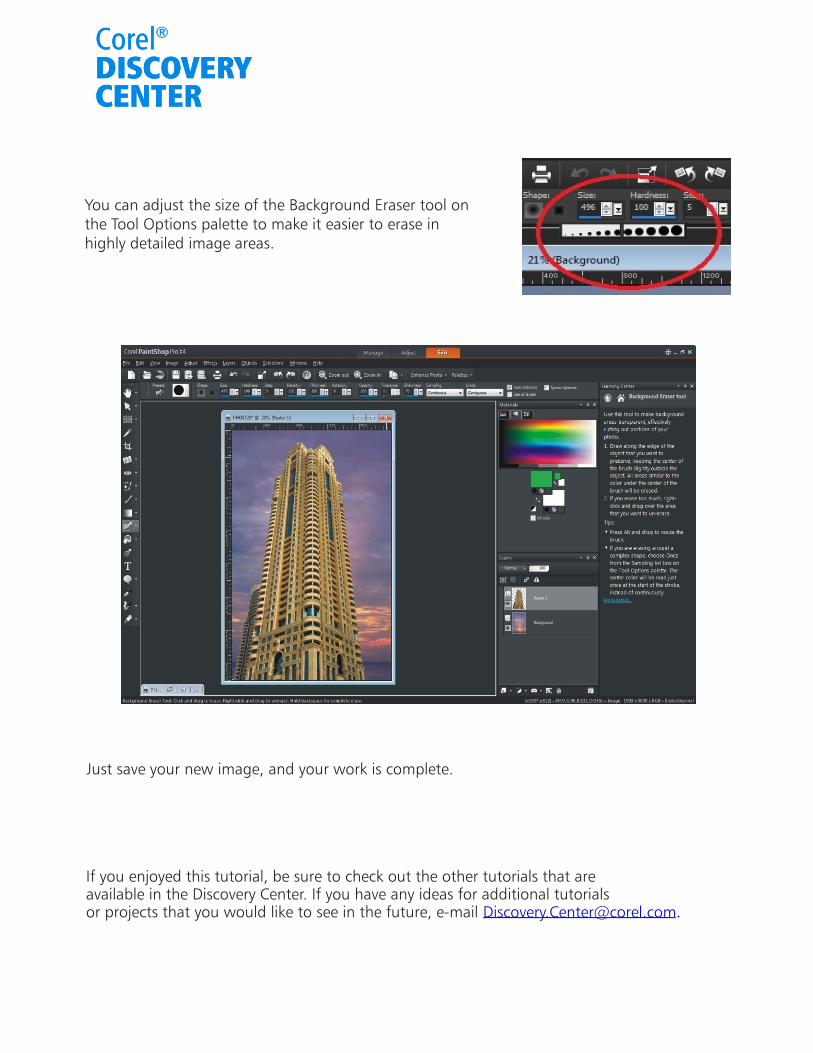
You can adjust the size of the Background Eraser tool on the Tool Options palette to make it easier to erase in highly detailed image areas.
Just save your new image, and your work is complete.
If you enjoyed this tutorial, be sure to check out the other tutorials that are available in the Discovery Center. If you have any ideas for additional tutorials or projects that you would like to see in the future, e-mail [email protected].