user guide mudchecker® - ofi te
TRANSCRIPT

OM_5841 V2.7
User GuideMudChecker®
MudChecker® 1.0 KS: 1504-KS MudChecker® 1.0 ES: 1504-ES MudChecker® 1.5 ES: 1504-1.5-ES
MudChecker® Drilling fluid analyzer
OM_5841 V2.7
www.salunda.com
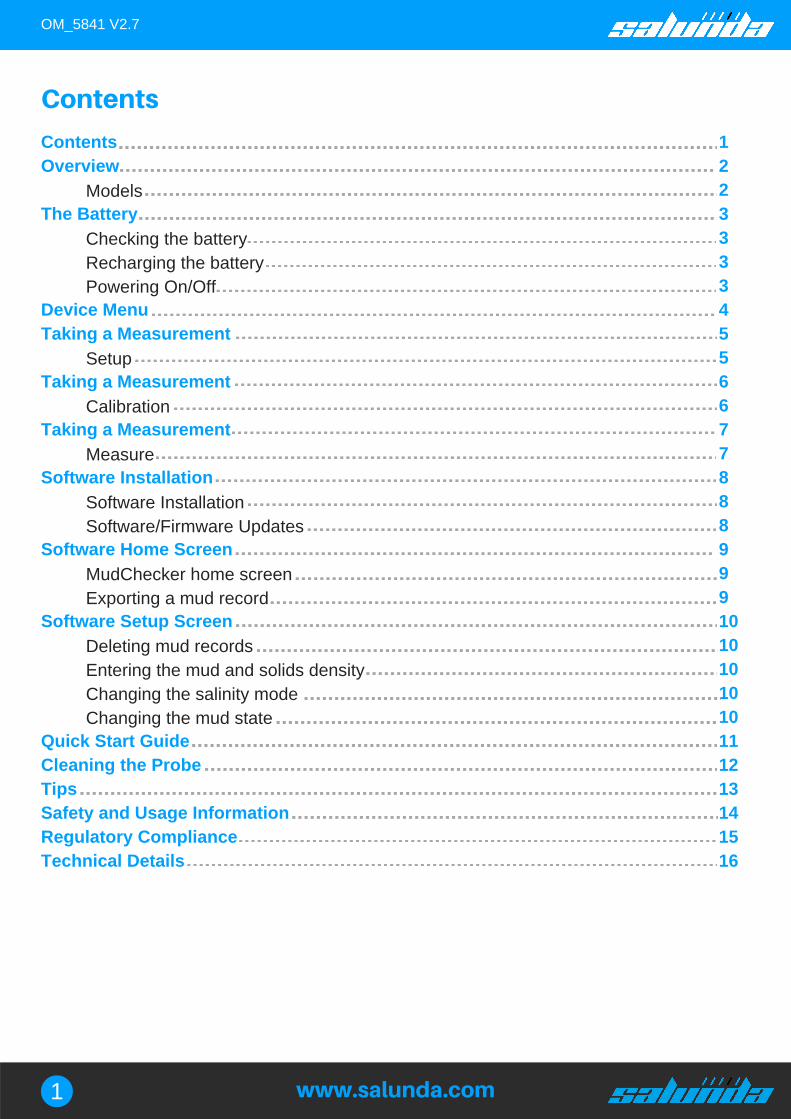
Contents
Contents Overview
The Battery
Device Menu Taking a Measurement
Taking a Measurement
Taking a Measurement
Software Installation
Software Home Screen
Software Setup Screen
Quick Start Guide Cleaning the Probe Tips Safety and Usage Information Regulatory Compliance Technical Details
Models
Checking the battery Recharging the battery Powering On/Off
Setup
Calibration
Measure
Software Installation Software/Firmware Updates
MudChecker home screen Exporting a mud record
Deleting mud records Entering the mud and solids density Changing the salinity mode Changing the mud state
1 2 2 3 3 3 3 4 5 5 6 6 7 7 8 8 8 9 9 9 10 10 10 10 10 11 12 13 14 15 16
1
OM_5841 V2.7
www.salunda.com
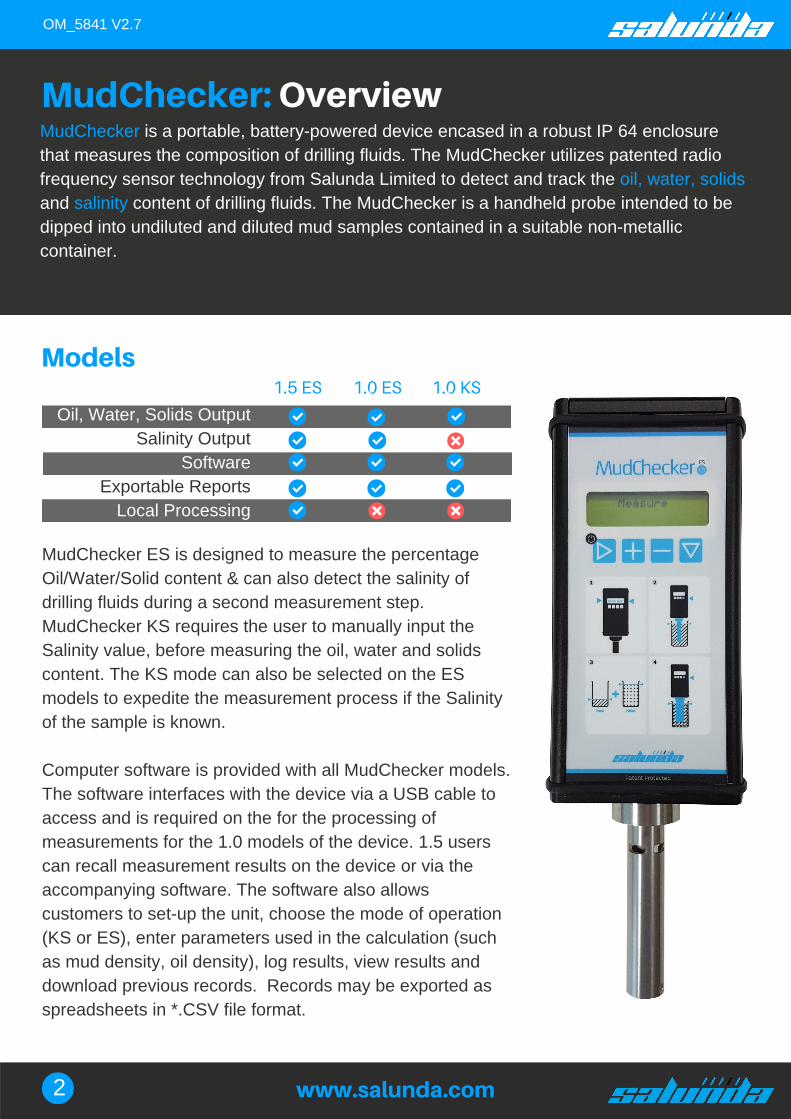
MudChecker: OverviewMudChecker is a portable, battery-powered device encased in a robust IP 64 enclosurethat measures the composition of drilling fluids. The MudChecker utilizes patented radiofrequency sensor technology from Salunda Limited to detect and track the oil, water, solidsand salinity content of drilling fluids. The MudChecker is a handheld probe intended to bedipped into undiluted and diluted mud samples contained in a suitable non-metalliccontainer.
1.5 ES 1.0 ES 1.0 KS
Models
Oil, Water, Solids Output Salinity Output
Software Exportable Reports
Local Processing
MudChecker ES is designed to measure the percentageOil/Water/Solid content & can also detect the salinity ofdrilling fluids during a second measurement step.MudChecker KS requires the user to manually input theSalinity value, before measuring the oil, water and solidscontent. The KS mode can also be selected on the ESmodels to expedite the measurement process if the Salinityof the sample is known.
Computer software is provided with all MudChecker models.The software interfaces with the device via a USB cable toaccess and is required on the for the processing ofmeasurements for the 1.0 models of the device. 1.5 userscan recall measurement results on the device or via theaccompanying software. The software also allowscustomers to set-up the unit, choose the mode of operation(KS or ES), enter parameters used in the calculation (suchas mud density, oil density), log results, view results anddownload previous records. Records may be exported asspreadsheets in *.CSV file format.
2
OM_5841 V2.7
www.salunda.com
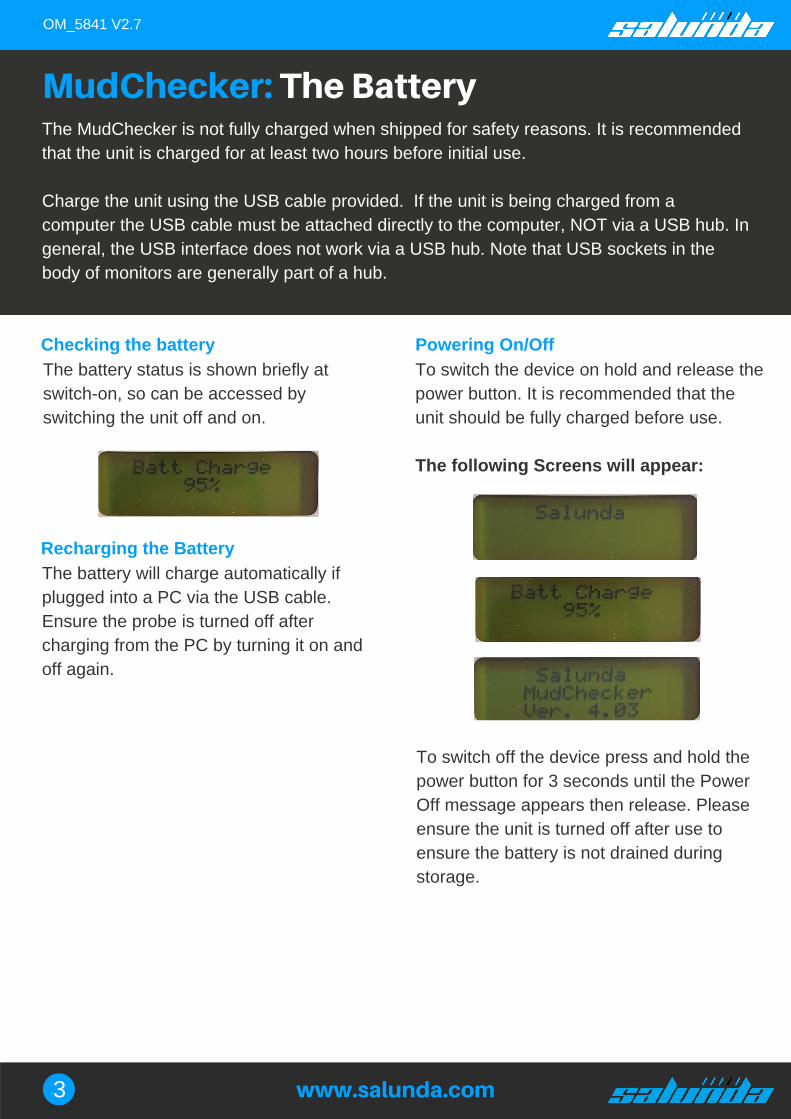
Checking the battery
The MudChecker is not fully charged when shipped for safety reasons. It is recommendedthat the unit is charged for at least two hours before initial use.
Charge the unit using the USB cable provided. If the unit is being charged from acomputer the USB cable must be attached directly to the computer, NOT via a USB hub. Ingeneral, the USB interface does not work via a USB hub. Note that USB sockets in thebody of monitors are generally part of a hub.
MudChecker: The Battery
The battery status is shown briefly atswitch-on, so can be accessed byswitching the unit off and on.
The battery will charge automatically ifplugged into a PC via the USB cable.Ensure the probe is turned off aftercharging from the PC by turning it on andoff again.
Recharging the Battery
Powering On/Off
To switch the device on hold and release thepower button. It is recommended that theunit should be fully charged before use.
The following Screens will appear:
To switch off the device press and hold thepower button for 3 seconds until the PowerOff message appears then release. Pleaseensure the unit is turned off after use toensure the battery is not drained duringstorage.
3
OM_5841 V2.7
www.salunda.com
MudChecker: Device Menu
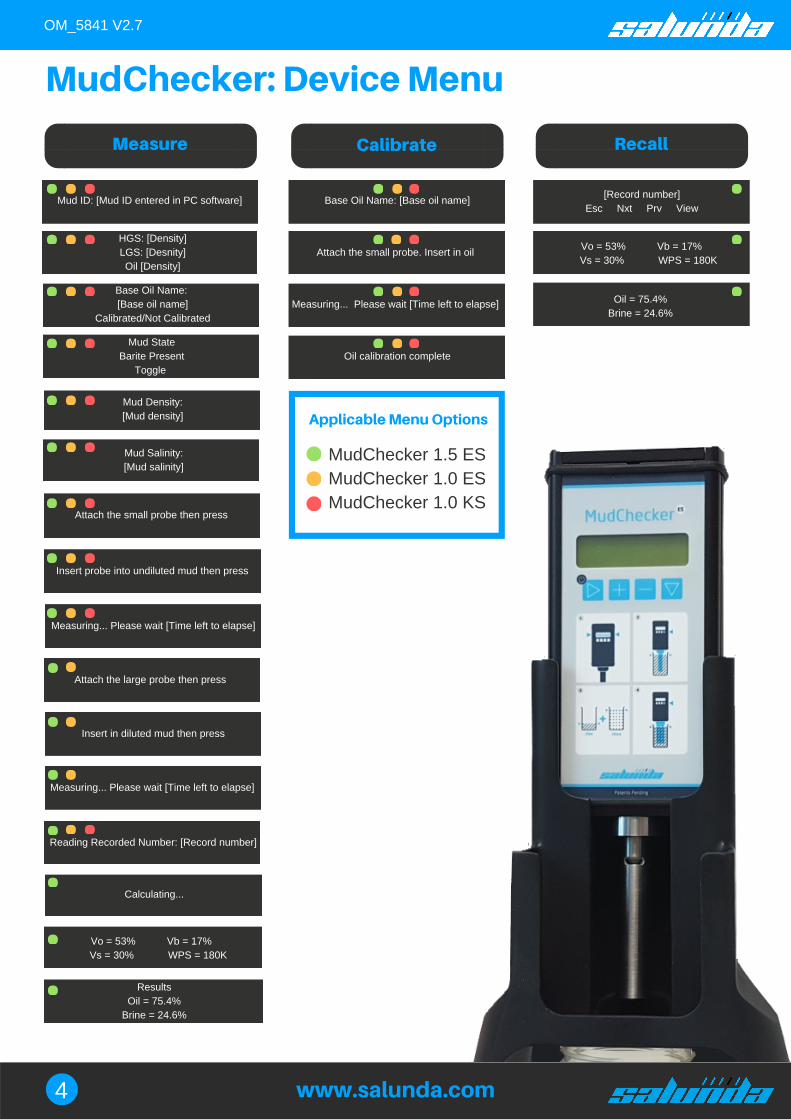
CalibrateMeasure Recall
Mud ID: [Mud ID entered in PC software]
HGS: [Density] LGS: [Desnity] Oil [Density]
Base Oil Name: [Base oil name]
Calibrated/Not Calibrated
Mud State Barite Present
Toggle
Mud Density: [Mud density]
Mud Salinity: [Mud salinity]
Attach the small probe then press
Measuring... Please wait [Time left to elapse]
Insert probe into undiluted mud then press
Reading Recorded Number: [Record number]
Calculating...
Results Oil = 75.4%
Brine = 24.6%
Base Oil Name: [Base oil name]
Attach the small probe. Insert in oil
Measuring... Please wait [Time left to elapse]
Oil calibration complete
[Record number] Esc Nxt Prv View
Vo = 53% Vb = 17% Vs = 30% WPS = 180K
Oil = 75.4% Brine = 24.6%
Vo = 53% Vb = 17% Vs = 30% WPS = 180K
Attach the large probe then press
Insert in diluted mud then press
Measuring... Please wait [Time left to elapse]
MudChecker 1.5 ES MudChecker 1.0 ES MudChecker 1.0 KS
Applicable Menu Options
4

OM_5841 V2.7
Setup
www.salunda.com
MudChecker: Taking a Measurement
The unit can operate in "Verbose Mode". In "Verbose Mode", step by step instructions aredisplayed on the device to guide the user through the measurement process. Once familiarwith the process it can be streamlined by turning "Verbose Mode" off and following themeasurement method outlined below. "Verbose Mode" can be switched on and off via thesoftware setup screen.
Verbose Mode
1 SetupThe Setup can be accessed by connectingMudChecker to the accompanying MudCheckersoftware using the USB cable supplied.
Once the MudChecker has synced with theMudChecker software, click the "Setup" buttonlocated on the top right of the application.
Users will then need to populate the inputs:
Mud ID: Mud Density: HGS Density: LGS Density:
Mud State: Base Oil Name:
Oil Density: Measurement Mode
Known Salinity:
Unique sample reference Density of mud sample Known density of HGS Assumed density of LGS Select whether barite present or absent Unique base oil reference Density of base oil Tick If Salinity measurement not requiredto operate in KS mode Brine salinity (only applicable in KSmode)
Once the input parameters have been populatedthe user should save these to the MudCheckerdevice by clicking "Save Settings". These settingswill be stored on the device as the default until theyare overwritten.
Mud Density, Barite Present/Absent & Salinity canalso be adjusted on the device itself and will beconfirmed on the LCD display as part of themeasurement process.
Settings can be restored to the factory default byclicking "Reset to Factory Default".
5

OM_5841 V2.7
Setup
www.salunda.com
MudChecker: Taking a Measurement
When taking a measurement for the firsttime, or when using a new drilling mud, itis recommended that you carry out a quickcalibration measurement of the base oilbefore carrying out a full measurement.
Calibration
2 CalibrationPower on the MudChecker device by holding downthe power button and navigate to the "Calibrate"menu using the scroll and navigation button.
Attach the narrow probe shield and submerge intothe base oil sample. Work through the calibrationmenu using the enter key.
The MudChecker will produce an audible tone oncethe calibration is complete. Calibration data will beon the device.
Ensure your base oil sample is clean and isuncontaminated. For best results calibratethe MudChecker with a fresh, clean sampleof base oil.
Important
Device Navigation
Power / Scroll / Hold to cancel or switch off
Navigate down one level in menu / Enter
Increase or decrease parameter value / holdboth to go back one level
The device will display whether it has beencalibrated or not during the measurement process.
You can check the last occasion in which the devicewas calibrated by accessing the setup screen in theMudChecker software.
You may also revert the oil calibration and settingsto those taken/inputted on a previous mud recordby selecting the appropriate record in theMudChecker software and clicking "SetMudChecker defaults from record".
6

OM_5841 V2.7
Setup
www.salunda.com
MudChecker: Taking a Measurement
Power on the device by holding down thepower button, then navigate to measureand press the enter key to initiate themeasurement process.
Measure
3 Measure
Power on the device using the power keyNavigate to the "Measure" menu option usingthe navigation keys on the device and select byusing the enter key. The device will present the input parametersselected during the set up phase, ensure theseare correct and use the enter key to continue.*Mud Density can be adjusted on the deviceusing the navigation and +/- keys.Attach the narrow probe to the MudCheckerdevice, then press the enter key and insert theprobe into your drilling fluid sample. Once the probe is fully submerged in yourdrilling fluid sample, press the enter key toinitiate the measurement process. The devicewill make an audible tone once measuring iscomplete.Open a packaged container of DSX7 dilutionsolution by breaking the seal. Pour the contentsof the DSX7 container into a blending cup.Using a syringe, measure out 20ml of undiluteddrilling mud and inject the mud into the DSX7solution. Blend contents. It is recommended:
Ensure the mud sample is homogenous -Mix the sample thoroughly using a blender ifnecessary. Ensure there are no air bubblesin the sample before inserting the probe intothe sample, and immerse the probe so thatthe slots in the probe shield are submerged.
Important
Attach the wide probe to the MudChecker devicethen press the enter key and insert into yourdiluted drilling fluid sample. The device will make an audible tone once themeasurement process is complete. If operating the MudChecker 1.5 press the enterkey to calculate & recall your measurement results.*MudChecker 1.0 models require the device to beconnected to the accompanying software to recallresults.
A quality blender is used To avoid splashing, blend at the slowest speedand gradually increase to the highest speed. Ensure the vortex is half the height of the fluidlevel in the cup whilst blending.Blend for 2 minutes to ensure the emulsionhas been thoroughly broken.
Measuring ES Mode
Measuring KS ModeIf the salinity of the drilling mud is known and youdo not require the measurement of this parameterthe device can be ran in KS (Known Salinity)mode. This mode allows users to manually inputthe mud salinity during the setup process andremoves the need to carry out the dilution step ofthe measurement process. The Mud Salinity can also be adjusted on thedevice during the measurement process by usingthe +/- keys. For more information please revert to the Setupsection of the user manual.
Device Navigation
Power / Scroll / Hold to cancel or switch off
Navigate down one level in menu / Enter
Increase or decrease parameter value / holdboth to go back one level
7

OM_5841 V2.7
Setup
www.salunda.com
MudChecker: Software Installation
Once the software has been installed clickthe "Sync to PC time". This will sync thedate and time on the MudCheckerhardware to your PC time. Mudmeasurement records will be date andtime stamped according to this.
Sync MudChecker date and time stamp
To initially install the MudChecker software, insertthe accompanying software CD into a PC or Laptopof your choice and complete the on-screeninstallation instructions (See technical detailssection for system requirements).
MudChecker 1.0 models require the software to beinstalled on a computer with an internet connection.Once the MudChecker device has been connectedusing the USB provided, the software will connectto Salunda's secure server in order to return yourresults. If you are connected to the internet via aprivate server you will need to contact your ITadministrator to whitelist Salunda's IP address -Please speak to a member of Salunda's team forfurther information.
Software Installation Software/Firmware UpdatesFrom time to time Salunda provide softwareupdates, you can download these from the set-upscreen by clicking "Check for Software Updates". Ifyou are running the latest version, the software willreturn a message advising no updates are available.
Firmware updates can also be accessed via the set-up screen by clicking the "Check for FirmwareUpdates" button. If you are running the latestversion the software will return a message advisingthe the firmware is at the latest revision.
8
OM_5841 V2.7
Setup
www.salunda.com
MudChecker: Software Home Screen
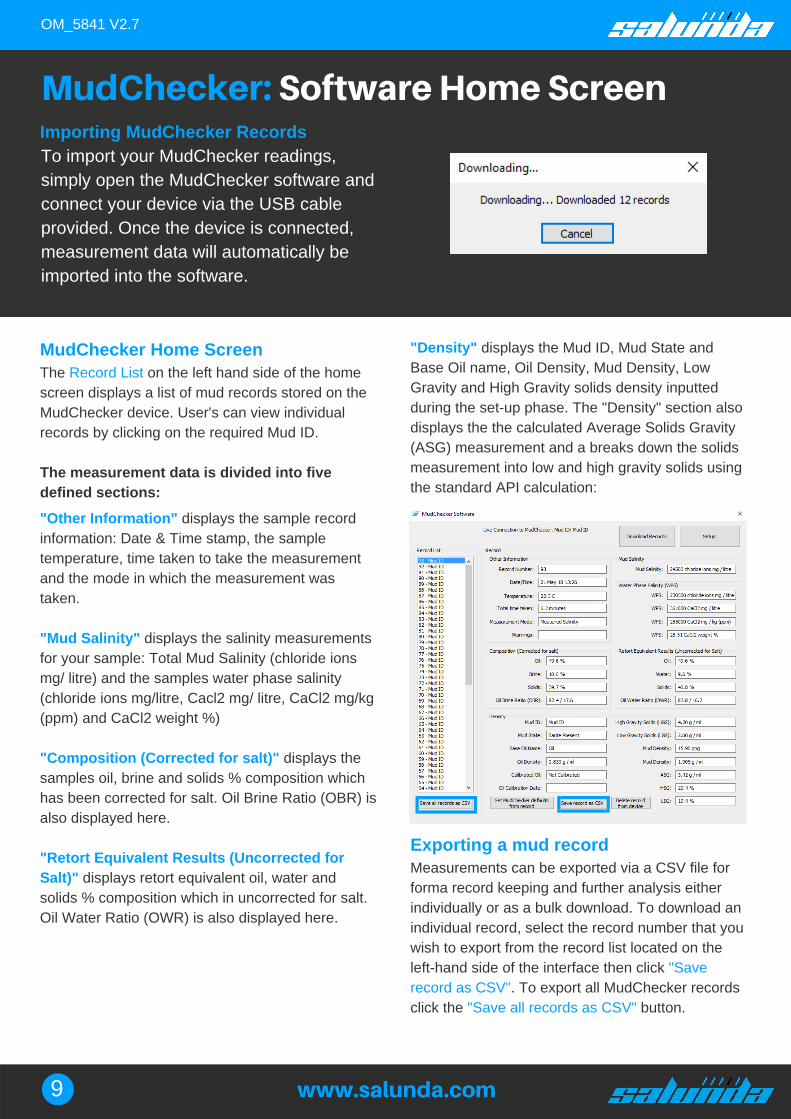
To import your MudChecker readings,simply open the MudChecker software andconnect your device via the USB cableprovided. Once the device is connected,measurement data will automatically beimported into the software.
Importing MudChecker Records
The Record List on the left hand side of the homescreen displays a list of mud records stored on theMudChecker device. User's can view individualrecords by clicking on the required Mud ID.
The measurement data is divided into fivedefined sections:
MudChecker Home Screen
"Other Information" displays the sample recordinformation: Date & Time stamp, the sampletemperature, time taken to take the measurementand the mode in which the measurement wastaken.
"Mud Salinity" displays the salinity measurementsfor your sample: Total Mud Salinity (chloride ionsmg/ litre) and the samples water phase salinity(chloride ions mg/litre, Cacl2 mg/ litre, CaCl2 mg/kg(ppm) and CaCl2 weight %)
"Composition (Corrected for salt)" displays thesamples oil, brine and solids % composition whichhas been corrected for salt. Oil Brine Ratio (OBR) isalso displayed here.
"Retort Equivalent Results (Uncorrected forSalt)" displays retort equivalent oil, water andsolids % composition which in uncorrected for salt.Oil Water Ratio (OWR) is also displayed here.
"Density" displays the Mud ID, Mud State andBase Oil name, Oil Density, Mud Density, LowGravity and High Gravity solids density inputtedduring the set-up phase. The "Density" section alsodisplays the the calculated Average Solids Gravity(ASG) measurement and a breaks down the solidsmeasurement into low and high gravity solids usingthe standard API calculation:
Exporting a mud recordMeasurements can be exported via a CSV file forforma record keeping and further analysis eitherindividually or as a bulk download. To download anindividual record, select the record number that youwish to export from the record list located on theleft-hand side of the interface then click "Saverecord as CSV". To export all MudChecker recordsclick the "Save all records as CSV" button.
9

OM_5841 V2.7
Setup
www.salunda.com
MudChecker: Software Setup Screen
When making changes to the MudCheckersetup ensure the device is connected tothe PC or desktop you are using and youclick "Save Settings" prior to exiting thesoftware to ensure the settings have beensaved to the device.
Saving changes to the setup
Records can be deleted from the MudChecker bynavigating to the setup screen and selecting"Delete all records from internal memory". If yourequire a copy of these records you should exportthese measurement records in CSV format prior todeleting.
Deleting records
Changing the salinity mode By default, MudChecker ES models will be set up inEnhanced Salinity mode which will enable the userto measure the chloride content and add anadditional step in the measuring procedure. If asalinity measurement is not required, this step canbe switched off in the software by navigating to thesetup screen an ticking the "Known Salinity" checkbox. The user will then be required to enter asalinity value. The salinity units can be adjustedusing the drop down box.
The density of the drilling mud and the solidsdensity can be inputted in the mud density sectionof the setup screen. A unique identifier of the userschoice can be inputted in the Mud ID to referencethe sample at a later stage.
Entering the mud and solids density Changing the mud stateTo adjust the "mud state" use the drop down box inthe calculations section of the setup screen toselect between "Barite Absent" and "BaritePresent". "Barite Present" mode is suggested onless viscous, normal or fresh muds. "Barite Absent"should be selected for muds which have been inuse for a longer period of time, or underflow withhigh solids content.
Deleting mud records
10

OM_5841 V2.7
Calibration
Measure Composition
Measure Salinity
1. Switch on the MudChecker® by
holding down the power button.
2. Navigate to "Calibrate" using the
navigation button then press enter.
3. Attach the narrow probe shield &
submerge in the base oil sample.
4. Initiate calibration by pressing
the enter key. 1. Fill the Salunda sample pot with
drilling mud.
2. Navigate to "Measure" using the
navigation button then press enter.
3. Attach the narrow probe shield &
submerge in the mud sample.
4. Initiate the composition
measurement by pressing the enter
key.
1. Mix 20ml of drilling mud with
205ml of DSX7 dilution solution.
2. Blend thoroughly for 3 minutes.
3. Attach the wide probe shield and
submerge in the diluted mud sample.
4. Initiate salinity measurement by
pressing the enter key.
1. Access the setup screen in the
MudChecker® software by clicking
the "Setup" button.
2. Input the sample name &
density of the drilling mud.
3. Input the base oil name &
density of the base oil.
4. Input the drilling mud salinity
Setup
Recall Results
1
2
3
4
5
MudChcker: Quick Start Guide
1. Connect the MudChecker® to aPC via the USB cable supplied. 2. The MudChecker® software willautomatically import historic recordsstored on the MudChecker® device. 3. Select a mud record by clickingon the relevant Mud ID listed on theleft hand side of the softwareinterface to view the measurementdata.
*Salinity input only applicable for KS mode
Device NavigationPower / Scroll / Hold to cancel or switch off
Navigate down one level in menu / Enter
Increase or decrease parameter value /hold both to go back one level
www.salunda.com
*Results will be automatically recalled on theMudChecker 1.5 ES
11
OM_5841 V2.7
Setup
www.salunda.com
MudChecker: Cleaning the Probe
Care should be taken when screwing orunscrewing the outer probe shield of theprobe to prevent cross threading of theshield. If the shield does become crossthreaded, please contact yourMudChecker distributor or agent.
Important
If the shield is difficult to remove from theprobe extra torque can be obtained byputting an allen key through the twoholes at the bottom end of the shield andapply force gently. Do not over tighten the probe shield
After each measurement, the cleaning process is asfollows:
Do not use cloths made from artificial fibers suchas nylon as this increases the risk of electrostaticdischarge to the unit.When cleaning the inner part of the probe, holdthe unit using the stainless-steel collar at the topof the probe to reduce the chance of anyelectrostatic discharge damage to yourMudChecker.
For best results clean the probethoroughly between tests.
Remove the probe shieldWipe the outside of the probe shaft with a softcotton cloth or paper towel. Use the cloth to wipe the exposed inner andouter probe shield surfaces.Always fit a probe shield to the unit aftercleaning to prevent accidental damage to theinner probe.
Warning: Please read informationthoroughly before cleaning:
Cleaning accessoriesSalunda has a number of cleaning accesoriesand kits available for purchase on the onlinestore. To find out more visit:www,salunda.com/shop
12

OM_5841 V2.7
Setup
www.salunda.com
MudChecker: Tips
It is recommended that you use a high-quality blender suitable for mixing drilling fluids,such as a Hamilton Beach single spindle mixer.
Blender information
Oil, water and solids can separate in a drilling fluidwhich has settled. For the most accurate results it isessential to ensure the drilling fluid ishomogeneous.
Salunda recommends following the below bestpractise for blending your diluted drilling fluidsample:
Blending your drilling fluid sample forthe salinity test
Submerging the probeIt is essential to ensure that the MudChecker probeis inserted into the drilling fluid sample so that thehorizontal slots at the top of the probe aresubmerged in the sample.
Expelling bubbles and air gapsWhen carrying out a measurement ensure that allair bubbles are expelled. Salunda recommendsthat you do this by giing the probe a gentle wigglewhilst submerged in the sample
Use DSX7 Dilution solution bottles directly fromSalundaOpen a sealed bottle of DSX7 and pour all of thecontents into a blending cup.Using a syringe, measure out 20ml of undiluteddrilling mud and inject the mud into the DSX7solution (be careful not to deposit the sample onthe sides or on the blade assembly above theliquid line). Switch on your blender. To avoid splashing,blend at the slowest speed and graduallyincrease to the highest speed. Ensure the vortex is half the height of the fluidlevel in the cup whilst blending. Blend for 2 minutes to ensure the oil emulsion issufficiently broken.
MudChecker requires chloride ions to besaturated in the water phase in order tomeasure. Similarly to traditional titrationmethods unsaturated chlorides will beattributed as solids.
13

OM_5841 V2.7
www.salunda.com
MudChecker: Safety and Usage InformationSafety Warnings
Avoid inhalation of fumes Wear eye protection Wear suitable gloves Keep away from sourcesof ignition
Safety PrecautionsFailure to follow these precautions could cause explosions or leaks resulting in fire, injury and damage to the surroundings. If the batteryinside the unit leaks and you or your clothing comes in contact with the leaking substances, immediately flush with large amounts ofwater and seek medical assistance.
Before using the MudChecker please be sure to read the safety precautions described. Always be sure to operate the equipment correctly.
The safety precautions below are intended to instruct you in the safe and correct operation of the unit and its accessories to preventinjuries to yourself or other persons and damage to the equipment. ‘Equipment’ refers to the MudChecker unit itself, the poweradapter supplied and the USB lead also supplied.
Do not attempt to disassemble or alter any part of the equipment that is not expressly described in this guide. Opening the equipmentor tampering with its seals will invalid the warranty and is in breach of the terms and conditions of sale from Salunda Limited. The equipment contains no user serviceable parts – Do not attempt to open or dismantle it. Stop using the equipment and switch unit off immediately if it emits smoke or fumes and contact MudChecker distributor directly. Do not use the equipment if it has condensation on or in it, or if you have wet hands Do not allow the body of the equipment to be immersed in water or any other liquids. If it does:
The gaskets on the unit case should be inspected regularly for signs of swelling and wear. If this occurs, please advise yourMudChecker distributor. Damage to the unit enclosure or top lid may significantly degrade the IP rating of the unit. Such damage should be discussed withyour MudChecker distributor. The MudChecker contains a high capacity, rechargeable, Lithium-based battery. While the MudChecker unit is splash proof it shouldnot be submerged in water or any other liquid as this could cause the battery to explode. Water will also cause failure of theelectronics. The MudChecker must not be exposed to temperatures higher than 40°C for prolonged periods as this can cause failure to operatecorrectly and failure of the battery especially during charging. Charging at these temperatures is inhibited by the firmware. It isrecommended that the unit should not be exposed to direct sunlight for long periods of time. If required to operate above thistemperature please contact Salunda for advice. Do not place the unit near a heat source (e.g. engine exhaust, radiator) or expose it to direct flame or heat, or leave it in the glovebox or boot of a vehicle for prolonged periods of time. Do not use substances containing alcohol, Benzene, Thinners or other solvents to clean the body of the equipment as this mightdamage the sealing and reduce the splash resistance. Keep the body of the unit, its probe and the connector sockets clean and dry. Dropping or subjecting the unit or probe to large shock could cause damage that will prevent correct and accurate operation. If thisdoes occur, please contact MudChecker distributor directly. At lower temperatures, the internal battery will become discharged sooner.
o Immediately turn the unit off and disconnect the USB lead. (Continuing to use the equipment could result in fire or electrical shock). o Wipe all wet items dry with a soft absorbent cloth. o If the unit has been immersed, please consult your MudChecker distributor directly.
14

OM_5841 V2.7
www.salunda.com
MudChecker: Regulatory ComplianceStatement of Product Quality Products supplied with this shipment have been manufacturedand tested, or have been procured from a quality assuredsource, so as to ensure conformance to specification.
This is in accordance with the requirements of our QualitySystem, registered as compliant with the requirements of ISO9001:2008. Certificate GB08/76144 applies; issued by SGS UKLtd. (UKAS accredited 005).
FCC ComplianceMudChecker complies with part 15 of the FCC Rules.Operation is subject to the following two conditions: (1) Thisdevice may not cause harmful interference, and (2) this devicemust accept any interference received, including interferencethat may cause undesired operation.
MudChecker has been tested and found to comply with thelimits for a Class B digital device, pursuant to part 15 of theFCC Rules. These limits are designed to provide reasonableprotection against harmful interference in a residentialinstallation. This equipment generates, uses and can radiateradio frequency energy and, if not installed and used inaccordance with the instructions, may cause harmfulinterference to radio communications. However, there is noguarantee that interference will not occur in a particularinstallation. If this equipment does cause harmful interferenceto radio or television reception, which can be determined byturning the equipment off and on, the user is encouraged to tryto correct the interference by one or more of the followingmeasures:
Reorient or relocate the receiving antenna. Increase the separation between the equipment and receiver. Connect the equipment into an outlet on a circuit different fromthat to which the receiver is connected. Contact MudChecker distributer or Salunda for help.
MudChecker is in conformity with the relevant European Community harmonization legislation:
Directive 2011/65/EU of the European Parliament and ofthe Council of 8 June 2011 on the restriction of the use ofcertain hazardous substances in electrical and electronicequipment.Directive 2012/19/EU of the European Parliament and ofthe Council of 4th July 2012 on waste electrical andelectronic equipment (WEEE).Directive 2001/95/EC of the European Parliament and ofthe Council of 3 December 2001 on general product safety.Directive 2014/30/EU of the European Parliament and ofthe Council of 26 February 2014 on the harmonization ofthe laws of the Member States relating to electromagneticcompatibility.
The following harmonized standards were used in verifying compliance:
EN 61010-1:2010 Safety requirements for electricalequipment for measurement, control, and laboratory use -Part 1: General requirements. EN 61326-1:2013 Electrical equipment for measurement,control and laboratory use. EMC requirements. Generalrequirements.
15
OM_5841 V2.7
Setup
www.salunda.com
MudChecker: Technical Details
Oil based muds (OBM) and Synthetic basedmuds (SBM).
Compatibility
Whilst every care has been taken in compiling the information in this publication, Salunda Ltd. cannot accept legal liability for anyinnacuracies. Salunda Ltd. has an intensive program of design and development which may well alter product specification. Salunda Ltd.reserve the right to alter specifications without notice and whenever necessary to ensure optimum performance from its product range. All rights reserved. © Salunda Limited 2016. All intellectual property rights vest entirely in Salunda Limited. Patent protected. No part of
this publication may be reproduced, stored in a retrieval system, or transmitted in any form, or by any means, electronic, mechanical,photocopying, recording or otherwise, without the prior permission of Salunda Ltd.
Dimensions: Main body with probe: 250x85x34(mm)Weight: 480 gramsVoltage: 5 volts nominalCurrent: 1000maOperating temperature: 5°C to 40°C
Minimum system requirements1GHz Processor (or similar) 1GB RAMWindows 7® or higher (32 bit)
Specification of Mudchecker
Contents
MudChecker 1.0 ES/KS or 1.5 ES Small probe shields Large probe shield (ES models only) Sample pot Cleaning cloth USB charging lead Software CD Operating manual Quick start guide
1 2 1 1 1 1 1 1 1
16