user guide - fccid.io · pdf file... nokia corporation declares that this rm-348 product is in...
TRANSCRIPT

User Guide
9210555Issue 1
CyanCyan MagentaMagentaYellowYellow BlackBlack

© 2008 Nokia. All rights reserved.DECLARATION OF CONFORMITY
Hereby, NOKIA CORPORATION declares that this RM-348 product is in compliance with the essential requirements and otherrelevant provisions of Directive 1999/5/EC. A copy of the Declaration of Conformity can be found at www.nokia.com/phones/declaration_of_conformity/.
Nokia, Nokia Connecting People, Nseries, N79, N-Gage, Navi and Visual Radio are trademarks or registered trademarks of Nokia Corporation. Nokia tune is asound mark of Nokia Corporation. Other product and company names mentioned herein may be trademarks or tradenames of their respective owners.Reproduction, transfer, distribution, or storage of part or all of the contents in this document in any form without the prior written permission of Nokia isprohibited.This software is based in part of the work of the FreeType Team. This product is covered by one or more of the following patents: United States Patent 5,155,805,United States Patent 5,325,479, United States Patent 5,159,668, United States Patent 2232861 and France Patent 9005712.US Patent No 5818437 and other pending patents. T9 text input software Copyright © 1997-2008. Tegic Communications, Inc. All rights reserved.
This product includes software licensed from Symbian Software Ltd ©1998-2008. Symbian and Symbian OS are trademarks of Symbian Ltd.
Java and all Java-based marks are trademarks or registered trademarks of Sun Microsystems, Inc.Portions of the Nokia Maps software are ©1996-2008 The FreeType Project. All rights reserved.This product is licensed under the MPEG-4 Visual Patent Portfolio License (i) for personal and noncommercial use in connection with information which hasbeen encoded in compliance with the MPEG-4 Visual Standard by a consumer engaged in a personal and noncommercial activity and (ii) for use in connectionwith MPEG-4 video provided by a licensed video provider. No license is granted or shall be implied for any other use. Additional information, including thatrelated to promotional, internal, and commercial uses, may be obtained from MPEG LA, LLC. See http://www.mpegla.com
.Nokia operates a policy of ongoing development. Nokia reserves the right to make changes and improvements to any of the products described in this documentwithout prior notice.
TO THE MAXIMUM EXTENT PERMITTED BY APPLICABLE LAW, UNDER NO CIRCUMSTANCES SHALL NOKIA OR ANY OF ITS LICENSORS BE RESPONSIBLE FOR ANY LOSS OFDATA OR INCOME OR ANY SPECIAL, INCIDENTAL, CONSEQUENTIAL OR INDIRECT DAMAGES HOWSOEVER CAUSED.THE CONTENTS OF THIS DOCUMENT ARE PROVIDED "AS IS". EXCEPT AS REQUIRED BY APPLICABLE LAW, NO WARRANTIES OF ANY KIND, EITHER EXPRESS OR IMPLIED,INCLUDING, BUT NOT LIMITED TO, THE IMPLIED WARRANTIES OF MERCHANTABILITY AND FITNESS FOR A PARTICULAR PURPOSE, ARE MADE IN RELATION TO THE ACCURACY,RELIABILITY OR CONTENTS OF THIS DOCUMENT. NOKIA RESERVES THE RIGHT TO REVISE THIS DOCUMENT OR WITHDRAW IT AT ANY TIME WITHOUT PRIOR NOTICE.
CyanCyan MagentaMagentaYellowYellow BlackBlackCyanCyan MagentaMagentaYellowYellow BlackBlack

Reverse engineering of any software in the Nokia device is prohibited to the extent permitted by applicable law. Insofar as this user guide contains any limitationson Nokia's representations, warranties, damages and liabilities, such limitations shall likewise limit any representations, warranties, damages and liabilitiesof Nokia's licensors.The availability of particular products and applications and services for these products may vary by region. Please check with your Nokia dealer for details, andavailability of language options.
Export controlsThis device may contain commodities, technology or software subject to export laws and regulations from the US and other countries. Diversion contrary tolaw is prohibited.
FCC/INDUSTRY CANADA NOTICEYour device may cause TV or radio interference (for example, when using a telephone in close proximity to receiving equipment). The FCC or Industry Canadacan require you to stop using your telephone if such interference cannot be eliminated. If you require assistance, contact your local service facility. This devicecomplies with part 15 of the FCC rules. Operation is subject to the following two conditions: (1) This device may not cause harmful interference, and (2) thisdevice must accept any interference received, including interference that may cause undesired operation. Any changes or modifications not expressly approvedby Nokia could void the user's authority to operate this equipment.9210555/Issue 1 EN
CyanCyan MagentaMagentaYellowYellow BlackBlackCyanCyan MagentaMagentaYellowYellow BlackBlack

ContentsSafety................................................................6About your device.................................................................6Network services...................................................................7
Find help...........................................................9Instructions inside - In-device help....................................9Get started.............................................................................9Nokia support and contact information.............................9Extended user guide.............................................................9Additional applications......................................................10Software updates...............................................................10Application Update.............................................................11Settings................................................................................11
Your device.....................................................12Transfer content.................................................................12Navi™ wheel........................................................................13N-Gage™ .............................................................................13Offline profile......................................................................14
Web browser..................................................15Browse the web..................................................................15Web feeds and blogs..........................................................16Widgets................................................................................16Empty the cache..................................................................17End the connection.............................................................17Connection security............................................................17
Connections....................................................18Wireless LAN........................................................................18
Bluetooth connectivity.......................................................19
Personalise your device.................................22Set tones in Profiles............................................................22Modify the standby mode..................................................22Modify the main menu.......................................................23
Positioning (GPS)............................................24About GPS............................................................................24Assisted GPS (A-GPS)...........................................................24Hold your device correctly.................................................25Tips on creating a GPS connection....................................25
Maps...............................................................27About Maps..........................................................................27Browse maps.......................................................................28Download maps..................................................................29Extra services for Maps.......................................................30
Music folder....................................................32Music player.........................................................................32Nokia Music Store...............................................................34FM transmitter.....................................................................34Radio applications..............................................................36
Camera............................................................39About the camera...............................................................39Activate the camera............................................................39Image capture.....................................................................39Video recording..................................................................42
Cont
ents
CyanCyan MagentaMagentaYellowYellow BlackBlackCyanCyan MagentaMagentaYellowYellow BlackBlack

Photos............................................................44About Photos.......................................................................44View images and videos....................................................44Active toolbar......................................................................45
Home network...............................................46About home network.........................................................46Important security information........................................46
Write and send messages..............................48
Make calls.......................................................50Voice calls ...........................................................................50Make a video call.................................................................50
Enhancements................................................51
Battery and charger information...................52Battery and charger information......................................52Nokia battery authentication guidelines.........................53
Care and maintenance....................................55Disposal................................................................................56
Additional safety information.......................57Small children.....................................................................57Operating environment.....................................................57Medical devices...................................................................57Vehicles................................................................................58Potentially explosive environments.................................58Emergency calls...................................................................59Certification information (SAR).........................................59
Index..............................................................61
Cont
ents
CyanCyan MagentaMagentaYellowYellow BlackBlackCyanCyan MagentaMagentaYellowYellow BlackBlack

SafetyRead these simple guidelines. Not following them maybe dangerous or illegal. Read the complete user guidefor further information.
SWITCH ON SAFELYDo not switch the device on when wirelessphone use is prohibited or when it may causeinterference or danger.ROAD SAFETY COMES FIRSTObey all local laws. Always keep your hands freeto operate the vehicle while driving. Your firstconsideration while driving should be roadsafety.INTERFERENCEAll wireless devices may be susceptible tointerference, which could affect performance.SWITCH OFF IN RESTRICTED AREASFollow any restrictions. Switch the device off inaircraft, near medical equipment, fuel,chemicals, or blasting areas.QUALIFIED SERVICEOnly qualified personnel may install or repairthis product.
ENHANCEMENTS AND BATTERIESUse only approved enhancements andbatteries. Do not connect incompatibleproducts.ENHANCEMENTSUse only approved enhancements. Do notconnect incompatible products.WATER-RESISTANCEYour device is not water-resistant. Keep it dry.
About your deviceThe wireless device described in this guide is approved foruse on the (E)GSM 850, 900, 1800,1900, and UMTS 900,2100 MHz networks. Contact your service provider formore information about networks.When using the features in this device, obey all laws andrespect local customs, privacy and legitimate rights ofothers, including copyrights.Copyright protection may prevent some images, music,and other content from being copied, modified, ortransferred.6
Safe
ty
CyanCyan MagentaMagentaYellowYellow BlackBlackCyanCyan MagentaMagentaYellowYellow BlackBlack
Your device supports several methods of connectivity. Likecomputers, your device may be exposed to viruses andother harmful content. Exercise caution with messages,connectivity requests, browsing, and downloads. Onlyinstall and use services and other software fromtrustworthy sources that offer adequate security andprotection against harmful software, such as applicationsthat are Symbian Signed or have passed the Java Verified™testing. Consider installing antivirus and other securitysoftware on your device and any connected computer.Your device may have preinstalled bookmarks and links forthird-party internet sites. You may also access other third-party sites through your device. Third-party sites are notaffiliated with Nokia, and Nokia does not endorse orassume liability for them. If you choose to access suchsites, you should take precautions for security or content.
Warning: To use any features in this device, otherthan the alarm clock, the device must be switched on. Donot switch the device on when wireless device use maycause interference or danger.The office applications support common features ofMicrosoft Word, PowerPoint, and Excel (Microsoft Office2000, XP, and 2003). Not all file formats can be viewed ormodified.Remember to make back-up copies or keep a writtenrecord of all important information stored in your device.
When connecting to any other device, read its user guidefor detailed safety instructions. Do not connectincompatible products.The images in this guide may differ from your devicedisplay.
Network servicesTo use the device you must have service from a wirelessservice provider. Many of the features require specialnetwork features. These features are not available on allnetworks; other networks may require that you makespecific arrangements with your service provider beforeyou can use the network services. Using network servicesinvolves transmission of data. Check with your serviceprovider for details about fees in your home network andwhen roaming on other networks. Your service providercan give you instructions and explain what charges willapply. Some networks may have limitations that affecthow you can use network services. For instance, somenetworks may not support all language-dependentcharacters and services.Your service provider may have requested that certainfeatures be disabled or not activated in your device. If so,these features will not appear on your device menu. Yourdevice may also have a special configuration such aschanges in menu names, menu order, and icons. Contactyour service provider for more information.
7
Safe
ty
CyanCyan MagentaMagentaYellowYellow BlackBlackCyanCyan MagentaMagentaYellowYellow BlackBlack

This device supports WAP 2.0 protocols (HTTP and SSL) thatrun on TCP/IP protocols. Some features of this device, suchas MMS, web browsing, and e-mail, require networksupport for these technologies.
8
Safe
ty
CyanCyan MagentaMagentaYellowYellow BlackBlackCyanCyan MagentaMagentaYellowYellow BlackBlack
Find helpFor more information on access codes, saving batterypower, and freeing memory, see the extended userguide on the product support pages of the Nokiawebsite.
Instructions inside - In-devicehelpYour device contains instructions to help you use it.When an application is open, to access the help text forthe current view, select Options > Help. To open helpfrom the main menu, select Tools > Utilities >Help, and the relevant application.You can find links to related topics at the end of thehelp text. To make the instructions easier to read, youcan change the size of the text. If you click on anunderlined word, a short explanation is displayed. Helpuses the following indicators: shows a link to arelated help topic. shows a link to the applicationbeing discussed. When you are reading theinstructions, to switch between help and theapplication that is open in the background, press andhold , or select the application link ( ).
Get startedSee the get started guide for keys and partsinformation, instructions for setting up the device andfor other essential information.
Nokia support and contactinformationCheck www.nseries.com/support or your local Nokiawebsite for the latest guides, additional information,downloads, and services related to your Nokia product.If you need to contact customer service, check the listof local Nokia Care contact centres at www.nokia.com/customerservice.For maintenance services, check your nearest NokiaCare point at www.nokia.com/repair.
Extended user guideAn extended version of this user guide is available onthe product support pages of the Nokia website. Someapplications or functions are explained only in theextended user guide. This is explained in the relevant
9
Find
hel
p
CyanCyan MagentaMagentaYellowYellow BlackBlackCyanCyan MagentaMagentaYellowYellow BlackBlack

sections. The extended user guide also contains atroubleshooting section.The applications and functions located in the followingfolders of your device are explained only in theextended user guide:● Video centre (main menu) — Instructions on using
Video centre● Tools — Information on file management,
synchronisation, and settings● Office — Information on text processing
applications and converter● Applications — Information on time management,
calculation, and application management● Media — Information on media players, recording,
and digital rights management
Additional applicationsThere are various applications provided by Nokia anddifferent third-party software developers that help youdo more with your device. These applications areexplained in the guides that are available on theproduct support pages at www.nseries.com/supportor your local Nokia website.
Software updatesNokia may produce software updates that offer newfeatures, enhanced functions, and improved
performance. You may be able to request theseupdates through the Nokia Software Updater PCapplication. Software updates may not be available forall products or their variants. Not all operators mayendorse the latest software versions available.To update the device software, you need the NokiaSoftware Updater application and a compatible PC withMicrosoft Windows 2000, XP, or Vista operatingsystem, broadband internet access, and a compatibledata cable to connect your device to the PC.
Warning: If you install a software update, youcannot use the device, even to make emergency calls,until the installation is completed and the device isrestarted. Be sure to back up data before acceptinginstallation of an update.The size of a software update is approximately 5-10 MBusing your device and 100 MB using a PC.The download and installation may take up to 20minutes with Device manager and up to 30 minuteswith Nokia Software Updater.To get more information and to download the NokiaSoftware Updater application, visit www.nokia.com/softwareupdate or your local Nokia website.If software updates over the air are supported by yournetwork, you may also be able to request updatesthrough the device.
10
Find
hel
p
CyanCyan MagentaMagentaYellowYellow BlackBlackCyanCyan MagentaMagentaYellowYellow BlackBlack

Your device may be able to periodically check for newsoftware updates with Nokia Software Checker. Press
, and select Tools > SW checker.Tip: To check the software version in yourdevice, enter *#0000# in the standby mode.
Application UpdatePress , and select Applications > App. update.With Application Update, you can check the availableupdates for applications and download them to yourdevice.After updating your device software using ApplicationUpdate, the instructions in the user guide or the helpsmay not be up to date.To download the available updates, select Options >Start update.To unmark updates, scroll to them, and press the scrollkey.To view information on an update, select Options >View details.To change the settings, select Options > Settings.
SettingsYour device normally has MMS, GPRS, streaming, andmobile internet settings automatically configured,
based on your network service provider information.You may have settings from your service providersalready installed in your device, or you may receive orrequest the settings from the network serviceproviders as a special message.You can change the general settings in your device,such as language, standby mode, display, and keypadlock settings.
11
Find
hel
p
CyanCyan MagentaMagentaYellowYellow BlackBlackCyanCyan MagentaMagentaYellowYellow BlackBlack

Your deviceFor more information on your device, such as antennalocations, display indicators, and shortcuts, see theextended user guide on the product support pages ofthe Nokia website.
Transfer contentYou can use the Switch application to copy contentsuch as phone numbers, addresses, calendar items,and images from your previous Nokia device to yourNokia N79 using Bluetooth connectivity.The type of content that can be transferred depends onthe model of the device from which you want totransfer content. If that device supportssynchronisation, you can also synchronise databetween the devices. Your Nokia N79 notifies you if theother device is not compatible.If the other device cannot be switched on without aSIM card, you can insert your SIM card in it. When yourNokia N79 is switched on without a SIM card, the offlineprofile is automatically activated, and transfer can bedone.
Transfer content for the first time1. To retrieve data from the other device for the first
time, on your Nokia N79, select Switch in theWelcome application, or press , and selectTools > Utilities > Switch.
2. Select the connection type you want to use totransfer the data. Both devices must support theselected connection type.
3. If you select Bluetooth, connect the two devices. Tohave your device search for devices with Bluetoothconnectivity, select Continue. Select the devicefrom which you want to transfer content. You areasked to enter a code on your Nokia N79. Enter acode (1-16 digits), and select OK. Enter the samecode on the other device, and select OK. The devicesare now paired. See "Pair devices", p. 21.Some earlier Nokia devices may not have the Switchapplication. In this case, the Switch application issent to the other device as a message. To install theSwitch application on the other device, open themessage, and follow the instructions on the display.
4. From your Nokia N79, select the content you wantto transfer from the other device.
12
Your
dev
ice
CyanCyan MagentaMagentaYellowYellow BlackBlackCyanCyan MagentaMagentaYellowYellow BlackBlack

When the transfer has started, you can cancel it andcontinue later.
Content is transferred from the memory of the otherdevice to the corresponding location in your NokiaN79. The transfer time depends on the amount of datato be transferred.
Navi™ wheelHereafter referred to as scroll key.Use the Navi wheel to move around the menus and lists(up, down, left, or right). Press the scroll key to selectthe action shown on top of the key or to show the mostused options .To turn the Navi wheel setting on or off, press , andselect Tools > Settings > General > Navi wheel >Navi wheel.When the Navi wheel setting is switched on in thesettings, you can scroll quickly through Photos, MusicPlayer, Nokia Video Centre, Contacts, and Messaginglists, or the multimedia menu.1. Move the tip of your finger gently around the rim of
the scroll key clockwise or anticlockwise. Keepmoving your finger until scrolling starts on thedisplay.
2. To continue scrolling, slide yourfinger around the rim of the scrollkey clockwise or anticlockwise.
Sleep mode indicatorThe inner rim of the Navi wheelilluminates slowly when the device isin the sleep mode. The light varies periodically as if thedevice was breathing. To switch off the illumination,press , and select Tools > Settings > General >Navi wheel > Breathing.
N-Gage™ For more information on the N-Gage application, seethe extended user guide on the product support pagesof the Nokia website.You can play high-quality, multiplayer N-Gage gameswith your device. N-Gage is a mobile gaming platformavailable for a range of compatible Nokia mobiledevices. To access N-Gage games, players, and content,select the N-Gage application in the main menu.For the full N-Gage experience, you need internetaccess on your device, either through the cellularnetwork or wireless LAN. Contact your service providerfor more information on data services.For more information, visit www.n-gage.com.
13
Your
dev
ice
CyanCyan MagentaMagentaYellowYellow BlackBlackCyanCyan MagentaMagentaYellowYellow BlackBlack
Offline profileTo activate the offline profile, press the power keybriefly, and select Offline.The offline profile lets you use the device withoutconnecting to the wireless network. When you activatethe offline profile, the connection to the wirelessnetwork is turned off, as indicated by in the signalstrength indicator area. All wireless RF signals to andfrom the device are prevented. If you try to sendmessages, they are placed in the outbox to be sentlater.When the offline profile is active, you can use yourdevice without a SIM card.
Important: In the offline profile you cannotmake or receive any calls, or use other features thatrequire cellular network coverage. Calls may still bepossible to the official emergency numberprogrammed into your device. To make calls, you mustfirst activate the phone function by changing profiles.If the device has been locked, enter the lock code.To leave the offline profile, press the power key briefly,and select another profile. The device re-enableswireless transmissions (providing there is sufficientsignal strength).
14
Your
dev
ice
CyanCyan MagentaMagentaYellowYellow BlackBlackCyanCyan MagentaMagentaYellowYellow BlackBlack
Web browserTo browse the web, you need to have an internetaccess point configured in your device.For more information on the web browser, see theextended user guide on the product support pages ofthe Nokia website.
Browse the webPress , and select Web.
Important: Use only services that you trust andthat offer adequate security and protection againstharmful software.
Important: Only install and use applications andother software from trusted sources, such asapplications that are Symbian Signed or have passedthe Java Verified™ testing.To browse a web page, in the bookmarks view, selecta bookmark, or enter the address in the field ( ), andpress the scroll key.Some web pages may contain material, such asgraphics and sounds, that requires a large amount ofmemory to view. If your device runs out of memory
while loading such a page, the graphics on the pageare not shown.To browse web pages without graphics, to savememory, select Options > Settings > Page > Loadcontent > Text only.To enter a new web page address you want to visit,select Options > Go to web address.To retrieve the latest content of the page from theserver, select Options > Navigation options >Reload.To save the web address of the current page as abookmark, select Options > Save as bookmark.To view snapshots of the pages you have visited duringthe current browsing session, select Back (available ifHistory list is set on in the browser settings and thecurrent page is not the first page you visit). Select thepage you want to go to.To save a page while browsing, select Options >Tools > Save page.You can save pages and browse them later whenoffline. You can also group pages into folders. To accessthe pages you have saved, select Options >Bookmarks > Saved pages.
15
Web
bro
wse
r
CyanCyan MagentaMagentaYellowYellow BlackBlackCyanCyan MagentaMagentaYellowYellow BlackBlack

To open a sublist of commands or actions for the pagethat is open, select Options > Service options (ifsupported by the web page).To prevent or allow the automatic opening of multiplewindows, select Options > Window > Block pop-ups or Allow pop-ups.Shortcuts while browsing● Press 1 to open your bookmarks.● Press 2 to search for keywords on the current page.● Press 3 to return to the previous page.● Press 5 to list all open windows.● Press 8 to show the page overview of the current
page. Press 8 again to zoom in and view the desiredsection of the page.
● Press 9 to enter a new web address.● Press 0 to go to the home page (if defined in
settings).● Press * and # to zoom in or out on the page.
Web feeds and blogsWeb feeds are xml files on web pages that are used bythe weblog community and news organisations toshare the latest headlines or text, for example, newsfeeds. Blogs or weblogs are web diaries. Most of theweb feeds use RSS and Atom technologies. It is
common to find web feeds on web, blog, and wikipages.The Web application automatically detects if a webpage contains web feeds.To subscribe to a web feed, select Options >Subscribe to web feeds.To view the web feeds to which you have subscribed,in the bookmarks view, select Web feeds.To update a web feed, select it and Options >Refresh.To define how the web feeds are updated, selectOptions > Settings > Web feeds.
WidgetsYour device supports widgets. Widgets are small,downloadable web applications that delivermultimedia, news feeds, and other information, suchas weather reports, to your device. Installed widgetsappear as separate applications in the Applicationsfolder.You can download widgets using the Download!application or from the web.The default access point for widgets is the same as inthe web browser. When active in the background,some widgets may update information automaticallyto your device.16
Web
bro
wse
r
CyanCyan MagentaMagentaYellowYellow BlackBlackCyanCyan MagentaMagentaYellowYellow BlackBlack

Using widgets may involve the transmission of largeamounts of data through your service provider'snetwork. Contact your service provider for informationabout data transmission charges.
Empty the cacheThe information or services you have accessed arestored in the cache memory of the device.A cache is a memory location that is used to store datatemporarily. If you have tried to access or haveaccessed confidential information requiringpasswords, empty the cache after each use. Theinformation or services you have accessed are storedin the cache.To empty the cache, select Options > Clear privacydata > Cache.
End the connectionTo end the connection and view the browser pageoffline, select Options > Tools > Disconnect; or toend the connection and close the browser, selectOptions > Exit.To take the browser to the background, press the endkey once. To end the connection, press and hold theend key.
To delete the information the network server collectsabout your visits to various web pages, selectOptions > Clear privacy data > Cookies.
Connection securityIf the security indicator ( ) is displayed during aconnection, the data transmission between the deviceand the internet gateway or server is encrypted.The security icon does not indicate that the datatransmission between the gateway and the contentserver (or the place where the requested resource isstored) is secure. The service provider secures the datatransmission between the gateway and the contentserver.Security certificates may be required for some services,such as banking services. You are notified if the identityof the server is not authentic or if you do not have thecorrect security certificate in your device. For moreinformation, contact your service provider.
17
Web
bro
wse
r
CyanCyan MagentaMagentaYellowYellow BlackBlackCyanCyan MagentaMagentaYellowYellow BlackBlack

ConnectionsYour device offers several options to connect to theinternet or to another compatible device or PC.For more information on different connectionmethods, such as Bluetooth and Data cable, see theextended user guide on the product support pages ofthe Nokia website.
Wireless LANYour device supports wireless local area network(WLAN). With WLAN, you can connect your device to theinternet and compatible devices that have WLAN.For more information on WLAN access points andoperating modes, see the extended user guide on theproduct support pages of the Nokia website.
About WLANTo use WLAN, it must be available in the location, andyour device must be connected to the WLAN. SomeWLANs are protected, and you need an access key fromyour service provider to connect to them.Some places, like France, have restrictions on the useof wireless LAN. Check with your local authorities formore information.
Features that use WLAN, or that are allowed to run inthe background while using other features, increasethe demand on battery power and reduce the batterylife.Your device supports the following WLAN features:● IEEE 802.11b/g standard● Operation at 2.4 GHz● Wired equivalent privacy (WEP) with keys up to 128
bits, Wi-Fi protected access (WPA), and 802.1xencryption methods. These functions can be usedonly if they are supported by the network.
WLAN wizardThe WLAN wizard helps you to connect to a WLAN andmanage your WLAN connections.The WLAN wizard shows the status of your WLANconnections in the active standby mode. To view theavailable options, scroll to the row showing the status,and select it.If the search finds WLANs, for example, WLAN networkfound is displayed, to create an internet access point(IAP) and start the web browser using this IAP, selectthe status and Start Web browsing.18
Conn
ectio
ns
CyanCyan MagentaMagentaYellowYellow BlackBlackCyanCyan MagentaMagentaYellowYellow BlackBlack

If you select a secured WLAN network, you are asked toenter the relevant passcodes. To connect to a hiddennetwork, you must enter the correct network name(service set identifier, SSID). To create a new accesspoint for a hidden WLAN, select New WLAN.If you are connected to a WLAN, the IAP name isdisplayed. To start the web browser using this IAP,select the status and Continue Web browsing. To endthe connection in the WLAN, select the status andDisconnect WLAN.If WLAN scanning is off and you are not connected toany WLAN, WLAN scanning off is displayed. To setscanning on and search for available WLANs, select thestatus and press the scroll key.To start a search for available WLANs, select the statusand Search for WLAN. To set WLAN scanning off, selectthe status and select WLAN scanning off.To access the WLAN wizard application in the menu,press , and select Tools > WLAN wiz..
Bluetooth connectivityAbout Bluetooth connectivityYou can make a wireless connection to othercombatible devices, such as mobile phones,computers, headsets, and car kits, with Bluetoothconnectivity.
You can use the connection to send images, video clips,music and sound clips, and notes, transfer files fromyour compatible PC, and print images with acompatible printer.Since devices with Bluetooth wireless technologycommunicate using radio waves, they do not need tobe in direct line-of-sight. However, they must be within10 metres (33 feet) of each other, although theconnection may be subject to interference fromobstructions such as walls or from other electronicdevices.This device is compliant with Bluetooth Specification2.0 supporting the following profiles: Generic Audio/Video Distribution Profile, Advanced Audio DistributionProfile, Audio/Video Remote Control Profile, BasicImaging Profile, Basic Printing Profile, Dial-upNetworking Profile, File Transfer Profile, Hands-FreeProfile, Headset Profile, Human Interface DeviceProfile, Object Push Profile, SIM Access Profile,Synchronization Profile, Serial Port Profile, andPhonebook Access Profile. To ensure interoperabilitybetween other devices supporting Bluetoothtechnology, use Nokia approved enhancements for thismodel. Check with the manufacturers of other devicesto determine their compatibility with this device.Features using Bluetooth technology increase thedemand on battery power and reduce the battery life.When the device is locked, you cannot use Bluetoothconnectivity.
19
Conn
ectio
ns
CyanCyan MagentaMagentaYellowYellow BlackBlackCyanCyan MagentaMagentaYellowYellow BlackBlack
SettingsPress , and select Tools > Bluetooth.When you open the application for the first time, youare asked to define a name for your device. You canchange the name later on.Select from the following:● Bluetooth — To make a wireless connection to
another compatible device, first set Bluetoothconnectivity On, then establish a connection. Toswitch off Bluetooth connectivity, select Off.
● My phone's visibility — To allow your device to befound by other devices with Bluetooth wirelesstechnology, select Shown to all. To set a time afterwhich the visibility is set from shown to hidden,select Define period. To hide your device fromother devices, select Hidden.
● My phone's name — Edit the name shown to otherdevices with Bluetooth wireless technology.
● Remote SIM mode — To enable another device,such as a compatible car kit enhancement, to usethe SIM card in your device to connect to thenetwork, select On.
Security tipsPress , and select Tools > Bluetooth.When you are not using Bluetooth connectivity, tocontrol who can find your device and connect to it,
select Bluetooth > Off or My phone's visibility >Hidden.Do not pair with or accept connection requests from anunknown device. This protects your device fromharmful content.
Send data using BluetoothconnectivitySeveral Bluetooth connections can be active at a time.For example, if you are connected to a compatibleheadset, you can also transfer files to anothercompatible device at the same time.1. Open the application where the item you want to
send is stored. For example, to send an image toanother compatible device, open Photos.
2. Select the item and Options > Send > ViaBluetooth.To interrupt the search, select Stop.
3. Select the device with which you want to connect.4. If the other device requires pairing before data can
be transmitted, a tone sounds, and you are askedto enter a passcode. See "Pair devices", p. 21.When the connection is established, Sendingdata is displayed.
20
Conn
ectio
ns
CyanCyan MagentaMagentaYellowYellow BlackBlackCyanCyan MagentaMagentaYellowYellow BlackBlack
Pair devicesTo pair with compatible devices and view your paireddevices, in the main view of Bluetooth connectivity,scroll right.Before pairing, create your own passcode (1 to 16digits), and agree with the owner of the other deviceto use the same code. Devices that do not have a userinterface have a factory-set passcode. The passcode isused only once.1. To pair with a device, select Options > New
paired device. Devices that are within range aredisplayed.
2. Select the device, and enter the passcode. The samepasscode must be entered on the other device aswell.
3. Some audio enhancements connect automaticallyto your device after pairing. Otherwise, scroll to theenhancement, and select Options > Connect toaudio device.
Paired devices are indicated by in the device search.To set a device as authorised or unauthorised, scroll tothe device, and select from the following options:● Set as authorised — Connections between your
device and the authorised device can be madewithout your knowledge. No separate acceptance orauthorisation is needed. Use this status for your owndevices, such as your compatible headset or PC or
devices that belong to someone you trust. indicates authorised devices in the paired devicesview.
● Set as unauthorised — Connection requests fromthis device must be accepted separately every time.
To cancel a pairing, scroll to the device, and selectOptions > Delete.If you want to cancel all pairings, select Options >Delete all.
21
Conn
ectio
ns
CyanCyan MagentaMagentaYellowYellow BlackBlackCyanCyan MagentaMagentaYellowYellow BlackBlack

Personalise your deviceYou can personalise your device by changing thestandby mode, main menu, tones, themes, or font size.Most of the personalisation options, such as changingthe font size, can be accessed through the devicesettings.For information on Themes, Audio themes, and 3-Dtones, see the extended user guide on the productsupport pages of the Nokia website.
Set tones in ProfilesPress , and select Tools > Profiles.You can use profiles to set and customise the ringingtones, message alert tones, and other tones fordifferent events, environments, or caller groups.To change the profile, select a profile, and Options >Activate, or press the power key in the standby mode.Scroll to the profile you want to activate, and selectOK.
Tip: To switch between the general and silentprofiles in the standby mode, press and hold #.
To modify a profile, scroll to the profile, and selectOptions > Personalise.
If you want to set a profile to be active a certain time,select Options > Timed. When the set time expires,the profile changes back to the previously active one.When a profile is timed, is displayed in the standbymode. The Offline profile cannot be timed.If you want the caller’s name to be spoken when yourdevice rings, select Options > Personalise > Saycaller's name > On. The caller’s name must be foundin Contacts.To create a new profile, select Options > Createnew.
Modify the standby modeTo change the look of the standby mode, press , andselect Tools > Settings > General >Personalisation > Standby mode > Standby
22
Pers
onal
ise
your
dev
ice
CyanCyan MagentaMagentaYellowYellow BlackBlackCyanCyan MagentaMagentaYellowYellow BlackBlack

theme. The active standby display shows applicationshortcuts, and events fromapplications such as calendarand player.To change the selection keyshortcuts or the defaultshortcut icons in the activestandby mode, select Tools >Settings > General >Personalisation > Standbymode > Shortcuts. Someshortcuts may be fixed, andyou cannot change them.To change the clock shown in the standby mode, press
, and select Applications > Clock > Options >Settings > Clock type. You can also change the standby mode backgroundimage or what is shown in the power saver in thedevice settings.
Tip: To check whether there are applicationsrunning in the background, press and hold .To close the applications you do not use, scroll toan application in the list, and press C. Leavingapplications running in the backgroundincreases the demand on battery power.
Modify the main menuTo change the main menu view, in the main menu,press and select Tools > Settings > General >Personalisation > Themes > Menu view. You canchange the main menu to be shown as Grid, List,Horseshoe, or V-shaped.To rearrange the main menu, in the main menu, selectOptions > Move, Move to folder, or New folder. Youcan move applications used less frequently into foldersand place applications that you use more often into themain menu.
23
Pers
onal
ise
your
dev
ice
CyanCyan MagentaMagentaYellowYellow BlackBlackCyanCyan MagentaMagentaYellowYellow BlackBlack

Positioning (GPS)You can use applications such as Maps and GPS data tofind out your location, or measure distances andcoordinates. These applications require a GPSconnection.For information on position requests, landmarks, andGPS data, see the extended user guide on the productsupport pages of the Nokia website.
About GPSThe Global Positioning System (GPS) is a worldwideradio navigation system that includes 24 satellites andtheir ground stations that monitor the operation of thesatellites. Your device has an internal GPS receiver.A GPS terminal receives low-power radio signals fromthe satellites and measures the travel time of thesignals. From the travel time, the GPS receiver cancalculate its location to the accuracy of metres.The coordinates in the GPS are expressed in degreesand decimal degrees format using the internationalWGS-84 coordinate system.The Global Positioning System (GPS) is operated by thegovernment of the United States, which is solelyresponsible for its accuracy and maintenance. The
accuracy of location data can be affected byadjustments to GPS satellites made by the UnitedStates government and is subject to change with theUnited States Department of Defense civil GPS policyand the Federal Radionavigation Plan. Accuracy canalso be affected by poor satellite geometry. Availabilityand quality of GPS signals may be affected by yourlocation, buildings, natural obstacles, and weatherconditions. The GPS receiver should only be usedoutdoors to allow reception of GPS signals.Any GPS should not be used for precise locationmeasurement, and you should never rely solely onlocation data from the GPS receiver and cellular radionetworks for positioning or navigation.To enable or disable different positioning methods,such as Bluetooth GPS, press , and select Tools >Settings > General > Positioning > Positioningmethods.
Assisted GPS (A-GPS)Your device also supports Assisted GPS (A-GPS).A-GPS is a network service.
24
Posi
tioni
ng (G
PS)
CyanCyan MagentaMagentaYellowYellow BlackBlackCyanCyan MagentaMagentaYellowYellow BlackBlack

Assisted GPS (A-GPS) is used to retrieve assistance dataover a packet data connection, which assists incalculating the coordinates of your current locationwhen your device is receiving signals from satellites.When you activate A-GPS, your device receives usefulsatellite information from an assistance data serverover the cellular network. With the help of assisteddata, your device can obtain the GPS position faster.Your device is preconfigured to use the Nokia A-GPSservice, if no service provider-specific A-GPS settingsare available. The assistance data is retrieved from theNokia A-GPS service server only when needed.You must have an internet access point defined in thedevice to retrieve assistance data from the Nokia A-GPSservice over a packet data connection. To define anaccess point for A-GPS, press , and select Tools >Settings > General > Positioning > Positioningserver > Access point. A wireless LAN access pointcannot be used for this service. Only a packet datainternet access point can be used. Your device asks forthe internet access point when GPS is used for the firsttime.
Hold your device correctlyThe GPS receiver is located on the back of the device.When using the receiver, make sure that you do notcover the antenna with your hand.
Establishing a GPSconnection may takefrom a couple ofseconds to severalminutes. Establishinga GPS connection in avehicle may takelonger.The GPS receiverdraws its power fromthe device battery. Using the GPS receiver may drainthe battery faster.
Tips on creating a GPSconnectionIf your device cannot find the satellite signal, considerthe following:● If you are indoors, go outdoors to receive a better
signal.● If you are outdoors, move to a more open space.● Ensure that your hand does not cover the GPS
antenna of your device. See "Hold your devicecorrectly", p. 25.
● If the weather conditions are bad, the signalstrength may be affected.
25
Posi
tioni
ng (G
PS)
CyanCyan MagentaMagentaYellowYellow BlackBlackCyanCyan MagentaMagentaYellowYellow BlackBlack

● Some vehicles have tinted (athermic) windows,which may block the satellite signals.
Check satellite signal statusTo check how many satellites your device has found,and whether your device is receiving satellite signals,press , and select Tools > Connectivity > GPSdata > Position > Options > Satellite status. Or,in the Maps application, select Options > Mapview > GPS info.If your device has foundsatellites, a bar for eachsatellite is shown in thesatellite info view. The longerthe bar, the stronger thesatellite signal. When yourdevice has received enoughdata from the satellite signal to calculate thecoordinates of your location, the bar turns black.Initially your device must receive signals from at leastfour satellites to be able to calculate the coordinatesof your location. When the initial calculation has beenmade, it may be possible to continue calculating thecoordinates of your location with three satellites.However, the accuracy is generally better when moresatellites are found.
26
Posi
tioni
ng (G
PS)
CyanCyan MagentaMagentaYellowYellow BlackBlackCyanCyan MagentaMagentaYellowYellow BlackBlack

MapsFor more information on Maps, see the extended userguide on the product support pages of the Nokiawebsite.
About MapsPress , and select Maps.With Maps, you can see your current location on themap, browse maps for different cities and countries,search for addresses and different points of interest,plan routes from one location to another, view trafficdetails, and save locations as favourites and send themto compatible devices.You can also purchase extra services, such as guides, aturn-by-turn Drive & Walk navigation service with voiceguidance, and a traffic information service.Maps uses GPS. See "Positioning (GPS)", p. 24. You candefine the positioning methods used with your devicein the device settings. For the most accurate locationinformation, use either the internal GPS or acompatible external GPS receiver.When you use Maps for the first time, you may need todefine an internet access point for downloading mapinformation for your current location. To change the
default access point later, in Maps, select Options >Tools > Settings > Internet > Networkdestination (shown only when you are online).When you browse a map in Maps, the map data for thearea is automatically downloaded to your devicethrough the internet. A new map is downloaded onlyif you scroll to an area which is not covered by mapsalready downloaded. Some maps may be pre-loadedon the memory card in your device.You can download more maps to your device usingNokia Map Loader PC software. See "Downloadmaps", p. 29.
Tip: You can also download maps by using awireless LAN connection.
Downloading maps may involve the transmission oflarge amounts of data through your service provider'snetwork. Contact your service provider for informationabout data transmission charges.If you want the Maps application to establish aninternet connection automatically when you start theapplication, in Maps, select Options > Tools >Settings > Internet > Go online at start-up >Yes. 27
Map
s
CyanCyan MagentaMagentaYellowYellow BlackBlackCyanCyan MagentaMagentaYellowYellow BlackBlack

To receive a note when your device registers to anetwork outside your home cellular network, selectOptions > Tools > Settings > Internet >Roaming warning > On (shown only when you areonline). Contact your network service provider fordetails and roaming costs.Almost all digital cartography is inaccurate andincomplete to some extent. Never rely solely on thecartography that you download for use in this device.
Browse mapsThe map coverage varies by country.When you open the Maps application, Maps zooms into the location that was saved from your last session.If no position was saved from the last session, the Mapsapplication zooms in to the capital city of the countryyou are in based on the information the device receivesfrom the cellular network. At the same time, the mapof the location is downloaded, if it has not beendownloaded during previous sessions.Your current locationTo establish a GPS connection and zoom in to yourcurrent location, select Options > My position, orpress 0. If the power saver turns on while the device isattempting to establish a GPS connection, the attemptis interrupted.
A GPS indicator is shown on the display.One bar is one satellite. When the device tries to find asatellite, the bar is yellow. When the device receivesenough data from the satellite to establish a GPSconnection, the bar turns green. The more green bars,the stronger the GPS connection.When the GPS connection is active, your currentlocation is indicated on the map with .Move and zoomTo move on the map, scroll up,down, left, or right. The mapis oriented towards north bydefault. The compass rosedisplays the orientation of themap and rotates duringnavigation when theorientation changes.When you browse the map onthe display, a new map isautomatically downloaded ifyou scroll to an area which is not covered by mapsalready downloaded. These maps are free of charge,but downloading may involve the transmission oflarge amounts of data through your service provider'snetwork. For more information on data transmissioncharges, contact your service provider.
28
Map
s
CyanCyan MagentaMagentaYellowYellow BlackBlackCyanCyan MagentaMagentaYellowYellow BlackBlack

The maps are automatically saved on a compatiblememory card (if inserted and set as the default mapsstorage).To zoom in or out, press * or #. Use the scale bar toestimate the distance between two points on the map.Adjust the map viewTo define the metric system used in the maps, selectOptions > Tools > Settings > Map > System ofmeasurement > Metric or Imperial.To define what kinds of points of interest are shownon the map, select Options > Tools > Settings >Map > Categories and the desired categories.To select whether you want to view maps in 2-D mode,3-D mode, as satellite image, or hybrid, selectOptions > Map mode > Map, Map 3D, Satellite, orHybrid. Satellite images may not be available for allgeographic locations.To define whether you want the map view to be a dayview or a night view, select Options > Tools >Settings > Map > Colours > Day mode or Nightmode.To adjust other internet, navigation, routing, andgeneral map settings, select Options > Tools >Settings.
Download mapsWhen you browse a map on the display in Maps, a newmap is automatically downloaded if you scroll to anarea which is not covered by maps alreadydownloaded. You can view the amount of transferreddata from the data counter (kB) shown on the display.The counter shows the amount of network traffic whenyou browse maps, create routes, or search for locationsonline. Downloading maps data may involve thetransmission of large amounts of data through yourservice provider’s network. Contact your serviceprovider for information about data transmissioncharges.To prevent the device from automatically downloadingmaps through the internet, for example, when you areoutside your home cellular network, or other maprelated data required by the extra services, selectOptions > Tools > Settings > Internet > Goonline at start-up > No.To define how much memory card space you want touse for saving maps or voice guidance files, selectOptions > Tools > Settings > Map > Maximummemory use > Max. memory card use. This optionis available only when a compatible memory card isinserted and set as the default maps storage. When thememory is full, the oldest map data is deleted. Thesaved maps data can be deleted using Nokia MapLoader PC software. 29
Map
s
CyanCyan MagentaMagentaYellowYellow BlackBlackCyanCyan MagentaMagentaYellowYellow BlackBlack

Nokia Map LoaderNokia Map Loader is PC software that you can use todownload and install maps from the internet to acompatible memory card. You can also use it todownload voice files for turn-by-turn navigation.To use Nokia Map Loader, you must first install it to acompatible PC. You can download the PC software fromthe internet at www.nokia.com/maps. Follow theinstructions on the screen.You must use the Maps application and browse mapsat least once before using Nokia Map Loader. Nokia MapLoader uses the Maps history information to check theversion of map data to be downloaded.After you have installed the PC software to your PC, todownload maps, do the following:1. Connect your device to the PC by using a compatible
USB data cable. Select Mass storage as the USBconnection mode.
2. Open Nokia Map Loader in your PC. Nokia MapLoader checks the version of map data to bedownloaded.
3. Select the maps or voice guidance files you want,and download and install them to your device.
Tip: Use Nokia Map Loader to save on mobiledata transfer fees.
Extra services for MapsYou can purchase a licence and download differentkinds of guides, such as city and travel guides, fordifferent cities to your device. You can also purchase alicence for a turn-by-turn Drive & Walk navigationservice with voice guidance, and a traffic informationservice to use it in Maps. A navigation licence is regionspecific (region selected when purchasing the licence),and it can be used only on the selected area. Thedownloaded guides are automatically saved to yourdevice.The licence you purchase for a guide or navigation canbe transferred to another device, but the same licencecan only be active in one device at a time.To view and update your licences, select Options >Extras > My licenses.Traffic and guide information and related services aregenerated by third parties independent of Nokia. Theinformation may be inaccurate and incomplete tosome extent and is subject to availability. Never relysolely on the aforementioned information and relatedservices.Downloading and using extra services may involve thetransmission of large amounts of data through yourservice provider’s network. Contact your serviceprovider for information about data transmissioncharges.30
Map
s
CyanCyan MagentaMagentaYellowYellow BlackBlackCyanCyan MagentaMagentaYellowYellow BlackBlack

To purchase and download extra services for Maps,select Options > Extras and the desired service.Downloading and using extra services may involve thetransmission of large amounts of data through yourservice provider’s network. Contact your serviceprovider for information about data transmissioncharges.
31
Map
s
CyanCyan MagentaMagentaYellowYellow BlackBlackCyanCyan MagentaMagentaYellowYellow BlackBlack
Music folderFor more information on Music player, radio and NokiaPodcasting, see the extended user guide on theproduct support pages of the Nokia website.
Music playerWarning: Listen to music at a moderate level.
Continuous exposure to high volume may damage yourhearing. Do not hold the device near your ear when theloudspeaker is in use, because the volume may beextremely loud.Music player supports files formats such as AAC, AAC+,eAAC+, MP3, and WMA. Music player does notnecessarily support all features of a file format or allthe variations of file formats.You can also use Music player to listen to podcastepisodes. Podcasting is the method for deliveringaudio or video content over the internet using eitherRSS or Atom technologies for playback on mobiledevices and PCs.You can transfer music from other compatible devicesto your device. See "Transfer music to yourdevice", p. 33.
Play a song or a podcast episodeTo open Music player, press , and select Music >Music player.
Tip: You can access the Music player from themultimedia menu.
You may have to refresh the music and podcastlibraries after you have updated the song or podcastselection in your device. To add all available items tothe library, in the Music player main view, selectOptions > Refresh library.To play a song or a podcast episode, do the following:1. Select categories to navigate to the song or podcast
episode you want to hear. If the Navi wheel settingis set on in the settings, to browse the lists, slideyour finger on the rim of the scroll key .
2. To play the selected files, press the scroll key.To pause playback, press the scroll key; to resume,press the scroll key again. To stop playback, scrolldown.
32
Mus
ic fo
lder
CyanCyan MagentaMagentaYellowYellow BlackBlackCyanCyan MagentaMagentaYellowYellow BlackBlack

To fast forward or rewind, press and hold the scroll keyto the right or left. To go to the next item, scrollright. To return to thebeginning of the item, scrollleft. To skip to the previousitem, scroll left again within 2seconds after a song orpodcast has started.To switch random play ( )on or off, select Options >Shuffle.To repeat the current item( ), all items ( ), or to switch repeat off, selectOptions > Repeat.If you play podcasts, shuffle and repeat areautomatically switched off.To adjust the volume, press the volume key.To modify the tone of the music playback, selectOptions > Equaliser.To modify the balance and stereo image or to enhancebass, select Options > Audio settings.To view a visualisation during playback, selectOptions > Show visualisation.To return to the standby mode and leave the playerplaying in the background, press the end key, or to
switch to another open application, press and hold.
To close the player, select Options > Exit.
PodcastsPress , and select Music > Music player >Podcasts.The podcast menu displays the podcasts available inthe device.Podcast episodes have three states: never played,partially played, and completely played. If an episodeis partially played, it plays from the last playbackposition the next time it is played. If an episode is neverplayed or completely played, it plays from thebeginning.
Transfer music to your deviceYou can transfer music from a compatible PC or othercompatible devices using a compatible USB data cableor Bluetooth connectivity.PC requirements for music transfer:● Microsoft Windows XP operating system (or later)● A compatible version of the Windows Media Player
application. You can get more detailed informationabout Windows Media Player compatibility fromyour device's product pages on the Nokia website.
● Nokia Nseries PC Suite 2.1 or later33
Mus
ic fo
lder
CyanCyan MagentaMagentaYellowYellow BlackBlackCyanCyan MagentaMagentaYellowYellow BlackBlack

Windows Media Player 10 may cause playback delaysto WMDRM technology protected files after they havebeen transferred to your device. Check Microsoftsupport website for a hotfix to Windows Media Player10 or get a newer compatible version of WindowsMedia Player.
Transfer music from PCYou can use the following methods to transfer music:● To view your device on a PC as a mass memory
device where you can transfer any data files, makethe connection with a compatible USB data cable orBluetooth connectivity. If you are using a USB cable,select Mass storage as the connection mode. Acompatible memory card must be inserted in thedevice.
● To synchronise music with Windows Media Player,connect a compatible USB data cable and selectMedia transfer as the connection mode. Acompatible memory card must be inserted in thedevice.
To change the default USB connection mode, press, and select Tools > Connectivity > USB > USB
connection mode.
Transfer with Windows Media PlayerMusic synchronisation functions may vary betweendifferent versions of the Windows Media Player
application. For more information, see thecorresponding Windows Media Player guides and help.
Nokia Music StoreIn the Nokia Music Store (network service) you cansearch, browse, and purchase music to download toyour device. To purchase music, you first need toregister for the service.To check the Nokia Music Store availability in yourcountry, visit www.nokia.com/music.To access the Nokia Music Store, you must have a validinternet access point in the device.To open Nokia Music Store, press , and selectMusic > Music store.To find more music in different categories of the musicmenu, select Options > Find in Music store.For more information, see the extended user guide onthe product support pages of the Nokia website.
FM transmitterAbout the FM transmitterThe availability of this feature may vary by country.At the time of printing, the FM transmitter part of thisequipment is intended to be used in the followingcountries: Belgium, Czech Republic, Denmark, Estonia,
34
Mus
ic fo
lder
CyanCyan MagentaMagentaYellowYellow BlackBlackCyanCyan MagentaMagentaYellowYellow BlackBlack

Finland, Germany, Iceland, Liechtenstein, Luxembourg,Norway, Portugal, Romania, Slovenia, Spain,Switzerland, Sweden, and the United Kingdom. For thelatest information and the list of non-Europeancountries where the FM transmitter can be used, seewww.nseries.com/fmtransmitter. Before using thefeature in a foreign country, see www.nseries.com/fmtransmitter to check if use is permitted.With the FM transmitter, you can play songs in yourdevice through any compatible FM receiver, such as acar radio or a home stereo system.The operating distance of the FM transmitter is up to amaximum of 3 metres (10 feet). The transmission maybe subject to interference due to obstructions, such aswalls, other electronic devices, or from public radiostations. The FM transmitter may cause interference tonearby FM receivers operating on the same frequency.To avoid interference, always search for a free FMfrequency on the receiver before using the FMtransmitter.The FM transmitter cannot be used at the same time asthe FM radio of your device.The operating frequency range of the transmitter isfrom 88.1 to 107.9 MHz.When the transmitter is on and transmitting sound,
is displayed in the standby mode. If thetransmitter is on, but not transmitting anything, isdisplayed and a periodic tone sounds. If the transmitter
is not transmitting anything for several minutes, itswitches off automatically.
Play a song using FM transmitterTo play a song stored in your device through acompatible FM receiver, do the following:1. Press , and select Music > Music player.2. Select a song or a playlist to be played.3. In the Now playing view, select Options > FM
transmitter.4. To activate the FM transmitter, set FM
transmitter to On, and enter a frequency that isfree from other transmissions. For example, if thefrequency 107.8 MHz is free in your area and youtune your FM receiver to it, you must also tune theFM transmitter to 107.8 MHz.
5. Tune the receiving device to the same frequency,and select Options > Exit.
To adjust the volume, use the volume function in thereceiving device. Listen to music at a moderate level.Continuous exposure to high volume may damage yourhearing.To deactivate the FM transmitter, select Options > FMtransmitter, and set FM transmitter to Off.If music is not played for several minutes, thetransmitter switches off automatically. 35
Mus
ic fo
lder
CyanCyan MagentaMagentaYellowYellow BlackBlackCyanCyan MagentaMagentaYellowYellow BlackBlack
FM transmitter settingsPress , and select Music > FM transmitter.To activate the FM transmitter, select FMtransmitter > On.To set a frequency manually, select Frequency andenter the desired value.To list the previously used frequencies, selectOptions > Last frequencies.
Radio applicationsPress , select Music > Radio, and Visual Radio orInternet radio.
FM radio You can use the radio as a traditional FM radio andautomatically tune into and save stations. If you tuneinto stations that offer the Visual Radio service(network service), you will see information related tothe radio programme on the display.The radio supports Radio Data System (RDS)functionality. Radio stations supporting RDS maydisplay information, such as the name of the station. Ifactivated in the settings, RDS also attempts to scan foran alternative frequency for the currently playingstation, if the reception is weak.
When you open the radio for the first time, a wizardhelps you to save local radio stations (network service).If you cannot access the Visual Radio service, theoperators and radio stations in your area may notsupport Visual Radio.For more information on the radio, see the extendeduser guide on the product support pages of the Nokiawebsite.
Listen to the radioThe FM radio depends on an antenna other than thewireless device antenna. A compatible headset orenhancement needs to be attached to the device forthe FM radio to function properly.Press , and select Music > Radio > Visual Radio.The quality of the radio broadcast depends on thecoverage of the radio station in that particular area.You can make a call or answer an incoming call whilelistening to the radio. The radio is muted when thereis an active call.To start a station search, select or .To change the frequency manually, select Options >Manual tuning.If you have saved radio stations in your device, to goto the next or previous saved station, select or .To adjust the volume, use the volume key.36
Mus
ic fo
lder
CyanCyan MagentaMagentaYellowYellow BlackBlackCyanCyan MagentaMagentaYellowYellow BlackBlack

Warning: Listen to music at a moderate level.Continuous exposure to high volume may damage yourhearing. Do not hold the device near your ear when theloudspeaker is in use, because the volume may beextremely loud.To listen to the radio using the loudspeaker, selectOptions > Activate loudspeaker.To view available stations based on location, selectOptions > Station directory (network service).To save the station to which you are currently tuned toyour station list, select Options > Save station.To open the list of your saved stations, selectOptions > Stations.To return to the standby mode while listening to theFM radio in the background, select Options > Play inbackground.
Nokia Internet RadioWith the Nokia Internet Radio application (networkservice), you can listen to available radio stations onthe internet. To listen to radio stations, you must havea WLAN or packet data access point defined in yourdevice. Listening to the stations may involve thetransmission of large amounts of data through yourservice provider's network. The recommendedconnection method is WLAN. Check with your serviceprovider for terms and data service fees before using
other connections. For example, a flat rate data plancan allow large data transfers for a set monthly fee.For more information on the internet radio settings,see the extended user guide on the product supportpages of the Nokia website.
Listen to internet radio stationsPress , and select Music > Radio > Internetradio.
Warning: Listen to music at a moderate level.Continuous exposure to high volume may damage yourhearing. Do not hold the device near your ear when theloudspeaker is in use, because the volume may beextremely loud.To listen to a radio station on the internet, do thefollowing:1. Select a station from your favourites or the station
directory, or search stations by their name from theNokia Internet Radio service.To add a station manually, select Options > Addstation manually. You can also browse for stationlinks with the Web application. Compatible links areautomatically opened in the Internet Radioapplication.
2. Select Listen.
37
Mus
ic fo
lder
CyanCyan MagentaMagentaYellowYellow BlackBlackCyanCyan MagentaMagentaYellowYellow BlackBlack
The Now playing view opens displayinginformation about the currently playing station andsong.
To stop the playback, press the scroll key; to resume,press the scroll key again.To adjust the volume, use the volume key.To view station information, select Options > Stationinformation (not available if you have saved thestation manually).If you are listening to a station saved in your favourites,scroll left or right to listen to the previous or next savedstation.
38
Mus
ic fo
lder
CyanCyan MagentaMagentaYellowYellow BlackBlackCyanCyan MagentaMagentaYellowYellow BlackBlack
CameraFor more information on the camera and camerasettings, see the extended user guide on the productsupport pages of the Nokia website.
About the cameraYour Nokia N79 has two cameras. The main, high-resolution camera, is on the back of the device. Thesecondary, lower resolution camera is on the front. Youcan use both cameras to capture images and recordvideos.Your device supports an image capture resolution of2592x1944 pixels. The image resolution in this guidemay appear different.The images and video clips are saved in Photos.See "Photos", p. 44. The produced images are in theJPEG format. Video clips are recorded in the MPEG-4 fileformat with the .mp4 file extension, or in the 3GPP fileformat with the .3gp file extension (sharing quality).To free memory for new images and video clips,transfer files to a compatible PC using a compatible USBdata cable, for example, and remove the files from yourdevice. The device informs you when the memory is
full. You can then free up memory in the currentstorage or change the memory in use.
Activate the cameraTo activate the main camera, open the lens cover. Toactivate the main camera when the lens cover isalready open and the camera is active in thebackground, press and hold the capture key.To close the main camera, close the lens cover.Keep a safe distance when using the flash. Do not usethe flash on people or animals at close range. Do notcover the flash while taking a picture.
Image captureStill image camera indicatorsThe still image camera viewfinder displays thefollowing:
39
Cam
era
CyanCyan MagentaMagentaYellowYellow BlackBlackCyanCyan MagentaMagentaYellowYellow BlackBlack
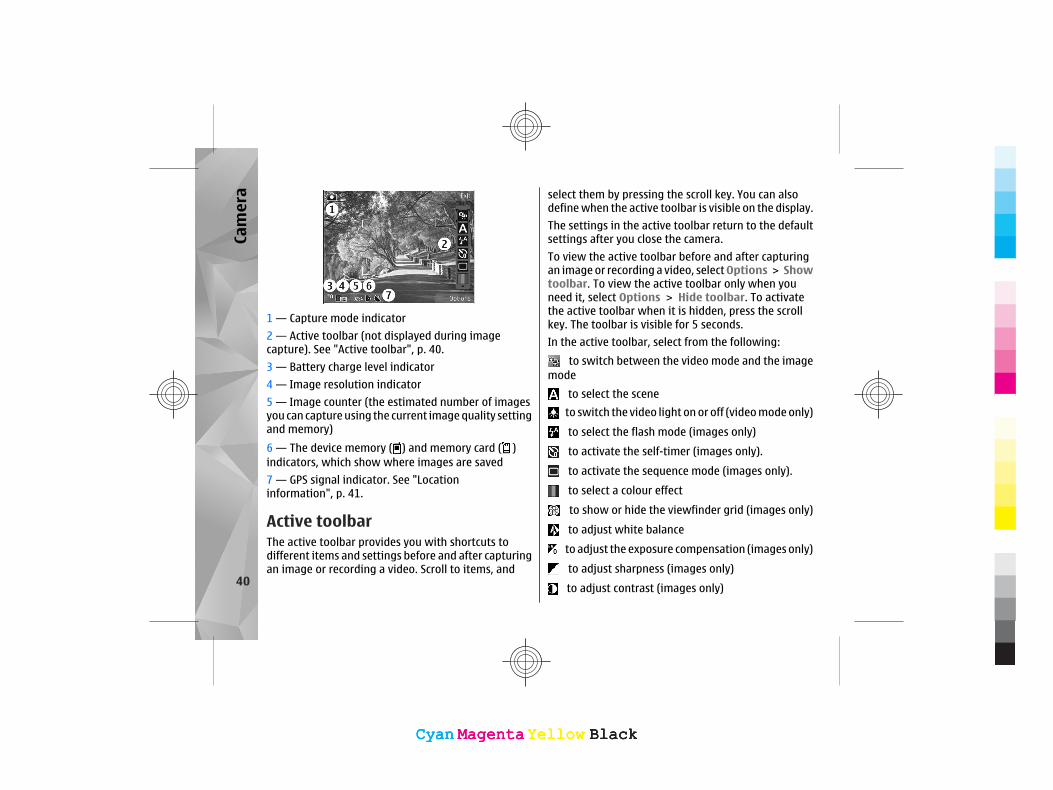
1 — Capture mode indicator2 — Active toolbar (not displayed during imagecapture). See "Active toolbar", p. 40.3 — Battery charge level indicator4 — Image resolution indicator5 — Image counter (the estimated number of imagesyou can capture using the current image quality settingand memory)6 — The device memory ( ) and memory card ( )indicators, which show where images are saved7 — GPS signal indicator. See "Locationinformation", p. 41.
Active toolbarThe active toolbar provides you with shortcuts todifferent items and settings before and after capturingan image or recording a video. Scroll to items, and
select them by pressing the scroll key. You can alsodefine when the active toolbar is visible on the display.The settings in the active toolbar return to the defaultsettings after you close the camera.To view the active toolbar before and after capturingan image or recording a video, select Options > Showtoolbar. To view the active toolbar only when youneed it, select Options > Hide toolbar. To activatethe active toolbar when it is hidden, press the scrollkey. The toolbar is visible for 5 seconds.In the active toolbar, select from the following:
to switch between the video mode and the imagemode
to select the scene to switch the video light on or off (video mode only) to select the flash mode (images only) to activate the self-timer (images only). to activate the sequence mode (images only). to select a colour effect to show or hide the viewfinder grid (images only) to adjust white balance to adjust the exposure compensation (images only) to adjust sharpness (images only) to adjust contrast (images only)40
Cam
era
CyanCyan MagentaMagentaYellowYellow BlackBlackCyanCyan MagentaMagentaYellowYellow BlackBlack
to adjust light sensitivity (images only)The icons change to reflect the current setting.Saving the captured image may take longer if youchange the zoom, lighting, or colour settings.The active toolbar in Photos has different options. See"Active toolbar", p. 45.
Capture imagesWhen capturing an image, note the following:● Use both hands to keep the camera still.● The quality of a digitally zoomed image is lower
than that of a nonzoomed image.● The camera goes into the battery saving mode if
there are no keypresses for a moment. To continuecapturing images, press the capture key.
To capture an image, do the following:1. If the camera is in the video mode, select the image
mode from the active toolbar.2. To lock the focus on an object, press the capture key
halfway down (main camera only, not available inlandscape or sport scene. See "Activetoolbar", p. 40.). A green locked focus indicatorappears on the display. If the focus was not locked,a red focus indicator appears. Release the capturekey, and press it halfway down again. You can alsocapture an image without locking the focus.
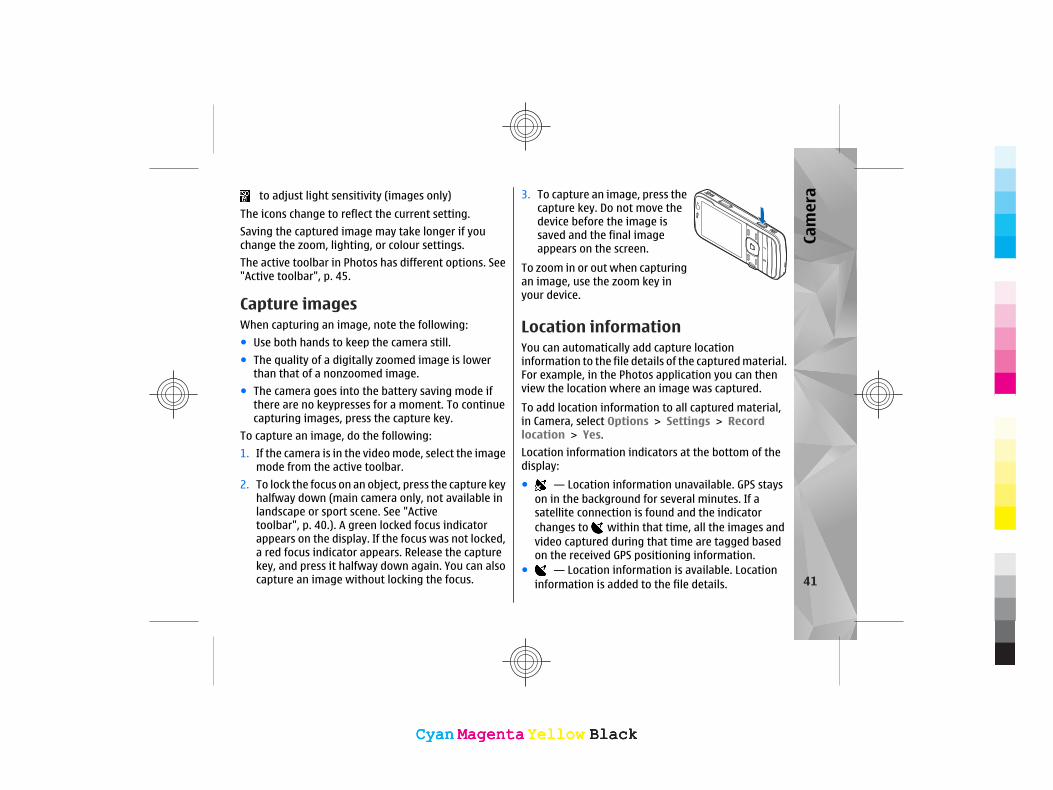
3. To capture an image, press thecapture key. Do not move thedevice before the image issaved and the final imageappears on the screen.
To zoom in or out when capturingan image, use the zoom key inyour device.
Location informationYou can automatically add capture locationinformation to the file details of the captured material.For example, in the Photos application you can thenview the location where an image was captured.To add location information to all captured material,in Camera, select Options > Settings > Recordlocation > Yes.Location information indicators at the bottom of thedisplay:● — Location information unavailable. GPS stays
on in the background for several minutes. If asatellite connection is found and the indicatorchanges to within that time, all the images andvideo captured during that time are tagged basedon the received GPS positioning information.
● — Location information is available. Locationinformation is added to the file details. 41
Cam
era
CyanCyan MagentaMagentaYellowYellow BlackBlackCyanCyan MagentaMagentaYellowYellow BlackBlack

Files with location information are indicated by inthe Photos application.
FlashThe flash is available only in the main camera.Keep a safe distance when using the flash. Do not usethe flash on people or animals at close range. Do notcover the flash while taking a picture.The camera of your device has a dual LED flash for lowlight conditions.Select the desired flash mode from the active toolbar:Automatic ( ), Red-eye ( ), On ( ), and Off ( ).
Video recordingVideo capture indicatorsThe video viewfinder displays the following:
1 — Capture mode indicator
2 — Video stabilisation on indicator3 — Audio mute on indicator4 — Active toolbar (not displayed during recording).See "Active toolbar", p. 40.5 — Battery charge level indicator6 — Video quality indicator. To change this setting,select Options > Settings > Video quality.7 — Video clip file type8 — Available recording time. When you are recording,the current video length indicator also shows theelapsed and remaining time.9 — The location to which the video clip is saved.10 — GPS signal indicator. See "Locationinformation", p. 41.
Record videos1. If the camera is in the image mode, select the video
mode from the active toolbar.2. To start recording, press the capture key. The red
record icon ( ) is displayed and a tone sounds.3. To pause recording at any time, press Pause. Select
Continue to resume. If you pause recording and donot press any key within one minute, the recordingstops.To zoom in or out of the subject, use the zoom keyin your device.42
Cam
era
CyanCyan MagentaMagentaYellowYellow BlackBlackCyanCyan MagentaMagentaYellowYellow BlackBlack

4. To stop recording, press the capture key. The videoclip is automatically saved in Photos. The maximumlength of a video clip is approximately 30 secondswith sharing quality and 90 minutes with otherquality settings.
To activate the front camera, select Options > Usesecondary camera. To start recording a video, pressthe scroll key. To zoom in or out, scroll up or down.
43
Cam
era
CyanCyan MagentaMagentaYellowYellow BlackBlackCyanCyan MagentaMagentaYellowYellow BlackBlack
PhotosFor information on file details, albums, tags, slideshow, image and video editing, printing, and sharingmedia files online, see the extended user guide on theproduct support pages of the Nokia website. See alsothe Gallery application in the extended user guide.
About PhotosPress , select Photos and from the following:● Captured — to show all the photos and videos you
have taken● Months — to show photos and videos categorised
by the month they where taken● Albums — to show the default albums and those
you have created● Tags — to show tags you have created for each item● Downloads — to show items and videos
downloaded from the web or received via MMS oremail
● All — to view all items● Share online — to post photos or videos to the webFiles stored on your compatible memory card (ifinserted) are indicated with .
To open a file, press the scroll key. Video clips open andplay in Video centre.To copy or move files to another memory location,select a file, Options > Move and copy, and from theavailable options.
View images and videosPress , select Photos and one of the following:● All — View all images and videos.● Captured — View images captured and video clips
recorded with the camera of your device.● Downloads — View downloaded video clips and
video clips saved in Video centre.Images and video clips can also be sent to you in amultimedia message, as an e-mail attachment, orthrough Bluetooth connectivity. To be able to view areceived image or video clip in Photos, you must firstsave it.
44
Phot
os
CyanCyan MagentaMagentaYellowYellow BlackBlackCyanCyan MagentaMagentaYellowYellow BlackBlack

The images and videoclip files are in a loopand ordered by dateand time. The numberof files is displayed. Tobrowse the files oneby one, scroll left orright. To browse filesin groups, scroll up ordown. Or, if the Naviwheel setting is activated, to browse the files, slideyour finger on the rim of the scroll key.To open a file, press the scroll key. When an imageopens, to zoom in the image, press the zoom key onthe side of your device. The zooming ratio is not storedpermanently.To edit a video clip or an image, select Options >Edit.To see where an image marked with was captured,select Options > Show on map.
Active toolbarThe active toolbar is available only when you haveselected an image or a video clip in a view.In the active toolbar, scroll up or down to differentitems, and select them by pressing the scroll key. Theavailable options vary depending on the view you are
in and whether you have selected an image or a videoclip.To hide the toolbar, select Options > Hide icons. Toactivate the active toolbar when it is hidden, press thescroll key.Select from the following:
to play the selected video clip to send the selected image or video clip to upload the selected image or video clip to a
compatible online album (only available if you have setup an account for a compatible online album).
to add the selected item to an album to manage tags and other properties of the selected
item to delete the selected image or video clip
45
Phot
os
CyanCyan MagentaMagentaYellowYellow BlackBlackCyanCyan MagentaMagentaYellowYellow BlackBlack
Home networkFor more information on the home network, see theextended user guide on the product support pages ofthe Nokia website.
About home networkYour device is compatible with Universal Plug and Play(UPnP) and certified by Digital Living Network Alliance(DLNA). You can use a wireless LAN (WLAN) access pointdevice or a WLAN router to create a home network.Then you can connect compatible UPnP devices thatsupport WLAN to the network. Compatible devices maybe your mobile device, a compatible PC, sound system,or television, or a compatible wireless multimediareceiver connected to a sound system or a television.You can share and synchronise media files in yourmobile device with other compatible UPnP and DLNAcertified devices using the home network. To enablethe home network functionality and manage thesettings, press , and select Tools > Connectivity >Home media. You can also use the Home mediaapplication to view and play media files from homenetwork devices on your device or on other compatibledevices such as a PC, sound system, or television.
To view your media files in another home networkdevice, in Photos, select a file, Options > Show viahome network, and the device.
Important securityinformationWhen you configure your WLAN home network, enablean encryption method on your access point device,then on the other devices you intend to connect to yourhome network. Refer to the documentation of thedevices. Keep any passcodes secret and in a safe placeseparate from the devices.You can view or change the settings of the WLANinternet access point in your device.If you use the ad hoc operating mode to create a homenetwork with a compatible device, enable one of theencryption methods in WLAN security mode whenyou configure the internet access point. This stepreduces the risk of an unwanted party joining the adhoc network.Your device notifies you if another device attempts toconnect to it and the home network. Do not acceptconnection requests from an unknown device.
46
Hom
e ne
twor
k
CyanCyan MagentaMagentaYellowYellow BlackBlackCyanCyan MagentaMagentaYellowYellow BlackBlack
If you use WLAN in a network that does not haveencryption, switch off sharing your files with otherdevices, or do not share any private media files.
47
Hom
e ne
twor
k
CyanCyan MagentaMagentaYellowYellow BlackBlackCyanCyan MagentaMagentaYellowYellow BlackBlack

Write and send messagesFor more information on messaging and messagingsettings, see the extended user guide on the productsupport pages of the Nokia website.Press , and select Messaging.
Important: Exercise caution when openingmessages. Messages may contain malicious softwareor otherwise be harmful to your device or PC.Before you can create a multimedia message or writean e-mail, you must have the correct connectionsettings in place.
The wireless network maylimit the size of MMSmessages. If the insertedpicture exceeds this limit thedevice may make it smaller sothat it can be sent by MMS.1. Select New message >
Message to send a text ormultimedia message(MMS), Audio message tosend a multimediamessage that includes onesound clip, or E-mail to send an e-mail message.
2. In the To field, press the scroll key to selectrecipients or groups from contacts, or enter therecipient’s phone number or e-mail address. To adda semicolon (;) that separates the recipients, press*.
3. In the Subject field, enter the subject of the e-mail.To change the fields that are visible, selectOptions > Message header fields.
4. In the message field, write the message.5. To add a media object to a multimedia message,
select Options > Insert content, the object typeor source, and the desired object. To insert abusiness card, slide, note, or some other file to themessage, select Options > Insert content >Insert other.
6. To capture an image or record a video clip or soundfor a multimedia message, select Options >Insert > Insert image > New, Insert videoclip > New, or Insert sound clip > New.
7. To add an attachment to an e-mail, select Optionsand the attachment type. E-mail attachments areindicated by .
8. To send the message, select Options > Send, orpress the call key.
48
Writ
e an
d se
nd m
essa
ges
CyanCyan MagentaMagentaYellowYellow BlackBlackCyanCyan MagentaMagentaYellowYellow BlackBlack
Note: The message sent icon or text on yourdevice screen does not indicate that the message isreceived at the intended destination.Your device supports text messages beyond the limitfor a single message. Longer messages are sent as twoor more messages. Your service provider may chargeaccordingly. Characters with accents or other marks,and characters from some language options, take upmore space, and limit the number of characters thatcan be sent in a single message.You may not be able to send video clips that are savedin the MP4 file format or that exceed the size limit ofthe wireless network in a multimedia message.
49
Writ
e an
d se
nd m
essa
ges
CyanCyan MagentaMagentaYellowYellow BlackBlackCyanCyan MagentaMagentaYellowYellow BlackBlack

Make callsFor more information on different call types, optionsduring calls, speed dialling, voice dialling, call waiting,video sharing,internet calls, and log, see the extendeduser guide on the product support pages of the Nokiawebsite.
Voice calls 1. In the standby mode, enter the phone number,
including the area code. To remove a number, pressC.For international calls, press * twice for the +character (which replaces the international accesscode), and enter the country code, area code (omitthe leading zero if necessary), and phone number.
2. To make the call, press the call key.3. To end the call (or to cancel the call attempt), press
the end key.Pressing the end key always ends a call, even ifanother application is active.
To make a call from Contacts, press , and selectContacts. Scroll to the desired name, or enter the firstletters of the name to the search field. To call thecontact, press the call key. If you have saved several
numbers for a contact, select the desired number fromthe list, and press the call key.
Make a video callWhen you make a video call (network service), you cansee a real-time, two-way video between you and therecipient of the call. The live video image, or videoimage captured by the camera in your device is shownto the video call recipient.To be able to make a video call, you must have a USIMcard and be in the coverage of a UMTS network. Foravailability of and subscription to video call services,contact your network service provider.A video call can only be made between two parties. Thevideo call can be made to a compatible mobile deviceor an ISDN client. Video calls cannot be made whileanother voice, video, or data call is active.1. To start a video call, enter the phone number in the
standby mode, or select Contacts and a contact.2. Select Options > Call > Video call.3. To end the video call, press the end key.
50
Mak
e ca
lls
CyanCyan MagentaMagentaYellowYellow BlackBlackCyanCyan MagentaMagentaYellowYellow BlackBlack

EnhancementsWarning: Use only batteries, chargers, and
enhancements approved by Nokia for use with thisparticular model. The use of any other types mayinvalidate any approval or warranty, and may bedangerous.For availability of approved enhancements, pleasecheck with your dealer. When you disconnect thepower cord of any enhancement, grasp and pull theplug, not the cord.
51
Enha
ncem
ents
CyanCyan MagentaMagentaYellowYellow BlackBlackCyanCyan MagentaMagentaYellowYellow BlackBlack
Battery and charger informationBattery and chargerinformationYour device is powered by a rechargeable battery. Thebattery intended for use with this device is BL-6F .Nokia may make additional battery models availablefor this device. This device is intended for use whensupplied with power from the following chargers: AC-5,AC-8, DC-1, DC-8, DC-9 . The exact charger modelnumber may vary depending on the type of plug. Theplug variant is identified by one of the following: E, EB,X, AR, U, A, C, or UB.The battery can be charged and discharged hundredsof times, but it will eventually wear out. When the talkand standby times are noticeably shorter than normal,replace the battery. Use only Nokia approved batteries,and recharge your battery only with Nokia approvedchargers designated for this device. Use of anunapproved battery or charger may present a risk offire, explosion, leakage, or other hazard.If a battery is being used for the first time or if thebattery has not been used for a prolonged period, itmay be necessary to connect the charger, thendisconnect and reconnect it to begin charging the
battery. If the battery is completely discharged, it maytake several minutes before the charging indicatorappears on the display or before any calls can be made.Always switch the device off and disconnect thecharger before removing the battery.Unplug the charger from the electrical plug and thedevice when not in use. Do not leave a fully chargedbattery connected to a charger, since overchargingmay shorten its lifetime. If left unused, a fully chargedbattery will lose its charge over time.Always try to keep the battery between 15°C and 25°C(59°F and 77°F). Extreme temperatures reduce thecapacity and lifetime of the battery. A device with a hotor cold battery may not work temporarily. Batteryperformance is particularly limited in temperatureswell below freezing.Do not short-circuit the battery. Accidental short-circuiting can occur when a metallic object such as acoin, clip, or pen causes direct connection of thepositive (+) and negative (-) terminals of the battery.(These look like metal strips on the battery.) This mighthappen, for example, when you carry a spare batteryin your pocket or purse. Short-circuiting the terminalsmay damage the battery or the connecting object.52
Batt
ery
and
char
ger i
nfor
mat
ion
CyanCyan MagentaMagentaYellowYellow BlackBlackCyanCyan MagentaMagentaYellowYellow BlackBlack

Do not dispose of batteries in a fire as they mayexplode. Batteries may also explode if damaged.Dispose of batteries according to local regulations.Please recycle when possible. Do not dispose ashousehold waste.Do not dismantle, cut, open, crush, bend, deform,puncture, or shred cells or batteries. In the event of abattery leak, do not allow the liquid to come in contactwith the skin or eyes. In the event of such a leak, flushyour skin or eyes immediately with water, or seekmedical help.Do not modify, remanufacture, attempt to insertforeign objects into the battery, or immerse or exposeit to water or other liquids.Improper battery use may result in a fire, explosion, orother hazard. If the device or battery is dropped,especially on a hard surface, and you believe thebattery has been damaged, take it to a service centrefor inspection before continuing to use it.Use the battery only for its intended purpose. Never useany charger or battery that is damaged. Keep yourbattery out of the reach of small children.
Nokia battery authenticationguidelinesAlways use original Nokia batteries for your safety. Tocheck that you are getting an original Nokia battery,
purchase it from an authorised Nokia dealer, andinspect the hologram label using the following steps:Successful completion of the steps is not a totalassurance of the authenticity of the battery. If you haveany reason to believe that your battery is not anauthentic, original Nokia battery, you should refrainfrom using it, and take it to the nearest authorisedNokia service point or dealer for assistance. Yourauthorised Nokia service point or dealer will inspectthe battery for authenticity. If authenticity cannot beverified, return the battery to the place of purchase.
Authenticate hologram1. When you look at the hologram
on the label, you should see theNokia connecting hands symbolfrom one angle and the NokiaOriginal Enhancements logowhen looking from anotherangle.
2. When you angle the hologramleft, right, down and up, youshould see 1, 2, 3 and 4 dots oneach side respectively.
53
Batt
ery
and
char
ger i
nfor
mat
ion
CyanCyan MagentaMagentaYellowYellow BlackBlackCyanCyan MagentaMagentaYellowYellow BlackBlack
What if your battery is notauthentic?If you cannot confirm that your Nokia battery with thehologram on the label is an authentic Nokia battery,please do not use the battery. Take it to the nearestauthorised Nokia service point or dealer for assistance.The use of a battery that is not approved by themanufacturer may be dangerous and may result inpoor performance and damage to your device and itsenhancements. It may also invalidate any approval orwarranty applying to the device.To find out more about original Nokia batteries, visitwww.nokia.com/battery.
54
Batt
ery
and
char
ger i
nfor
mat
ion
CyanCyan MagentaMagentaYellowYellow BlackBlackCyanCyan MagentaMagentaYellowYellow BlackBlack

Care and maintenanceYour device is a product of superior design andcraftsmanship and should be treated with care. Thefollowing suggestions will help you protect yourwarranty coverage.● Keep the device dry. Precipitation, humidity, and all
types of liquids or moisture can contain mineralsthat will corrode electronic circuits. If your devicedoes get wet, remove the battery, and allow thedevice to dry completely before replacing it.
● Do not use or store the device in dusty, dirty areas.Its moving parts and electronic components can bedamaged.
● Do not store the device in hot areas. Hightemperatures can shorten the life of electronicdevices, damage batteries, and warp or melt certainplastics.
● Do not store the device in cold areas. When thedevice returns to its normal temperature, moisturecan form inside the device and damage electroniccircuit boards.
● Do not attempt to open the device other than asinstructed in this guide.
● Do not drop, knock, or shake the device. Roughhandling can break internal circuit boards and finemechanics.
● Do not use harsh chemicals, cleaning solvents, orstrong detergents to clean the device.
● Do not paint the device. Paint can clog the movingparts and prevent proper operation.
● Use a soft, clean, dry cloth to clean any lenses, suchas camera, proximity sensor, and light sensor lenses.
● Use only the supplied or an approved replacementantenna. Unauthorised antennas, modifications, orattachments could damage the device and mayviolate regulations governing radio devices.
● Use chargers indoors.● Always create a backup of data you want to keep,
such as contacts and calendar notes.● To reset the device from time to time for optimum
performance, power off the device and remove thebattery.
These suggestions apply equally to your device,battery, charger, or any enhancement. If any device isnot working properly, take it to the nearest authorisedservice facility for service. 55
Care
and
mai
nten
ance
CyanCyan MagentaMagentaYellowYellow BlackBlackCyanCyan MagentaMagentaYellowYellow BlackBlack

DisposalThe crossed-out wheeled-bin symbol on yourproduct, literature, or packaging reminds youthat all electrical and electronic products,batteries, and accumulators must be taken to
separate collection at the end of their working life. Thisrequirement applies to the European Union and otherlocations where separate collection systems areavailable. Do not dispose of these products as unsortedmunicipal waste.By returning the products to collection you helpprevent uncontrolled waste disposal and promote thereuse of material resources. More detailed informationis available from the product retailer, local wasteauthorities, national producer responsibilityorganizations, or your local Nokia representative. Forthe product Eco-Declaration or instructions forreturning your obsolete product, go to country-specificinformation at www.nokia.com.
56
Care
and
mai
nten
ance
CyanCyan MagentaMagentaYellowYellow BlackBlackCyanCyan MagentaMagentaYellowYellow BlackBlack

Additional safety informationSmall childrenYour device and its enhancements may contain smallparts. Keep them out of the reach of small children.
Operating environmentThis device meets RF exposure guidelines when usedeither in the normal use position against the ear orwhen positioned at least 1.5 centimetres (5/8 inch)away from the body. When a carry case, belt clip, orholder is used for body-worn operation, it should notcontain metal and should position the device theabove-stated distance from your body.To transmit data files or messages, this device requiresa quality connection to the network. In some cases,transmission of data files or messages may be delayeduntil such a connection is available. Ensure the aboveseparation distance instructions are followed until thetransmission is completed.Parts of the device are magnetic. Metallic materialsmay be attracted to the device. Do not place creditcards or other magnetic storage media near the device,because information stored on them may be erased.
Medical devicesOperation of any radio transmitting equipment,including wireless phones, may interfere with thefunctionality of inadequately protected medicaldevices. Consult a physician or the manufacturer of themedical device to determine if they are adequatelyshielded from external RF energy or if you have anyquestions. Switch off your device in health carefacilities when any regulations posted in these areasinstruct you to do so. Hospitals or health care facilitiesmay be using equipment that could be sensitive toexternal RF energy.
Implanted medical devicesManufacturers of medical devices recommend that aminimum separation of 15.3 centimetres (6 inches)should be maintained between a wireless device andan implanted medical device, such as a pacemaker orimplanted cardioverter defibrillator, to avoid potentialinterference with the medical device. Persons whohave such devices should:● Always keep the wireless device more than 15.3
centimetres (6 inches) from the medical devicewhen the wireless device is turned on.
57
Addi
tiona
l saf
ety
info
rmat
ion
CyanCyan MagentaMagentaYellowYellow BlackBlackCyanCyan MagentaMagentaYellowYellow BlackBlack
● Not carry the wireless device in a breast pocket.● Hold the wireless device to the ear opposite the
medical device to minimise the potential forinterference.
● Turn the wireless device off immediately if there isany reason to suspect that interference is takingplace.
● Read and follow the directions from themanufacturer of their implanted medical device.
If you have any questions about using your wirelessdevice with an implanted medical device, consult yourhealth care provider.
Hearing aidsSome digital wireless devices may interfere with somehearing aids. If interference occurs, consult yourservice provider.
VehiclesRF signals may affect improperly installed orinadequately shielded electronic systems in motorvehicles such as electronic fuel injection systems,electronic antiskid (antilock) braking systems,electronic speed control systems, and air bag systems.For more information, check with the manufacturer, orits representative, of your vehicle or any equipmentthat has been added.
Only qualified personnel should service the device orinstall the device in a vehicle. Faulty installation orservice may be dangerous and may invalidate anywarranty that may apply to the device. Check regularlythat all wireless device equipment in your vehicle ismounted and operating properly. Do not store or carryflammable liquids, gases, or explosive materials in thesame compartment as the device, its parts, orenhancements. For vehicles equipped with an air bag,remember that air bags inflate with great force. Do notplace objects, including installed or portable wirelessequipment in the area over the air bag or in the air bagdeployment area. If in-vehicle wireless equipment isimproperly installed and the air bag inflates, seriousinjury could result.Using your device while flying in aircraft is prohibited.Switch off your device before boarding an aircraft. Theuse of wireless teledevices in an aircraft may bedangerous to the operation of the aircraft, disrupt thewireless telephone network, and may be illegal.
Potentially explosiveenvironmentsSwitch off your device when in any area with apotentially explosive atmosphere, and obey all signsand instructions. Potentially explosive atmospheresinclude areas where you would normally be advised toturn off your vehicle engine. Sparks in such areas could
58
Addi
tiona
l saf
ety
info
rmat
ion
CyanCyan MagentaMagentaYellowYellow BlackBlackCyanCyan MagentaMagentaYellowYellow BlackBlack

cause an explosion or fire resulting in bodily injury oreven death. Switch off the device at refuelling pointssuch as near gas pumps at service stations. Observerestrictions on the use of radio equipment in fueldepots, storage, and distribution areas; chemicalplants; or where blasting operations are in progress.Areas with a potentially explosive atmosphere areoften, but not always, clearly marked. They includebelow deck on boats, chemical transfer or storagefacilities and areas where the air contains chemicals orparticles such as grain, dust, or metal powders. Youshould check with the manufacturers of vehicles usingliquefied petroleum gas (such as propane or butane)to determine if this device can be safely used in theirvicinity.
Emergency callsImportant: This device operates using radio
signals, wireless networks, landline networks, anduser-programmed functions. If your device supportsvoice calls over the internet (internet calls), activateboth the internet calls and the cellular phone. Thedevice will attempt to make emergency calls over boththe cellular networks and through your internet callprovider if both are activated. Connections in allconditions cannot be guaranteed. You should neverrely solely on any wireless device for essentialcommunications like medical emergencies.
To make an emergency call:1. If the device is not on, switch it on. Check for
adequate signal strength. Depending on yourdevice, you may also need to complete thefollowing:● Insert a SIM card if your device uses one.● Remove certain call restrictions you have
activated in your device.● Change your profile from offline or flight profile
mode to an active profile.2. Press the end key as many times as needed to clear
the display and ready the device for calls.3. Enter the official emergency number for your
present location. Emergency numbers vary bylocation.
4. Press the call key.When making an emergency call, give all the necessaryinformation as accurately as possible. Your wirelessdevice may be the only means of communication at thescene of an accident. Do not end the call until givenpermission to do so.
Certification information (SAR)This mobile device meets guidelines for exposureto radio waves.
59
Addi
tiona
l saf
ety
info
rmat
ion
CyanCyan MagentaMagentaYellowYellow BlackBlackCyanCyan MagentaMagentaYellowYellow BlackBlack
Your mobile device is a radio transmitter and receiver.It is designed not to exceed the limits for exposure toradio waves recommended by internationalguidelines. These guidelines were developed by theindependent scientific organisation ICNIRP and includesafety margins designed to assure the protection of allpersons, regardless of age and health.The exposure guidelines for mobile devices employ aunit of measurement known as the Specific AbsorptionRate or SAR. The SAR limit stated in the ICNIRPguidelines is 2.0 watts/kilogram (W/kg) averaged over10 grams of tissue. Tests for SAR are conducted usingstandard operating positions with the devicetransmitting at its highest certified power level in alltested frequency bands. The actual SAR level of anoperating device can be below the maximum valuebecause the device is designed to use only the powerrequired to reach the network. That amount changesdepending on a number of factors such as how closeyou are to a network base station. The highest SARvalue under the ICNIRP guidelines for use of the deviceat the ear is 1.40 W/kg .Use of device accessories may result in different SARvalues. SAR values may vary depending on nationalreporting and testing requirements and the networkband. Additional SAR information may be providedunder product information at www.nokia.com.Your mobile device is also designed to meet therequirements for exposure to radio waves established
by the Federal Communications Commission (USA) andIndustry Canada. These requirements set a SAR limit of1.6 W/kg averaged over one gram of tissue. Thehighest SAR value reported under this standard duringproduct certification for use at the ear is 1.40 W/kg andwhen properly worn on the body is 1.15 W/kg .
60
Addi
tiona
l saf
ety
info
rmat
ion
CyanCyan MagentaMagentaYellowYellow BlackBlackCyanCyan MagentaMagentaYellowYellow BlackBlack

IndexAactive standby mode 22active toolbar
in camera 40in Photos 45
applicationsupdating 11
assisted GPS (A-GPS) 24audio messages 48
Bblogs 16Bluetooth connectivity
device visibility 20pairing devices 21security 20sending data 20settings 20switching on/off 20
browserbrowsing pages 15cache memory 17security 17widgets 16
Ccache memory 17calls 50camera
flash 42imaging mode 41indicators 39location information 41video mode 42
clock 23contact information 9customer service 9
DDLNA 46
Ffeeds, news 16FM radio 36FM transmitter 34
playing songs 35settings 36
Ggames 13general information 9
GPS (Global PositioningSystem) 24grid view of menus 23
Hhelp application 9home network 46
Iinternet connection 15
See also browserinternet radio
listening 37
Llist view of menus 23location information 24
Mmain menu 23Maps 27media
music player 32radio 36
memoryweb cache 17 61
Inde
x
CyanCyan MagentaMagentaYellowYellow BlackBlackCyanCyan MagentaMagentaYellowYellow BlackBlack
MMS (multimedia messageservice) 48multimedia messages 48music player 32
transferring music 34
NN-Gage 13Navi wheel 13navigation tools 24news feeds 16Nokia contact information 9
Ooffline mode 14
Pphotographs
See cameraphotos
viewing 44positioning information 24product support pages 9profiles
offline restrictions 14
Rradio 36RDS (Radio Data System) 36recording video clips 42
ringing tones 22
Sscroll key 13security
web browser 17settings
Bluetooth connectivity 20FM transmitter 36
SMS (short messageservice) 48software update 10songs 32standby mode 22support 9
Ttext messages
sending 48tones 22toolbar 40, 45transferring music 33
UUPnP (Universal Plug and Playarchitecture) 46useful information 9
Vvideo calls 50
Visual Radio 36voice calls
See calls
Wweb connection 15web logs 16widgets 16wireless LAN (WLAN) 18
Zzooming 41, 42
62
Inde
x
CyanCyan MagentaMagentaYellowYellow BlackBlackCyanCyan MagentaMagentaYellowYellow BlackBlack