user guide - neopost.ca · • an active neopost digital-postage-on-call-account (dpoc). all...
TRANSCRIPT
User Guide
Join us on
www.neopost.ca
2
Getting startedHardware and subscription requirements 4PC requirements - browsers 4
Activating the application 5
Weighing your itemsGet weight feature 10Manual weight entry 10Zeroing the weighing platform 11
Step 1: Define the packageChoose a package type and measure your item 12Defining a custom package 13
Step 2: Enter the addressSaving addresses 14Adding ship from addresses 15Managing your address books 15
Step 3: Select services and optionsConfirming the address 16Changing the delivery date 16Selecting services and adding options 17
Step 4: Print the shipping labelPrinting labels with postage 18
Managing your postage fundsAllocating funds for your letters and parcels 19Adding NeoFunds to your postage account 20Viewing your postage (DPOC) account activity 20
Cancel a shipment online 21-22
TABLE OF CONTENTS
Generating reportsShipment report 23Transaction report 24Activity report 24
Reset and help featuresReset 25Help 25Contact us 25
Configuring NeoShipUser account settings 26Preferences 26Printers 26Print label defaults 26Label formats 26Label charges 26
3
4
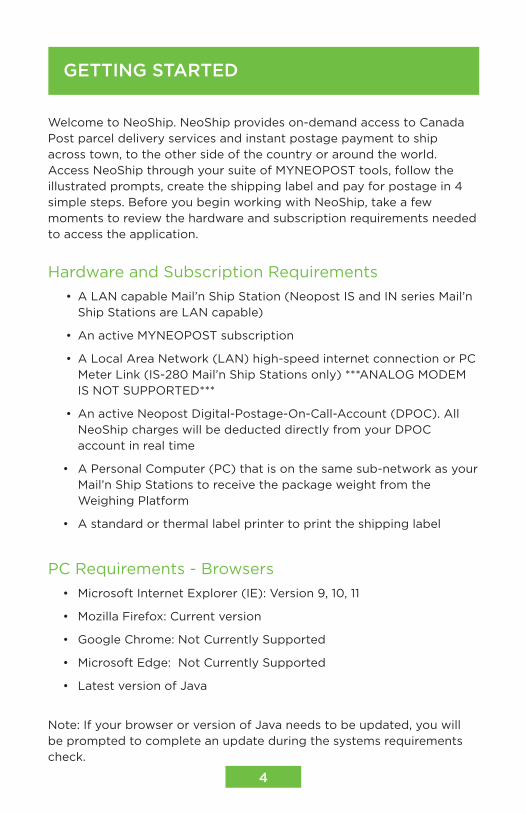
Welcome to NeoShip. NeoShip provides on-demand access to Canada Post parcel delivery services and instant postage payment to ship across town, to the other side of the country or around the world. Access NeoShip through your suite of MYNEOPOST tools, follow the illustrated prompts, create the shipping label and pay for postage in 4 simple steps. Before you begin working with NeoShip, take a few moments to review the hardware and subscription requirements needed to access the application.
Hardware and Subscription Requirements• A LAN capable Mail’n Ship Station (Neopost IS and IN series Mail’n
Ship Stations are LAN capable)
• An active MYNEOPOST subscription
• A Local Area Network (LAN) high-speed internet connection or PC Meter Link (IS-280 Mail’n Ship Stations only) ***ANALOG MODEM IS NOT SUPPORTED***
• An active Neopost Digital-Postage-On-Call-Account (DPOC). All NeoShip charges will be deducted directly from your DPOC account in real time
• A Personal Computer (PC) that is on the same sub-network as your Mail’n Ship Stations to receive the package weight from the Weighing Platform
• A standard or thermal label printer to print the shipping label
PC Requirements - Browsers • Microsoft Internet Explorer (IE): Version 9, 10, 11
• Mozilla Firefox: Current version
• Google Chrome: Not Currently Supported
• Microsoft Edge: Not Currently Supported
• Latest version of Java
Note: If your browser or version of Java needs to be updated, you will be prompted to complete an update during the systems requirements check.
GETTING STARTED

5
ACTIVATING THE APPLICATION
Step 1Complete the system requirement check and accept terms.
The “System Requirements Check” page displays the minimum requirements needed in order to use the NeoShip and: 1) sets the language. 2) set the unit of measurement. 3) verifies your PC operating system and web browser. 4) verifies Java is enabled. 5) searches for the weighing platform connected to your Mail’n Ship Station. If Java is not detected, you can install the latest version by clicking on the link provided. Once Java has been successfully installed, close the browser window. Open a new browser window and login back into your MYNEOPOST account.
To activate NeoShip, simply sign in to MYNEOPOST and click on the NeoShip icon. NeoShip will confirm if you have the correct Mail’n Ship Station and MailCare service plan to launch the application. Next, complete the steps below.
Step 2Ensure your Mail’n Ship weighing platform and a printer are connected, then select your printer. Verify your print settings by printing a test label.
6
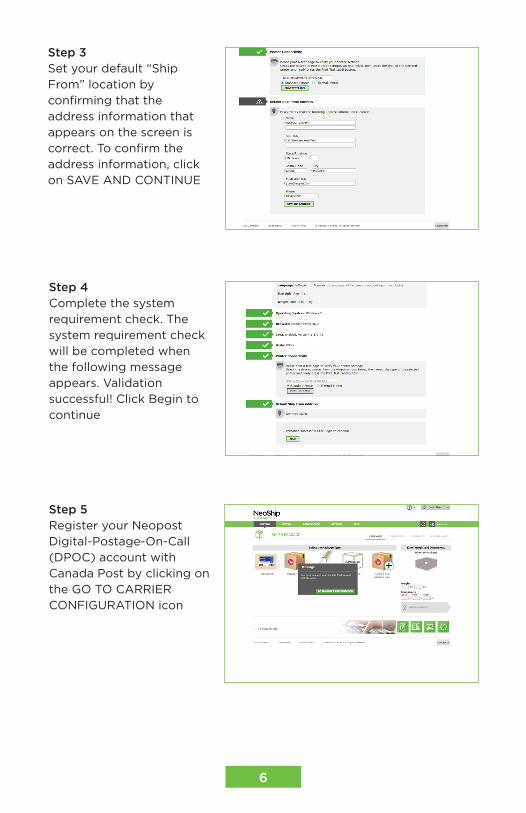
Step 3Set your default “Ship From” location by confirming that the address information that appears on the screen is correct. To confirm the address information, click on SAVE AND CONTINUE
Step 4Complete the system requirement check. The system requirement check will be completed when the following message appears. Validation successful! Click Begin to continue
Step 5Register your Neopost Digital-Postage-On-Call (DPOC) account with Canada Post by clicking on the GO TO CARRIER CONFIGURATION icon

Step 6Click the “Copy” button to paste later in Step 12.
Click Register to Canada Post to create your Canada Post customer profile. You will need your Solutions for Small Business membership number and your Canada Post Supplier number that appears to complete your profile. Note: Your Canada Post Supplier Account Number = your Neopost Postage (DPOC) Account Number.
7
Step 7If you are a new user to Canada Post, click on Sign Up
Step 8Fill in mandatory fields and click Create Profile
8
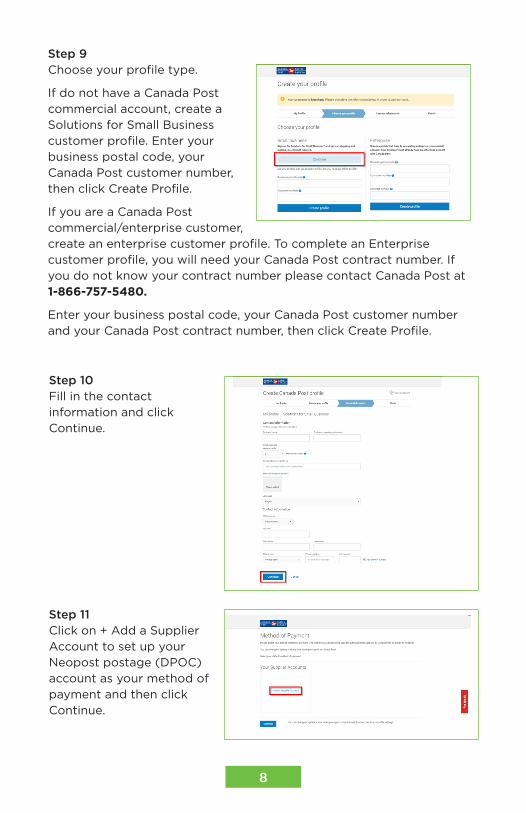
Step 9Choose your profile type.
If do not have a Canada Post commercial account, create a Solutions for Small Business customer profile. Enter your business postal code, your Canada Post customer number, then click Create Profile.
If you are a Canada Post commercial/enterprise customer, create an enterprise customer profile. To complete an Enterprise customer profile, you will need your Canada Post contract number. If you do not know your contract number please contact Canada Post at 1-866-757-5480.
Enter your business postal code, your Canada Post customer number and your Canada Post contract number, then click Create Profile.
Step 10Fill in the contact information and click Continue.
Step 11Click on + Add a Supplier Account to set up your Neopost postage (DPOC) account as your method of payment and then click Continue.
9
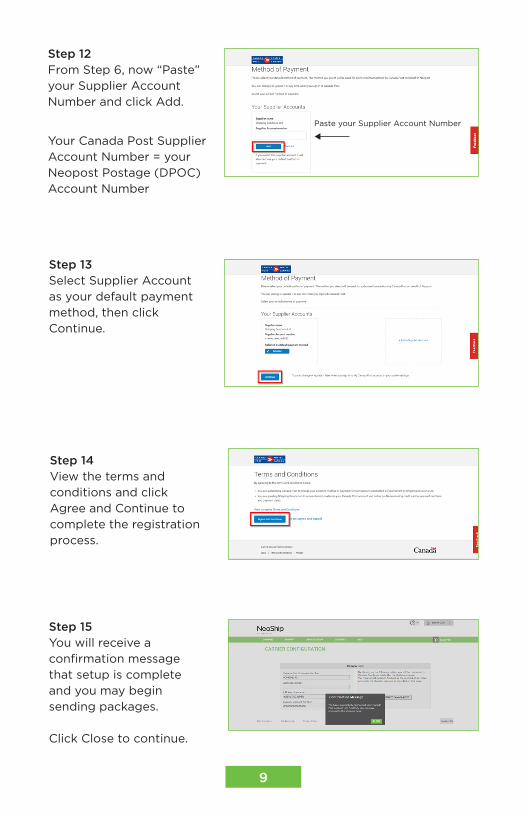
Step 12From Step 6, now “Paste” your Supplier Account Number and click Add.
Your Canada Post Supplier Account Number = your Neopost Postage (DPOC) Account Number
Step 14View the terms and conditions and click Agree and Continue to complete the registration process.
Step 13Select Supplier Account as your default payment method, then click Continue.
Step 15You will receive a confirmation message that setup is complete and you may begin sending packages. Click Close to continue.
t
Paste your Supplier Account Number
10
Get Weight FeatureNeoShip includes the GET WEIGHT feature to allow you to use your Mail’n Ship Station weighing platform to weigh your items. Turn on your Mail’n Ship Station and ensure the green light indicator is illuminated and go to the Home screen. Place an item on the weighing platform. Select the Package Type and then click the GET WEIGHT icon that appears on the NeoShip screen. When you select GET WEIGHT a pop-up message may be displayed alerting you about the weight. If the weight of your item exceeds the weighing capacity of your weighing platform or there is some other issue, simply enter the weight manually. Note: For the IS-350 or IN/360 customers: Please disable Smart Start in Supervisor mode. To disable the automatic motor start go to Default User Settings / System Settings / Smart Start / On-Off.
Manual Weight EntryIf your Mail’n Ship Station does not include the GET WEIGHT feature, or if the weight of your item exceeds the weighing capacity of your weighing platform, simply enter the weight manually.
Note: The weight and dimensions are required to complete a shipment.
WEIGHING YOUR ITEMS

1111
Zeroing the Weighing PlatformTo zero your weighing platform, first ensure there are no items on the Mail’n Ship Station weighing platform surface. Hold the “Scale” symbol button of the Mail’n Ship Station for two (2) seconds, then press the “OK” button. Please wait for the zeroing process to complete, and then press the “OK” button again.
Mail’n Ship Stations models with touch screens use the “C” clear button.
“Scale” button
“Clear” button
“OK” button

STEP 1: DEFINE THE PACKAGE
1212
From the NeoShip Application on your PC screen: Select a package type from the list displayed, or define a new package that best matches the item you are shipping.
Place the item on your Mail’n Ship Station’s weighing platform and, click GET WEIGHT or manually enter the weight into the weight field
If your Mail’n Ship Station includes the GET WEIGHT feature, place the item on the weighing platform, then click the GET WEIGHT icon. The weight field will automatically populate with the weight calculated by your Mail’n Ship Station.
If your item exceeds the weighing capacity of the platform, please refer to the Manual Weight Entry
Enter the dimensions of your package in the appropriate length, width and height fields. Entering dimensions will ensure that the price of your shipment is calculated accurately. Once all of the required fields have been populated, the large arrow button located in the bottom right side of the screen will turn green. You are now ready to enter your address. Click the ENTER ADDRESS button to proceed.

1313
Defining a custom package
The custom package feature is typically used when:
• The type of item that you are shipping is not displayed in the list of package options
• Creating a short-cut keys for commonly shipped packages. Creating a short cut allows you to save the characteristics of a particular item reducing the total number of shipment steps.
To define a custom package:
1. Select the Define a New Package Type icon
2. Complete the package description and enter the package dimensions
3. Add a Short description of the package. The description will be displayed under the image that you choose for the item. Notice on the right side of the screen, there is a preview button – as you create the description it will be displayed.
4. Assign the applicable price and extra services for the package. Before completing the custom package set up, decide whether you want to include this item in the public or private address book. Remember, if you make this item “public” all users that are registered to the Mail’n Ship Station and postage account will be able to access and view it.
If you decide to save your custom package in the private address book, you will be the only user that will be able to view it in the future.
The option of adding an image is the last step before completing the custom package.
To include an image:
Select “Import a package image” and follow the screen prompts.
As a last step, click “Create” to save.
Note: NeoShip allows up to five (5) public packages per customer for all users that belong to that particular location. Each user is allowed to save up to two (2) private packages.
14
STEP 2: ENTER THE ADDRESS
Saving addressesIf you decide to build and save an address book, you need to create an ID for each address. The ID field will be your way of identifying a specific address profile. For future shipments, once the ID is entered, the associated address profile will auto-populate. The ID field can accept up to ten (10) alphanumeric characters.
Once the ID has been created, complete the profile by entering information in the requested fields. Fields marked with a u are required.
u Attention
Company
u Street Address
Apt / Suite / Other
u Phone
Recipient email Address – this option is used if you want to notify the recipient by email that he/she will be receiving a package. Tracking information will also be provided in the notification email.
u Country
u City
u Province
Reference – this is an open field and is designed to be used as a way of identifying a specific shipment. A reference field can accept up to twenty (20) alpha-numeric characters. NeoShip allows you to add the up to five (5) references per shipment.
u Postal Code

15
Save Address To – If you want to create an address book or short-cut key, the address needs to be saved. First, select the Save Address To check box, then decide whether you want to save the address to a private or public address book. A public address book can be viewed by all users that are registered to a Mail’n Ship Station and funding account at a particular location. Each user is required to create a profile on MYNEOPOST. A private address book is linked to a specific user and his/her unique MYNEOPOST login credentials.
u Ship from – If you want to charge back the shipment to a specific department, simply pull down the department drop down box and select the appropriate department. If the department you are looking for is not listed, you can add a new department by selecting the SETTINGS tab, Ship From Addresses, and Add new.
Adding Ship From addresses
The Ship From addresses are a compilation of addresses that you can use as the location your packages are shipped from. If you have multiple Ship From addresses, you can set which address is chosen by default.
To add a new “Ship From” address, click the Add New icon and enter address information. This address will be available as an optional address. To save changes, click the Add icon at the bottom of the screen.
Managing your address books
To view and manage the contents within the public and private address books, select ADDRESS BOOK from the menu bar, followed by Manage My Contacts. You have the option of viewing each address book separately, together, or by using the pull down Address Book Type.
You can also create a custom view tailored to meet your specific needs. Simply select and enter the filter criteria in the three fields and then click on the Filter icon. To remove the filtering, simply click on the Reset Fields icon with the trash can symbol.
16
Confirming the address
When you move to Step 3 (SERVICES), you will be asked to validate the address previously entered in Step 2. If a corrected address appears, and it meets your needs, simply click on the Use Corrected Address icon to continue. Now that the address has been saved, the next time you want to use that Address Profile, all you need to do is enter the Address ID and the Address Profile will auto-populate.
Changing the delivery date
If you want to change the delivery date, simply select the shipping date calendar. You can move the delivery date forward - up to three (3) days from the date the item is prepared. If you change the shipping date, we recommended that you put the item into the mailstream on the new date, otherwise you run the risk that Canada Post may reject it.
STEP 3: SELECT SERVICES AND OPTIONS
17
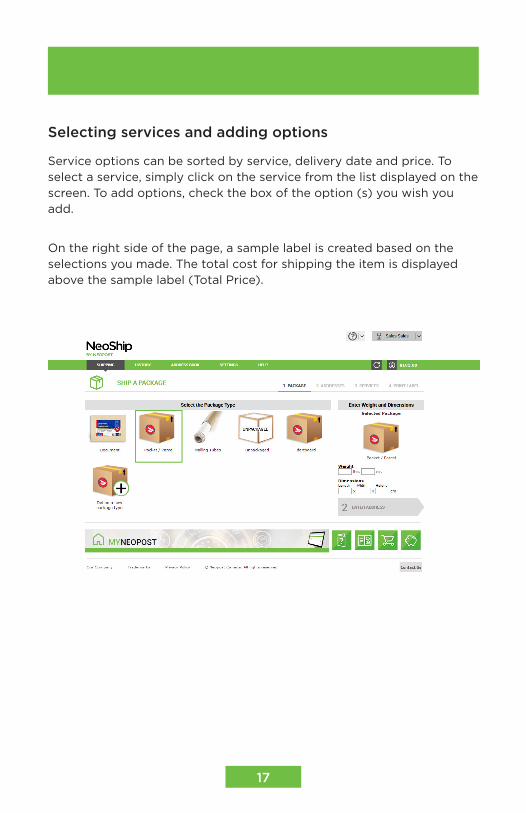
Selecting services and adding options
Service options can be sorted by service, delivery date and price. To select a service, simply click on the service from the list displayed on the screen. To add options, check the box of the option (s) you wish you add.
On the right side of the page, a sample label is created based on the selections you made. The total cost for shipping the item is displayed above the sample label (Total Price).

18
STEP 4: PRINT THE SHIPPING LABEL
Before printing a shipping label, you have the option to print a test label that will not deduct any funds from your postage account. Printing a test label validates your selection and that the printer is ready for printing.
To print a test label, select “Print Test Label”. A dialogue box will be displayed alerting you that the “Test Label printed successfully”.
To print a shipping label with postage, first select the check box acknowledging the funds will be deducted from your Postage (DPOC) Account or your NeoFunds® Account.
Next, select the check box that states you will use one of the available label formats and available printers.
NOTE: BOTH CHECK BOXES MUST BE SELECTED TO PROCEED.
Once you have made the necessary selections, the “PRINT LABEL” button will be available.
Print the label and affix it to your package!

19
MANAGING YOUR POSTAGE FUNDS
Important note: Funds downloaded to the Lettermail System cannot be transferred back into the Postage Account
Allocating funds for your letters and parcelsYour Digital-Postage-On-Call (DPOC) account allows you to access funds to pay postage for your letters and your parcels.
NeoShip is designed to deduct funds directly from your postage account to pay for postage for parcels. Only postage needed to pay for letters is downloaded to the meter embedded in your Mail’n Ship Station.
Postage - Parcels
Postage is deducted from DPOC when user prints the shipping label
NeoShip
Money for postage deposited into DPOC
Overdraft Protection
User transfers money to meter
Lettermail Station
Postage - Letters
Supplier Account/DPOC
20
Adding NeoFunds to your postage accountNeoFunds is a simple postage on demand service that allows you to access a line of credit to ensure you always have sufficient funds in your Postage Account. NeoFunds is designed to be a safety net that works just like the overdraft protection that a bank provides. It is an optional financial service that does not have a monthly subscription fee and you can close your NeoFunds account at any time.
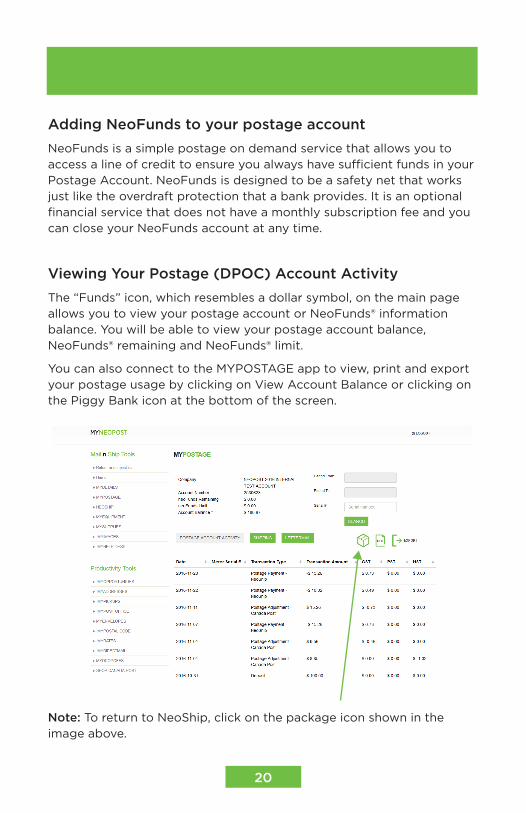
Viewing Your Postage (DPOC) Account ActivityThe “Funds” icon, which resembles a dollar symbol, on the main page allows you to view your postage account or NeoFunds® information balance. You will be able to view your postage account balance, NeoFunds® remaining and NeoFunds® limit.
You can also connect to the MYPOSTAGE app to view, print and export your postage usage by clicking on View Account Balance or clicking on the Piggy Bank icon at the bottom of the screen.
Postage - Letters
Note: To return to NeoShip, click on the package icon shown in the image above.
u
21
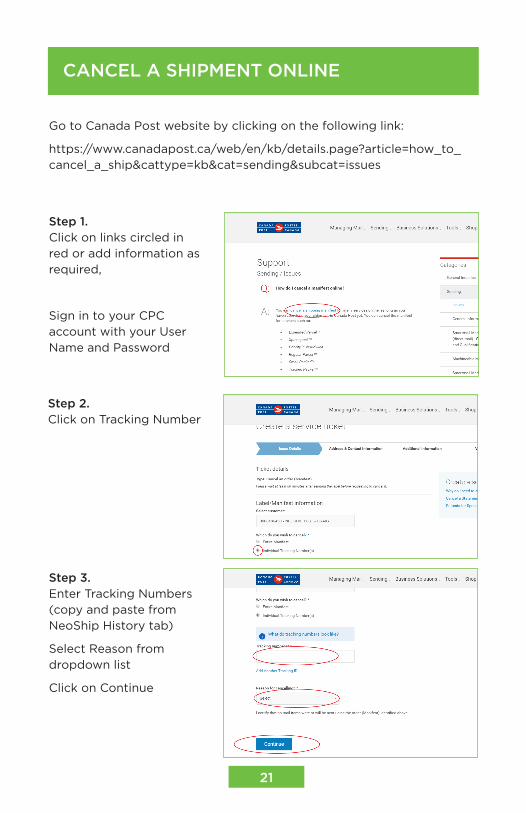
CANCEL A SHIPMENT ONLINE
Go to Canada Post website by clicking on the following link:
https://www.canadapost.ca/web/en/kb/details.page?article=how_to_cancel_a_ship&cattype=kb&cat=sending&subcat=issues
Step 1. Click on links circled in red or add information as required,
Sign in to your CPC account with your User Name and Password
Step 2. Click on Tracking Number
Step 3. Enter Tracking Numbers (copy and paste from NeoShip History tab)
Select Reason from dropdown list
Click on Continue
22
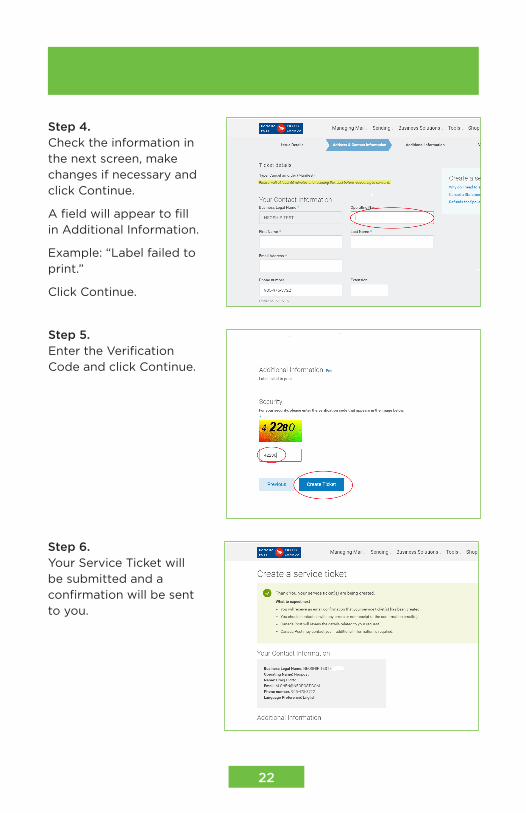
Step 4. Check the information in the next screen, make changes if necessary and click Continue.
A field will appear to fill in Additional Information.
Example: “Label failed to print.”
Click Continue.
Step 5. Enter the Verification Code and click Continue.
Step 6. Your Service Ticket will be submitted and a confirmation will be sent to you.
23
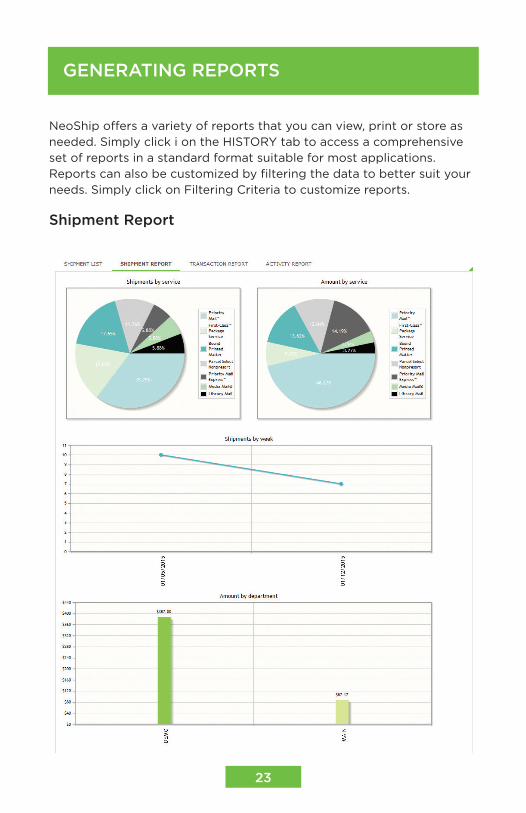
GENERATING REPORTS
NeoShip offers a variety of reports that you can view, print or store as needed. Simply click i on the HISTORY tab to access a comprehensive set of reports in a standard format suitable for most applications. Reports can also be customized by filtering the data to better suit your needs. Simply click on Filtering Criteria to customize reports.
Shipment Report

24
Transaction Report
Activity Report
GENERATING REPORTS

25
RESET AND HELP FEATURES
Contact UsThe “Contact Us” may be used to contact the system administrator by clicking on the “EMAIL US” button or you may call us at 1-800-661-0200 for Customer Care phone support.
ResetThe “Reset” icon, located in the upper right corner of the main page, allows you to clear all package label information and start over from the beginning.
Note: the reset button is only available for use prior to printing a label.
HelpThe question mark button depicts “Help”. It is located on the main page as well as on other screens within the application. When you click on the “?”, information relating to the screen will be displayed. Note: Help content is screen specific.
26
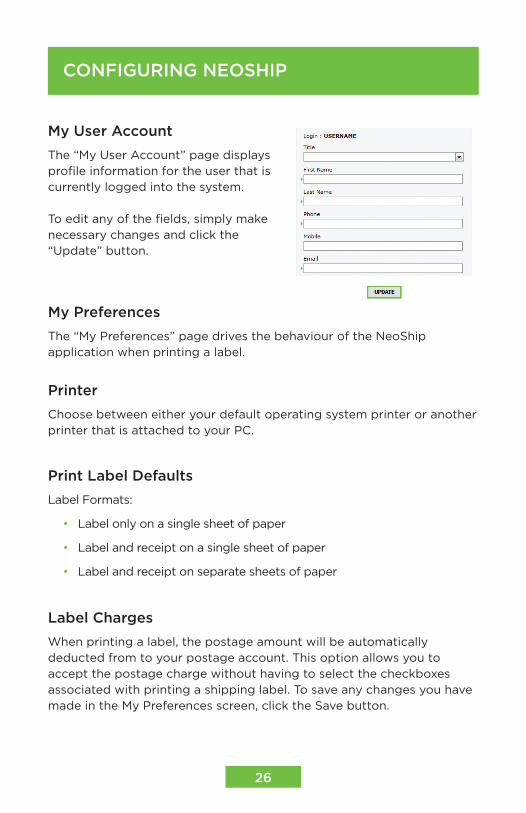
CONFIGURING NEOSHIP
My User AccountThe “My User Account” page displays profile information for the user that is currently logged into the system. To edit any of the fields, simply make necessary changes and click the “Update” button.
My PreferencesThe “My Preferences” page drives the behaviour of the NeoShip application when printing a label.
PrinterChoose between either your default operating system printer or another printer that is attached to your PC.
Print Label DefaultsLabel Formats:
• Label only on a single sheet of paper
• Label and receipt on a single sheet of paper
• Label and receipt on separate sheets of paper
Label ChargesWhen printing a label, the postage amount will be automatically deducted from to your postage account. This option allows you to accept the postage charge without having to select the checkboxes associated with printing a shipping label. To save any changes you have made in the My Preferences screen, click the Save button.
27
1.800.NEOPOST (636.7678)
©2016 Neopost Canada Ltd. All Rights Reserved. N210 06/16
Neopost® and the Neopost logo are registered trademarks of Neopost S.A. All other company and product names may be trademarks and are the property of their respective owners. All information in this document, including descriptions of features, functions, performance and specifications is subject to change without written notice at any time..
No part of this document may be reproduced or distributed in any form or by any means without the express permission of an authorized representative of Neopost Canada. This manual and all information contained therein are confidential and may only be disclosed as necessary to support customer use of the equipment.
Limitations of this Manual
The information presented herein is subject to change. Neopost Canada Ltd. assumes no liability whatsoever for any losses or damages resulting from use of this information.