university of nairobi department of electrical and ... · project report submitted in partial...
TRANSCRIPT

1
UNIVERSITY OF NAIROBI DEPARTMENT OF ELECTRICAL AND INFORMATION ENGINEERING
RASPBERRY PI BASED SECURITY SYSTEM
PRJ INDEX 156
BY:
SINGOEE SYLVESTRE SHESHAI
F17/1454/2011
SUPERVISOR: Mr. ONDENG’ OSCAR
EXAMINER: Dr. G.S.O ODHIAMBO
Project report submitted in partial fulfillment of the requirement for the award of
the degree of Bachelor of Science in Electrical and Electronic Engineering of the
University of Nairobi
Date of Submission: 17th
May, 2016.

i
1) I understand what plagiarism is and I am aware of the university policy in this regard.
2) I declare that this final year report is my original work and has not been submitted elsewhere
for examination, award of a degree or publication. Where other people’s work or my own work
has been used, this has properly been acknowledged and referenced in accordance with the
University of Nairobi’s requirements.
3) I have not sought or used the services of any professional agencies to produce this work.
4) I have not allowed, and shall not allow anyone to copy my work with the intention of passing
it off as his/her own work.
5) I understand that any false claim in respect of this work shall result in disciplinary action, in
accordance with University anti-plagiarism policy.
Signature: ………………………
Date: …………………………….
CERTIFICATION
This report has been submitted to the Department of Electrical and Information Engineering,
University of Nairobi with my approval as supervisor:
Sign…………..……………………………… Date……………………………………
Mr. Ondeng’ Oscar
DECLARATION OF ORIGINALITY
NAME OF STUDENT:
SINGOEE SYLVESTRE S.
REGISTRATION NUMBER: F17/1454/2011
COLLEGE: Architecture and Engineering
FACULTY/ SCHOOL/ INSTITUTE: Engineering
DEPARTMENT: Electrical and Information Engineering
COURSE NAME:
PROJECT TITLE :
Bachelor of Science in Electrical and
Electronic Engineering.
Raspberry Pi based Home Security System.

ii
DEDICATION
To you who always believed in me - Mum.

iii
ACKNOWLEDGEMENTS
I would like to thank God for guiding me throughout my academic journey and to acknowledge
my supervisor, Mr. Oscar Ondeng’, for his undying support, priceless motivation and guidance
throughout the project duration.
Moreover, I extend my sincere gratitude to all the lecturers and non-teaching staff of the
Department of Electrical and Information Engineering for their contribution towards the success
of this work.
The role my friends played during the entire period cannot also go unmentioned. Thank you all
for your moral support and encouragement. I am deeply honored and indebted to you all.
To my family (Dories, Magic, Mikwa and mum), I appreciate the support you have given me
throughout my academic journey. This quest has not been easy but you have always solemnly
stood by my side. I say thank you.

iv
ABSTRACT
As an essential constituent of many associations’ security and safety precedence, video
surveillance has established its importance and benefits numerous times by providing immediate
supervising of possessions, people, environment and property. This project deals with the design
approach of an Embedded Real-Time Surveillance System Based Raspberry Pi SBC for intruder
detection that reinforces surveillance technology to provide essential security to our life and
associated control and alert operations.
The proposed security solution hinges on our novel integration of cameras and motion detectors
into web application. Raspberry Pi operates and controls motion detectors and video cameras for
remote sensing and surveillance, streams live video and records it for future playback. This
research is focused on developing a surveillance system that detects strangers and to response
speedily by capturing and relaying images to owner based wireless module.
This Raspberry Pi based Smart Surveillance System presents the idea of monitoring a particular
place in a remote area. The proposed solution offers a cost effective ubiquitous surveillance
solution, efficient and easy to implement.
This project will also present the idea of motion detection and tracking using image processing.
This type of technology is of great importance when it comes to surveillance and security. Live
video streams will therefore be used to show how objects can be detected then tracked. The
detection and tracking process will be based on pixel threshold.
Keywords: Embedded System, Raspberry PI, Surveillance System, Motion Detection, tracking,
video processing

v
TABLE OF CONTENTS
DECLARATION OF ORIGINALITY….………………………………..………………...i
DEDICATION………………..…………………….………………….…………………..ii
ACKNOWLEDGEMENTS……….……….……………………………….……………..iii
ABSTRACT……………………………………………………………………………….iv
TABLE OF CONTENTS……………………………………………………….….………v
LIST OF FIGURES………………………………………………………………………viii
LIST OF TABLES…………………………………………………………………………ix
ABBREVIATIONS……………………….………………………………………………..x
CHAPTER ONE………………………………………………………………………...….1
1.1. General Background……………………………………………………………..…..1
1.2. Problem Statement …………………………………………………………………..2
1.3. Objectives…….…………………………………………………………………..….2
1.4 Scope of the Project…………..………………..……………………………………..2
1.5 Justification…………………………………………………………………………...3
CHAPTER TWO……………………………………………………………………………4
2.1 Related works on security systems…………………………………………………...4
2.2 Evolution of Security…………………………………………………………………5
2.3 Security Systems Definition………………………………………………………….6
2.4 Current Security Technologies………….…………………………………………….6
2.4.1 Arduino Based Home Security System…….………………………………….6
2.4.1.1 How it Works……..…………….…….……………………………..6
2.4.2 CCTV Surveillance System…………………………...………………………7
2.4.2.1 Operation of CCTV System………………………………...……….7
2.4.3 Remote Surveillance IP System……………………………………...………..7
2.4.4 Raspberry Pi Based Surveillance System…………………………...…………7
2.4.4.1 Why RPI Security System for Homes?...............................................8
2.5 Image Processing…………………………………………………………….…..9
2.5.1 Image Processing Techniques………………………………………….9

vi
2.5.1.1 Image Blurring…………………………………….………….9
2.5.1.2 Grayscalling……………………………………….………….9
2.5.1.3 Thresholding………………………………………………...10
2.5.2 Object Detection and Tracking………………………………………..11
2.5.3 Methods of Detection and Tracking…………………………………..12
2.5.3.1 Background Subtraction Method…………………………...12
2.5.3.2 Real time Background Subtraction and Shadow Technique..12
2.5.3.3 Template Matching………………………………………….12
2.5.3.4 Shape Based………………………………………………...12
2.5.3.5 Optical Flow Method…………………………………….....12
2.6 The Raspberry Pi……………………………………………………………..…13
2.6.1 The Raspberry Pi Models………………………………………….….13
2.6.2 Programming the Raspberry Pi……………...………………….…….15
2.6.3 Raspberry Pi Operating Systems…………...………………….……..15
2.6.4 The Pi Camera Module…………………..………………….……….15
2.7 Passive Infrared Sensor…………………………………………….…………..16
2.7.1 Principle of Operation of a PIR Sensor………………………………17
2.7.2 Reading the PIR Sensor………………………………………………17
2.7.3 Changing the Sensitivity of the PIR Sensor…………………………..18
2.7.3.1 Timeout Consideration………………………………….......18
2.7.4 Example Applications of the PIR Sensor……………………………..19
CHAPTER THREE ………………………………………… ………………….………...20
3.1 Resources………………………………………….………………….………….20
3.2 Design Hardware…………...…………………….………………….…………..20
3.2.1 Raspberry Pi Model B+……………….………………….……..……..20
3.2.1.1 Booting Up the RPI Model.…………………….…...……....20
3.2.1.2 Setting up internet connection on the RPI…….…….……….20

vii
3.2.1.3 Enabling the Pi Camera……………………………………….21
3.2.2 PIR Sensor Setup………………………………………………………..22
3.2.3 Automatic Light Simulation…………………………………….……….23
3.3 Hardware Architecture…………………………………………………….………23
3.4 Design Software…………………………………………………………….……..24
3.4.1 The Flowchart of the RPI Based Security System……………….……...24
3.4.1.1 System Initialization and Configuration……………….……...24
3.4.1.2 Generating and Sending E-mail…………………………..……25
3.4.1.3 Pseudocode………………………………………………..…...26
3.4.1.4 Developing the Full Code Listing………………………….….26
3.4.2 OpenCv - Python Video Processing………………………………….…26
3.4.2.1 Flowchart……………………………………………………...27
3.4.2.2 Pseudocode…………………………………………………....27
CHAPTER FOUR………………………………………………………………………….28
4.1 RESULTS………………………………………………………………………....28
4.1.1 Detection Using a PIR Sensor…………………………………………..29
4.1.2 Detection and Tracking Using Camera………………………………….29
4.1.2.1 Real Time Video Captions From Camera…………………….30
4.2 ANALYSIS OF THE RESULTS…………………………………………………32
4.3 CONCLUSION……..…………………………………………………………….33
4.4 RECOMMENDATIONS…………………………………………………………34
CHAPTER FIVE…………………………………………………………………………...35
5.1 REFERENCES……………...……………………………………………….…....35
5.2 APPENDICES…………………………………………………………………….37
5.2.1 Appendix (i)……………………………………………………………...36
5.2.2 Appendix (ii)……………………………………………………………..42
5.2.3 Appendix (iii)………………………………………………………….....44

viii
LIST OF FIGURES
Figure 1: Arduino based home security system block diagram[13] ............................................... 6
Figure 2: Raspberry Pi based Security System [19] ....................................................................... 8
Figure 3: Original and gray images [19] ....................................................................................... 10
Figure 4: Thresholding [19] .......................................................................................................... 10
Figure 5: Detecting moving object [23]. ...................................................................................... 10
Figure 6: Video analysis [24]. ....................................................................................................... 11
Figure 7: The Raspberry Pi [25]. .................................................................................................. 14
Figure 8: Pi Camera module[25]................................................................................................... 16
Figure 9: Operation of a PIR sensor[29]. ...................................................................................... 17
Figure 10: Controlling the PIR sensor from an Arduino Microcontroller [30]. ........................... 18
Figure 11: internet set up architecture .......................................................................................... 21
Figure 12: Raspberry Pi camera module ....................................................................................... 22
Figure 13: Hardware Architecture of the Security Systems Based on Raspberry Pi. ................... 23
Figure 14: Flowchart implementation of the security system ....................................................... 24
Figure 15: System Initialization and configuration ...................................................................... 25
Figure 16: Flowchart of motion detection and tracking algorithm ............................................... 27
Figure 17: Motion detection and tracking in real-time video stream. Result when the object in the
field of view of the camera was stationary. .................................................................................. 30
Figure 18: Result showing the tracking upon motion of an originally stationary object. ............. 31
Figure 19: Result for detection and tracking at a threshold level of 100 pixels. This was obtained
irrespective of motion of the object .............................................................................................. 32

ix
LIST OF TABLES
Table 1: Results for maximum sensitivity of the PIR sensor .................................................................... 28 Table 2: Results for medium sensitivity of the PIR sensor ........................................................................ 28 Table 3: Results for minimum sensitivity of the PIR sensor ..................................................................... 29 Table 4: Changing the threshold level of the camera ................................................................................ 29

x
ABBREVIATIONS
CCTV……………………..Closed Circuit Television
DVR………………………Digital Video Recorder
IP Camera…………………Internet Protocol Camera
VPN……………………….Virtual Private Network
LCD……………………….Liquid Crystal Display
SBC………………………..Single Board Computer
RPI…………………………Raspberry Pi
TCP/IP…………………….Transmission Control Protocol/Internet Protocol
GSM………………………Global System for Mobile Communication
PIR………………………..Passive Infrared Sensor
P2P………………………...Point to Point
VCR………………………Video Cassette Recorder
HDMI……………………..High Definition Multimedia Interface
GPIO………………………General Purpose Input/Output
DAC……………………….Digital to Analog Converter
SSH……………………….Secure Shell
SMTP……………………..Simple Mail Transfer Protocol
MIME…………………….Multipurpose Internet Mail Extension

11

1
CHAPTER ONE
1.1 General Background
The demands on video surveillance systems are rapidly increasing in the present day. One of the
first things people will want to know about their surveillance system is whether or not they have
the ability to connect to it over the internet for remote viewing. In the past, security systems had
to be monitored by a guard who was locked away in a room all day watching the monitors to
make sure that nothing would happen. The other option was to come back and review the footage
but damage could have happened. Therefore, researchers and scientists had to come up with
ways of overcoming that and thus improving security at large.
Commercial spaces, universities, hospitals, casinos and warehouses require video capturing
systems that have the ability to alert and record beside live video streaming of the intruder. The
advancements in video surveillance technology have made it possible to view your remote
security camera from any internet-enabled PC or smartphone from anywhere in the word. This
encompasses the use of CCTV (DVRs) systems and IP cameras. This technology is awesome but
its cost of implementation has proven to be an impediment especially for a small home
application.
Therefore, new innovative technology revolves around affordability of a product in terms of its
cost and ease of implementation. The Raspberry Pi crosses both criteria in that it is a cheap,
effective computer which can be interfaced with other modules to realize systems with immense
functionality. A lot can be done on it ranging from motor speed control, automatic lighting, VPN
server, security system etc. [1] [2]. The latter is of great interest in this project.
The Raspberry Pi microcomputer is capable of implementing a cost effective security system for
various applications. This new arising technology related to security provides a comfortable and
safe environment for small homes. The various objectives of the system are to detect an intruder,
take an image of the intruder and also convey an alert message to the facility owner. In doing so
it thus allows for remote monitoring of homes from anywhere in the world.
The system to be designed cannot wholly replace the role of CCTV and IP surveillance cameras
especially in large commercial set ups but will make it easy for low income home owners to
monitor their homes at a very affordable price. In addition to the fact that the Raspberry Pi board
is cheap, the camera to be used in this case is relatively cheap compared to the others. The whole
security system circuitry is simple and easy to implement.
Image processing is a term which indicates the processing on image or video frame which is
taken as an input and the result set of processing is may be a set of related parameters of an
image. The purpose of image processing is visualization which is to observe the objects that are
not visible. Analysis of human motion is one of the most recent and popular research topics in
digital image processing. In which the movement of human is the important part of human
detection and motion analysis, the aim is to detect the motions of human from the background
image in a video sequence. It also includes detection and tracking [2]. The process of object

2
tracking is segmenting a region of interest from a video frames and keeping track of its motion
and position.
1.2 Problem Statement
The need to develop a cost effective surveillance system through innovative technology
immensely influenced the development of this project. This project will design and implement a
security system based on Raspberry Pi microcomputer. The system should be able to detect
motion (intruder), activate a camera to take frames of video after motion is sensed and then send
an alert to the facility owner through electronic mail plus an image attachment.
The cost of installation of any security system depends on several factors. First, the type of
camera being used is of great consideration. A typical digital camera e.g. CCTV and IP camera
with an LCD costs about US $ 450 [25] (different brands can differ on prices) while the
Raspberry Pi SBC together with its camera module is estimated at US$ 80[25].
Another aspect of this project is to present an idea of monitoring and tracking of an intruder
through the use of a camera. Any object passing through the field of view of camera will be
detected then tracked in case the object attempts to move any body part.
1.3 Objectives
1.3.1 Overall Object
The main aim of this project is to design and develop a security system that includes features
such as motion detection, image processing and emailing or SMS to facility owner. The system
is to be based on Raspberry Pi SBC.
The specific objectives are:
To study and describe how the Raspberry Pi can be interfaced with a motion
detector and Pi camera.
To study how a Raspberry Pi can be programmed so as to be able to send an email
to a prescribed mailhub.
To develop and build a prototype of the surveillance system based on the
Raspberry Pi SBC.
To design and implement a motion detecting and tracking system for real time
video analysis.
1.4 Scope of the project
This project is focused on developing a surveillance system that detects motion and to respond
speedily by capturing an image and relaying it to an administrator device through the internet
platform. The system will require Raspberry Pi module, motion detection sensor, camera and

3
internet connection. It will come up with an implementation of a surveillance system which
presents the idea of monitoring a particular place in remote areas. The system can be monitored
by the user form anywhere in the world.
However, this project will not attempt to design the motion detection device, camera or the
Raspberry PI. It will therefore use these systems together with a suitable program script to
accomplish a real time surveillance system as desired.
1.5 Justification
The security system to be designed in this project can be used extensively to monitor facilities by
owners. The owner shall be able to monitor their property from wherever they are in the world. It
will not replace the use of CCTV and camera surveillance systems but reduce the cost of
implementation of a basic security system. This thus will enable small home owners to secure
their facility at a cheaper cost.

4
CHAPTER TWO
2.1 Related Works on security Systems
In the present day, researchers and developers have come up with a wide range of surveillance
systems that are used for remote monitoring, alerting as well as controlling tasks through
affordable and easy to implement hardware systems. Some have so far been realized while others
still remain a proposition.
An embedded home surveillance system which assesses the implementation of a cost effective
alerting system based on small motion detection was presented by Padmashree A. Shake and
Sumedha S. Borde. They worked on implementing cheap in price, low power consumption; well
utilize resources and efficient surveillance system using a set of various sensors. Their system
helps to monitor the household activities in real time from anywhere and based on
microcontroller which is considered nowadays as a limited resource and an open source solution
compared to SBC[3].
D. Jeevanand worked on designing of a networked video capture system using Raspberry Pi. The
proposed system works on capturing video and distributing with networked systems besides
alerting the administration person via SMS alarm as required by the client. Their system was
designed to work in a real-time situations and based on Raspberry Pi SBC. Contrasting to other
embedded systems their real-time application offers client video monitor with the help of alerting
module and SBC platform[4].
Sneha Singhd and his team described IP Camera Video Surveillance system using Raspberry Pi
technology. The Researchers aimed at developing a system which captures real time images and
displays them in the browser using TCP/IP. The algorithm for face detection is being
implemented on Raspberry Pi, which enables live video streaming along with detection of human
faces. The research did not include any of surveillance reactions[5].
Mahima F. Chauhan and Gharge Anuradha offered to design and develop a real time video
surveillance system based on embedded web server Raspberry PI B+ Board. Their system has
low cost, good openness and portability and is easy to maintain and upgrade. Thus this
application system provides better security solutions. This system can be used to effect security
in banking halls, industry, environment and in military arts[6].
Jadhav G. J evaluates in 2014 the use of various sensors, wireless module, microcontroller unit
and finger print module to formulate and implement a cost effective surveillance system. He and
his team adopted an ARM core as a basis processor of the system. PIR sensor is used to detect
motion in the vision area, while vibrating sensor is used to sense any vibration events such as
sound of breaking. The intruder detection technique is proposed by using the PIR sensor that
detect motion and trigger a system of alerting and sending short message service through GSM
module for a specified phone number. Their work can be featured by adopting numerous diverse
kinds of demanding database and thus it will be more secure and difficult to hack[7].

5
In 2014, Sanjana Prasad and his colleagues worked on developing a mobile smart surveillance
system based on SBC of Raspberry Pi and motion detector sensor PIR. Their development boosts
the practice of portable technology to offer vital safety to our daily life and home security and
even control uses. The objective of their research is to develop a mobile smart phone home
security system based on information capturing module combined with transmitting module
based on 3G technology fused with web applications. The SBC will control the PIR sensor
events and operates the video cameras for video streaming and recording tasks. Their system has
the capability to count number of objects in the scene[8].
Uday Kumar worked on implementation of a low cost wireless remote surveillance system using
Raspberry Pi. Conventional wireless CCTV cameras are widely used in surveillance systems at a
low cost. He and his team implemented a low cost and secure surveillance system using a camera
with Raspberry Pi and the images acquired have to be transferred to the drop box using a 3G
internet dongle. This was successfully implemented using Raspberry Pi and 3G dongle[9].
2.2 Evolution of Security
With the invention of electricity, the art of home protection was greatly improved. In 1853, the
first patent on electro-magnetic alarms meant that businesses and wealthy residents could secure
valuables. Magnetic contacts were installed on the windows and doors that, when tripped, would
send a signal through the electromagnetic wiring and sound an alarm. These groundbreaking
security systems were effective in deterring break-ins from occurring[10].
According to Cisco Expo, major strides have been made with regards to surveillance systems.
After the alarm system, analog video camera with Video Cassette Recorder evolved. It had poor
imaging and no remote access. To overcome the drawbacks of this system, digital video
recorders evolved. They gave good quality pictures and enable for transmission of video signals
through data networks and thus allowed for remote monitoring[11].
Network Video Recorder then emerged. They have the advantages of the DVRs but have other
merits over DVRs. They give more storage options and network connection. The most superior
version is the type that uses Cisco Video Surveillance Platform. They give secure remote access
and control from anywhere, fail-safe redundant storage, easy integration with other systems and
enterprise class storage and support[11].
2.3 Security System Definition
Security literally means a way or method by which something is secured through a system of
interworking components and devices. On the other hand, security systems are networks of
integrated electronic devices working together with a central control panel to protect against
burglars and other potential intruders[12]. Security systems work on the simple concept of
securing entry points into a home with sensors that communicate with a control panel or
command center installed in a convenient location. The sensors are typically placed in entrances
as well as easily accessible windows. A typical home security system has the following
components: A control panel, which is the primary controller of a security system, door and
window sensors, motion sensors, wired or wireless security cameras, high-decibel siren or alarm
and window stickers [11].

6
2.4 Current Security Technologies
2.4.1 Arduino Based Home Security System
This security system project deals with the design and development of a theft control system for
home, which is being used to prevent/control any theft attempt. The developed system makes use
of an embedded system comprising of an open hardware microcontroller(Arduino) and a modem
based on Global System for Mobile communication (GSM) technology[13].
The designed and developed system can be installed in the home. An interfacing intrusion-
detector unit is also connected to the microcontroller-based security system. The system thus
incorporates a passive infrared sensor (PIR) for motion detection. In case of an intrusion attempt,
a warning message is being transmitted by the system (as an sms) to the owner’s mobile phone,
or to any pre-configured mobile phone number for further processing.
Figure 1: Arduino based home security system block diagram[13]
The security system comprises of an Arduino Uno microcontroller, a standard SIM900A based
GSM/GPRS modem and PIR sensor. The whole system can be powered from any 12VDC/2A
power supply unit/battery.
2.4.1.1 How it works
Its working principle can be analyzed from the block diagram of fig 1.1. When input power is
applied to the system, the system goes into standby mode. However, when the terminals of
connector joining PIR with the Arduino microcontroller are short circuited, the preprogrammed
warning message is automatically transmitted to the concerned mobile number. This system
however does not transmit the image of the intruder. It only conveys a notification message.

7
2.4.2 Closed-circuit television (CCTV) Security System
Video surveillance is the use of video cameras to transmit a signal to a specific place, on a
limited set of monitors. It differs from broadcast television in that the signal is not openly
transmitted, though it may employ point to point (P2P), point to multipoint, or mesh wireless
links.[14] In the U.S. the first commercial closed-circuit television system became available in
1949, called Vericon[15].
2.4.2.1 Operation of a CCTV Security System
The simplest system is a camera connected directly to a monitor by a coaxial cable with the
power for the camera being provided from the monitor[16]. The outdoor or indoor camera take
several images per second and thus cannot be differentiated by human eye. The images are then
transferred via a coaxial cable or optic fibre to a computer placed in a secure location. This
computers are monitored by security personnel and responds to any improper behaviors’[17].
These systems have been incorporated with alarm systems so as to send out an alert in case of a
security bridge.
Two types of CCTV storage exist; VCR and DVR. The DVR system is more superior as it can
be able to transmit digitized video signals over the data networks and thus can allow for remote
control and monitoring of the system.
2.4.3 Remote Surveillance IP System
IP surveillance is a digitized and networked version of closed-circuit television (CCTV). In an IP
surveillance system, an IP camera records video footage and the resulting content is distributed
over an IP (Internet protocol) network[18]. Adding networking capability to digital CCTV
provides additional benefits, including:
Improved ability for remote viewing and control. Anyone on the network can potentially
see video from any camera connected to the network.
IP storage makes it possible to store data in any geographic location.
Greater ease of distribution. An image of a crime suspect, for example, can be
immediately distributed to officials.
The ability to connect to email and other communications systems so that alerts can be
sent automatically.
2.4.4 Raspberry Pi Based Surveillance System
A raspberry pi can be used to implement a security system with motion detection, image
processing and alert mechanism. The alert ought to contain a time lapse photo or video and
transmitted over the internet. This thus will enable the users to monitor the homes from
anywhere in the world.

8
Figure 2: Raspberry Pi based Security System [19]
As shown in the figure above, the whole architecture of the system is composed of five modules
namely:
Raspberry Pi SBC model
Pi camera/USB Camera
PIR sensor
WiFi Dongle
Monitor/laptop
The role of each module shall be discussed in detail later in this chapter.
2.4.4.1 Why Raspberry Pi based Security Systems for Homes?
Several criteria have been used to select a security system required to safeguard a facility. The
chief among all these has been the cost of implementation of such a system. The Raspberry Pi is
also a very versatile device whose functionality is not limited. It can be extended from being
merely a security device to temperature control device, automatic lighting and proxy server. The
following reasons explain the need to have your home security system based on Raspberry Pi:
An IP Camera system has the ability to distribute alarm messages over the internet as
well as the Raspberry Pi based security system. However, the cost of an IP Camera
makes it not easily affordable to small home owners.(insert cost plus citation) Thus they
can be deployed in large industrial set ups, defence forces, police departments etc.
Arduino microcontroller based security system can be relatively cheaper to implement as
compared to Raspberry Pi based system but its memory capacity renders it more
ineffective especially when trying to interface with other modules e.g. camera, monitors,
motion sensors, mouse and keyboard. Raspberry Pi has an extendable SD card storage
and can be expanded to suit the needs of an individual. Moreover, Arduino

9
microcontroller requires a GSM modem to enable it transfer information through the
internet. The Raspberry Pi has a port to connect it to the internet.
A CCTV surveillance system is expensive to purchase and install compared to the system
in question. It requires a DVR system to connect it to the data networks through TNP/IP.
A DVR on its own is very expensive. Hence such a system may not be afforded by low
income home owners.
2.5 Image Processing
Image Processing is a technique to enhance raw images received from cameras/sensors placed on
satellites, space probes and aircrafts or pictures taken in normal day-to-day life for various
applications[20]. Most importantly, this technology is used in surveillance.
There are two methods available in Image Processing:
2.5.1 Image Processing Techniques
2.5.1.1 Image Blurring
Gaussian blur (also known as Gaussian smoothing) is the result of blurring an image by a
Gaussian Function. It is a widely used to reduce noise and detail[20]. The visual effect of this
blurring technique is a smooth blur resembling that of viewing the image through a translucent
screen, distinctly different from the bokeh effect produced by an out-of-focus lens or the shadow
of an object under usual illumination[19]. Gaussian smoothing is also used as a pre-processing
stage in computer vision algorithms in order to enhance image structures at different scales[21].
The equation of a Gaussian function in one dimension is:
…………………………………………………………. (1)
2.5.1.2 Grayscalling
Grayscale is a range of shades of gray without apparent color[22]. The darkest possible shade is
black, which is the total absence of transmitted or reflected light. The lightest possible shade is
white, the total transmission or reflection of light at all visible wavelengths [22]. Intermediate
shades of gray are represented by equal brightness levels of the three primary colors (red, green
and blue) for transmitted light, or equal amounts of the three primary pigments (cyan, magenta
and yellow) for reflected light[23].
In the case of transmitted light (for example, the image on a computer display), the brightness
levels of the red (R), green (G) and blue (B) components are each represented as a number from
decimal 0 to 255, or binary 00000000 to 11111111. For every pixel in a red-green-blue ( RGB)
grayscale image, R = G = B. The lightness of the gray is directly proportional to the number
representing the brightness levels of the primary colors. Black is represented by R = G = B = 0 or
R = G = B = 00000000, and white is represented by R = G = B = 255 or R = G = B = 11111111.
Because there are 8 bits in the binary representation of the gray level, this imaging method is
called 8-bit grayscale[20].

10
Figure 3: Original and gray images [19]
2.5.1.3 Thresholding
Figure 4: Thresholding [19]
Thresholding is a process of converting a grayscale input image to a bi-level image by using an
optimal threshold[22]. The purpose of thresholding is to extract those pixels from some image
which represent an object (either text or other line image data such as graphs, maps). Though the
information is binary the pixels represent a range of intensities. Thus the objective of
binarization is to mark pixels that belong to true foreground regions with a single intensity and
background regions with different intensities.
2.5.2 Object Detection and Tracking
Figure 5: Detecting moving object [23].

11
The above can be achieved through the implementation of the algorithm below:
Figure 6: Video analysis [24].
2.5.3 Methods of Detection and Tracking
2.5.3.1 Background Subtraction Method
A very widely used method which is simple to implement by just subtracting the current frame
from previous frame and obtaining threshold value of difference between given pixel value and
obtained pixel value [24]. If threshold value is greater than the given the pixel it is considered as
foreground. This method is not as appropriate as it is highly inaccurate and gives false rate
detection.

12
2.5.3.2 Real Time Background Subtraction and Shadow
Detection Technique Theory
It describes two type of distortion namely brightness distortion and chromaticity distortion based
on RGB values of pixels in given image. This method is accurate up to some extends as it also
detect the shadow part of object [23].
2.5.3.3 Template Matching
Template Matching is probably the best method for some specific environment. It's the most
accurate although sometimes there is lack of originality in object detected. Object can be
detected for one specific video using a template cropped from the video. However, there is no
guaranteed accuracy because all that is known is the best match for each frame; no scanning is
done on the percentage template matches the frame. It only works if the object is always in the
video, otherwise it will create a false detection [23].
2.5.3.4 Shape Based
Shape based method is used to detect objects in real-world images. The shape features are more
striking as compared to local features like SIFT because most object categories are better
described by their shape then texture, such as cows, horses and cups and also for wiry objects
like bikes, chair or ladders, local features contain large amount of background noise. Thus shape
features are often used as a replacement to local features [23].
2.5.3.5 Optical Flow Method
Sequences of ordered images allow the estimation of motion as either instantaneous image
velocities or discrete image displacements. The optical flow methods try to calculate the motion
between two image frames which are taken at times t and at every voxel position. These
methods are called differential since they are based on local Taylor series approximations of the
image signal; that is, they use partial derivatives with respect to the spatial and temporal
coordinates [23].
For a 2D+t dimensional case (3D or n-D cases are similar) a voxel at location (𝑥, 𝑦, 𝑡) with
intensity 𝐼(𝑥, 𝑦, 𝑡) will have moved by , and between the two image frames, and the following brightness constancy constraint can be given[23]:
…………………………………… (2)
From these equations it follows that [23]:
………………………………………………… (3)

13
or
……………………………………………… (4)
This results in
…………………………………………………….. (5)
Thus:
…………………………………………………………….. (6)
or
………………………………………………………………… (6)
2.6 The Raspberry Pi
The Raspberry Pi is a Linux based microcomputer based on ARM architecture[24]. It was built
mainly to aid in developing open source game. The device is estimated to cost about $35 [30]
depending on the model.
2.6.1 The Raspberry Pi Models
This part describes the models of Raspberry Pi available. This report will not attempt to provide
full specifications but an overview in order to help in making a decision as to which device it is
required to accomplish the objectives in question. Currently, five Raspberry Pi models do exist.
They are: Model B+, Model A+, Model B, Model A and the Compute Module (currently only
available as part of the Compute Module development kit ). All these models use the same SoC
(System on Chip - combined CPU & GPU), the BCM2835, but other hardware features
differ[25].

14
Figure 7: The Raspberry Pi [25].
a) Model B+/B
First release was made in July 2014. This Model is an upgrade of the Model B. It has the
following characteristics: 4 USB ports, 40 pins on the GPIO header , Improved power circuitry
which allows higher powered USB devices to be attached and now hot-plugged. The full size
composite video connector of Model B has been removed and the functionality moved to the
3.5mm audio/video jack and the full size SD card slot of Model B has also been replaced with a
much more robust microSD slot[25]. The following details some of the improvements over the
Model B:
Current monitors on the USB ports mean the B+ now supports hot-plugging
Current limiter on the 5V for HDMI means HDMI cable-powered VGA converters work
in all cases.
14 more GPIO pins
EEPROM readout support for the new HAT expansion boards
Higher drive capacity for analog audio out, from a separate regulator, which means a
better audio DAC quality
No more back powering problems, due to the USB current limiters which also inhibit
back flow, together with the "ideal power diode"
Composite output moved to 3.5mm jack

15
Connectors now moved to two sides of the board rather than the four of the original
device
Ethernet LEDs moved to the Ethernet connector
4 squarely-positioned mounting holes for more rigid attachment to cases.
b) Model A/A+
This is the basic device, with a single USB port and 256MB of SDRAM. Onboard ports include:
Full size SD card, HDMI output port, Composite video output, One USB port, 26 pin expansion
header exposing GPIO, 3.5mm audio jack, Camera interface port (CSI-2), LCD display interface
port (DSI) and One microUSB power connector for powering the device[25].
2.6.2 Programming the Raspberry Pi
To enable communication with the outside world, the Raspberry Pi has to be programmed with a
suitable programming language. These languages include Java, FOTRAN, Pascal, Python, C,
C++ etc.[26]. Each language has its own syntax and semantics. RPI can be programmed using
any of these languages but for purposes of this project, Python will be of great importance to
study. It is provided by default through and thus optimum operation of the Pi can be achieved.
2.6.3 Raspberry Pi Operating Systems
An operating system makes Raspberry Pi run. Since Raspberry Pi is a credit sized computer that
is based on Linux, optimum performance of RPI can be achieved if it is therefore operated in this
environment. Raspbian provides more than a pure OS: it comes with over 35,000 packages, pre-
compiled software bundled in a nice format for easy installation on RPI[25]. Important to note is
that the Raspberry Pi does not operate in a Windows environment. To get access to Pi from
windows we require Putty Software. Putty is an SSH and TelNet client.
2.6.4 The Pi Camera Module
The Camera Board on the Raspberry Pi is a small printed circuit board with a camera on it.
The PCB is connected to a ribbon cable which connects to the Pi itself on its own port. The
ribbon can be extendable. The camera on the board is very small (5MP camera)[25]. As for now
it is the only Camera made specifically for the Pi therefore these specifications cannot be
updated. Since it uses 250mA, externally powering the Pi should be sufficient enough for the
camera[27].Specific configuration settings are required to initialize the camera plus a Python
script to enable it take pictures.

16
Figure 8: Pi Camera module[25].
2.7 Passive Infrared Sensor
2.7.1 Principle of operation of a PIR Sensor
An individual PIR sensor detects changes in the amount of infrared radiation impinging upon it,
which varies depending on the temperature and surface characteristics of the objects in front of
the sensor [28]. When an object, such as a human, passes in front of the background, such as a
wall, the temperature at that point in the sensor's field of view will rise from room temperature to
body temperature, and then back again[28].
The sensor converts the resulting change in the incoming infrared radiation into a change in the
output voltage, and this triggers the detection. Objects of similar temperature but different
surface characteristics may also have a different infrared emission pattern, and thus moving them
with respect to the background may trigger the detector as well[28].

17
Figure 9: Operation of a PIR sensor[29].
2.7.2 Reading PIR Sensors
Connecting PIR sensors to a microcontroller is really simple. The PIR acts as a digital output so
all you need to do is listen for the pin to flip high (detected) or low (not detected). It is likely that
you'll want retriggering, so be sure to put the jumper in the H position! [30] Power the PIR with
5V and connect ground to ground. Then connect the output to a digital pin i.e. the GPIO pin of
the RPI device. A C/Python code can then be used to read a channel from the PIR sensor[29].

18
Figure 10: Controlling the PIR sensor from an Arduino Microcontroller [30].
2.7.3 Changing the sensitivity of the PIR sensor
There are two 'timeouts' associated with the PIR sensor[31]:
The “Tx” timeout: how long the LED is lit after it detects movement - this is easy to
adjust on Adafruit PIR's because there's a potentiometer.
The “Ti” timeout which is how long the LED is guaranteed to be off when there is no
movement. This one is not easily changed but if you're handy with a soldering iron it is
within reason.
2.7.3.1 “Tx” timeout consideration
On Adafruit PIR sensors, there's a little trim potentiometer labeled TIME. This is a 1 MΩ
adjustable resistor which is added to a 10K series resistor[30]. And C6 is 0.01uF so;
Tx = 24576 x (10K + R_time) x 0.01u ……………………………………………………….. (7)
If the R_time potentiometer is turned all the way down counter-clockwise (to 0 ohms) then[30];
Tx = 24576 x (10K) x 0.01uF = 2.5 second…………..……………………………………….. (8)
If the R_time potentiometer is turned all the way up clockwise to 1 MΩ then[30];
Tx = 24576 x (1010K) x 0.01uF = 250 seconds ……………………………………………... (9)

19
2.7.4 Example Applications of the PIR sensor
Remote camera trigger
A home-made security system using PIR sensors (which is built into a Start Trek panel!)
PIR sensor + Arduino + Servo = automatic cat door!
Motion detection in home surveillance/security systems [28].
2.8 Email Notification
In order to allow for email notifications to send, the OS needs a program that allows for emails to
be sent[31]. Simple Mail Transfer Protocol (SMTP) is a program that allows a system to deliver
an email from a local computer to a mailhost. It does not receive mail but can send out mail.
SMTP is ideal for situations where alerts are needed to be sent, therefore it is useful when
sending notifications.
A python script can be used to achieve this. It may just send a notification without image or can
be modified to send an attachment along with the alarm message[17]. For SMTP to support
transmission of an attached file, Multipurpose Internet Mail Extension (MIME) is required.

20
CHAPTER THREE
3.1 Resources
For an embedded real-time surveillance system to be utilized for effective monitoring and
alerting, the system has to have at least three functions. These functions are: detection, image
processing and alert mechanism. This Raspberry Pi based security system is thus composed of
mainly two parts. These are: design hardware and design software
3.2 Design Hardware (System Modules Set Up and Configuration).
The entire system modules consist of seven parts components namely:
Raspberry Pi Model B+ controller,
PIR motion sensor,
RJ45 Ethernet connector,
Pi camera module
MicroSD card
LED and 220 Ohms resistor
USB powered cable.
3.2.1 Raspberry Pi Model B+
This is the model that was chosen to implement the project. It has merits over other models in
that it has increased number of USB ports and large number of GPIO pins. Moreover, this piece
of hardware was available at the department.(refer to section two for diagram)
3.2.1.1 Booting Up the Pi Model
Raspbian ‘Wheezy’ image was written into the 4GB Micro SD card. This was the operating
system chosen to run on the Pi because the OS has been optimized and ported to the Raspberry
Pi ARM architecture. This OS has very good integration with the hardware and comes pre-
loaded with a GUI and development tools.
After slotting in the Micro SD card and connecting RJ45 Ethernet cable to the Pi and the
personal computer with Putty software (Putty is an SSH client used to remotely access and
control the Pi from computer running on Windows platform) the system was powered. Putty was
then started and the default static IP address of the Pi was typed into the host name field. While
doing this, windows pc was set to manual IP configuration. This was to allow it communicate
with the Raspberry Pi.
3.2.1.2 Setting Up internet connection on the Pi
Internet was necessary in so that the Pi can communicate over network protocols and thus allow
for installation of necessary Python packages. The architecture below was used to achieve that.

21
Figure 11: internet set up architecture
Since the broadcast router uses Dynamic Host Configuration Protocol (DHCP) to dish out IP
addresses to devices connected to it, it was necessary to change the IP address of the Pi from
static to dynamic. This was done by editing the network interfaces file using the command;
3.2.1.3 Enabling the Pi Camera
This is the camera made specifically for the Raspberry Pi. It was hooked to the raspberry pi
through CSI-2 electrical port which is an extremely fast port. To configure and enable the
camera, the following commands were executed at the CLI of the raspberry pi:
sudo apt_get update
sudo apt_get upgrade
sudo raspi-config
sudo nano /etc/network/interfaces

22
After these configuration settings, the system was rebooted. This was done to ensure that the
camera was allocated enough space in memory. The camera takes 5MP image and has a
resolution of 1080 by 890. And to ensure that the camera was well configured and functional, the
following command was executed.
This by default this command takes a three second image and save it in a file called image.png.
Figure 12: Raspberry Pi camera module
3.2.3 Setting Up the Passive Infrared Sensor
This is formed the prime motion sensor. It was used to control the entire system. The device used
here was HC501SR passive infrared sensor. The detection range is 7 meters by 140(degrees)
coning angles. It has a delay time of 16 seconds but adjustable. The ambient temperature is
253K-323K. It was powered directly from the Pi through the 5V dc supply pin. Its output was
connected as the input to the programmable GPIO pin.
3.2.4 Automatic Light Simulation
An LED was used to simulate an automatic light control. This was designed to be controlled
through the action of a PIR sensor. This device was connected to the GPIO pin through a 220Ω
resistor.
3.3 Hardware Architecture
The entire system modules were interfaced together as shown below.
sudo raspistill –o image.png

23
Figure 13: Hardware Architecture of the Security Systems Based on Raspberry Pi.

24
3.4 Design Software
3.4.1 The flowchart of the Raspberry Pi Based Security system
This following flowchart was used to design and thus document the security systems project. It
illustrates the series of events starting from intrusion event up to the point when it sends out an
alert. This algorithm was implemented using a Python script. Figure 3.4 below presents the basic
flowchart of the entire system.
Figure 14: Flowchart implementation of the security system
3.4.1.1 System initialization and configuration
This involved the following tasks:
Importing Python libraries and packages. These libraries are predefined and help in
making the interfaced modules work properly.
Pi Camera setting and configuration.
GPIO settings and pin initialization: (the channel was set using the BCM channel
numbering. Passive infrared pin channel was set to read mode while the led channel was
set to drive/write mode.

25
a) Read a Channel
In order to read the value of any GPIO pin, simply type; GPIO.input(channel)
b) Drive a channel
In order to drive a channel of GPIO pin, type; GPIO.output(channel, status)
This sequence of events can be elaborated well using the block diagram below.
Figure 15: System Initialization and configuration
3.4.1.2 Generating and sending e-mail
After configuring the system to send an alert to the predefined subscriber, it was then necessary
to generate and send the mail. Multipurpose Internet Mail Extension (MIME) package was then
called and used to generate the attachment. MIME supports characters other than ASCII, non –
text attachments (audio, video and application programs) etc. It thus extends the format of an
email. Simple Mail Transfer Protocol (SMTP) program was then used to deliver the email from
the Raspberry Pi to the configured mailhub. This can be summarized using the blocks below.

26
3.4.1.3 Pseudocode
i. Upon restart of the system, send out email with boot IP assigned to a mailhost.
ii. Check the status of the GPIO pin. If the pin is LOW, GPIO output pin 13 should remain
LOW and the system is idle. Else if the pin suddenly goes HIGH. Interpret this as an
interrupt event.
iii. While the value of the input GPIO pin is HIGH (interrupt event), set pin 13 to be HIGH.
This instance blinks the LED. Call the function that starts the Pi Camera.
iv. Camera takes a 10 seconds video and save it in a file.
v. The system checks whether the internet is enabled on the Raspberry Pi.
vi. If internet, send email to a prescribed mailhost. If no internet, wait for 5 seconds then
check again.
Reset the PIR sensor pin to LOW and recheck again the status after 2 seconds. This should return
the program to the main loop.
3.4.1.4 Developing the Full Code Listing.
To be able to develop the Python script that executes the algorithm defined in the flowchart, the
following were done at the CLI of the Raspberry Pi:
The Pi was started and a directory was created using mkdir command
Inside the directory, a file was created using the touch command and made executable
using sudo chmod +x (filename).
The nano command was then used to open the editor and the full Python code was
written there. The script was executed using the following command:
(Full code listing is appended as appendix (ii))
3.5 OpenCv – Python Video Processing
OpenCv is a very powerful tool used to analyze images and video files. The basic processing
procedure to be followed is detailed in the flowchart below. Thresholding as a technique of
image processing was chosen for the implementation of motion detection and tracking in video
streams. The choice to script using OpenCv – Python was because Python on its own does not
support video processing. There is so far no video processing library in Python. OpenCv thus
provided the necessary platform to achieve image processing. The following flowchart was used
for this implementation
Sudo python filename.py

27
Figure 16: Flowchart of motion detection and tracking algorithm
3.5.1 Pseudocode
i. Start the camera and set to capture video stream
ii. Grab a frame from the video stream. If frame is grabbed, continue with the process. Else
stop. Initialize the frame as the current frame
iii. Convert the captured frame to grayscale. Then do Gaussian blurring to remove noise in
the gray image
iv. Capture another frame and repeat step two above.
v. Check for pixel threshold if enough to call motion detected
vi. Draw a rectangle around the region where motion was detected
(The code listing is provided in appendix (ii))

28
CHAPTER FOUR
4.1 RESULTS
4.1.1 Detection Using a PIR Sensor
Tweaking the sensitivity of the PIR sensor among different levels, the following were the results:
Sensitivity = maximum
Table 1: Results for maximum sensitivity of the PIR sensor
Distance in meters
LED ON/OFF Alert send Ref.
15
OFF NO NONE
10
OFF
NO NONE
8
OFF
NO NONE
6 YES
YES Fig. 4.4
5 YES
YES Fig. 4.4
4 YES
YES Fig. 4.4
3 YES
YES Fig. 4.4
Sensitivity = medium
Table 2: Results for medium sensitivity of the PIR sensor
Distance in meters
LED ON/OFF Alert send Ref.
15 OFF
NO NONE
10 OFF
NO NONE
8 OFF
NO NONE
6 OFF
NO NONE
5 ON
NO NONE
4 ON
YES Fig. 4.4

29
3 ON
YES Fig. 4.4
Sensitivity = Low
Table 3: Results for minimum sensitivity of the PIR sensor
Distance in meters
LED ON/OFF Alert send Ref.
15 OFF
NO NONE
10
OFF
NO NONE
8 OFF
NO NONE
6 OFF
NO NONE
5 OFF
NO NONE
4
OFF
NO NONE
3
ON
YES Fig. 4.4
4.1.2 Detection and Tracking Using Camera
Table 4: Changing the threshold level of the camera
Pixel
threshold
0
5
10
20
25
30
50
80
100
Motion
detection
NO
YES
YES
YES
YES
YES
YES
YES
NO
Tracking
NO
YES
YES
YES
YES
YES
YES
YES
NO

30
4.1.2.1 Captions Showing detection and tracking using camera in real time video
Threshold level = 25
Figure 17: Motion detection and tracking in real-time video stream. Result when the object
in the field of view of the camera was stationary.

31
Threshold level = 25 pixels
Figure 18: Result showing the tracking upon motion of an originally stationary object.

32
Threshold = 100 pixels
Figure 19: Result for detection and tracking at a threshold level of 100 pixels. This was
obtained irrespective of motion of the object
4.2 ANALYSIS OF THE RESULTS
Executing the Python script in appendix (i) successfully yielded the results indicated in tables 1-
3. It can be depicted that the range of detection of the PIR sensor varies at different sensitivity
levels. The higher the sensitivity of the sensor the higher the range of detection
Referring again to the results in tables 1-3, it can be safely said that the PIR sensor formed the
primary motion detector and hence the first line of defense. All the other modules solely

33
depended on the PIR GPIO pin to go HIGH. In case this sensor fails, the whole security
procedure as designed shall fail.
The send alerts from this part are provided in appendix section. They show the email send to a
mailhost through SMTP protocol. The attached file is a 10 second video that shall be analyzed in
order to explain the concept of image processing in real time video.
Running the Python-OpenCv code provided in appendix (ii) did not yield successful results in
the RPI. This was because a large video file or otherwise live video streams require large
processor speed. The RPI runs at 700MHz. This script was thus implemented differently on the
laptop PC. The results in table 4 were obtained.
From those results in table 4, it can be deduced that varying the pixel threshold of the camera
achieves the action of detection and tracking. However, detection occurs only within some limits.
This can be shown by comparing the captions indicated in Figures 18 - 20. At a pixel threshold =
25, Motion detection and tracking was achieved, while at 100 pixels (Figure 20), no detection
nor tracking was possible. In Figure 16, 𝑓𝑛 and 𝑓𝑛−1 represents the amount of pixels for the previous object and amount of pixels for the current object.
4.3 CONCLUSSION
The project designed and implemented a security system based on the Raspberry Pi. The aspects
of the system are: motion detection using a PIR sensor, video capturing using a Pi Camera and
sending out an alert through e-mail. It did not however achieved the option of image processing
in the Raspberry Pi because of system constraints i.e. processor speed.
4.4 RECOMMENDATIONS
The following are recommended:
Major improvements on the system processor speed are much needed in order to process
large files e.g. video for effective motion detection and tracking.
The designed security system can be used in homes to monitor the facility at any given
time.
The system requires to be remotely controlled. Hence, future explorations should focus
much more on the same.

34
CHAPTER FIVE
5.1 REFERENCES
[1] Z. Sundas, “Motion Detecting Camera Security System with Email Notifications and Live
Streaming Using Raspberry Pi.” .
[2] M. Peter and H. David, “Learn Raspberry Pi with Linux,” Apress, 2012.
[3] P. S. Dhake and B. Sumedha S., “Embedded Surveillance System Using PIR Sensor.,” vol.
No. 02, no. 3, 2014.
[4] J. D., “Real Time Embedded Network Video Capture And SMS Alerting system,” Jun.
2014.
[5] S. Sneha, “IP Camera Video Surveillance using Raspberry Pi.,” Feb. 2015.
[6] F. C. Mahima and A. Prof. Gharge, “Design and Develop Real Time Video Surveillance
System Based on Embedded Web Server Raspberry PI B+ Board. International Journal of
Advance Engineering and Research Development (Ijaerd), NCRRET.,” pp. 1–4, 2015.
[7] J. G. J, “Design and Implementation of Advanced ARM Based Surveillance System Using
Wireless Communication.,” 2014.
[8] P. Sanjana, J. S. Clement, and S. R., “Smart Surveillance Monitoring System Using
Raspberry PI and PIR Sensor.,” 2014.
[9] U. Kumar, R. Manda, S. Sai, and A. Pammi, “Implementation Of Low Cost Wireless Image
Acquisition And Transfer To Web Client Using Raspberry Pi For Remote Monitoring.
International Journal of Computer Networking, Wireless and Mobile Communications
(IJCNWMC).,” vol. No. 4, no. 3, pp. 17–20, 2014.
[10] “The History of Security _ PerspecSys.com.htm.” .
[11] A.-D. Osama, “Cisco IP Video Surveillance Introduction,” Cisco Expo, 2009.
[12] “What is a security system and how does it work _ SafeWise.htm.” .
[13] T.K. Hareendran, “GSM Home Security Alarm System With Arduino,” Library Security
System, 2014. .
[14] R. Verman, “Distance Education In Technological Age,” Anmol Publ. Pvt Ltd, p. 166,
2005.
[15] “Television Rides Wires,” Pop. Sci., no. February, p. 179, 1949.
[16] “Introduction to Closed Circuit Television,” Jan-2013. .
[17] B. Messauod, Access Control Systems: Secuiry, Management and Trust Models., 1st ed.
Austin, TX, USA: Springer, 2006.
[18] “IP Surveillance,” IT Encyclopedia. .
[19] “ijcsit2014050648.pdf.” .
[20] B. E. Reddy, M. Veeresha, and N. Rao, “Image Processing: A Survey.”
[21] A. Ambrosetti and P. H. Rabinowitz, “Dual variational methods in critical point theory and
applications,” J. Funct. Anal., vol. 14, no. 4, pp. 349–381, 1973.
[22] “113-115-OBJECT-DETECTION-AND-TRACKING-USING-IMAGE-
PROCESSING.pdf.” .
[23] “Simon_Denman_Thesis.pdf.” .
[24] S. Prasad, P. Mahalakshmi, A. J. C. Sunder, and R. Swathi, “Smart Surveillance Monitoring
System Using Raspberry PI and PIR Sensor,” Int. J. Comput. Sci. Inf. Tech., vol. 5, no. 6,
2014.
[25] Raspberry Pi for Begginers, 2014th ed. London UK.: Imagine Pulishing Ltd.

35
[26] B. J. Glenn, Computer Science: An Overview, 11th ed. Edwards Brothers.
[27] “The Raspberry Pi Education Manual,” Dec. 2012.
[28] “How Infrared Motion Detector Components Work,” Glolab Corporation., 2013.
[29] “pir-passive-infrared-proximity-motion-sensor.pdf.” .
[30] G. Honey, Intruder alarms, 2nd ed. Oxford ; Burlington, MA: Newnes, 2003.
[31] “The Raspberry Pi Education Manual,” no. 1.0, Dec. 2012.

36
5.2 APPENDICES
5.2.1 Appendix (i)
Pure Python code used to implement the RPI based security system. This is the code that
was executed in the Pi .
#!/usr/bin/env python
#Import necessary Python packages
import RPi.GPIO as GPIO
import time
import picamera
import sys
import urllib
import smtplib
import picamera
import mimetypes
import email.mime.application
import subprocess
from email.mime.text import MIMEText
#Check for the type of connection either wlan or ethernet
def connect_type(word_list):
if 'wlan0' in word_list or 'wlan1' in word_list:
con_type = 'wifi'
elif 'eth0' in word_list:
con_type = 'Ethernet'
else:
con_type = 'current'
return con_type
#gmail settings
toaddrs = '[email protected]'
username = '[email protected]'
fromaddrs = '[email protected]'
password = 'sylvestre'
#setting up server to use to send mail
smtpserver = smtplib.SMTP('smtp.gmail.com', 587)
smtpserver.ehlo()

37
smtpserver.starttls()
smtpserver.ehlo()
smtpserver.login(username, password)
arg='ip route list'
p=subprocess.Popen(arg,shell=True,stdout=subprocess.PIPE)
data=p.communicate()
ip_lines = data[0].splitlines()
split_lines_a = ip_lines[1].split()
split_lines_b = ip_lines[1].split()
ip_type_a = connect_type(split_lines_a)
ip_type_b = connect_type(split_lines_b)
ipaddr_a = split_lines_a[split_lines_a.index('src')+1]
ipaddr_b = split_lines_b[split_lines_b.index('src')+1]
my_ip_a = 'Your %s IP address is %s' % (ip_type_a, ipaddr_a)
my_ip_b = 'Your %s IP address is %s' % (ip_type_b, ipaddr_b)
msg1 = MIMEText(my_ip_a)
msg1['Subject'] = 'BOOT IP'
msg1['From'] = '[email protected]'
msg1['To'] = 'toaddrs'
smtpserver.sendmail(fromaddrs, toaddrs, msg1.as_string())

38
smtpserver.quit()
time.sleep(10)
#GPIO Pin set up and initialization using board pin numbering
GPIO.setwarnings(False)
GPIO.setmode(GPIO.BOARD)
pir_pin = 11 #Initialize the channel as input
GPIO.setup(11, GPIO.IN) #Read value from channel
led_pin = 13 #initialize the channel as output
GPIO.setup(13, GPIO.OUT) #Drive the channel
GPIO.output(13, GPIO.LOW)
#A function to blink an LED(represent the automatic light system)
def led_light():
valueX = GPIO.input(11)
if valueX == True:
time.sleep(2)
elif valueX == False:
GPIO.output(13, False)
time.sleep(1)
# A function that captures video
def video_capture():
with picamera.PiCamera() as camera:
camera.resolution = (640, 480)
camera.sharpness = 0
camera.contrast = False
camera.ISO = 0
camera.saturation = 0
camera.exposure_mode = 'auto'
camera.exposure_compensation = 0
camera.video_stabilization = False
camera.crop = (0.0, 0.0, 1.0, 1.0)
camera.hflip = True
camera.vflip = True
camera.brightness = 60
# set filename and capture video to that file.
filename = 'my_camera.h264'
camera.start_preview()
time.sleep(1)
print 'Taking Video..Wait'
camera.start_recording(filename)
camera.wait_recording(10)

39
camera.stop_recording()
print 'Video taken..checking for internet connectivity.'
# Main program loop
try:
while True:
for i in range(0, 10000000):
value1 = GPIO.input(11)
if value1 == False:
print 'system not alarmed...'
time.sleep(5)
elif value1 == True:
print 'Motion Detected...alert start'
led_light()
video_capture()
try:
stri = "https://www.google.co.in"
e = 'no connection'
data = urllib.urlopen(stri)
print("Connected")
print "Sending mail...."
#send gmail to prescribed mailhub
fromaddrs = '[email protected]'
password = '**********'
username = '[email protected]'
toaddrs = '[email protected]'
Subject = 'PIR Activated!!!'
body = email.mime.Text.MIMEText('PIR Sensor detected motion')
msg = email.mime.Multipart.MIMEMultipart()
msg['Subject'] = 'PIR Triggered!'
msg['fromaddrs'] = '[email protected]'
msg['toaddrs'] = '[email protected]'
msg.attach(body)
#send the attached file
filename = 'my_camera.h264'
fp = open(filename, 'rb')
att = email.mime.application.MIMEApplication(fp.read())
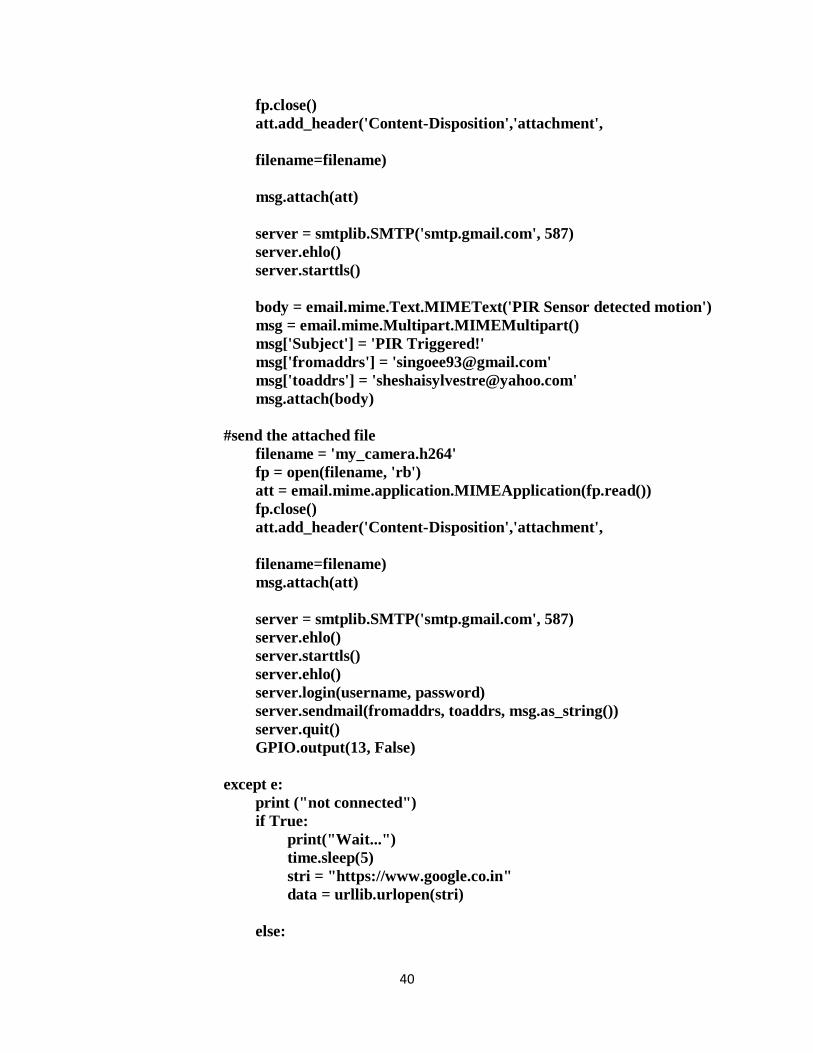
40
fp.close()
att.add_header('Content-Disposition','attachment',
filename=filename)
msg.attach(att)
server = smtplib.SMTP('smtp.gmail.com', 587)
server.ehlo()
server.starttls()
body = email.mime.Text.MIMEText('PIR Sensor detected motion')
msg = email.mime.Multipart.MIMEMultipart()
msg['Subject'] = 'PIR Triggered!'
msg['fromaddrs'] = '[email protected]'
msg['toaddrs'] = '[email protected]'
msg.attach(body)
#send the attached file
filename = 'my_camera.h264'
fp = open(filename, 'rb')
att = email.mime.application.MIMEApplication(fp.read())
fp.close()
att.add_header('Content-Disposition','attachment',
filename=filename)
msg.attach(att)
server = smtplib.SMTP('smtp.gmail.com', 587)
server.ehlo()
server.starttls()
server.ehlo()
server.login(username, password)
server.sendmail(fromaddrs, toaddrs, msg.as_string())
server.quit()
GPIO.output(13, False)
except e:
print ("not connected")
if True:
print("Wait...")
time.sleep(5)
stri = "https://www.google.co.in"
data = urllib.urlopen(stri)
else:

41
print "Sending mail ...."
#Exit upon keyboard press
except KeyboardInterrupt():
GPIO.clenup()
time.sleep(2)
raise

42
5.2.2 Appendix (ii)
OpenCv – Python Code.
# import the necessary packages
import argparse
import datetime
import time
import cv2
# construct the argument parser and parse the arguments
ap = argparse.ArgumentParser()
ap.add_argument("-v", "--video", help="C:\Users\shadrack\Desktop\opencv")
ap.add_argument("-a", "--min-area", type=int, default=1000, help="minimum area size")
args = vars(ap.parse_args())
# if the video argument is None, then we are reading from webcam
if args.get("video", None) is None:
camera = cv2.VideoCapture(0)
time.sleep(1)
# otherwise, we are reading from a video file
else:
camera = cv2.VideoCapture(args["video"])
# initialize the first frame in the video stream
currentFrame = None
S
# loop over the frames of the video
while True:
# grab the current frame and initialize the occupied/unoccupied
# text
(grabbed, frame) = camera.read()
text = "No Motion Detected...."
# if the frame could not be grabbed, then we have reached the end
# of the video
if not grabbed:
break
#convert it to grayscale, and blur it
gray = cv2.cvtColor(frame, cv2.COLOR_BGR2GRAY)
gray = cv2.GaussianBlur(gray, (21, 21), 0)
# if the first frame is None, initialize it
if currentFrame is None:

43
currentFrame = gray
continue
previousFrame = currentFrame
currentFrame = gray
# compute the absolute difference between the current frame and
# first frame
frameDelta = cv2.absdiff(previousFrame, gray)
thresh = cv2.threshold(frameDelta, 100, 255, cv2.THRESH_BINARY)[1]
# dilate the thresholded image to fill in holes, then find contours
# on thresholded image
thresh = cv2.dilate(thresh, None, iterations=2)
(cnts, _) = cv2.findContours(thresh.copy(), cv2.RETR_EXTERNAL,
cv2.CHAIN_APPROX_SIMPLE)
# loop over the contours
for c in cnts:
# if the contour is too small, ignore it
if cv2.contourArea(c) < args["min_area"]:
continue
# compute the bounding box for the contour, draw it on the frame,
# and update the text
(x, y, w, h) = cv2.boundingRect(c)
cv2.rectangle(frame, (x, y), (x + w, y + h), (0, 255, 0), 2)
text = "Motion Detected.."
# draw the text and timestamp on the frame
cv2.putText(frame, "Room Status: ".format(text), (10, 20),
cv2.FONT_HERSHEY_SIMPLEX, 0.5, (0, 0, 255), 2)
cv2.putText(frame, datetime.datetime.now().strftime("%A %d %B %Y
%I:%M:%S%p"),
(10, frame.shape[0] - 10), cv2.FONT_HERSHEY_SIMPLEX, 0.35, (0, 0, 255),
1)
# show the frame and record if the user presses a key
cv2.imshow("Security Feed", frame)
cv2.imwrite("security.jpg", frame)
#cv2.imshow("Thresh", thresh)
#cv2.imshow("Frame Delta", frameDelta)
key = cv2.waitKey(1) & 0xFF
# if the `q` key is pressed, break from the lop
if key == ord("q"):
break
# cleanup the camera and close any open windows
cv2.destroyAllWindows()

44
5.2.3 Appendix (iii)
Send mail
Received mail
Fig 4.4: Result showing an email notification sent from gmail to yahoo mail