u n i t 2 l e s s o n 2 : c ar e g i v i n g t o o l s , e
TRANSCRIPT

Unit 2 Lesson 2: Caregiving Tools, Equipment, and Paraphernalia (UT)
Table of Contents
Introduction 2
Essential Questions 2
Reach our Goals! 3
Springboard 3
Learn about It! 4 Caregiving Tools, Equipment, and Paraphernalia 5 Operating the Tools, Equipment, and Paraphernalia 10
Check Up 21
Skill Enhancer 22
Did You Know? 24
Wrap Up 24
Introspect: Self-Evaluation 25
Bibliography 26
Glossary 26
1 Copyright © 2018 Quipper Limited

GRADE 7/8 Caregiving Tools, Equipment, and Paraphernalia (UT) Introduction As one of the health care providers, a caregiver must demonstrate skills in using tools, equipment, and paraphernalia in taking care of a patient because these are used to do a particular task, whether cleaning, preparing a meal, or taking vital signs. For this reason, it is essential to identify and learn how to use various tools, equipment, and paraphernalia in caregiving.
Essential Questions
2 Copyright © 2018 Quipper Limited

Reach our Goals!
In this lesson, you should be able to: ● classify caregiving tools, equipment, and paraphernalia; ● describe the purpose of each caregiving tool,
equipment, and paraphernalia; and ● use each caregiving tool, equipment, and paraphernalia
based on task requirement efficiently.
Springboard
Concept Charade There will be 5 pairs of students who will be asked to act out different situations. The rest of the class should identify which caregiving tool is the most appropriate to be used. Choose your answer from the choices and write only the letter of the correct answer on your notebook.
A. sphygmomanometer
B. stethoscope
C. digital thermometer
3 Copyright © 2018 Quipper Limited

D. blender
E. washing machine
1. Marie needs to monitor regularly the body temperature of her patient who is suffering from dengue. ___________________________________________________________________________________________
2. Mrs. Aurora is undergoing a surgical procedure. ___________________________________________________________________________________________
3. The doctor asked Dale to check the heart rate of his mother every day, if it is in the normal range. ___________________________________________________________________________________________
4. Lily is taking care of a patient who is recovering from stroke. The doctor advised the patient to be in a soft diet and asked Lily to prepare liquidized food. ___________________________________________________________________________________________
5. A caregiver is also responsible to maintain the cleanliness of the patient’s room, including the beddings. ___________________________________________________________________________________________
Learn about It!
From the previous activity, you encountered some tools, equipment, and paraphernalia and their particular uses in caregiving. In this section, you will get to know more about the tools, equipment, and paraphernalia in getting the task done in taking care of the patient.
4 Copyright © 2018 Quipper Limited

Caregiving Tools, Equipment, and Paraphernalia Preparing for Meal Time
Taking care of a patient includes preparation of healthy meals. Below are the things needed to fulfill the task.
● Airpot An airpot is a container used to store liquid which maintains its hotness or coldness.
● Blender
A blender is a kitchen appliance which is used in preparing puree, or liquidized meals specially made for the patient who is in a soft diet.
● Food Processor
This kitchen appliance has a similar function with the blender. Aside from shredding and chopping the food ingredients easily, this is also used for making a puree or liquidized meal. However, it differs from the blender in terms of its detachable blades. Each detachable blade is meant for a specific task like chopping, mincing, pureeing and grating.
● Coffeemaker This countertop appliance is used to brew coffee. Usually, coffee is served to older adults. However, you have to be reminded that anything in excess can have serious side effects. So, as a caregiver, you need to monitor the daily caffeine consumption of your clients or you have to know from the doctor if they are allowed before giving them a cup.
● Ladle
This tool is used for serving soup. Also, it is used for measuring and portioning liquids. Most of the patients who have difficulty in eating solid food, choose to have soup instead. Therefore, this tool must be present in meal preparation.
5 Copyright © 2018 Quipper Limited

● Food tong This kitchen hand tool is useful in preparing the meals of your patient. For instance, using your bare hands in transferring food items from the platter to the patient’s plate is not safe, and it can cause food contamination. This tool is used to hold and grasp food items.
● Peeler
Fruits and vegetables are always present in a patient’s meal. Therefore, this short tool with a slotted, swiveling blade is also important in order to peel the fruits and vegetables.
● Knife This cutting tool is necessary for meal preparation
since most of the food ingredients need to be cut or sliced.
● Cutting board This tool is an important partner of the knife. Cutting boards can be hardwood, rubber, or plastic. There are also color-coded cutting boards that are designed to reduce cross-contamination. Each color corresponds to a food category, for example, green board is used for vegetables and fruits, yellow for raw poultry , blue for cooked poultry, white for dairy products, brown for fish and other seafoods and red for raw meat.
● Microwave oven This kitchen appliance is used mostly for heating prepared food and for thawing raw or cooked items.
6 Copyright © 2018 Quipper Limited
For Cleaning, Ironing, and Washing Keeping the patient’s room and tools clean is important to prevent any air-borne diseases and reduce the chance of infection.
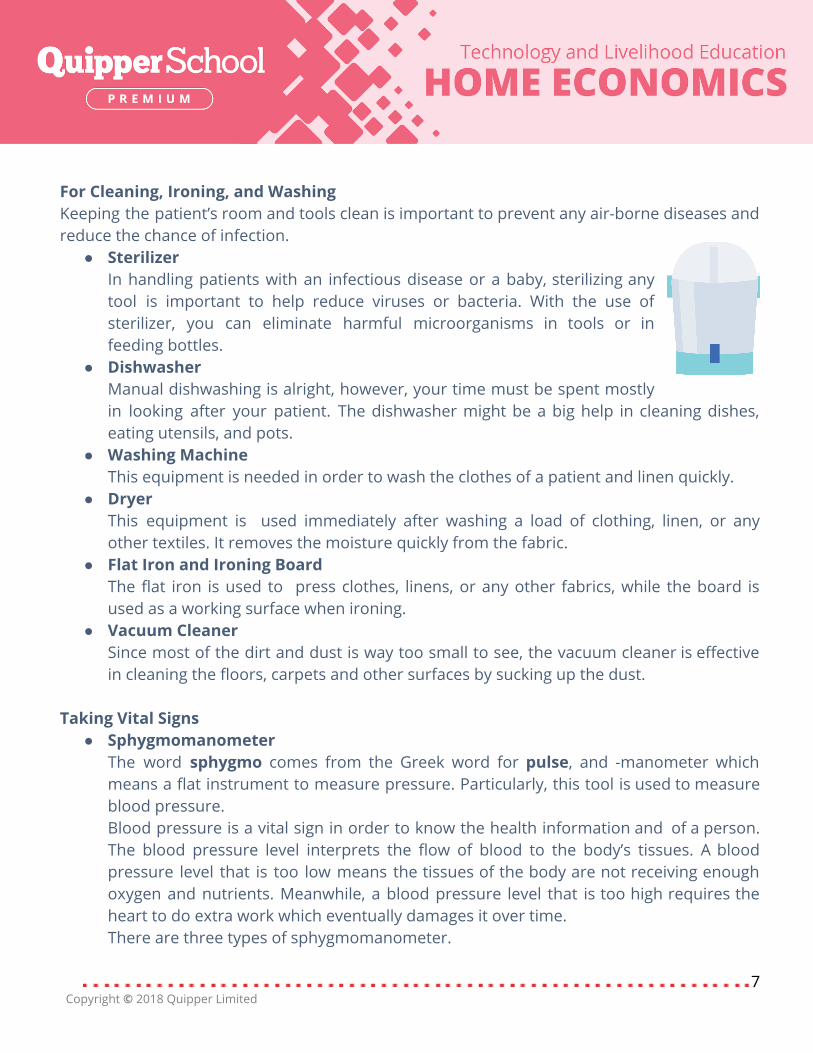
● Sterilizer In handling patients with an infectious disease or a baby, sterilizing any tool is important to help reduce viruses or bacteria. With the use of sterilizer, you can eliminate harmful microorganisms in tools or in feeding bottles.
● Dishwasher Manual dishwashing is alright, however, your time must be spent mostly in looking after your patient. The dishwasher might be a big help in cleaning dishes, eating utensils, and pots.
● Washing Machine This equipment is needed in order to wash the clothes of a patient and linen quickly.
● Dryer This equipment is used immediately after washing a load of clothing, linen, or any other textiles. It removes the moisture quickly from the fabric.
● Flat Iron and Ironing Board The flat iron is used to press clothes, linens, or any other fabrics, while the board is used as a working surface when ironing.
● Vacuum Cleaner Since most of the dirt and dust is way too small to see, the vacuum cleaner is effective in cleaning the floors, carpets and other surfaces by sucking up the dust.
Taking Vital Signs ● Sphygmomanometer
The word sphygmo comes from the Greek word for pulse, and -manometer which means a flat instrument to measure pressure. Particularly, this tool is used to measure blood pressure. Blood pressure is a vital sign in order to know the health information and of a person. The blood pressure level interprets the flow of blood to the body’s tissues. A blood pressure level that is too low means the tissues of the body are not receiving enough oxygen and nutrients. Meanwhile, a blood pressure level that is too high requires the heart to do extra work which eventually damages it over time. There are three types of sphygmomanometer.
7 Copyright © 2018 Quipper Limited

❖ An aneroid manometer is a small, round dial with a needle that indicates the pressure.
❖ A mercury manometer is a column of mercury that may be mounted on a wall or placed on a table.
❖ A digital sphygmomanometer provides a blood pressure reading without needing someone to inflate and deflate the cuff or listen to the blood flow sounds. The blood pressure is displayed digitally.
● Stethoscope
This device is used to take an apical pulse which makes the sounds louder and allows you to hear each beat of the person’s heart. The device consists of the following parts:
❖ Earpieces are two tubes that aid in listening to the sounds produced by the body parts and receive by the chest-piece.
❖ Brace and binaural connect the earpieces to the rubber or plastic tubing that conducts the sound.
❖ An amplifying device makes the sound louder. This includes the diaphragm and bell.
● Thermometer
This tool is used to measure body temperature. There are many different types of thermometers in use.
❖ Glass Thermometer consists of a glass bulb attached to a thin glass tube that is marked with a temperature scale and filled with mercury. The mercury inside the thermometer expands with heat and moves up the glass tube, showing the temperature on the scale.
❖ Electronic Thermometer is powered by batteries, and the temperature is displayed on a screen on the front of the instrument.
❖ Tympanic Thermometer is used to measure the body temperature in the ear.
8 Copyright © 2018 Quipper Limited

Try It!
1. Use the table to classify each caregiving tool, equipment, and paraphernalia based on its function.
vacuum cleaner sphygmomanometer stethoscope
flat iron ladle airpot
blender food processor thermometer
Meal Preparation Cleaning, Washing, and Ironing
Taking Vital Signs
2. What are the three types of sphygmomanometer? Discuss each. _________________________________________________________________________________________________________________________________________________________________________________________________________________________________________________________________________________
3. Discuss the differences of the glass, electronic, and tympanic thermometers. _________________________________________________________________________________________________________________________________________________________________________________________________________________________________________________________________________________
9 Copyright © 2018 Quipper Limited

4. Discuss the importance of sterilizer in caregiving. _________________________________________________________________________________________________________________________________________________________________________________________________________________________________________________________________________________
5. How does a stethoscope work in taking a pulse rate? _________________________________________________________________________________________________________________________________________________________________________________________________________________________________________________________________________________
Operating the Tools, Equipment, and Paraphernalia The following are the proper procedures in using and operating some common equipment and devices in caregiving. It is necessary to master the proper utilization of each in order to be trusted in doing a particular caregiving task.
Common Equipment in Meal Preparation Blender
1. Check the blender if it is clean and in working condition. Place it in a stable flat surface. 2. Place the pitcher onto the base and plug the equipment. 3. Put the ingredients in the pitcher. 4. Close the lid with a feeder cap and hold the cover tightly so that the cap and ingredients
will not come out when operating the blender. 5. Start blending. Choose the speed setting appropriately. The setting should be based on
the recommended speed for a specific food item to blend. 6. After you have blended the ingredients, time to transfer it into another container like
glass. Make sure to scrape out the bottom part with a spatula to get all the smoothies, if the liquid is thick.
7. Clean the blender immediately after use. When cleaning this equipment, you have to remove the pitcher from the base, since the base is not allowed to be washed with water.
10 Copyright © 2018 Quipper Limited

Food Processor
1. Assemble the food processor. Check first if the equipment is unplugged before arranging and putting all the parts into place. You have to place the plastic bowl onto the base. Then, put the blade properly at the center of the bowl. Make sure that everything is tightened and secured into place.
2. Place the recipe ingredients. The process of adding the ingredients is based on the recipe requirement, such as putting all the ingredients together or blend one at a time. Adding of hot ingredients will not be allowed. Make sure the ingredients are cooled to room temperature. If large ingredients will be used in the recipe you have to cut them first into smaller chunks in order to blend them easily.
3. Secure the lid of the food processor. 4. Process the food ingredients. Some food processors have a pulse button or run
button. If you want to blend the ingredients continuously and prepare a smooth sauce or soup, press the run button once. On the other hand, press the pulse button when chopping the food items and the equipment will only run whenever you press it. Remember that some brand of this equipment has more than two buttons if so, refer to the manufacturer’s manual.
5. When adding additional ingredients, add each one slowly during the blending process. You can add the ingredients while the process is ongoing as long as there is a tube lid. In contrary, if tube lid is not available, you have to turn off the equipment before adding the ingredients.
6. Clean the processor once you have already completed the task. You have to clean and wash the bowl and the blade immediately. Do not wash the electric base of the processor.
Coffeemaker
1. Pour the water in the reservoir. The measurement of water depends on the number of coffee cups you need to make.
2. Add a coffee filter into the basket. The amount of coffee to water may vary. Also, it depends on how strong or weak your clients like it. Then, add the coffee into the filter.
3. Turn on the coffee maker and wait until the coffee is completely brewed. Warming up the Food in Microwave Oven
1. Place the microwave oven on a flat and dry surface. 2. Make sure that the roller ring and glass tray are placed securely inside.
11 Copyright © 2018 Quipper Limited

3. Plug the microwave into a wall outlet. 4. Arrange the food in the middle of a plate. Always remember to use glass-ceramic
containers. The plastic container can also be used as long as it is microwavable. 5. Warm the food for 1-2 minutes. However, if you notice that the food item is not warm
enough, put it in for another 30 seconds. Defrosting a frozen food items
1. Remove the food item from the packaging and place it in a ceramic or glass container before defrosting.
2. Make sure to cook the defrosted food item immediately to prevent bacterial growth. Common Equipment in Cleaning, Washing, and Ironing Bottle Sterilizer
1. Before using the equipment, you have to read the manufacturer’s structural manual. 2. Pour the recommended amount of water to the sterilizer in order to create the steam. 3. Wash the bottles first. The sterilizer is used for killing the harmful microorganisms, not
for removing the residues. 4. Using the prongs, place the bottles upside down. Place the nipples, nipple rings and
caps and ensure that the items are not touching to each other. 5. Cover the sterilizer and turn on the unit. 6. For most electric sterilizers, the process of sterilization takes about 10 minutes to reach
a temperature high enough to kill the germs. Once the cycle ends, the equipment automatically begins to cool down. Do not remove the cover until the cycle ends.
7. Unplug the unit. 8. Remove the feeding bottles from the sterilizer. 9. Clean the sterilizer based on the manufacturer’s instructions manual.
Washing Machine
1. The very first step in washing is sorting the clothes from your patient. Sort the clothes according to color and material. For instance, all light-colored clothes should be washed together, and all dark-colored should be washed at the same time.
2. Put detergent into the washing machine. 3. Place the clothes loosely into the washing machine. 4. Close the lid and choose the setting of the washing machine according to the type of
fabric that you are washing.
12 Copyright © 2018 Quipper Limited

5. Turn on the machine. Wait for the machine to turn off before you unload the washed laundry.
6. Place the washed clothes in a laundry basket. 7. Turn off and unplug the equipment.
Flat Iron
1. Check the label of every garment before ironing. This is necessary as some fabrics need special care instructions.
2. Unfold your ironing board near the outlet. Plug in your iron and choose the appropriate setting based on the material of the clothes you are ironing.
3. Preheating the flat iron should be done before starting. You will have to wait about 2-5 minutes to let the iron warm up.
4. Stretch the garment across the ironing board to make sure it is flat. 5. Run the iron over one part of the garment such as the hem just to be sure that it is not
too hot. 6. Move the iron over the pants, blouse, or shirt and take note of pleats and pockets. For
the shirts, start with the collar next to the sleeves, and then the shirt itself. For pants and shorts, start with the inside, then with the outside of the pants starting from the waistband down. Generally, skirts and dresses are ironed from the top to the hem. If there are pleats, iron from the bottom and work upward with fast strokes. Each pleat should be pressed individually. Hang each garment that you have ironed to keep it from wrinkling again.
7. Unplug the iron and allow the unit to cool before storing it.
Common Devices in Taking Vital Signs Stethoscope When there is a change in a person’s normal pulse rate, rhythm, or amplitude, it may be a sign of illness. The following steps will help you measure the apical pulse of the patient using a stethoscope.
1. Clean first the earpieces, the diaphragm, and the bell by wiping them with alcohol wipes.
2. Place the earpieces in each ear. The indication that the earpieces are placed correctly is when they fit snugly, yet comfortable, and the outside can hardly be heard.
3. Place the diaphragm of the stethoscope under the person’s clothing, on the apical pulse
13 Copyright © 2018 Quipper Limited

site located on the left chest. The diaphragm or bell must be placed directly on the person’s skin because clothing might block or distort the sound.
4. Using two fingers, hold the diaphragm or bell firmly against the person’s chest. Look at your watch and begin counting the heartbeat for 60 seconds.
5. After 60 seconds, remove the diaphragm from the person’s chest. Adjust the persons clothing as necessary.
6. Lastly, clean the earpieces, the diaphragm, and the bell of the stethoscope by wiping them with alcohol wipes.
Sphygmomanometer Blood pressure measurements allow healthcare providers to monitor existing problems and may possibly prevent the future one. Blood pressure is the force of the blood pushing against the walls of the blood vessels. The heart contracts as it pumps the blood into the arteries. When the heart is contracting, the pressure increases. This pressure is known as the systolic pressure. Further, as the heart relaxes between each contraction, the pressure decreases. And, this is known as diastolic pressure. The following steps will help you measure the patient’s blood pressure accurately with use of sphygmomanometer.
1. Clean the earpieces, the diaphragm, and the bell of the stethoscope. 2. Stand no more than 3 feet away from the manometer. If it is not mounted on the wall,
stand a mercury manometer upright on a flat surface, the measuring scale should be within the level of your eyes.
3. Lay an aneroid manometer on a flat surface directly in front of you or leave it attached to the blood pressure cuff.
4. Squeeze the cuff to empty it of any remaining air. Turn the valve on the bulb clockwise to close it; this will cause the cuff to inflate when you pump the bulb.
5. Wrap the cuff around the person’s upper arm so that the bottom of the cuff is at least l
14 Copyright © 2018 Quipper Limited

inch above the person’s elbow. The cuff should be snug, not too tight or too loose. 6. Locate the person’s brachial artery by placing your fingers at the inner aspect of the
elbow. 7. Place the stethoscope earpieces in your ears. 8. Hold the bulb in one hand and position the diaphragm of the stethoscope over the
brachial artery with the other hand and then inflate the cuff 30 mm Hg more. Inflate the cuff until you hear the pulse stop. Or, hold the bulb in one hand and feel for the person’s radial pulse (in his or her wrist) with the other hand. Inflate the cuff until you are no longer able to feel the radial pulse then infl ate the cuff 30 mm Hg more.
9. Turn the valve on the bulb slightly counterclockwise to allow air to escape from the cuff slowly.
10.Record the reading on the manometer where the first sound is heard. This indicates the systolic pressure.
11.Continue releasing the air from the cuff. Record the reading on the manometer where the last sound is heard. This is the diastolic pressure.
12. Remove the cuff from the arm of your patient and record the reading on the patient’s chart.
13.Return the sphygmomanometer to its case or wall holder. 14.Using alcohol wipes, clean the earpieces, the diaphragm, and the bell of the
stethoscope. Thermometer The body temperature tells how hot the body is. When measuring the body temperature, what you are measuring is the difference between the heat produced and lost by the person’s body. The body temperature can be measured from several different areas of the body:
● The mouth for the oral temperature ● The rectum for the rectal temperature ● The armpit for the axillary temperature ● The ear for the tympanic temperature
The table below shows the normal temperature ranges of both adults and children on each method used to obtain temperature.
Method Range for Adults Range for Children
Fahrenheit (°F) Celsius (°C) Fahrenheit (°F) Celsius (°C)
15 Copyright © 2018 Quipper Limited

Oral 97.6 to 99.6 36.5 to 37.5 97 to 99 36 to 37
Rectal 98.6 to 100.6 37 to 38.1 98 to 100 37 to 38
Axillary 96.6 to 98.6 36 to 37 96 to 98 35 to 36
Tympanic 98.6 37 98 to 100 37 to 38
Measuring an Oral Temperature
1. Prepare first the thermometer. For taking an oral temperature you can use the glass or the digital thermometer
a. Glass thermometer: Place over the thermometer in a running water to rinse away the disinfectant. Wipe thermometer with a paper towel to dry it out and inspect for cracks or chips. Carefully shake down the glass thermometer so that the indicator material is below the 94°F or 34°C mark. Cover the end of the glass thermometer.
b. b. Electronic thermometer: Cover the electronic probe. Turn the thermometer on and wait until you see the “ready” sign on the display screen.
2. Ask the patient to open his or her mouth. Slowly and carefully insert the thermometer, placing the tip under the person’s tongue and to one side.
3. Ask the patient to gently close his or her mouth around the thermometer without biting down. If necessary, hold the thermometer in place. Ask the person to breathe through his or her nose.
4. Leave the thermometer in place for a specific time: a. Glass thermometer: the process of taking the temperature will take 3 to 5
minutes b. Electronic thermometer: you can take the thermometer until you hear a beep
sound, usually after a few seconds. 5. Ask the person to open his or her mouth. Remove the thermometer from the person’s
mouth. 6. Read and record the temperature measurement.
a. Glass thermometer: Using a tissue, remove the thermometer sheath from the glass thermometer, do not to touch the bulb end of the thermometer. Dispose of the tissue and the thermometer sheath in a facility-approved waste container. Hold the thermometer horizontally by the stem at eye level while facing a light source. Rotate the thermometer until you can see the level of the measurement
16 Copyright © 2018 Quipper Limited

indicator. Read the temperature. b. Electronic thermometer: Read the temperature on the electronic thermometer
display screen. Remove the probe sheath from the probe by pushing the button on the top of the probe. Direct the probe sheath into a facility approved waste container.
7. Prepare the thermometer for its next use. a. Glass thermometer: Shakedown the glass thermometer, clean it and return it to
its case. b. Electronic thermometer: Replace the probe into the electronic thermometer.
(Always read the temperature before placing the probe in the instrument because this action clears the display screen.) Turn the instrument off if it does not automatically turn itself off. Place the thermometer in its charger.
Measuring a Rectal Temperature 1. Prepare first the thermometer. For taking a rectal temperature you can use the glass or
the digital thermometer. a. Glass thermometer: Place over the thermometer in a running water to rinse
away the disinfectant. Wipe thermometer with a paper towel to dry it out and inspect for cracks or chips. Carefully shake down the glass thermometer so that the indicator material is below the 94°F or 34°C mark. Cover the end of the glass thermometer.
b. Electronic thermometer: Cover the electronic probe. Turn the thermometer on and wait until you see the “ready” sign on the display screen.
2. Place the thermometer on a clean paper towel on the over-bed table. Open the lubricant package and squeeze a small amount of lubricant onto the paper towel. Wipe some lubricant on the tip of the thermometer to ease insertion.
3. Ask the person to lie on his or her side, facing away from you. Help the person into this position, if necessary.
4. Fanfold the top linens to below the person’s buttocks. Adjust the person’s hospital gown or pajama bottoms as necessary to expose the person’s buttocks. 8. Put on the gloves.
5. With one hand, raise the person’s upper buttock to expose the anus. Suggest that the person take a deep breath and slowly exhale as the thermometer is inserted. Using your other hand, gently and carefully insert the lubricated end of the thermometer into the person’s rectum. Never force the thermometer into the rectum. If you are unable to insert the thermometer, stop.
17 Copyright © 2018 Quipper Limited

6. Hold the thermometer in place for the specifi ed amount of time: a. For the Glass thermometer, it will take 3 to 5 minutes b. Electronic thermometer: you can take the thermometer until you hear a beep
sound, usually after a few seconds. 7. Remove the thermometer from the person’s rectum. Wipe the person’s anal area with a
tissue to remove the lubricant, and adjust the person’s hospital gown or pajama bottoms as necessary to cover the buttocks.
8. Read and record the temperature measurement. c. Glass thermometer: Using a tissue, remove the thermometer sheath from the
glass thermometer, do not to touch the bulb end of the thermometer. Dispose of the tissue and the thermometer sheath in a facility-approved waste container. Hold the thermometer horizontally by the stem at eye level while facing a light source. Rotate the thermometer until you can see the level of the measurement indicator. Read the temperature.
d. Electronic thermometer: Read the temperature on the electronic thermometer display screen. Remove the probe sheath from the probe by pushing the button on the top of the probe. Direct the probe sheath into a facility approved waste container.
9. Remove your gloves and dispose of them. Wash your hands. 10.Help the person back into a comfortable position. 11.Prepare the thermometer for its next use.
c. Glass thermometer: Shakedown the glass thermometer, clean it and return it to its case.
d. Electronic thermometer: Replace the probe into the electronic thermometer. (Always read the temperature before placing the probe in the instrument because this action clears the display screen.) Turn the instrument off if it does not automatically turn itself off. Place the thermometer in its charger.
Measuring an Axillary Temperature
1. Prepare first the thermometer. For taking an oral temperature you can use the glass or the digital thermometer
a. Glass thermometer: Place over the thermometer in a running water to rinse away the disinfectant. Wipe thermometer with a paper towel to dry it out and inspect for cracks or chips. Carefully shake down the glass thermometer so that the indicator material is below the 94°F or 34°C mark. Cover the end of the glass
18 Copyright © 2018 Quipper Limited

thermometer. b. Electronic thermometer: Cover the electronic probe. Turn the thermometer on
and wait until you see the “ready” sign on the display screen. 2. Assist the person with removing his or her arm from the sleeve of his or her hospital
gown or shirt. 3. Pat the underarm area gently with a paper towel. 4. Ask the person to lift his or her arm slightly. Position the tip of the thermometer in the
center of the axilla and ask the person to hold the thermometer in place by holding his or her arm close to the body.
5. The person holds the thermometer in place by holding her arm with the other hand. 6. Leave the thermometer in place for a specified time:
a. For glass thermometer, you need to wait for 10 minutes to get the measurement b. For the electronic thermometer, you can obtain the temperature when you hear
the beep sound, usually just after a few seconds 7. Ask the person to lift his or her arm slightly. Remove the thermometer. 8. Read the temperature measurement.
Measuring a Tympanic Temperature 1. You need to inspect first the ear canal for excessive cerumen (ear wax). If you see a lot
of wax build-up in the ear canal, gently wipe the ear canal with a warm, moist washcloth.
2. Then, turn the thermometer on and wait until the “ready” sign appears on the display screen.
3. Stand slightly to the front of, and facing, the person. To straighten the ear canal, hold the top portion of the person’s ear and gently pull.
4. Insert the covered probe into the person’s ear canal, pointing the probe down and toward the front of the ear canal. This will seal off the ear canal by seating the probe properly, leading to a more accurate temperature reading.
5. To take the temperature, press the button on the instrument. Keep the button pressed and the probe in place until you hear the beep sound from the instrument.
6. Remove the probe and read the temperature on the display screen. 7. If your facility requires a tympanic temperature to be taken in both ears, repeat the
procedure, using a clean probe cover for the other ear. 8. Turn off the thermometer. Charge it.
19 Copyright © 2018 Quipper Limited

Try It! Let us apply now what you learned from this section.
1. What do you call the thermometer used for getting the body temperature from eardrum? ___________________________________________________________________________________________
2. What are the ways in taking a person’s body temperature?
_________________________________________________________________________________________________________________________________________________________________________________________________________________________________________________________________________________
3. In which part of the body can you take the axillary temperature?
___________________________________________________________________________________________
4. What will happen if the diaphragm of the stethoscope is placed over the patient’s clothes when taking the pulse rate from the chest? _________________________________________________________________________________________________________________________________________________________________________________________________________________________________________________________________________________
5. Why is it necessary to inspect the glass thermometer for chips or cracks before taking the body temperature of a person? _________________________________________________________________________________________________________________________________________________________________________________________________________________________________________________________________________________
20 Copyright © 2018 Quipper Limited

Check Up
Read and analyze first the instructions given and answer the following assessment. Write your answers in your notebook.
A. Recall the important concepts from the lesson by answering the following questions or doing the following tasks.
1. What is a systolic pressure? ____________________________________________________________________________________________________________________________________________________________________________________________________________________________________________________________
2. What kind of temperature is being measured when the thermometer is placed under the person’s arm? ____________________________________________________________________________________
3. What kind of thermometer contains mercury?
____________________________________________________________________________________ 4. Why is blood pressure considered a vital sign?
____________________________________________________________________________________
5. How can a vacuum cleaner clean the carpets or floors? ____________________________________________________________________________________
B. Read and analyze the scenario below and identify appropriate tools be used in fulfilling the caregiving task. (5 points)
6. Sheila just had her surgery, the doctor requires her to monitor the blood pressure regularly. What tool should she use? ____________________________________________________________________________________________________________________________________________________________________________________________________________________________________________________________
21 Copyright © 2018 Quipper Limited

7. Tine needs to check the heart rate of her husband every day, if it is in the normal range. What tool should she use to hear the heartbeat clearly? ____________________________________________________________________________________
8. Ana is taking care of a patient who is recovering from a car accident. The doctor
advised the patient to be in a soft diet and asked Ana to prepare a liquidised food since the patient could not open her mouth widely.. What tool is appropriate for making a soft diet food? ____________________________________________________________________________________
C. Arrange the following procedures in taking the blood pressure using the sphygmomanometer. Write 1 for the first step to be taken, 2 for the second step, and so on.
________ Hold the bulb in one hand and position the diaphragm of the stethoscope over the brachial artery with the other hand and then inflate the cuff 30 mm Hg more.
________ Inflate the cuff until you hear the pulse stop. ________ Clean the earpieces, the diaphragm, and the bell of the stethoscope. _______ Lay an aneroid manometer on a flat surface directly in front of you or leave it
attached to the blood pressure cuff. _______ Record the reading on the manometer where the first sound is heard. _______ Wrap the cuff around the person’s upper arm so that the bottom of the cuff is at
least l inch above the person’s elbow.
Skill Enhancer
Taking Vital Signs
Goal: Your goal is to take, and record the vital signs of 5 people using the tools accurately. Role: The student will act as a healthcare provider who needs to monitor the health of the people by taking the vital signs. Audience: The audience will be a teacher or other people in the school or community. Situation: You are conducting a medical mission in your school. One of the services offered is giving information on the vital signs of a person. Product/Performance: The student will have to show their skills in using the tools in taking
22 Copyright © 2018 Quipper Limited

the vital signs of 5 people. Standard: The performance task will be evaluated using a rubric.
RUBRIC
Criteria Below Expectation
1 point
Needs Improvement
3 points
Successful Performance
4 points
Exemplary Performance
5 points
Proper Use of Tools The student identified the 1 correct tool for a specific task in taking a vital sign. Procedures in using the tools for taking vital signs were not clearly demonstrated.
The student identified the 2 of the tools correctly for a specific task in taking a vital sign. Demonstrated skills in using the tools in taking vital signs with 2 missed procedures.
The student identified the most of the tools correctly for a specific task in taking a vital sign. Demonstrated skills in using the proper tools.
The student identified the tools correctly for a specific task in taking a vital sign. Demonstrated excellent skills in using the proper tools.
Work Habits Student did not meet minimum requirements of the job, and were not willing to be trained
Student achieved minimal requirements for the job.
Student consistently completed required tasks. Student met expectations.
Student took pride in the way he worked and strived for excellence. Student exceeded expectations.
Safety practices The student did not observe safety practices.
Student observed few safety practices
Student observed most of the safety practices
Student observed all the safety practices.
23 Copyright © 2018 Quipper Limited

Did You Know?
● Many people based their health status from the vital signs because a change in vital signs can be an important sign that something is wrong.
● A high temperature may be a sign of infection. Also, drastic changes in the environmental temperature can also affect a person’s body temperature.
Wrap Up
Meal Preparation Cleaning, Washing, and Ironing
Taking Vital Signs
airpot sterilizer sphygmomanometer ❖ aneroid manometer ❖ mercury manometer ❖ digital
sphygmomanometer
blender dishwasher stethoscope
food processor washing machine thermometer ❖ glass thermometer ❖ digital thermometer ❖ tympanic thermometer
coffeemaker dryer
microwave oven flat iron and board
knife vacuum cleaner
chopping board
peeler
24 Copyright © 2018 Quipper Limited

ladle
food tong
Introspect: Self-Evaluation
How confident are you with your acquired skills from the lesson? Put a check (/) on the corresponding descriptor.
Skills
Very confident Fairly confident Not very confident
Not at all confident
I can identify the appropriate tools, equipment, and paraphernalia in caregiving.
I can determine the proper utilization of each tool, equipment, and paraphernalia.
I can use and operate the caregiving tools, equipment, and paraphernalia properly.
25 Copyright © 2018 Quipper Limited

Bibliography
Carter, Pamela J. 2012. Lippincott’s Textbook for Nursing Assistants (Third Edition). Philadelphia: Lippincott Williams & Wilkins. Elana D. Zucker. 2009. The Caregiver’s Resourcebook (Sixth Edition). Pearson Education South Asia PTE. LTD. https://www.wikihow.com/Use-a-Coffee-Maker Harris, Tom. “How Vacuum Cleaners Work.” Accessed November 15, 2018.
https://home.howstuffworks.com/vacuum-cleaner.htm
Glossary armpit - underarm bulb - a rubber which you squeeze in sphygmomanometer to inflate the cuff cuff – a fabric that is wrapped around a patient’s arm pulse - refers to the rate, rhythm, and strength of the heartbeat rectum - the end part of the large intestine
26 Copyright © 2018 Quipper Limited