turning an end grain lidded box
TRANSCRIPT
8/3/2019 Turning an End Grain Lidded Box
http://slidepdf.com/reader/full/turning-an-end-grain-lidded-box 1/30
1
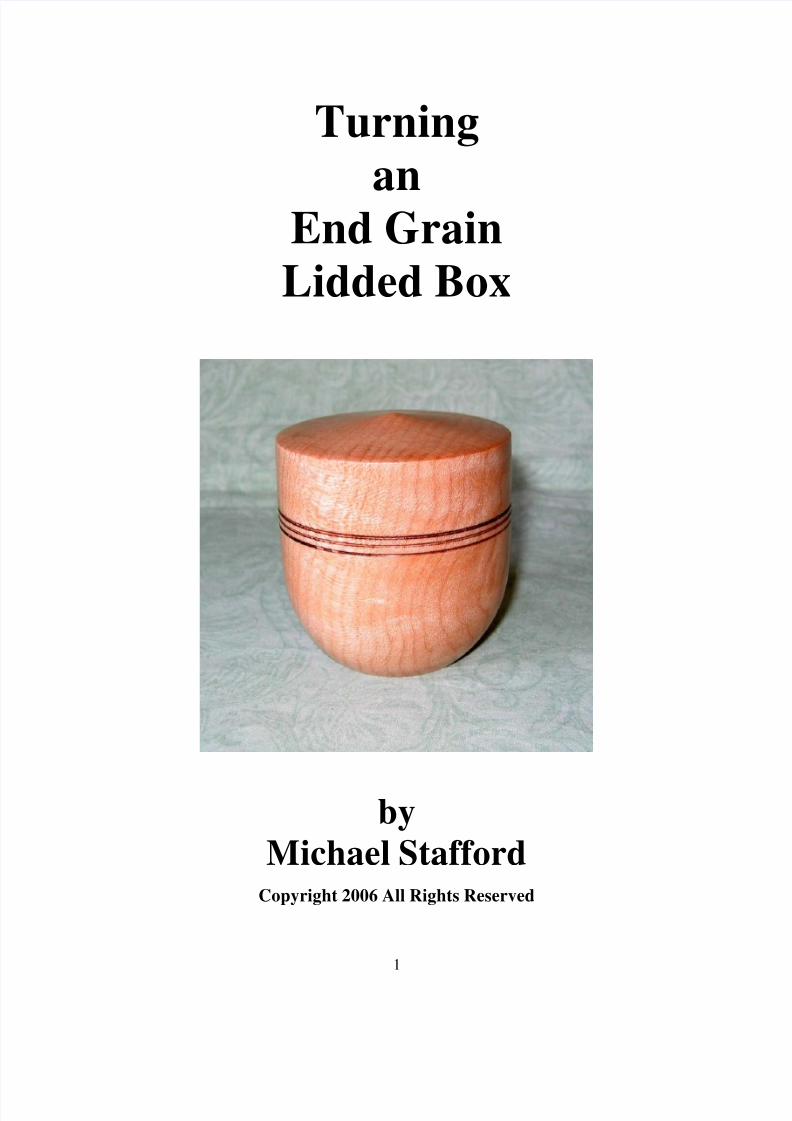
Turning
anEnd Grain
Lidded Box
by
Michael StaffordCopyright 2006 All Rights Reserved

8/3/2019 Turning an End Grain Lidded Box
http://slidepdf.com/reader/full/turning-an-end-grain-lidded-box 2/30
2
Turning an End Grain Lidded Box
Turning an end grain lidded box differs primarily in the way the wood is oriented
on the lathe and the tools that are used. Whereas the ring boxes previously describedwere turned in the face plate orientation, end grain lidded boxes are turned with the grain
running the length of box in the spindle orientation. The grain is rotating parallel to the
axis of rotation of the lathe. Because of this, spindle gouges, detail gouges, skew chiselsand other spindle turning tools are used. However some turners use bowl gouges to great
effect while hollowing end grain. In finishing and smoothing the inside of end grainlidded boxes, scrapers in a variety of shapes are useful in removing ripples left by other
turning tools and in achieving a smooth shape.
End grain lidded boxes are somewhat limited in size as the larger they become the
more difficult it can be for someone with small hands to open the box. Stability also
becomes a concern as the diameter of the box increases. Even though end grain liddedboxes are generally more stable than face plate turned ring boxes, as the box increases in
size the reaction to changes in humidity and temperature also become more of a
consideration.
Because end grain lidded boxes are generally small they afford the turner an
opportunity to use highly figured and expensive exotic woods which would be
impractical in larger boxes. These relatively small boxes are usually held in the hand tobe opened and must be finished to perfection as all surfaces are touched by their owners.
Turned boxes that will be used to contain pills in a purse or pocket may have avery securely fitting lid whereas another box sitting on a desk and holding paper clips
will by necessity have a loose fitting lid that is easily removed with one hand. The mark
of a finely turned box is the suction fit of the lid. Experience shows far more of these
small boxes are displayed as decorative objects than used as functional storagecontainers.
In this tutorial I will describe the methods I use to turn an end grain lidded box. Ipattern my method after Richard Raffan whose book Turning Boxes was the inspiration
for me to learn how to turn these functional yet decorative objects.
The steps for turning an end grain lidded box will begin on the next page with
wood selection.
I hope this tutorial will encourage other turners to try this fascinating aspect of wood turning.

8/3/2019 Turning an End Grain Lidded Box
http://slidepdf.com/reader/full/turning-an-end-grain-lidded-box 3/30
3
Pictured is an assortment of turning blanks 3-4” long and 2 1/2- 3” square. Species infront from left to right are curly maple, curly shedua, pink Tasmanian myrtle burl, and in
the rear from the left are Goncalo alves, Bois de rose and curly bubinga.
The first step in preparing a blank for mounting between centers is to locate the center on
each end. Here a center finding jig is being used to mark the center. It is best to mark
from all four corners to ensure finding the true center.

8/3/2019 Turning an End Grain Lidded Box
http://slidepdf.com/reader/full/turning-an-end-grain-lidded-box 4/30
4
With an awl make a shallow mark on each end to locate the exact center. The points of
the drive center and live center will be located by these marks.
Here the picture shows the ends of two blanks after being placed in a V-block and scoring
the ends with a band saw. This scoring process makes it easier to seat the drive center
without pounding it with a mallet which can sometimes split the blank.

8/3/2019 Turning an End Grain Lidded Box
http://slidepdf.com/reader/full/turning-an-end-grain-lidded-box 5/30
5
Mount the blank between centers and turn it round. Here a roughing gouge is being used
to turn the blank round. Some time could be saved by knocking off the corners of the
blank on the table saw or band saw but it is nearly as quick to turn them off.
Continue turning the blank until it is completely round along its length. With a sharp
gouge a fine finish is possible.

8/3/2019 Turning an End Grain Lidded Box
http://slidepdf.com/reader/full/turning-an-end-grain-lidded-box 6/30
6
Use outside calipers to determine the diameter of the chuck jaws in compression mode.
Each end of the blank will require a spigot sized to fit inside the jaws so that the chuck
can securely grip the wood in compression mode.
Use the calipers to size the spigot on each end. Size the spigot to fit the chuck jaws with
a parting tool. If the jaws are dovetailed a skew chisel can be used to cut the spigot tomatch that shape. The shoulder of the blank should be square or slightly concave so that
the jaws will seat completely against it.
8/3/2019 Turning an End Grain Lidded Box
http://slidepdf.com/reader/full/turning-an-end-grain-lidded-box 7/30
7
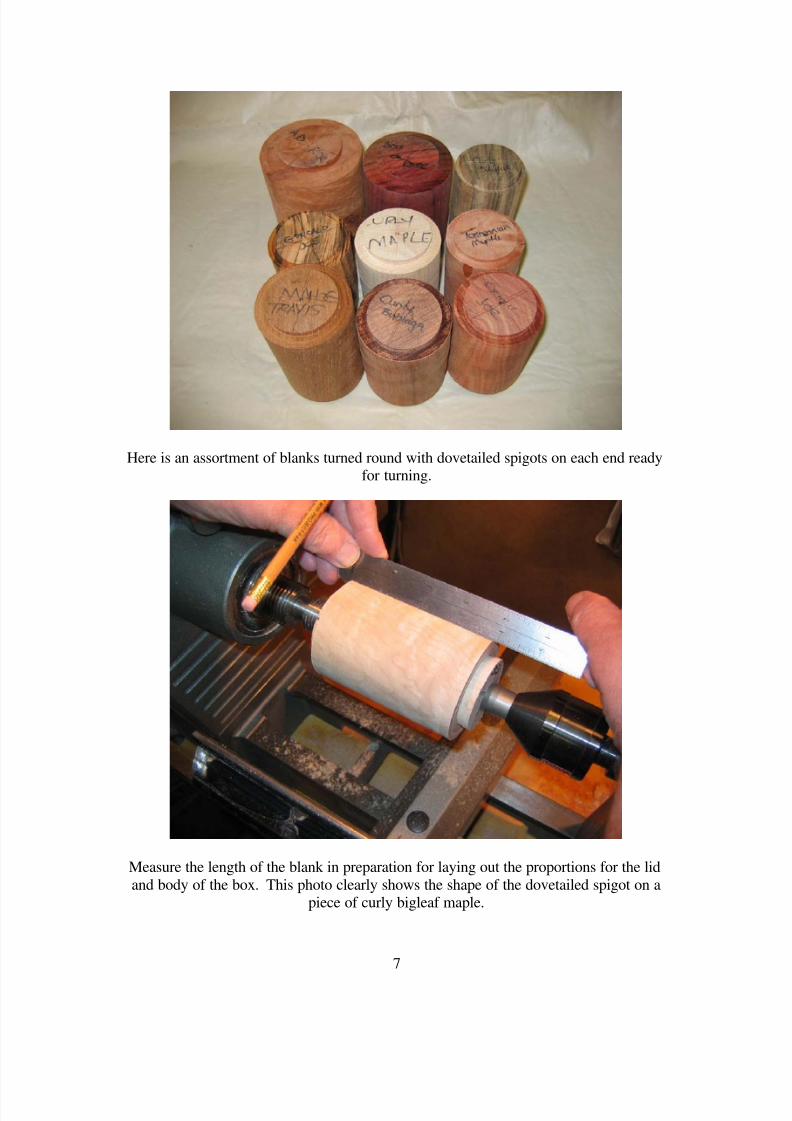
Here is an assortment of blanks turned round with dovetailed spigots on each end readyfor turning.
Measure the length of the blank in preparation for laying out the proportions for the lid
and body of the box. This photo clearly shows the shape of the dovetailed spigot on apiece of curly bigleaf maple.

8/3/2019 Turning an End Grain Lidded Box
http://slidepdf.com/reader/full/turning-an-end-grain-lidded-box 8/30
8
Here a rule is being used to mark the location for the parting cut and proposed location of the box lid flange. Usually the lid overlaps the box body by about ¼”. A well balanced
box aims for proportions of about 40% lid and 60% box body.
A 1/16” fluted parting tool is used to separate the two parts of the box. The thinness of
the tool minimizes the grain mismatch when the box is finished. Usually I part until thereremains a small ½” diameter piece connecting the top and bottom.
8/3/2019 Turning an End Grain Lidded Box
http://slidepdf.com/reader/full/turning-an-end-grain-lidded-box 9/30
9
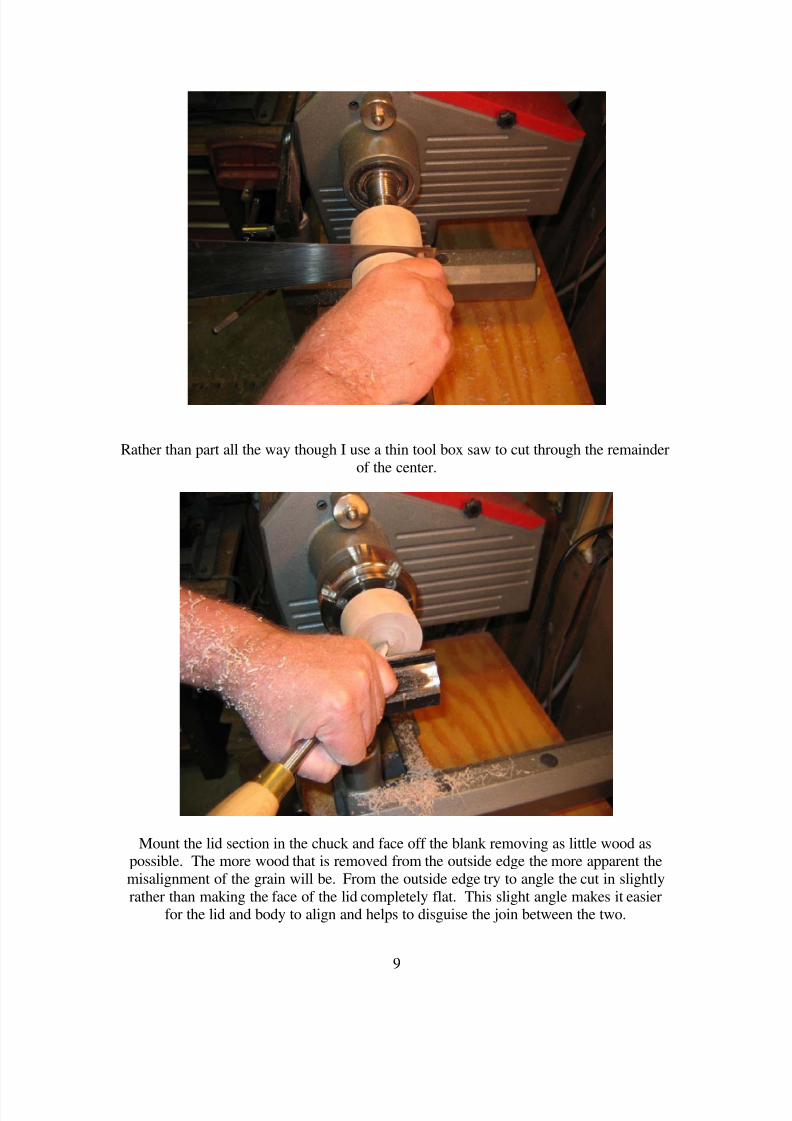
Rather than part all the way though I use a thin tool box saw to cut through the remainder
of the center.
Mount the lid section in the chuck and face off the blank removing as little wood aspossible. The more wood that is removed from the outside edge the more apparent the
misalignment of the grain will be. From the outside edge try to angle the cut in slightly
rather than making the face of the lid completely flat. This slight angle makes it easierfor the lid and body to align and helps to disguise the join between the two.
8/3/2019 Turning an End Grain Lidded Box
http://slidepdf.com/reader/full/turning-an-end-grain-lidded-box 10/30
10
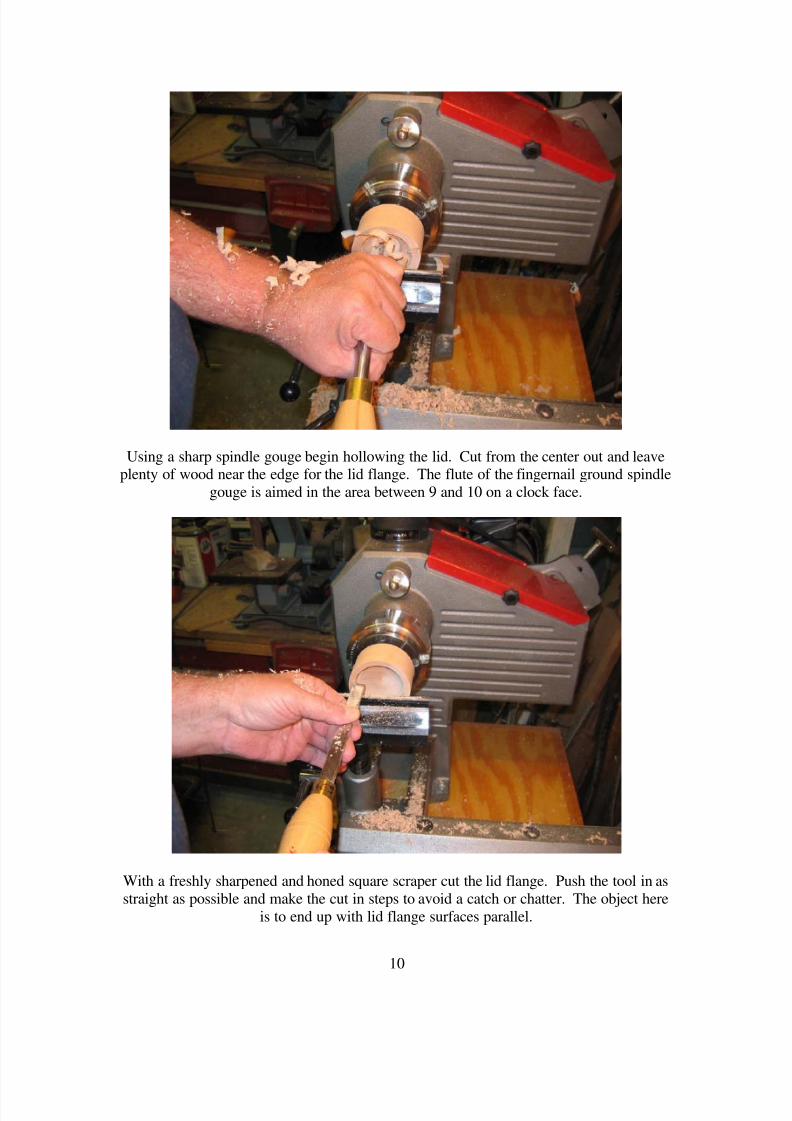
Using a sharp spindle gouge begin hollowing the lid. Cut from the center out and leaveplenty of wood near the edge for the lid flange. The flute of the fingernail ground spindle
gouge is aimed in the area between 9 and 10 on a clock face.
With a freshly sharpened and honed square scraper cut the lid flange. Push the tool in as
straight as possible and make the cut in steps to avoid a catch or chatter. The object here
is to end up with lid flange surfaces parallel.

8/3/2019 Turning an End Grain Lidded Box
http://slidepdf.com/reader/full/turning-an-end-grain-lidded-box 11/30
11
Use the inside calipers to determine if the lid flange is parallel. Insert the caliper upagainst the shoulder cut by the square scraper and spread open the tips until they just
touch. Slowly pull the calipers out toward the lip of the lid. If the sides are parallel the
caliper tips should touch the sides of the lid flange equally at all points. The object is to
not have the lid flange dovetailed inwardly or outwardly so that a good suction fit can beachieved over the box body flange. If the lid flange is outwardly dovetailed, the lid will
not stay on during turning. If the lid is dovetailed inwardly, the lid will be tight as it first
goes on but will be loose and revolve freely when on all the way.
Adjust the cut with the square scraper until the flange is parallel. Keep checking with the
inside calipers until the flange is parallel. Take time and get this right so the lid will fitproperly.

8/3/2019 Turning an End Grain Lidded Box
http://slidepdf.com/reader/full/turning-an-end-grain-lidded-box 12/30
12
Once the flange is parallel use a freshly sharpened spindle gouge or as pictured here a
sharp round nose scraper to clean up and detail the inside of the lid. Be careful not to
damage the lid flange.
Sand the inside surfaces of the lid. Be careful not to sand the inside edges of the lidflange as sanding them can result in the flange becoming out of round. A quick swipe
with a fine grit paper is all that is needed to smooth the lid flange if the surfaces were cut
cleanly.

8/3/2019 Turning an End Grain Lidded Box
http://slidepdf.com/reader/full/turning-an-end-grain-lidded-box 13/30
13
Once the sanding is complete use a couple of rules to measure the depth of the lid. This
measurement will help establish where the parting cut and top of the outside of the lidwill be.
Here the measurement from the inside of the lid and an approximation of the lid thicknessis marked on the lid exterior. Typically allow 3/16-1/4” thickness for the lid thickness
when parting off. Design of the lid will be the determining factor.

8/3/2019 Turning an End Grain Lidded Box
http://slidepdf.com/reader/full/turning-an-end-grain-lidded-box 14/30
14
A thin 3/32” diamond parting tool is used to make a reference cut on the outside of thelid. This helps to define where the inside top of the lid is-- approximately ¼” below this
parting cut.
Here the inside of the lid is sanded and ready to finish. The shoulder of the flange on theinside is not as smooth as the rest of the inside surfaces because it cannot be finely
sanded without distorting the lid flange itself.

8/3/2019 Turning an End Grain Lidded Box
http://slidepdf.com/reader/full/turning-an-end-grain-lidded-box 15/30
15
The lid has been finished and polished on the inside. At this point the lid flange is overly
thick but this will be remedied when the lid is mated with the box body and both are
shaped as a unit.
Chuck up the body of the box. Measure the approximate length of the box flange.The toe of the skew is used to sever the fibers and approximate the length of the box
flange where the lid will over fit the box. This helps to minimize grain tear out during
the next step.

8/3/2019 Turning an End Grain Lidded Box
http://slidepdf.com/reader/full/turning-an-end-grain-lidded-box 16/30
16
Use a parting tool to cut a tapered lip on the box flange. The object here is to cut atapered shoulder where the lid will just begin to go onto the box flange. Do not cut the
box flange so that the lid will fit at this time.
A skew can be used to do a peeling/scraping cut for better control and less splintering of
the box flange as it nears the diameter where the lid will just begin to go on. Test the lidon the box flange frequently and when it just fits on the tapered flange at all, stop cutting.

8/3/2019 Turning an End Grain Lidded Box
http://slidepdf.com/reader/full/turning-an-end-grain-lidded-box 17/30
17
Use a freshly sharpened fingernail profile spindle gouge to hollow the box body.
Remember to allow enough thickness in the area of the box flange so that it can be
adjusted later on to fit the lid.
A curved scraper is being used to refine and smooth the inside shape of the box after the
spindle gouge work. Sharp scrapers work very well on end grain if a light touch is used.Little wood is being removed here, just smoothed out.

8/3/2019 Turning an End Grain Lidded Box
http://slidepdf.com/reader/full/turning-an-end-grain-lidded-box 18/30
18
Some preliminary shaping is done of the exterior to mirror the internal shape. Finalshaping will be done when the lid is mated back up with the body of the box.
Here is the cleanly cut surface of the interior of the box ready for sanding.

8/3/2019 Turning an End Grain Lidded Box
http://slidepdf.com/reader/full/turning-an-end-grain-lidded-box 19/30
19
Sand the interior using a complete range of grits through 400 or higher depending on the
wood. The finish on the inside should be as good as that on the outside.
Once the sanding is complete use a sharp skew to fine tune the box flange. After
hollowing and sanding the flange might be out of round. At this point the flange should
be cut as cleanly as possible. The lid should be able to be jam fitted onto the box flangesecurely enough for turning but not so tightly as to split.

8/3/2019 Turning an End Grain Lidded Box
http://slidepdf.com/reader/full/turning-an-end-grain-lidded-box 20/30
20
Here the lid has been jammed onto the box flange. The lid and box body must be turned
as a unit to achieve a continuous profile. If the lid fits too loosely on the box flange a
piece of tissue can be inserted between the two to make for a tighter fit. Sometimes a
wipe with a damp sponge can also help a loose lid fit tightly enough for turning.
With a sharp detail gouge the exterior of the box is turned to shape. Note that a livecenter has been brought up for support.

8/3/2019 Turning an End Grain Lidded Box
http://slidepdf.com/reader/full/turning-an-end-grain-lidded-box 21/30
21
Nibble away the excess material on the lid so that the top can be accessed with a gouge
while still supported with the live center. Use the live center to provide additionalsupport for as long as possible.
With a fingernail ground spindle gouge, begin shaping the top of the lid. This operation
is much easier with the live center providing support. A catch in the end grain can tearthe lid from the box and damage it.

8/3/2019 Turning an End Grain Lidded Box
http://slidepdf.com/reader/full/turning-an-end-grain-lidded-box 22/30
22
Refine the shape of the entire box. This box will have straight sides and a rounded
bottom.
The toe of the skew was used to cut some small grooves around the join between the lid
and the box body. These lines disguise the join. Then a wire pulled taut between two
blocks was used to burn the grooves as decoration.

8/3/2019 Turning an End Grain Lidded Box
http://slidepdf.com/reader/full/turning-an-end-grain-lidded-box 23/30
23
Here is the end result of the friction burning with the wire. The box is ready for the restof the spigot on the lid to be removed.
With a thin parting tool nibble away the small tenon on the lid. Take light cuts as a catchcould tear the spigot and a piece of the lid from the box.

8/3/2019 Turning an End Grain Lidded Box
http://slidepdf.com/reader/full/turning-an-end-grain-lidded-box 24/30
24
With a sharp spindle gouge carefully trim the waste from the stub spigot and shape the lid
for sanding. Although this lid was a nice tight jam fit a piece of masking tape was
wrapped around the box at the join to keep the lid in place in the event of a catch.
Carefully sand the lid. Sanding end grain can be tricky so keep the paper moving. Allowthe grit to do the work and avoid extra pressure as pressure will just increase the heat and
some woods are prone to heat checking on end grain.

8/3/2019 Turning an End Grain Lidded Box
http://slidepdf.com/reader/full/turning-an-end-grain-lidded-box 25/30
25
Remove the tape if used and sand as much of the exterior of the box as can be accessed.In this shape all but the bottom and the foot can be finish sanded. Sanding with both
hands provides better control.
Remove the lid and tack off the box, particularly the inside. Finish and polish it.
8/3/2019 Turning an End Grain Lidded Box
http://slidepdf.com/reader/full/turning-an-end-grain-lidded-box 26/30
26
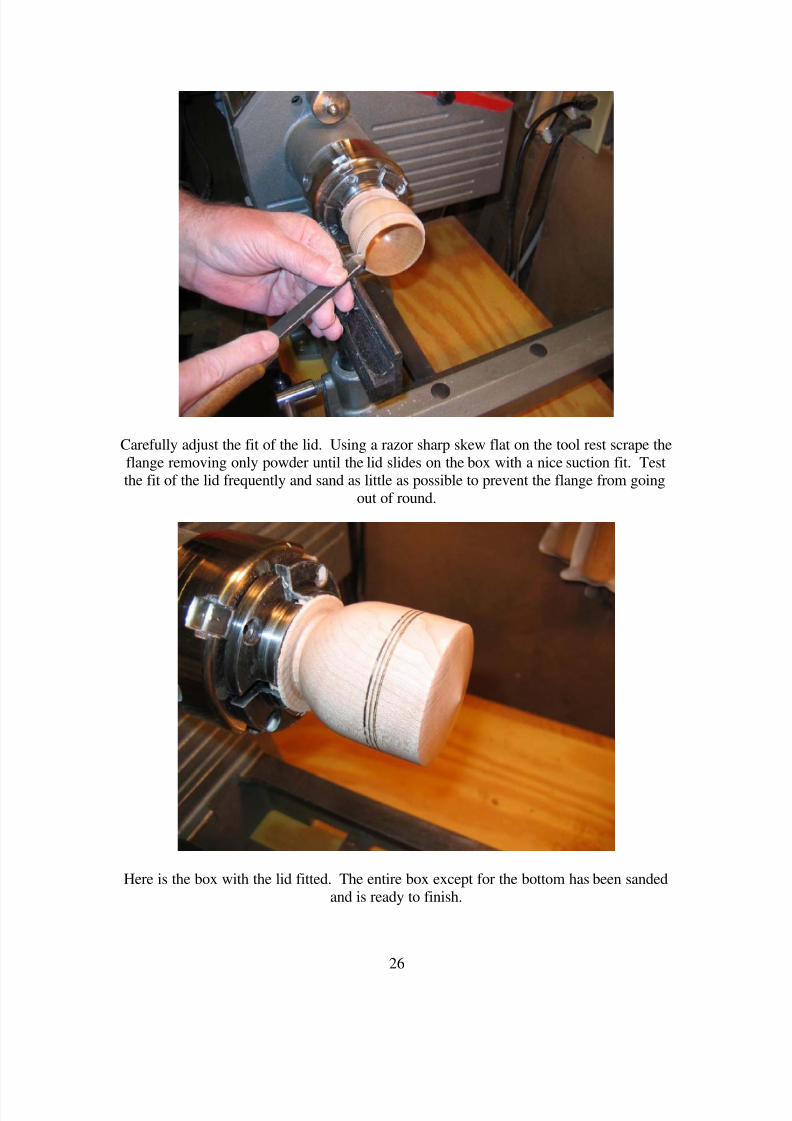
Carefully adjust the fit of the lid. Using a razor sharp skew flat on the tool rest scrape the
flange removing only powder until the lid slides on the box with a nice suction fit. Test
the fit of the lid frequently and sand as little as possible to prevent the flange from going
out of round.
Here is the box with the lid fitted. The entire box except for the bottom has been sanded
and is ready to finish.

8/3/2019 Turning an End Grain Lidded Box
http://slidepdf.com/reader/full/turning-an-end-grain-lidded-box 27/30
27
The box has been finished and polished and is ready to be parted off the bottom spigot.
The 1/16” fluted parting tool is used to remove most of the material from the spigot at the
bottom of the box in preparation for reverse turning the box body.

8/3/2019 Turning an End Grain Lidded Box
http://slidepdf.com/reader/full/turning-an-end-grain-lidded-box 28/30
28
The body of the box is carefully held in the chuck with the jaws gripping the body flangeand the face of the jaws seated against the shoulder of the box body. The tailstock is
brought up for support and a narrow parting tool is used to nibble away the remainder of
the spigot on the bottom.
With a freshly sharpened and honed spindle gouge, light cuts are taken to clean up the
bottom and create a concave area so the box will sit flat. Gliding along on the bevel of the gouge helps to ensure the box remains in the chuck jaws.

8/3/2019 Turning an End Grain Lidded Box
http://slidepdf.com/reader/full/turning-an-end-grain-lidded-box 29/30
29
Sand and finish the bottom as smoothly as the rest of the box. These boxes are small and
people examine all surfaces with their eyes and their fingers and poorly finished areas aresure to be detected.
The picture shows the finished and sanded bottom. A small decorative groove and a
concave bottom assure that the surface was turned, not just parted off and sanded flat.
8/3/2019 Turning an End Grain Lidded Box
http://slidepdf.com/reader/full/turning-an-end-grain-lidded-box 30/30
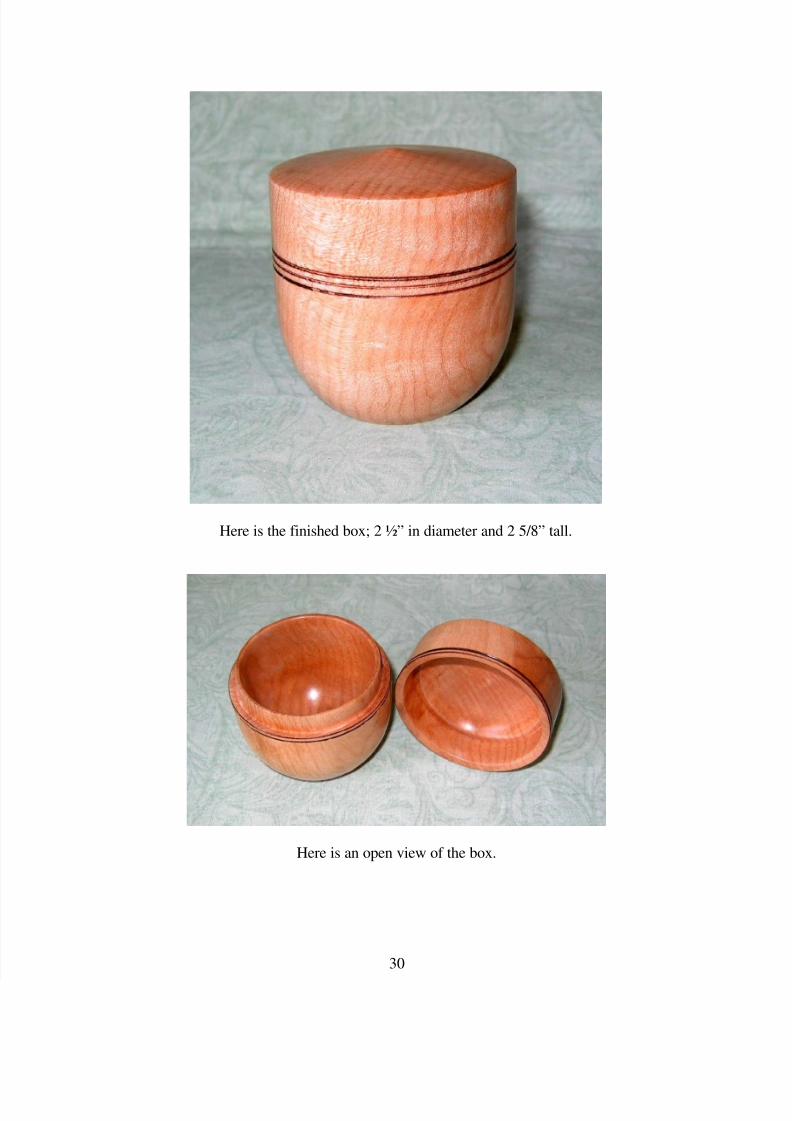
Here is the finished box; 2 ½” in diameter and 2 5/8” tall.
Here is an open view of the box.