tie fighter$ origami (revision 1)
DESCRIPTION
How to fold a tie figther from a dollar bill. Credit goes to Won Park for designing a tie fighter from a dollar bill and Phillip Schultz, who designed an origami tie fighter from a square that is reshaped into a rectangular polygon in the first couple of steps.TRANSCRIPT

I recently saw Won Park’s $ tie fighter on Deviant Art <http://orudorumagi11.deviantart.com/art/Dollar-Tie-Fighter-87704829> and set out to see if I could fold one.
First, some terms describing parts of the finished model.

1-2. Valley-fold to center, lengthwise, x 2
3. Inside reverse fold.The tip of the triangle forms the cockpit’s nose.

4. Another inside reverse fold. The intersection in the circle should be behind the tip of the
triangle that will form the cockpit’s nose. The crease in the oval does not need to line up with the top edge of the bill.
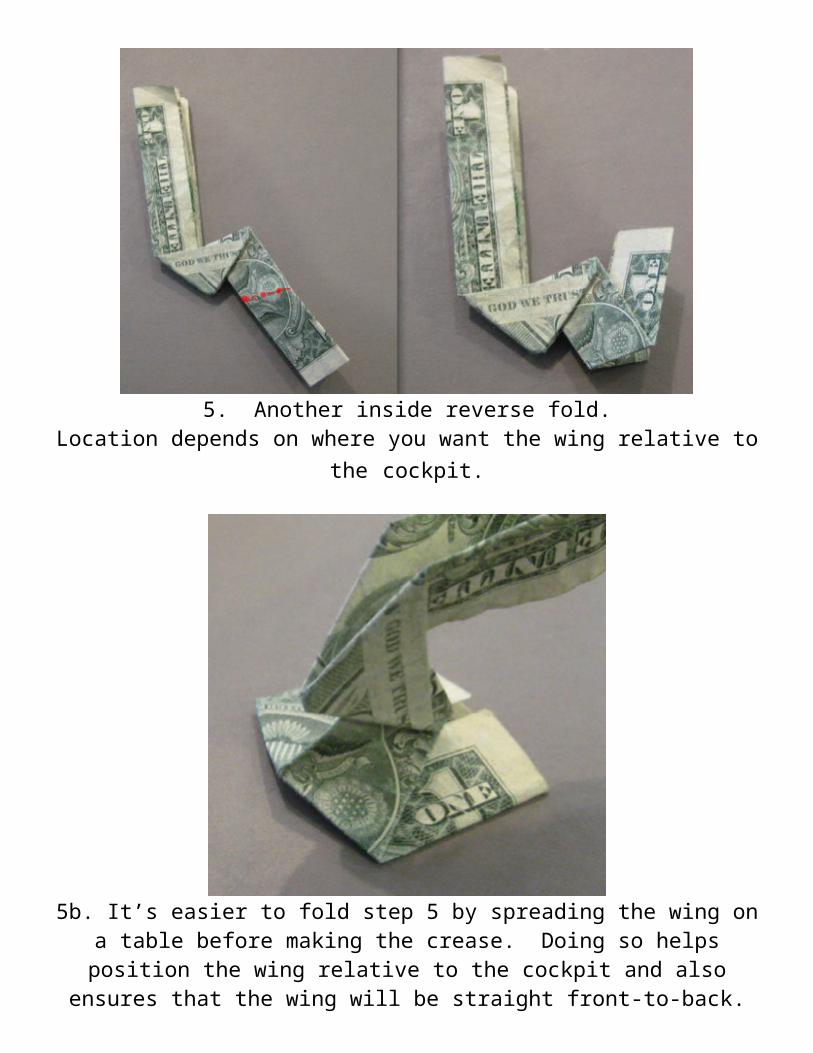
5. Another inside reverse fold.Location depends on where you want the wing relative to the
cockpit.
5b. It’s easier to fold step 5 by spreading the wing on a table before making the crease. Doing so helps position the wing relative to the cockpit and also ensures that the wing will be
straight front-to-back.

Result of step 5.

O. Optional. Reverse/sink the part of crease on the front of the strut that’s nearest the cockpit. It’s much easier to leave this step
out and I think the model looks fine without this step. But it will make the strut skinnier, if you like that look. The optional step is
required if you want your model to look like Mr. Park’s.
Result after optional step.There should be a small fold of paper where indicated by the
mountain fold line.

The small fold of paper in the finished model.
Another view after the optional step.

6. Shape wing into a nice-looking hexagon. The creases along the forward edge (top crease shown in yellow) help keep the wing
from flopping around.

7. Shape cockpit. Results below. The bottom model was folded with the optional step.