the standby wizard version 7 for unix / linux - oracle high …€¦ · · 2017-06-01introduction...
TRANSCRIPT
The Standby Wizard For Oracle
User Manual
For UNIX and Linux Servers
Version 9
Relational Database Consultants, Inc.
All Rights Reserved.

The Standby Wizard For Oracle User Manual.Copyright - Relational Database Consultants, Inc.
The Standby Wizard For Oracle
User Manual
For UNIX & Linux ServersRelational Database Consultants, Inc. (RDC)
12021 Wilshire BlvdSuite 108
Los Angeles, CA. 90025310-281-1915
www.relationalwizards.com
Restricted Rights Notice
Copyright 2001. All Rights Reserved. No portion of this document may be reproduced, recorded, transmitted, or copied without permission from the copyright holders. Information in this document is subject to change without notice.
Trademark Notice
All trademarks in this document belong to their respective holders.
Relational Database Consultants, Inc.www.relationalwizards.com
All Rights Reserved.
2

The Standby Wizard For Oracle User Manual.Copyright - Relational Database Consultants, Inc.
Table of Contents
Introduction
Chapter 1 Installation of the Standby Wizard
Chapter 2 Standby Database Creation - Preliminary Checklist
Chapter 3 Creating a Standby Database
Chapter 4 Building a Standby Database
Chapter 5 Mounting Your Standby Database and Confirming Synchronization With Your Primary Database
Chapter 6 Managing Your Standby Database Using the Standby Database Manager
Chapter 7 Understanding the Primary and Standby Agents
Chapter 8 Troubleshooting a Standby Database Configuration
Chapter 9 Rebuilding Your Standby Database
Chapter 10 Creating Multiple Standby Databases From Your Primary Database
Chapter 11 Emergency Fail-Over to a Standby Database (Activation)
Chapter 12 Graceful Switchback to the Primary Database
Appendix A. The Standby Wizard and the Initialization File (init.ora)
Appendix B. Modifying the Operating System Parameters of the Standby Wizard
Appendix C. Sample SQL*Net Settings
Appendix D. Uninstalling the Standby Wizard
Relational Database Consultants, Inc.www.relationalwizards.com
All Rights Reserved.
3

The Standby Wizard For Oracle User Manual.Copyright - Relational Database Consultants, Inc.
IntroductionToday’s environment dictates that our information be stored in highly available systems. As we move into the 21st Century, we are faced with increased incidents of cyber-crime, power shortages, and real terrorism. Yet, at the same time, our information systems must meet the 24/7 demands of a global networked economy. In this age, the threats to our information systems are greater than ever before - yet so are the demands put upon them. Therefore, high-availability will soon become a standard for all information retrieval systems in this new century.
The Oracle Corporation, through its popular Oracle RDBMS, offers the standby database as its high availability paradigm. In the Oracle model, a production primary database archives changes (redo logs) to a dormant standby database. This standby database constantly recovers those same logs to stay synchronized with the primary database. In the event of a failure, this standby database can be activated - made ready to perform the crucial tasks of the primary database and thus become available for use.
Unfortunately, up to this point, setting up an Oracle standby database is a very complex and costly project. Only skilled DBA’s can accomplish the many steps required to both build and maintain a standby database configurations. Because of the these high human resource costs, Relational Database Consultants, Inc. (RDC) has automated the labor involved in creating and maintaining standby databases in the form of the new software offering: The Standby Wizard for Oracle.
The Standby Wizard for Oracle is designed to lower your costs, automate your labor, and increase the fitness of your high-availability solution. With the Standby Wizard, any Oracle DBA can set up a standby database configuration in only a few hours. After a user becomes proficient with the Standby Wizard, one can define and begin building a standby database in only a few minutes. The Standby Wizard is also not dependent on the Oracle Enterprise Edition, Oracle 9i, or SQL*Net. This will help smaller companies reduce their Oracle licensing costs, or at least, allow them to purchase other Oracle offerings they find necessary.
The fact that the Standby Wizard is not dependent on Oracle’s SQL*Net will allow you to build standby databases across any network connection - to remote databases that might not even be a part of your Oracle domain. This feature allows you to clone database copies to any remote server that can house your Oracle standby database. The Standby Wizard not only automates the creation of your standby database(s) – diagnostic and maintenance functions are also automated. Managing a standby database configuration used to involve the querying of complex data dictionary views or mulling over raw output. Now all this information is at your fingertips with a simple Windows interface and an easy-to-understand auditing log for each standby database that you create.
Some maintenance tasks that used to be crucial to keeping a standby database viable are no longer necessary with the Standby Wizard. The Standby Wizard can actually detect if a tablespace (data file) or redo log specification has changed and will perform intelligently an incremental rebuild of your standby database, making only the minimal changes necessary. The Standby Wizard will also detect database changes that are not logged (no logging) and will perform an intelligent rebuild on only those data files that need repair. This not only saves human resource hours but it will save you disk and CPU usage maintaining your standby database configuration.
If disaster ever hits, the Standby Wizard can be activated along with your standby database without the need for an Oracle DBA to issue SQL commands to start, mount, activate, and open your standby database. Simply click on an automated command file from your mouse. The
Relational Database Consultants, Inc.www.relationalwizards.com
All Rights Reserved.
4

The Standby Wizard For Oracle User Manual.Copyright - Relational Database Consultants, Inc.
Standby Wizard automates these tasks, and with our powerful monitoring and validation tools, the chances of your standby database performing incorrectly during a crisis greatly diminish.
In your high-availability planning to migrate back to your primary database after a crisis, the graceful switchback features of the Standby Wizard are second to none. Simply click on a single button with your mouse and the Standby Wizard rebuilds your original primary database from memory! Because of this graceful switchback feature, the Standby Wizard can be used as an automated backup tool for your production databases or as a tool to clone databases with.
The amount of person-hours you will save using the Standby Wizard is amazing. We at Relational Database Consultants, Inc. (RDC) have experienced a 95% reduction in labor costs when using the Standby Wizard to build and maintain standby databases. Once you use the Standby Wizard, the complex project of implementing Oracle’s standby database technology will become nothing more than a simple task – no more difficult than creating or dropping a table while drinking your morning cup of java.
However, as you drink your java for the first time with the Standby Wizard User Manual, we strongly recommend that you carefully read each chapter of this user manual before you perform the associated tasks or function of the Standby Wizard. Don’t be fooled by the ease-of-use of this product, behind the scenes the complex tasks of standby database creation are still taking place. When you first install the Standby Wizard, there is a checklist you need to go through. Therefore, we urge you to learn as much as you can about the Standby Wizard and Oracle’s standby database paradigm – yet leave the actual work to the Standby Wizard.
Relational Database Consultants, Inc.www.relationalwizards.com
All Rights Reserved.
5

The Standby Wizard For Oracle User Manual.Copyright - Relational Database Consultants, Inc.
Chapter One
Installation of the Standby WizardRequirements
The Standby Wizard for Oracle Version 8 requires the following to be implemented successfully on your Oracle platform(s):
1. An Oracle database of version 9.2.or above with the Java option installed (default). (If you have an earlier version of Oracle, contact us at: [email protected] an appropriate version of the Standby Wizard)
2. An Oracle database that is archiving its redo logs (alter database archivelog).
3. To run the Java user-interface from Unix - you will need the Java JRE 1.4 or higher. The Java JRE is supplied by Oracle. You can download the Java JRE 1.4 from SUN at this link:
http://java.sun.com/products/archive/j2se/1.4.1_02/index.html
The .exe extractable version of the Standby Wizard for Oracle installs on a Windows Client from where you can manage Unix servers.
4. Technical ability to perform basic Windows Administration tasks.
5. Technical ability to perform Oracle DBA tasks.
6. A valid Oracle support license.
7. A Network Configuration between servers (Intranet, extranet (VPN), or LAN/WAN) that will allow either standard rcp, scp, or ftp to copy and receive files from your primary database to a given standby host without password prompting. Oracle's SQL*Net must also be installed on both the primary and standby servers
8. Access to the Oracle Unix/Linux user account running the borne shell. (bash shell is acceptable)
Once you have determined that these above conditions are met, Installation of the Standby Wizard is performed in three easy steps:
Installation Step One - Client Installation
Win32 Client Installation:
The first Installation step is performed on the Windows client that will communicate with the Unix servers.
Simply click on the installation executable, the Standby Wizard Windows Installation places all of the Standby Wizard programs in the c:\Program Files\Standby Wizard Version 8 directory. Be sure to read your license agreement that resides in this directory.
Relational Database Consultants, Inc.www.relationalwizards.com
All Rights Reserved.
6

The Standby Wizard For Oracle User Manual.Copyright - Relational Database Consultants, Inc.
The demo version of this release only works for a limited time and must not be used on production systems.
Note: Windows Client 64 bit users:
The Encryption Wizard client may be inadvertently placed in directory "c:\program files(x86)\Standby Wizard Version 8" by Windows. Copy this installation directory to: C:\Program Files\Standby Wizard Version 8. The Standby Wizard's Java client is 64-bit compatible.
Zip File Installation (Unix Client)
Once you download the .zip file for the Standby Wizard, simply extract the contents into a single directory on your client. If you plan on running the Java User Interface from a Unix server directly - you may transfer the extraction to a new directory on your Unix workstation or server.
Installation Step Two - Database Installation
The Standby Wizard for Oracle server component is always installed on the primary database that we are going to create standby databases from and never on a standby database. The database installation script is run from SQL*Plus either locally or via a remote client. The following is a list of the actions performed by the Database Installation script when it is run on the primary database:
1. Creates an Oracle user account named rdc_standby_user and grants certain resource and system privileges.
2. Creates the tables that the Standby Wizard uses.
3. Compiles the intelligent PL/SQL packages that comprise the Standby Wizard.
4. Creates your license information.
When you click on the Database Installation icon, you will need to have DBA privileges required to create the Standby Wizard user rdc_standby_user. This is why the first prompt that you will receive when running the install script will be for the SYSTEM account password. The database installation script rdc_standby_install.sql, first connects as SYSTEM to create an Oracle user account by the name rdc_standby_user. This new account is granted the following roles:
1. Connect 2. Resource3. Execute_Catalog_Role4. Select_Catalog_Role5. Select Any Dictionary6. Select Any Table7. Manage Tablespace8. Alter Database9. Alter System10. Administer Database Trigger11. Execute Any Procedure12. JavaSysPriv
Aside from the SYSTEM password that you will be prompted for, you will be asked to provide information necessary to create the rdc_standby_user Oracle user and grant
Relational Database Consultants, Inc.www.relationalwizards.com
All Rights Reserved.
7

The Standby Wizard For Oracle User Manual.Copyright - Relational Database Consultants, Inc.
rdc_standby_user the above privileges needed to create standby databases. If you make a mistake at any point in the process, just hit control-c or cancel from sqlplus and simply run the database installation script again.
If you are re-installing the Standby Wizard, make sure no one is connected as the Standby Wizard user, rdc_standby_user and that the primary agent is offline. The Database Installation script first drops the Standby Wizard user account and all of its objects, to insure a clean install.
Starting the Database Installation Script From a Windows Client:
Once you have installed the Standby Wizard product on your client Windows machine, you will need to start the Database Installation icon from the Program Menu - simply navigate to Start | Programs | Standby Wizard Verison 8. | Database Installation. The database installation script creates the Standby Wizard user and installs the Standby Wizard tables and intelligent PL/SQL packages within the Oracle RDBMS via SQL*Plus.
If the Database Installation step never starts, and you are not prompted for these five items, it probably indicates that your SQL*Plus executable“sqlplusw” is not located in the current OS path. If this is the case, you can fix the OS path, use sqlplus.exe as the target, or evoke SQL*Plus from the Program Menu and run the script rdc_standby_install.sql as such:
SQL>start “c:\Program Files\Standby Wizard Version 8\rdc_standby_install.sql”
Starting the Database Installation script from Unix, Linux, or the Windows Command Prompt
Unix and Linux users can install the Standby Wizard by simply starting SQL*Plus in the directory containing the Standby Wizard zip extract. Once SQL*Plus is started, simply start the Database installation script from the SQL*Plus prompt as such:
SQL>@rdc_standby_install
Or
SQL>start rdc_standby_install
Database Installation Script Walk-Through
Here is a list of the five SQL*Plus prompts you will receive when running the Database Installation script:
1. Enter the password for the Oracle user account SYSTEM:
This is the sting of the system account password. By default in Oracle, it is manager. So for instance, if you connect as system/foobar, you would enter the string foobar after this prompt. This password is only used to create the Standby Wizard user account rdc_standby_user and is immediately undefined in the SQL*Plus script.
2. Enter the SQL*Net service_name used to connect to this database:
Relational Database Consultants, Inc.www.relationalwizards.com
All Rights Reserved.
8
The Standby Wizard For Oracle User Manual.Copyright - Relational Database Consultants, Inc.
This is the service name that you currently use in your connection strings to login into the database for which you are installing the Standby Wizard, your primary database. For instance, if you log in as: scott/tiger@mydb, then your SQL*Net service name is mydb.
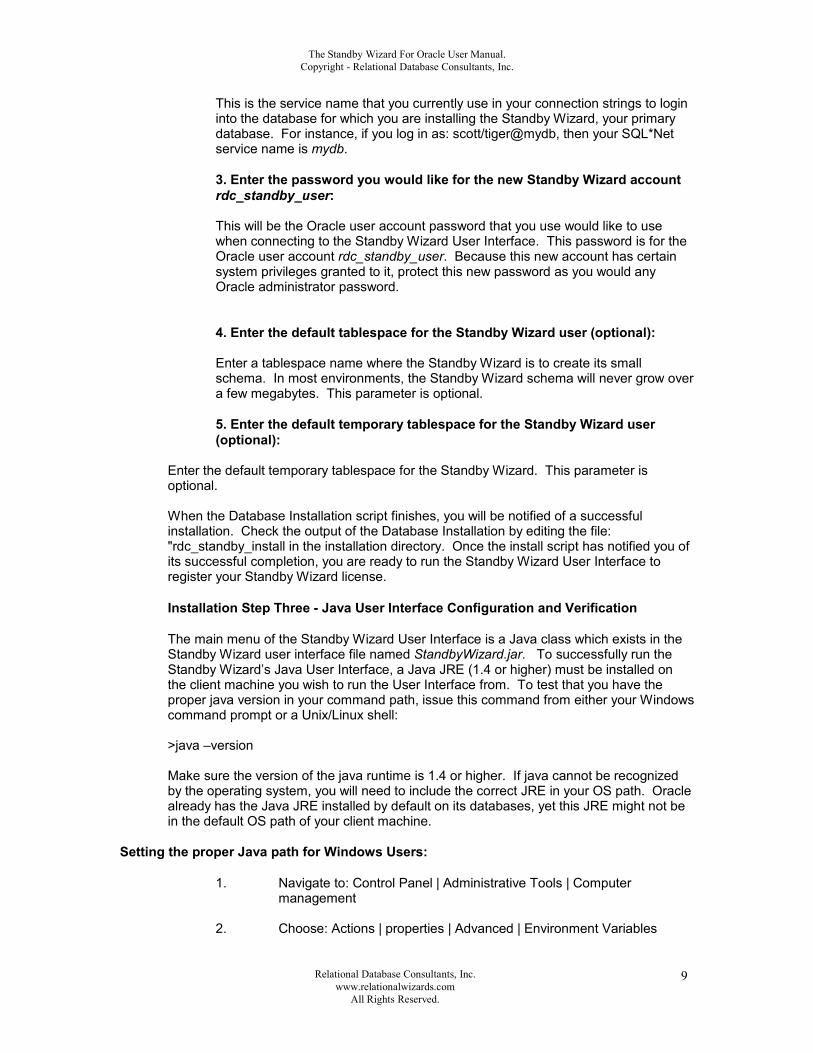
3. Enter the password you would like for the new Standby Wizard account rdc_standby_user:
This will be the Oracle user account password that you use would like to use when connecting to the Standby Wizard User Interface. This password is for the Oracle user account rdc_standby_user. Because this new account has certain system privileges granted to it, protect this new password as you would any Oracle administrator password.
4. Enter the default tablespace for the Standby Wizard user (optional):
Enter a tablespace name where the Standby Wizard is to create its small schema. In most environments, the Standby Wizard schema will never grow over a few megabytes. This parameter is optional.
5. Enter the default temporary tablespace for the Standby Wizard user (optional):
Enter the default temporary tablespace for the Standby Wizard. This parameter is optional.
When the Database Installation script finishes, you will be notified of a successful installation. Check the output of the Database Installation by editing the file: "rdc_standby_install in the installation directory. Once the install script has notified you of its successful completion, you are ready to run the Standby Wizard User Interface to register your Standby Wizard license.
Installation Step Three - Java User Interface Configuration and Verification
The main menu of the Standby Wizard User Interface is a Java class which exists in the Standby Wizard user interface file named StandbyWizard.jar. To successfully run the Standby Wizard’s Java User Interface, a Java JRE (1.4 or higher) must be installed on the client machine you wish to run the User Interface from. To test that you have the proper java version in your command path, issue this command from either your Windows command prompt or a Unix/Linux shell:
>java –version
Make sure the version of the java runtime is 1.4 or higher. If java cannot be recognized by the operating system, you will need to include the correct JRE in your OS path. Oracle already has the Java JRE installed by default on its databases, yet this JRE might not be in the default OS path of your client machine.
Setting the proper Java path for Windows Users:
1. Navigate to: Control Panel | Administrative Tools | Computer management
2. Choose: Actions | properties | Advanced | Environment Variables
Relational Database Consultants, Inc.www.relationalwizards.com
All Rights Reserved.
9

The Standby Wizard For Oracle User Manual.Copyright - Relational Database Consultants, Inc.
3. Click on the system variable in the lower list called “path” and click on EDIT to modify the path to include the proper java path.
Example: (In this example mypath is already defined)
Path = c:\mypath;C:\Program Files\s1studio_jdk\j2sdk1.4.1_02\bin
For Oracle 9i users who don’t want to install the SUN JRE, the following example uses the Oracle JRE 1.3. In this example, ORACLE_HOME is defined as c:\oracle\ora92. In Oracle 9i the JRE path is: ORACLE_HOME/jdk/jre/bin.Path = c:\mypath;c:\oracle\ora92\jdk\jre\bin;
Once you have edited the path information and clicked on OK - open a new command prompt window and run the command “java –version” again.
Setting the Proper Path for Unix/Linux users:
After you have extracted the Standby Wizard for Oracle, move all of the files up to a single Unix directory where you wish to start the Standby Wizard.
If you cannot run “java –version” - then to change the Java path, simply edit your .profile or .bash_profile file in the home directory of the Unix account that will run the Standby Wizard to include the proper Java path.
Note:
Make sure to set the script StandbyWizard.sh as an executable for Unix as such:$chmod 744 StandbyWizard.sh
5. Starting the Standby Wizard User Interface
To invoke the Standby Wizard User Interface from a windows client simply click on the icon labeled Java User Interface. You may also run the bat file named StandbyWizard.bat directly from the directory C:\Program Files\Standby Wizard for Oracle
If you are running a Unix or Linux client - simply execute the provided shell script that you modified in the previous step:$./StandbyWizard.sh
Note:
Oracle 12c users need to add this line to the sqlnet.ora file on the primary and standby database servers to run the Standby Wizard Java UI:
SQLNET.ALLOWED_LOGON_VERSION=8
Relational Database Consultants, Inc.www.relationalwizards.com
All Rights Reserved.
1

The Standby Wizard For Oracle User Manual.Copyright - Relational Database Consultants, Inc.
In this example, the password we specified during the Standby Wizard install is rdc and the Database SID is prod817. The host machine where the Oracle server resides is rdc4 - if you do not have a host name you can instead use the IP address of the database server.
In most cases the default Oracle port number is 1522 or 1521. Feel free to change this value dependent on the settings of the listener.ora file located on your primary database server.
Once Java connects you to your RDBMS, you will see the Standby Wizard Main Menu:
Relational Database Consultants, Inc.www.relationalwizards.com
All Rights Reserved.
1

The Standby Wizard For Oracle User Manual.Copyright - Relational Database Consultants, Inc.
From the Standby Wizard main menu, you can always see the following useful items:
1. The Version No. of the Standby Wizard.2. The Expiration Date (remains blank after purchase).3. The Host Name of the physical machine the Standby Wizard has been installed on.4. The primary database Oracle SID.5. The current Operating System of the primary database.
When you first enter the Main Menu - you will need to enter a demo license code which can be obtained at [email protected].
To complete your installation, click on the menu button labeled Administration:
Relational Database Consultants, Inc.www.relationalwizards.com
All Rights Reserved.
1
The Standby Wizard For Oracle User Manual.Copyright - Relational Database Consultants, Inc.
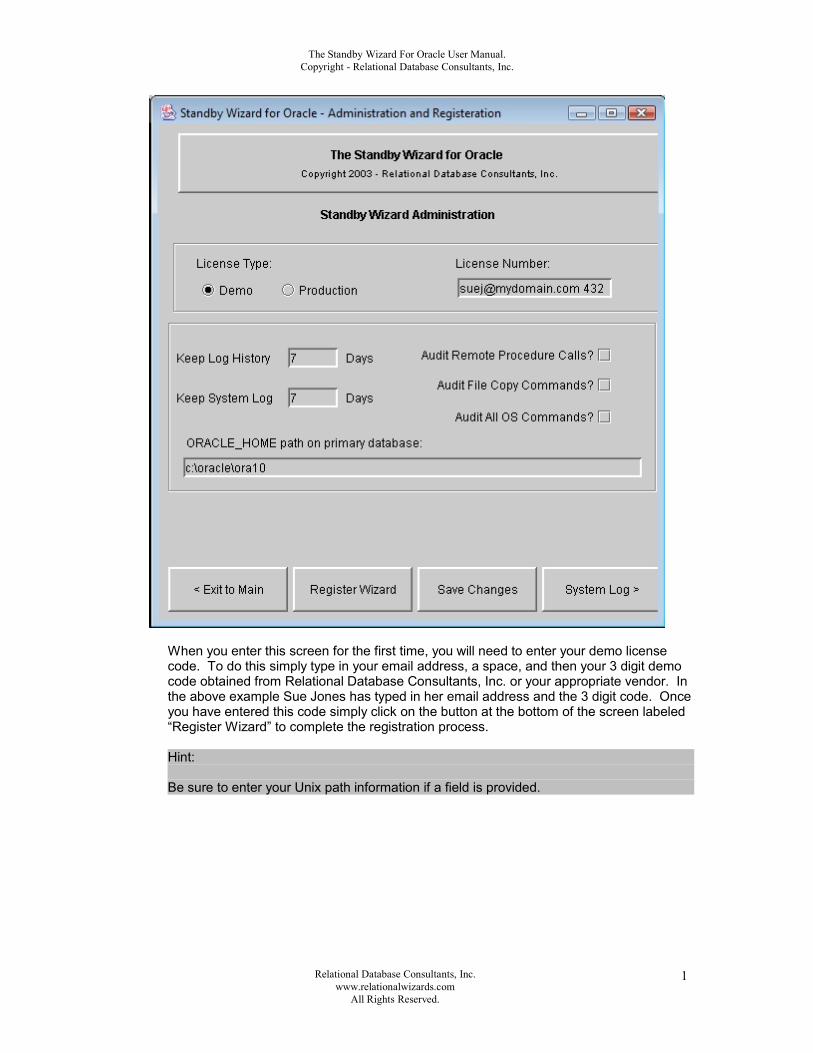
When you enter this screen for the first time, you will need to enter your demo license code. To do this simply type in your email address, a space, and then your 3 digit demo code obtained from Relational Database Consultants, Inc. or your appropriate vendor. In the above example Sue Jones has typed in her email address and the 3 digit code. Once you have entered this code simply click on the button at the bottom of the screen labeled “Register Wizard” to complete the registration process.
Hint:
Be sure to enter your Unix path information if a field is provided.
Relational Database Consultants, Inc.www.relationalwizards.com
All Rights Reserved.
1

The Standby Wizard For Oracle User Manual.Copyright - Relational Database Consultants, Inc.
Chapter Two
Standby Database Preliminary ChecklistUsing the Standby Wizard to create standby databases is very simple. The Standby Wizard interface takes you through four easy steps to create a standby database. In each step, you define or clarify basic information that the Standby Wizard will need to create your new standby database. Yet, don’t be fooled by the simplicity of this process - creating a Standby Database is always a complex task and a very CPU/Disk intensive one also. This is why we must go through a preliminary checklist before we create our first standby database with the Standby Wizard.
1. Check Free Disk Space
Essentially, what must occur in standby database creation is the duplication of all database data from the primary host on the standby host. If your database is large, this step could take hours or even days!
For instance, if your current database size is 300 gigabytes, then 300 gigabytes of data will need to be copied from your primary host to your standby host. And although the Standby Wizard efficiently deletes old redo logs after they are successfully applied, you will need more than 300 gigabytes of disk space free on your standby host to accommodate both the Oracle Installation itself and any bulk transfer of redo logs that might need to be applied to the standby database after a network shortage.
If you are creating a standby database on the same host as your primary database, then the new standby database will still require enough free disk space to copy all of the Oracle data files to a new location and the ability to accommodate any unexpected bulk transfer of redo logs.
To find out your total database size, enter the Standby Wizard main menu. At the bottom of the window - your total database size is listed next to the label "Current Database Size". To create a standby database for an OLTP production system, we recommend that you have free disk space of not less than 150% of the current database size – after you have installed the Oracle software on the standby host
2. Prepare the Standby Host
If you plan to create your standby database on the same physical host as your primary database, then you do not need to perform an installation check because your primary instance is already assumed to exist and be running.
If the new standby host is to be on a separate machine, you are required to install the same Oracle RDBMS version as installed on the primary host (or as close as possible). Furthermore, the standby host must be running the same operating system version and using the same file system (Unix, NTFS, FAT32) as the primary host. A warning to Sun Solaris users: Solaris for Intel can never be used to build standby databases against SPARC Solaris servers and visa/versa because there file systems are different.
The Standby Wizard does not require that you connect to the standby host unless you wish to use the GUI activation screen and/or the graceful switchback features of the Standby Wizard. If you would like to implement these features on your standby host, you
Relational Database Consultants, Inc.www.relationalwizards.com
All Rights Reserved.
1

The Standby Wizard For Oracle User Manual.Copyright - Relational Database Consultants, Inc.
will need to install the Standby Wizard forms on the standby host and/or create a SQL*Net connection for them on the standby host. This can be accomplished by editing the tnsnames.ora and listener.ora files on the standby host and the tnsnames.ora file on your Java client to include your new standby SID(s) IP address identifier or a Global Name you wish to assign it.
If you are going to use the Standby Wizard front-end on your standby host for activation, you can execute the Standby Wizard menu using the StandbyWizard.sh installation file, or by activating from a Windows client.
Caution:
Never perform a Database Installation on a standby database created by the Standby Wizard. By definition, the standby database is a copy of the primary database, and thus already contains the Standby Wizard schema – necessary for a graceful switchback.
When you install the Oracle RDBMS on your standby host, feel free to create the default Oracle installation database for any other instances you require. As long as the standby database’s Oracle Sid and database name is unique for each physical standby host - there will be no conflicts. If you are installing Oracle for the first time on the standby host, you should allow the installer to create the default instance so you can test the fitness of your new database server.
Tip:
If you need to save disk space on your standby host, you can shutdown the default Oracle instance after testing the Oracle installation and remove the data files created in $Oracle_Home/./oradata. The Standby Wizard is not dependent on the existence of any instances on the standby host, only the installation of the Oracle RDBMS software.
Many times critical applications require that certain executable files, directory structures, and cron jobs be present and running on the standby host server. If this is the case at your site, a valid application environment will also have to be installed on the standby host in case of a fail-over. You should test this environment first, by activating your first standby database and using it as a duplicate test site. If this step is avoided or not completed properly, then during a crisis your Oracle database will be working perfectly when activated by the Standby Wizard - yet your ability to use it will not exist!
3. Chose Transfer Method(s) to Copy Files to the Standby Host
If you plan to use the Standby Wizard to build standby databases on remote machines, you will be prompted for a method for copying files to the remote standby host. The three methods available to you for transferring files:
1. RCP - Remote Copy2. SCP - Secure Copy3. FTP - File Transfer Protocol
Because the Standby Wizard is partially a response to the harsh security environment of this age, the remote transfer command that you intend to use does not require you to grant any permissions to any machines to copy or view files on your primary production host. Your production host instead, needs to be granted permission to read files, write files and create directories on your remote standby host. This security methodology insures that the use of the Standby Wizard will not decrease the security of your network or database servers.
Relational Database Consultants, Inc.www.relationalwizards.com
All Rights Reserved.
1

The Standby Wizard For Oracle User Manual.Copyright - Relational Database Consultants, Inc.
Because the Standby Wizard’s secure methodology requires that your primary host be granted permissions to read and write files and directories on your standby host connecting as the local “oracle” Unix user.
Note:
If you are using a different account than “oracle” to run the Oracle software on your standby host or primary host, make sure to note the account name, for you will need to specify this alternate account name when creating your standby database with the Standby Wizard.
Another requirement to use these remote copy methods with the Standby Wizard, is that there be no password prompting. This does not, in any way, limit security or password authentication, yet requires additional setup steps. Once you have decided on your transfer protocol, and they could be multiple protocols, these are the guidelines we recommend to test the fitness of your remote copying.
1. Guidelines For Implementing RCP (Remote Copy)
The Standby Wizard requires that RCP prompts for no password and implements the flags –p and –r. To verify this, type man rcp from the Unix prompt.
The Standby Wizard copies files to the remote host via rcp in the following way:
$rcp –p <local filename> oracle@standbyhost:<remotefilename>
The Standby Wizard gets files from the remote host via rcp in the following way:
$rcp –p oracle@standbyhost:<remotefilename> <localfilename>
The Standby Wizard creates remote directories via rcp in the following way:
$rcp –r /tmp/stanby/dir/subdir oracle@standbyhost:/mnt/subidr
2. Guidelines For Implementing SCP (Secure Copy)
Secure Copy is always more difficult to implement than RCP. The reason being is that the Standby Wizard requires the use of the –B flag which insures that there will be no password prompting. By default, Secure Copy requires password prompting. Thus, you will need to either turn authentication off on the standby host or you will need to place encrypted keys on both the standby and primary host machines that will allow the primary host to identify itself and copy files without password prompting. Refer to www.openssh.com for more information on how to accomplish this Herculean task.
Aside from the –B flag, SCP requires the –r and –p flags for the Standby Wizard to function at 100% capability. The –q flag, which is a Standby Wizard default, is not required and you can change it if required by referring to Appendix B of this document: Modifying the Operating System Parameters of the Standby Wizard.
The Standby Wizard copies files to the remote host via scp in the following way:
$scp –B –q -p <local filename> oracle@standbyhost:<remotefilename>
Relational Database Consultants, Inc.www.relationalwizards.com
All Rights Reserved.
1

The Standby Wizard For Oracle User Manual.Copyright - Relational Database Consultants, Inc.
The Standby Wizard copies files from the remote host via scp in the following way:
$scp –B –q -p oracle@standbyhost:<remotefilename> <localfilename>
The Standby Wizard creates remote directories via. scp in the following way:
$scp –B –r –q -p /tmp/stanby/dir/subdir oracle@standbyhost:/mnt/subidr
3. Guidelines for Implementing FTP or (Secure) SFTP ( File Transfer Protocol)
The Standby Wizard uses a very small and stable subset of FTP. The only catch, of course, is that the Standby Wizard, as with rcp and scp, requires that no password prompting occur. Usually this can be accomplished by placing a secure .netrc copy (chmod 600) in the primary host’s Oracle account home directory. Type in man ftp from the Unix prompt for more information on how to store passwords for FTP hosts.
If you are using SFTP you will need to configure your standby database to accept a secure FTP login via a set of authentication files and encrypted keys. Regardless of if you are using FTP or SFTP you should verify that the below sequence of commands will work for the Standby Wizard:
The Standby Wizard copies files via ftp in the following way:
$ftp
>open <standby host>>binary>put <local filename> <remote filename>>chmod <umask> <remote filename>
The Standby Wizard gets files via ftp in the following way:
$ftp
>open <standby host>>binary>get <local filename> <remote filename>
The Standby Wizard creates remote directories via ftp in the following way:
$ftp
>open <standby host>>binary>mkdir <remote filename>
Whatever transfer method you chose to work with, make sure to test it out before using the Standby Wizard GUI to implement your standby database solution. You can test your copy commands by copying a file, then getting a file, and then copying an empty subdirectory using either the above discussed copy commands for RCP and SCP or by issuing an FTP mkdir command from FTP as shown above.
Relational Database Consultants, Inc.www.relationalwizards.com
All Rights Reserved.
1

The Standby Wizard For Oracle User Manual.Copyright - Relational Database Consultants, Inc.
4. Chose the directories on your Standby Host to house the new standby database(s)
We must consider at least three directories that the Standby Wizard is going to create and/or populate with data. The Unix mount points that will house these directories must be accessible to the Oracle Unix account for the reading, writing and the executing of files. Here are the functional descriptions of the three directory locations utilized by the Standby Wizard:
1. The default data file directory - This will be where the Standby Wizard stores the data files of the primary host as well as the standby database’s own redo logs. By default, the Standby Wizard will create a series of sub-directories in the default data file directory with the original primary machine path names. Of course, if you have a mission-critical OLTP database that must be optimized, then you may want to separate your new standby data files on multiple drives. In this scenario, the Standby Wizard will map any configuration of drives you need. 2. The archived log directory – This will be the directory path on the standby host that will receive archived redo logs from the primary host via the Standby Wizard. This directory path will be the log_archive_dest parameter of the automatically generated standby database init.ora file.
3. The standby working directory - This will be the new standby database initialization directory path that will contain the generated control file and init.ora file for the standby database. Along with these crucial files, this directory contains programs (command files) to start, stop, recover, validate, and activate your standby database. The size of all these files combined is usually only a few megabytes.
In many cases, we can simply use one mount point for the three above-mentioned directory structures. For instance, we might define a /u01 as a mount point on the standby host accessible to the Oracle Unix account. On this mount point /u01, we would then define the three required sub-directories required as such:
/u01/standby1/scripts/u01/standby1/archive/u01/standby1/data
If your database is large, and you need to move a few tablespaces to separate physical or logical mount points, you can edit any of your data files in the Standby Wizard GUI and define separate mount points and/or file paths for these tablespace files.
Regarding directory creation, you do not need to create the new Standby Wizard directories, only plan for them. The Standby Wizard will create them for you as it builds your standby database via the GUI front-end.
Relational Database Consultants, Inc.www.relationalwizards.com
All Rights Reserved.
1

The Standby Wizard For Oracle User Manual.Copyright - Relational Database Consultants, Inc.
The both the remote standby and primary database Unix “oracle” accounts will need Read-Write-Execute privileges on all mount point(s) or existing directory paths you plan to use in your standby database implementation. In the above example, you might change the ownership of the mount point from root to oracle after you create it as such:
#whoami root#chmod oracle:dba /u01
5. Choosing Your Standby Database SID Name
Before you define your standby database in the Standby Wizard GUI, you need to verify your primary Oracle SID and then decide what the Oracle SID will be for the standby database. For example, if you are running a production database with Oracle SID of prod, the Standby Wizard connects to Oracle from a Unix shell as such
$ORACLE_SID=prod$export $ORACLE_SID$sqlplus rdc_standby_user/password
Regarding the choice of a standby database Oracle SID, In this case we might chose standby1 for to identify the first standby database supporting prod. In a disaster, users and/or applications would re-connect to their Oracle accounts using the service name of standby1 or any other global names you would like to define. For example, the user scott would be able to connect to the above standby database during a fail-over in the following way:
sqlplus scott/tiger@standby1
In some cases, this SID difference can be hidden from the users by using SQL*Net global service names and the FAILOVER command; yet, the Standby SID will still determine the name of the init.ora file generated by the Standby Wizard, along with all of the command script file names; Therefore it is important to choose a short and easy to understand identifier for your standby database.
Rule:
You can define duplicate Oracle SID names only across separate physical hosts. You will also need to define a distinct service name in the primary tnsnames.ora file that points to the standby SID/Host. See Appendix C for more details.
If you are using global names with SQL*Net, and wish to use global names for the standby databases you are going to create, this will not affect the Standby Wizard’s functions as long as the Oracle SID used by the Standby Wizard remains valid on the standby server and the Standby Wizard can connect to SQL*Plus by exporting the Unix environment variable ORACLE SID as shown above.
6. SQL*Net Considerations for the Standby Database
Both the primary standby databases need entries in the listener.ora and tnsnames.ora files on both servers. See Appendix C for an example.
This can also be accomplished with Enterprise Manager.
Relational Database Consultants, Inc.www.relationalwizards.com
All Rights Reserved.
1

The Standby Wizard For Oracle User Manual.Copyright - Relational Database Consultants, Inc.
7. Check Log_Archive_Format Parameter (init.ora)
In many default Oracle installations the log_archive_format parameter for a given database is set something similar to:
Log_archive_format=%%ORACLE_SID%%T%TS%S.ARC
The problem for standby database configuration with this format mask is that the Primary Oracle SID is hard-coded into the archived log file name through the use of %ORACLE SID%.
If you wish that your log_archive_format parameter be set to this value, then the following limitations exist regarding your standby database strategy:
1. All standby databases created off your primary database must have the same Oracle SID as your primary database.
2. You may not create two databases with the same Oracle SID on any physical host.
3. You may not create a standby database locally, because this would violate the 2nd rule above.
4. If you are planning multiple standby databases in support of your primary database, then each standby database must be on a separate physical host. This also follows from the 2nd rule above.If this restriction is too limiting, shutdown your Oracle instance and change the log_archive_format parameter to something like:
arc%T%S.arc
In this case, the prefix ‘.arc’ will replace the Oracle SID and will thus allow your archived logs to be recovered by a standby database that has an Oracle SID name other than that of your primary database.
Note to 10g - 11g Users:
The init.ora parameter db_recovery_file_dest is not used by the Standby Wizard, therefore a log_archve_dest_N parameter needs to be defined.
8. Redo Log Compression & Encryption During Transfer
If you plan on running the Standby Wizard for Windows using redo log file compression, you will need to follow these steps:
1. Verify the Unix command: compress –f [filename] to compress a file.
2. Verfiy the Unix command: uncompress –fd [filename] to uncompress a file.
The Standby Wizard will always name compressed log files with the extension ‘.Z’. The Standby Wizard always unzips archived log files on the primary host immediately after transfer so as not to interfere with any recovery effort that may be necessary later. As of release 6.1.X, compression only is implemented after the initial Standby Database build and is performed by the primary agent.
Note:
Relational Database Consultants, Inc.www.relationalwizards.com
All Rights Reserved.
2
The Standby Wizard For Oracle User Manual.Copyright - Relational Database Consultants, Inc.
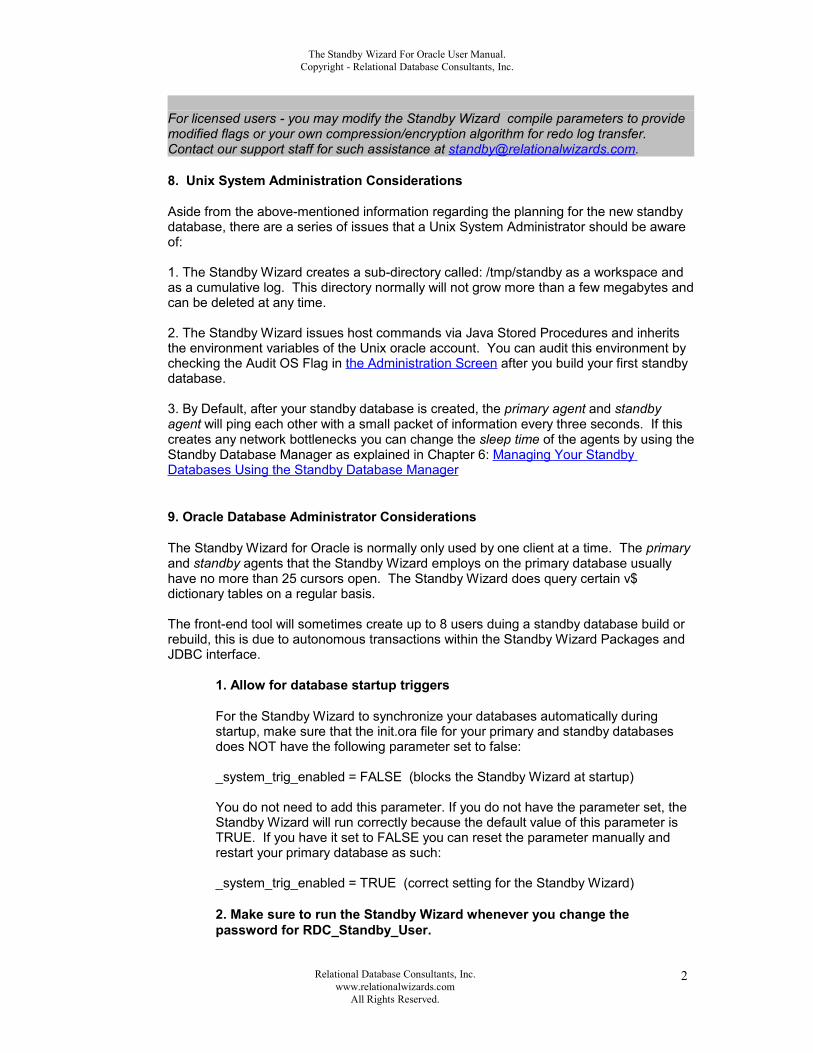
For licensed users - you may modify the Standby Wizard compile parameters to provide modified flags or your own compression/encryption algorithm for redo log transfer. Contact our support staff for such assistance at [email protected].
8. Unix System Administration Considerations
Aside from the above-mentioned information regarding the planning for the new standby database, there are a series of issues that a Unix System Administrator should be aware of:
1. The Standby Wizard creates a sub-directory called: /tmp/standby as a workspace and as a cumulative log. This directory normally will not grow more than a few megabytes and can be deleted at any time.
2. The Standby Wizard issues host commands via Java Stored Procedures and inherits the environment variables of the Unix oracle account. You can audit this environment by checking the Audit OS Flag in the Administration Screen after you build your first standby database.
3. By Default, after your standby database is created, the primary agent and standby agent will ping each other with a small packet of information every three seconds. If this creates any network bottlenecks you can change the sleep time of the agents by using the Standby Database Manager as explained in Chapter 6: Managing Your Standby Databases Using the Standby Database Manager
9. Oracle Database Administrator Considerations
The Standby Wizard for Oracle is normally only used by one client at a time. The primary and standby agents that the Standby Wizard employs on the primary database usually have no more than 25 cursors open. The Standby Wizard does query certain v$ dictionary tables on a regular basis.
The front-end tool will sometimes create up to 8 users duing a standby database build or rebuild, this is due to autonomous transactions within the Standby Wizard Packages and JDBC interface.
1. Allow for database startup triggers
For the Standby Wizard to synchronize your databases automatically during startup, make sure that the init.ora file for your primary and standby databases does NOT have the following parameter set to false:
_system_trig_enabled = FALSE (blocks the Standby Wizard at startup)
You do not need to add this parameter. If you do not have the parameter set, the Standby Wizard will run correctly because the default value of this parameter is TRUE. If you have it set to FALSE you can reset the parameter manually and restart your primary database as such:
_system_trig_enabled = TRUE (correct setting for the Standby Wizard)
2. Make sure to run the Standby Wizard whenever you change the password for RDC_Standby_User.
Relational Database Consultants, Inc.www.relationalwizards.com
All Rights Reserved.
2

The Standby Wizard For Oracle User Manual.Copyright - Relational Database Consultants, Inc.
Because the Standby Wizard stores the password for its own account rdc_standby_user encrypted within its own schema, you will need to execute the Standby Wizard User Interface, so the Standby Wizard can store this information.Perform a log switch after a password change after you log into the Standby Wizard.
3. Increase DB_LINKS initialization parameter.
The db_links initialization parameter is set to 4 on most Oracle installations. To be safe increase this value to at least 25 or a value 20% higher than currently listed above 25. The Standby Wizard requires a link to be open to communicate with a standby database.
Relational Database Consultants, Inc.www.relationalwizards.com
All Rights Reserved.
2
The Standby Wizard For Oracle User Manual.Copyright - Relational Database Consultants, Inc.
Chapter Three
Creating a Standby Database
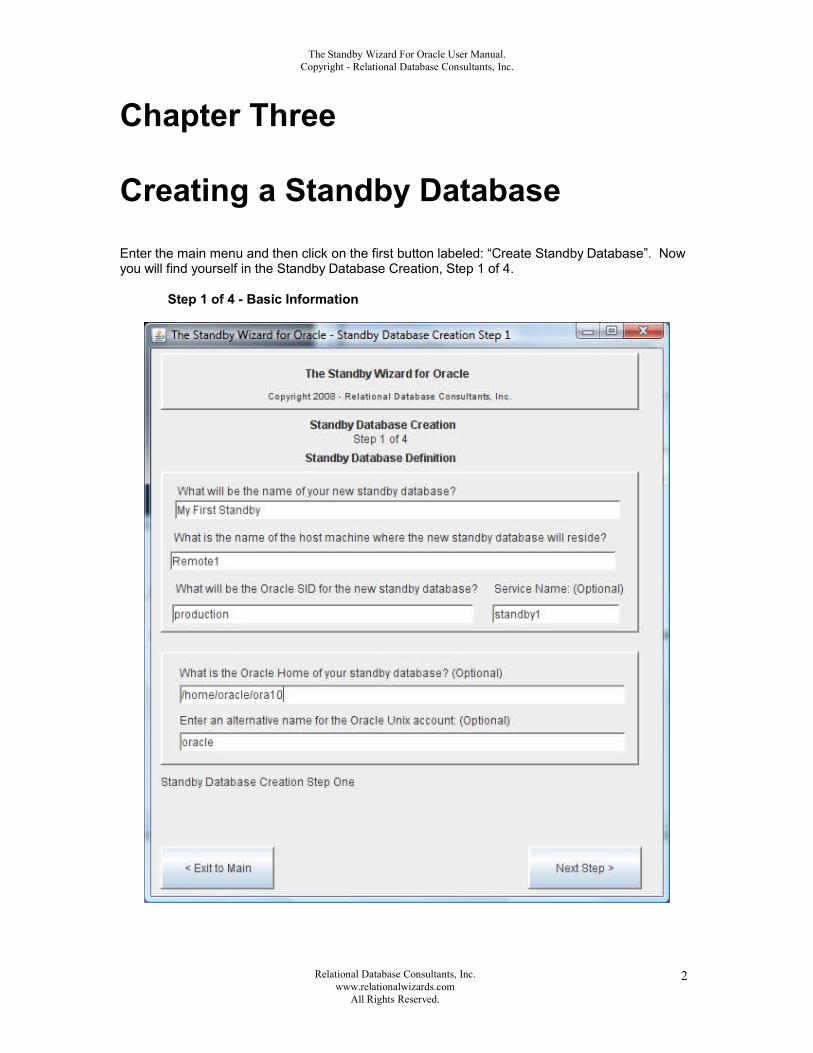
Enter the main menu and then click on the first button labeled: “Create Standby Database”. Now you will find yourself in the Standby Database Creation, Step 1 of 4.
Step 1 of 4 - Basic Information
Relational Database Consultants, Inc.www.relationalwizards.com
All Rights Reserved.
2

The Standby Wizard For Oracle User Manual.Copyright - Relational Database Consultants, Inc.
1. What will be the name of your new standby database?
Enter a unique name to identify your standby database. This name is not used outside the Standby Wizard dialogs and maintenance screens, so it can be anything you would like. An entry like my first standby is perfectly valid.
2. What is the name of the host machine where the new standby database will reside?
If the Standby Wizard detects that your primary database’s archived logs have a naming format that includes the Oracle SID name, you are restricted to using the same Oracle SID for your standby database as your production database. You can edit the init.ora parameter log_archive_format if this restriction is unacceptable. Simply take out any references to %SID% or %ORACLE_SID%. This is also discussed in the preliminary checklist of the previous chapter .
3. What will be the Oracle SID of the new standby database?
Enter a unique identifier that will define the Oracle SID for your standby database. The standby Oracle SID should already have been decided upon, since it is one of the steps in the preliminary checklist discussed in the previous chapter . If you are creating a standby database on the same physical host as your primary database, the Oracle SID name must be different from that of your primary instance.
4. Service Name (Optional)
If your Standby SID is the same as your primary SID you will need to enter an alternate alias service name for your standby database. This alias must be in the tnsnames.ora file on the primary host.
5. What is the Oracle Home of your standby database? (Optional)
If you are running multiple Oracle Home’s on your standby host, you may enter the Oracle Home of your standby database. This value will be exported into every borne/bash shell script generated by the Standby Wizard. You may also leave this value blank and control your Oracle Home parameters separately using your Unix / Linux session.
6. Enter an alternative name for the Oracle Unix account: (Optional)
If you installed Oracle on your Unix or Linux machine using a different account than the default name “oracle”, enter the account name in this field.
Relational Database Consultants, Inc.www.relationalwizards.com
All Rights Reserved.
2

The Standby Wizard For Oracle User Manual.Copyright - Relational Database Consultants, Inc.
Step 2 of 4 - Directory Path Information
In the second step of standby database creation, the Standby Wizard asks you to define both the primary and standby working directories that will house the Standby Wizard scripts, control file, and init.ora file. You will also define in this step the archived redo log destination you would like used on the standby host.
To complete the above screen, step 2 in standby database creation, provide full directory path names, as shown above, for the three following questions:
1. What directory on the primary host would you like the Standby Wizard scripts to reside?
Assign the primary working directory for the Standby Wizard to use on the primary host. This directory is where the Standby Wizard will write out all necessary scripts, the standby
Relational Database Consultants, Inc.www.relationalwizards.com
All Rights Reserved.
2

The Standby Wizard For Oracle User Manual.Copyright - Relational Database Consultants, Inc.
control file, and the init.ora file that will later be copied to the standby host. If the specified directory doesn’t yet exist…the Standby Wizard will create it for you. By definition, this directory must reside on the primary host.
2. What directory on the standby host would you like the Standby Wizard scripts to reside?
Assign the standby working directory for the Standby Wizard to use on the standby host. This directory will receive a copy of the above-mentioned files from the primary host working directory. It is here, in the standby working directory, that you can mount, recover and activate your standby database from. If the specified directory doesn’t exist, the Standby Wizard will create it for you.
3. What directory on the standby host would you like to receive Archived Redo Logs?
This directory will become the archive destination log_archive_dest of the standby host. Here redo logs from the primary machine will be received and read into the Oracle RDBMS to keep the standby instance synchronized with the primary instance. If the specified archive directory doesn’t exist, the Standby Wizard will create it for you.
Relational Database Consultants, Inc.www.relationalwizards.com
All Rights Reserved.
2

The Standby Wizard For Oracle User Manual.Copyright - Relational Database Consultants, Inc.
Step 3 of 4 - Storage Options
The above window contains only a few buttons and one field. From here you will chose one of two strategies to map your primary database files to the standby database. In the this step we deal with datafile strategies:
1. Map all data files from the primary host to this directory on the standby host:
If you chose the default option you will need to define the default datafile directory on the standby host where the primary database data files and redo logs will be stored. When you chose option one, be sure to enter a mount point that has the free space necessary to duplicate the primary database file system. If your primary database contains data stored on many different logical and/or physical
Relational Database Consultants, Inc.www.relationalwizards.com
All Rights Reserved.
2

The Standby Wizard For Oracle User Manual.Copyright - Relational Database Consultants, Inc.
disks, the standby wizard will create a sub-directory tree containing the original logical structure of your data files beneath the default datafile directory you specify.
If you have a very large database and need to separate the data on many disks, simply enter one of the directory locations you are going to use for data files in this step. In the next step, you can edit your Oracle data file locations and assign them any valid windows path on your standby host that the Standby Wizard account can write to using the share name of the given disk.
2. Do not automatically map the standby data files.
In most cases, there is no need to use this option unless you wish an exact mirror of the data and redo logs on both the standby host and the primary host. Your standby host must exist on a separate machine for the Standby Wizard to create an exact mirror of your data files.
If you want an exact mirror of your data files but on a new disk drive letter, simply chose option one instead and enter the new drive letter as your default data file directory
3. Re-Create Temp Files
This will instruct the Standby Wizard to re-define your Tempfiles on the new standby database, these file names can be edited or blanked-out during the next step.
4. Use this transfer method to copy data files
After you have chosen the strategy to map your primary database’s data files to your standby host, choose from the list below the transfer method that you would like the Standby Wizard to use when copying files. This topic is covered extensively in section 3 of the previous chapter: Standby Database Creation - Preliminary Checklist.
5. Compress Archived Redo Logs before transfer
By Checking this box you instruct the primary agent to transfer archived logs by compressing them first. This will reduce network I/O for large archive redo log sizes. The default Unix compression commands used by the Standby Wizard are compress and uncompress - these commands are required as discussed in section 8 of the previous chapter: Standby Database Creation - Preliminary Checklist.
6. Manually Copy Data Files
A few of our clients use this option to transfer large physical backups of data warehouses when telnet transfer is not practical. Simply follow instructions during the build and manually transfer the datafiles during the build.
Relational Database Consultants, Inc.www.relationalwizards.com
All Rights Reserved.
2
The Standby Wizard For Oracle User Manual.Copyright - Relational Database Consultants, Inc.
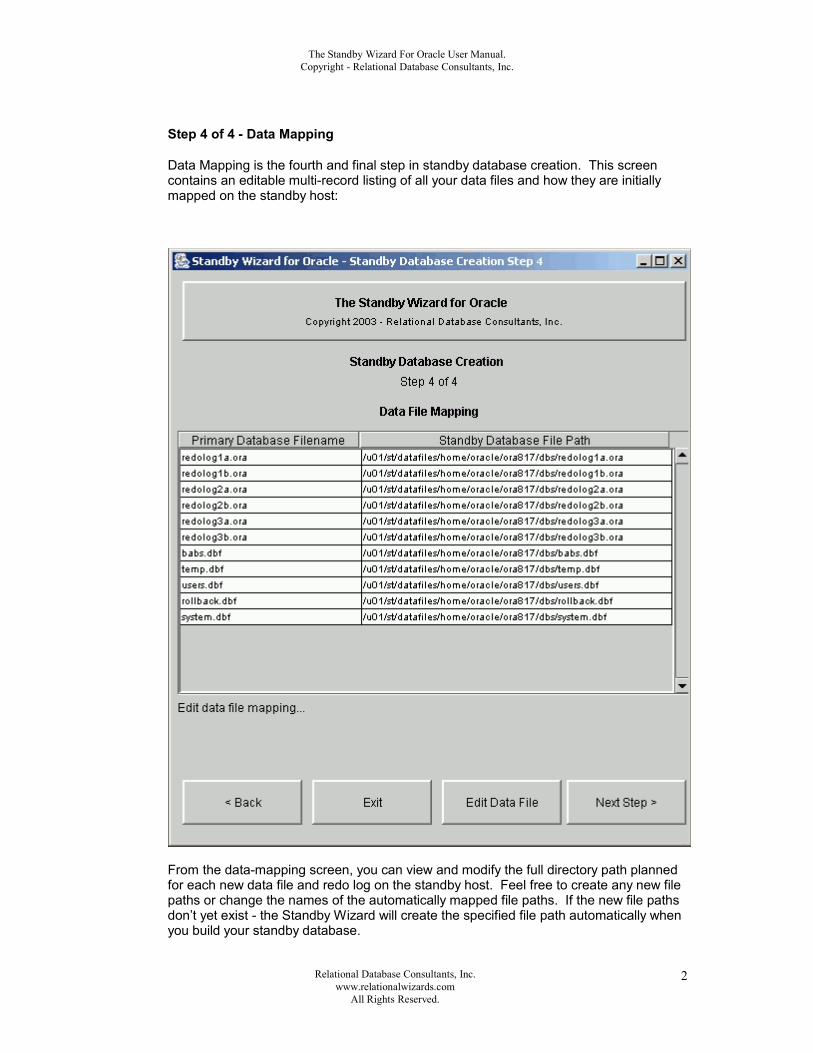
Step 4 of 4 - Data Mapping
Data Mapping is the fourth and final step in standby database creation. This screen contains an editable multi-record listing of all your data files and how they are initially mapped on the standby host:
From the data-mapping screen, you can view and modify the full directory path planned for each new data file and redo log on the standby host. Feel free to create any new file paths or change the names of the automatically mapped file paths. If the new file paths don’t yet exist - the Standby Wizard will create the specified file path automatically when you build your standby database.
Relational Database Consultants, Inc.www.relationalwizards.com
All Rights Reserved.
2

The Standby Wizard For Oracle User Manual.Copyright - Relational Database Consultants, Inc.
To edit a data file, click on the appropriate file path and then click on the button labeled “Edit Data File”. From here you Can change the destination directory of any datafile on the standby host. You can also view the size of the given data file in bytes:
Even If you do not need to edit any of these file path names, scroll through the listing of files and verify that each underlying storage device on the standby host will have adequate free disk-space to house the file sizes necessary.
Once you have finished this last step, simply click on the button labeled “next”…and you will be ready to build your first standby database.
Relational Database Consultants, Inc.www.relationalwizards.com
All Rights Reserved.
3

The Standby Wizard For Oracle User Manual.Copyright - Relational Database Consultants, Inc.
Chapter Four
Building a Standby DatabaseUp until this point, the Standby Wizard has not done anything CPU intensive. At most, the Standby Wizard has queried a number of small data dictionary tables and entered a few rows of data into its schema. Now we are ready to build our standby database and unlike the previous steps, this is one of the most intensive database tasks there is. When the Standby Wizard is ready to build a standby database, you will always see this screen:
Relational Database Consultants, Inc.www.relationalwizards.com
All Rights Reserved.
3

The Standby Wizard For Oracle User Manual.Copyright - Relational Database Consultants, Inc.
Once you click on the “Build Standby” button - control to the screen will be frozen - aside from informational messages - and the Standby Wizard will begin the task of copying your live production database to a remote host. This task entails going into hot backup mode and copying each data file across a network. Therefore, activity on your primary database’s redo logs are going to increase and disk IO, along with network IO, will skyrocket.
If your database is used heavily, then it would be a good idea to build your standby database during off-peak hours. Furthermore, if you have a huge data-warehouse, the task of copying all the data files could take days. If you are concerned about estimating the time to copy your primary database to the standby host, simply use your copy command of choice to copy one data file of a given size to its destination on the standby host. For Example, if 1 gigabyte takes 4 minutes to copy then 300 gigabytes will take approximately (4X300) 1200 minutes or 20 hours.
As the standby Wizard performs standby database creation, you will be informed as to all the steps the Standby Wizard goes through in the process, including the copying of each primary data file to the standby host. Once this process is finished, the Standby Wizard will notify you. At this point, you can simply return to the main menu. Your Standby Database creation is now complete.
Tip:
If you want to stop the Standby Wizard in the middle of a long standby database build, you will need to kill the Java front-end and you may also need to use the process table to kill any currently running copy commands. After you have stopped this build, unlessThe standby database creation was successful, the definition you created will be deleted during the next login attempt to the Standby Wizard interface.
Relational Database Consultants, Inc.www.relationalwizards.com
All Rights Reserved.
3

The Standby Wizard For Oracle User Manual.Copyright - Relational Database Consultants, Inc.
Chapter Five - Mounting a Standby DatabaseA standby database must enter recovery mode in order to keep-up with the primary database’s changes. After the initial data files and log files are copied, recovery is the only way to refresh a standby database without performing an incremental or complete rebuild. Therefore, once we have created our standby database, we need to mount our standby database on the standby host and start recovery via the standby agent and primary agent.
Caution:
Be sure to delete any old Oracle password files from your standby host with the same Oracle SID name as your new standby database before mounting your new standby database. The password file has the naming convention of: “orapw<oraclesid>” and is usually located in the directory $ORACLE_HOME/dbs.
1. Confirming the Existence of the Standby Wizard Scripts
Before mounting your new standby database, enter the standby working directory that you defined in step 2 of 4 in your standby database build and confirm the existence of the Standby Wizard scripts. These five shell scripts and the respective SQL scripts they call, are all prefixed with your standby host name and standby Oracle SID respectively: rdc2_standby_activate.sh rdc2_standby_activate.sql rdc2_standby_mount.sh rdc2_standby_mount.sql rdc2_standby_recover.shrdc2_standby_recover.sqlrdc2_standby_shutdown.shrdc2_standby_shutdown.sqlrdc2_standby_startup.shrdc2_standby_startup.sql
As we can see, the Standby Wizard command scripts have the following naming convention:
<hostname>_<sid>_<function>
In this case, our standby server is named rdc2 and our standby Oracle SID is standby.
The five automatically generated scripts that exist on the standby host represent the full life cycle of tasks that are performed on a standby database:
1. Mount
The Mount Script is the only script that you need to run manually…and only after either the initial build of your standby database or after a rebuild.
2. Recover
This script is used by the Standby Agent to recover archived logs from the primary instance. It can also be run manually
Relational Database Consultants, Inc.www.relationalwizards.com
All Rights Reserved.
3

The Standby Wizard For Oracle User Manual.Copyright - Relational Database Consultants, Inc.
3. Startup
This script will start your standby database and open it in read-only mode.
4. Shutdown
This script should be run if you need to shutdown the standby database. You can still shutdown your new standby database using SQL*Plus or your favorite DBA tool, yet this script is tailored by the Standby Wizard to perform any final recovery before the shutdown is complete.
. 5. Activate
This script is used to activate your standby database and transform it into a regular read-write database. Remember, activation can never be undone, once you activate your standby database it becomes a working duplicate of your primary database and is no longer a standby database. You must perform a complete rebuild to transform it again into a standby database.
The Activate script can be started manually or can be called by an application of yours that determines the primary host is not responding. You can also activate any standby database from the Standby Wizard Front-End. For more on activation, refer to Chapter 11 titled: Emergency Fail-Over to a Standby Database (Activation)
2. Running the Mount Script From the Standby Host
The mount script needs to be run only once unless you are performing a rebuild on your standby database. Make sure to delete any password files of the same Oracle SID as your new standby database. When you execute the mount script, you will pass in the password you defined in Step 1 of 4 – Standby Database Creation. The Standby Wizard will create for you the appropriate orapwd file during the mount process.
The mount script has the following naming convention:
<host>_<sid>_mount.sh
For example, if our standby host machine is named rdc2 and our standby database’s Oracle SID is standby, our mount script will always have this name:
rdc2_standby_mount.sh
To run the mount script we simply pass in a new Internal Password for our standby database. For example, if we want to assign the password “tiger” to the Internal account we would simply mount our standby database as such from the Unix command line:
$./rdc2_standby_mount.sh tiger
As the mount script runs, you will see a message similar to this one during recovery:
Alter Database Recover Automatic Standby Database Until Cancel*ERROR at line 1:ORA-00279: change 4624336 generated at 02/24/2002 10:56:04 needed for thread 1ORA-00289: suggestion : /u02/archive/arch_1_1244.arcORA-00280: change 4624336 for thread 1 is in sequence #1244ORA-00278: log file '/u02/archive/arch_1_1244.arc' no longer needed for thisrecoveryORA-00308: cannot open archived log '/u02/archive/arch_1_1244.arc'
Relational Database Consultants, Inc.www.relationalwizards.com
All Rights Reserved.
3

The Standby Wizard For Oracle User Manual.Copyright - Relational Database Consultants, Inc.
ORA-27037: unable to obtain file statusLinux Error: 2: No such file or directory
Igonre the fact that Oracle prints out this error; this is normal output for a recovery operation in Oracle 8i. After this message, you will receive some useful informational messages, which should conclude with the following string:
OPEN_MODE----------READ ONLY SQL> Spool OffSQL> Exit;
This final message insures that your standby database is valid and currently open in read-only mode. If you simply want to clone your primary database - you could activate your new standby database now by running the activation script in the same way we ran the mount script.
In most cases though, we want our standby database(s) to mirror our primary instance and take over only in times of peril, thus we still need to confirm that the new standby database will remain synchronized with the primary database that it supports.
The Standby Wizard accomplishes the task of synchronization behind the scenes by launching the primary agent and the standby agent. In the next chapter, we will learn how to use the Standby Database Manager to confirm the fitness of our new standby database configuration and its ability to remain current with the primary instance.
Relational Database Consultants, Inc.www.relationalwizards.com
All Rights Reserved.
3

The Standby Wizard For Oracle User Manual.Copyright - Relational Database Consultants, Inc.
Chapter Six
Managing a Standby Database Confirming synchronization and other tasks are accomplished through the Standby Database Manager screen, option 2 from the main menu:
Relational Database Consultants, Inc.www.relationalwizards.com
All Rights Reserved.
3

The Standby Wizard For Oracle User Manual.Copyright - Relational Database Consultants, Inc.
From this summary screen, we can confirm the fitness of our standby database. The first two fields of the summary screen, Standby Host and Standby SID, allow us to identify any given standby database that we have created, the fields that follow them are the current attributes for that standby database. Here is a description of each of the columns in the summary screen:
Host Name
This is the physical host that you defined for your standby database in Step 1 of 4 in the standby database build.
Oracle SID
You specified this Oracle SID for your standby database in Step 1 of 4 in the standby database build.
Last Log
The log sequence# of the last log recovered on the standby database.
Log Gap
This numeric field is the difference between the last redo log archived by the primary instance and the last archived log that was successfully recovered by the standby agent. The current log gap represents how synchronized your standby database would be if a failure interrupted service on the primary host at any given moment.
The current log gap should always tend towards 0, and should only equal a high value if there is very intense database activity with redo logs being archived at a rate faster than your network and the Standby Wizard can handle. After a network failure, or a shutdown on the standby host, this number will be high, but the Standby Wizard will work hard to close the gap once you have re-established a connection between servers and started the two instances.
Last Contact
This represents the time elapsed since the primary agent has had contact with the standby database via the standby agent. Its value equals the time since the primary agent last read an updated status file from the standby agent. In most cases, time since last contact should be under two minutes.
Status
This field defaults to “Recover” after you build your standby database. This means that the standby agent is instructed to keep the standby database open for read-only operations if and only if recovery is complete.
By suspending recovery as explained below the mode changes to “Opened.”
Rebuild?
This field is either labeled Yes or No. Hopefully, after your first standby database build this value should be No. If the value changes to “Yes” - it indicates that the Standby Wizard has detected a change in the data file structure or has detected that a nologging
Relational Database Consultants, Inc.www.relationalwizards.com
All Rights Reserved.
3

The Standby Wizard For Oracle User Manual.Copyright - Relational Database Consultants, Inc.
operation was performed on your primary database. We will learn more about rebuilds in Chapter 9 - Rebuilding Your Standby Database.
2. Confirming Synchronization Using the Summary Screen
To confirm synchronization, click on the button labeled: Force Log Switch. At this point, your primary database will archive its current redo log, and immediately the log gap will change to 1. This indicates that the standby database is now one redo log behind the primary database in its synchronization efforts – thanks to your last mouse click.
After you issue the log switch, the primary agent will become aware of your action, and send over the new log you created to the standby database. Once this new log is copied to your standby host, the standby agent will perform recovery and thus bring the current log gap back to zero.
Therefore, after performing the log switch, click on the button labeled refresh screen every few seconds to monitor the primary and standby agent’s progress as they close the gap that was just created. In most cases, depending on the size of your redo logs and speed of your network and database servers, this closing of the gap, should take no more than 30 seconds.
As you are waiting for the log gap to close you can click on the button labeled “Log History” to view the list of redo logs that have been sent to the standby database by the primary agent:
Relational Database Consultants, Inc.www.relationalwizards.com
All Rights Reserved.
3

The Standby Wizard For Oracle User Manual.Copyright - Relational Database Consultants, Inc.
The Log History screen contains a Sequence that maps directly to the table V$Log_History. This number will grow in time. To clear the Standby Wizard’s Log History for any given standby database, simply click on the button at the bottom labeled “Clear History”.
You may turn off the recording of log transfers by entering the Administration Screen of the Standby Wizard and unchecking the box labeled: “Record Log Transfer History”.
If synchronization does not occur, first check the Standby Wizard's database link as discussed in Chapter 8, Section 8 on troubleshooting.
3. Standby Database Management Parameters
You can change the following three flags, and use the following management buttons from this screen:
1. Compress Logs
You can instruct the Standby Wizard to compress archived logs before copying them to save network bandwidth. Make sure GNU Zip is installed on your servers.
2. Suspend Recovery
Instruct the Standby Database selected to stay open for reporting or other tasks, even if new logs are archived.
3. Suspend Log Transmission
Instruct the primary agent to not send redo logs to the selected standby database.
Management Screen Command Buttons:
1. Ping
When you hit the ping button, it is similar to “refresh.” The standby database is tested and an audit record is written if this ping is successful.
2. Send & Recover
If, for some reason, the Primary Agent isn't sending logs or recovering them, you can send and/or recover manually with this dialog to keep your standby database synchronized while you debug the problem.
3. Shutdown
This button will shutdown your standby database by executing the shutdown script.
4. Activate
This button will activate you standby database. Remember, this task cannot be undone.
Warning:
Oracle 9i users, simply close the java user-interface if it freezes during activation.
Relational Database Consultants, Inc.www.relationalwizards.com
All Rights Reserved.
3

The Standby Wizard For Oracle User Manual.Copyright - Relational Database Consultants, Inc.
4. The Standby Details Screen
After entering the summary screen of the Standby Database Manager, you can view detailed information regarding any standby databases that you have created. To do this, first navigate your mouse to the row of the standby database you wish to view, click on that row, and then click on the button below labeled “Standby Details”. You will then be transported to the Standby Database Manager – Standby Details Screen:
From this screen, you can view useful basic information regarding the standby database that you selected from the Standby Database Manager summary screen.
Relational Database Consultants, Inc.www.relationalwizards.com
All Rights Reserved.
4

The Standby Wizard For Oracle User Manual.Copyright - Relational Database Consultants, Inc.
If required, you can always delete a standby database from this screen by clicking on the “Delete Standby” button. Deleting a standby database deletes the database definition stored in the Standby Wizard’s schema and thus stops the primary agent from sending redo logs to the standby archive directory.
Standby deletion does not shutdown or delete the actual physical standby database instance. You should perform the shutdown task from your favorite DBA tool or using the Standby Wizard shutdown script.
5. System Log
The System log is where you should first go when there is a problem with the Standby Wizard. This log displays all errors and warnings that the Standby Wizard has encountered. To view the Event Log Screen, click on the button labeled “Event Log”:
Relational Database Consultants, Inc.www.relationalwizards.com
All Rights Reserved.
4

The Standby Wizard For Oracle User Manual.Copyright - Relational Database Consultants, Inc.
Chapter Seven
Understanding the Primary AgentSynchronization between any Oracle database and its standby database is defined as the successful transfer and recovery of archived redo logs to the standby database. Therefore, in any standby database configuration, two things must occur for synchronization to be successful:
1. Archived Redo logs from the primary database must be sent to the standby database.
2. The standby database must recover these logs,
If both of these above events occur, synchronization is accomplished and your log gap will always tend towards zero. The first task, the sending of archived redo logs to the standby host, is accomplished by the Standby Wizard through the use of a primary agent. The second task, the recovery of these logs, is accomplished by remote calls via a database link from the primary database to the standby
The Primary Agent and Its FunctionsThe Primary Agent, by default, is usually launched by a database startup trigger existing on the primary host. The Primary Agent is first launched when you create your first standby database.
After the Primary agent is launched on your primary database, it remains in an infinite loop, performing a series of simple tasks all in support of the transfer of newly archived redo logs to the Standby Wizard’s standby database(s). The following list is the lifecycle of tasks that the Primary Agent goes through between its sleep periods
1. Check the primary instance to see if any new redo logs have been archived.3. Send required redo log(s) to the standby.4. Call a PL/SQL package on the standby via a database link to enact recovery.5. Delete old archived logs from the standby6. Sleep
The Standby Wizard allows you to manage and monitor the primary agent through the Primary Agent Manager interface. To enter the Primary Agent Manager, click on the button labeled “Primary Agent” from the Standby Database Manager.
Relational Database Consultants, Inc.www.relationalwizards.com
All Rights Reserved.
4

The Standby Wizard For Oracle User Manual.Copyright - Relational Database Consultants, Inc.
Here is a typical view that you will see from the Primary Agent Manager:
As you can see, the primary agent manager will indicate the status of the primary agent. We can also see information on the last log archived on the primary database.
Relational Database Consultants, Inc.www.relationalwizards.com
All Rights Reserved.
4
The Standby Wizard For Oracle User Manual.Copyright - Relational Database Consultants, Inc.
These are the following functions you can perform with the Primary Agent Manager
1. Change Sleep Time
This value should not be changed until you have operated the Standby Wizard successfully for a time with the default values of 5 seconds. If your primary database does not write to its redo logs often, a number like 30 seconds is not unreasonable.
2. Change Audit File Write Time
The audit file is written every N minutes on both the standby and primary agents. To decrease the size of this file increase this number – in minutes.
3. Perform Archive Log Switch on Primary (Automatically)
You can instruct the primary agent to switch your primary database every N minutes. This is similar to using Oracle’s initialization parameter archive_lag_target parameter to force a log switch during a given interval.
4. Launch On Startup
Normally a database startup trigger launches the primary agent. To disable this, uncheck this box.
5. Transmit Logs Regardless of Standby Agent Status
If you would like the transmission of redo logs to occur, regardless of the state of your standby database, then simply mark the checkbox labeled: “Transmit Logs Regardless of Standby Agent Status”. A drawback of this strategy is that during a network failure, the primary agent will continue to attempt to send redo logs even though it has lost contact with the standby agent.
6. Start Agent / Stop Agent
The Primary Agent Manager GUI allows you to start and stop the primary agent. Yet because of the importance of this agent, you can also start and stop the primary agent from the SQL*Plus command line as such:
SQL>exec rdc_standby_user.rdc_standby_util.startagent;
SQL>exec rdc_standby_user.rdc_standby_util.stopagent;
SQL>exec rdc_standby_user.rdc_standby_util.killagent;
Obviously, the third method should not be used outside of an emergency, because the status of the Primary Agent will not be updated when it is killed.
Hint:
Information about the Primary Agent is stored in a one-row table within the Standby Wizard schema called Primary_Agent. The history of the primary agent archived log transfers are kept in the table Standby_Log_History.
Relational Database Consultants, Inc.www.relationalwizards.com
All Rights Reserved.
4

The Standby Wizard For Oracle User Manual.Copyright - Relational Database Consultants, Inc.
Chapter Eight
Troubleshooting a Standby DatabaseAlthough the Standby Database Manager can detect and report many errors, for advanced troubleshooting, we need to consider the following files used to track both Oracle issues and the Standby Wizard's own online System Log that can be accessed from the main menu:
Relational Database Consultants, Inc.www.relationalwizards.com
All Rights Reserved.
4

The Standby Wizard For Oracle User Manual.Copyright - Relational Database Consultants, Inc.
Aside from information in the System Log, the Standby Wizard creates the following files to trace even harder to find errors:
1. The Primary Agent Status File
The Primary Agent Status File is pushed over to the standby stage directory by the primary agent. Without this file, synchronization will fail. If you are troubleshooting the Standby Wizard, make sure this file is being moved to the standby host and that its timestamp is changing between the primary agent’s sleep period.
The primary agent file always has the naming convention:
<primary host>_<primary sid>_primary_agent.txt 2. The Audit Log
The audit log is written to both the standby and primary working directories every few minutes to trace the status of your standby database(s). The audit log has the naming convention of host_sid_audit.txt.
Example of the Audit Log: ********************* Standby Database Status ********************** Event Message: Ping from primary.Standby Host: rdc8Standby SID: stand10Last Contact: (Standby Time): 08/19/2008 12:51:53Standby Archive Directory: c:\st\aRecovery Mode: Recover AlwaysCurrent Log Gap: 0Last Archived Log RecID: 1318Last Archived Log Sequence#: 28Last Recovered Log RecID: 1318Last Recovered Log Sequence#: 28Last Recovered Log Timestamp: 08/19/2008 12:43:10
3. The Error Log
The Standby Agent Error Log exists for the standby agent to report any errors that it encounters to the outside world. Remember that the standby agent exists in a read-only database and can only record its activity through Operating System files. Hopefully you will not see one of these logs for a while, they have the naming convention:
<standby_host>_<standby sid>_error.txt
As with the Audit Log on the primary database, if synchronization is occurring we can ignore most errors that may be encountered by the standby agent.
Relational Database Consultants, Inc.www.relationalwizards.com
All Rights Reserved.
4

The Standby Wizard For Oracle User Manual.Copyright - Relational Database Consultants, Inc.
4. The Standby Working Directory Spool Files
In the standby working directory there will exist a .lst file for every shell script that has been run at least once. If your mount, startup, shutdown, or recovery scripts fail you will most likely see this at the end of the Standby Wizard script output stream:
OPEN_MODE----------MOUNTED SQL> Spool OffSQL> Exit;
If this situation occurs, you will need to debug the error because synchronization between your primary host and standby database cannot occur until your standby instance is open in read-only mode. The easiest way to debug an error like this is to simply view the .lst file extension of the script executed. If we ran the script: rdc2_standby_startup.sh and we received the above error, we would first look in rdc2_standby_startup.lst to determine the exact SQL error that was encountered by the Standby Wizard.
5. The Administration Screen Auditing Parameters
From the main menu, you can enter Administration, and edit three valuable debugging parameters:
1. Audit Remote Procedure Calls
This option will audit procedure calls to your standby made via a database link. Use this option if you see all the right files on the standby but can't ping the database.
2. Audit File Copy Commands
If your datafiles and/or archived logs don't seem to be copying to the standby, use this option to view the exact copy commands being used.
3. Audit All OS Commands
This option will audit all commands from the Standby Wizard to the Operating System.
Once you set these flags, future actions of the standby wizard will be inserted into the System Log for you to view. Turn these flags off after debugging or the System Log will grow very large.
Tip:
If your troubleshooting efforts fail, you can simply attempt an incremental rebuild of your standby database. This process will copy over a new control file and will attempt to send all the logs necessary to make your standby database valid again. See Chapter 9 titled: Rebuilding Your Standby Database, for more information.
Relational Database Consultants, Inc.www.relationalwizards.com
All Rights Reserved.
4

The Standby Wizard For Oracle User Manual.Copyright - Relational Database Consultants, Inc.
6. Standby Wizard Temporary Working Area: /tmp/standby
The Standby Wizard performs all agent spawning with temporary files created in /tmp/standby on both the primary and standby hosts. The standby agent also uses this directory to spawn recovery and/or activation functions. If all else fails in our debugging efforts, we need to look at the Temporary Working Area - for it keeps a detailed log of the primary and standby agents and of the recovery process itself. Here is a sample listing from /tmp/standby:
[oracle@rdc2 standby]$ lsdir standby_run_sql.logstandby_exec_sql.log standby_run_sql.shstandby_exec_sql.sh standby_run_sql_thu_01am.logstandby_exec_sql_thu_01am.log standby_run_sql_thu_02am.logstandby_exec_sql_thu_02am.log standby_run_sql_thu_03am.logstandby_exec_sql_thu_03am.log standby_run_sql_thu_04am.logstandby_exec_sql_thu_04am.log standby_run_sql_thu_05am.logstandby_exec_sql_thu_05am.log standby_run_sql_thu_12am.logstandby_exec_sql_thu_12am.log standby_run_sql_wed_01pm.log
If we are looking at the /tmp/standby directory on the standby host then we are viewing the record of the standby agent and its launching of the recovery script. If you look into the /tmp/standby directory on the primary host you can view a record of the spawn attempts the Standby Wizard has made to start the primary agent.
The files in /tmp/standby are maintained as a circular file system. It will contain, at the most, one week of detailed logging information.
Caution:
In most cases, /tmp/standby never grows over a few megabytes unless the current Unix copy or ftp command used by the primary agent is outputting too much information after a successful copy command – this sometimes occurs if ftp or scp are not configured correctly or bypass authentication.
7. The Default Log File
The Standby Wizard packages write errors and/or auditing messages to a default log file named $ORACLE_HOME/ RDC$StandbyWizard.log in cases where the current schema
is not queried.
8. Test Database Link to Standby Database
The Standby Wizard creates a database link between the primary database and each of its standby databases. Without this link, the primary agent cannot recover the standby database it belongs to. To test these links from SQL*Plus, simply run the following script, found in the client installation directory:
SQL>@rdc_standby_testlinks.sql
The query should return one row per standby database, containing the link name, sid and host name of that standby.
Relational Database Consultants, Inc.www.relationalwizards.com
All Rights Reserved.
4

The Standby Wizard For Oracle User Manual.Copyright - Relational Database Consultants, Inc.
Chapter Nine
Rebuilding Your Standby Database.One of the most powerful features of the Standby Wizard is its ability to perform rebuilds whenever the data file structure of your primary database changes or users perform nologging operations.
In the past, during the life-cycle of a production database, if any user renamed, added, or dropped a data file (tablespace), all standby databases built against the modified production database were not valid until they were rebuilt.
Fortunately for the Standby Wizard user, the above scenario is a thing of the past. All you need to do when your primary database file structure changes or for some other reason your standby database becomes invalid – is to follow these two simple steps:
1. Step One - Perform a Rebuild With the Standby Database Manager
The Standby Wizard allows you to perform standby database rebuilds directly from the Standby Wizard User Interface and the Standby Database Manager. Whenever you enter the Standby Database Manager, the Standby Wizard compares the current standby database configuration to your existing primary database. If there are any changes to the data files or redo log structure, the column labeled “Rebuild?” will be marked with a “YES”.
Tip:
You may also use the incremental rebuild feature to edit any data file mappings on your standby host. Although once you have edited the datafile, it will need to be copied again to the standby host. For large data files, use the “alter database rename datafile” command to avoid having to perform an incremental rebuild
Caution:
If you add or drop any control files on your primary database, you should perform a partial rebuild with the Standby Wizard. If you do not do this, then not all control files will be automatically replaced by the Standby Wizard during graceful switchback. You will have to manually copy your control file to any locations defined after you created your initial standby database.
Before you perform any rebuild on a standby database, stop the standby agent on the standby host and make sure the standby database itself is shut down. If you rebuild a standby database that is open, the rebuild will probably fail and you will have to perform a partial or maybe even a complete rebuild all over again. Also, consider disk and CPU usage when you rebuild a standby database - these values skyrocket during the transfer of “hot” Oracle tablespaces.
Once you have confirmed that your standby database is shutdown, you can start the rebuild process from the Standby Database Manager by clicking on the standby database you wish to rebuild and then by clicking on the button within the “Rebuild Standby” group labeled either “Incremental” or “Complete”.
Relational Database Consultants, Inc.www.relationalwizards.com
All Rights Reserved.
4

The Standby Wizard For Oracle User Manual.Copyright - Relational Database Consultants, Inc.
If choose to perform an incremental rebuild, only those data files that have changed will be copied over along with the new controlfile and any necessary redo logs. You will be guided through the Standby Wizard Creation steps 3 & 4 to allow any new mapping of your data files. Once this process is finished, click on the button labeled: “Next”. Now you can start the incremental rebuild by clicking on the “Build Standby” button.
Just as with standby database creation, once you hit the button “Build Standby” you will lose screen control as the Standby Wizard re-copies the necessary data files over to the standby database and informs you of its progress.
Sometimes you may need to perform a complete rebuild. Simply answer “Yes” to the previous rebuild prompt. This will instruct the Standby Wizard to rebuild your entire standby database. A complete rebuild will take approximately the same time as standby database creation took.
A complete rebuild is necessary if your standby database is invalidated for other reasons than a modified data file or a nologging operation. For instance, a standby database may simply be destroyed - due to a total disk failure on the standby host. In this scenario, we would choose a complete rebuild once the standby host is running again. It is also necessary to perform a complete rebuild - when rebuilding your original standby database after a disaster and graceful switchback.
2. Mount the Rebuilt Standby Database
After we finish an incremental or complete rebuild and the Standby Wizard recreates our standby database - we must mount the new standby database again from the standby host with the newly generated mount script located in the standby working directory with the naming convention of:
<standby host>_<standby sid>_mount.sh
Simply run the mount script again as you we did during the initial build of our standby database. In the previous example our standby host was named rdc2 and our standby sid was standby. Therefore we will always mount this standby with the following script as such:
$rdc2_standby_mount.sh <new orapwd file password>
Once this mount is successful and the standby database is opened in read-only mode, synchronization should occur immediately between the host and the primary database supports.
Relational Database Consultants, Inc.www.relationalwizards.com
All Rights Reserved.
5

The Standby Wizard For Oracle User Manual.Copyright - Relational Database Consultants, Inc.
Chapter Ten
Creating Multiple Standby Databases From Your Primary DatabaseThe Standby Wizard can create an unlimited number of synchronized standby databases, all receiving data from your primary host. This becomes vital if your high-availability needs are crucial. For instance, you might want to create a standby database on a machine located within your local area network for normal fail-over scenarios. Yet, during physical disaster, you require the ability to activate a standby database at a remote location. In this case, you would build two standby databases. Possibly, after these two standby databases were functioning, you would then build a third standby database on the primary host itself, yet located on another storage device to give you high-availability even during a complete network failure.
When you build your 2nd or Nth standby database with the Standby Wizard, there are no restrictions, aside from the already existing restrictions that apply. Remember that you cannot have the same ORACLE_SID / service name on the same physical host. You also must have the same OS / File System / Oracle Version running on all nodes of your multiple standby database strategy.
As you go through the steps of building your standby databases, you should always define unique standby working directories for each standby database (step 2 of 4 in Standby Database Creation). This will avoid any user confusion due to the Standby Wizard scripts generated for the multiple standby databases. The Standby Wizard also enforces the rule of unique archive destinations for each standby database.
After you have successfully built your multiple standby database configurations, the Standby Wizard’s primary agent on your primary database will simple communicate with more than one standby agent. The primary agent will transfer the archived redo logs from the primary database to all of your standby database log archive destinations after any given log switch. Each standby database will recover these files on instructions from their respective standby agents.
Tip:
We strongly recommend that the Standby Wizard DBA first build and maintain a single standbydatabase before attempting a multiple standby configuration.
Relational Database Consultants, Inc.www.relationalwizards.com
All Rights Reserved.
5

The Standby Wizard For Oracle User Manual.Copyright - Relational Database Consultants, Inc.
Chapter Eleven
Emergency Fail-Over to a Standby Database (Activation)In the event of a failure with the primary instance, the standby database must be activated before it becomes a normal database open in read-write mode. The Standby Wizard makes activation easy and gives you three avenues to activate a standby database. If you are using Oracle 8.1.5, we strongly recommend that you use only the first method described below.
Caution:
If both your primary and standby databases are on the same physical host, you must shutdown your primary database before activating your standby database. This is due to an Oracle database restriction that requires you to have only one open read-write database with the same db_name on any give host.
1. Activation Using the Standby Wizard Scripts
This method of activation involves either a person or an application executing the standby wizard activation script from the standby stage directory that you defined in Step 2 of 4 in standby database creation. This script always has the naming convention of:
<standby host>_<standby sid>_activate.sh
In our previous examples, where the standby host is rdc2 and our standby sid is standby, we would activate our standby database as such from the Unix prompt:
$./rdc2_standby_activate.sh
The final output of the activation script goes both to the screen and a spool file, in this case: rdc2_standby_activate.lst. This output should indicate that your standby database is now open in read-write mode and is now a fully functional Oracle instance:
OPEN_MODE----------READ WRITE SQL> Spool OffSQL> Exit;
2. Activation Using the Standby Wizard Interface
This method of activation is the easiest to perform for a live person. Simply enter the Standby Wizard User Interface main menu, but connect instead using your standby database SID and not your primary database SID. Once you connect directly to your standby database which must be started and in read-only mode, the Standby Wizard will
Relational Database Consultants, Inc.www.relationalwizards.com
All Rights Reserved.
5

The Standby Wizard For Oracle User Manual.Copyright - Relational Database Consultants, Inc.
be aware that you have connected to a standby database and you will receive the following prompt:
You can test for this prompt now by connecting to your standby host using the Standby Wizard User Interface - yet be aware that if you do activate your standby the following rule always applies:
Once a standby database is activated…it can never be a standby database again unless you perform a complete rebuild.
Tip:
You may have to wait for a short time to login to your standby database after a primary failure. The standby agent may be performing recovery and the database may not yet be in read-only mode which is required for a JDBC connection to Oracle.
Relational Database Consultants, Inc.www.relationalwizards.com
All Rights Reserved.
5

The Standby Wizard For Oracle User Manual.Copyright - Relational Database Consultants, Inc.
Chapter Twelve
Graceful Switchback to the Primary DatabaseBecause an activated standby database contains a copy of the Standby Wizard’s schema from the primary database, the Standby Wizard already has all the necessary information needed to switch your standby database back to the primary database server after a disaster. In the Oracle world, a graceful switchback to a primary database is always accomplished by re-creating your primary database as a standby database and then mounting and activating it.
Caution
Never perform an installation of the Standby Wizard on your activated standby database! This will wipe out your existing rdc_standby_user schema and prevent you from performing a graceful switchback to the primary host with the standby wizard. The Standby Wizard is already installed on your standby host. Why? Because, your standby host by definition, is a copy of your primary database.
If you are running Oracle*Forms from your Unix server, you will need to copy the .fmx files of that comprise the Standby Wizard User Interface. If you are on a client, confirm that you can connect to your now activated standby database using Net*8. If you can enter into the main menu of the user interface connected to the standby database as rdc_standby_user, your Oracle*Forms installation is valid. Your Standby Wizard Oracle account rdc_standby_user will have the same password as it did on the primary host. This is because your activated standby database is a copy of your primary database.
In a switchback scenario, you will be running your Oracle applications from the standby database, maybe for a few days after a major failure at your primary site. At some point, your primary host will be restored from the last good backup. Now you are ready to perform a graceful switchback and resume normal operations on your primary host.
If you are going to perform a graceful switchback using the Standby Wizard, You will need to grant the standby host Oracle user account that will be performing the graceful switchback, read-write privileges on the former primary database’s server
Tip:
Because the primary host is usually a very secure system, if you are in a secure environment, it is a good idea to remove any permissions that you granted to the standby host Oracle Unix account, once your activation is complete.
When you are ready to perform a graceful switchback, confirm that you have successfully restored your Oracle Installation, along with the init.ora file that your primary database is normally started with. If your init.ora file has a reference to the parameter ifile, make sure the iifle file mentioned is also restored and its path exists.
Relational Database Consultants, Inc.www.relationalwizards.com
All Rights Reserved.
5
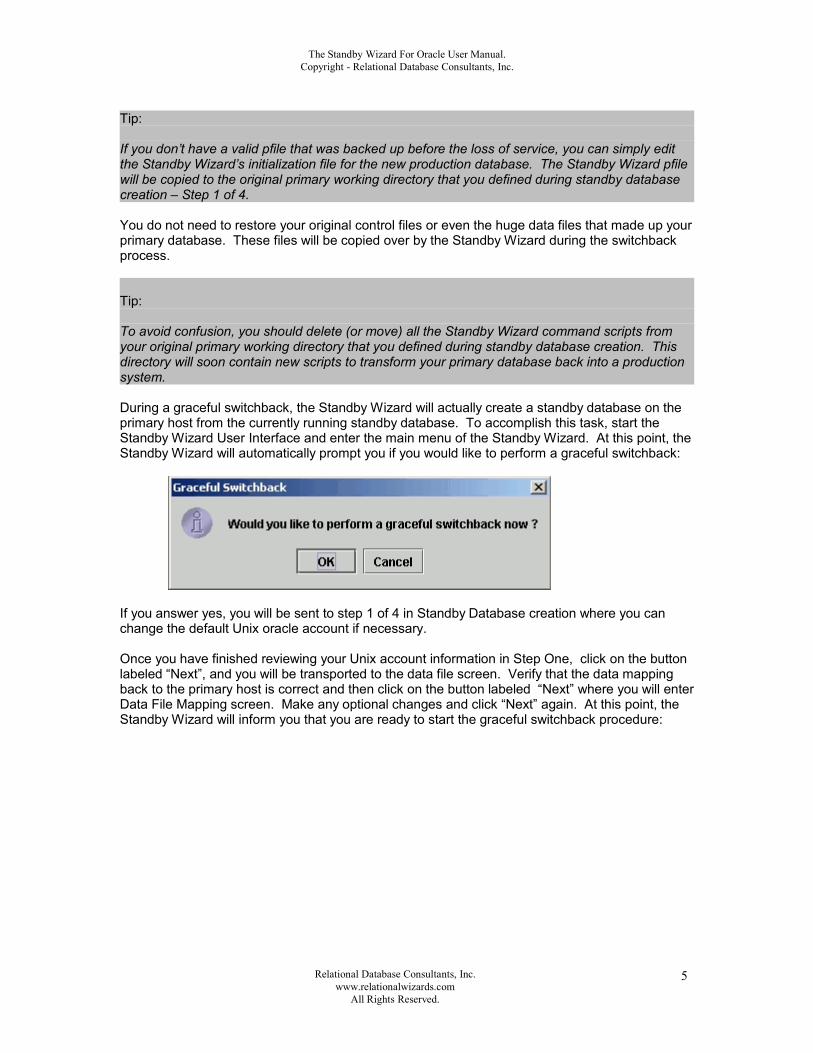
The Standby Wizard For Oracle User Manual.Copyright - Relational Database Consultants, Inc.
Tip:
If you don’t have a valid pfile that was backed up before the loss of service, you can simply edit the Standby Wizard’s initialization file for the new production database. The Standby Wizard pfile will be copied to the original primary working directory that you defined during standby database creation – Step 1 of 4.
You do not need to restore your original control files or even the huge data files that made up your primary database. These files will be copied over by the Standby Wizard during the switchback process.
Tip:
To avoid confusion, you should delete (or move) all the Standby Wizard command scripts from your original primary working directory that you defined during standby database creation. This directory will soon contain new scripts to transform your primary database back into a production system.
During a graceful switchback, the Standby Wizard will actually create a standby database on the primary host from the currently running standby database. To accomplish this task, start the Standby Wizard User Interface and enter the main menu of the Standby Wizard. At this point, the Standby Wizard will automatically prompt you if you would like to perform a graceful switchback:
If you answer yes, you will be sent to step 1 of 4 in Standby Database creation where you can change the default Unix oracle account if necessary.
Once you have finished reviewing your Unix account information in Step One, click on the button labeled “Next”, and you will be transported to the data file screen. Verify that the data mapping back to the primary host is correct and then click on the button labeled “Next” where you will enter Data File Mapping screen. Make any optional changes and click “Next” again. At this point, the Standby Wizard will inform you that you are ready to start the graceful switchback procedure:
Relational Database Consultants, Inc.www.relationalwizards.com
All Rights Reserved.
5

The Standby Wizard For Oracle User Manual.Copyright - Relational Database Consultants, Inc.
As noted in the switchback dialog – make sure the primary database is shutdown before you begin the graceful switchback.
To start the actual switchback and transfer of data, simply click on the button labeled "Build Standby" that you initially used to build your standby database. Now the Standby Wizard will create the primary instance from scratch by transferring all of the data files back to the primary host from their current location on the standby host. This process will take approximately the same amount of time it took to initially build your Standby Database.
Tip:
If graceful switchback fails, you can always attempt the operation again once you have corrected the problem. Simply perform a complete rebuild of the primary database by running the Standby Database Manager on the standby host.
Relational Database Consultants, Inc.www.relationalwizards.com
All Rights Reserved.
5

The Standby Wizard For Oracle User Manual.Copyright - Relational Database Consultants, Inc.
Once the graceful switchback build is finished, your primary database is ready to be started...but still, it is only standby database. The primary database needs to become an open production database again.
To transform your primary database from a standby database to an operational database you will need to run the Standby Wizard mount script now located on the primary host in the primary working directory defined back at standby database creation:
1. Starting the Mount Script - This script will mount your primary database as a standby database. The mount script has the naming convention:
<primary host>_<primary sid>_mount.sh
Before you run the mount script, delete any old Oracle password files of the primary sid. These files usually exist in the directory $ORACLE_HOME/dbs. When running the mount script pass in your primary database’s internal password as such:
$rdc2_prod_mount.sh password
After you build and mount the primary database as a standby database, you may chose to keep the database synchronized with the standby host that is now acting as a temporary production database. It is at this point that you can transfer and test any other applications, or prepare users for the re-connection they will need to perform when moving their work back to the primary database.
Caution:
The primary working directory that contains the scripts necessary to switchback to your primary database, also contains backup copies of the scripts used for your standby database. Make sure you run the correct script name during a graceful switchback by checking its Host Name and Oracle SID.
2. Activating Your Rebuilt Production Database
When mounted successfully, you are ready to transform your primary database into a working production database by simply activating it, as discussed in Chapter 11, Emergency Fail-Over to a Standby Database (Activation), using either the Standby Wizard User Interface or the activation script now located in your original primary working directory, specified during the standby database build.
Caution:
If both your primary and standby databases are on the same physical host, you may need to shutdown your standby database before activating your primary database. This is due to an Oracle database restriction that requires you to have only one read-write database with the same db_name open at once on any given database server.
Once we have run these two scripts, the primary database is now open to the world for read/write operations. To confirm this, check the activation script spool file (.lst) , in the same way you did when you first activated your standby database on the standby host. Search for the following string near the end of the output to confirm that your primary database is again open for read-write operations:
OPEN_MODE----------READ WRITE
Relational Database Consultants, Inc.www.relationalwizards.com
All Rights Reserved.
5

The Standby Wizard For Oracle User Manual.Copyright - Relational Database Consultants, Inc.
SQL> Spool OffSQL> Exit;
At this point, once operations are running smoothly again on our primary database, you can chose to perform a complete rebuild of your original standby database, or instead, chose to create a new standby database with the Standby Wizard.
Relational Database Consultants, Inc.www.relationalwizards.com
All Rights Reserved.
5
The Standby Wizard For Oracle User Manual.Copyright - Relational Database Consultants, Inc.
Appendix A.
The Standby Wizard Initialization File (init.ora file)The Standby Wizard creates standby databases by cloning the primary database init.ora file as closely as possible. This file is always located in the standby working directory that you defined during standby database creation.
All parameters of your standby database init.ora file are equal to their values on the primary, aside from the following parameters that are given new values by the Standby Wizard:
1. service_names2. instance_name3. log_archive_dest4. lock_name_space5. control_files6. utl_file_dir
Feel free to modify the service_names parameter if you are using global names and Net*8 as long as the Standby SID is retained.
The following initialization parameters are removed from the init.ora file by the Standby Wizard, thus Oracle will assign them a default value:
1. Ifile2. mts_dispatchers3. mts_servers4. core_dump_dest5. backgroup_dump_dest6. user_dump_dest7. dispatchers
You may add to the init.ora file any of these removed parameters. Be careful if you edit the ifile parameter, it will make the standby database dependent on another initialization file that could overwrite the first six parameters vital to your standby database’s health.
You may wish to decrease the values of your performance-related initialization parameters, cloned from your primary database, such as db_block_buffers. This way you can limit memory usage of the Oracle SGA on your standby host. If you ever need to activate your standby database, you can increase these parameters again before you run the activation script.
Relational Database Consultants, Inc.www.relationalwizards.com
All Rights Reserved.
5

The Standby Wizard For Oracle User Manual.Copyright - Relational Database Consultants, Inc.
Appendix B. Modifying the Operating System Parameters of the Standby WizardThe Operating System and other useful Standby Wizard parameters are contained in the package header with the file name:
rdc_standby_os.pkg
This file exists in the Installation directory of the Standby Wizard.
Operating System or Standby Wizard parameters should not be modified unless either:
1. You need to change the command path or options of copy commands used by the Standby Wizard.
2. You would like to change the performance and/or OS calls of the Standby Wizard.
To change an operating system parameter of the Standby Wizard, complete the following steps:
1. Shutdown the primary agent.
2. Edit the parameter(s) you would like to test, paying careful attention to their datatype and length.
3. Log into SQL*Plus as rdc_standby_user.
3. Compile the package header rdc_standby_os.pkg without errors.
4. Start the script rdc_standby_compile.sql from SQL*Plus to recompile all the package bodies.
5. Test the changes on a non-production system.
Relational Database Consultants, Inc.www.relationalwizards.com
All Rights Reserved.
6

The Standby Wizard For Oracle User Manual.Copyright - Relational Database Consultants, Inc.
Appendix C. Sample SQL*Net settings
Because the Standby Wizard uses database links to communicate with each standby database, The standby database must be listed in the listener.ora file on the standby host. Example:
SID_LIST_LISTENER = (SID_LIST = (SID_DESC = (SID_NAME = PLSExtProc) (ORACLE_HOME = /home/oracle/ora10) (PROGRAM = extproc) ) (SID_DESC = (GLOBAL_DBNAME = stand10) (ORACLE_HOME = /u01/oracle/ora10) (SID_NAME = stand10)
))
LISTENER = (DESCRIPTION_LIST = (DESCRIPTION = (ADDRESS = (PROTOCOL = IPC)(KEY = EXTPROC1)) (ADDRESS = (PROTOCOL = TCP)(HOST = rdc8)(PORT = 1521)) ) )
Both the primary and standby database locations must be identified in the tnsnames.ora files, located on both servers: Here is an example of a standby service listing:
STAND10 = (DESCRIPTION = (ADDRESS = (PROTOCOL = TCP)(HOST = rdc9)(PORT = 1521)) (CONNECT_DATA = (SERVER = DEDICATED) (SERVICE_NAME = stand10) ) )
If you are using an alternate service name -- and the same Oracle SID for your standby as your production machine -- make sure the tnsnames.ora file can identify this service:
STAND10 = (DESCRIPTION = (ADDRESS = (PROTOCOL = TCP)(HOST = rdc9)(PORT = 1521)) (CONNECT_DATA = (SERVER = DEDICATED) (SERVICE_NAME = production) ) )
In both cases, RDC9 is the remote host. In the second example Stand10 is only a service alias pointing to a production SID on a remote machine which is the standby host.
Relational Database Consultants, Inc.www.relationalwizards.com
All Rights Reserved.
6

The Standby Wizard For Oracle User Manual.Copyright - Relational Database Consultants, Inc.
Appendix D. Uninstalling the Standby WizardTo Uninstall the Standby Wizard perform the following tasks:
1.Confirm that you have stopped the primary agent and have verified that the Standby Wizard Oracle account rdc_standby_user is not logged into your production database. You can do this as follows:
SQL>Select Username, Client_Info from v$session where username = ‘RDC_STANDBY_USER’;
2. If you are running the Standby Wizard from a windows client, click on the Icon labeled “Database Uninstall” to drop the standby wizard user: rdc_standby_user and its objects from your database.
If you want to Uninstall the Standby Wizard from the Unix prompt, enter the following commands in the directory that contains the Standby Wizard Tar extraction:
$sqlplus system/manager
SQL>@rdc_standby_uninstall.sql
2. After the database Uninstall, if you are using a Windows client - click on the “Uninstall” icon from the Standby Wizard program group to remove the Standby Wizard programs from your client machine.
Thank you for using the Standby Wizard. Please send us comments at:
Relational Database Consultants, Inc.www.relationalwizards.com
All Rights Reserved.
6

The Standby Wizard For Oracle User Manual.Copyright - Relational Database Consultants, Inc.
Relational Database Consultants, Inc.www.relationalwizards.com
All Rights Reserved.
6